

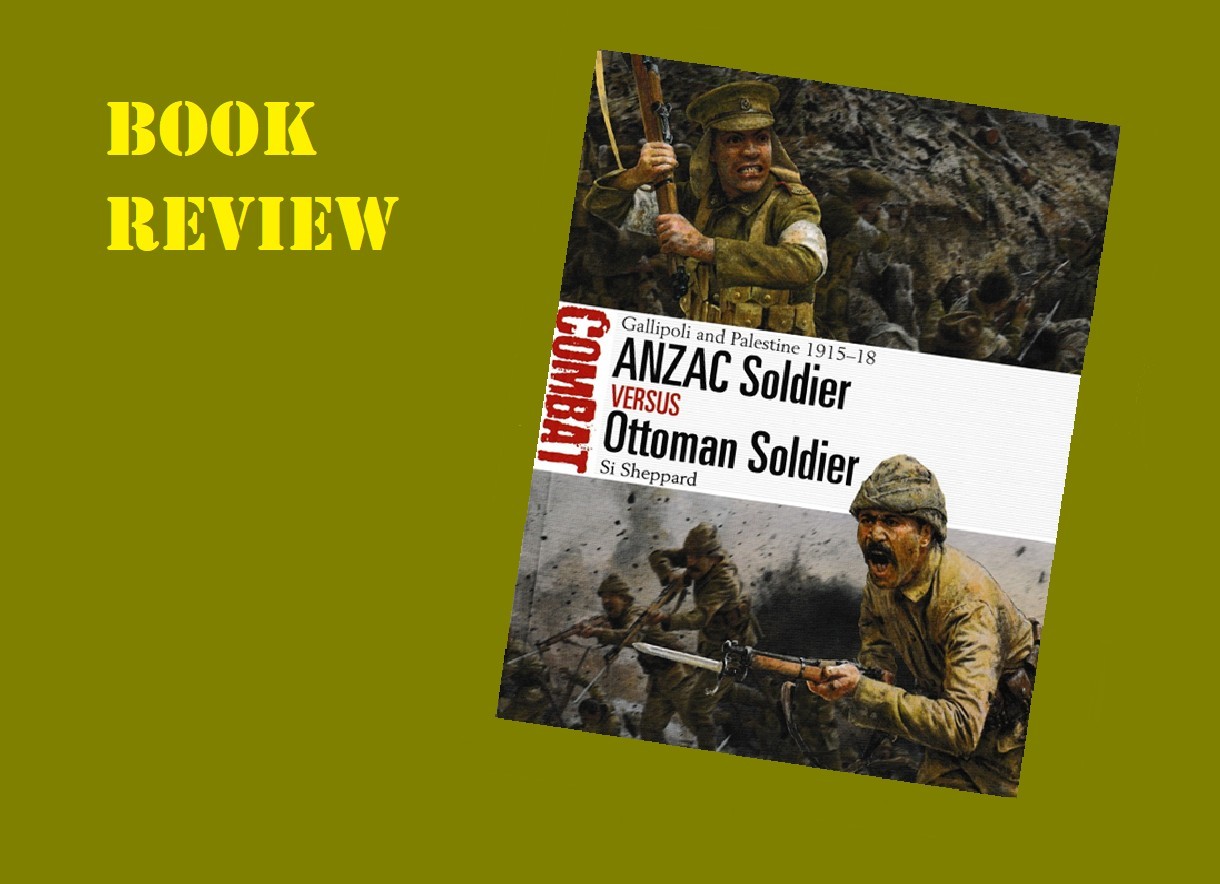
HISTORY:
** The Gallipoli campaign of 1915-16 pitch the Australian and New Zealand volunteers known as the ANZACs into a series of desperate battles with Ottoman soldiers defending their homeland. In August 1915, the two sides clashed in the bitter battles of Lone Pine and Chunuk Bair as the allies sought to overcome the stalemate that set in following the landings in April. After the allied evacuation of Gallipoli in January 1916, the ANZACs played a decisive role in the Allies’ hard-fought advance through Ottoman held Sinai and Palestine, especially during the fateful battle of Beersheba in October 1917. In this book, featuring specially commissioned artwork and mapping plus carefully chosen archive photographs, acclaimed military historian Si Sheppard assesses and compares the fighting men on both sides who fought at Lone Pine, Chunuk Bair and Beersheba **
** Quoted from the back cover of the book.
THE BOOK:
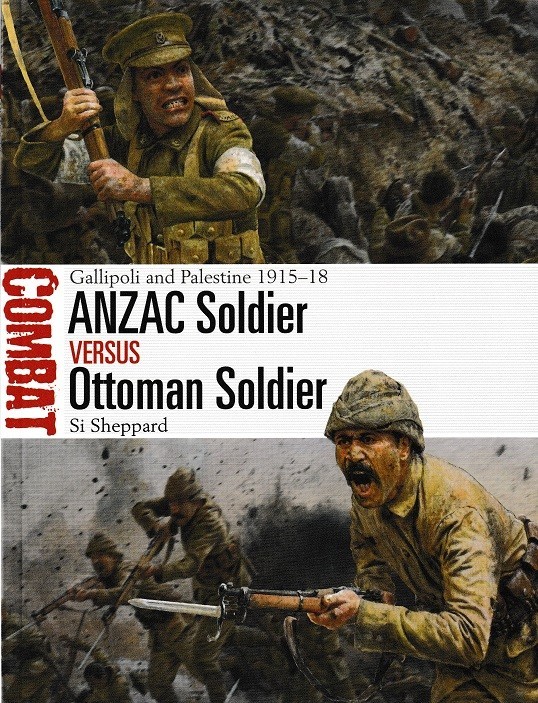
Osprey Publications has released ANZAC Soldier vs Ottoman Soldier, Gallipoli and Palestine 1915–18 as Number 68 in the Combat series. It is an 80-page soft cover book. Included with the text are black and white and color photographs, color illustrations, detailed captions, color strategic and tactical maps and more. It has a 2023 copyright, a publication date of February 28, 2023, and the ISBN is 978-1-4728-4918-2.
THE CONTENTS:
- Introduction
- The Opposing Sides
- Recruitment and mobilization
- Leadership and organization
- Logistics and morale
- Weapons, training and tactics
- Lone Pine
- 6-10 August 1915
- Chunuk Bair
- 7-10 August 1915
- Beersheba
- 31 October 1917
- Analysis
- Aftermath
- Unit Organizations
- Bibliography
- Index
THE TEXT:
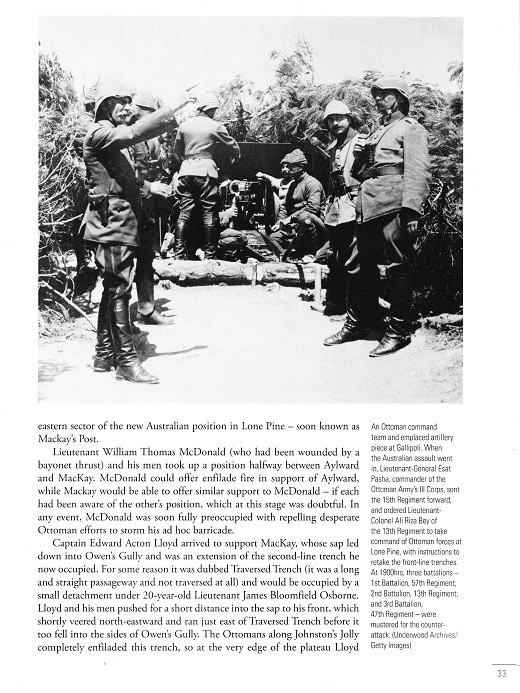
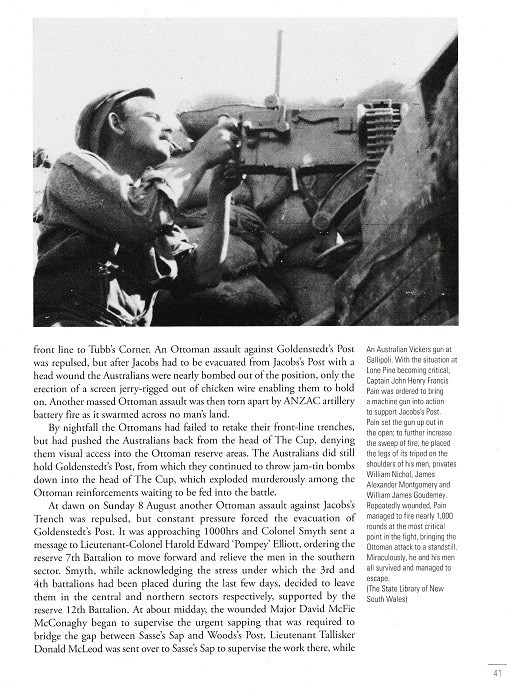
Author Si Sheppard provides a well written text detailing three conflicts between the Anzac and Ottoman militaries in Gallipoli and Palestine during the years of 1915 through 1918 during World War I. The text goes into great detail in all areas of the book as outlined on the contents page, please refer to the contents listing that I have provided for the areas that are covered through the book. The three conflicts listed are greatly detailed with information provided on specific military units and their movements and actions, locations, successful actions, actions that failed, weaponry used, and such other informative information that the reader would expect to find in a well written historical publication. The text in the book is nicely written and well detailed. As I read through the text, I didn’t notice any spelling or grammatical errors. Grammar and spelling might not be an important factor to everyone however it is something that I take notice of and pass on my findings. I feel that if the text is well written then it shows that the author has taken the time to be professional with their writing. Anyone wanting to add an excellent reference and history book on fighting between the Anzac and Ottoman forces at Lone Pine, Chunuk Bair and Beersheba during World War I to their personal library will be pleased with this informative and interesting book.
THE PHOTOGRAPHS:
A total of 44 black and white photographs and 8 color photographs are included in this volume. The photographs range from wide angle photographs to close-up detailed photographs. The contain a combination of in-action photographs, photographs removed from motion pictures to photographs that have been staged for the photographer. The majority of the photographs are clear and easily viewable; however, a few have an out of focus look to them and some appear to be too dark, and others appear too light. This is typical for the discussed period of history and consideration needs to be given to the fact that some of the photographs are over one hundred years old and the quality of the photographs is of no fault of the author and do not take anything away from the book. Author Si Sheppard stuck to the title of the book and chose subject specific photographs and did not include photographs that strayed from the main subject of the book. The majority, if not all, of the photographs will prove to be a wealth of information to anyone interested in the fighting between the Anzac and Ottoman forces during World War I as well as their weapons, uniforms and equipment and the scale figure and diorama modeler will benefit as well due to the details the photographs contain.
THE ILLUSTRATIONS:
There are 2 black and white illustrations and 4 color illustrations with detailed captions included by illustrator Steve Noon. One of the color illustrations is two-page action scene split page illustration accompanied by black and white copies of the same illustrations that describe the scenes and point out and describe key areas of interest. The illustrations are very well done, nicely detailed and are of:
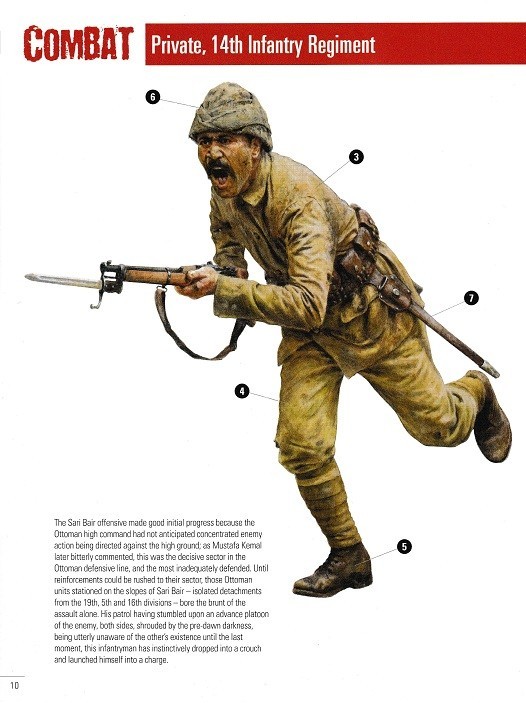
Plate A
Private, 14th Infantry Regiment – Chunuk Bair, 7 August 1915 (See attached scan)
- Two-page front and back illustrations, of an Ottoman soldier charging with his rifle and bayonet at the ready. Accompanying the illustrations is a well written caption that details and points out nine items of interest such as weapons, dress, and other items of the period.
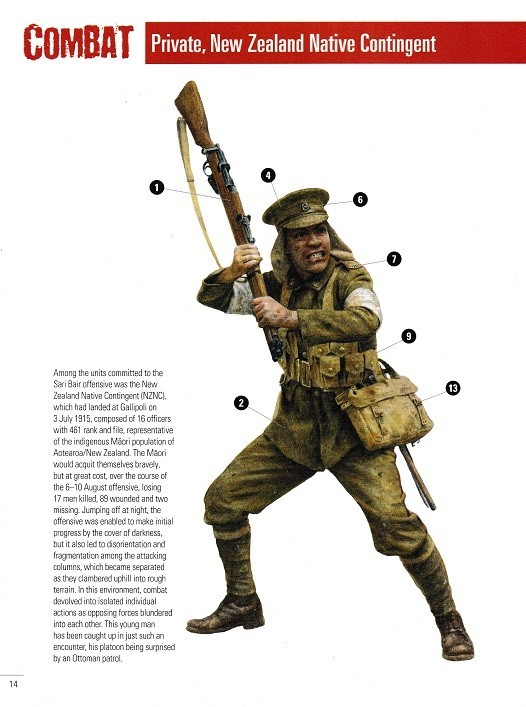
Plate B
Private, New Zealand Native Contingent – Chunuk Bair, 7 August 1915 (See attached scan)
- Two-page front and back illustrations of a New Zealand Native Contingent private who has taken up the traditional fighting stance of the Māori warrior. Accompanying the illustrations is a well written caption that details and points out thirteen items of interest such as weapons, dress, and other items of the period.
Plate C
Dawn Counter-Attack
- A two-page action illustration showing Australian and Ottoman soldiers in hand-to-hand combat to gain control of a trench at Lone Pine. The action scene details the Australian troops mustering at a critical trench intersection as Ottoman troops counter-attack during the dawn hours on 7 August 1915.
Plate D
The ALH charge at Beersheba
- A two-page action illustration showing the mounted Australian Light Horse (ALH) trooper’s point of view as they gallop forward in waves attacking the Ottoman trenches at Beersheba (top illustration) and the Ottoman soldier’s point of view, from the reserve trench which contains a MG 09 machinegun crew, of the Australians attacking the main trench and advancing on their position (bottom illustration). On the following page there are two smaller black and white duplicate illustrations each with a detailed caption explaining the view from each side of the action.
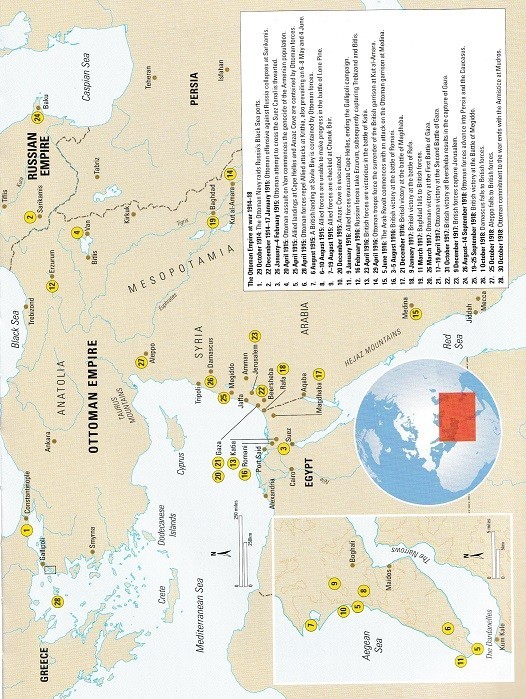
THE MAPS:
There are 4 color maps included in this volume that are accompanied by well written captions and detailed keys that point out specific locations as well as movements and actions by both sides during each conflict.
The maps are of:
- The Ottoman Empire in World War I
- Lone Pine, 6-10 August 1915
- Chunuk Bair, 7-10 August 1915
- Beersheba, 31 October 1917
PROFILES:
There are 2 individuals profiled in this volume, and they are:
- Mustafa İsmet İnönü
- Henry George ‘Harry’ Chauvel
THE CAPTIONS:
The captions are well written and explain the accompanying photographs, illustrations and maps in great detail eliminating any doubt as to what is shown. The captions go into very specific detail as to the specific weapons shown, specific individuals, military units, associated equipment carried and used, specific items of interest shown, dates and locations and other such pertinent information. As I read through the captions, I didn’t notice any spelling or grammatical errors. Si Sheppard’s captions will be helpful to the reader due to their detailed content as opposed to captions in other books that I have seen that are very brief and lack detailed information.
INFORMATIONAL CHARTS:
There are 2 informational charts included in this volume and they provide information on the following:
- Key to military symbols
- Key to unit identification
Osprey Publishing also offers ANZAC Soldier vs Ottoman Soldier, Gallipoli and Palestine 1915–18 as:
eBook (PDF) ISBN: 978-1-4728- 4916-8
and
Ebook (Epub & Mobi) ISBN: 978-1-4728- 4919-9
Osprey Publishing’s, ANZAC Soldier vs Ottoman Soldier, Gallipoli and Palestine 1915–18 is also available as an electronic Kindle version through Amazon.com.
PRICE:
UK £15.99 / US $23.00 / CAN $31.00
This book was provided to me by Osprey Publishing. Please mention that you saw the book reviewed here on the KitMaker Network when you make your purchase. Thank you.