

Introduction
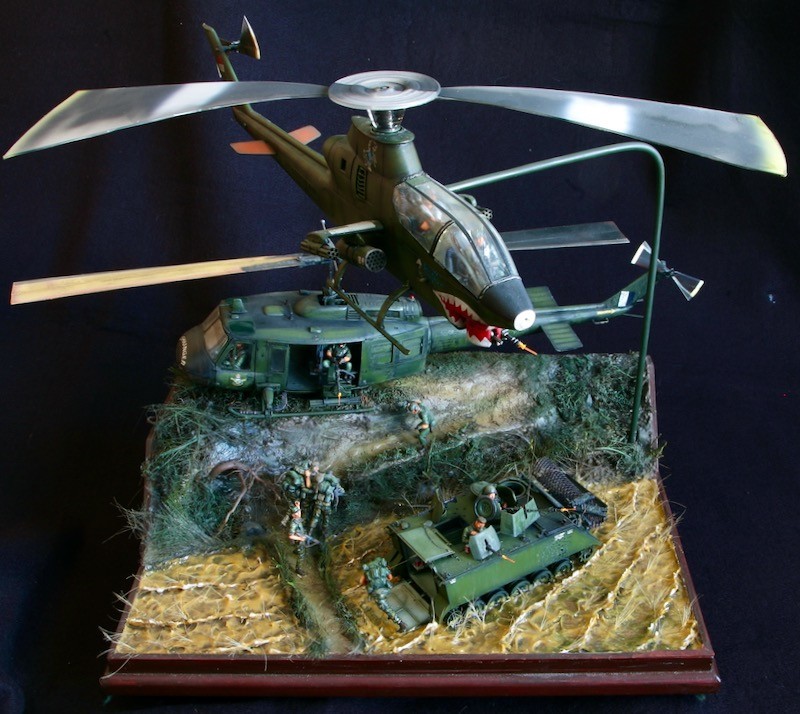
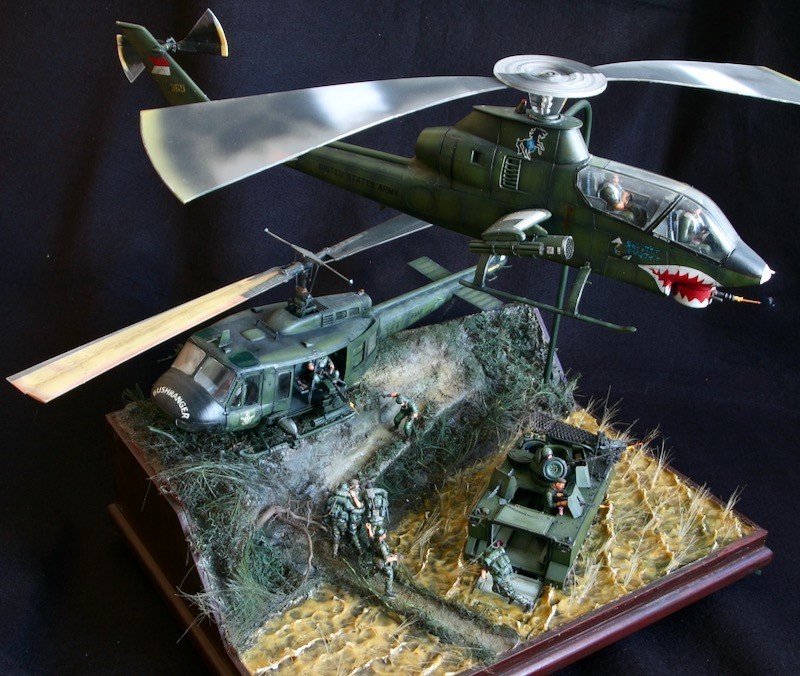
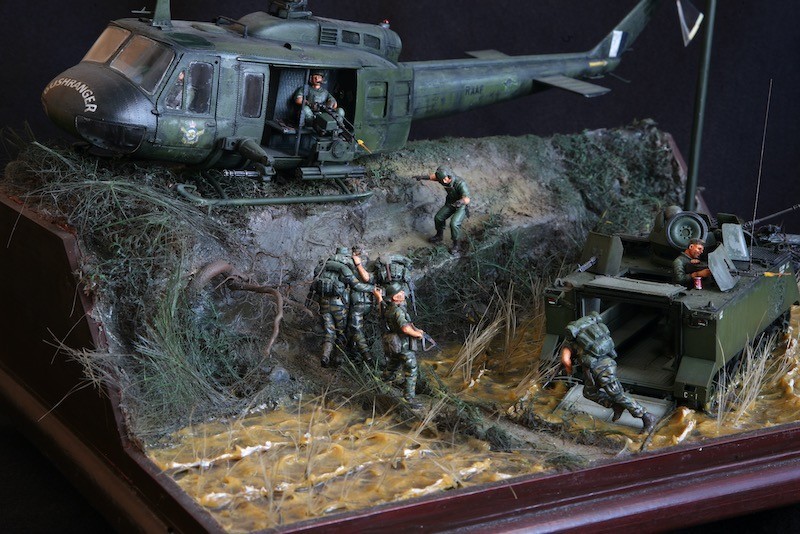
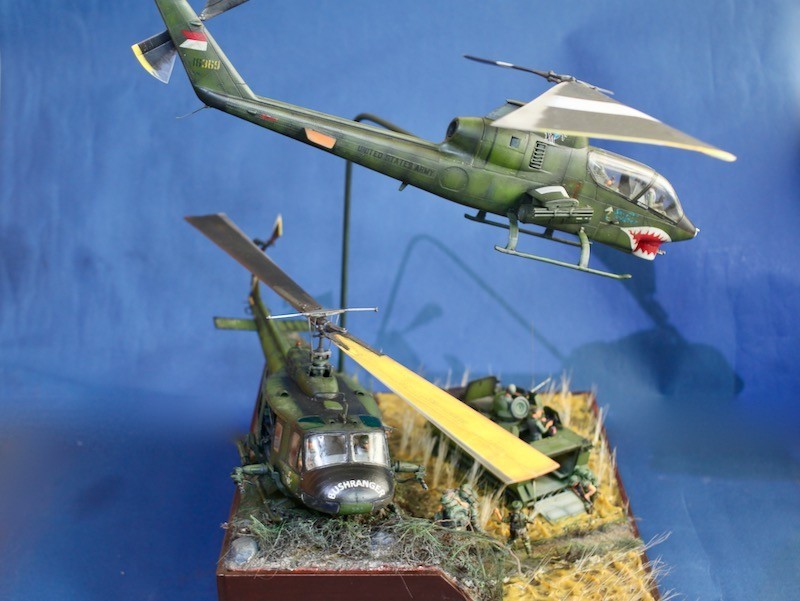
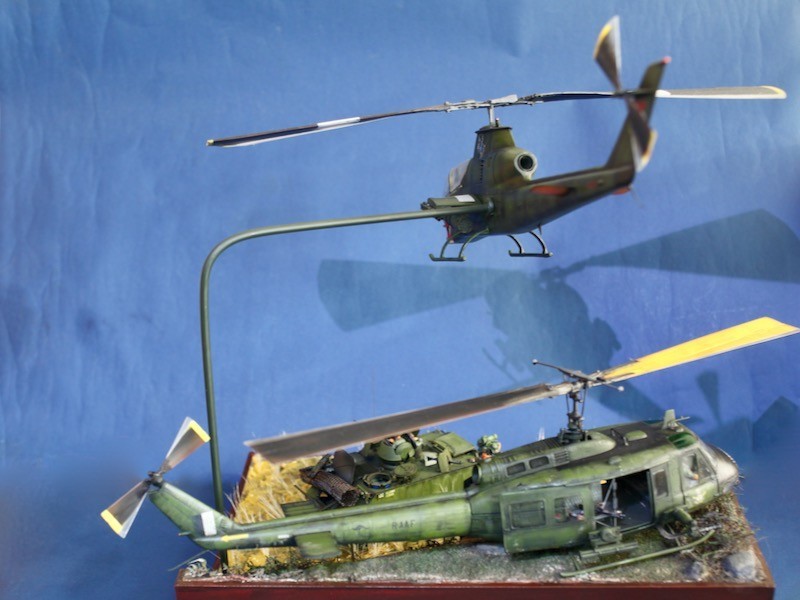
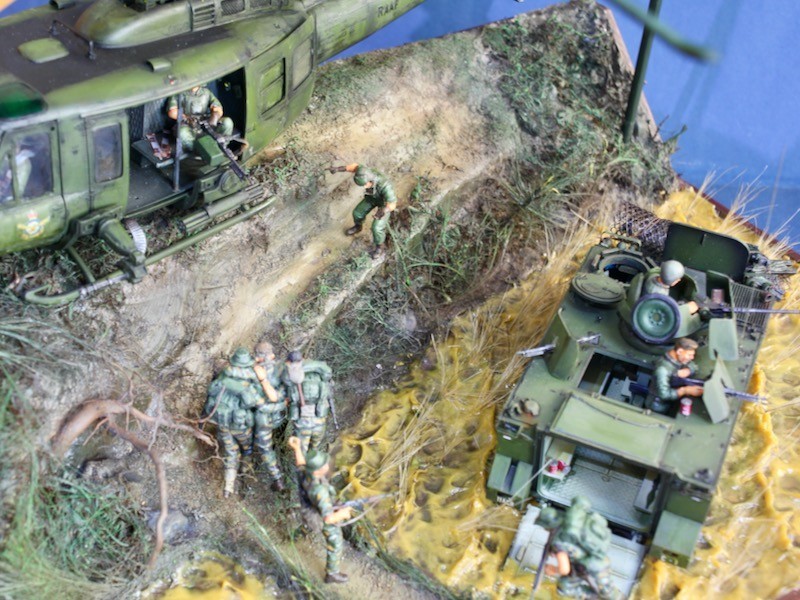
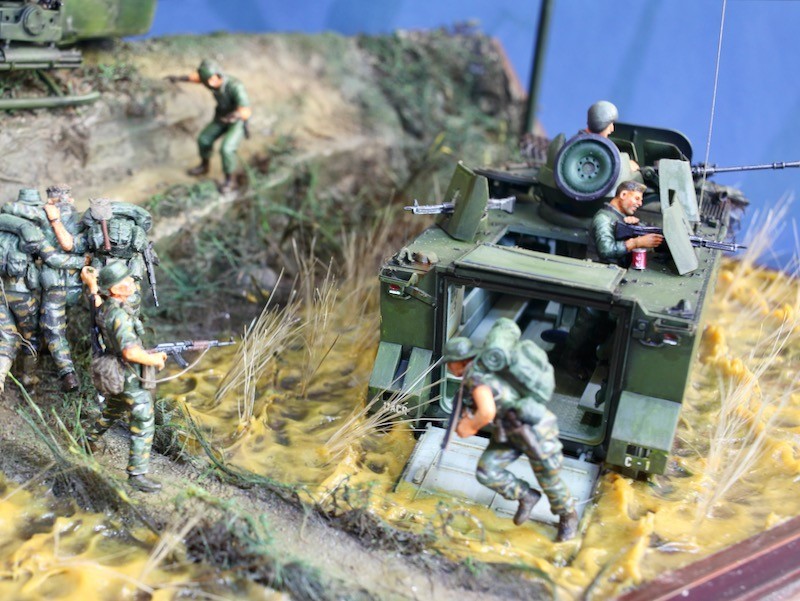
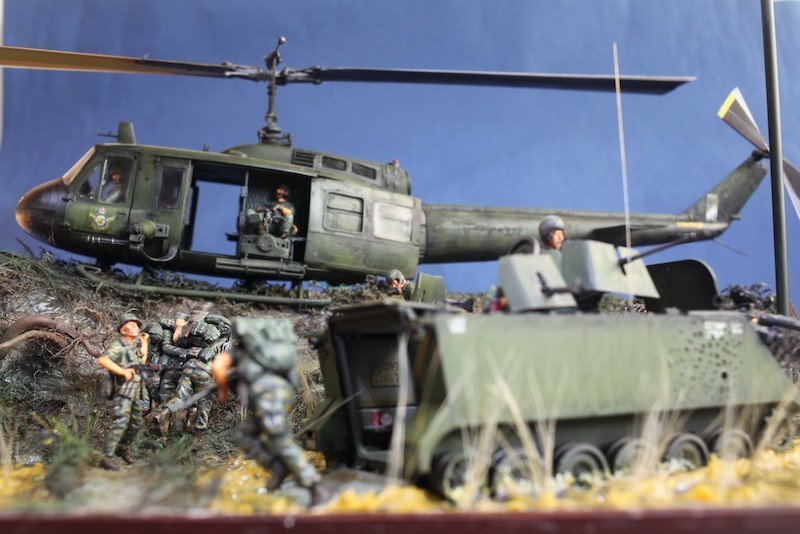
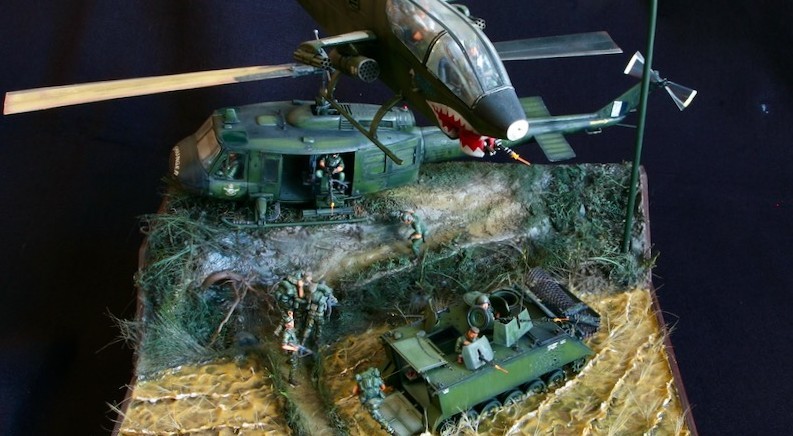
The diorama features the Revell Huey and Cobra in an evacuation scene. In the foreground will be an M113 ACAV knocked out by an RPG. It's a diorama so not too much superdetailing was planned. I had to be flexible with the incident. I tend to work backwards in these projects depending on the markings of the vehicles. My reading so far was that UH1D gunships were used with troop carriers (slicks). The gunships were later called Cobras and these were later replaced by the AH-1G cobras beginning around 1968. Problem is a number of the famous units cut their teeth on UH-1D gunships so they have the history and the nice markings. I was unable to find a unit that featured both UH-1H (or D) and AH-1G with sharkmouths. So anything accurate for the time would have to do.
Diorama
Planning something like this is complicated especially from the point of view of balance. I lost no time in making the base as per the maximum specifications that would fit on the shelf. That done, the models were mocked up and put in place . The mock-up was used as a basis of a sketch and I was able to get the positions of all the players optimally in this way. I wanted a diorama with a tight configuration that could bring in armor and aircraft elements that were iconic of the Vietnam war. That usually involves a crash scene or maintenance scene. With helicopter scenes however evacuation and defense is uniquely possible and especially more so in Vietnam.
The main land features were formed in styrofoam and completed with a veneer of plaster. Groundwork was added and formed to look windswept by rotor wash . The base was painted and water formed with acrylic paste again to simulate rotor wash. Once thoroughly dry, the place for the M113 was cut out and the ACAV glued in place with more acrylic paste. Long grass was then glued through drill holes to represent a rice field.
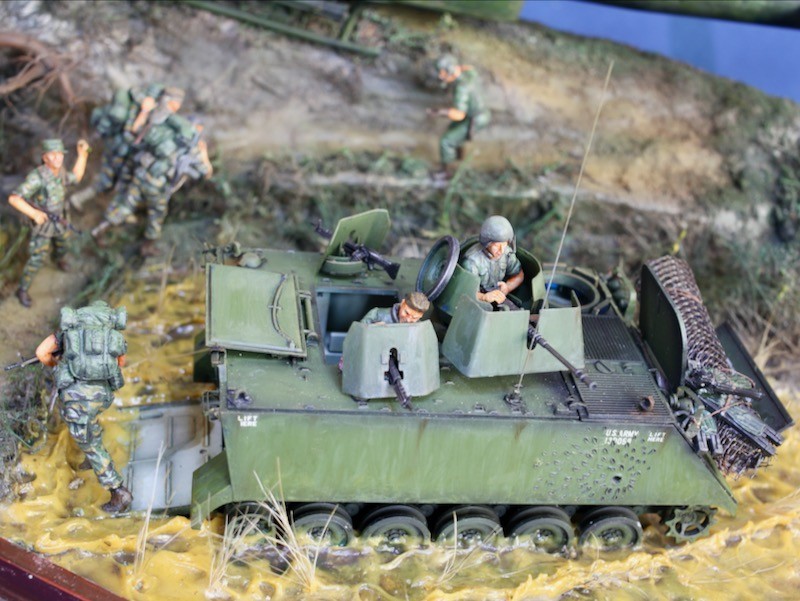
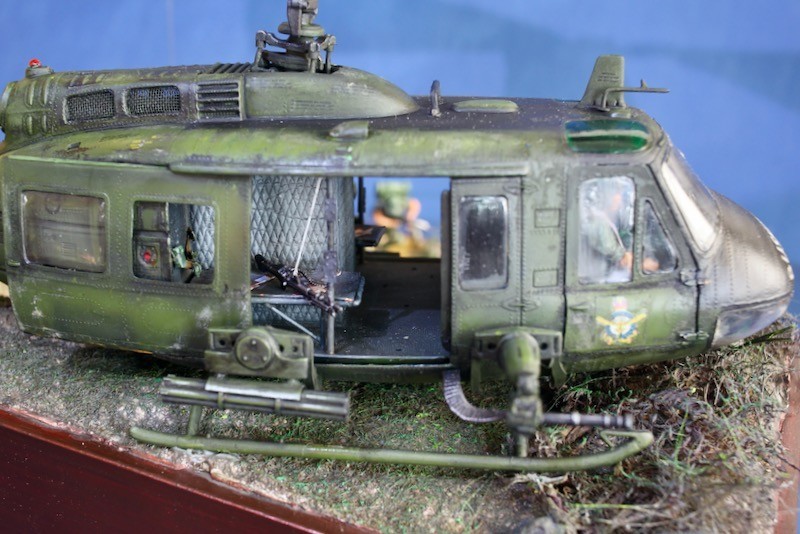
Once satisfied with the general configuration of the helicopters I formed the figures around the models. The figures were an important part of the diorama and there would have to be many. Thirteen figured were cobbled together from the spares box, the Dragon “US Helicopter Crew” set, MB “Head for the Huey” set. I couldn't find any more pilot sets here and in Australia so I had resorted to casting them in resin. I do not usually copy figures like this preferring to sculpt them instead. Painting 13 figures is a procrastination nightmare and once I got that done I put the project away for months.
Models
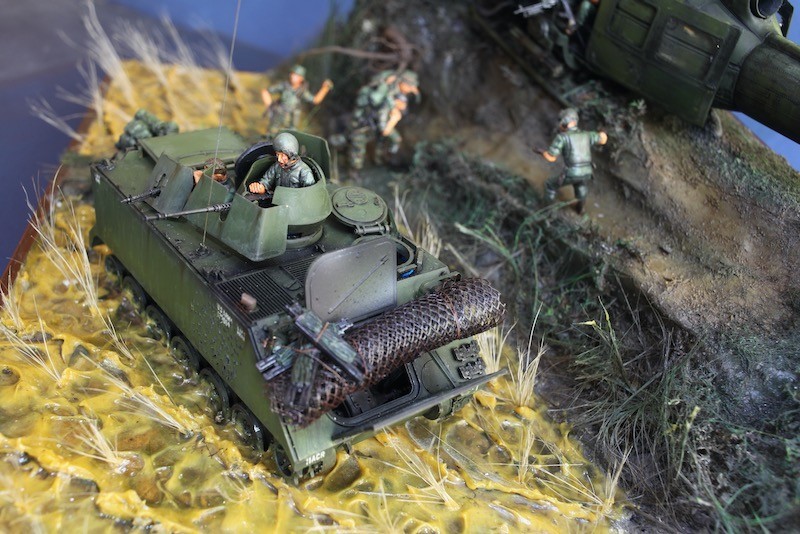
The main models were the Revell UH-1H, Revell AH-1G. The M113 ACAV was detailed with the Eduard set which I had lying around. The upgrade is by no means crucial for a project like this. This was base painted and initial weathering completed. The APC was painted early in the process and mounted so as to be weathered on the base.
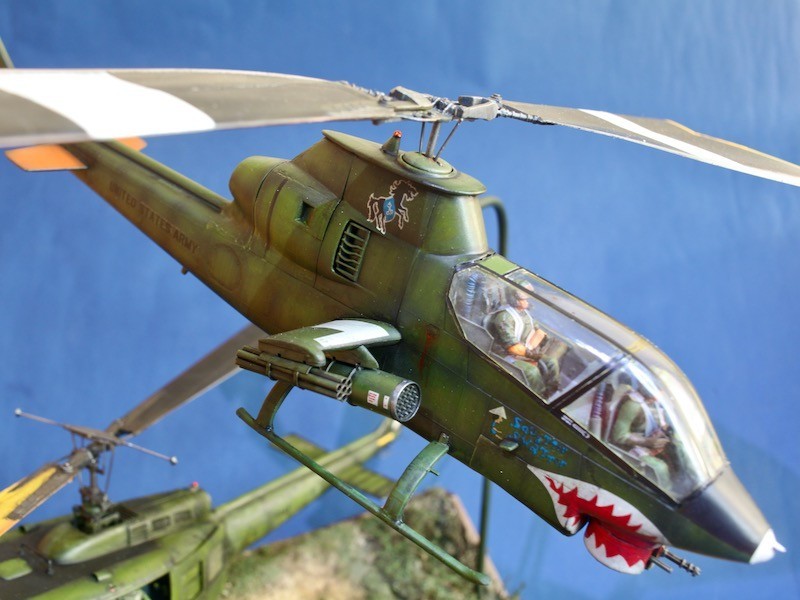
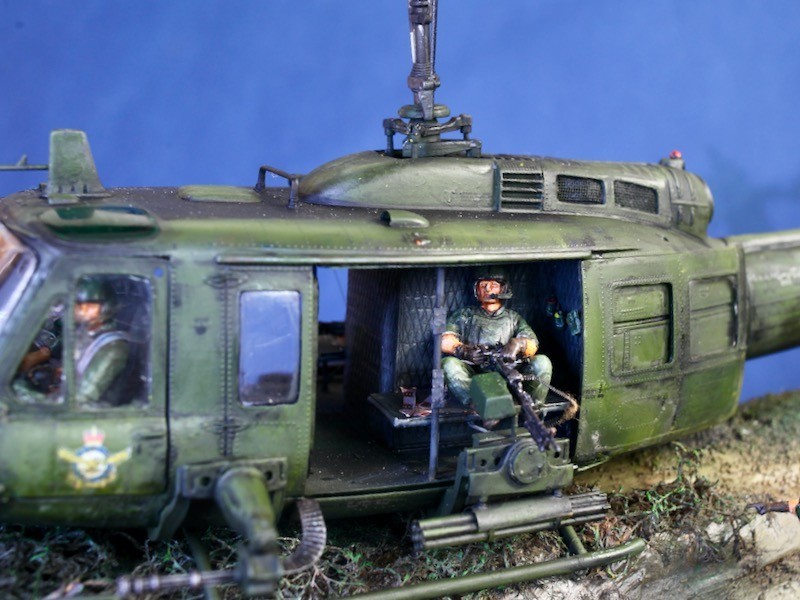
The UH-1H is configured as an Australian Bushranger. The Bushrangers had a number of unique features. Principal among this were the armament. I made the crew seats from copper and brass. The pilot seat were detailed using brass and copper and the seat belts were from Eduard. Eduard’s choice of colors is baffling to me as they always seem too bright so I toned it down a bit using washes. The final operation configuration of the Bushranger for the remainder of its service in Vietnam was: 2 x M-60 General Purpose Machine Guns – this came from the Dragon kit, lightly modified; 2 x M158 7 round reusable rockets tubes – scratchbuilt using styrene tube and copper sheet and the mount had to be modified to accommodate this; 2 x XM-21 forward mounted miniguns – from the Revell kit but mounted forward. Bushrangers like the A2-110 returned to Australia on 8 December 1970 so the diorama is a depiction accurate to 1960 to 1970 (simple). The rotors in the Bushranger were yellow and black as opposed to the yellow tip seen traditionally. I added clear sheet on the trailing edge and painted it to (sort of) simulate movement. After many attempts at both this and the AH-1G I sort of just settled (still not happy).
The AH-1G was an interesting build. It needed to be suspended above the diorama using a metal rod but be removable for painting and transport. I made the rocket tubes this time from all copper and brass and was much happier with the result. A neodymium magnet was secured to the inside of the fuselage and the model balance around an optimal point which was secured with epoxy. The AH-1G model fell off its mount many times and had to be repaired repeatedly. The cockpit was detailed from references. It isn’t entirely accurate but with the canopy on, the main visible details are quite adequate. The pilots were put in place and special attention given to ensuring the handles and levers are actually gripped and not suspended as you see in many dioramas.
Painting
All markings on the UH-1H were custom made. These were either hand-painted, printed on the home printer or cobbled together from the spares box. The markings of the AH-1G were from the kit. Both vehicles were painted in enamels, varnished with Future-Tamiya Flat acrylic, weathered with turpenoids and drybrushed sparingly. I used drop filters and oil washes for weathering. Weathering on the AH1G was kept in check to show an aircraft that barely landed in the field. The UH-1H and M113 were weathered liberally. The figures were all done in artist’s oils on acrylic. The special forces camouflage uniform is accurate for the field of operation.