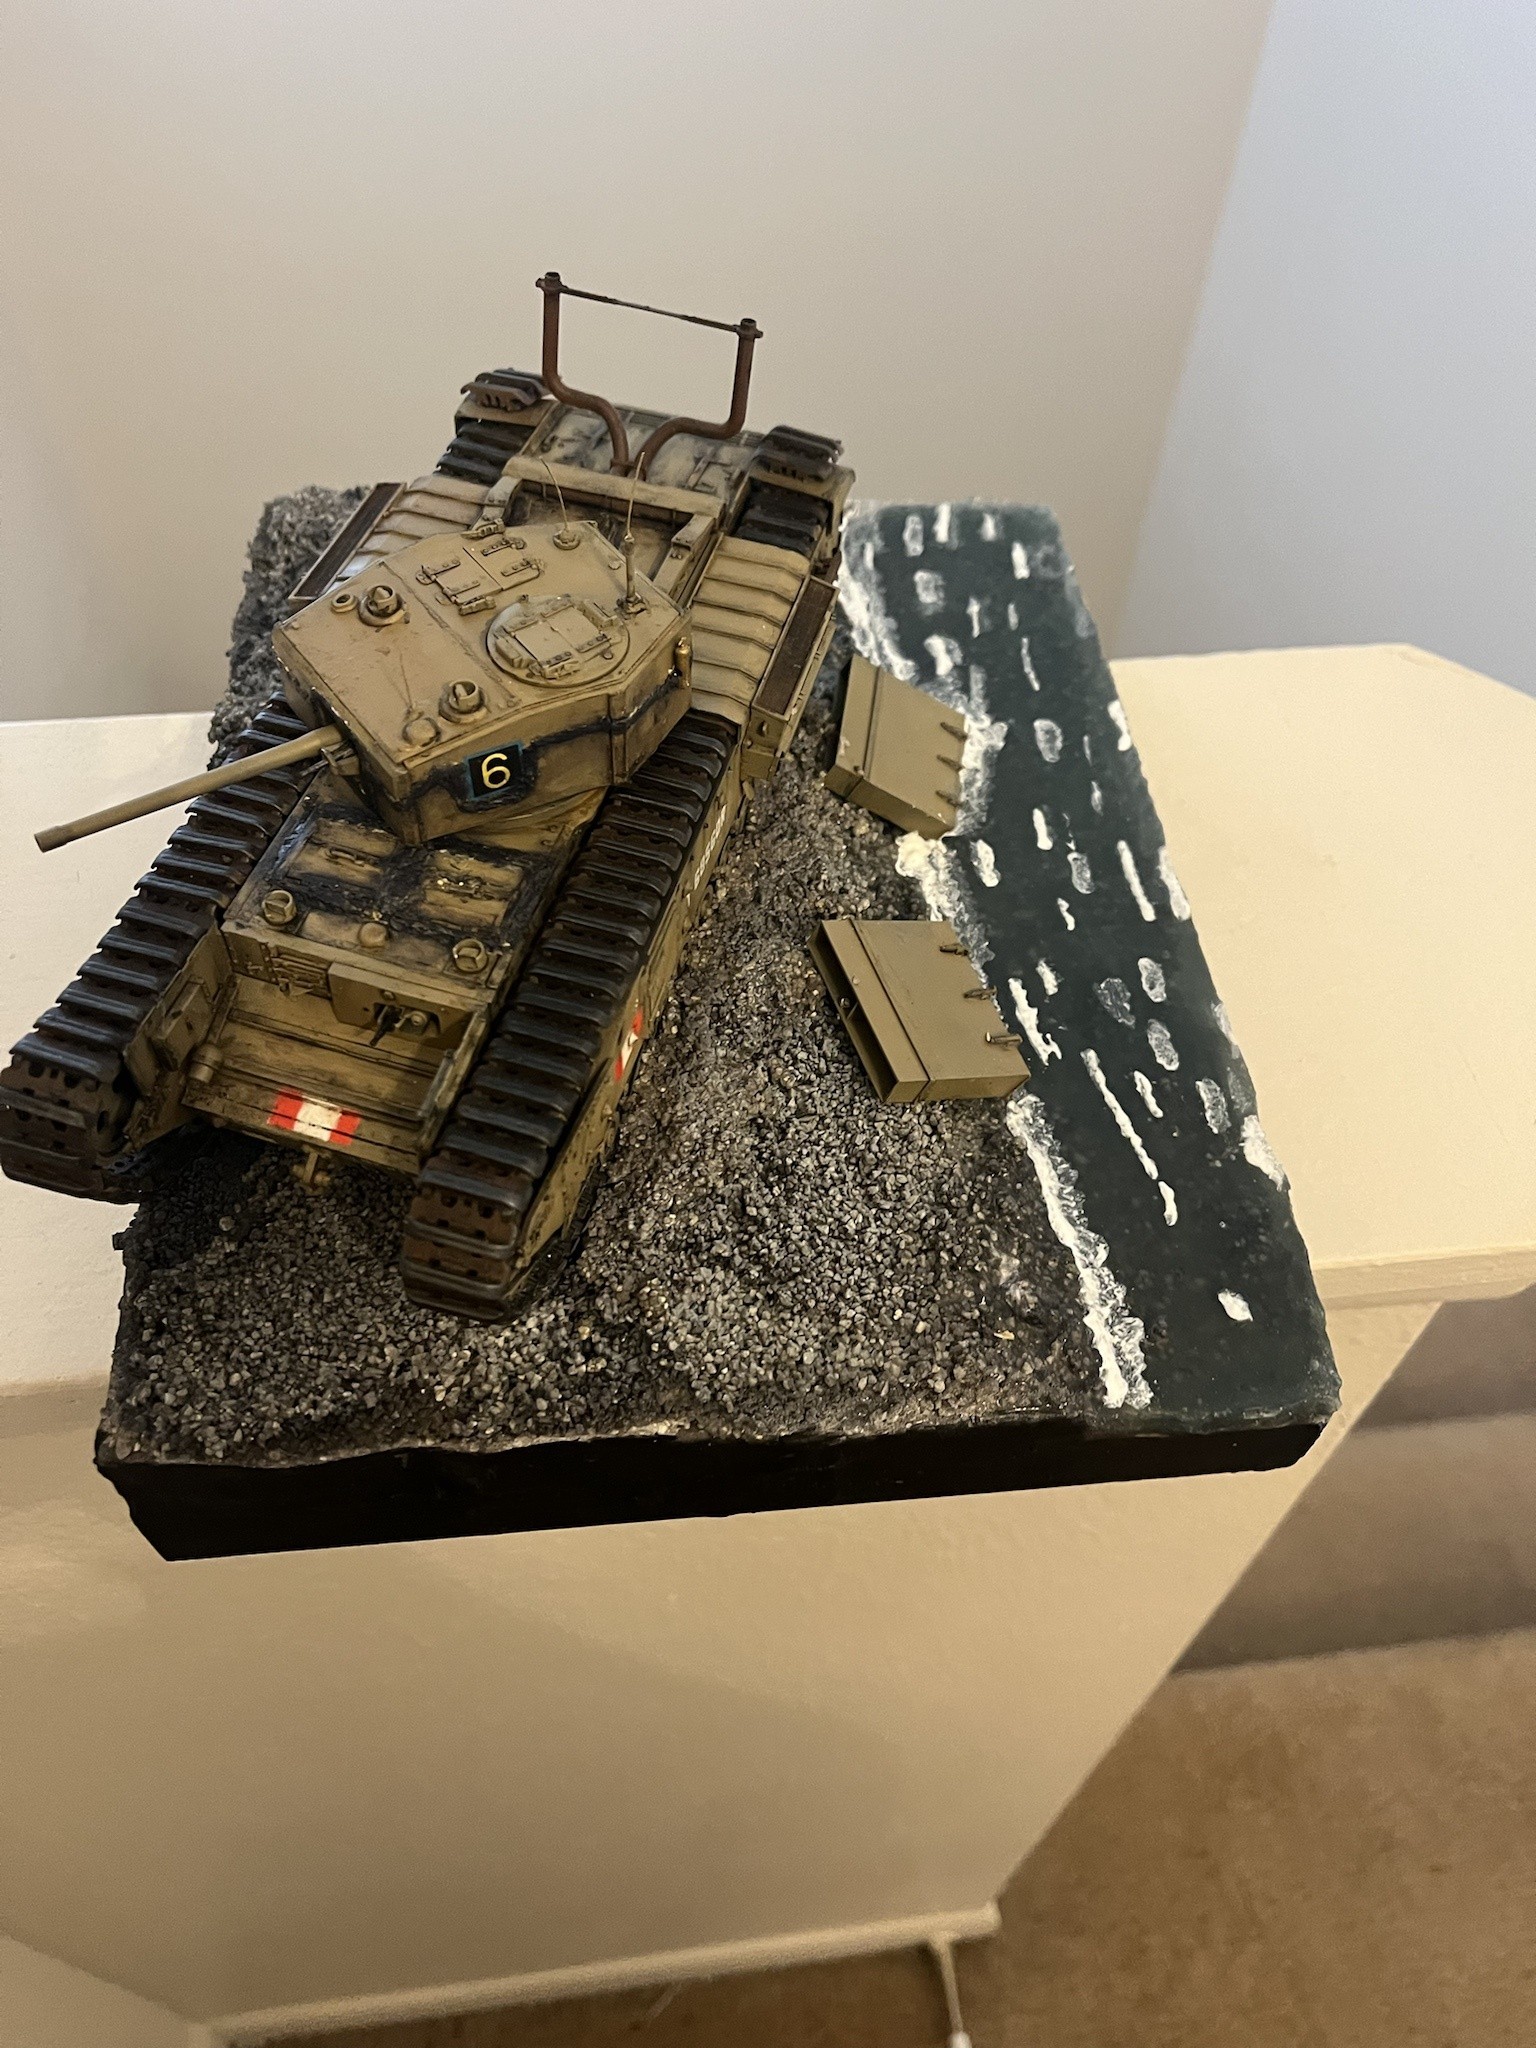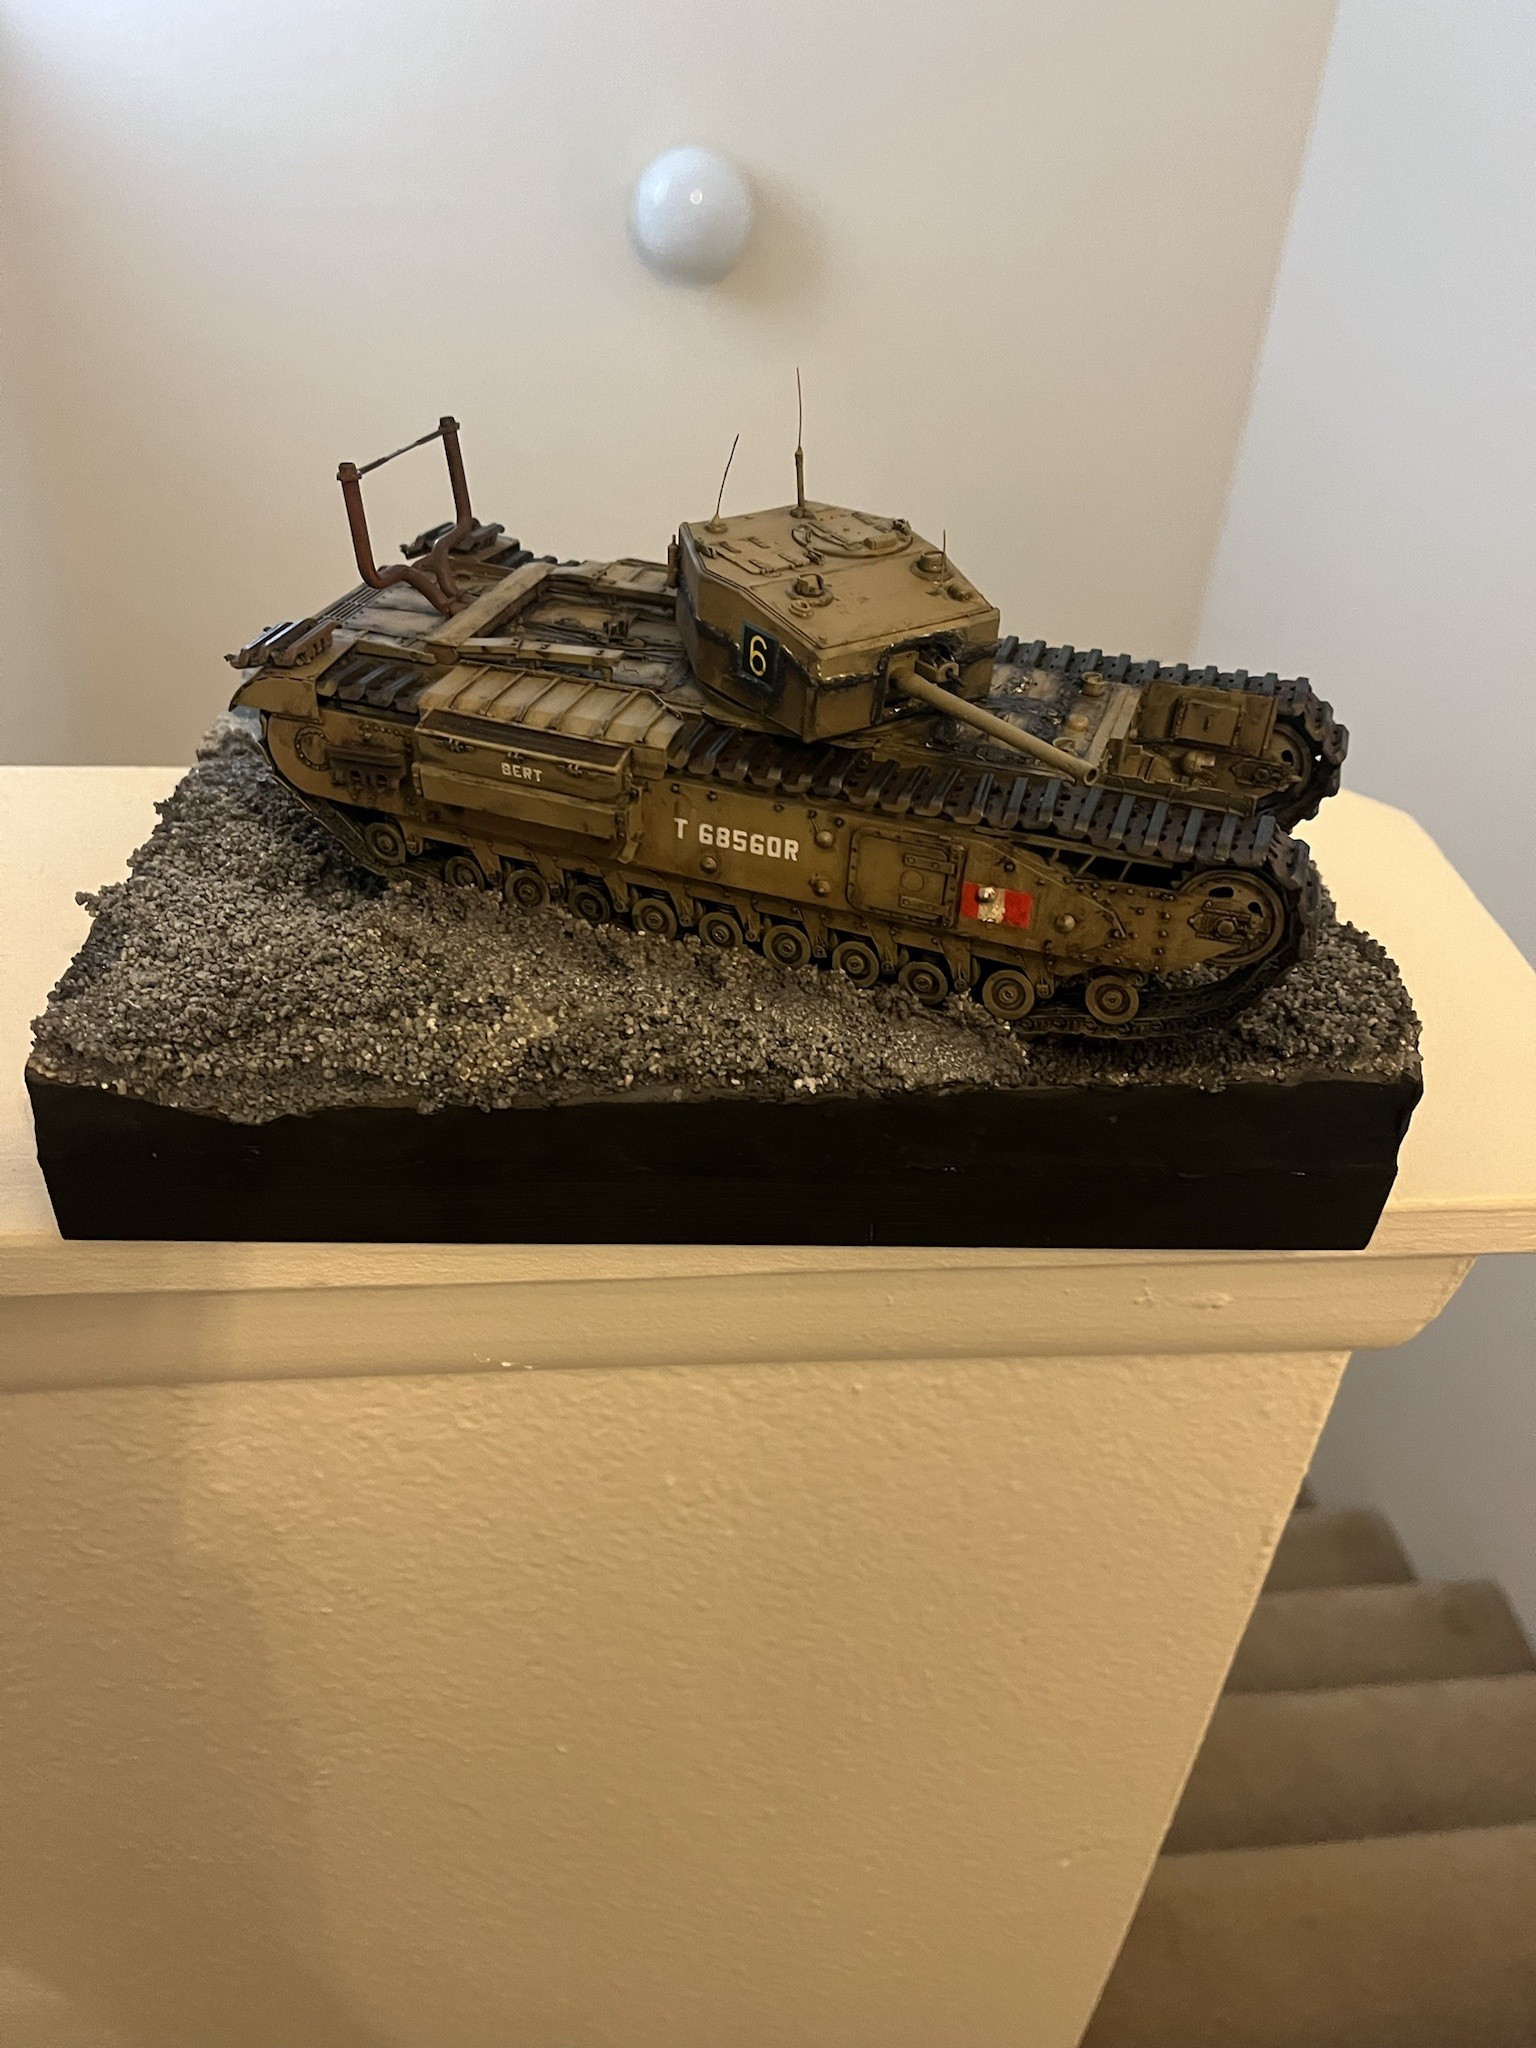


“Bert” at dieppe
Over the past month I’ve been working on AFV Clubs Dieppe Churchill. The raid at Dieppe has always fascinated me since I was a young teenager beginning to study military history. As I continued studying military history I learned how valuable of a lesson the Dieppe Raid would be for the Allied forces in their hopes to achieve a foothold in mainland Europe.
I remember seeing this kit come out about 15 years ago when AFV Club decided to release a line of the Churchill tanks for a year. After slowly growing up in this hobby and taking time away from it as a young adult I knew that this would have to be in my stash and a must build, if anything just to scratch the itch and today I built it. It took many years for me to finally scratch that itch. As someone that builds primarily German armor from WW2 I decided to change courses and try something new.
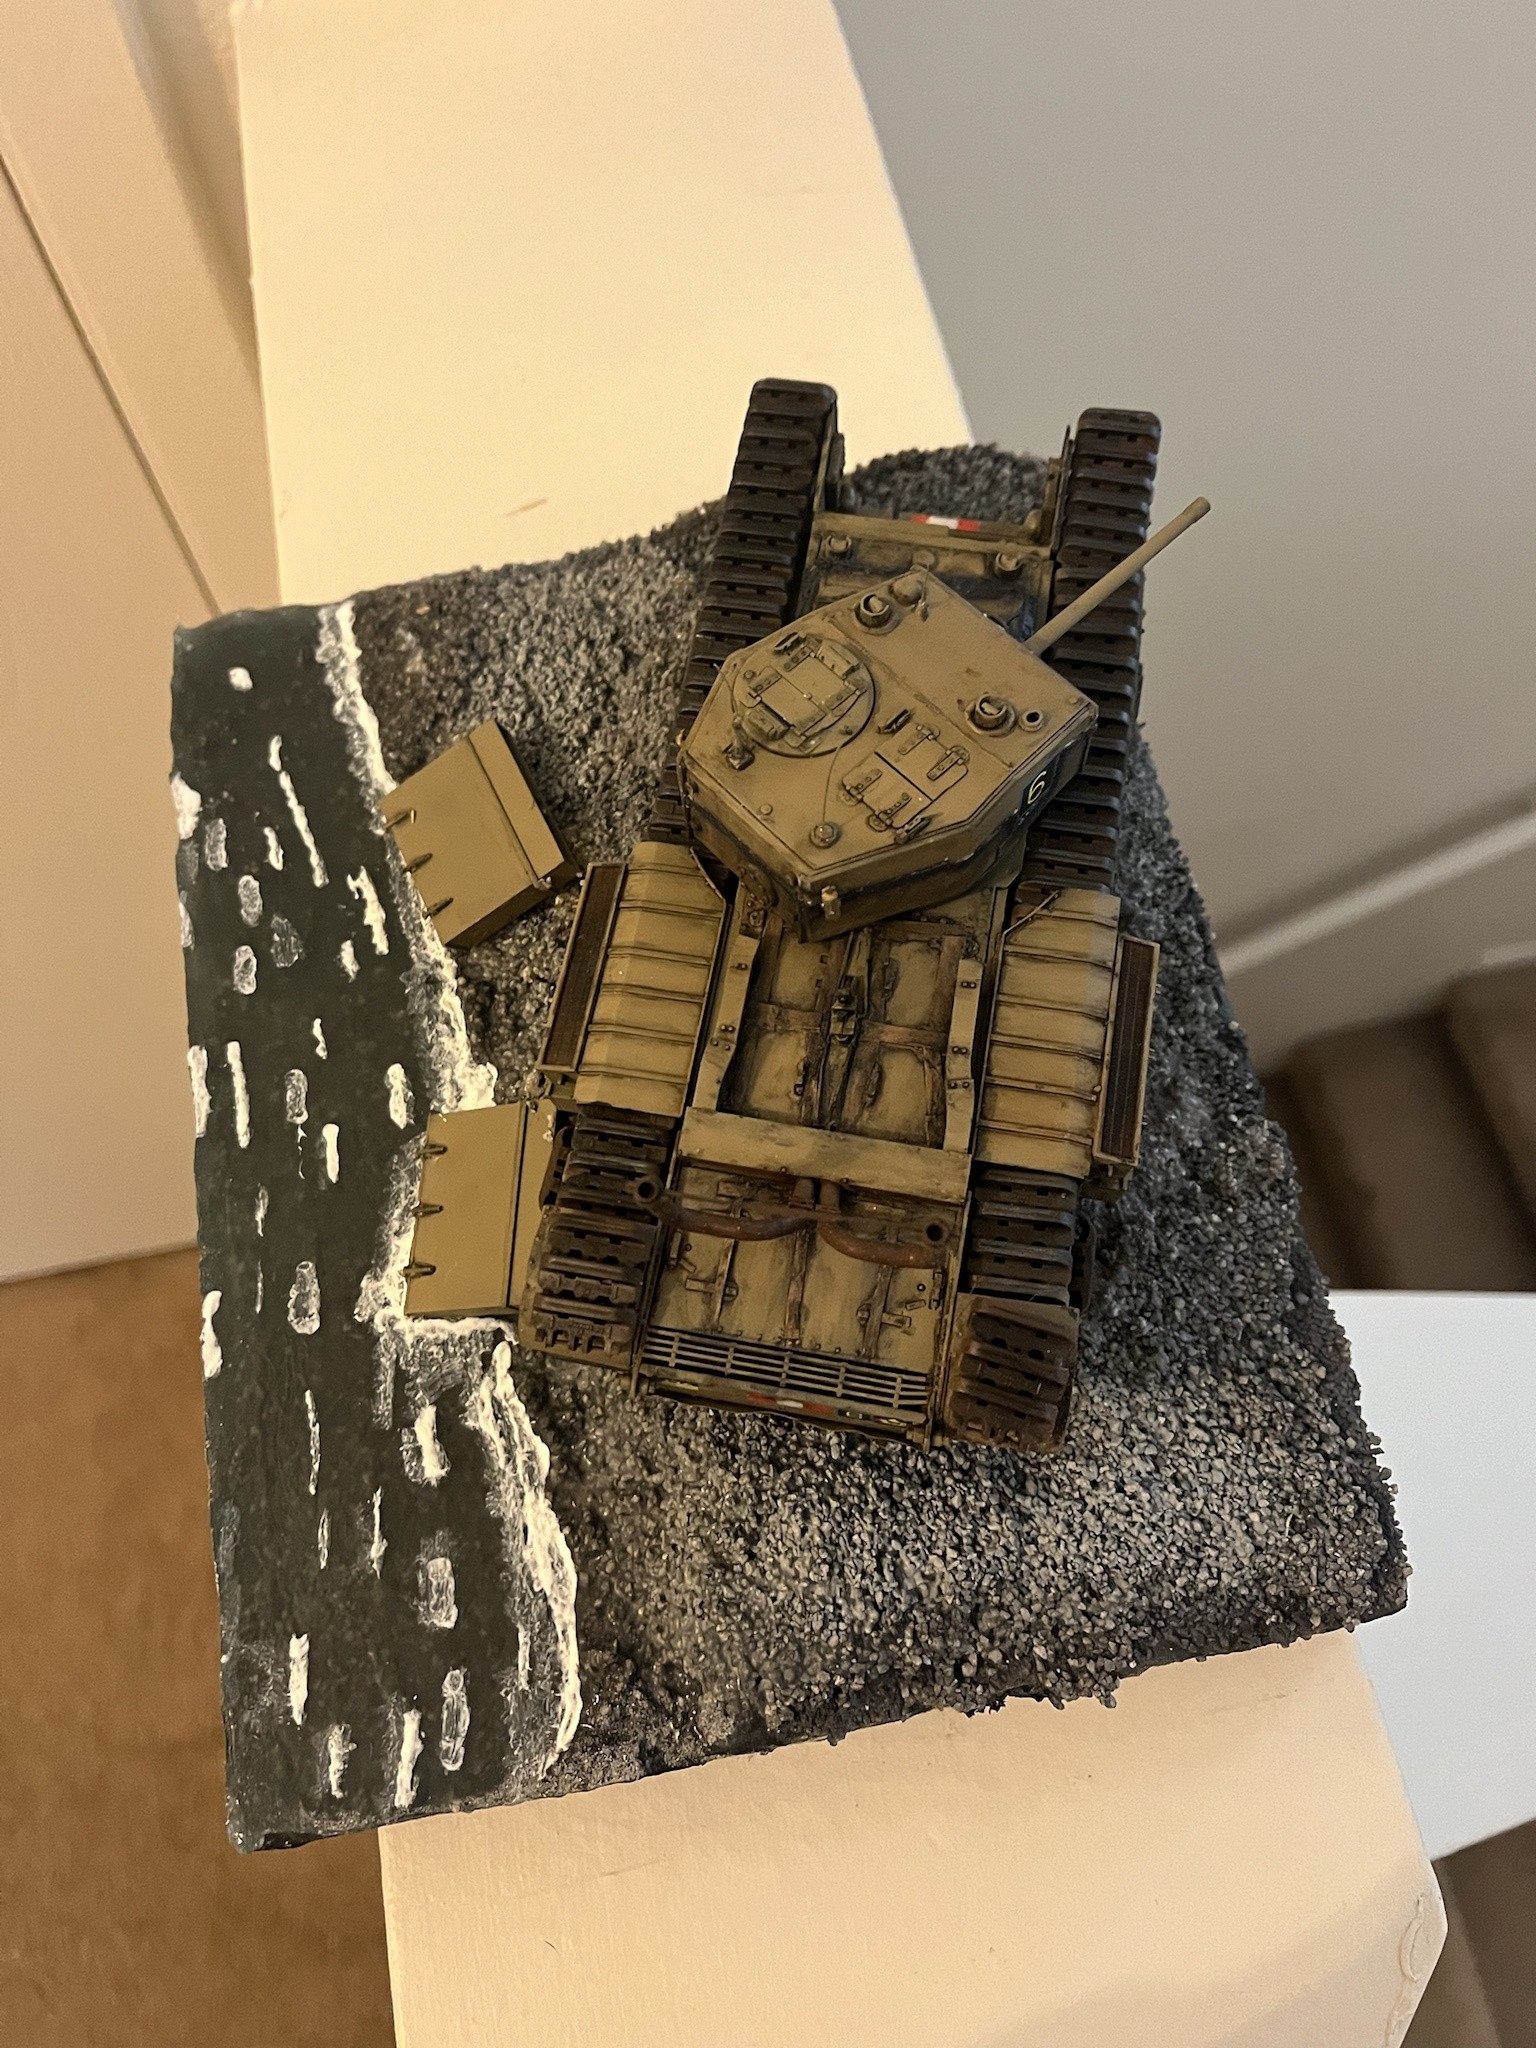
The AFV Club Dieppe Churchill goes together quite nicely. The kit was an easy build and with very few fit issues. The hull is built in pieces rather than in a traditional lower and upper hull that other companies would give you. The track, probably the most unique I’ve ever touched, went together after some quick analysis of how it worked. By far, this is one of the few plastic track sets that will move with the drive sprocket and not break immediately. This made it easy to paint when it was time.
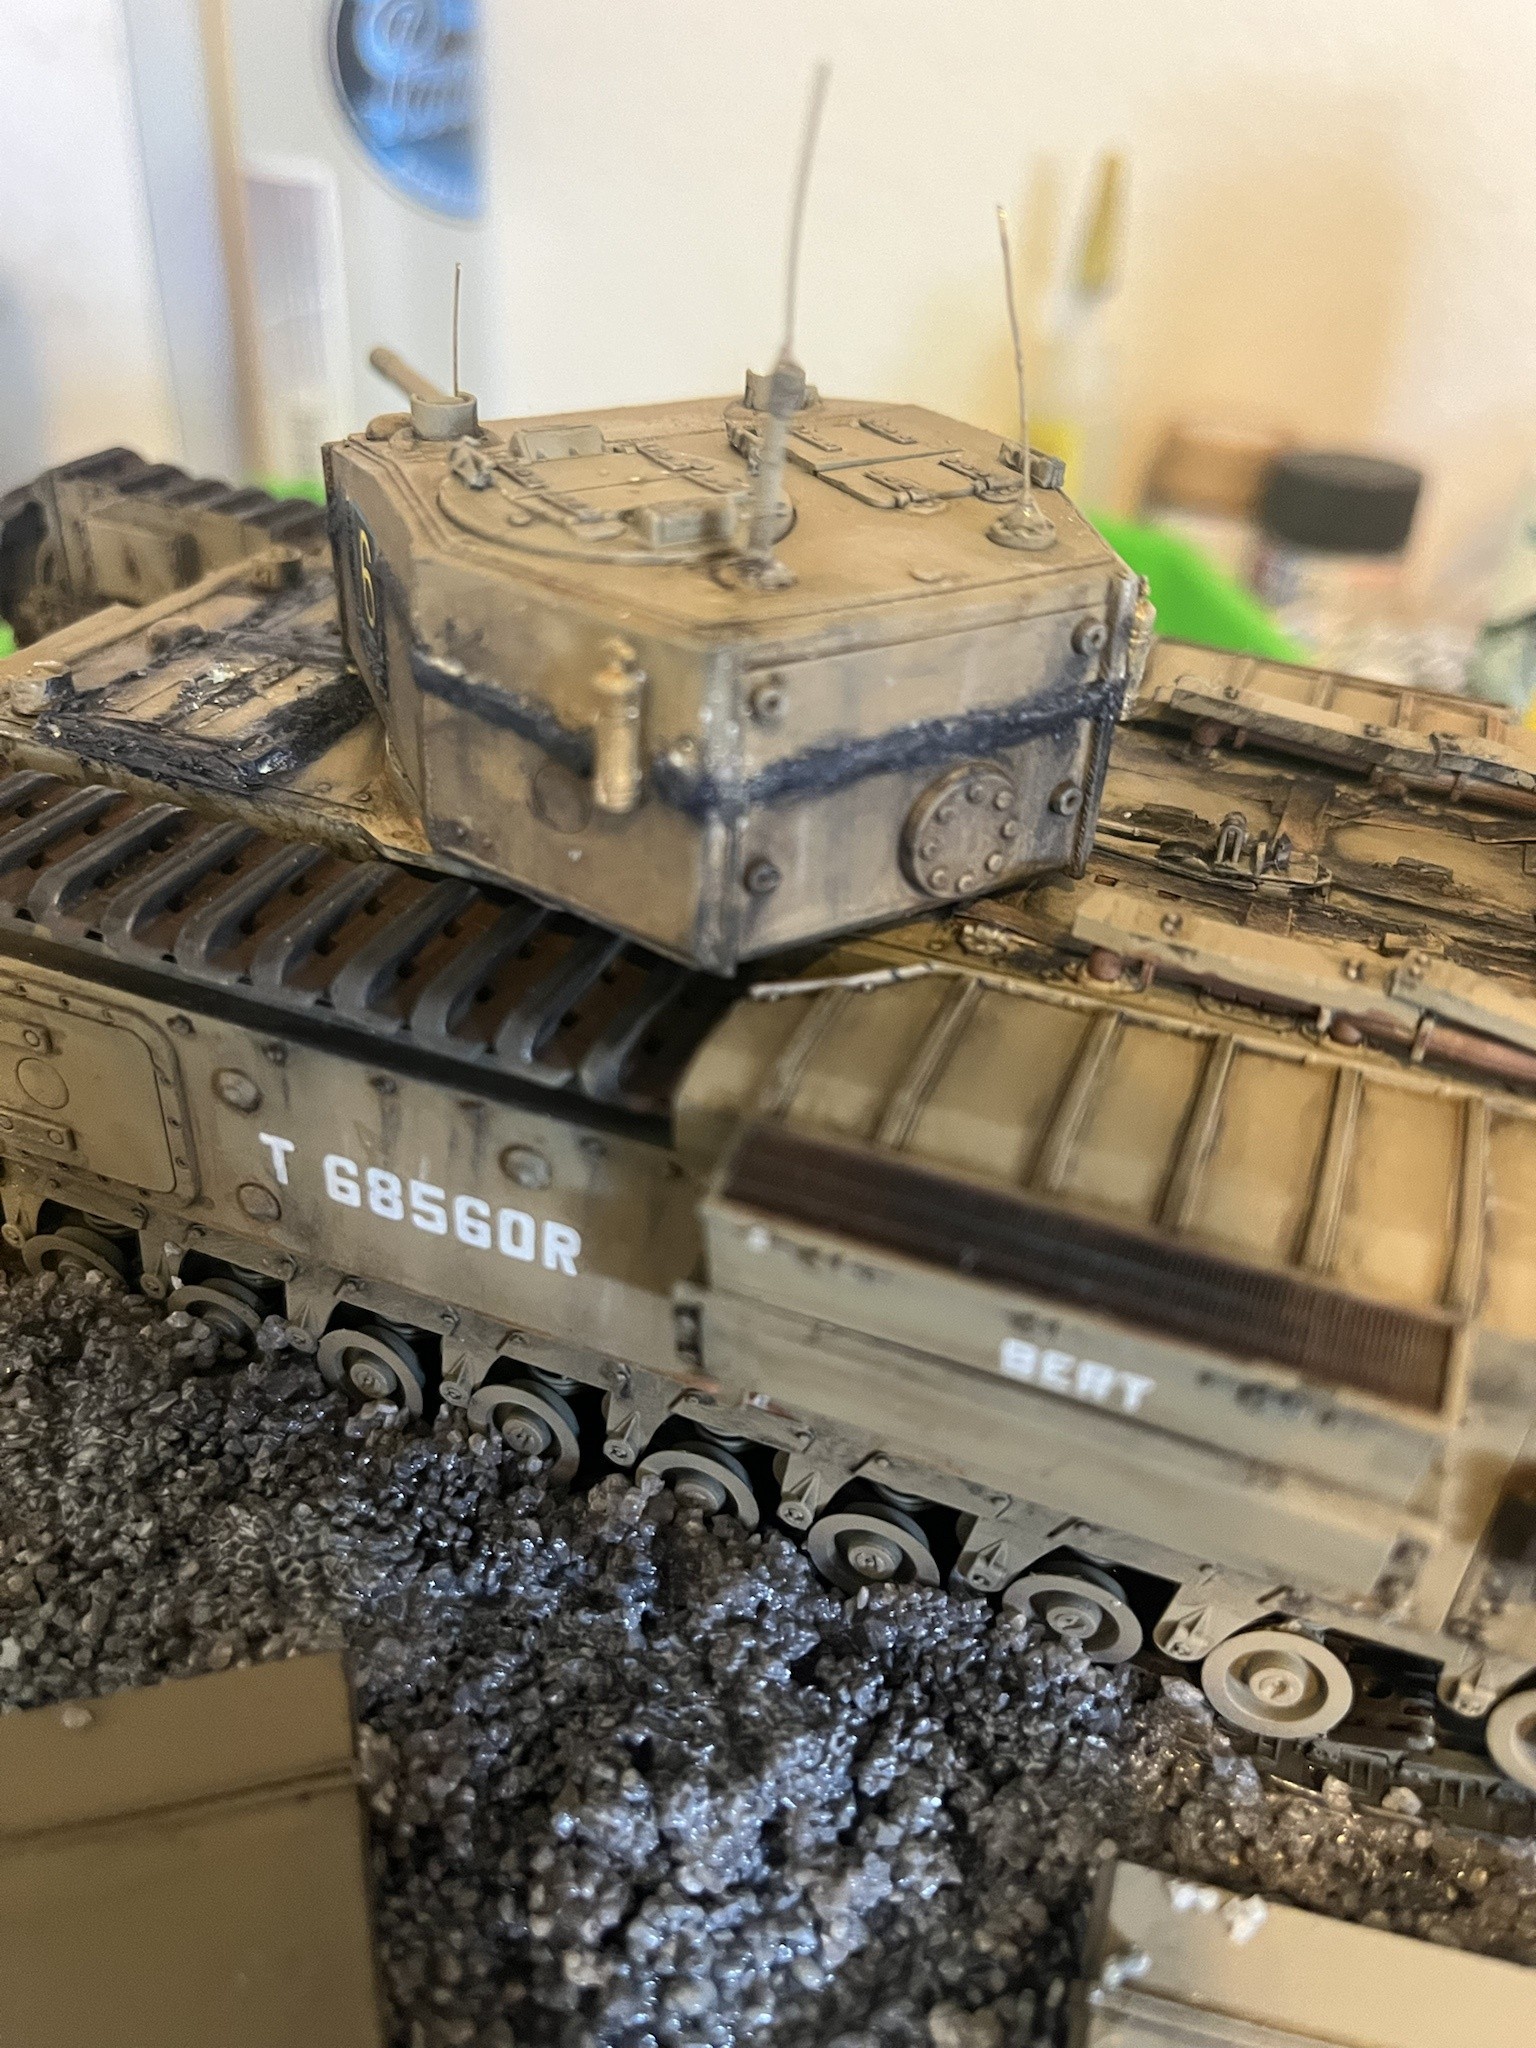
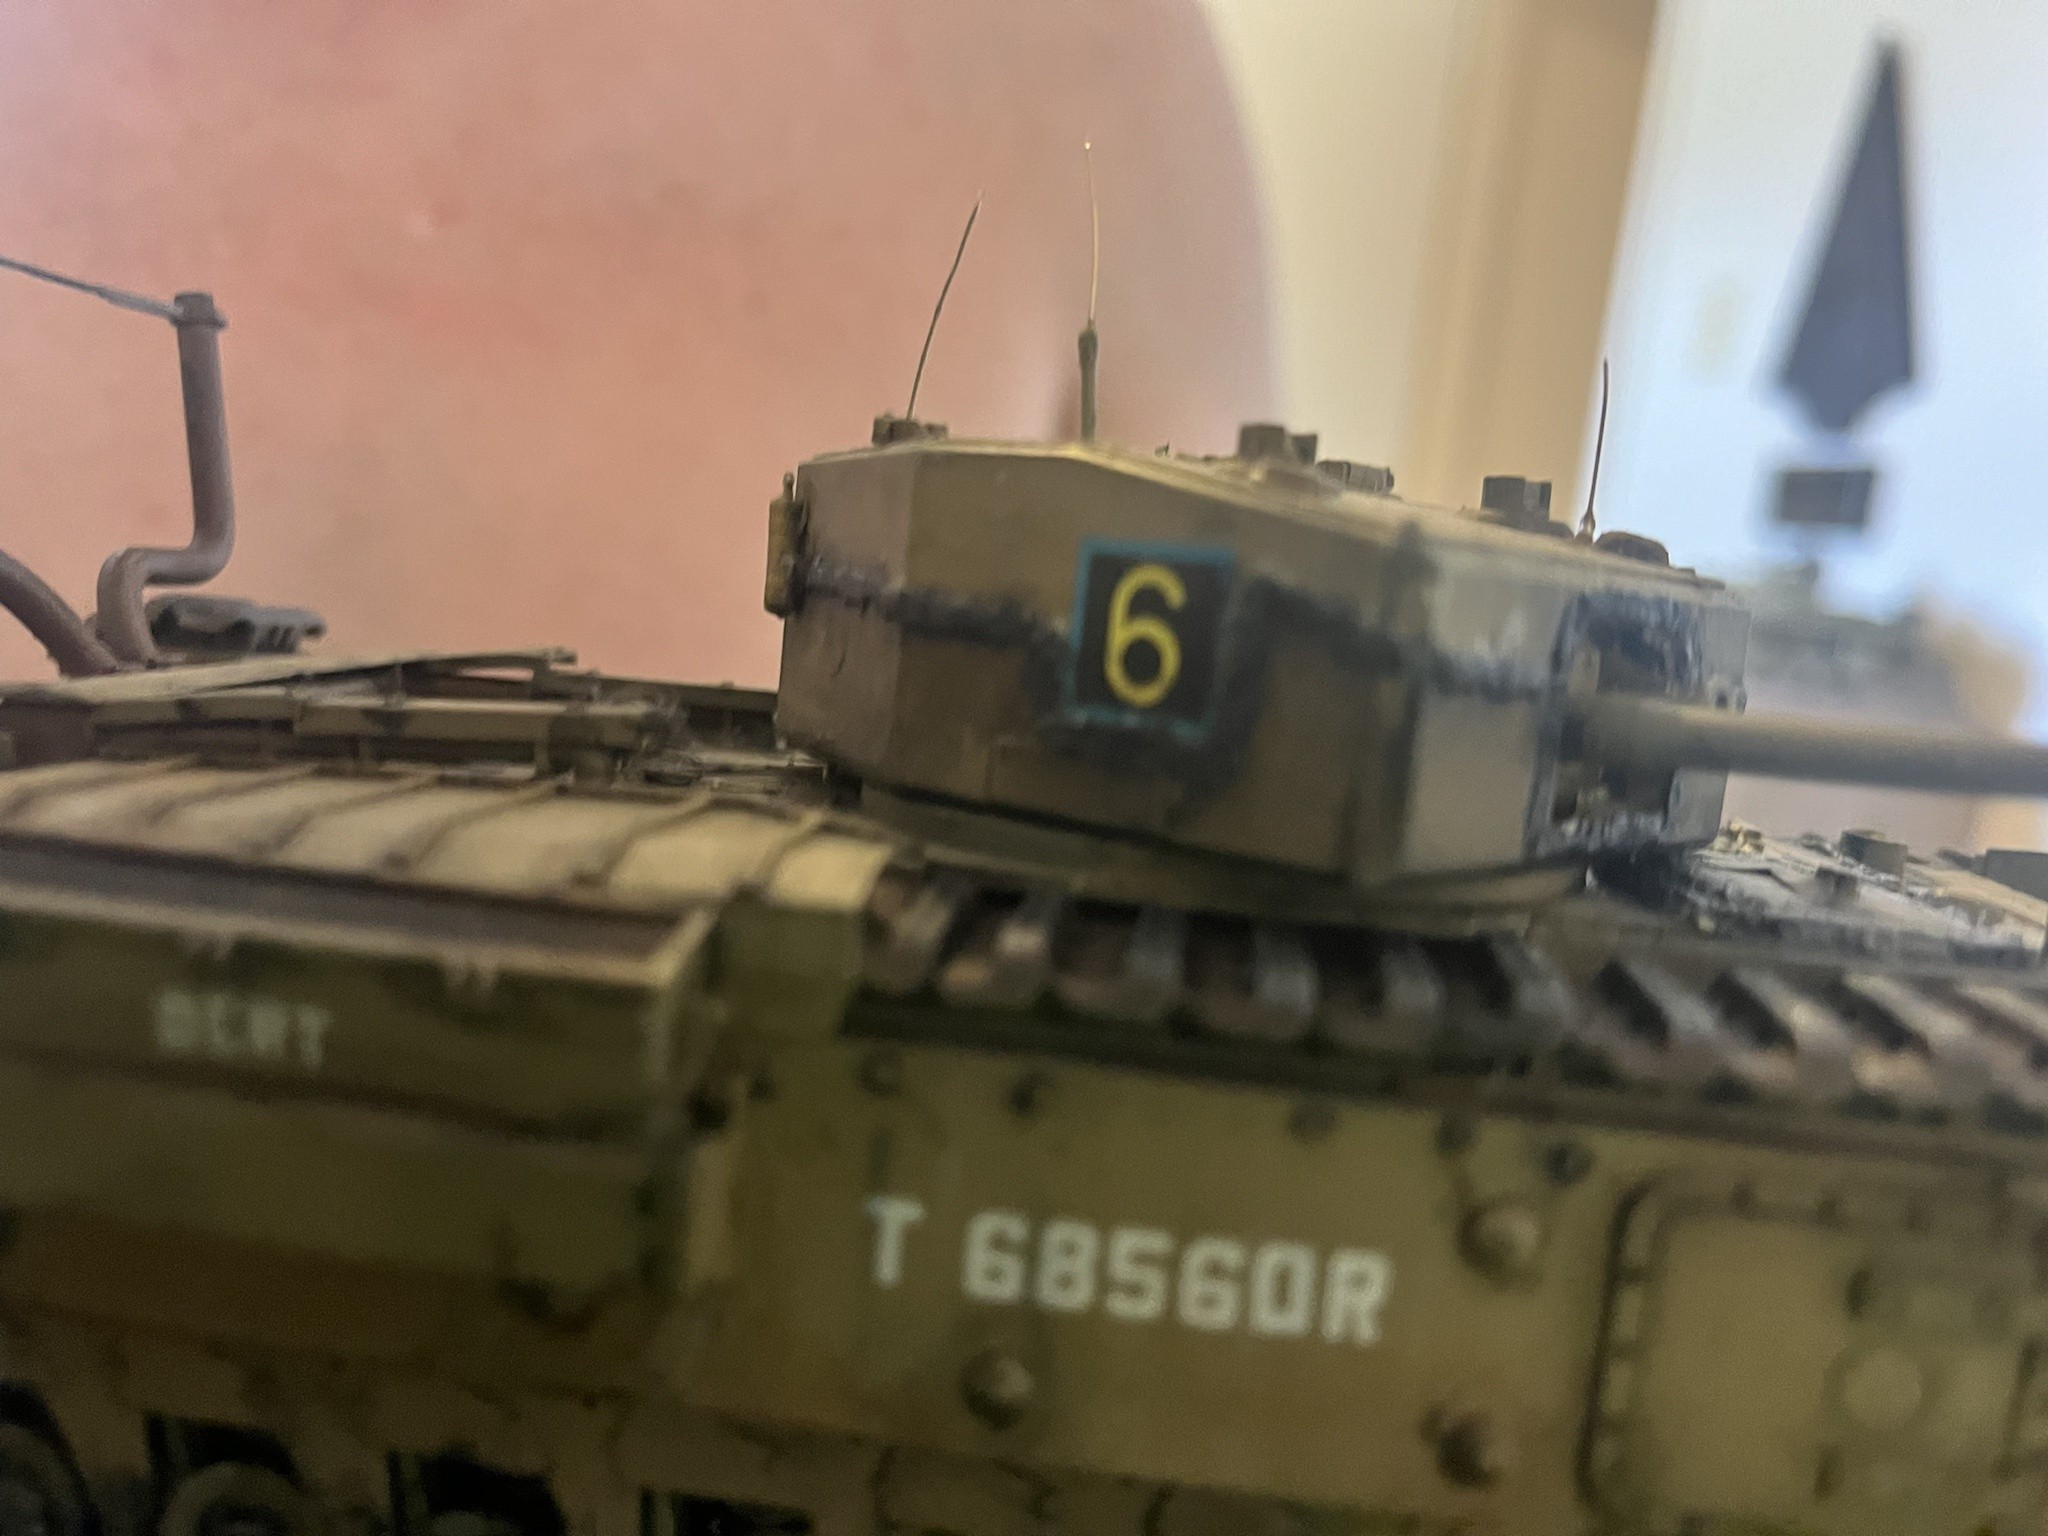
I was informed by members of the forum that the Dieppe Churchill’s had additional items on them to make them waterproof during the raid that AFV Club did not have in the kit. For water proofing tape I cut strands of white paper and soaked them in a glue and water mix then applied them onto the grill doors of the engine deck. I painted over them with Khaki from AK Interactive and dirtied them with Payne’s grey Master Touch oil paint. For the water proof paste on the driver’s hatch I used Mr White Putty and spread it over to create a seal. Once finished I painted with ammo kit Dark Grey base and applied Payne’s grey oil paints from Master touch. The turret seal that would have held the canvas up as well as secured the detonation cord around the turret was built with milliput that was filed down around the turret. I painted it with a primer coat of black and grey and finished it off with, you guessed it, Payne’s grey from master touch oils.
For paints I stuck with ammo Mig. I primed with black and white one shot primer. The base color was khaki NO 3, with shadow and highlight buff added from AK interactive to achieve shading and highlight effects. For the tracks I used Ammo Mig Dark track then went over with Vallejo Air Black to polish the treads that would have made contact with the beach and street when coming off the beach. To emphasize the minimal wear and tear on the tank I decided to do a light wash using Master Touch oil paints burnt umber mixed with a liberal amount of Naptha lighter fluid to make a homemade wash. After it dried I used a wet q-tip with mineral spirits to clean up excess. I then attacked the tracks using dark wash from Ammo Mig to bring the colors together.
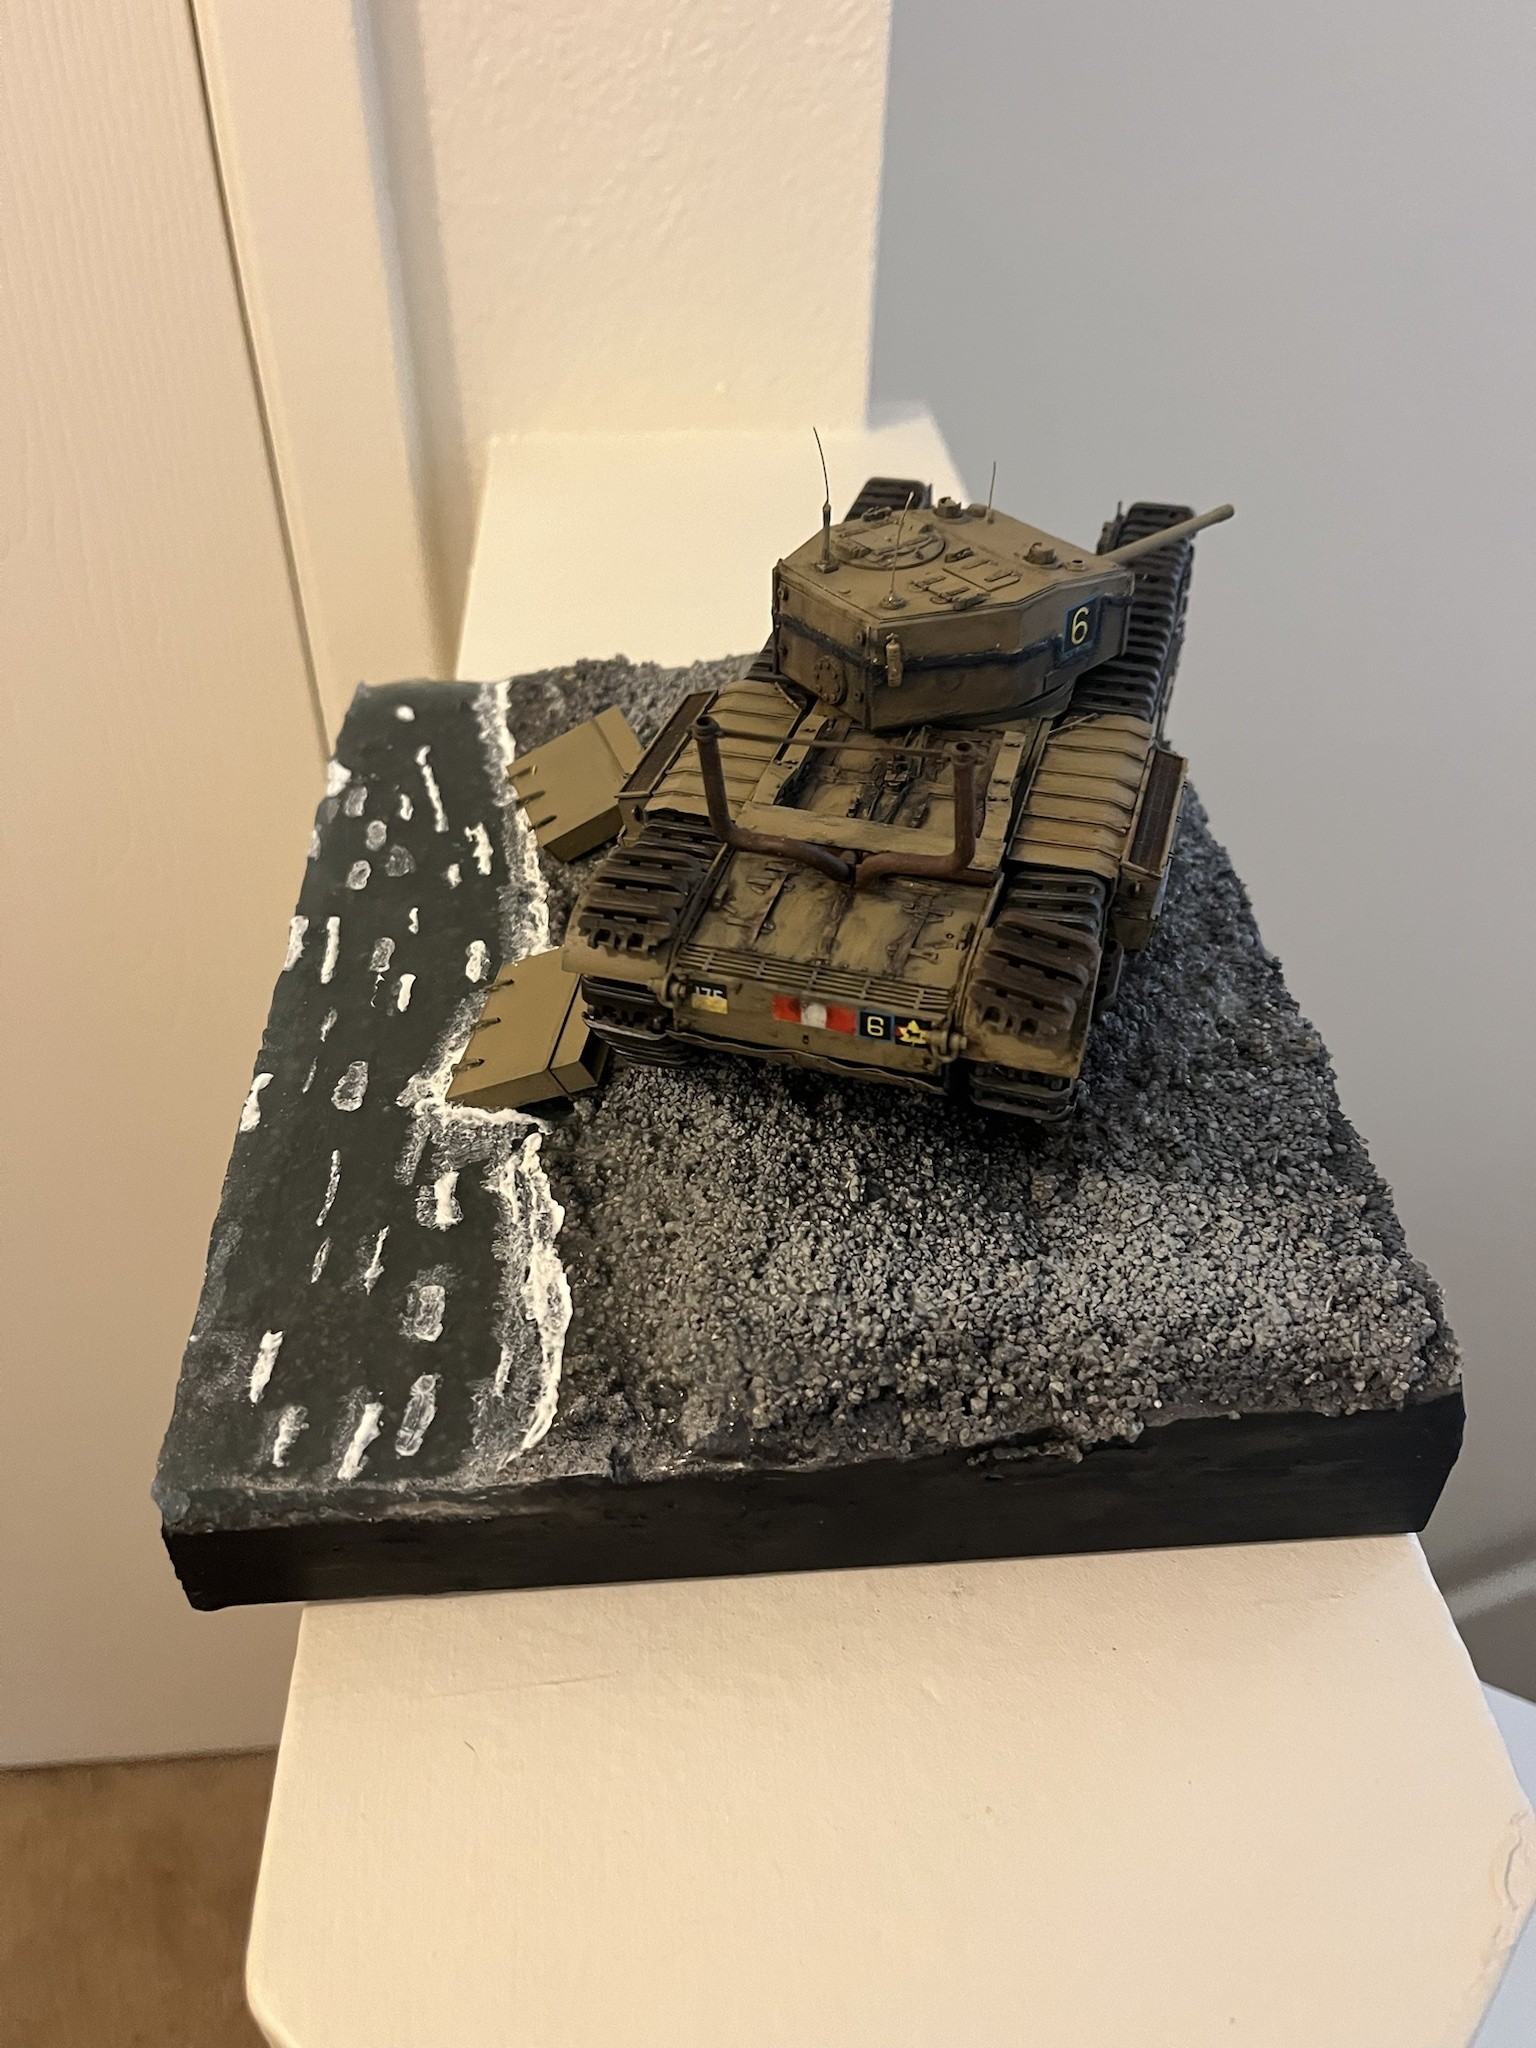
The beach scene itself is inspired from photos of “Bert” and the other tanks of the Calgary Regiment after the battle. The diorama can be viewed in two perspectives, did they just land and disendow their snorkel kit, or is this very covering the retreat to the fleet.
The base was made using a Master Touch wooden paint stand that I bought from hobby lobby. I reread Shep Paines how to build diorama books and remembered the old screw trick to keep models attached to diorama bases. Once I had laid out the diorama with Styrofoam and mapped out how I wanted the scene to look I drilled my initial hole. I covered the diorama in model clay and let it dry overnight. For the beach pebbles I bought. 10Ib bag of PCS Industries Golden California Sand that was the relative size of what a 1/35 pebble would be. The initial base color for the pebbles was AK Interactive primer grey followed by coats of Ammo Mig Dark Grey to stone grey to achieve various highlights and shadows that a beach with armor turning up the pebbles would have. I made three different pots of sand with three different colors of grey using Ammo Migs Highlight grey, stone grey and plain grey. I then sprinkled this throughout the scene and built up the layers needed. The final layer was put on after setting the Churchill down and I made sure to build up the pebbles around the tracks.
The water is a resin pour utilizing Janchun resin that I bought off of Amazon. I mixed Vallejo Blue and Vallejo Air Green to achieve the results. I did two pours and once it dried I used AK Interactive water gel transparent to achieve the wave look and then their Water Foam to achieve the waves on the beach. When this was all finished I sealed it with Ammo Mig Matt Varnish