












As a modeler of predominantly Iraqi and Iranian equipment, the MT-LBu has been on my projects list for a while. Both the 1V13 and 1V14 variants were used by the Iraqi army and Republican Guard Forces Command, in all of the armored and mechanized divisions. I had plenty of good references, even of one found in an Iraqi museum in 2003!
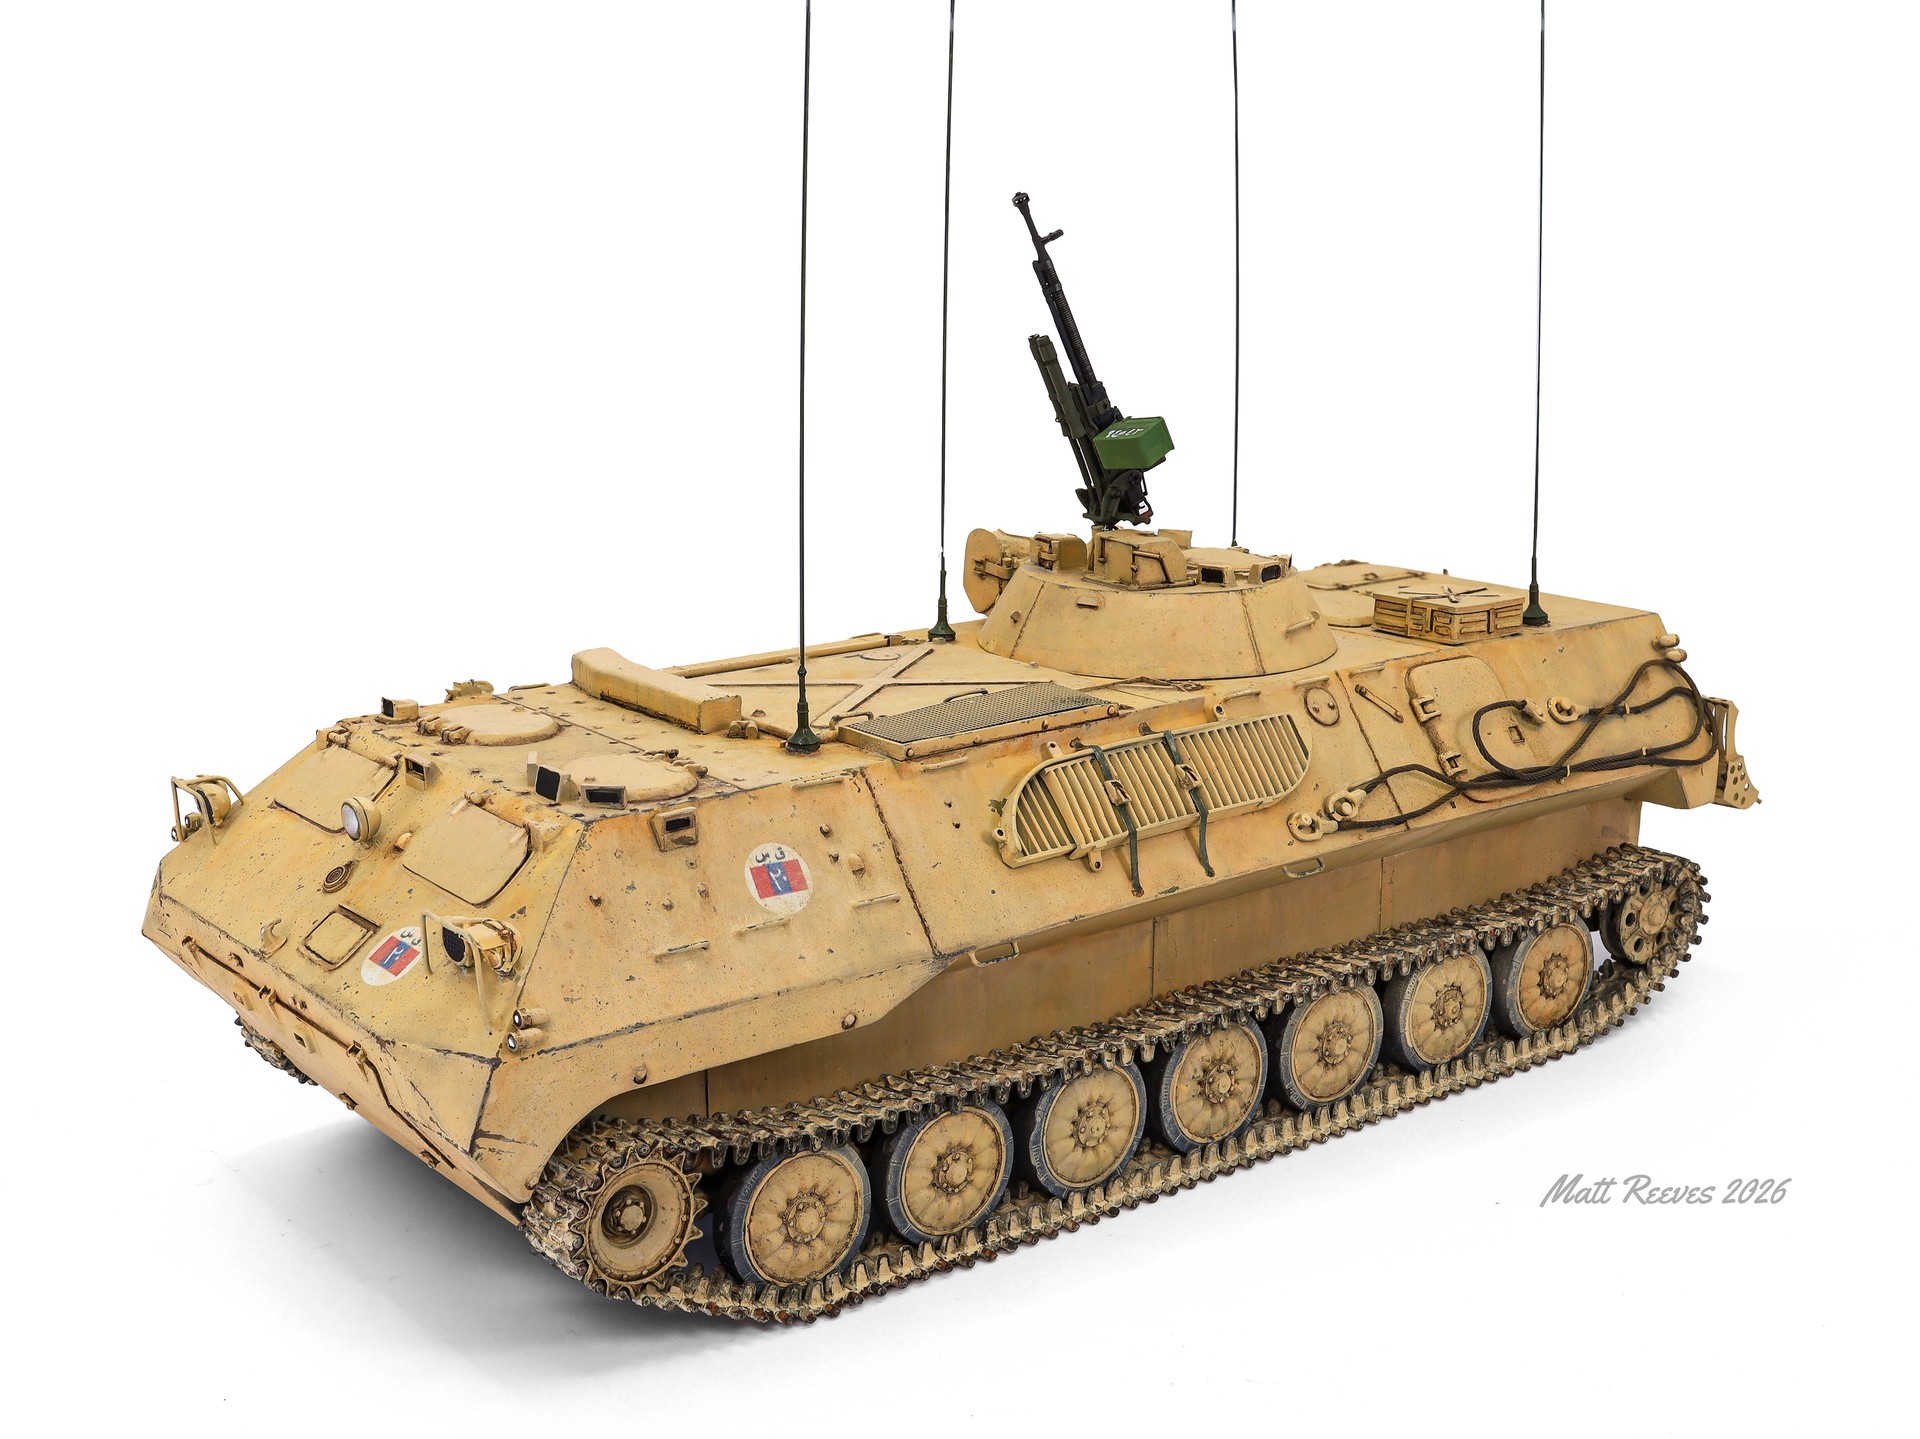
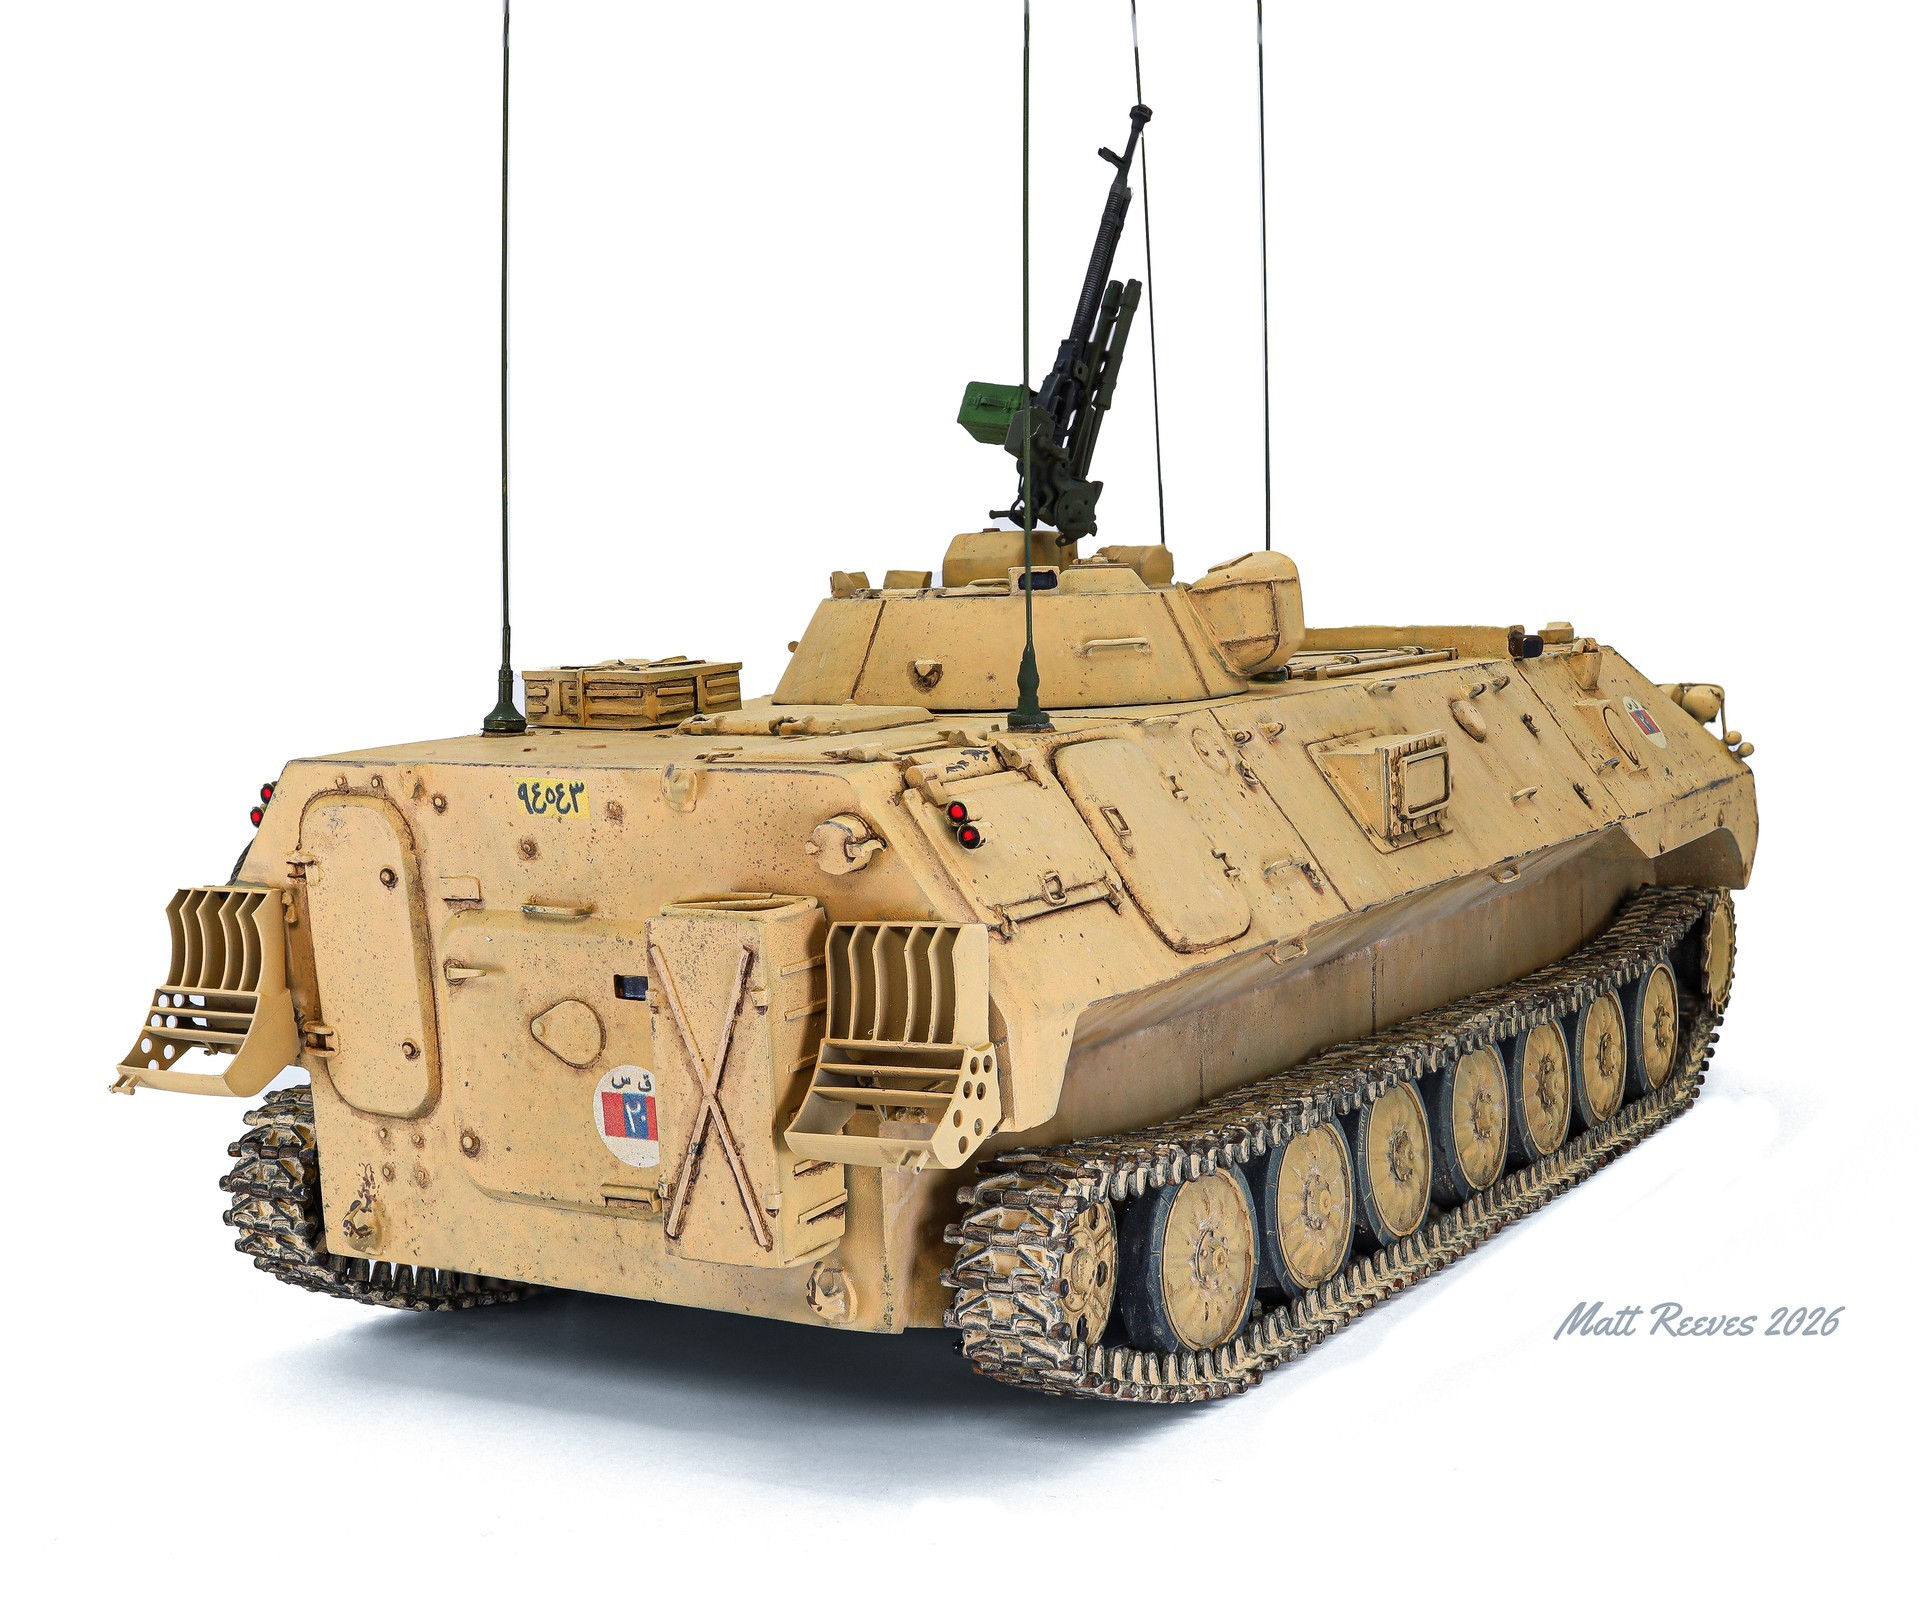
SP Designs produces a 1/35 kit of this vehicle in resin. While it’s a well-cast and accurate model, I made a few updates to mine. The biggest issue was the suspension. As with virtually all resin kits, the tracks are warped and don’t fit together well. Since the MT-LBu shares the chassis of the 2S1 Gvozdika artillery platform, I found a set of Friulmodell metal tracks for the 2S1 and used them instead of the kit parts. The kit was missing a few details, such as the straps that hold the swim vanes to the port side of the hull. I made these with Tamiya tape. I also used Eureka!XXL tow cables and Aber R-123 brass radio antennas. Though the kit has the AAMG mount on the turret, no machine gun is provided. By now I’ve been thoroughly spoiled by the 3D-printed DShK machine guns from E.T. Model, so I used one of those.
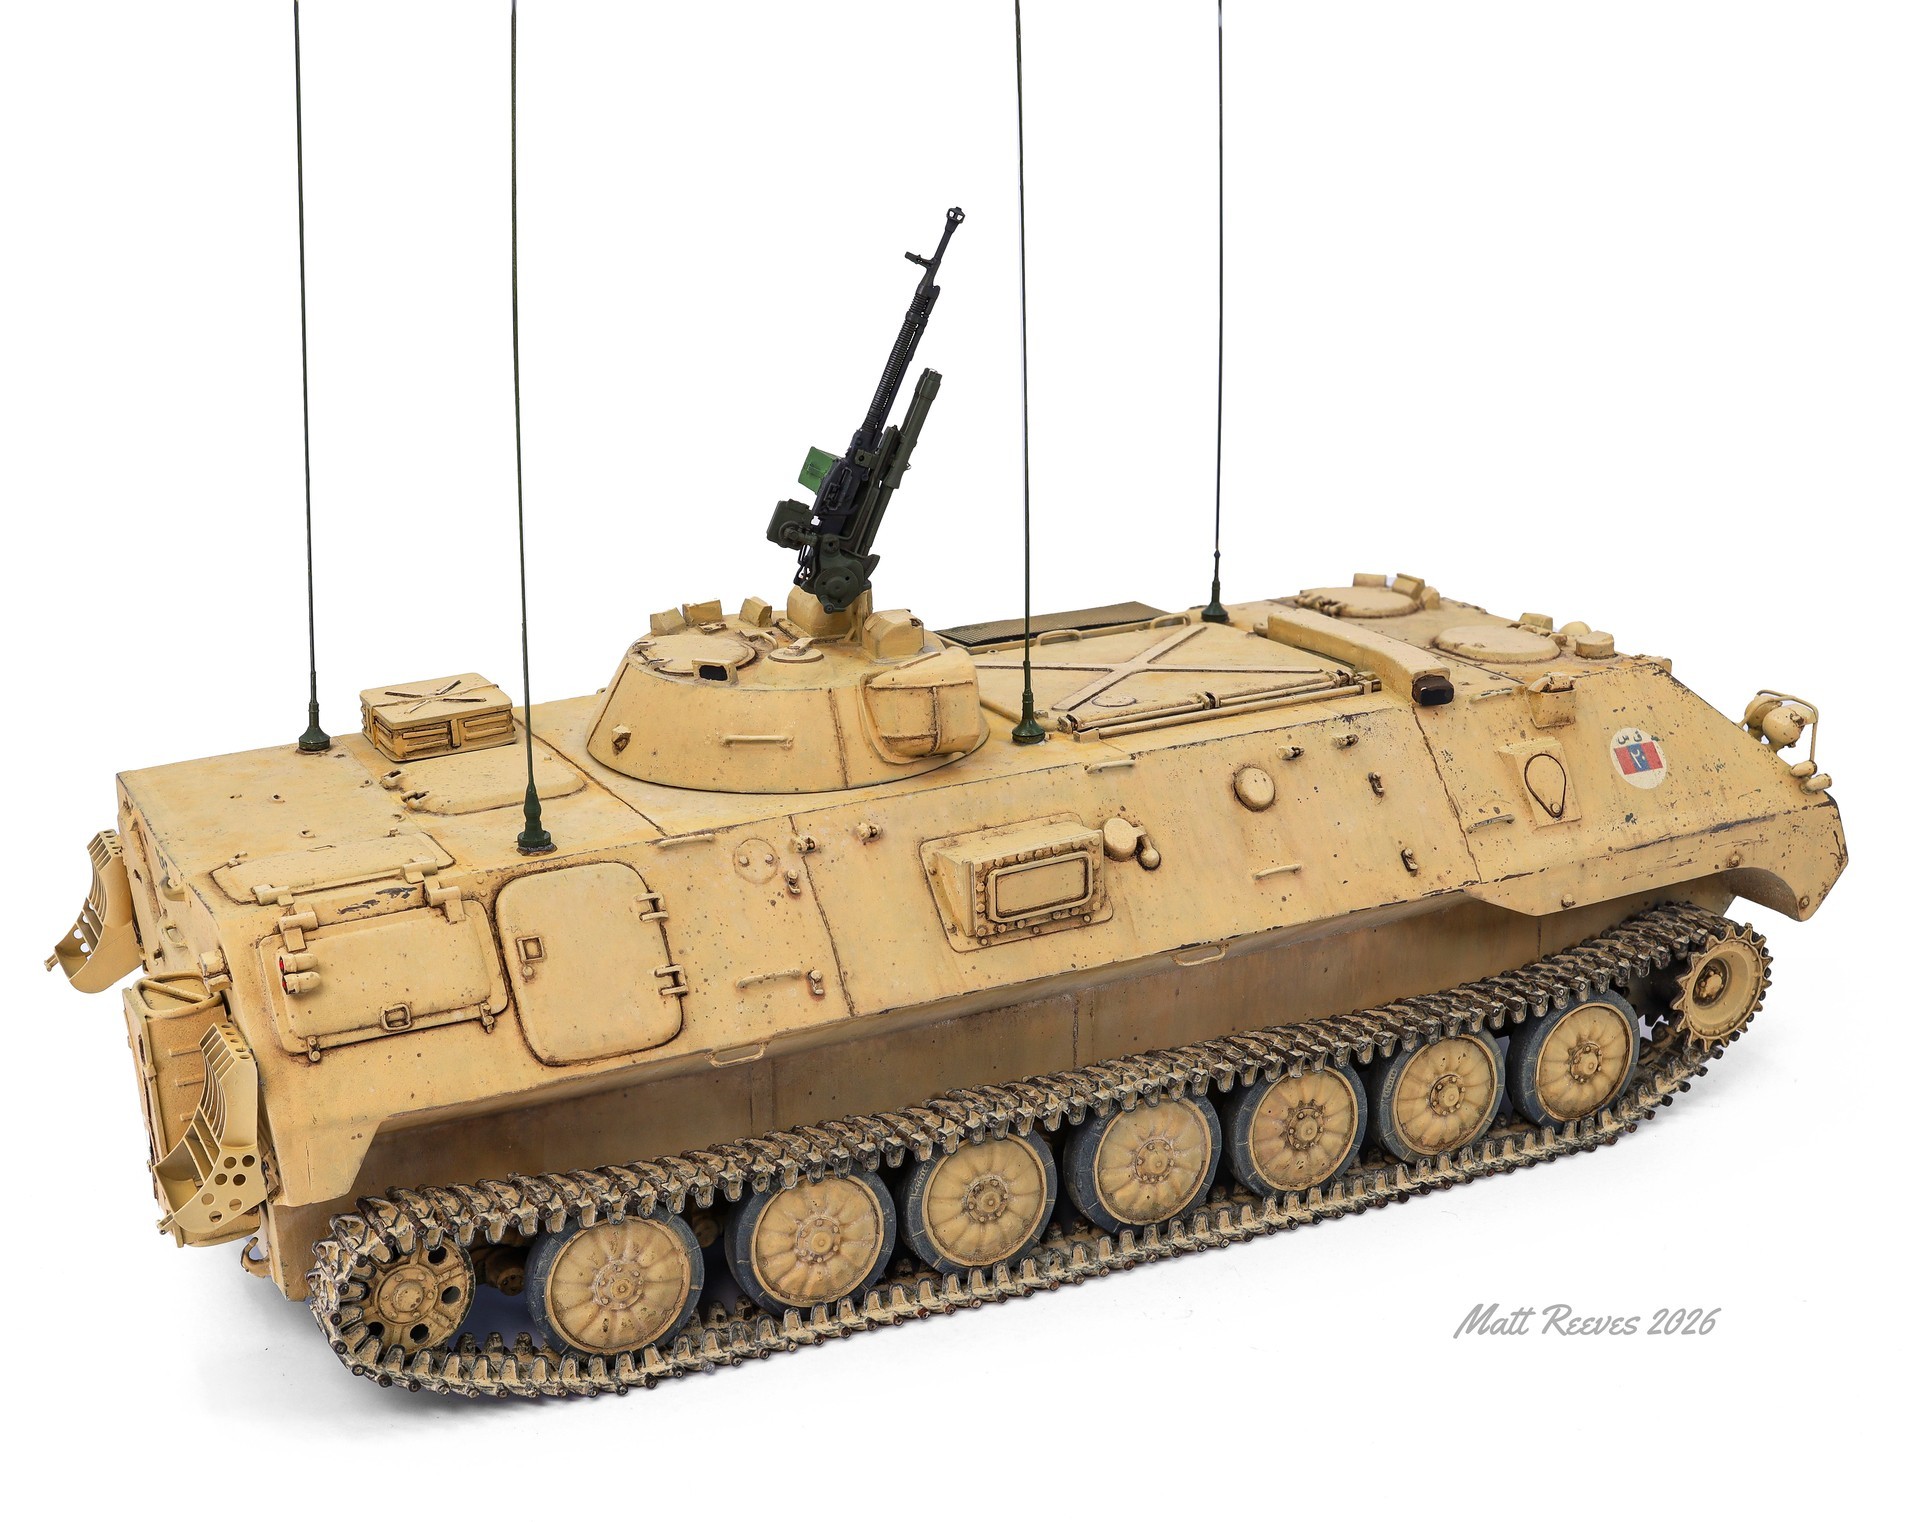
On virtually all of my completed models for the past several years, I’ve either painted the markings or made my own. I draw them in Adobe Illustrator and have them printed by a company called Draw!Decal. I had my pick of markings options, but I chose 20th Field Artillery Battalion of the Iraqi 3rd Armored Division “Salah ad Din.” As part of the Iraqi 3rd Army Corps “Al Qadisiyah,” 3AD launched a diversionary attack against thinly-held USMC lines during the Battle of al Khafji, Saudi Arabia, in January 1991. The division was mauled, mostly by Coalition air strikes, during this battle. One MT-LBu was captured in fine shape, and as there were several excellent reference photos of it, I chose it for my model.
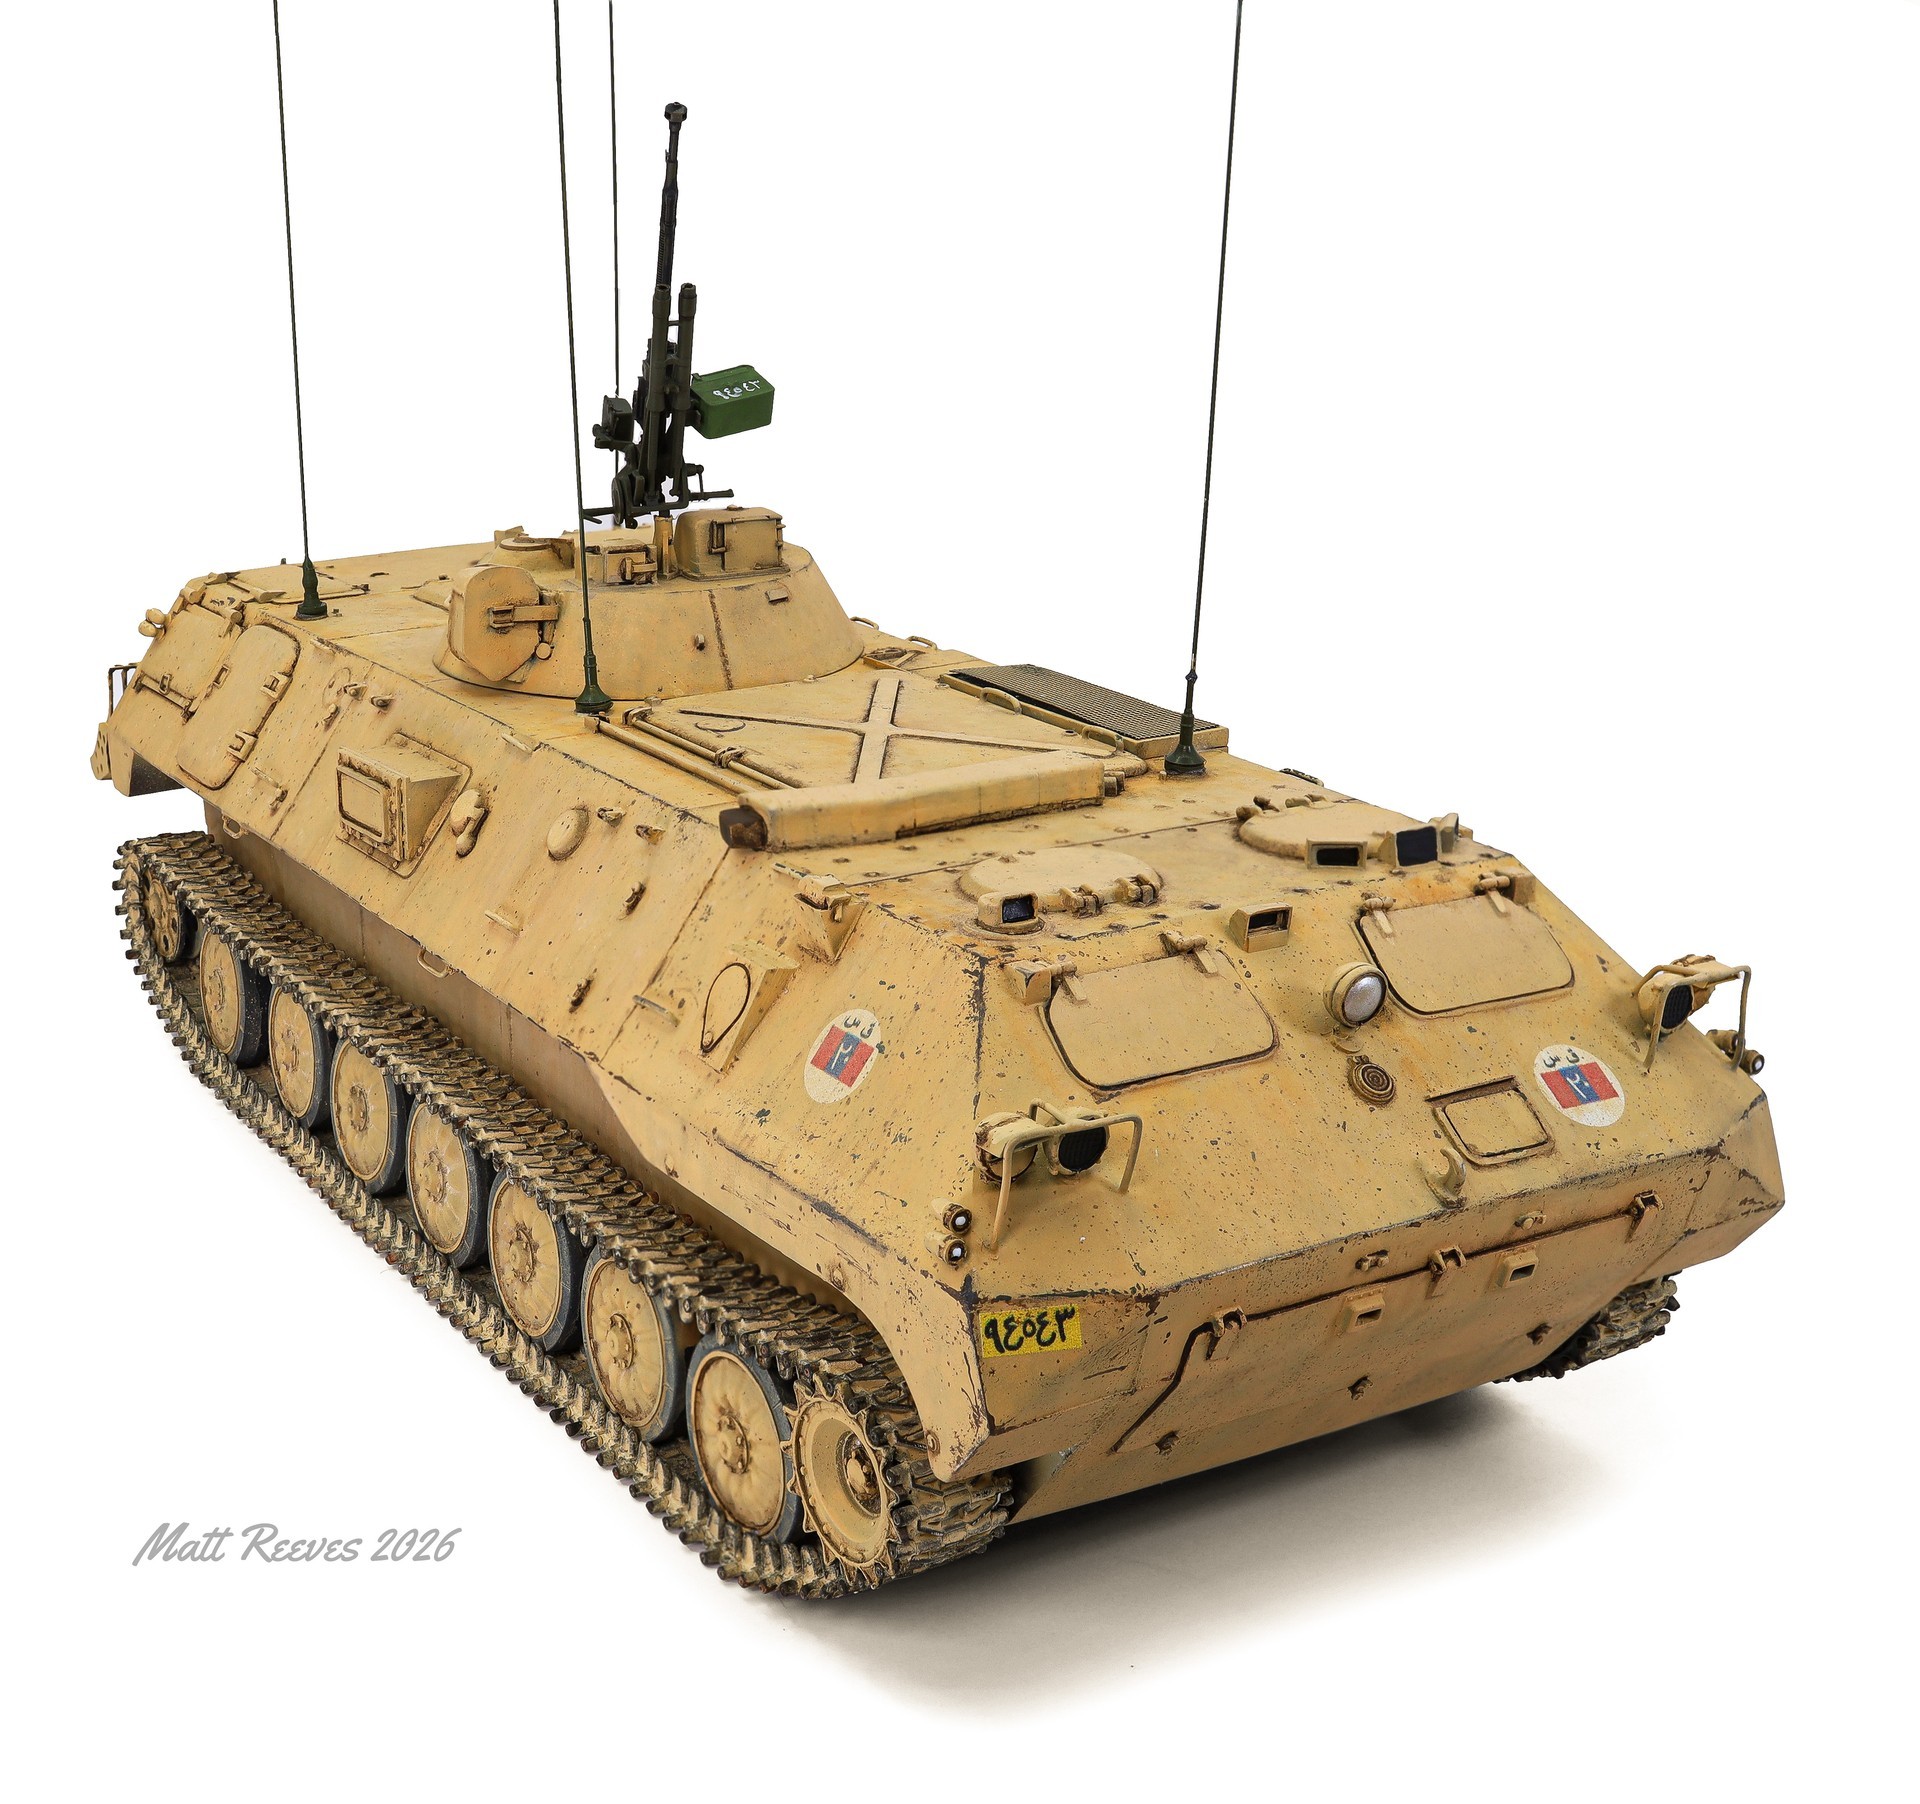
I painted my MT-LBu in AK Real Colors British Sand Yellow (RC#093). There was a huge variety of paint colors in the old Iraqi forces, due to the sheer size of the army and RGFC and numerous sources of paint supplies. Modelers therefore have a wide latitude in choosing colors for their Iraqi models, and I encourage them to contact me if they need references!
Keeping with my references, I didn’t do a lot of weathering on this model. First I apply my custom decals, and only varnish under and over the decals, rather than coating the entire model. The gloss undercoat helps them stick to the surface, and the top one protects them from the weathering process. Finally I hit them with Mr. Color UV Cut, which kills any shiny spots from carrier film I may have missed.
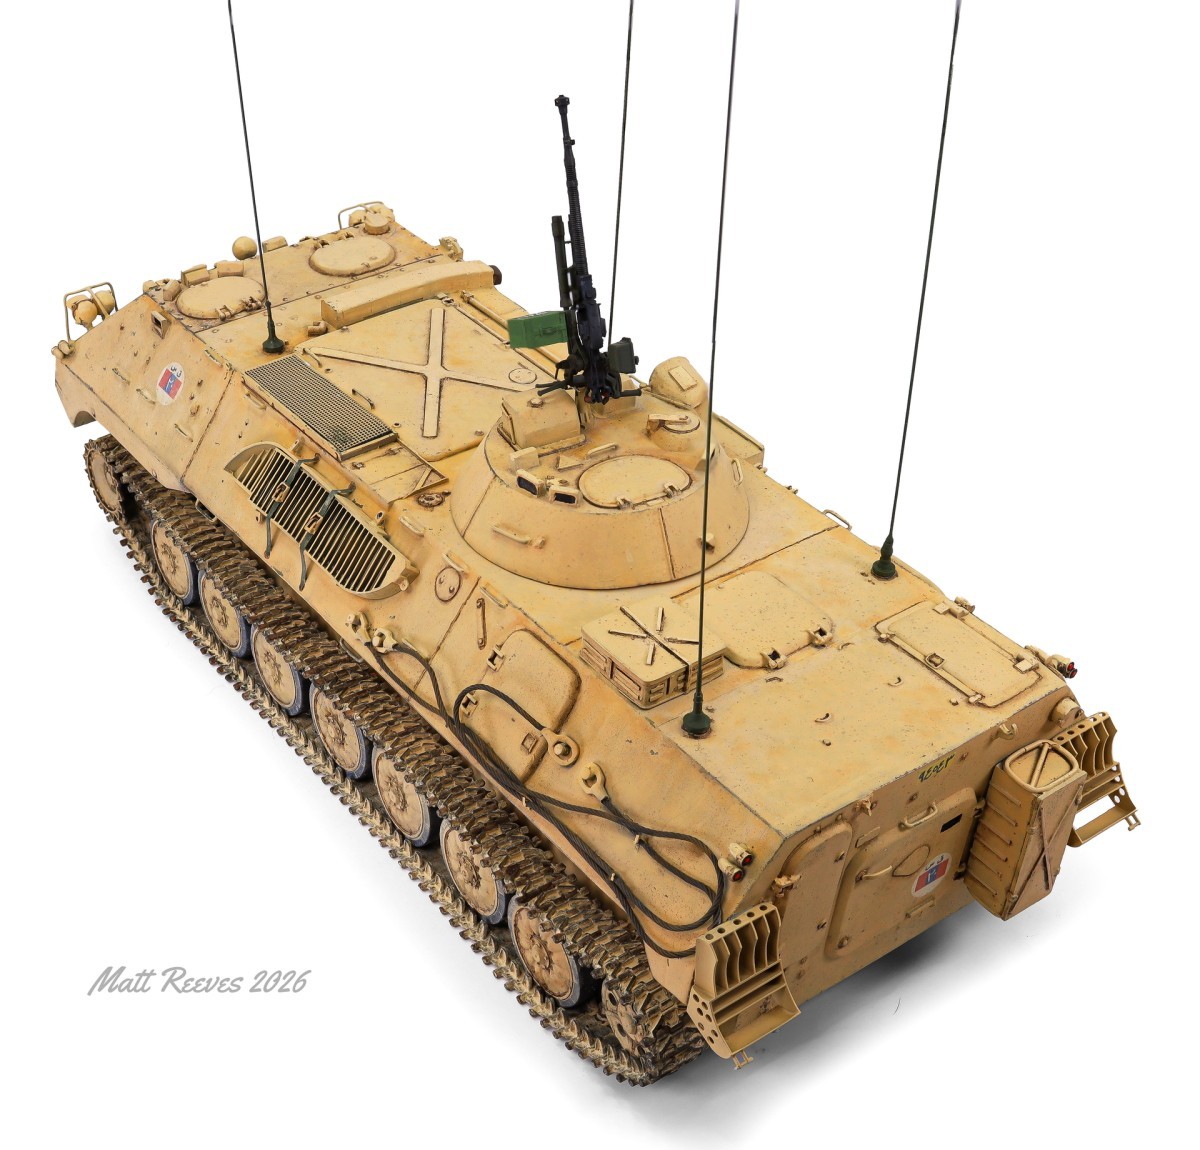
After the decals were set, I started the weathering with my usual application of numerous shades of dust with different shades of sand-colored oil paints. I then made very fine paint chips by applying brown and green acrylic paint with a sponge, and scuffed the edges of the hull with steel-colored pigments applied with a rubber brush. I then weathered the chips and decals with more oils and a bit of sand-colored pigments.
SP Designs makes some fantastic products, and I highly recommend all of them. The owner, Sergei, is a very nice guy and responds quickly to emails and Facebook messages. His turnaround time in casting and 3D printing is very quick, and shipping is remarkably so.