


This has been one of those things I always wanted to build because of the uniqueness factor: the Ferdinand tank destroyer had a petrol-electric drive, which, although, was not a groundbreaking thing at a time (ships and locomotives already had similar arrangements), but only Ferdinand Porsche thought of putting it into a tank. It also used an unique longitudinal torsion bar system, making it an interesting vehicle to model with interior all around. (Although these factors directly contributed to the failure of Porsche’s heavy tank proposal.)
There are a lot of myths circulating all over about this tank destroyer, too. The Tank Museum has an interesting video on the Elephant/Ferdinand worth watching if interested in the history of this vehicle. If you are interested in the sprues, Amusing Hobby’s website has some really nice shots. If you need some references, there is an excellent book on the Ferdinand/Elephant available. If you wish to see more photos of the building process, you can find them here.
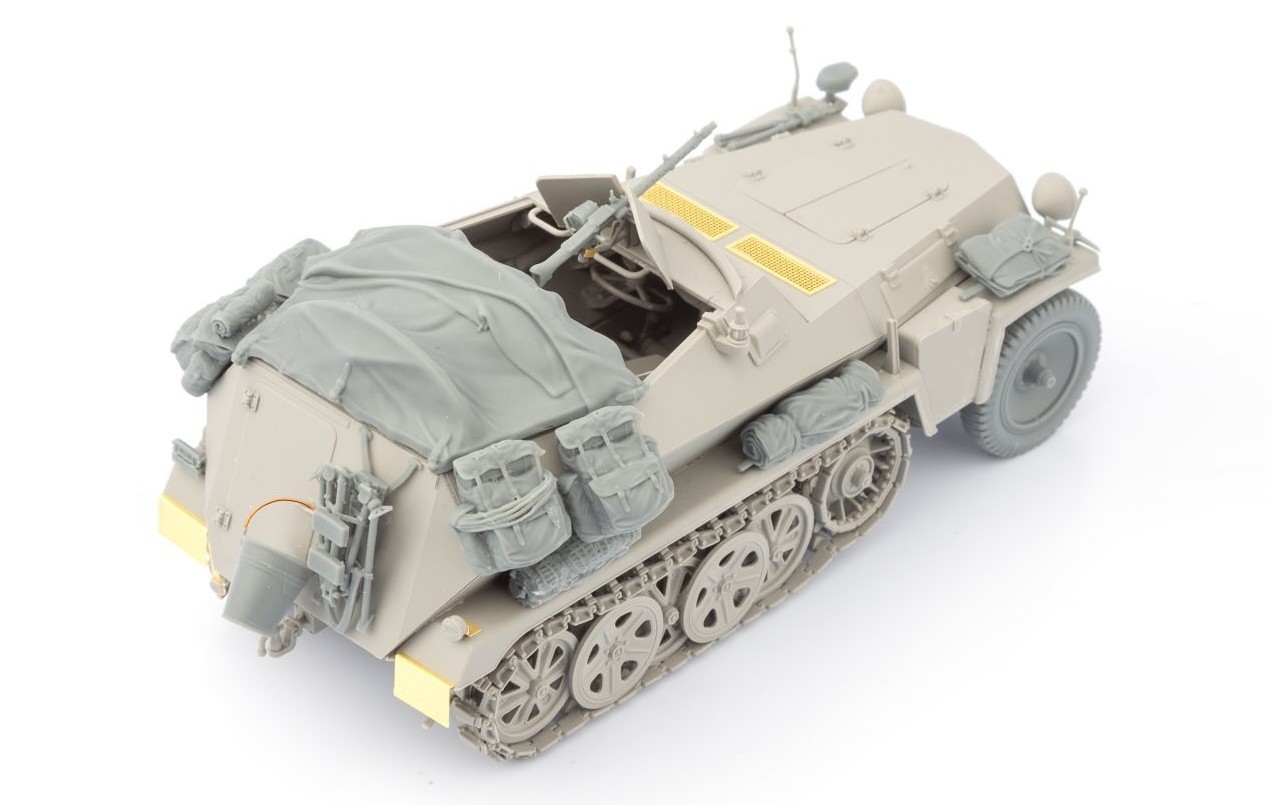
Because I really have a thing for models with interiors, and because the Ferdinand was such a unique vehicle, as soon as it came out I ordered Amusing Hobby’s model. It arrives in an enormous box (OK, it does have another model included, which is not part of this review), so it is somewhat intimidating at first. Fear not, the box may be huge, but the model is not the daunting 2000+ part monstrosity; they were pretty generous with space at Amusing Hobby. It is actually quite a manageable model; anyone with some experience can build it without the fear of burnout or overall complexity. If you are able to handle a Hobby Boss, Trumpeter or newer Zvezda, ICM kit, you will be able to handle this one. You get a well-designed (with some caveats), well-detailed, and easy enough to assemble model - and also an enormous box. (And I mean enormous. I cannot stress enough how big the box is… you can fit two boxes of MiniArt T-55s with interior into that thing.)
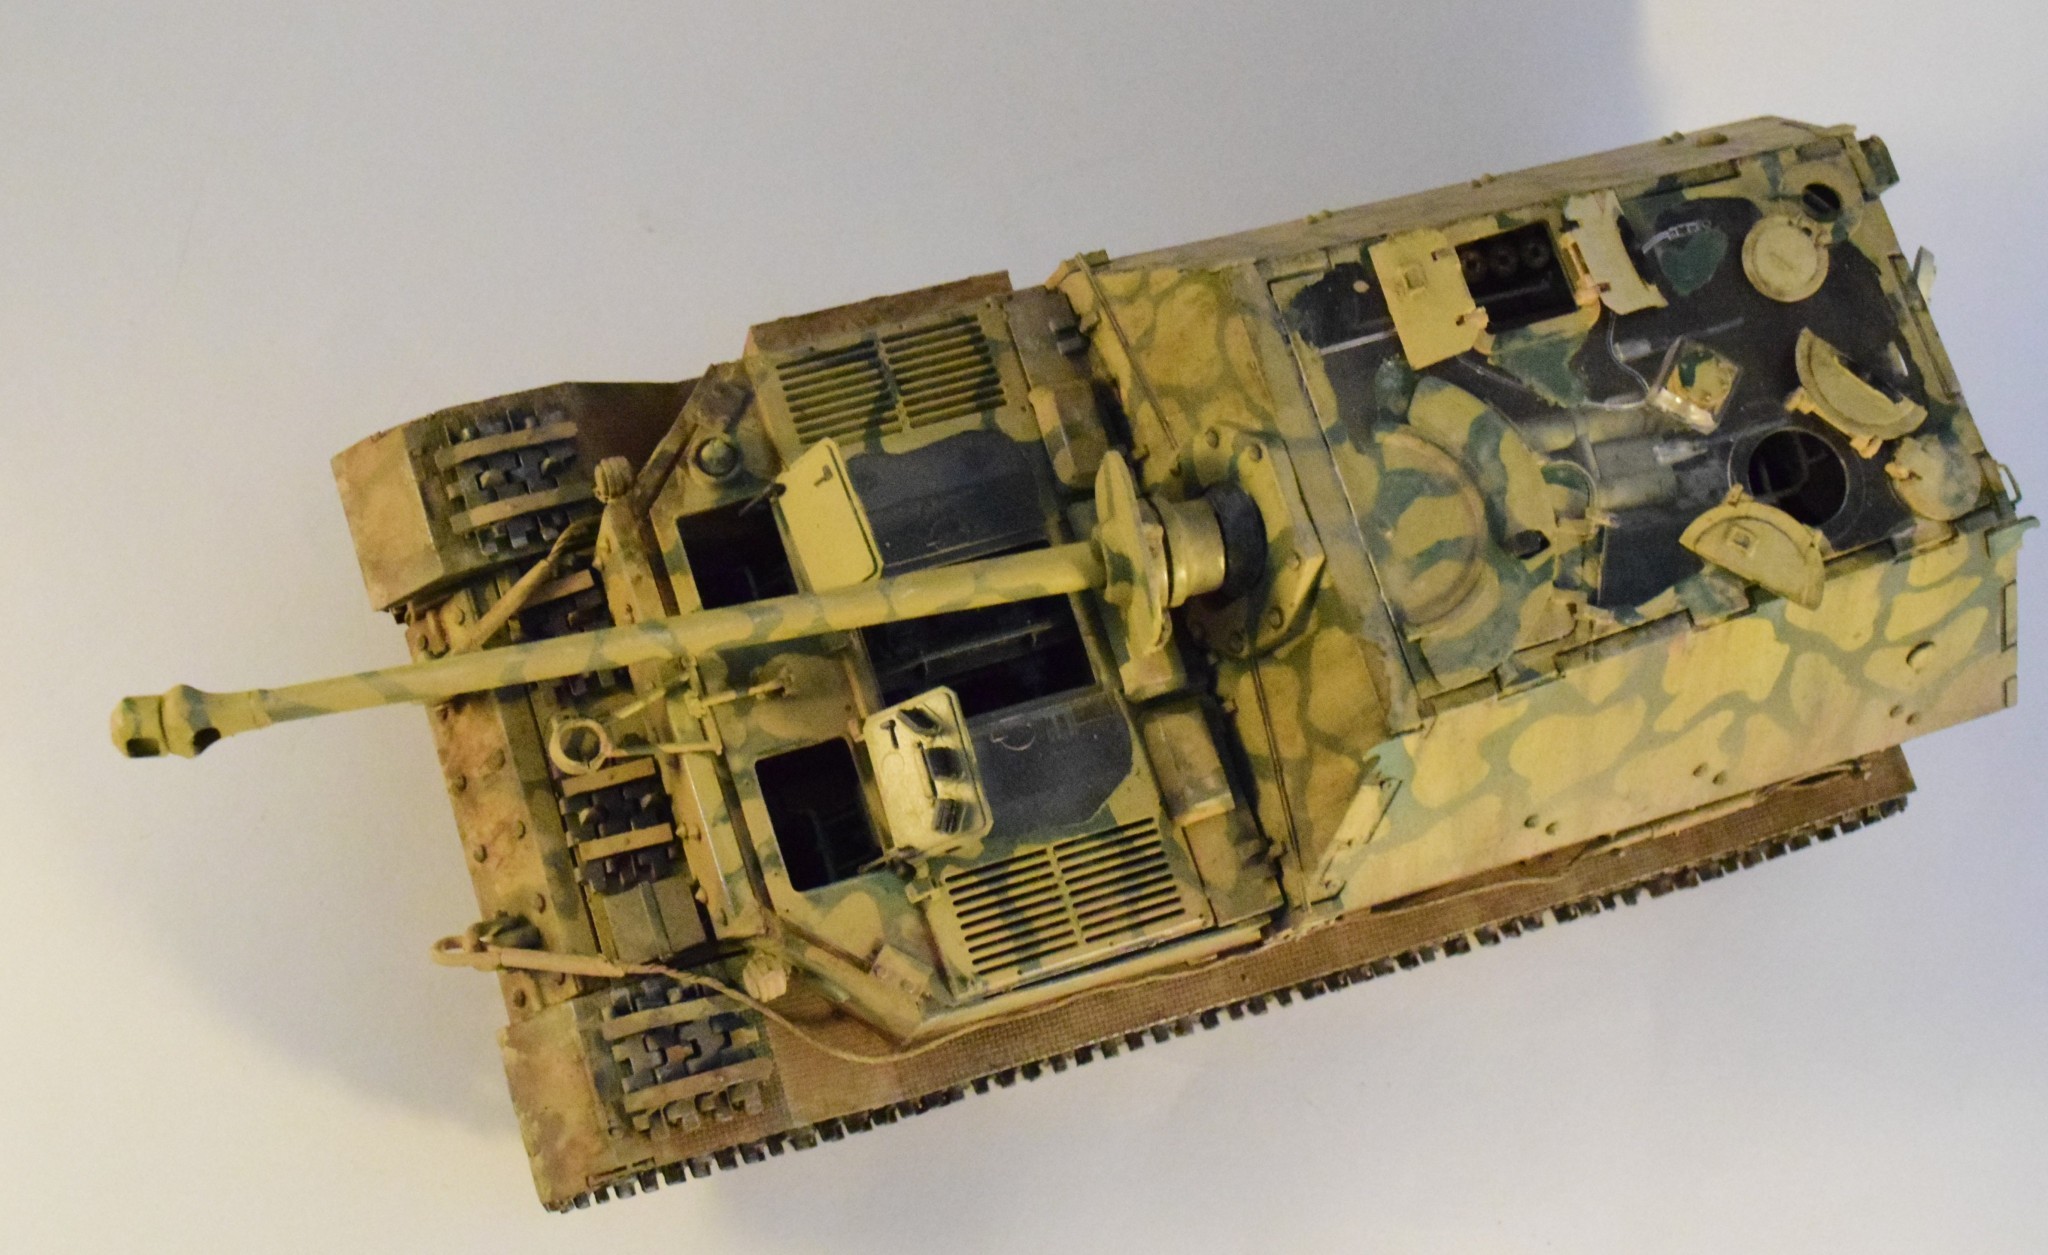
You get some reasonable amount of PE, transparent parts to display the interior (not generally liked, but I am OK with them), workable individual track links (more on that later), and alternative rubber-band style tracks, and an alternative metal barrel with metal muzzle break -overall not bad for the price. (And I haven’t mentioned the crane, of course.)
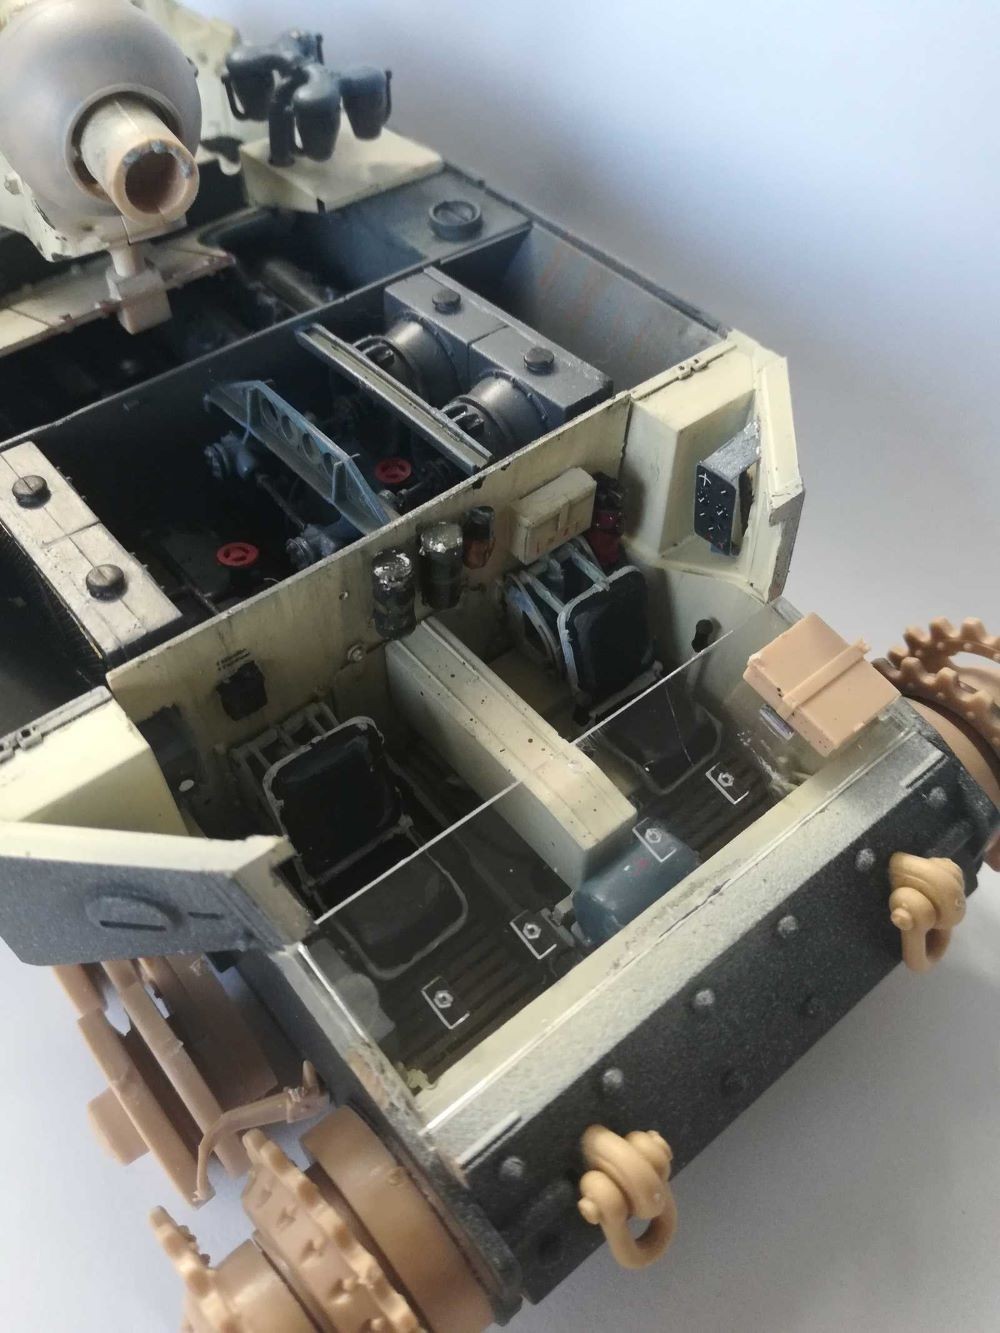
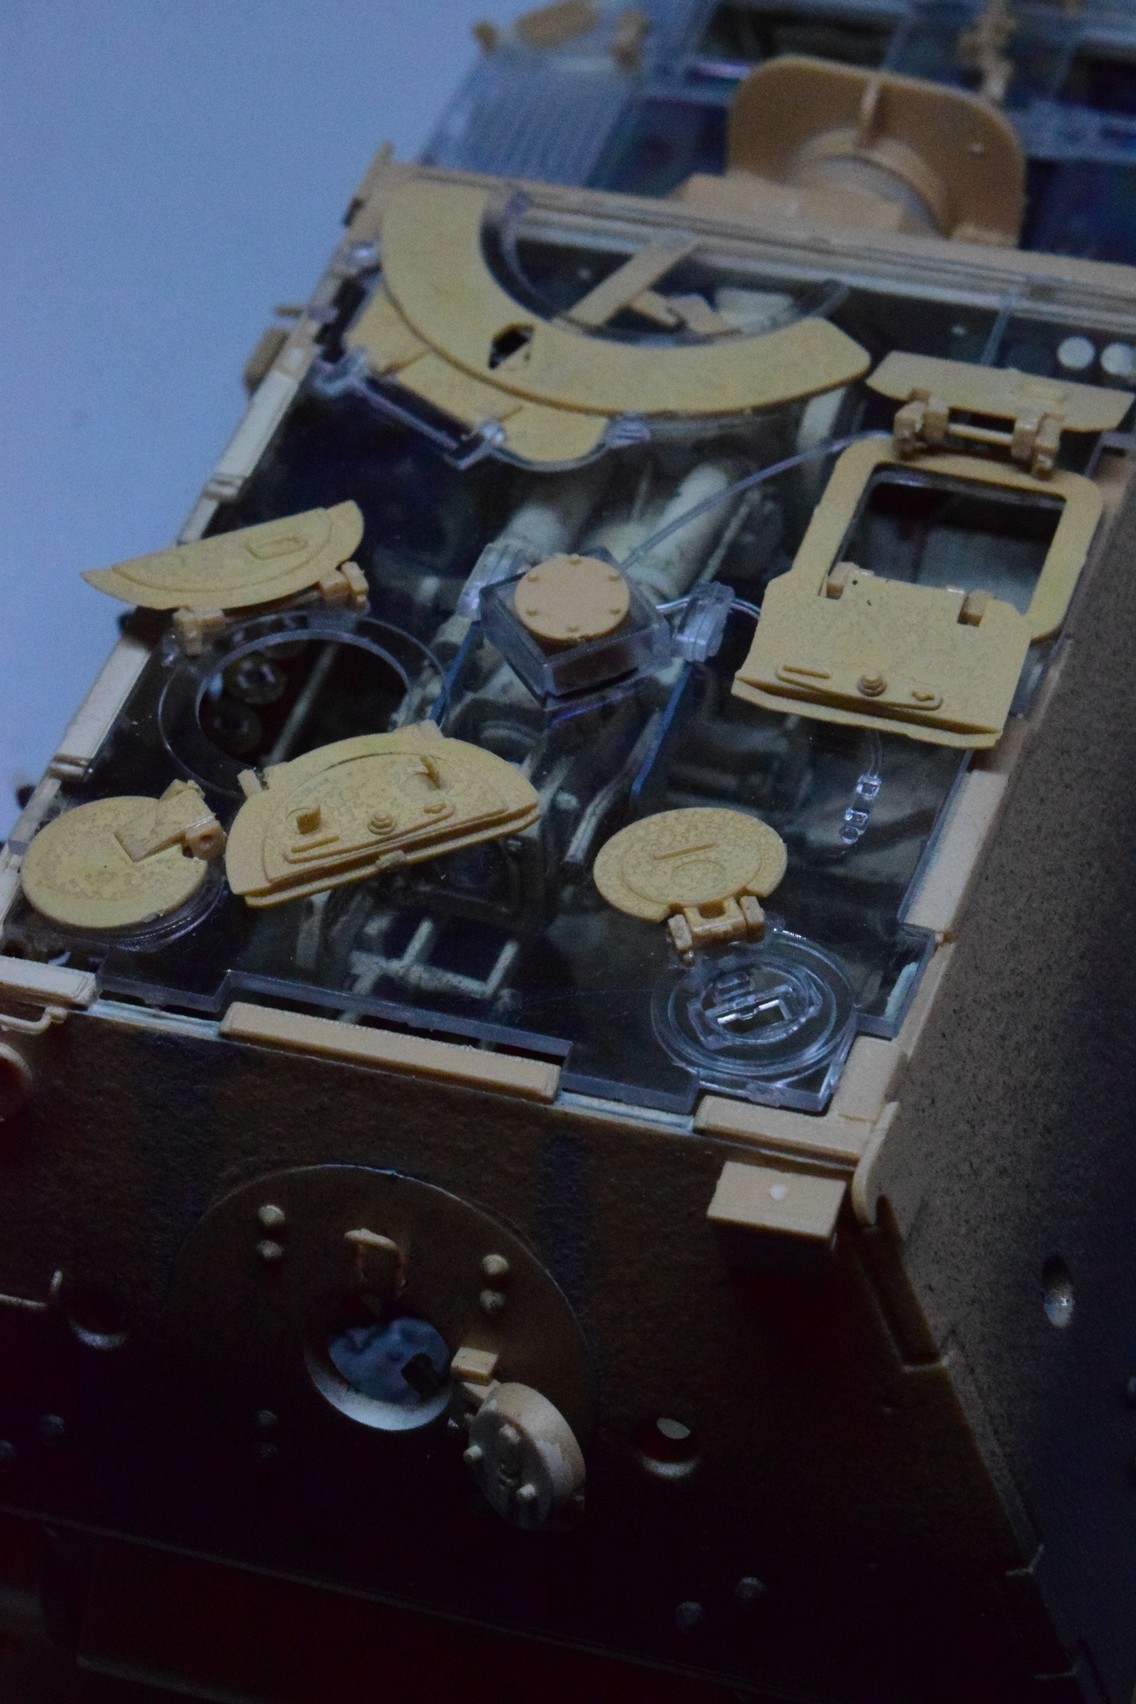
The build starts with the interior, and overall it goes together well. The driver’s compartment is not completely accurate, and some extra detailing (cabling, etc.) would also improve it, but overall it looks the part. The fit is very tight, and mostly very good (I ran into some issues, which are listed below.)
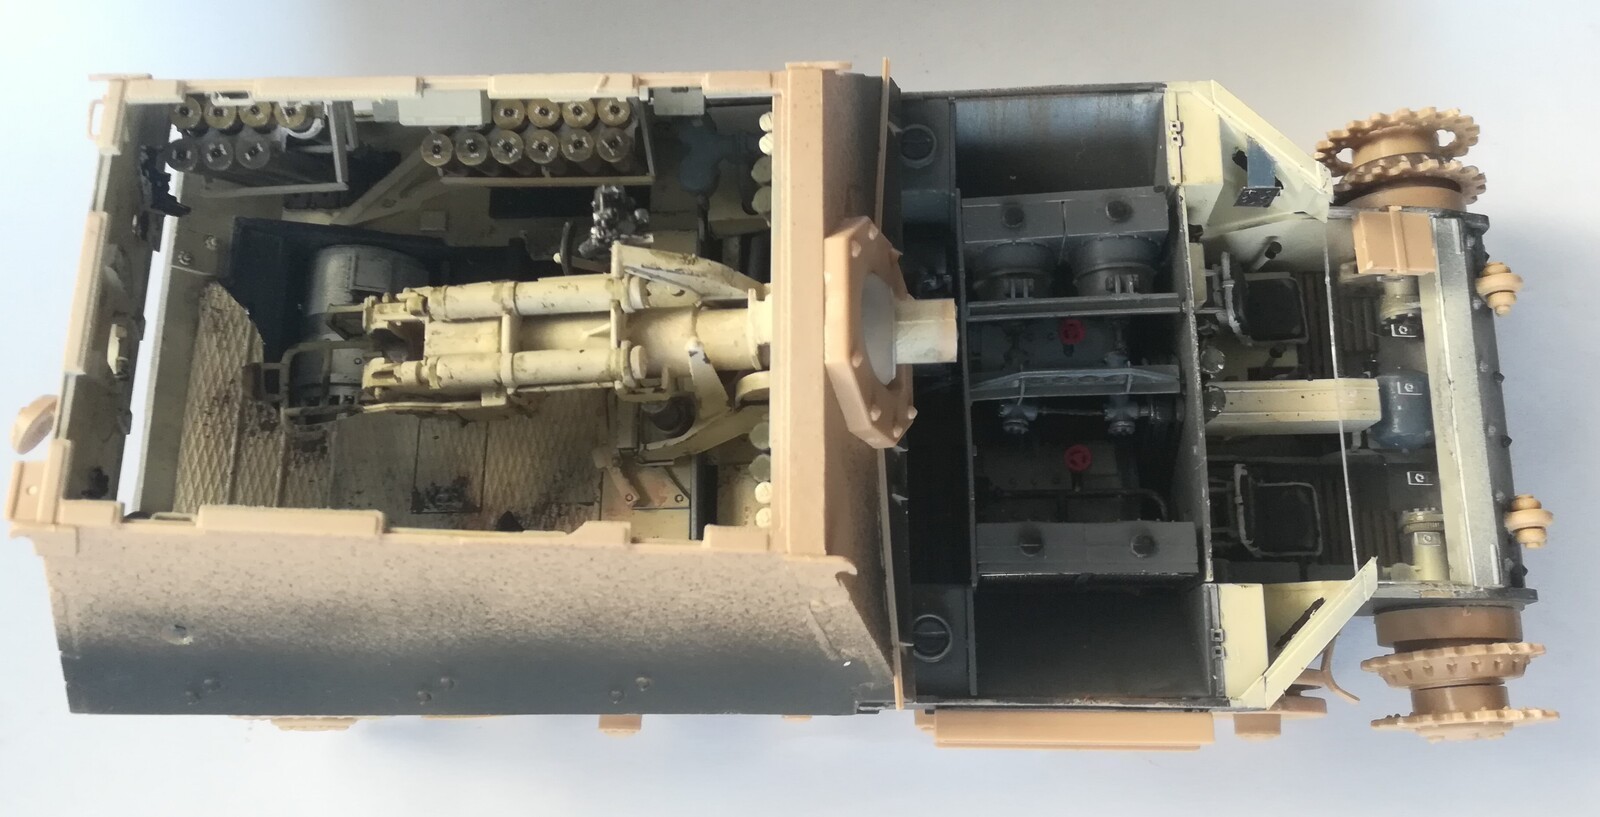
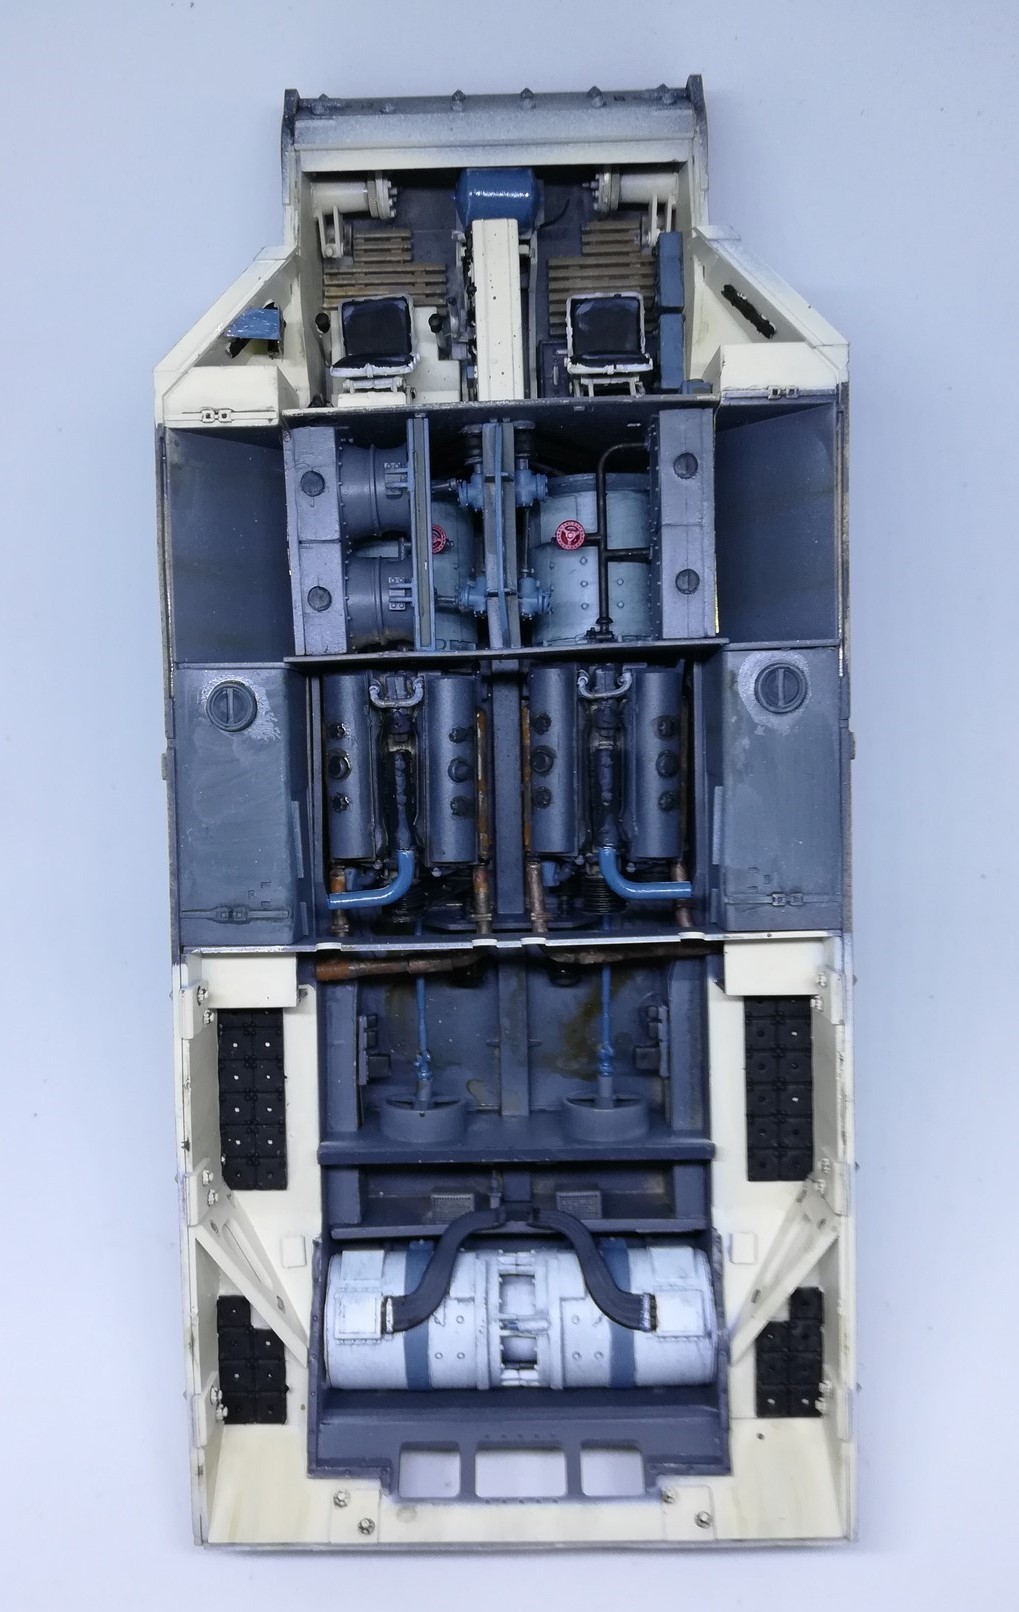
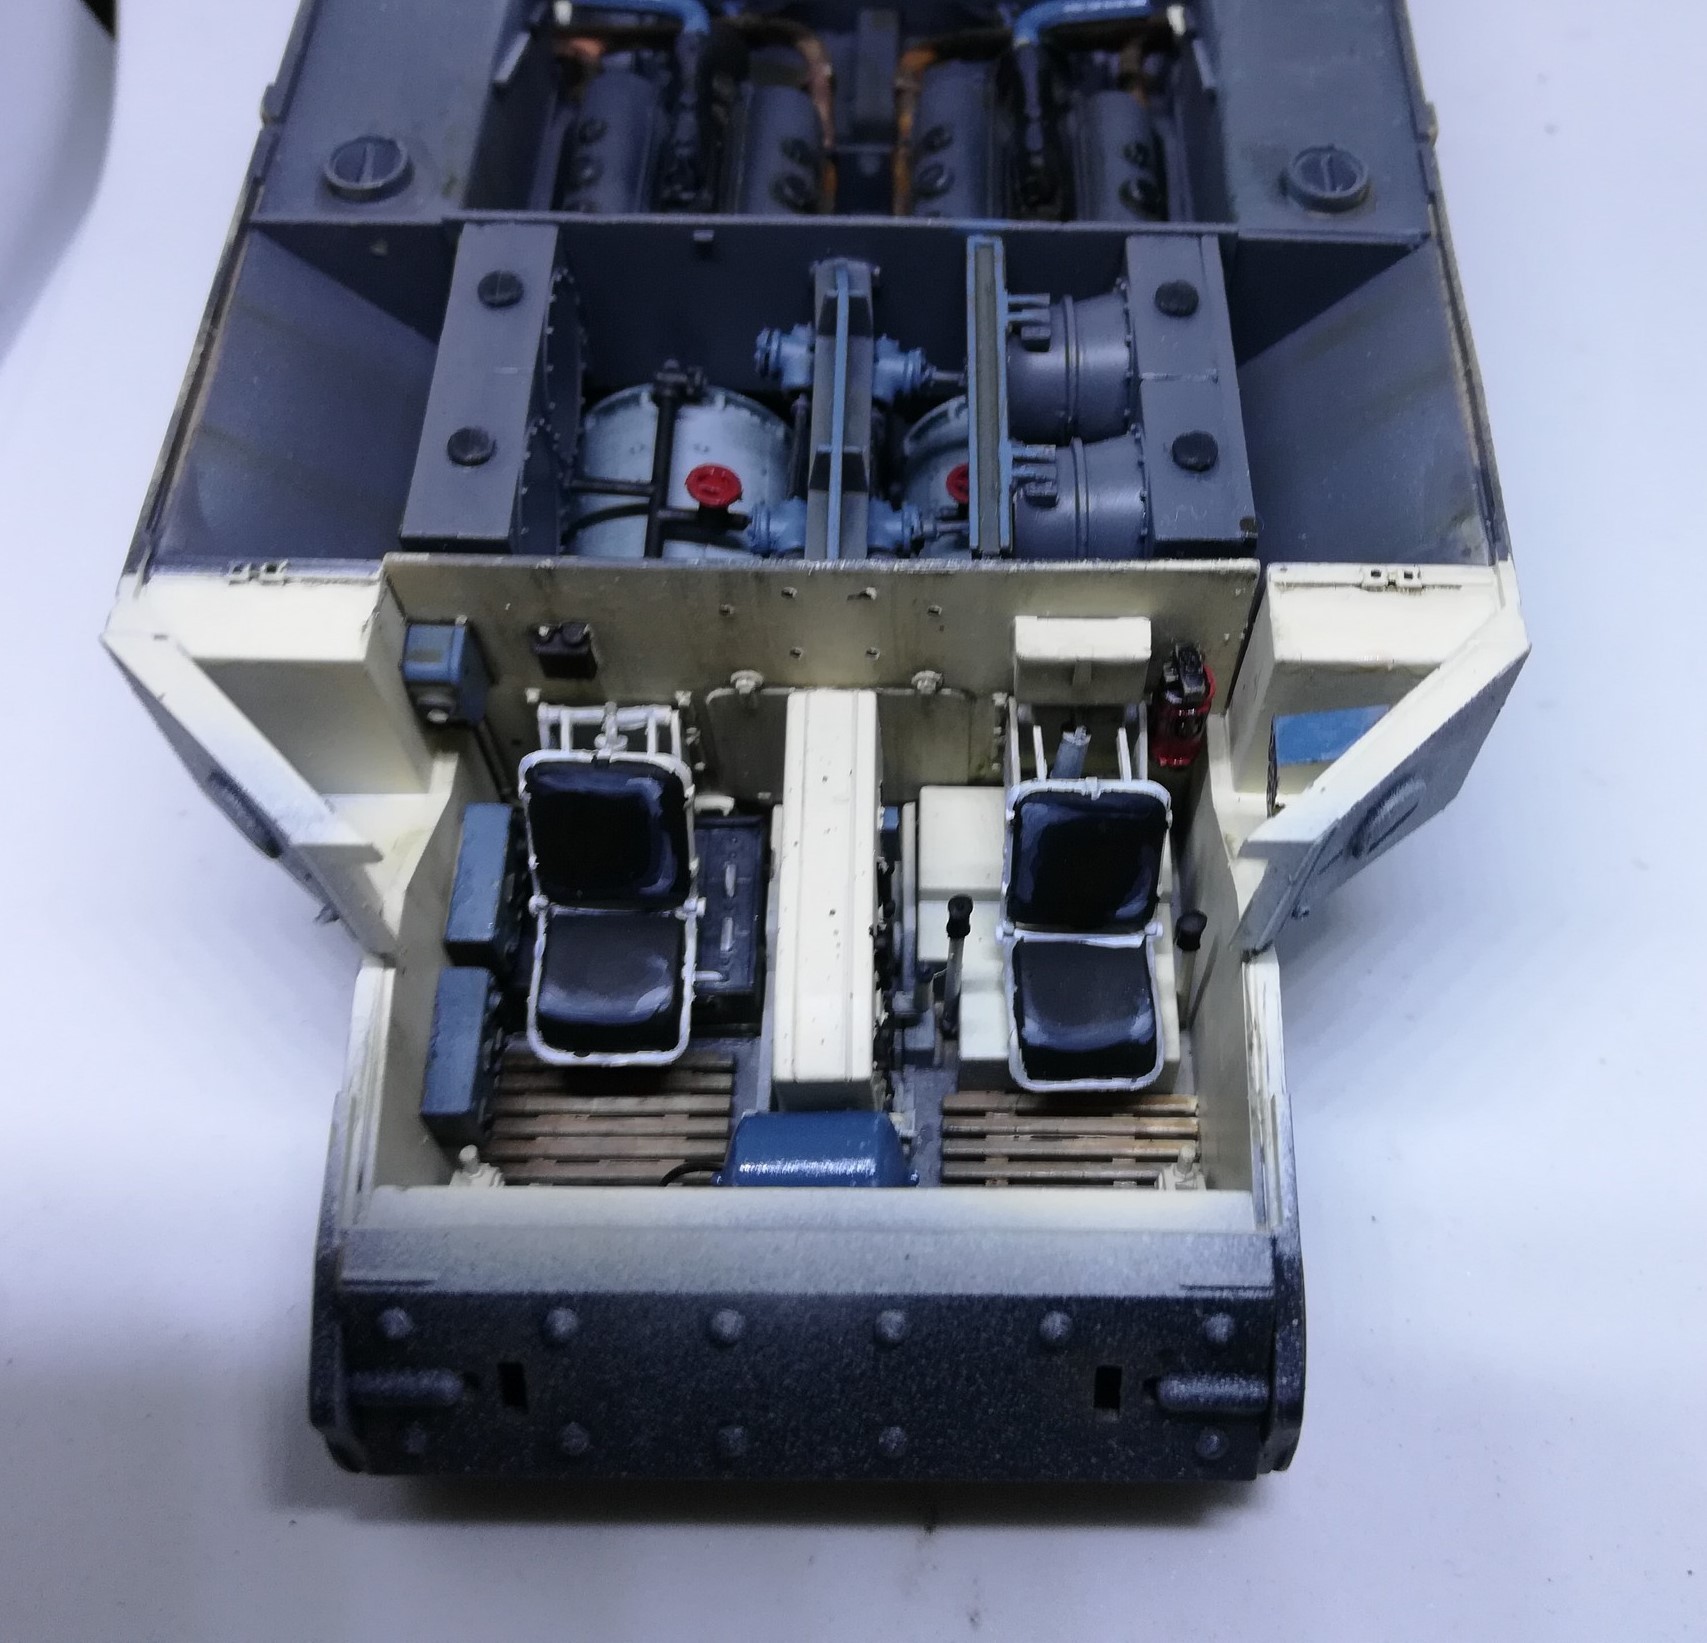
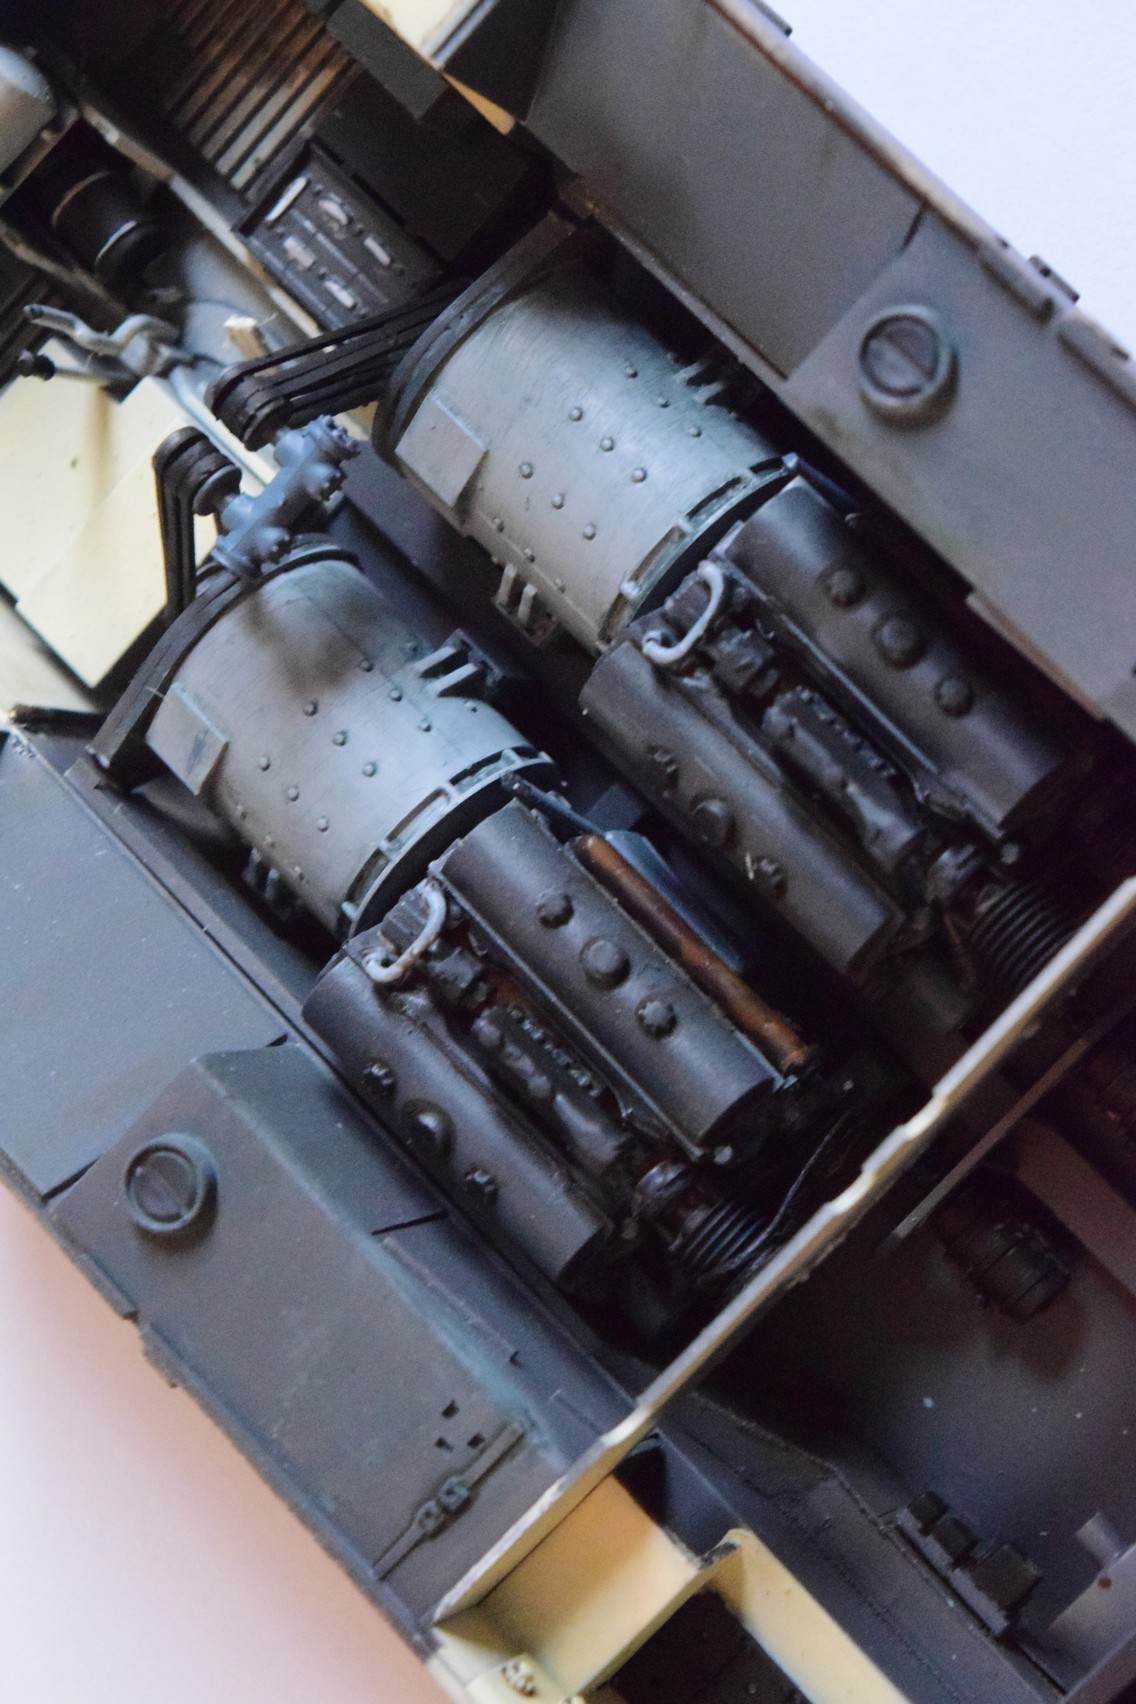
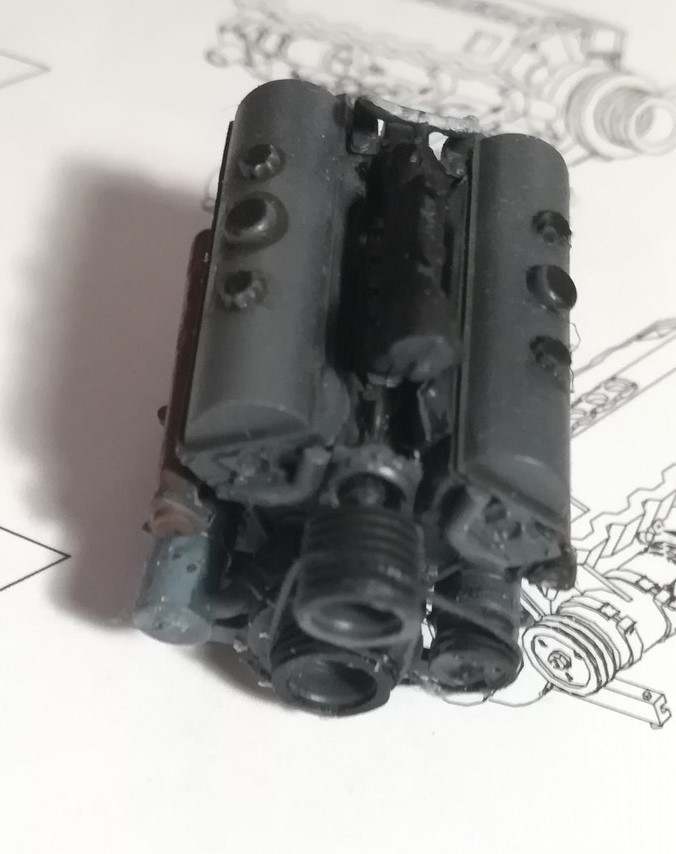
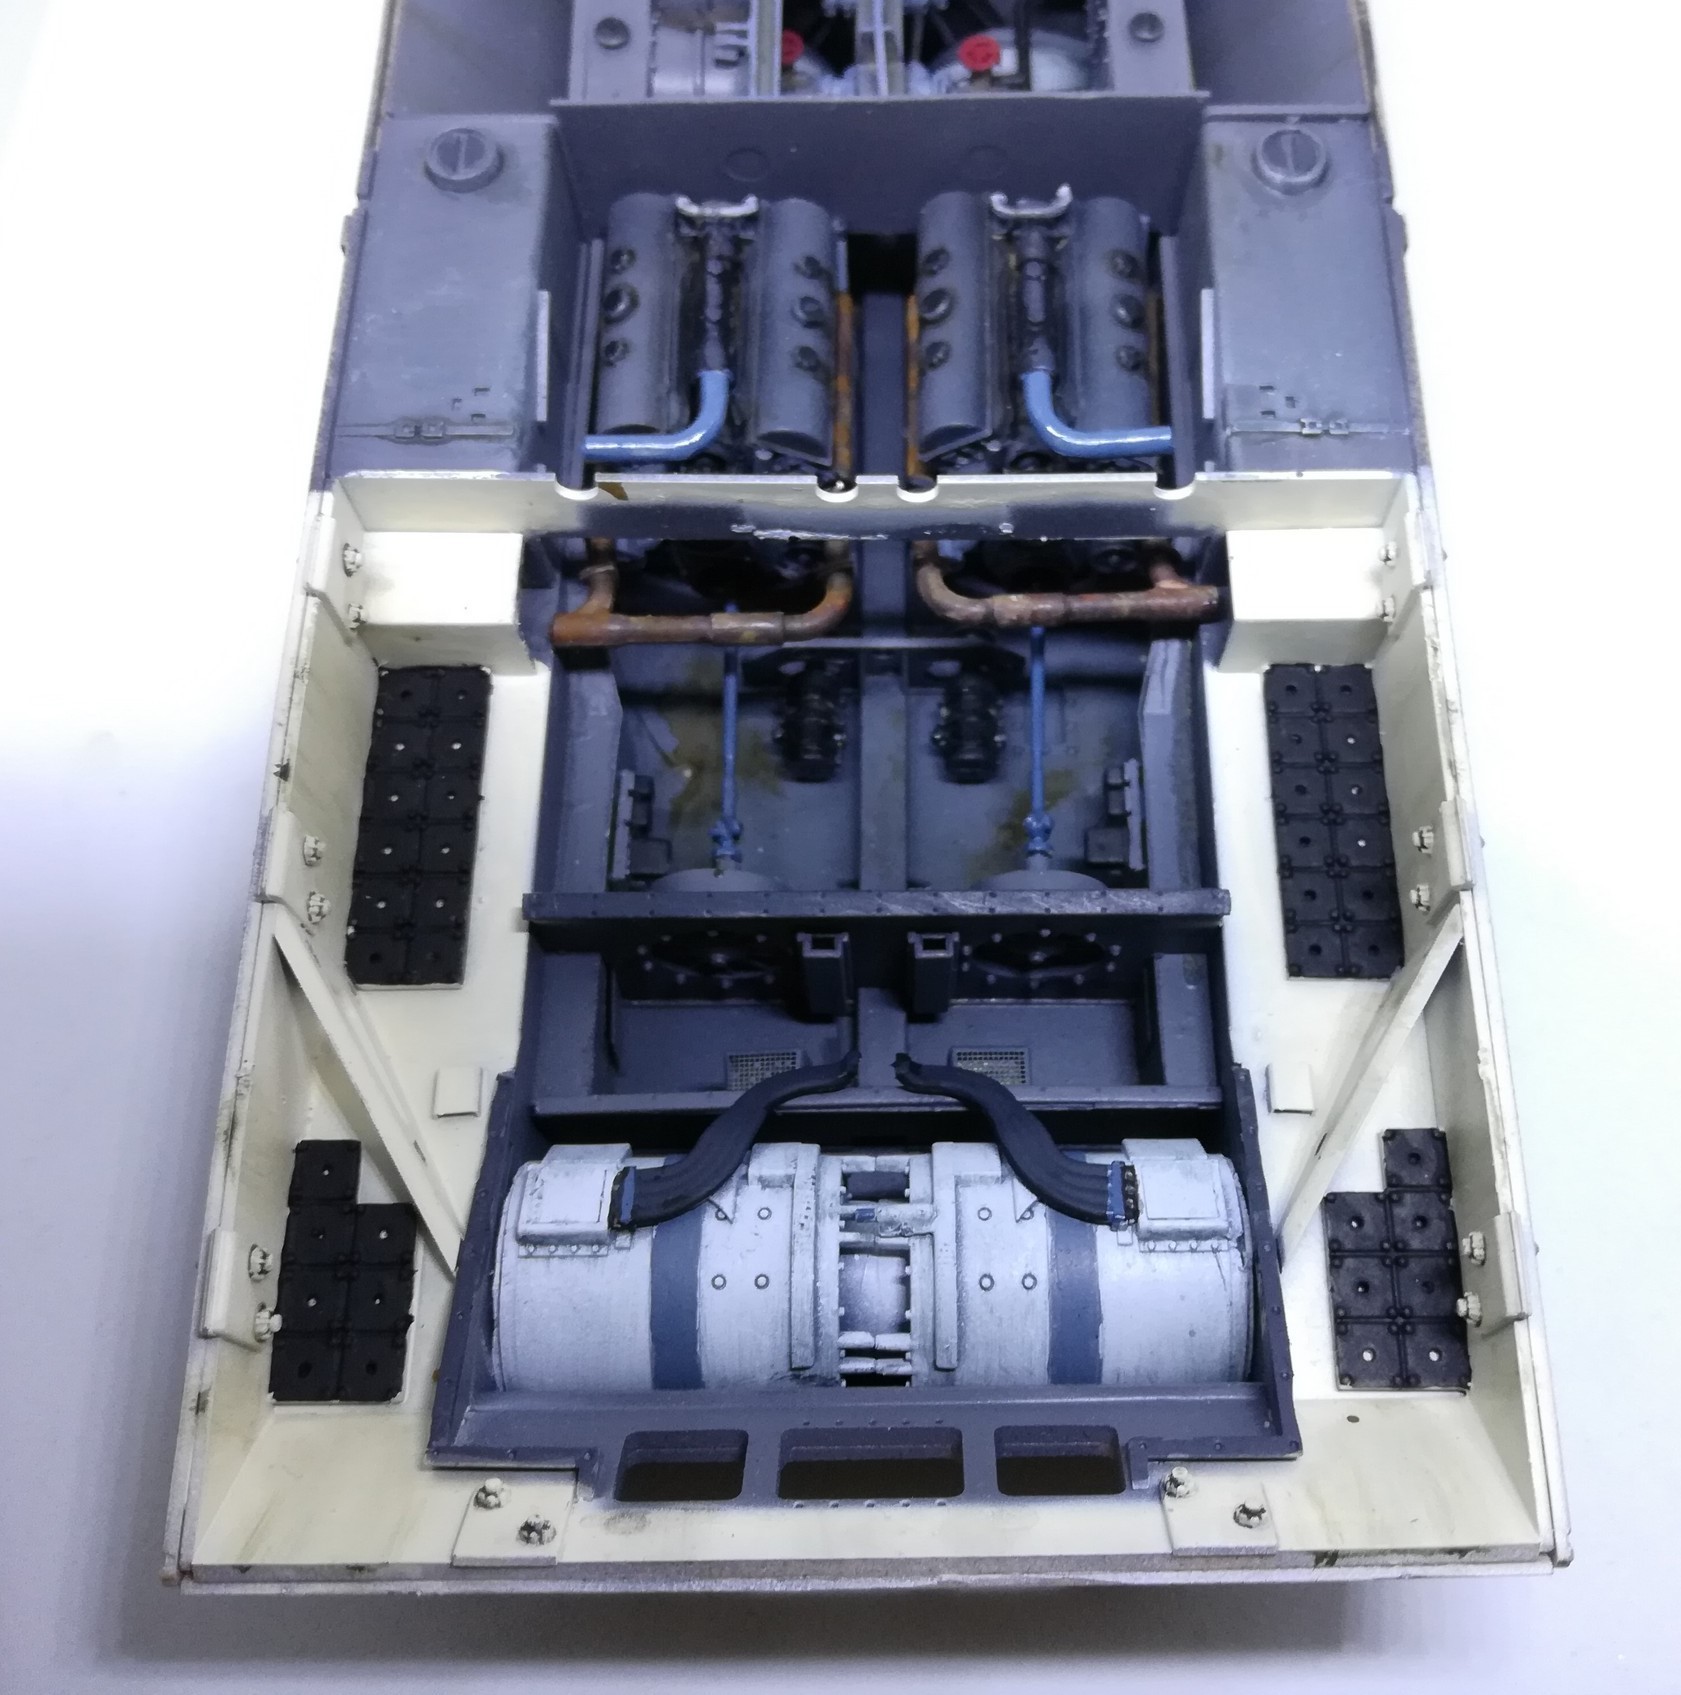
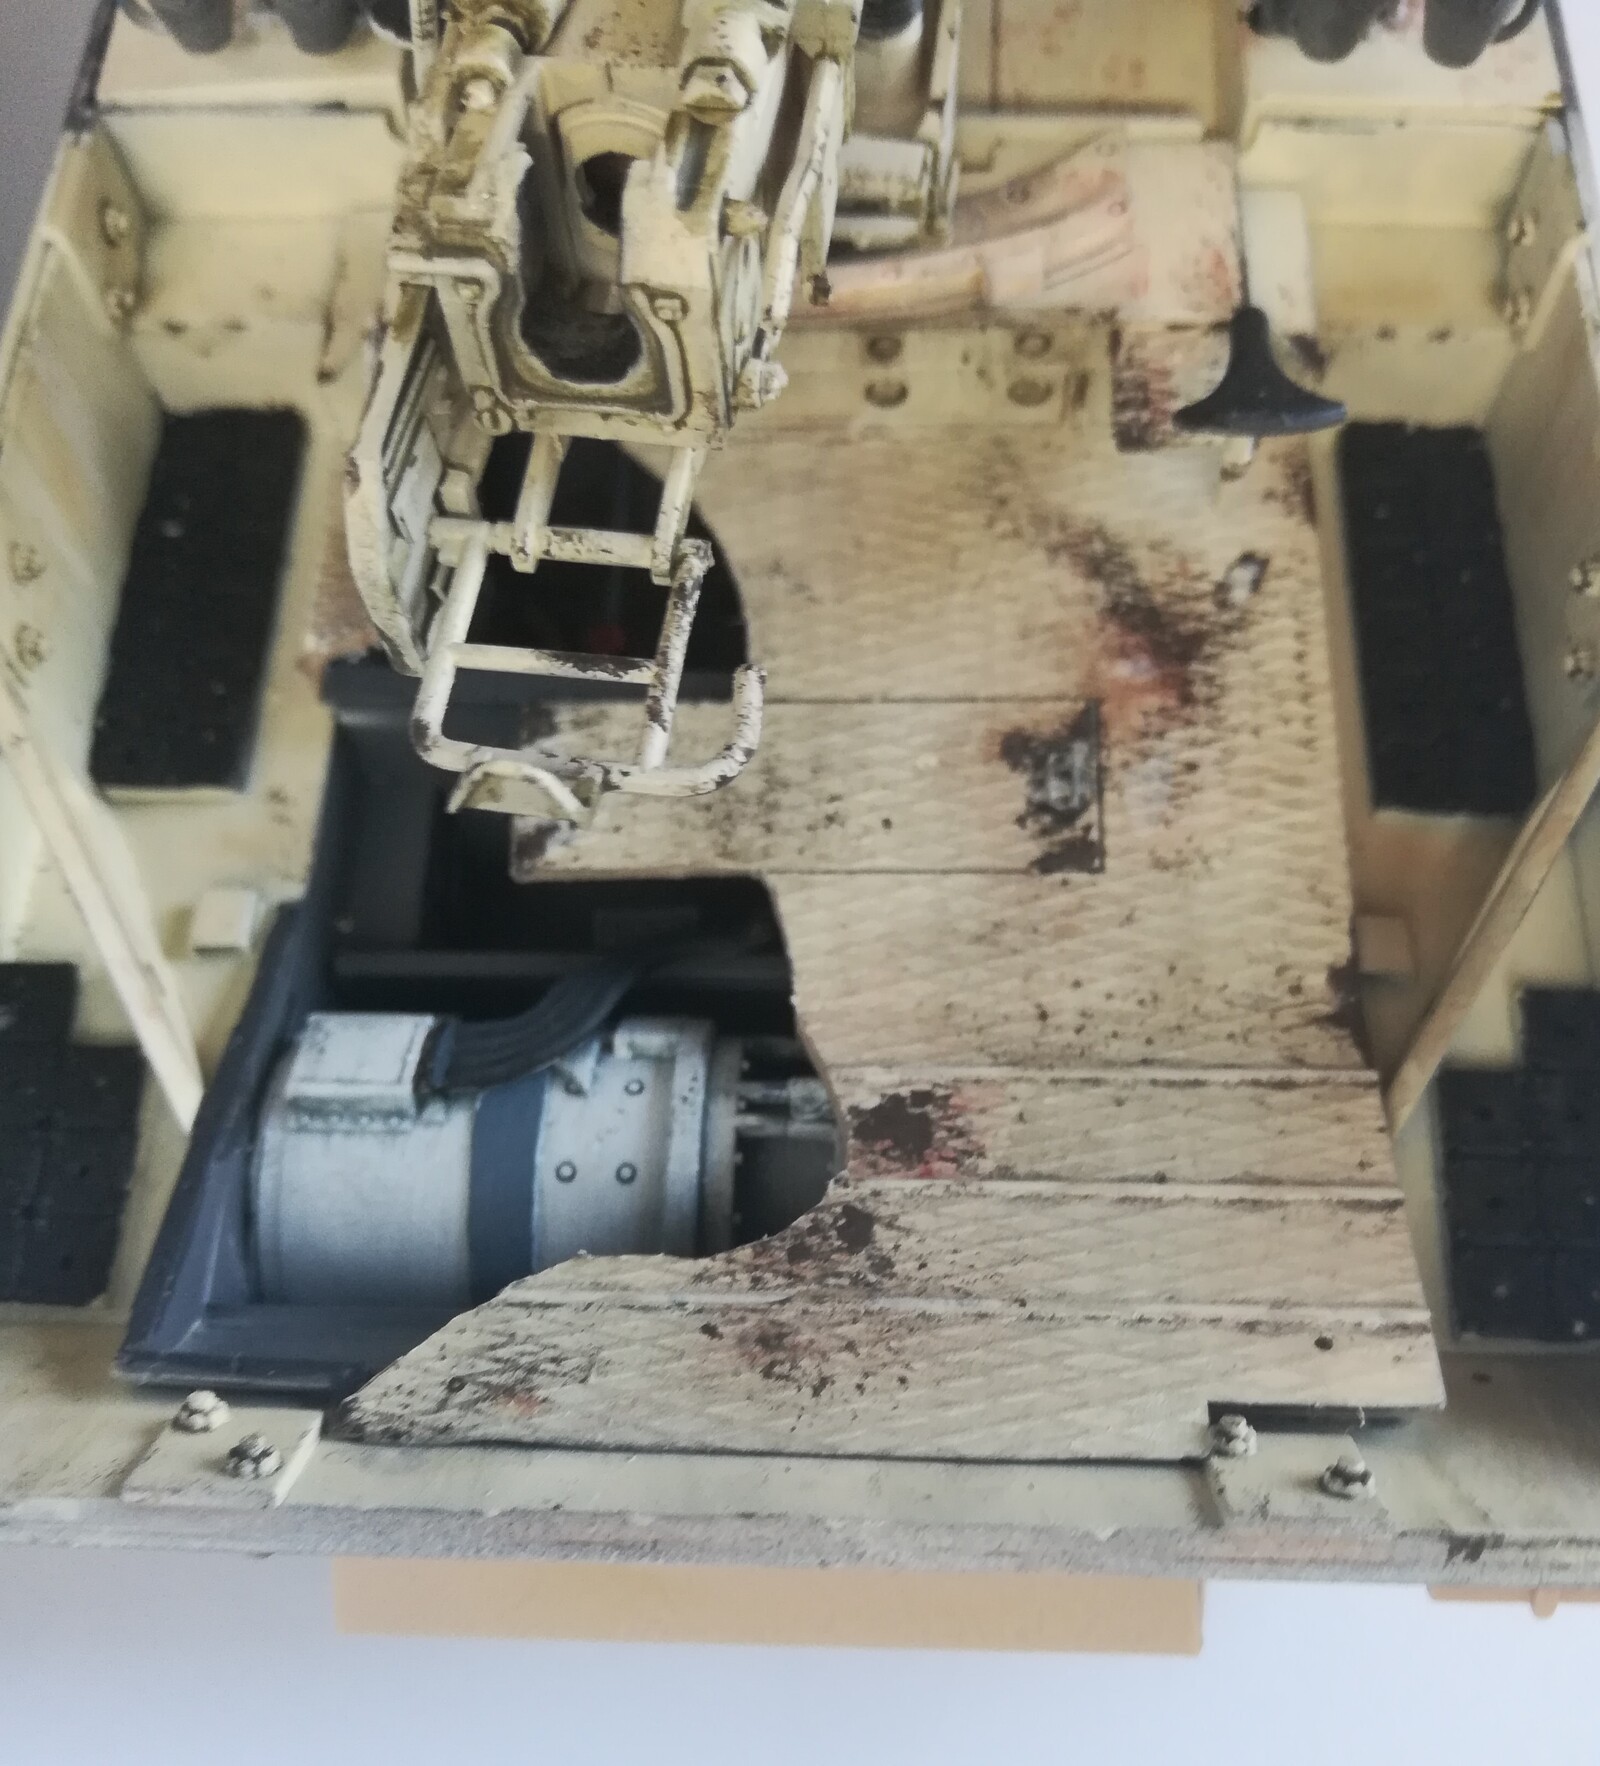
The two Maybach engines are not too complex but have great detail; if you feel like, you can add the drive-belts to make them more realistic (although if you install them none of it will be visible). The whole engine-generator-electric motor assembly looks great -it is a shame most of it is hidden once the assembly is complete. I left out some bits and also cut away parts of the floor of the fighting compartment to show them off.
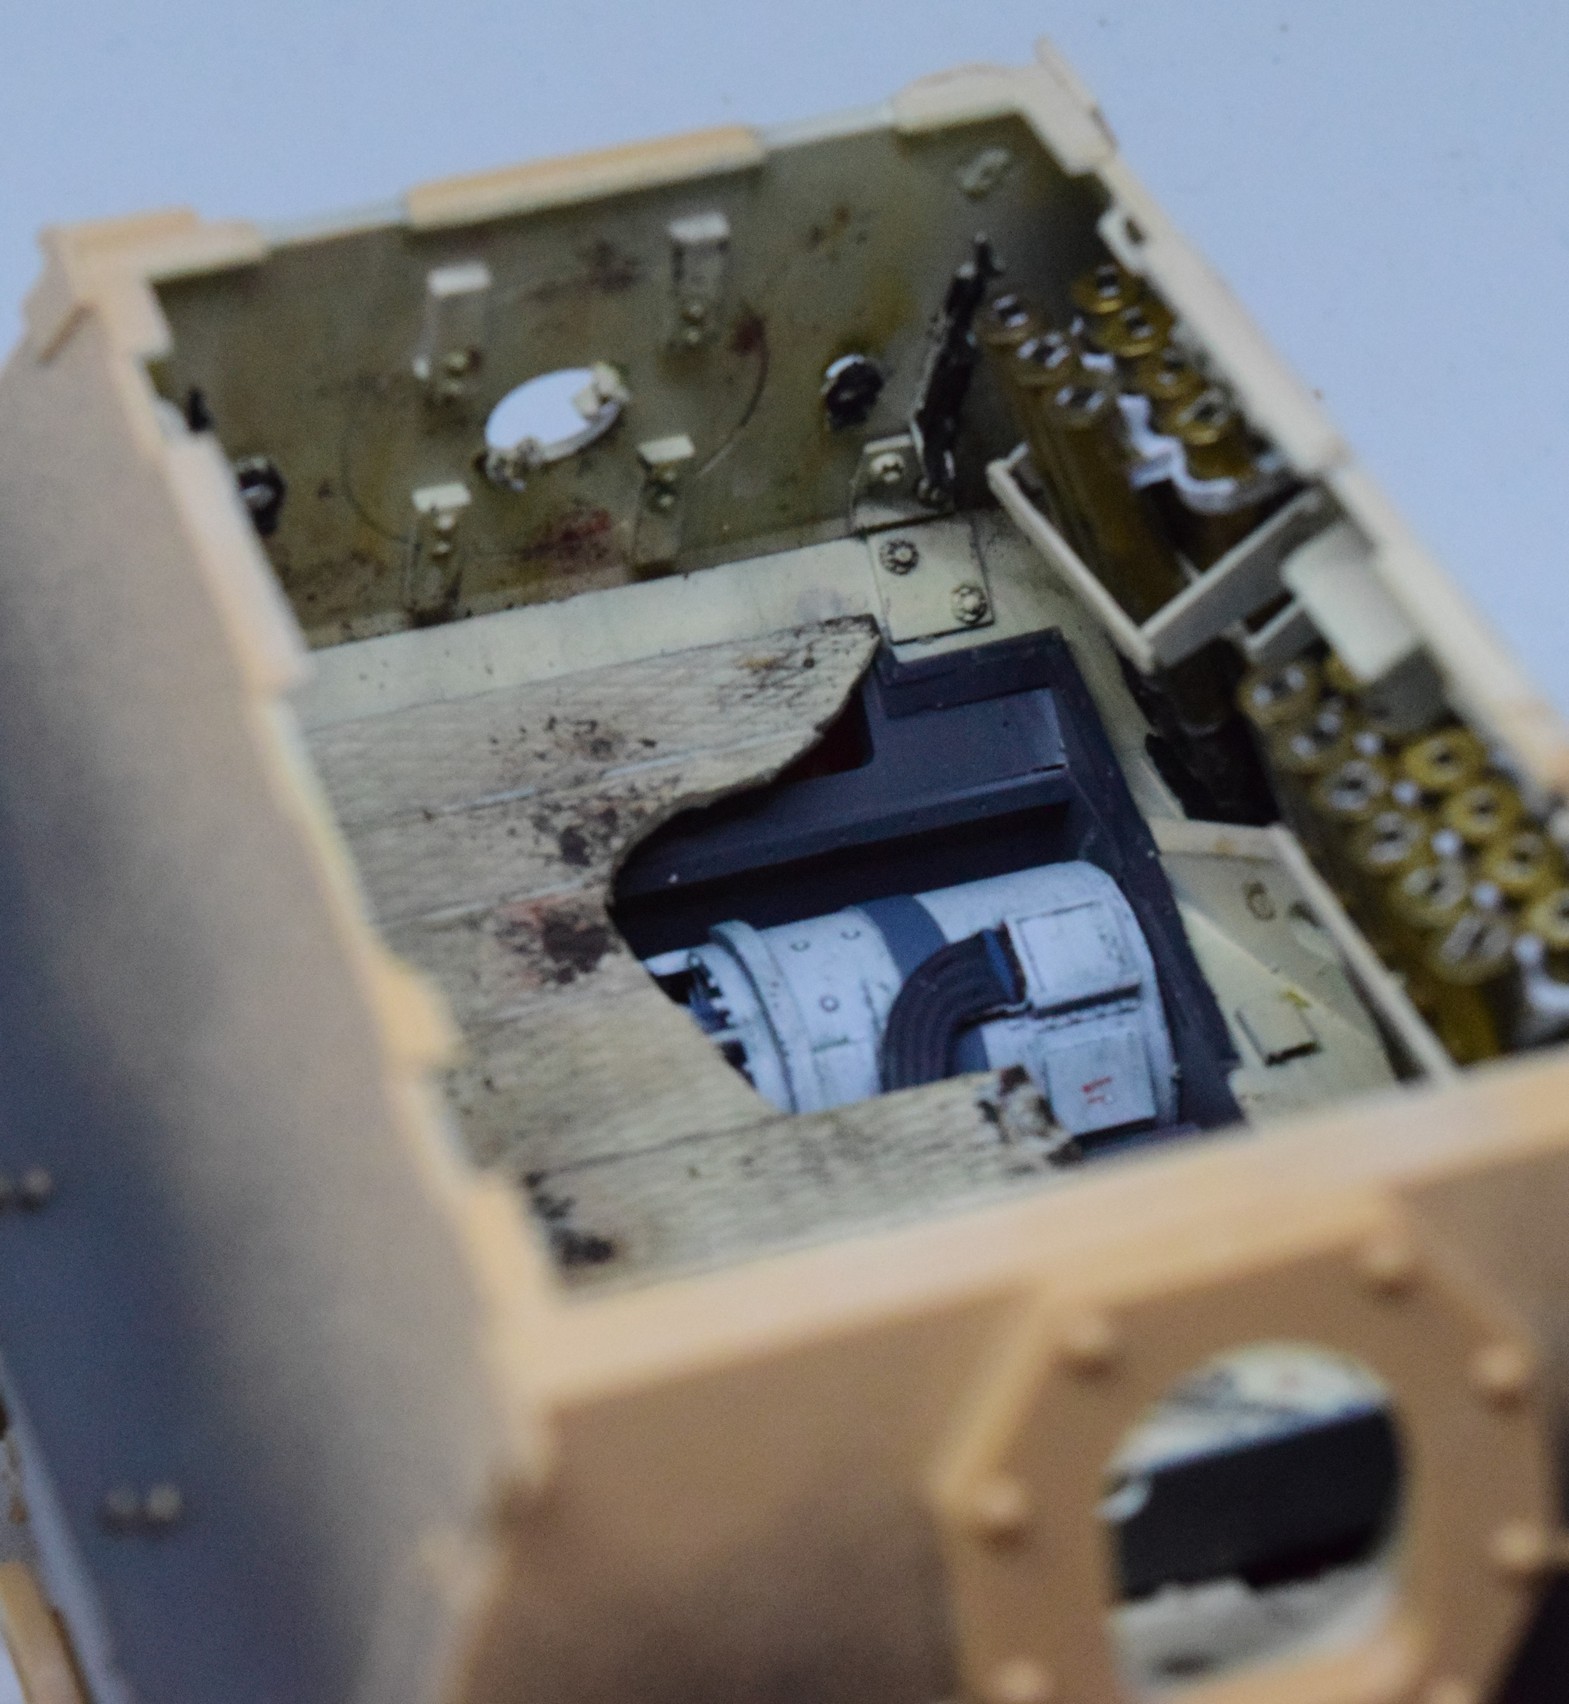
The assembly of the fighting compartment was also quite simple (again, see the list below for issues). You get a lot of ammunition, but most of it is not actually used as the racks come as a unit. Which is a shame because you cannot depict the model anyway else but fully loaded. If you want to, for example, show it off during maintenance/construction with the superstructure lifted off (using the crane from the kit), you will have to scratch-build the rack. The installation of the gun was a bit of a problem due to some fit issues, but other than that, not much to report.
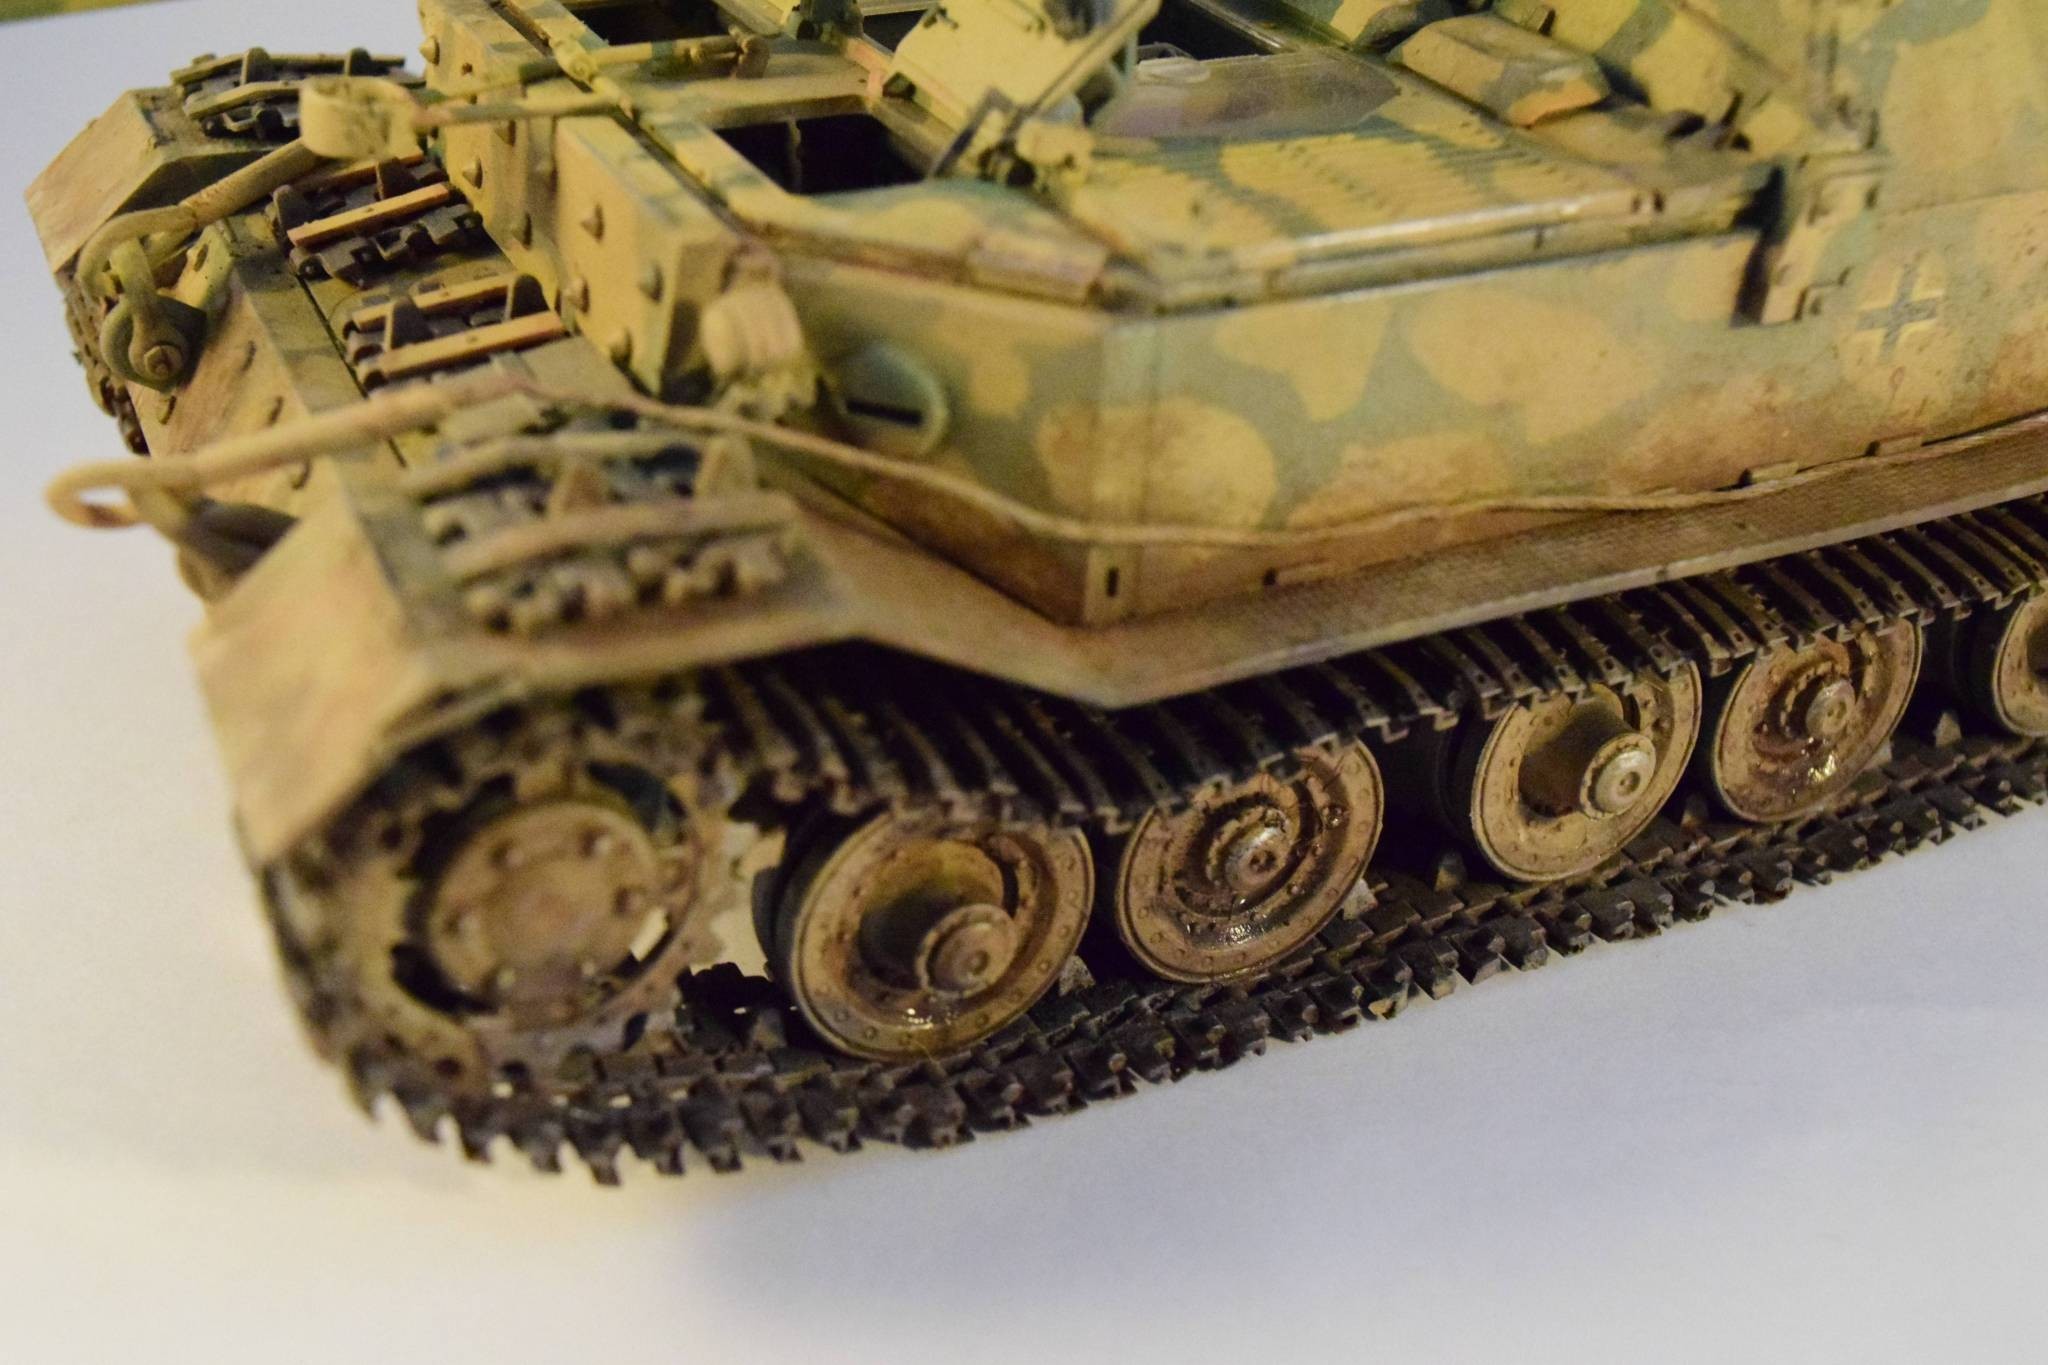
Once the interior was ready, the rest of the model went together as a conventional one. The horizontal torsion bars are actually replicated with thin wire. They will not be strong enough to provide actual suspension but it will allow the bogies to be movable with a tiny bit of spring. If you do not want to be bothered with them you can just leave the wires out, honestly.
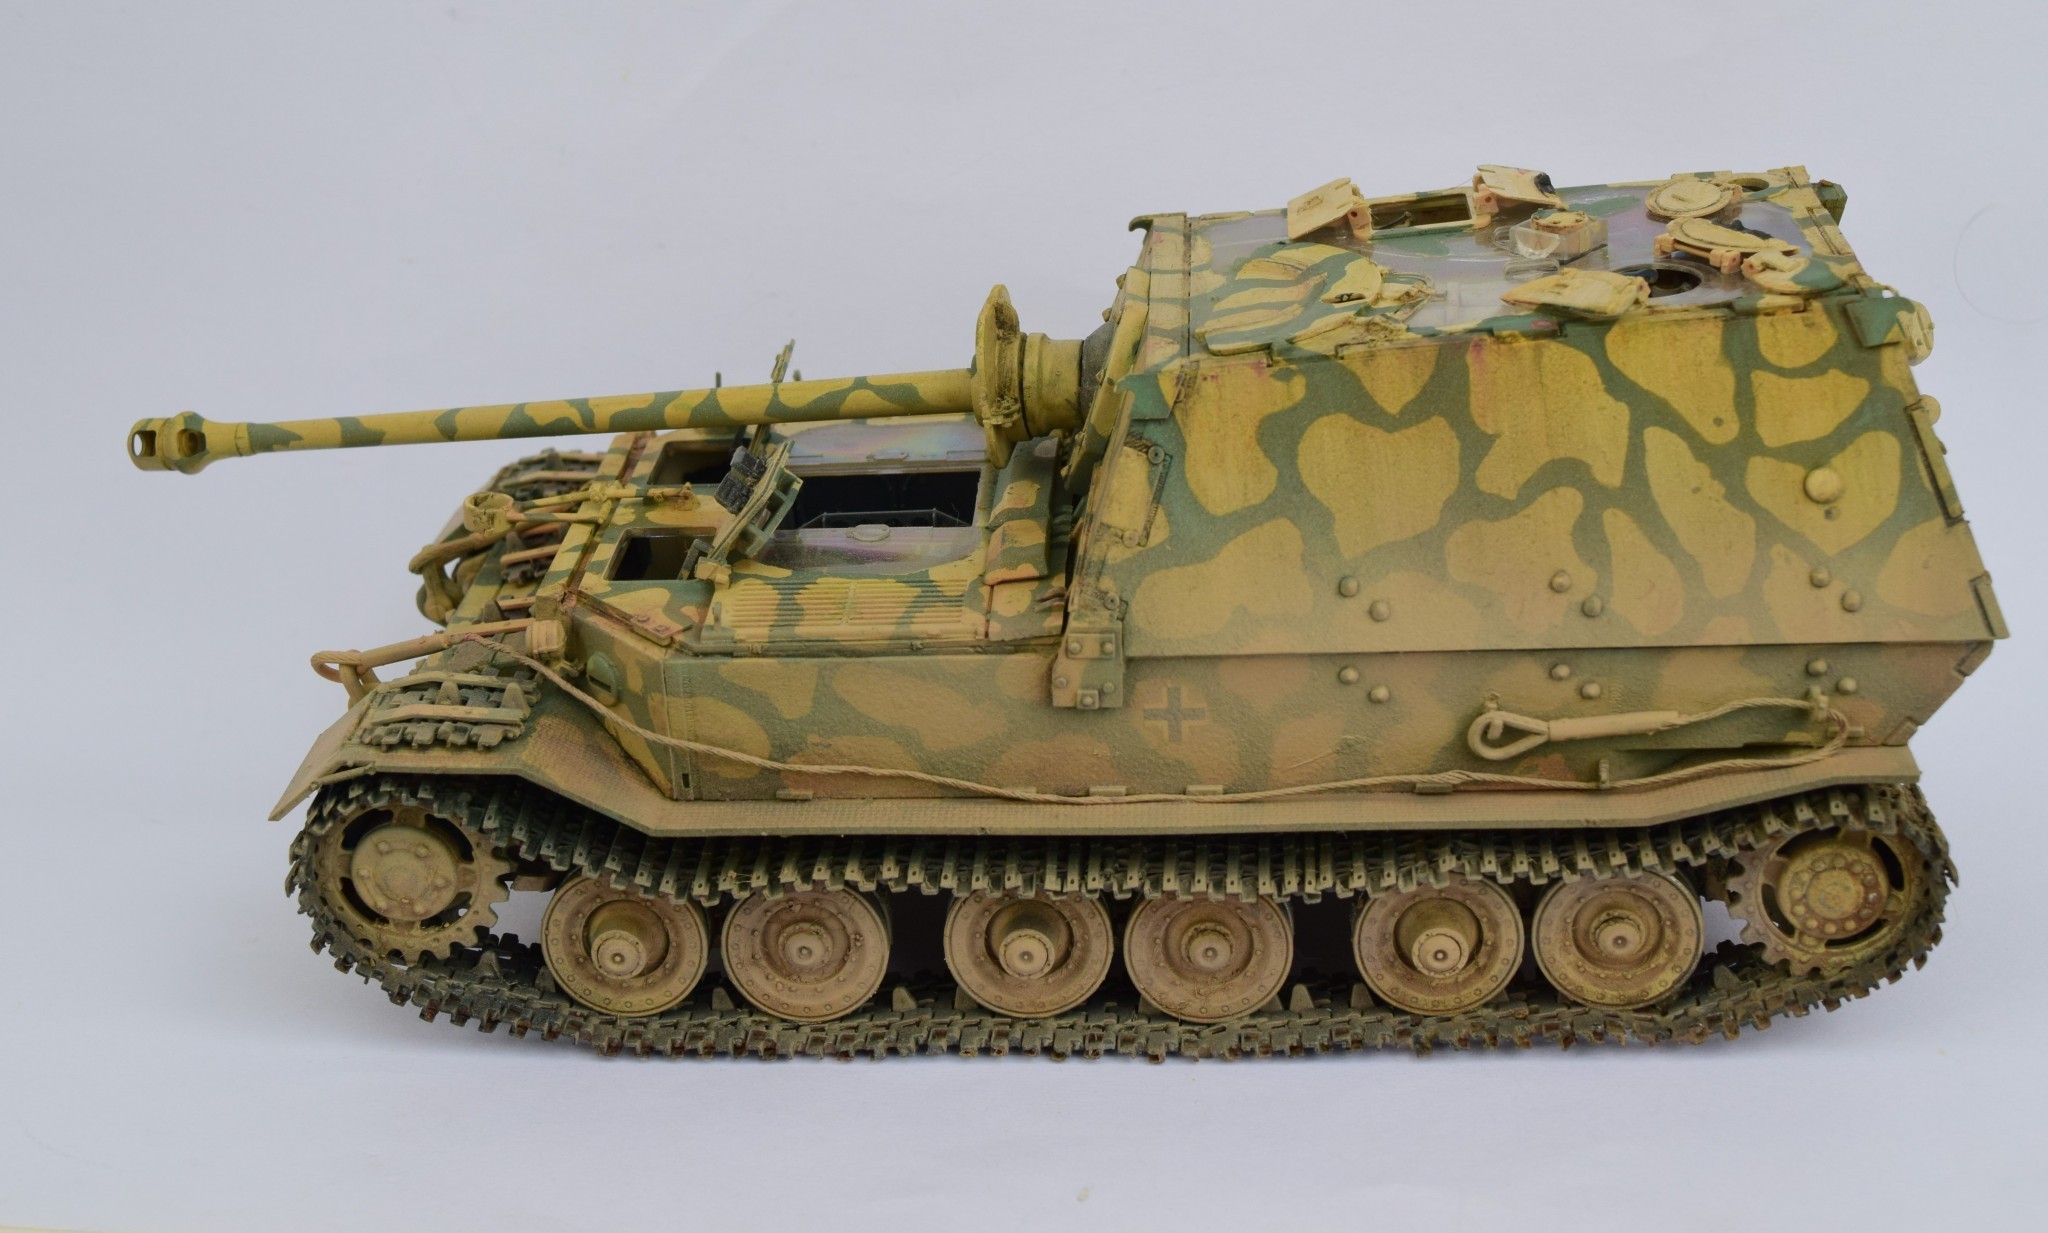
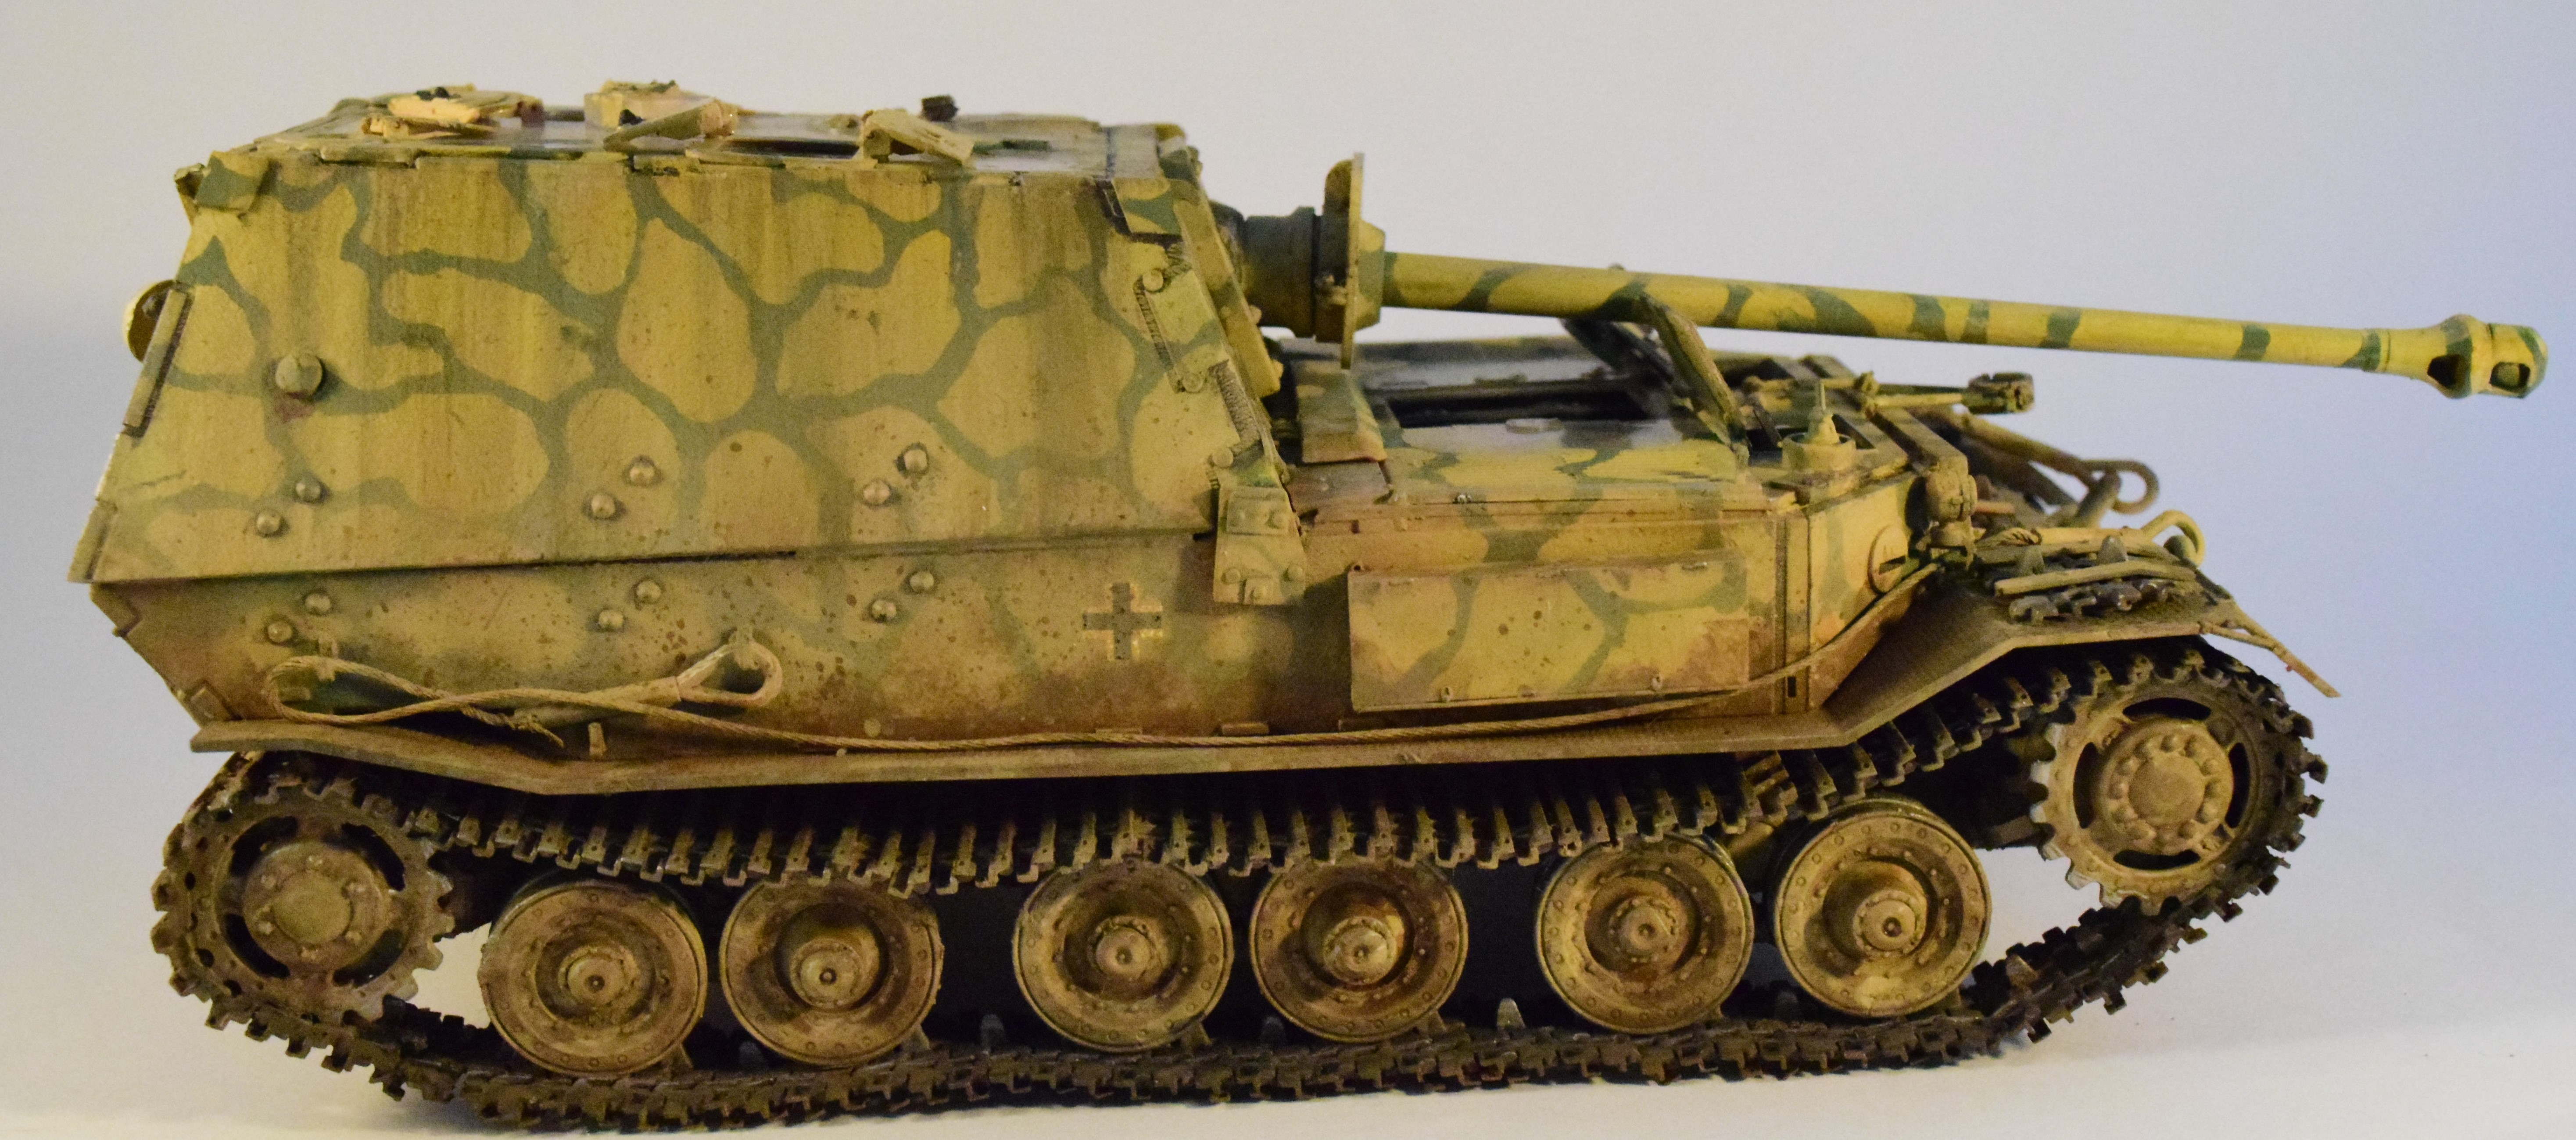
The tracks gave me some headache despite having a rig to help assembly (again, see below), the superstructure had some fit issues, but none of these things were game-breaking; just the usual part and parcel of model building. Painting was done with acrylics, and the dust and mud was replicated using oil paints and several commercial products (washable dust from Ammo Mig, acrylic pencils, resin texture by AK, and pigments).
Here are the main issues with the model:
The workable tracks are a headache to assemble; I gave up on the workable part, and just glued everything together. It was still a headache to do, and was tempted to use the rubber band tracks instead several times.
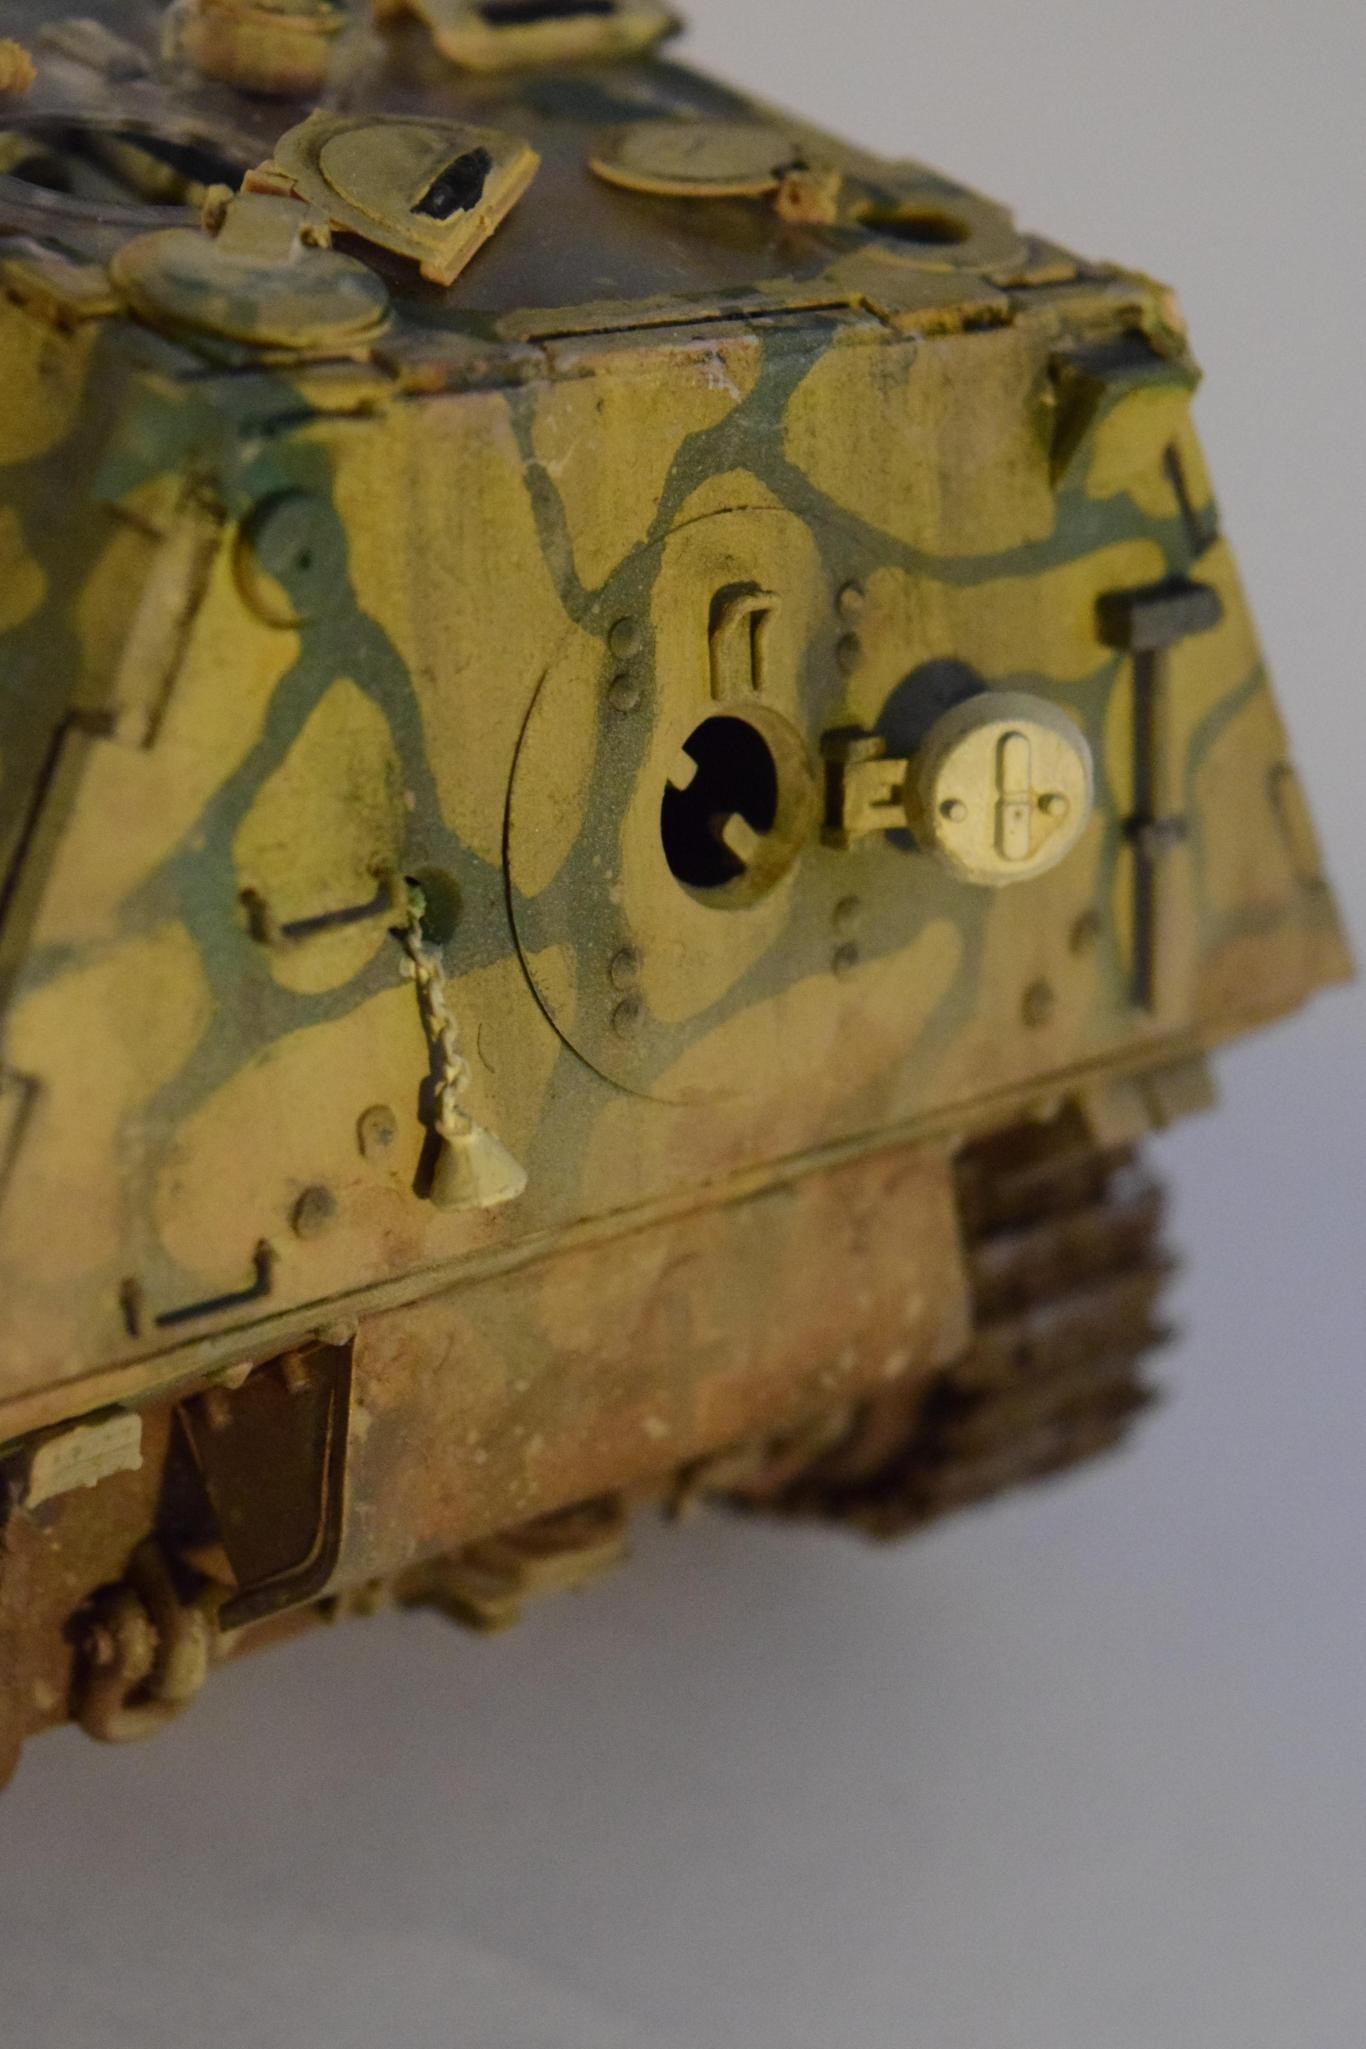
The horizontal cover of the driving compartment, D2, (where the extra tracklinks are stored) is too long. It needs to be filed down so it actually fits inside the hull. I did not remove enough so now it is bent on one side leaving a visible gap between the horizontal and vertical frontal armor... It was not clear that that side was bent when I glued it in place. The frontal part is straight as I had it pressed flat in its place - the back part, however, stayed bent, hence the gap. I filled it in, and installed the extra tracklinks to hide this shameful error on my part. I wanted to leave this part originally clear.
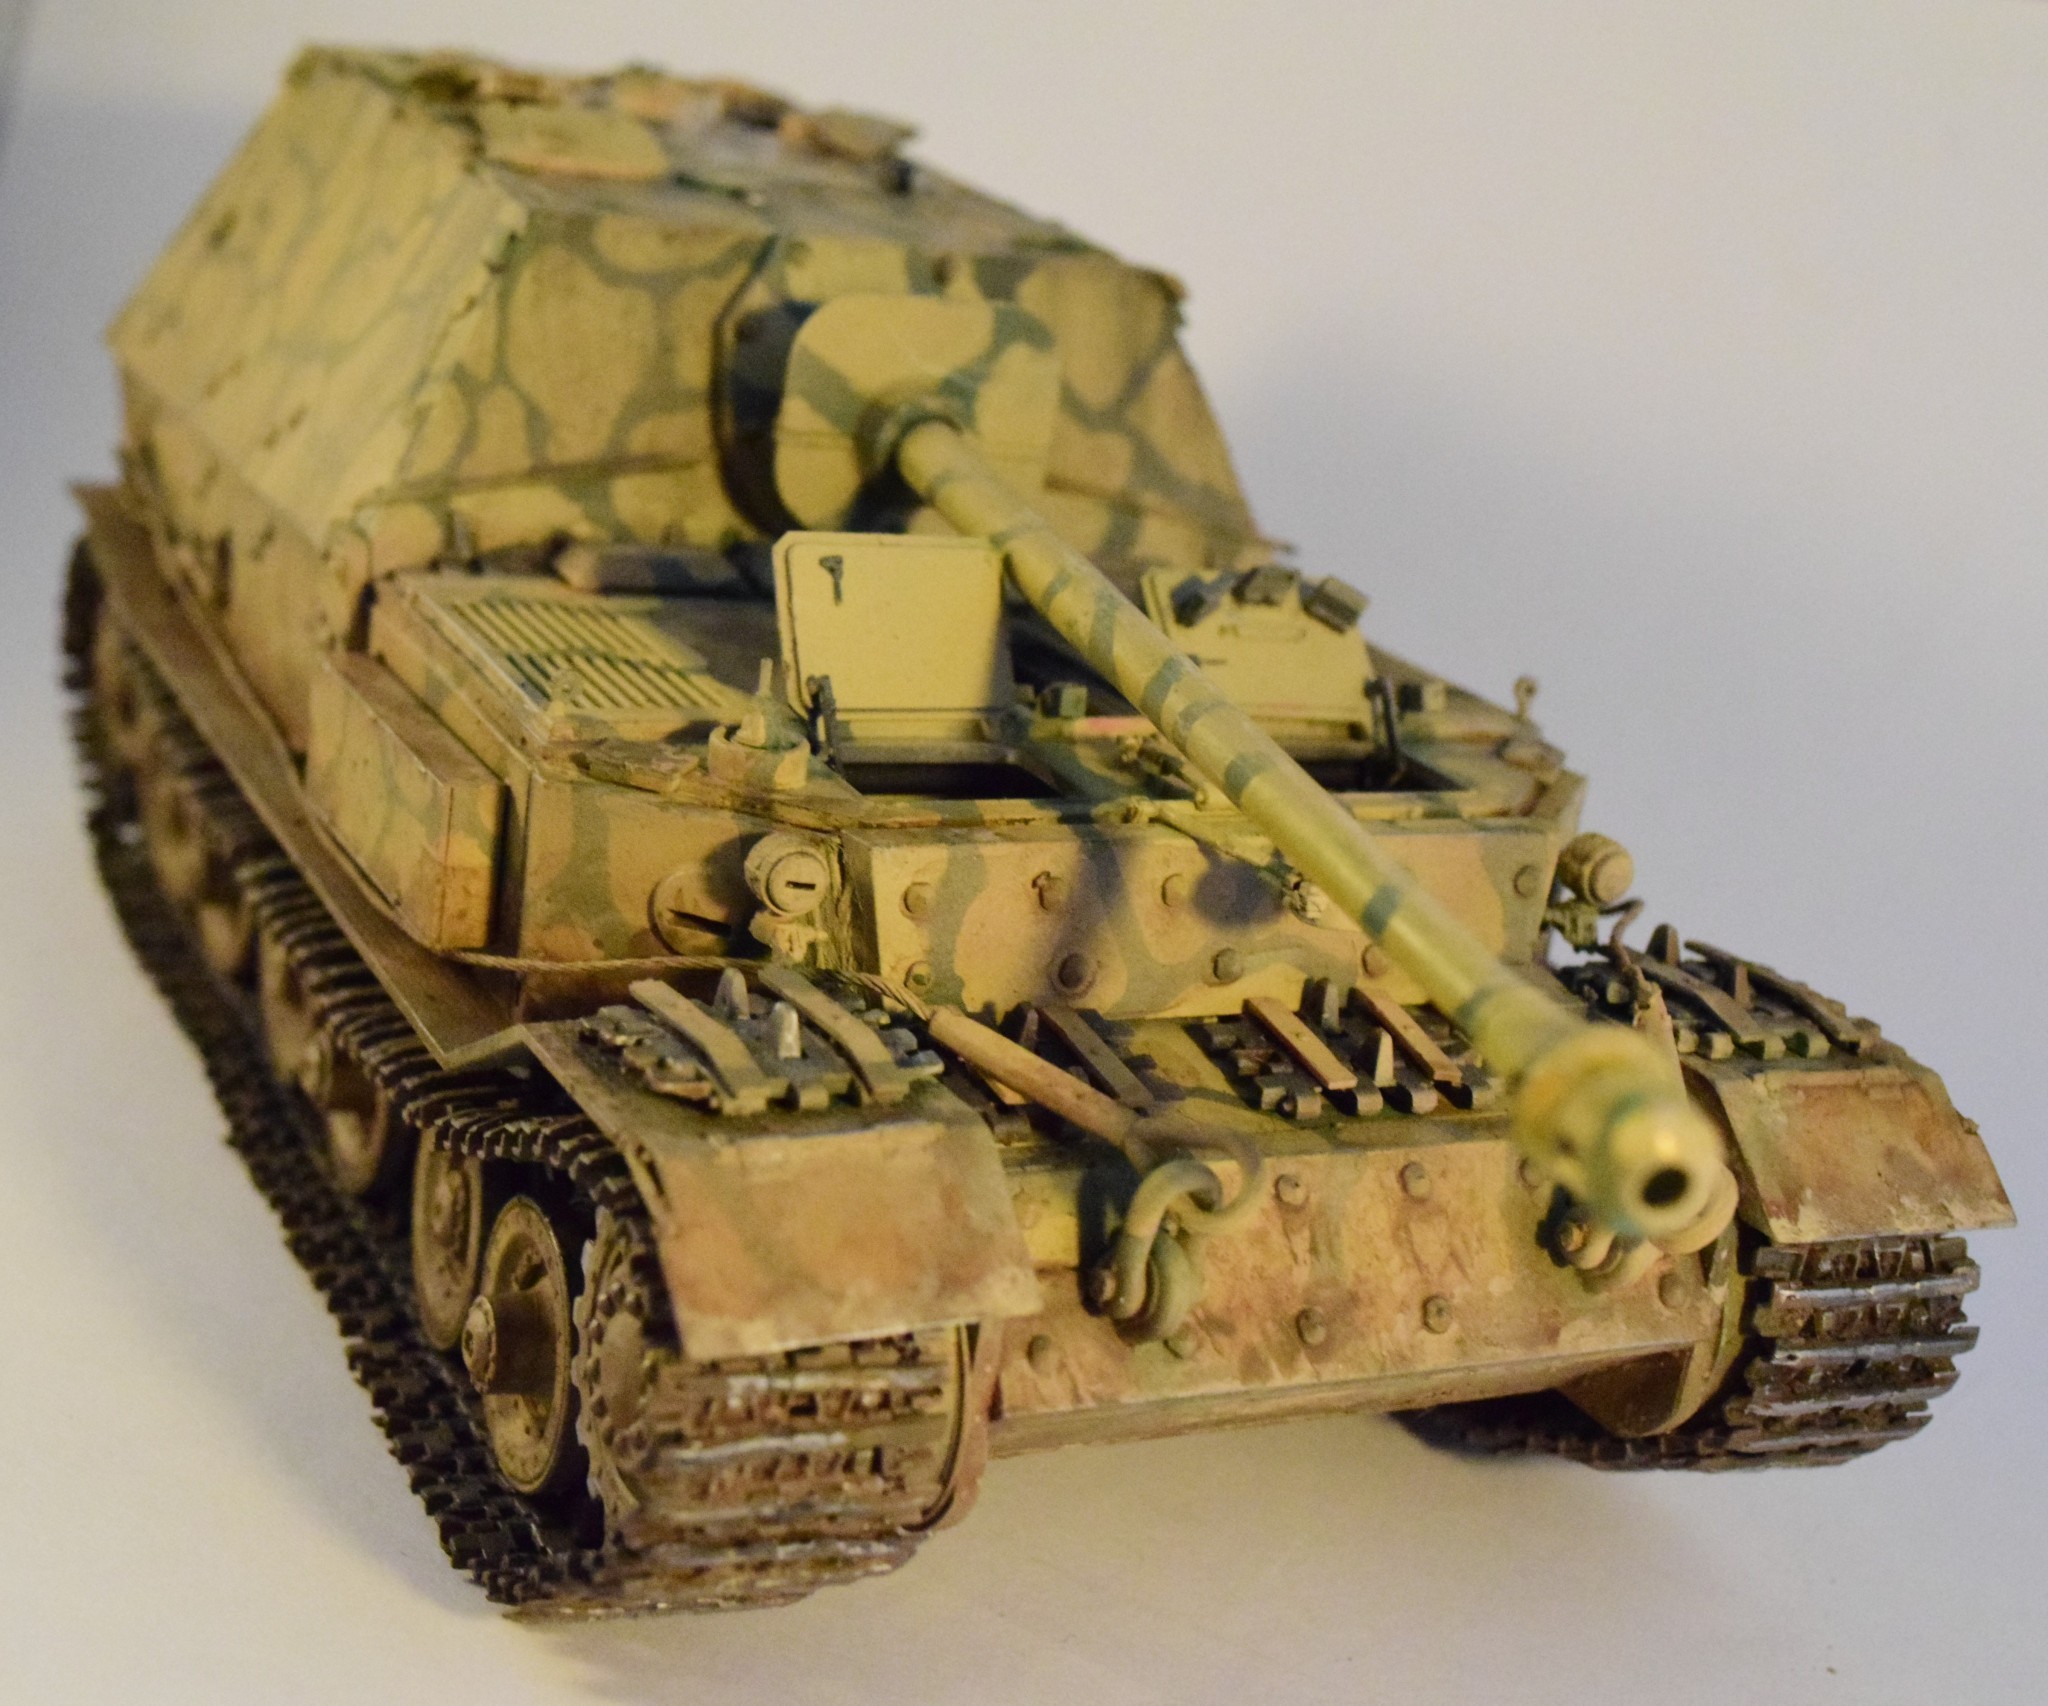
Step 33: the assembly of the air filters (those strange flower-like things on both sides of the gun) should not be done in the suggested order. The instructions would have you put the whole filter assembly together, and then install them in place. You should first glue the individual holding legs into place, and then add the top of the filters with the canisters installed to make sure there will be no fit issues with the superstructure later on.
E18, the panel that holds the gun, and the top of the engines do not have enough clearance... The engines sit a mm or so too high, and will not let the panel settle into its place.
If we are discussing the gun: I wanted to put it in an off-set, depressed position as if the tank destroyer was taking aim at something. However. The gun is designed to be placed in a travel position because obviously as the gun rotates, so does the gun sight; however the cover of the gun sight (B24) is not designed to be in any other position but travel. (Minor issue, really.)
The superstructure has a very tight fit… (or rather, a poor fit- I still had to fill some gaps) I had to remove the gun, in order to be able to glue the top of the superstructure on -which obviously created fit issues with the gun later on. I did some surgery on the gun: I cut off the pin that would keep it in place because once the superstructure is on, it cannot be inserted into the hole on the floor. I also thinned the gun shield significantly to make room for the ball mount. This allowed me to squeeze the gun into place, but it was a struggle.
The periscopes do not fit into their slots easily; I had to thin them down a bit to make them fit.
Part D5 (some sort of engine hatch) is too wide to fit between the superstructure and the engine deck. I had to sand it a bit off to make it sit correctly.
Part J35 should be labelled B35.
Also a minor issue but one which can vastly improve how the interior looks: the bottom of the ammunition cartridges should have the primer. I simply used leftover decals from RFM’s Panther kit, but they can be replicated using paint as well -but they should be somehow added as detail, especially considering that the ammunition was stored upside down, making them very visible. Few interior stencils would not hurt, either, but this detail is usually overlooked by most companies producing models with interiors anyhow. (There are some aftermarket transfers available.)
Again; I would like to stress that these issues are not major. It would be nice not to have them, but the overall experience of building this model was of an unbridled joy (OK I am being a bit hyperbolic here but I still had a lot of fun with it). As mentioned before, any modeller with a couple of models under their belt should be able to deal with them, and have a pretty spectacular model on their shelves. If you always wanted a full interior model but were worried about the part count and complexity that usually comes with it, then this is the model for you. For more ambitious and experienced builders it is an excellent base kit for superdetailing. If I was to build a second Ferdinand model, I would definitely build a cut-in-half version, with one side completely removed as it absolutely deserves to show the intricate interior off.