

1⁄35Libyan T-54 Mod 1949
4
Comments
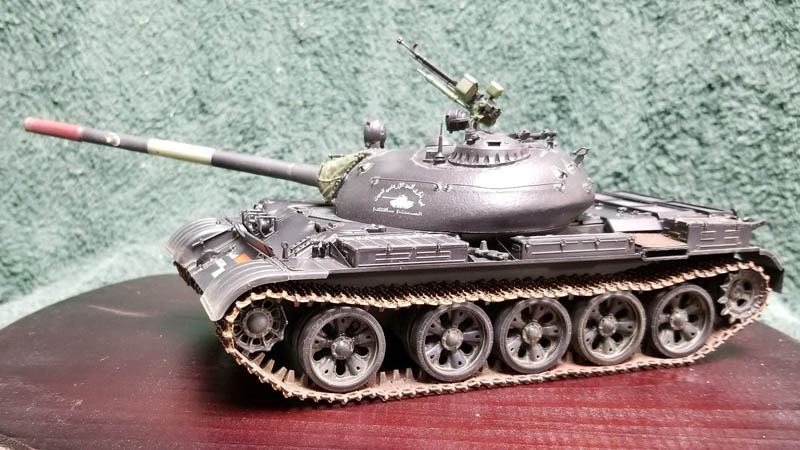
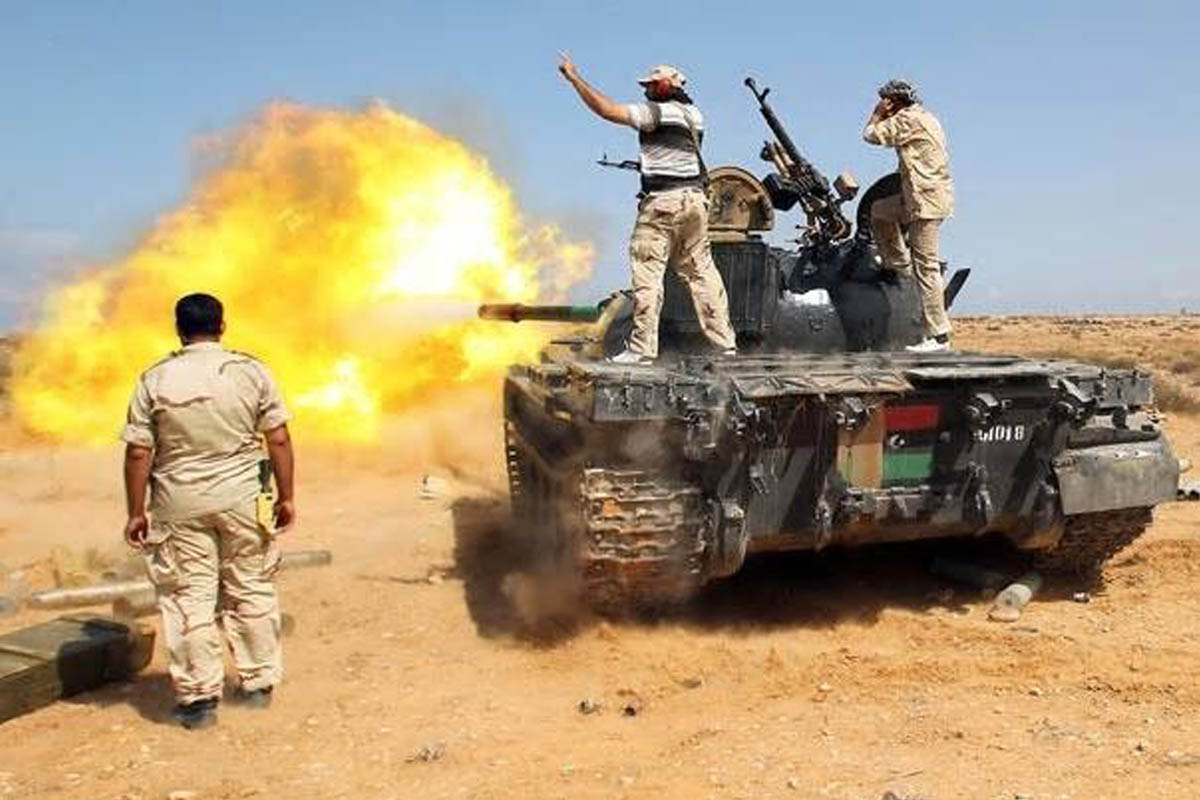
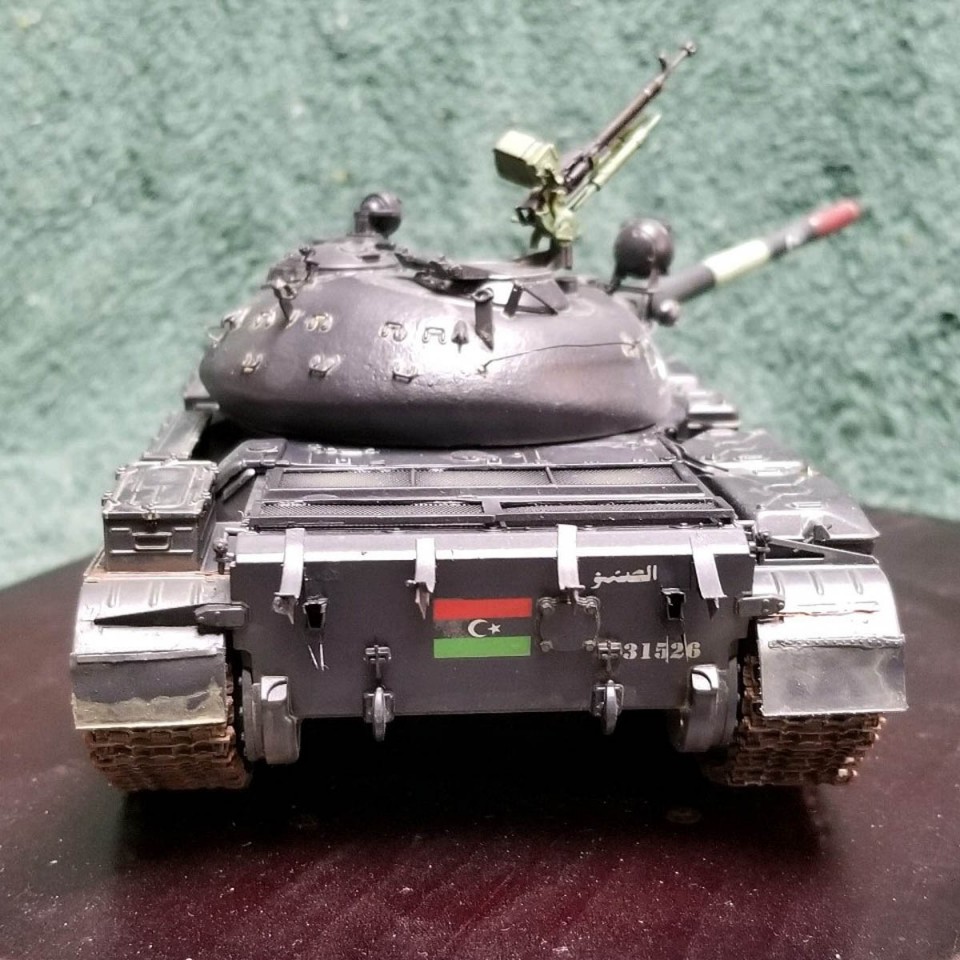
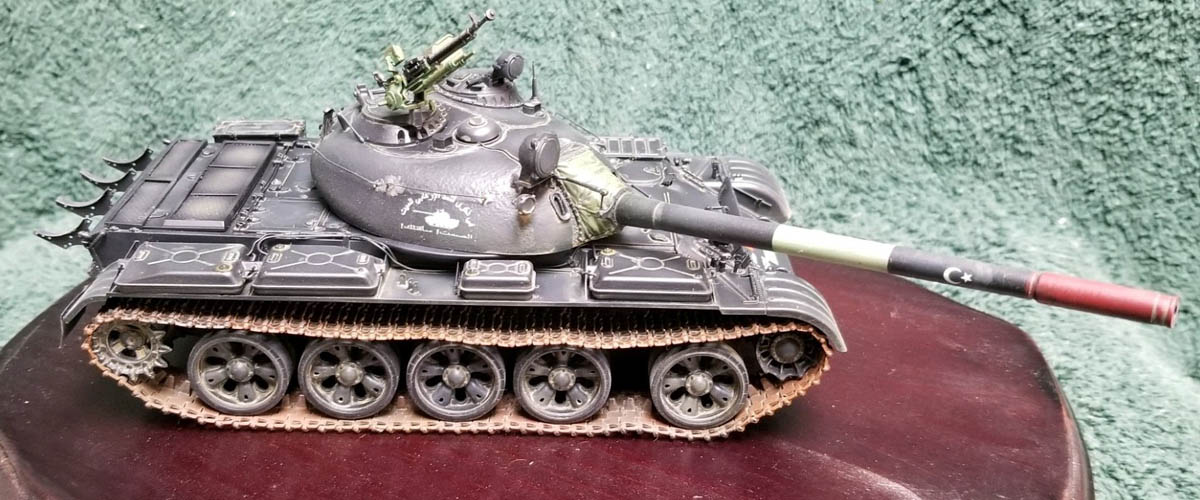
As the Arab Spring gained momentum in early 2011, many countries formerly run by dictatorial leaders dissolved into chaos and civil war. One such example was Colonel Muammar Gaddafis regime in Libya. Various pro- and anti- government factions fought over cities and territories with varying allegiances. A year or so ago, my friend Chris Meddings, advertised the release of the book: Soviet Armour in Foreign Wars. In the book was a model of a black T-55 with very cool red/black/green markings. This sort of thing is right up my alley! But, I have also wanted to add a T-54 model 1949 to my collection. Libya received about 1000 T-54/55 tanks in the 1970s and 1980s. I reasoned that some earlier T-54s would inevitably get shipped out with later variants. My model depicts a T-54 model 1949 belonging to the Misrata Tank Division of the National Liberation Army in fighting in Sirte, Libya in mid-2011. Their vehicles were painted black to identify them as friendly to the NATO pilots providing air support.
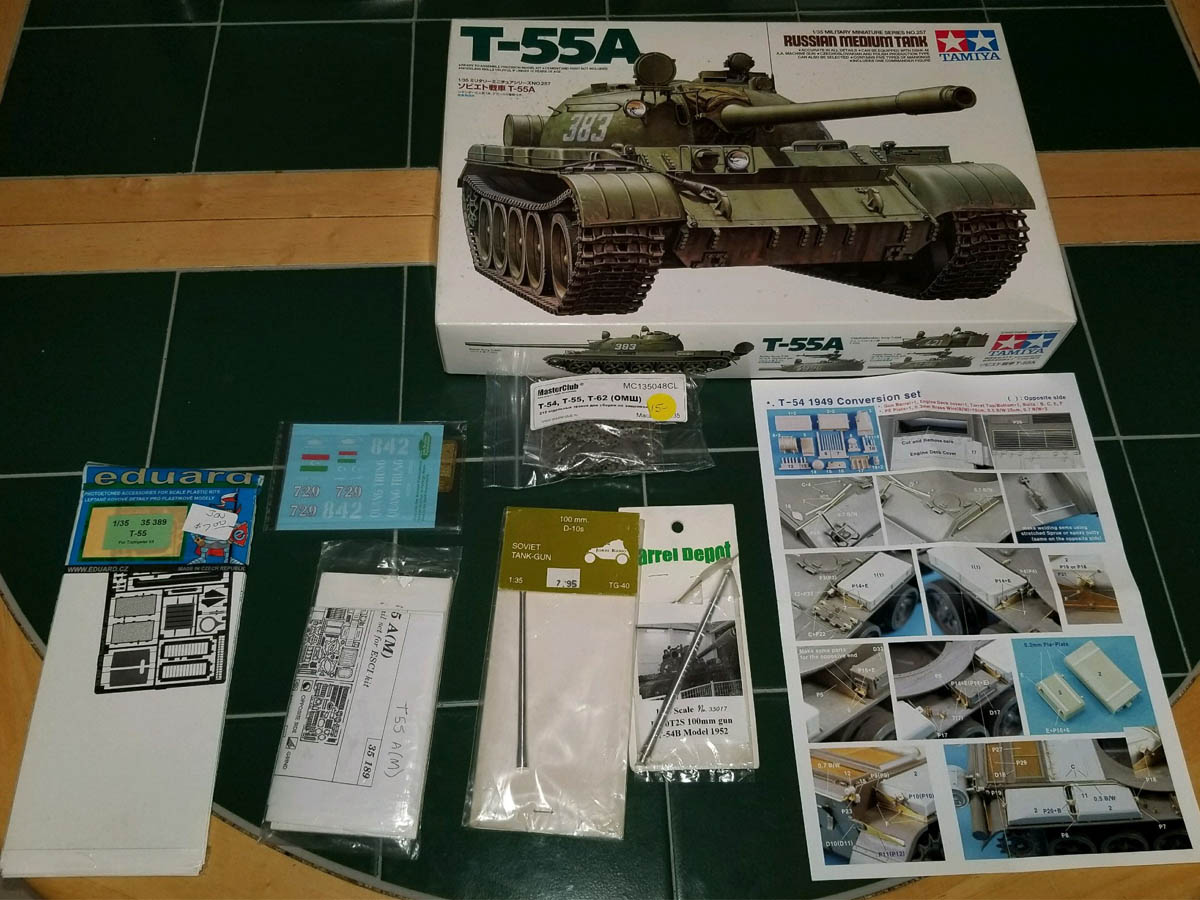
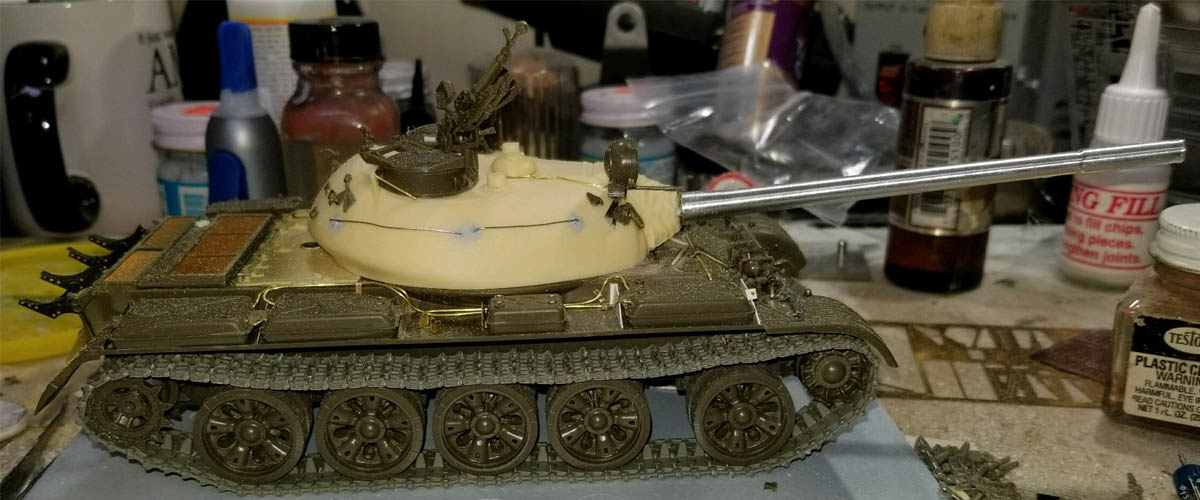
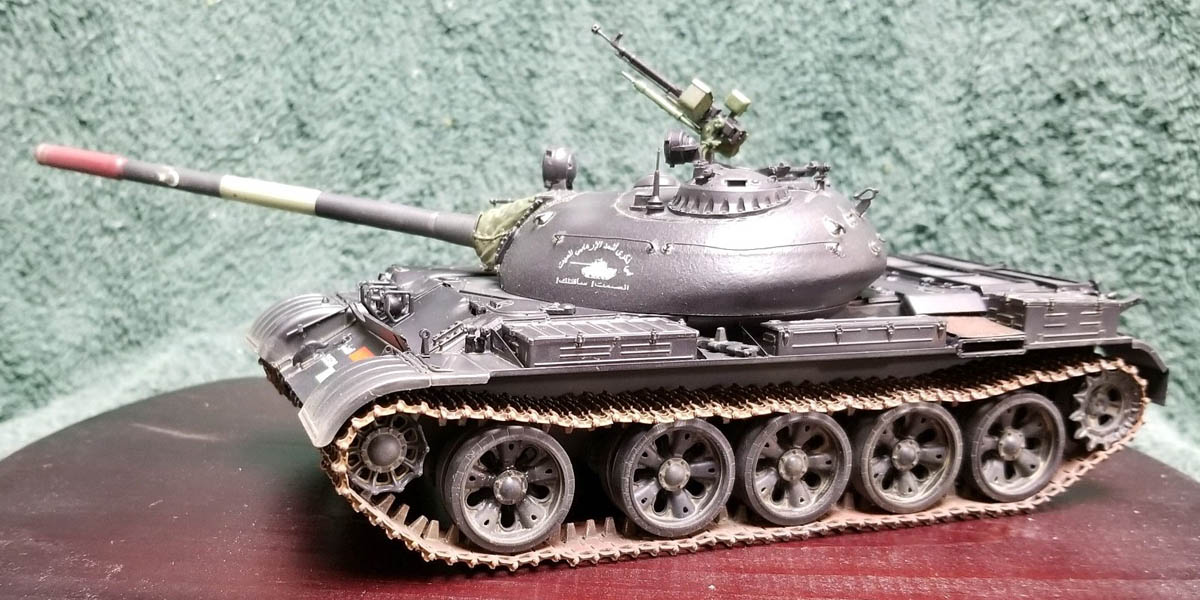
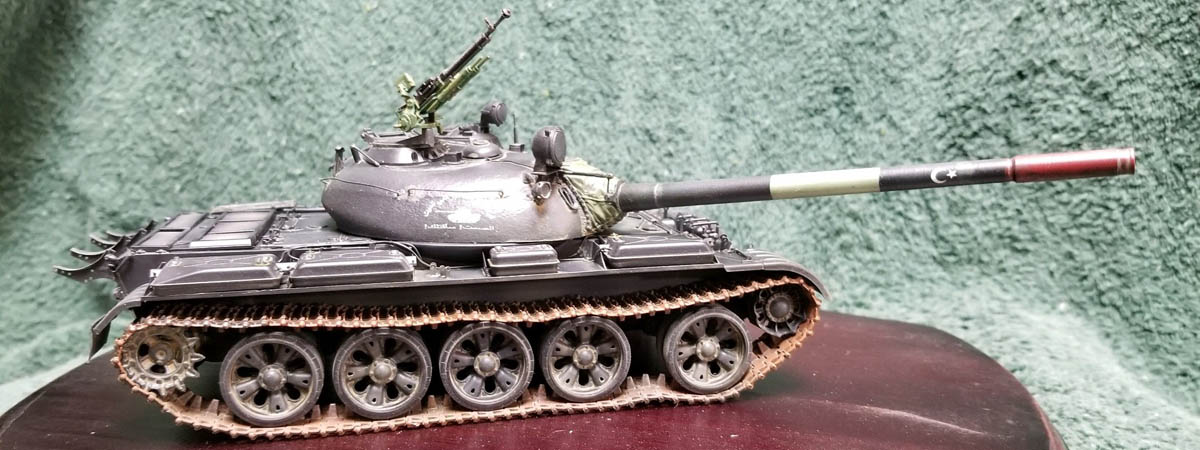
To build the model, I used Tamiyas excellent T-55 kit as a base, along with the Legend conversion kit to back date the vehicle to a T-54 model 1949. The clearest distinction of the vehicle is the small bustle on the back of the turret. Other equipment, including road-wheels, track, fuel tanks, etc., would get updated during the periodic re-builds that characterize many Russian vehicles during their service lives. In addition, a Jordi Rubio gun barrel, Masterclub tracks, a couple of Eduard photo-etch sets, the Inside the Armour decals (from the book), the usual wine foil, wire, styrene and a couple of custom decals rounded out the project.
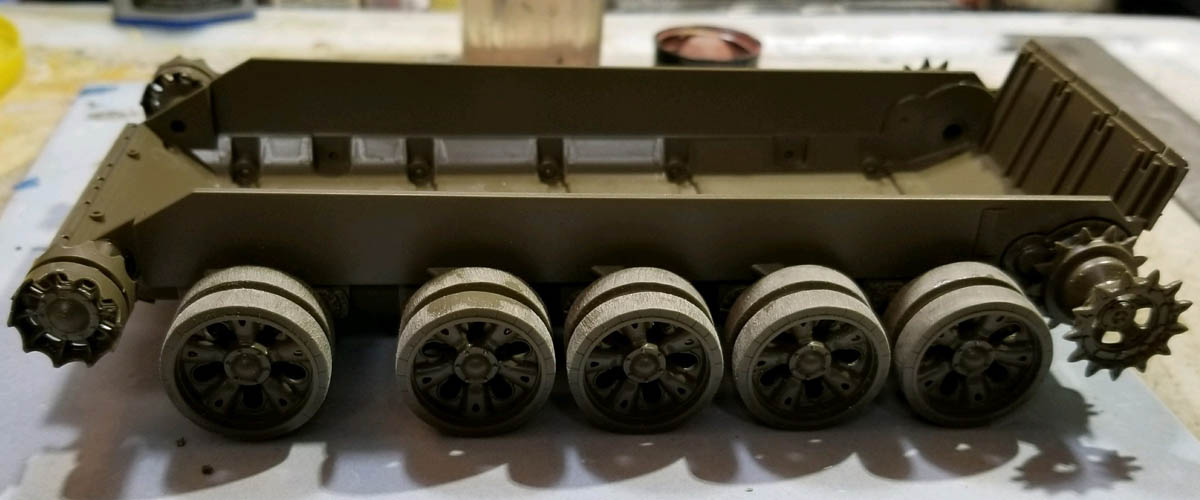
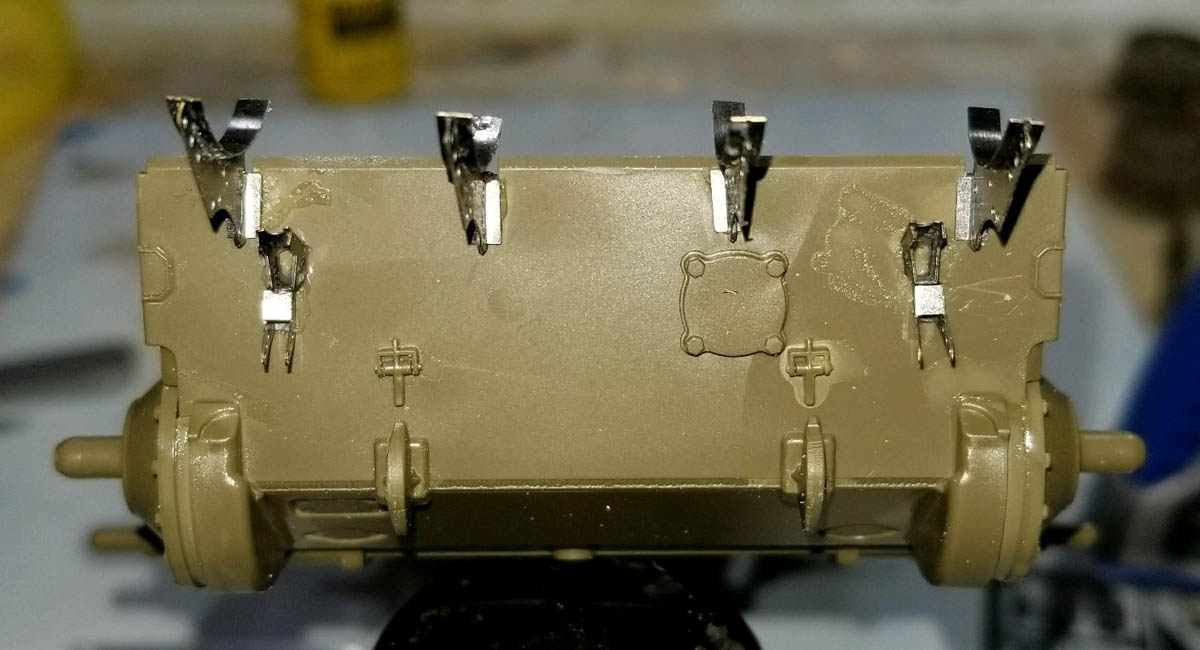
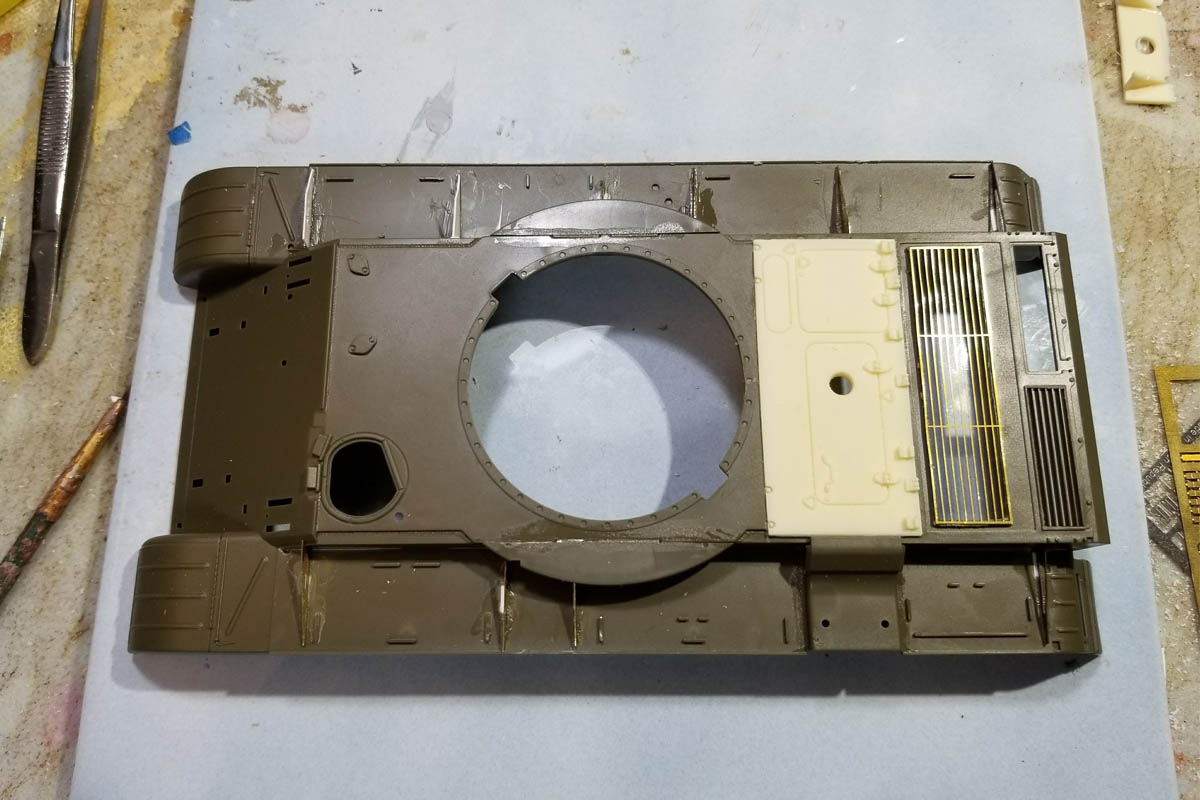
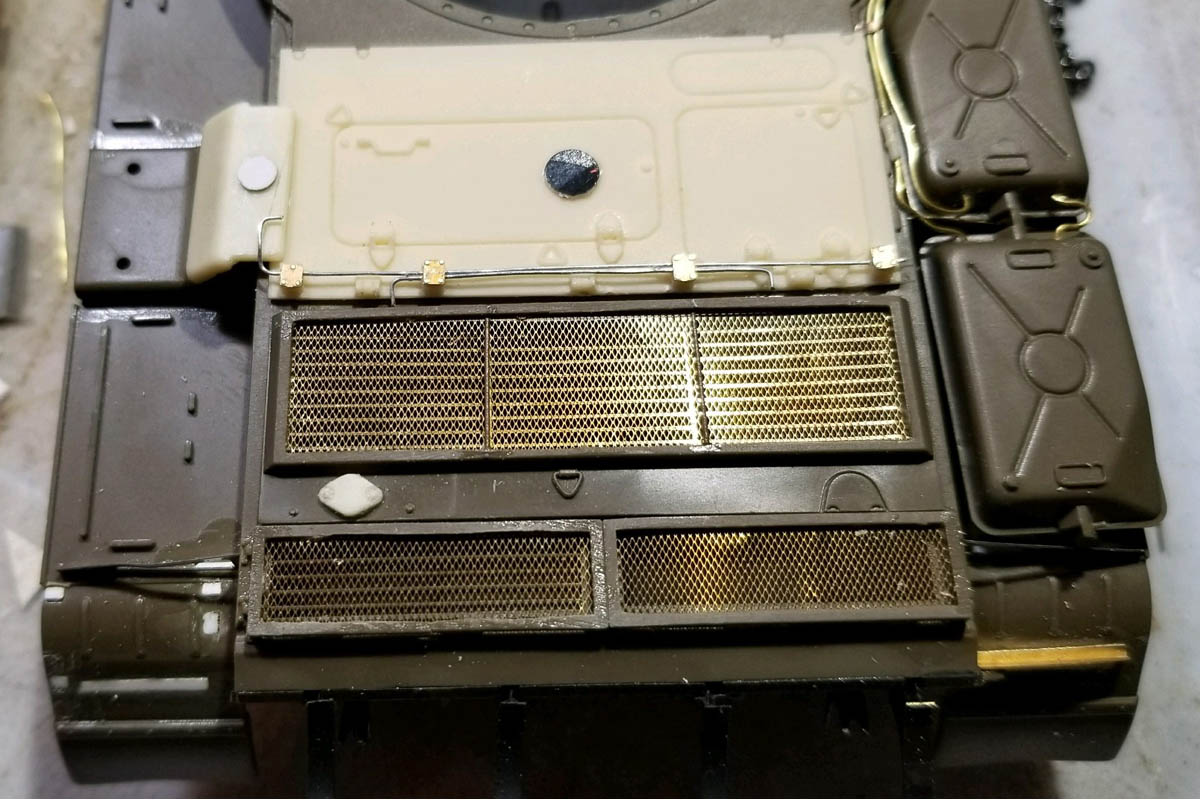
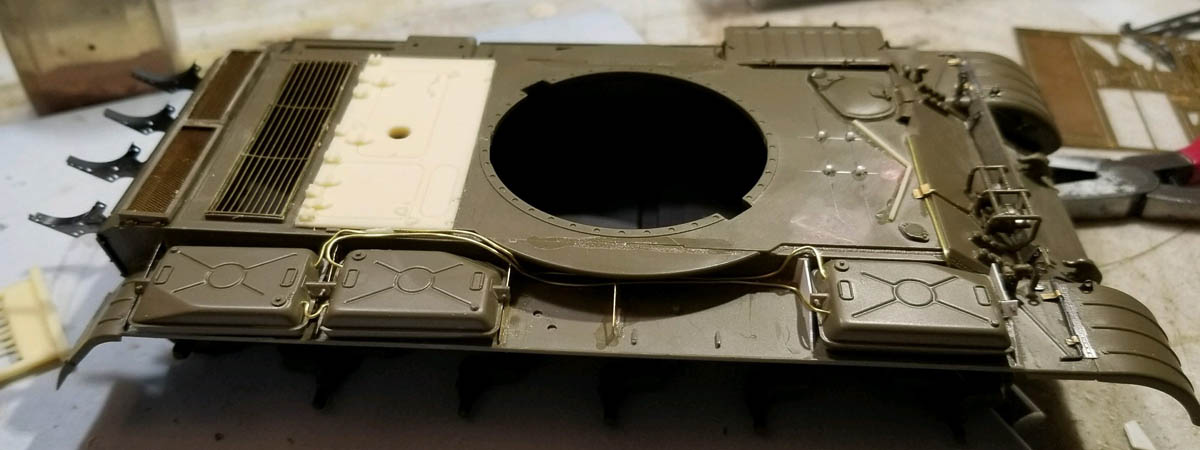
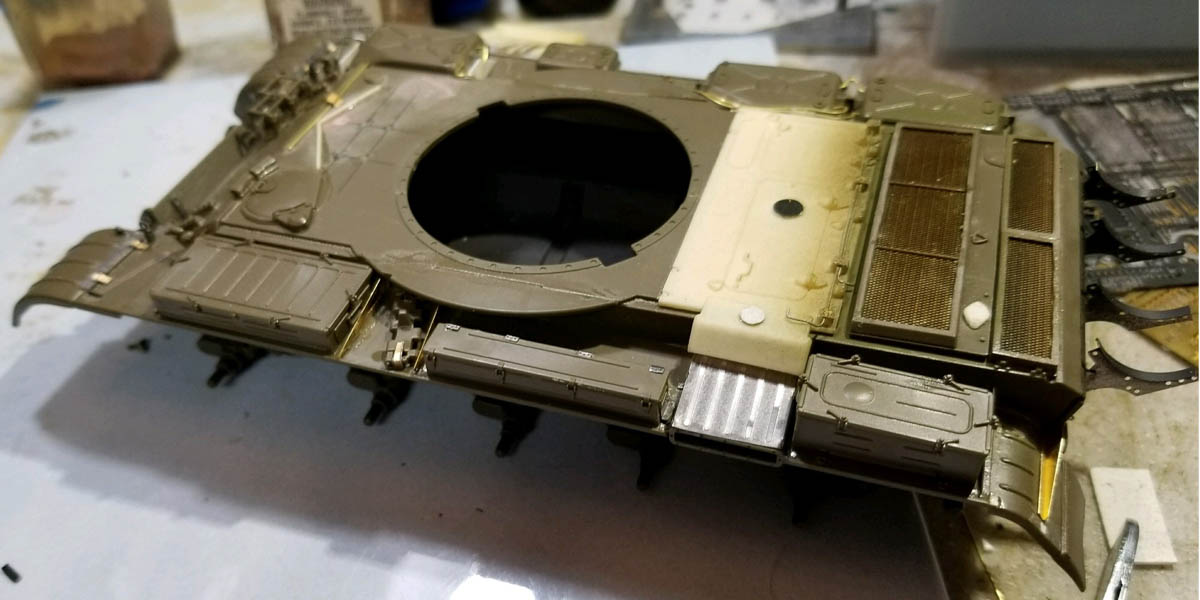
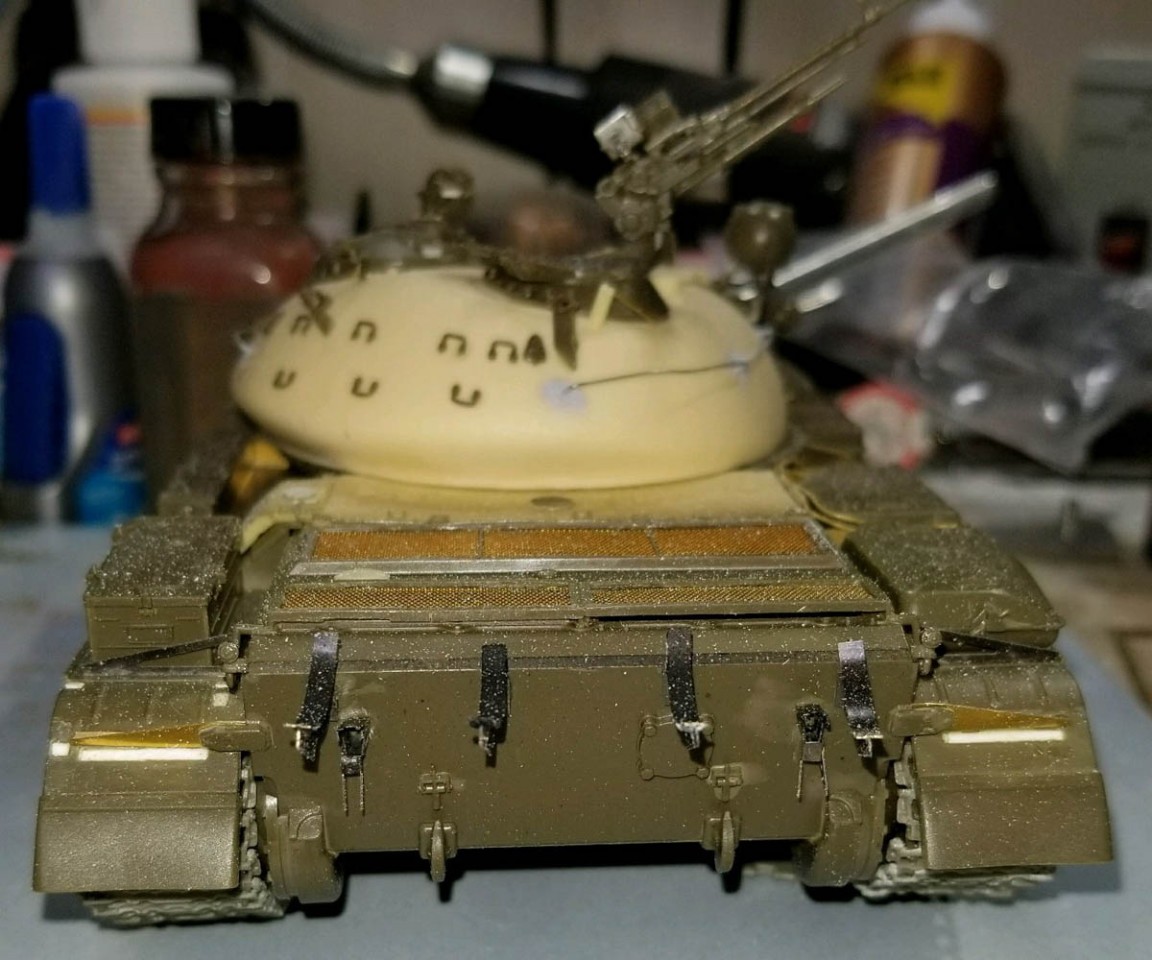
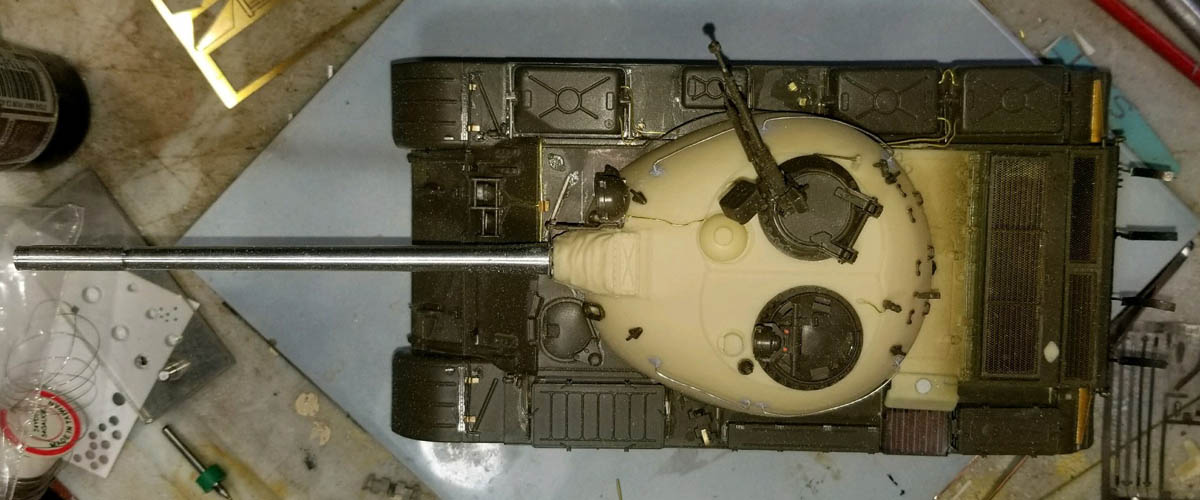
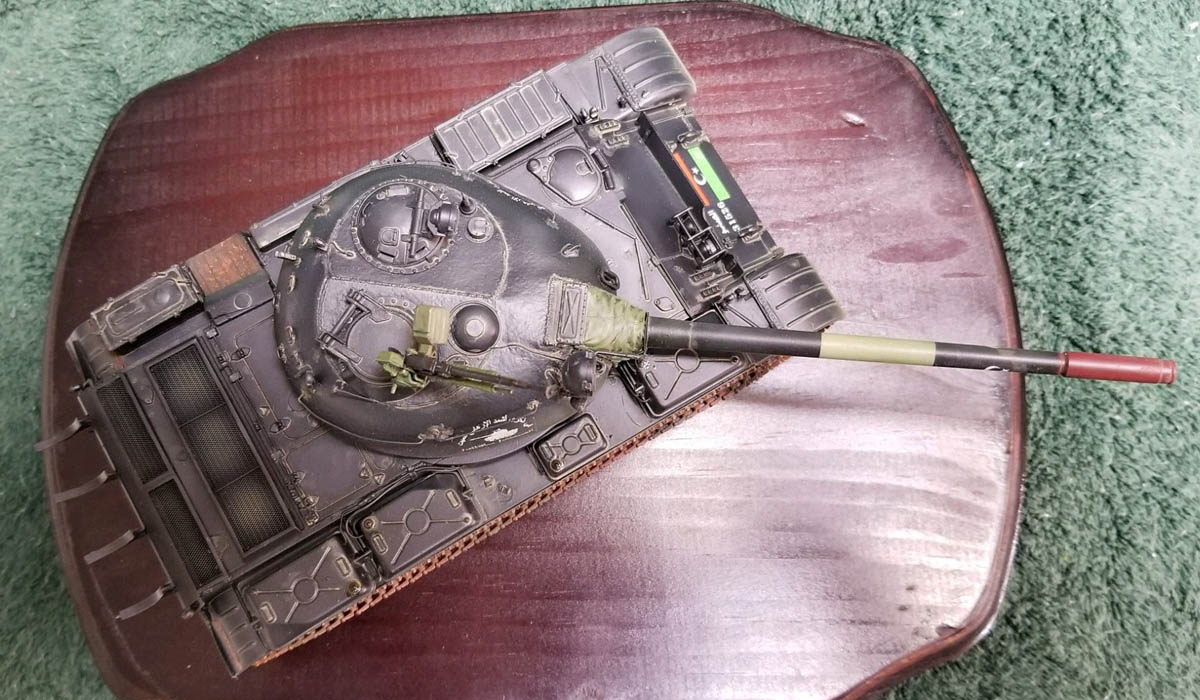
I started out with the lower hull as per the instructions and got it all together. It wasnt until I reached the rear plate that I began to use some of the Eduard photo-etched parts. I used the un-ditching beam mounts, as well as the spare fuel drum holders, although I left them empty to better see the engine deck. From there, I moved on to the upper hull. The only real changes here were on the engine deck, requiring the removal of a grating or two. I was also quite terrified of the giant photo-etch louvers for the main engine vent. I did make sure the inside on the hull was painted flat black to ensure that nothing could be seen under the louvers. In the end, this went on the model without issue. Also, the resin engine decking went into place with little more that some light sanding to fine-tune the fit. With the engine deck done, I moved onto the fender brackets, which were a combination of sheet styrene and photo-etch parts from the Legends and Eduard sets.
Once the brackets were done, the next order of business was to fit the fuel tanks and stowage bins on the fenders. I used the Tamiya kit parts, but added wire for the fuel system and photo-etch parts with stretched sprue bolts to secure them to the fender brackets. Once the big items were attached and secured, I worked on the smaller details and fittings on the hull, including wiring covers, bolts and other fittings. The exhaust cover was made from wine foil as were the rear fender flaps (see photo 8). It was at this point that I built the Masterclub tracks. These are the resin snap-together type and I was a little leery as Masterclubs resin IS-2 track was awful; being too brittle. But these were a breeze, requiring a little clean-up to remove a small pour nub from each link. It took me about 90 minutes to construct both runs of track.
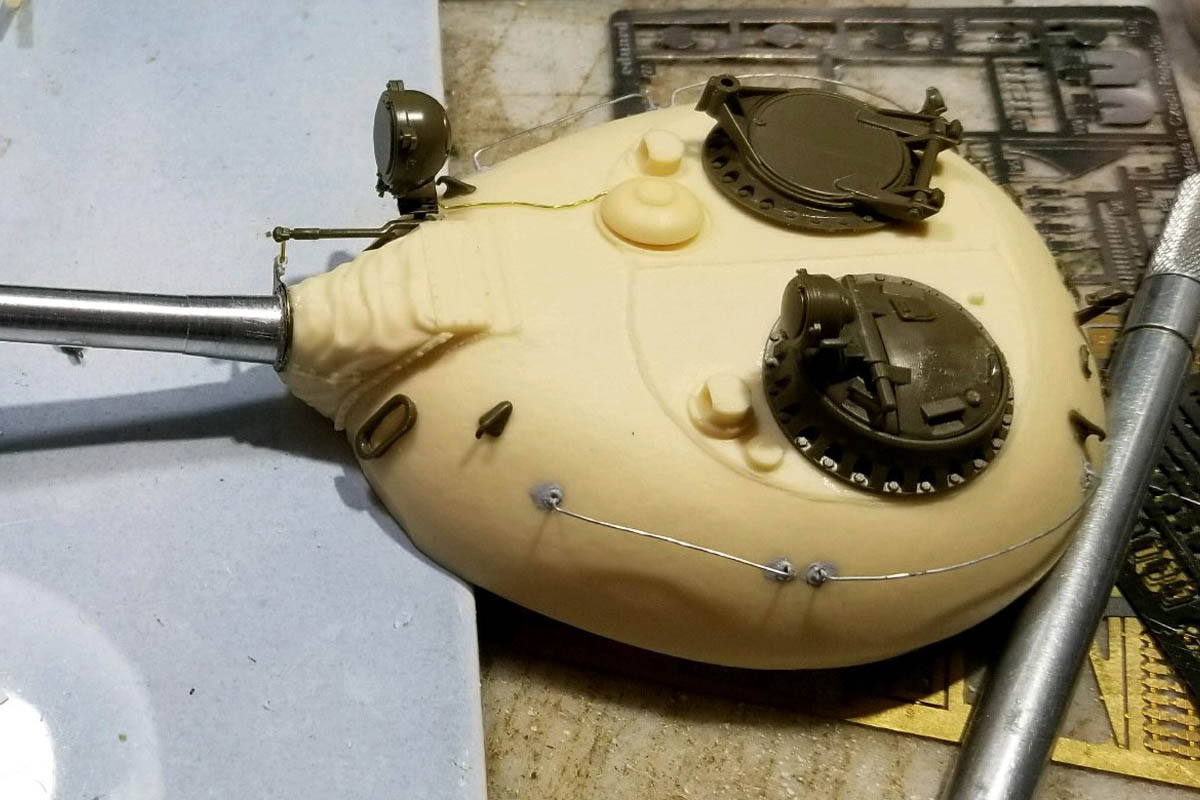
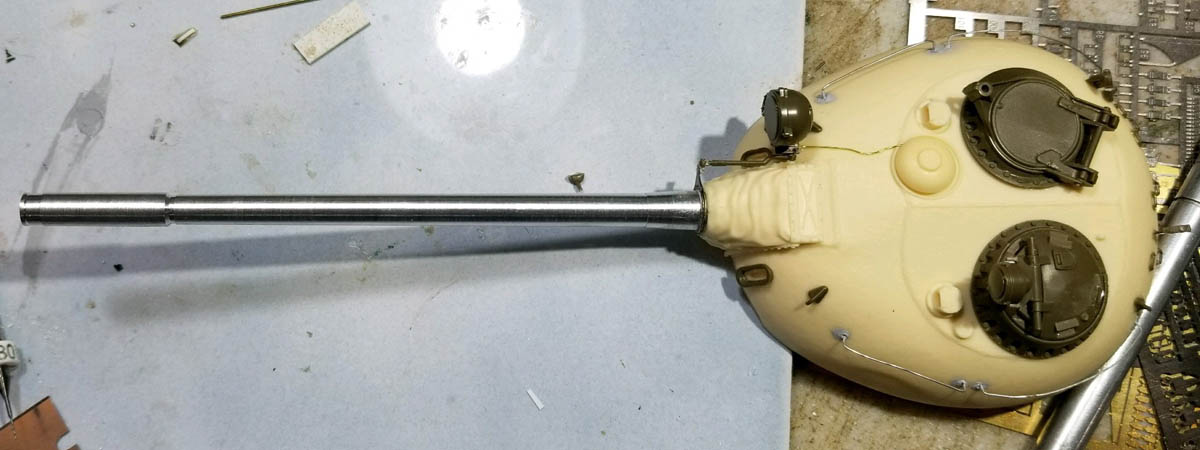
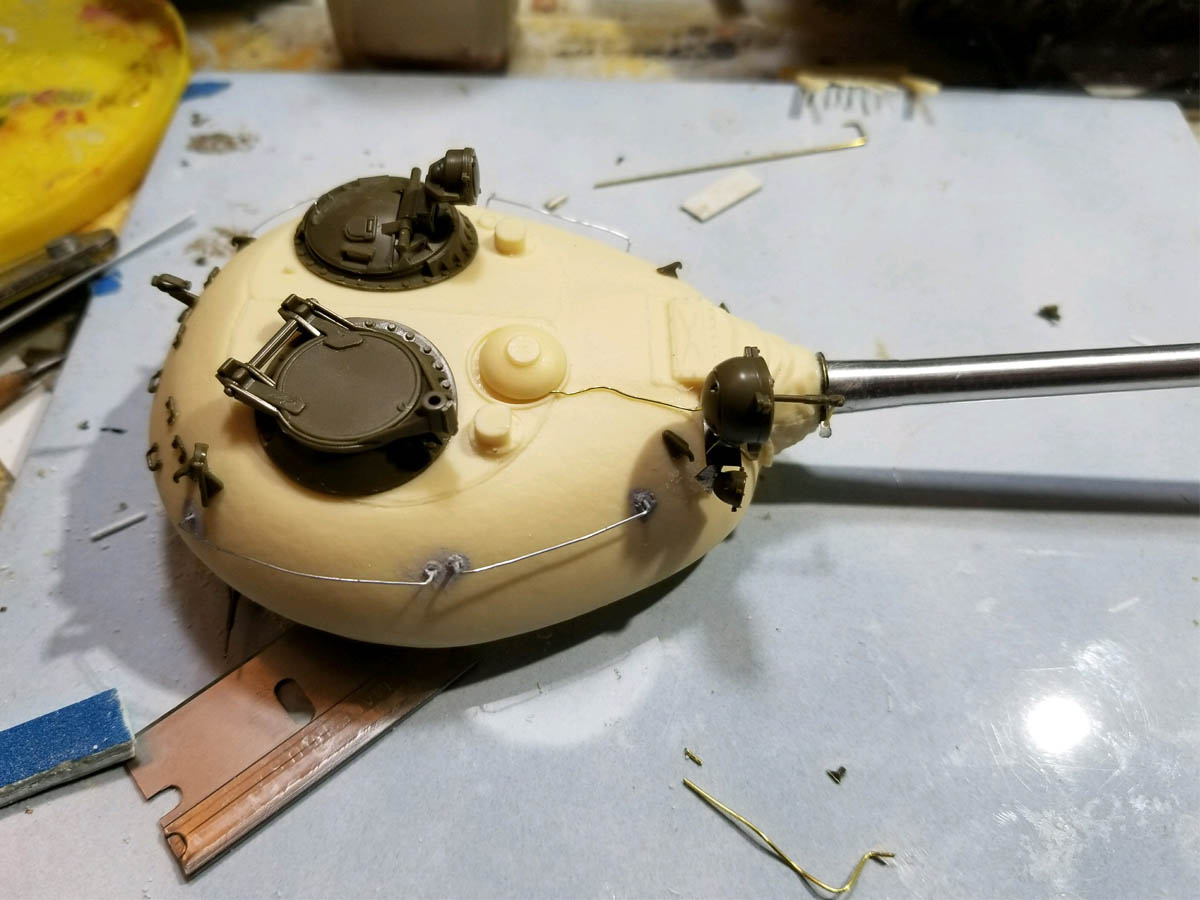
Work now moved to the turret, which is most of the conversion kit. The pour plug was pretty intimidating, but cleaned up nicely after some judicious cutting and sanding. The texture that was destroyed when the pour plug was removed was restored with some Mr. Surfacer 500. Some of the internal bracing inside the turret needed to be hacked away so the upper and lower halves fit properly, but this wasnt a big deal. What did take some time and careful fitting was the gun barrel, which I do not believe was designed for the conversion kit. It took a good deal of styrene strip to ensure the barrel was straight and true in the mount. Again, a little bit of extra attention paid off well later on. The rest of the turret was pretty straight forward, using kit and conversion set parts as appropriate in the instructions; along with a sprinkling of Eduard parts and some wire for good measure.
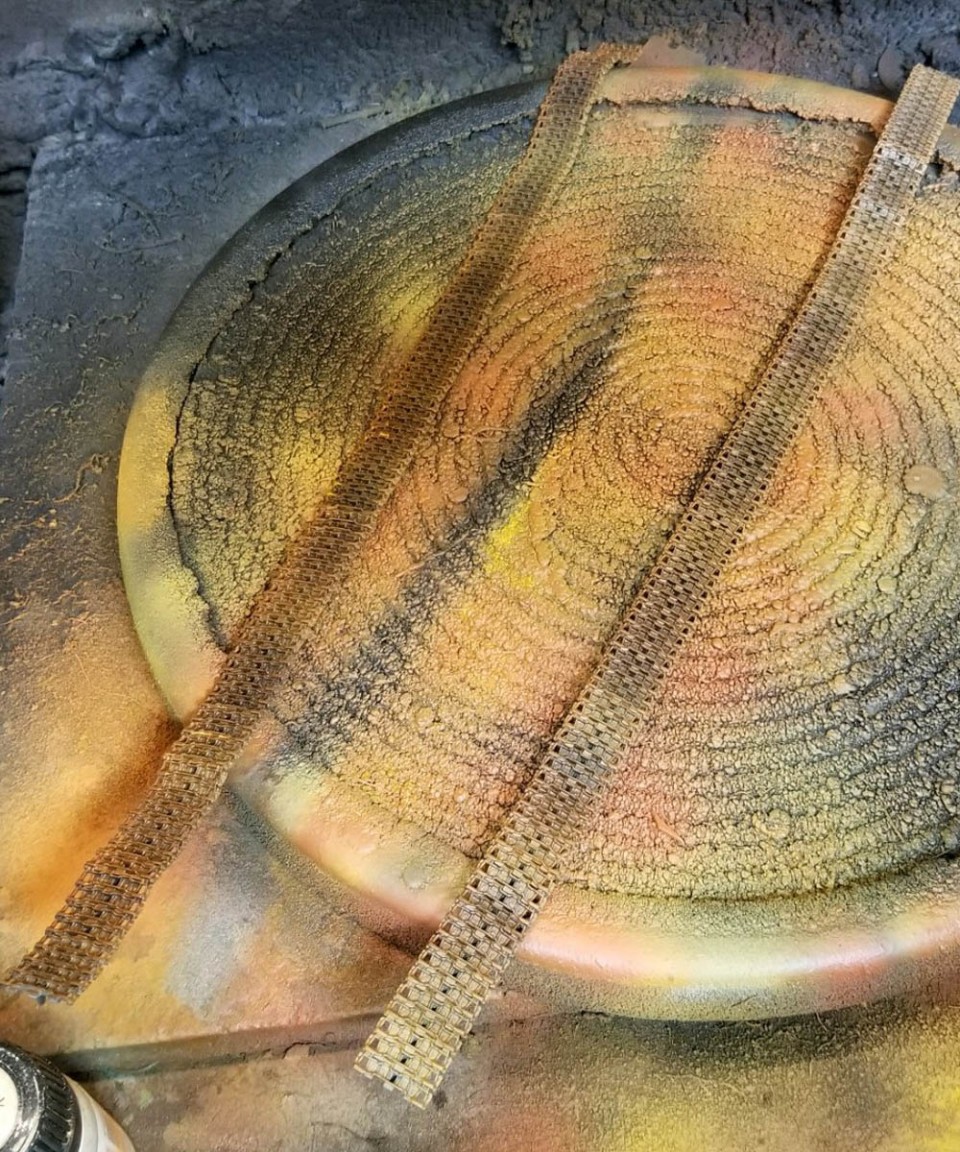
With the model completed, it was now time to start painting. The really neat part of the paint scheme for this thing was that it was black, which also is royal pain to pull off without turning the model into a light sucker where you cant see any details or a sickly gray that looks like its been bleached. With that in mind, I started things off with some spray-can flat black. This is the cheap stuff from the local hardware store. Its tough as nails when dry and provides a great base to work from that wont be affected by the oncoming onslaught that is my painting technique. The major parts of the model were dry, I began airbrushing on a couple of layers gradually lightening black, starting with Vallejo black and ending with black-gray. Even then, it was determined that the model looked a little too dark, so a final misting of German gray/black gray was used to further lighten things up. Afterwards, I masked and painted the national color stripes on the gun barrel. I used Vallejos thinner and a drop of acrylic paint retarder to keep the paint from drying on the airbrush tip. To do the tracks, I used the method I showed on this site a while back, using various rust colors zig-zagged across the surface.
After drying overnight, the model was glossed using Tamiya gloss in the spray can (its fast, dries quick and you dont need to tear down the airbrush to clean it once youre done). From there, I decaled the model, using most of the decals provided in the Soviet Armour in Foreign Wars book. I messed up one of the barrel crescents, thinking that they both should have pointed in the same direction. Unfortunately, they should have been flipped on one side. It wasnt until much later that I noticed the problem when re-reading the book. Oops! I did make two changes, however. First, was the vehicle number, which I figured would have been different as this was a slightly different vehicle. Second, there was some kind of inscription on the sides of the turret. Again, since my vehicle was different, I wanted mine to show some difference.
There is a comedian/puppeteer named Jeff Dunham who has a character called Achmed the Dead Terrorist. Achmeds signature line is, Silence! I kill you! Being totally sick and twisted, it dawned on me that this would perfect for my model. So, using Google translate, I wrote, In memory of Achmed the Dead Terrorist and Silence! I kill you! into Arabic. Im not 100% sure that the translator got it right, but Id like to believe it did. Thats my story and Im sticking to it. With that completed, I found a silhouette of a T-55 and made my own markings in paint.nets free graphics program. Think of it as an illustrator light. I then resized and printed the image out in MS word on my Alps MD-1300 printer. To ensure that the decals did not silver, I used thinned white glue under the decals before they went down and Mr. Mark Softener to make sure that they snuggled down on the surface completely.
After everything had sat overnight to dry the model was sprayed with Armoury figure flat. This is designed for model war-gaming models and is rock hard and super stable. Both of these attributes are quite useful, considering the materials I use in my weathering.
One of the first problems I faced was how to add shadowing to model thats already black? The answer is, you dont. In order to add some tonal variations to the paint, I made up a couple of green filters and used them to tone down the gray highlights, which looked a little stark. Then, I grabbed some Ammo of MIG Kursk Earth liquid pigment and thinned it down to pin-wash consistency and pin-washed all of the recesses and details. This gave a great dusty look to all of the recesses and highlighted them nicely. My usual approach of dot filters was not used as they would not be visible on the dark background. At this point, the model received another layer of clear flat to seal everything. The final touches included a very light dry-brush of dark steel on the roof-mounted machine gun and tracks. Fuel spills around the filler caps on the auxiliary fuel tanks were made with thinned AK Interactive Fuel stains, which seems to be sepia oil in a clear gloss base. It does the job nicely. With that, the model was completed.
The model is very striking to my eye; you dont see too many tanks painted black! It has done very well in competition, taking silver medals at the Great White North (Oshawa, ON) and Armorcon (Danbury, CT) AMPS regional shows. It has also taken second place in the post-war armor category at a local IPMS show, Hudson Valley Miniatures Guild show (Poughkeepsie, NY) and also in the armor conversion category at Mosquitocon (Wayne, NJ). There are just a couple more shows in the models career until its retired, so stay tuned for the next one. Remember kill network TV: build a model!
To build the model, I used Tamiyas excellent T-55 kit as a base, along with the Legend conversion kit to back date the vehicle to a T-54 model 1949. The clearest distinction of the vehicle is the small bustle on the back of the turret. Other equipment, including road-wheels, track, fuel tanks, etc., would get updated during the periodic re-builds that characterize many Russian vehicles during their service lives. In addition, a Jordi Rubio gun barrel, Masterclub tracks, a couple of Eduard photo-etch sets, the Inside the Armour decals (from the book), the usual wine foil, wire, styrene and a couple of custom decals rounded out the project.
I started out with the lower hull as per the instructions and got it all together. It wasnt until I reached the rear plate that I began to use some of the Eduard photo-etched parts. I used the un-ditching beam mounts, as well as the spare fuel drum holders, although I left them empty to better see the engine deck. From there, I moved on to the upper hull. The only real changes here were on the engine deck, requiring the removal of a grating or two. I was also quite terrified of the giant photo-etch louvers for the main engine vent. I did make sure the inside on the hull was painted flat black to ensure that nothing could be seen under the louvers. In the end, this went on the model without issue. Also, the resin engine decking went into place with little more that some light sanding to fine-tune the fit. With the engine deck done, I moved onto the fender brackets, which were a combination of sheet styrene and photo-etch parts from the Legends and Eduard sets.
Once the brackets were done, the next order of business was to fit the fuel tanks and stowage bins on the fenders. I used the Tamiya kit parts, but added wire for the fuel system and photo-etch parts with stretched sprue bolts to secure them to the fender brackets. Once the big items were attached and secured, I worked on the smaller details and fittings on the hull, including wiring covers, bolts and other fittings. The exhaust cover was made from wine foil as were the rear fender flaps (see photo 8). It was at this point that I built the Masterclub tracks. These are the resin snap-together type and I was a little leery as Masterclubs resin IS-2 track was awful; being too brittle. But these were a breeze, requiring a little clean-up to remove a small pour nub from each link. It took me about 90 minutes to construct both runs of track.
Work now moved to the turret, which is most of the conversion kit. The pour plug was pretty intimidating, but cleaned up nicely after some judicious cutting and sanding. The texture that was destroyed when the pour plug was removed was restored with some Mr. Surfacer 500. Some of the internal bracing inside the turret needed to be hacked away so the upper and lower halves fit properly, but this wasnt a big deal. What did take some time and careful fitting was the gun barrel, which I do not believe was designed for the conversion kit. It took a good deal of styrene strip to ensure the barrel was straight and true in the mount. Again, a little bit of extra attention paid off well later on. The rest of the turret was pretty straight forward, using kit and conversion set parts as appropriate in the instructions; along with a sprinkling of Eduard parts and some wire for good measure.
With the model completed, it was now time to start painting. The really neat part of the paint scheme for this thing was that it was black, which also is royal pain to pull off without turning the model into a light sucker where you cant see any details or a sickly gray that looks like its been bleached. With that in mind, I started things off with some spray-can flat black. This is the cheap stuff from the local hardware store. Its tough as nails when dry and provides a great base to work from that wont be affected by the oncoming onslaught that is my painting technique. The major parts of the model were dry, I began airbrushing on a couple of layers gradually lightening black, starting with Vallejo black and ending with black-gray. Even then, it was determined that the model looked a little too dark, so a final misting of German gray/black gray was used to further lighten things up. Afterwards, I masked and painted the national color stripes on the gun barrel. I used Vallejos thinner and a drop of acrylic paint retarder to keep the paint from drying on the airbrush tip. To do the tracks, I used the method I showed on this site a while back, using various rust colors zig-zagged across the surface.
After drying overnight, the model was glossed using Tamiya gloss in the spray can (its fast, dries quick and you dont need to tear down the airbrush to clean it once youre done). From there, I decaled the model, using most of the decals provided in the Soviet Armour in Foreign Wars book. I messed up one of the barrel crescents, thinking that they both should have pointed in the same direction. Unfortunately, they should have been flipped on one side. It wasnt until much later that I noticed the problem when re-reading the book. Oops! I did make two changes, however. First, was the vehicle number, which I figured would have been different as this was a slightly different vehicle. Second, there was some kind of inscription on the sides of the turret. Again, since my vehicle was different, I wanted mine to show some difference.
There is a comedian/puppeteer named Jeff Dunham who has a character called Achmed the Dead Terrorist. Achmeds signature line is, Silence! I kill you! Being totally sick and twisted, it dawned on me that this would perfect for my model. So, using Google translate, I wrote, In memory of Achmed the Dead Terrorist and Silence! I kill you! into Arabic. Im not 100% sure that the translator got it right, but Id like to believe it did. Thats my story and Im sticking to it. With that completed, I found a silhouette of a T-55 and made my own markings in paint.nets free graphics program. Think of it as an illustrator light. I then resized and printed the image out in MS word on my Alps MD-1300 printer. To ensure that the decals did not silver, I used thinned white glue under the decals before they went down and Mr. Mark Softener to make sure that they snuggled down on the surface completely.
After everything had sat overnight to dry the model was sprayed with Armoury figure flat. This is designed for model war-gaming models and is rock hard and super stable. Both of these attributes are quite useful, considering the materials I use in my weathering.
One of the first problems I faced was how to add shadowing to model thats already black? The answer is, you dont. In order to add some tonal variations to the paint, I made up a couple of green filters and used them to tone down the gray highlights, which looked a little stark. Then, I grabbed some Ammo of MIG Kursk Earth liquid pigment and thinned it down to pin-wash consistency and pin-washed all of the recesses and details. This gave a great dusty look to all of the recesses and highlighted them nicely. My usual approach of dot filters was not used as they would not be visible on the dark background. At this point, the model received another layer of clear flat to seal everything. The final touches included a very light dry-brush of dark steel on the roof-mounted machine gun and tracks. Fuel spills around the filler caps on the auxiliary fuel tanks were made with thinned AK Interactive Fuel stains, which seems to be sepia oil in a clear gloss base. It does the job nicely. With that, the model was completed.
The model is very striking to my eye; you dont see too many tanks painted black! It has done very well in competition, taking silver medals at the Great White North (Oshawa, ON) and Armorcon (Danbury, CT) AMPS regional shows. It has also taken second place in the post-war armor category at a local IPMS show, Hudson Valley Miniatures Guild show (Poughkeepsie, NY) and also in the armor conversion category at Mosquitocon (Wayne, NJ). There are just a couple more shows in the models career until its retired, so stay tuned for the next one. Remember kill network TV: build a model!
About the Author


Comments


Hey Georg great job !! I saw your model at the Long Island figure show about a month ago. Looks even better in person....awesome choice of subject too !
Rich
DEC 20, 2018 - 08:12 AM
Copyright ©2021 by Georg Eyerman. Images and/or videos also by copyright holder unless otherwise noted. The views and opinions expressed herein are solely the views and opinions of the authors and/or contributors to this Web site and do not necessarily represent the views and/or opinions of Armorama, KitMaker Network, or Silver Star Enterrpises. All rights reserved. Originally published on: 2018-12-04 04:55:59. Unique Reads: 5797

WEB HOSTING BY


Copyright ©2021 Armorama and Kitmaker Network, a subsidiary of Silver Star Enterprises
All Rights Reserved. Please read our Conditions of Use and Privacy Policy.
All Rights Reserved. Please read our Conditions of Use and Privacy Policy.