

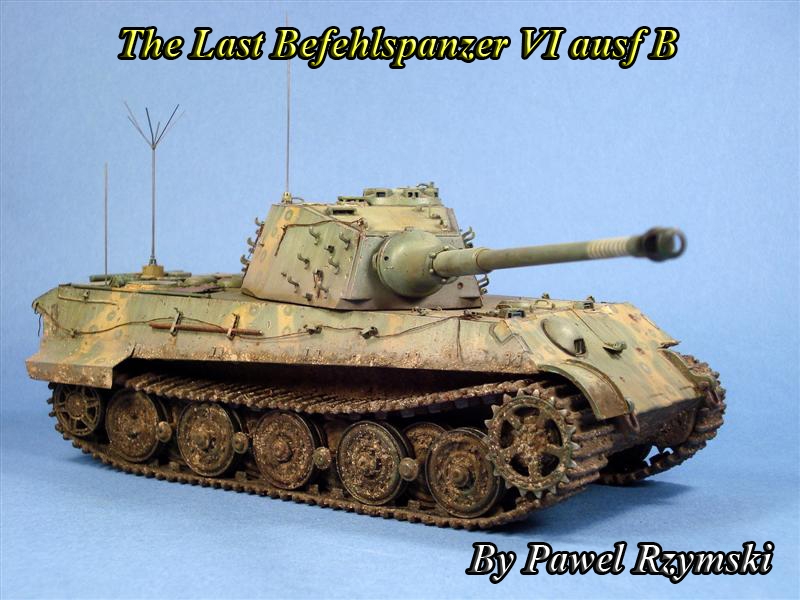
1⁄35The Last Befehlspanzer VI ausf B
5
Comments
INTRODUCTION
The idea of this build came to me after reading a few discussions on late WWII German armour. The plan was to create an ultimate version of the Tiger ausf B with the maximum of visible late production features. Main elements of such a vehicle would be 6 pairs of track hangers per turret side, reinforced front mudguards, late AA machine gun mount, 18 teeth sprocket etc. Additionally, the tank was to be done in the command version with the Stern Antenna on the engine deck.THE KIT AND ACCESSORIES
The kit used for this project was the DML King Tiger Late Production Ardennes 1944. The kit is an excellent base for a late/final version. Main accessories came from the Lion Roar King Tiger PE set (35035), Tasca German antennas kit (35004) and also a DML Quartermaster Series transport tracks set.CONSTRUCTION
I started the build by the rear plate. The places where the wooden block and the jack would have been fitted were filled with putty as those tools were progressively abandoned during the production cycle to completely disappear on the late production vehicles. The holders for the shackles and the convoy light were done using parts from the PE set. Looking how to personalize a bit this very common part of the model I reviewed some wartime pictures I had on my PC. As a result a jerry can holder along with jerry cans was added (a field modification for sure). Furthermore, one of the heavy exhaust pipe covers was left over. In that place I drilled holes and put some styrene rods to imitate bolts. picture1 The lower hull was built pretty straight forward with the addition of the late pattern 18 teeth sprocket from the kit (parts P14 and P15). This sprocket was to enter the serial production from March 1945 but very few got to the production line. Moving along to the upper hull some serious work on the photo etched parts started. The Lion Roar set is pretty good with a very impressive number of parts. The overall quality is very satisfying and the layout is very good which makes parts easy to find. The instructions are clear but it is always worth taking a good look on the reference pictures if you have any doubts. All parts proposed to replace the parts from the kit were used. For sure it demands a lot of additional work but the obtained detail level justifies the effort. Some upgrades to the basic kit were needed in order to obtain a March '45 vehicle. Armoured plates which started to appear from January 1945 were installed over the air intakes on the engine deck. Four vent lines, late style front mudguards reinforced with 2 ribs were also added using the photo etched parts. The track mounting cable and its fittings on the right side of the hull were left off as they were not used any more starting from March 45. On the engine deck the Stern antenna mount from the Tasca set and a scratched additional antenna bin were installed for the command version.TURRET
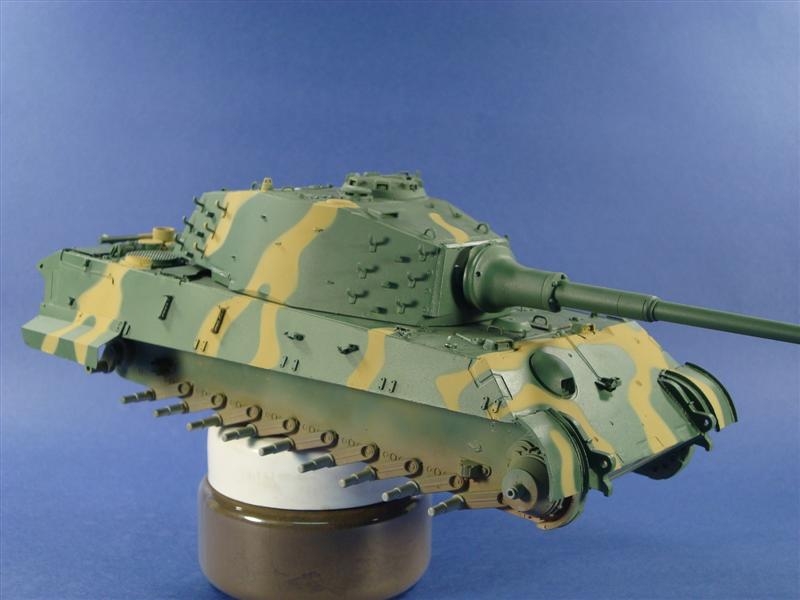
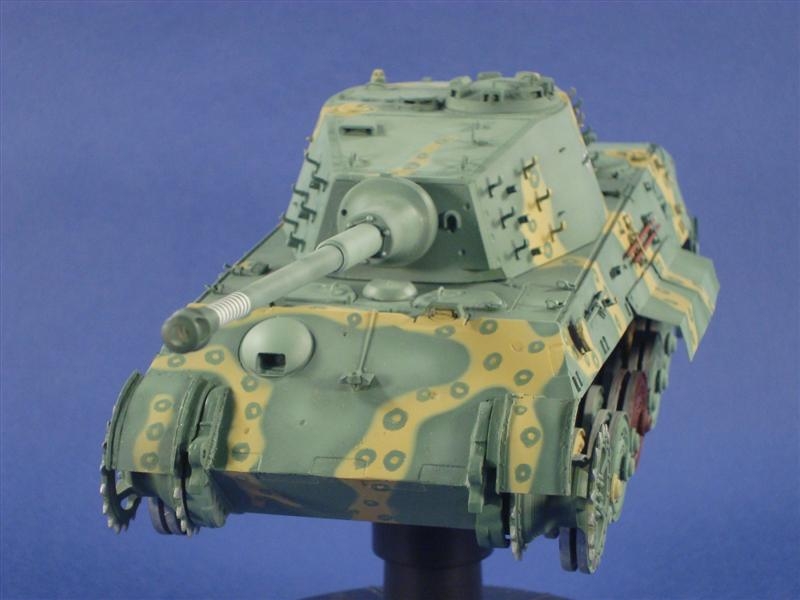
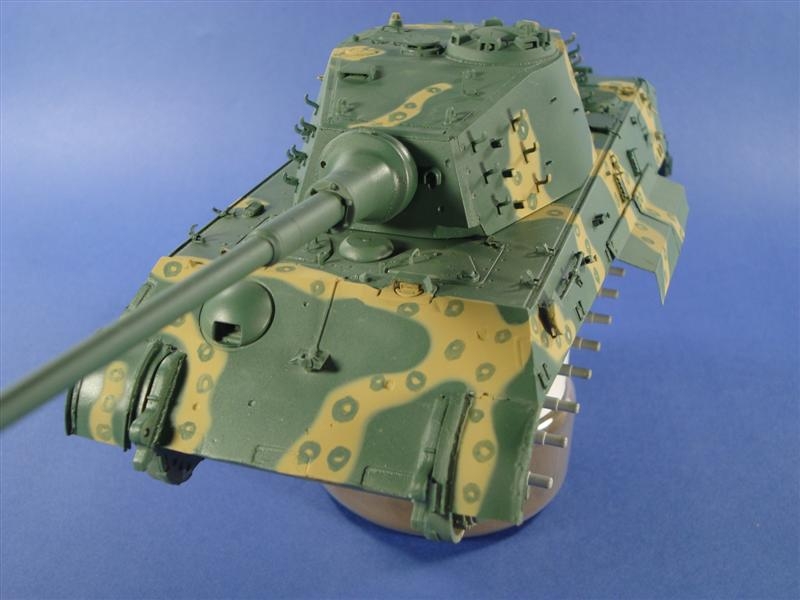
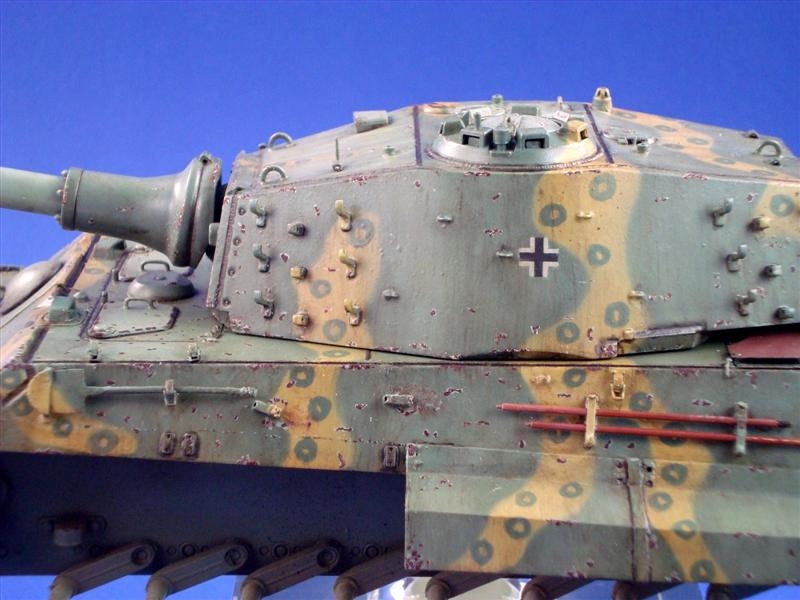
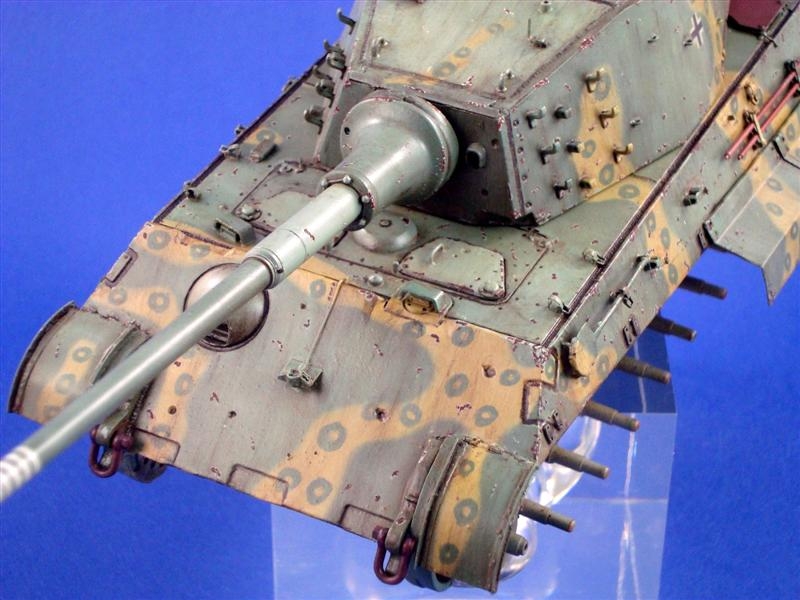
The turret was relatively easily converted to match the final type starting by the track hangers. From March 45 there were to be six pairs of them per side instead of traditional four. The additional parts are in the box as it contains sprues from the previous Jagdtiger kit so it's an easy task. Another important detail were welded camouflage loops made from a thin cooper wire - a feature known much better from late Panthers G than Tiger II. The rain cover over the gunner's sight should not be cut off as marked on the instructions (step 18). This cover was introduced on the final vehicles probably from March. To continue the conversion the rear hatch was modified to match the late style by adding two bolts and changing the shape of upper corners. At the end a simplified MG mount on the commander's cupola and an additional antenna base were added. Pictures 2 & 3


About the Author


Comments
Beautiful job, Pawel. Well researched - it was a joy to follow your build tread. Excellent result!
Thanks for sharing
MAY 25, 2010 - 07:59 PM

Great to see this up on the site mate, it's great to get a 'summary' of the build after following it along the way in your excellent blogs.
Exceptional work as always!
James
MAY 25, 2010 - 10:47 PM

Thanks a lot guys for the kind words, it was a great pleasure to build this model with all the interest and support I got.
spit
MAY 26, 2010 - 08:01 PM

Just great! The weathering was very good. Dirty but just right. I also like the choice of camouflage. I look forward to see more of your builds.
MAY 30, 2010 - 10:10 AM
Thanks Noli for your comments. I hope to be back in some time.
spit
MAY 31, 2010 - 09:37 AM
Copyright ©2021 by Pawel RZYMSKI. Images and/or videos also by copyright holder unless otherwise noted. The views and opinions expressed herein are solely the views and opinions of the authors and/or contributors to this Web site and do not necessarily represent the views and/or opinions of Armorama, KitMaker Network, or Silver Star Enterrpises. All rights reserved. Originally published on: 2010-05-22 00:00:00. Unique Reads: 21476

WEB HOSTING BY


Copyright ©2021 Armorama and Kitmaker Network, a subsidiary of Silver Star Enterprises
All Rights Reserved. Please read our Conditions of Use and Privacy Policy.
All Rights Reserved. Please read our Conditions of Use and Privacy Policy.