

1⁄35Paper Panzer Half-Track
8
Comments

Introduction
The Sdkfz 251 series of half-tracks served a variety of roles for the German forces during World War 2 with 22 variants ultimately being produced. A 23rd variant was drawn-up but never entered production and is known as the 251/23. The design was an attempt to create a reconnaissance vehicle by using the Ausf D vehicle in combination with a 2.0cm KwK 38 or Flak 38 in a Hangelafette turret similar to that used on the Sdkfz 234/1 or Aufklarungspanzer 38(t). No authenticated photos of this vehicle exist and its widely believed that this variant never got off the drawing-board and is therefore a paper panzer. Cyber-Hobby, as the boutique arm of DML, has produced a limited edition kit representing the 251/23 and is the subject of this build project.Lower Hull Construction
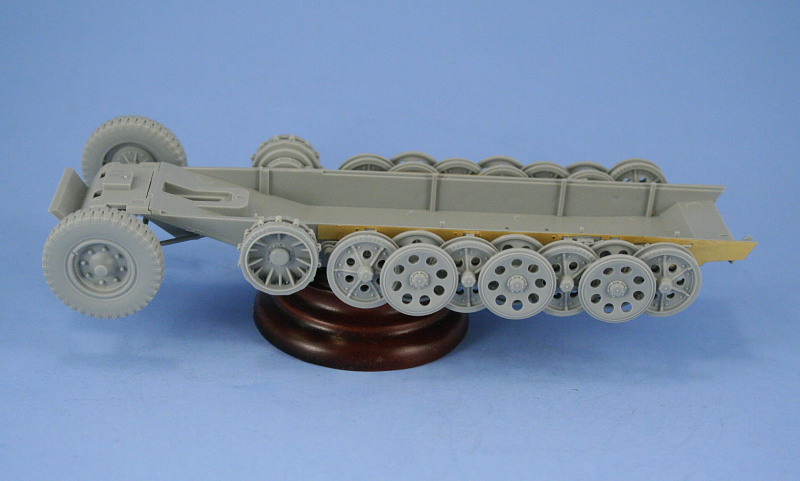
The first few steps of the construction deal with the lower hull and running gear and are familiar to anyone who has built one of DMLs 251 series of kits. I skipped over the installation of the fuel tanks and transmission details since these are hidden under the floor plate anyhow and arent necessary for the build. The kit-included PE extra side armor was installed along with the suspension arms and idler mounts, with some care needed to keep them aligned properly since the slot tabs have just a bit of play in them. The front wheels and their suspension are one of the more complex assemblies in the entire construction of the kit. The rocker arms and how they connect up with the wheel hubs and leaf springs is very complex and almost requires a third hand to get it all together. In the end, I was able to construct it so that the wheels remained steer-able and the suspension functioning properly laterally to insure flexibility for final alignment of the wheels. The road wheels were also assembled in their corresponding pairs for the interleaved arrangement with the exception of the end-cap wheels. Each of the road wheels has multiple sprue attachment points, so careful removal and clean-up was necessary to preserve them in good shape. The wheels were test-fitted using blue-tack to hold them in place and allow for easy removal for painting and detailing later on.Interior
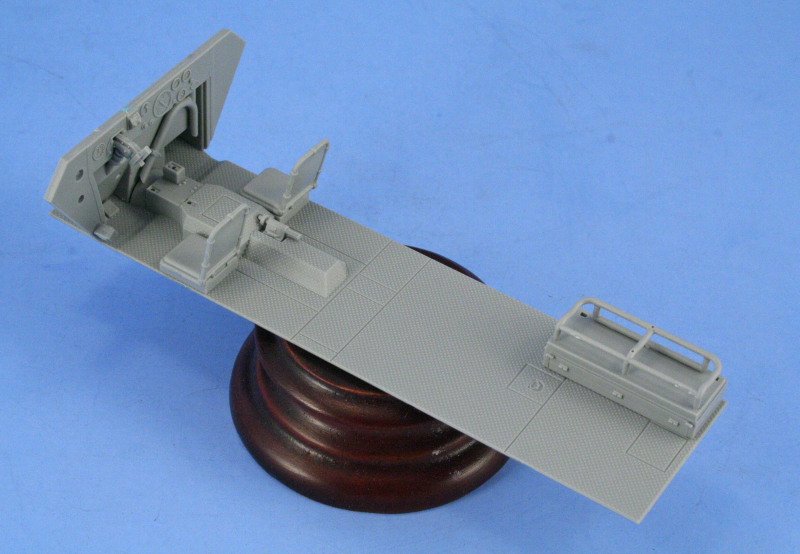
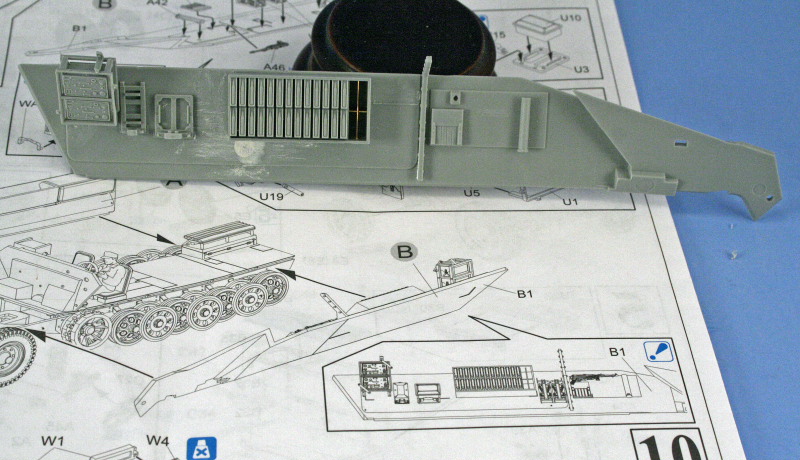
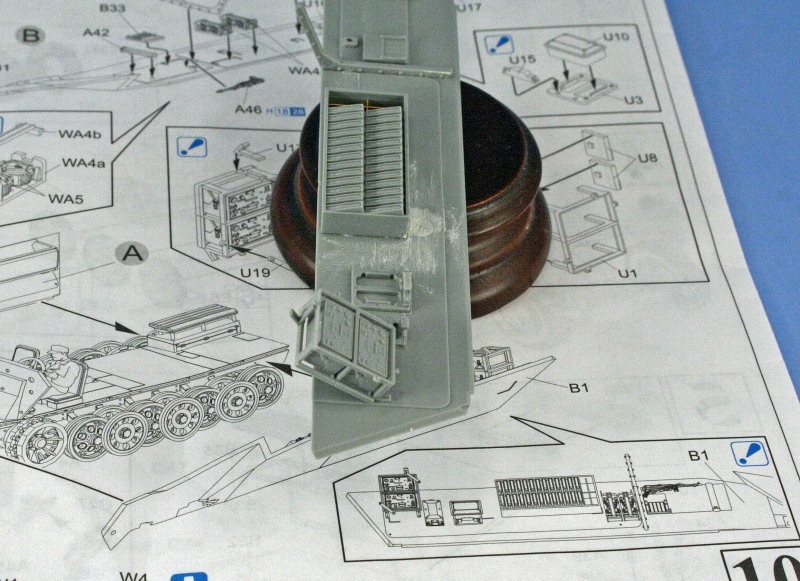
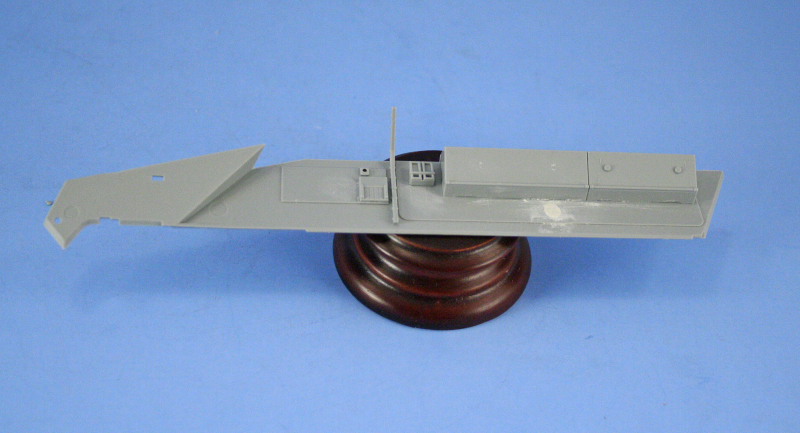
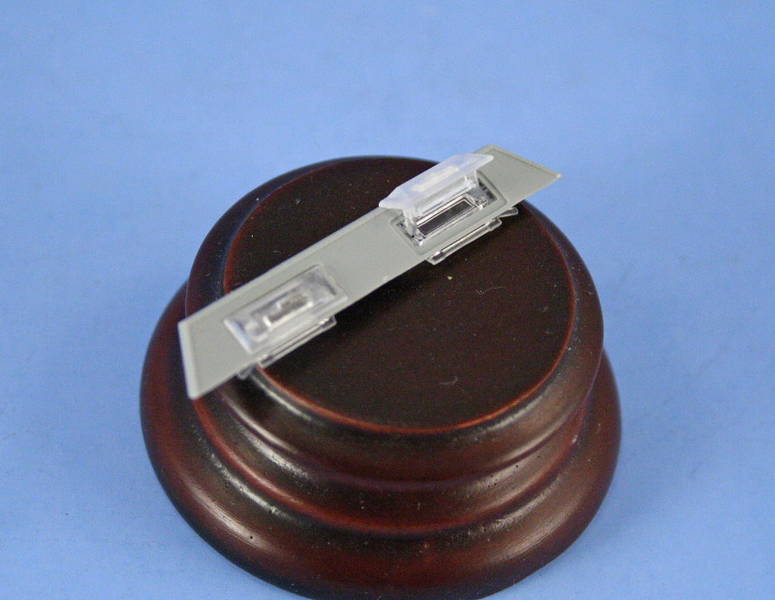
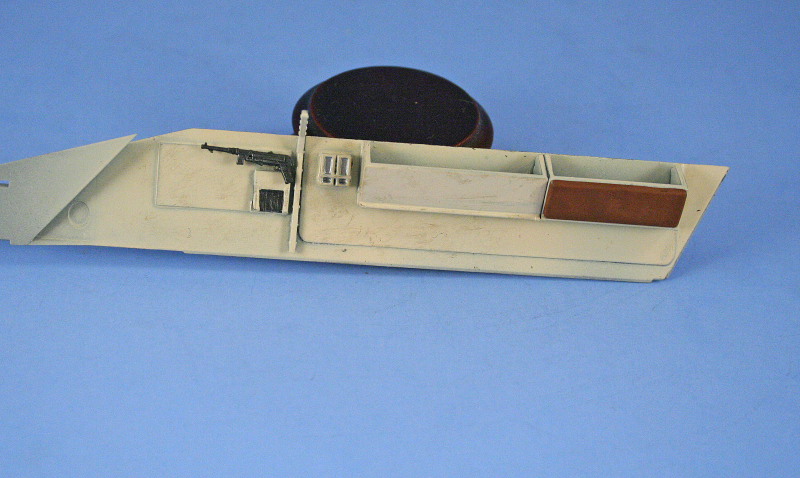
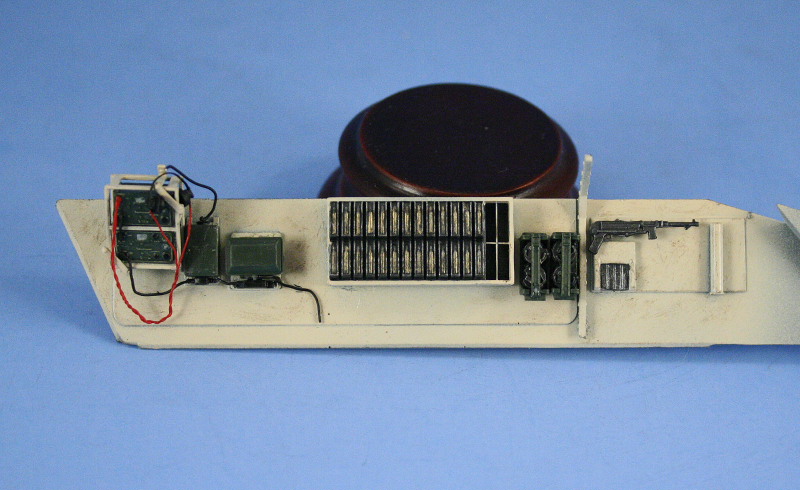
One of the attractive features of this kit is that, despite the fact that its a closed-top vehicle, it still provides a substantial amount of interior detail. I decided early on that I would include as much of the interior detail as possible and make it at least partially viewable by leaving the rear hull doors in the open position along with the detail viewable through the open turret. The interior would be finished in Elfenbein with a Red Oxide floor and this in turn drove the order in how the interior was constructed and painted. For the most part, the kit instruction steps were done in order, with the floor plate and drivers area getting the first attention. This is the standard interior provided in DMLs kits and included decals for the instrument panel which were added after painting. Only one bench seat and back is installed on the right side to provide a seat for the radio operator and the holes required for that need to be opened up in the floor plate, something the instructions neglect to indicate. For the front seats, I selected the option that allowed for the PE cushion spring inserts to be used, although these are quite delicate and werent installed until after the seats had been painted and detailed. The lower hull sides, particularly on the left side, are populated with quite a bit of interior equipment but also have a myriad number of molded in locator marks, many of which werent appropriate for this variant, so some head-scratching and knife work were required to get things in their proper final position and remove the un-needed marks. Some deep sink marks were also present and required putty filling and sanding to correct. The most critical part of all the detail is the 2.0cm ammunition rack on the left side. The instructions are somewhat vague and conflicting on its exact location and it is vital that it be positioned properly to avoid causing a fit problem with the hull roof. The little side diagram misleads you into thinking that the ammunition rack should sit raised on the hull panel when in fact it needs to sit flush to have sufficient clearance with the hull roof. Also on the left side are the radios and their rack mounts. These, unlike the ammunition rack, do need to sit raised and are actually supposed to be cantilevered out from the lower and upper hulls to allow them to stand level for use by the radio operator. The racks are multi-part affairs along with the radios and have some very fine details, some of the best Ive seen in styrene, and would get some additional detail attention once the interior was painted. As an added touch, I also decided to take advantage of the detailed visor assemblies provided in the kit and construct the drivers visor not only open but with the foul weather glass in place as well. This required some careful work since all of the assembly is done using clear styrene parts and would have to be masked on both the interior and exterior surfaces to preserve it during painting, so once again some handy blue-tack was pressed into service for that. The interior was then painted an overall coat of Model Master enamel Flat Black followed by a coat of Interior Panzer Buff with the floor plate painted with Rust for the Red Oxide finish. All the corresponding details were finished in their respective colors and the interior dry brushed with Raw Umber to simulate some light wear. The floor plate was dry brushed lightly with Steel and also some Raw Umber for the same effect. Last but not least, I add some additional detail to the radios provided and used some fine gauge solder along with some spare PE headphone bands and styrene ear-pieces from a DML figure set originally meant for the Hummel in the spares bin to add some detail. The radios were wired up along with the junction boxes and the headphones left hanging on the edge of the rack to add a lived in touch to the interior.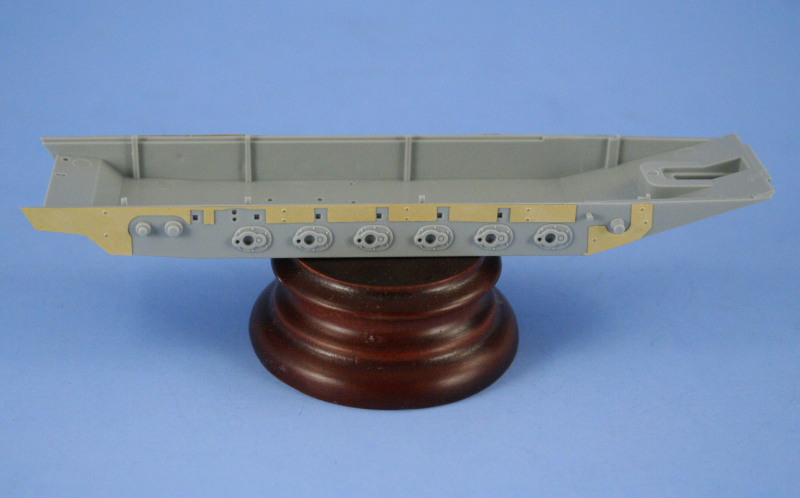


About the Author


FROM: TEXAS, UNITED STATES
Like many, I started out in the hobby as a kid building airplanes to hang from my bedroom cieling. I took a long break from the hobby, returning in 2001 with an interest in armor inspired mostly by online gaming. WW2 armor, 1/35 scale, is my preferred genre with a special taste for the stranger vehi...
Comments

Looking very purposefully, this combo. And a beautiful build. Although I personally would've added a 3-tone scheme.
One question, is it doable to use a regular 251/D and use parts from another vehicle to donate the Schwebe-laffette?
Or are there too many other areas that need modifying?
But it is looking very very nice, even with the single color scheme it still looks interesting.
Well done!
APR 21, 2007 - 11:34 PM

Herbert,
Thanks for your comments, always appreciated. I was tempted to do a 3-tone...even thought about a factory hard-edged scheme...but ended up with the straight Dunkelgelb scheme after looking at similar prototypes for the Aufklarungspanzer, Gepard, etc. where they show the prototype vehicles in plain Dunkelgelb plus I wanted to see what I could do with it from a weathering perspective so it was an "experiment" in more ways than one.
Not sure I understand your question though about swapping out parts for a 251 D? Do you mean if the Hangelafette turret can be used on another 251 D like the AFV or on another kit/ vehicle entirely? The turret is a stand-alone set of sprues/parts with a specially provided hull roof with turret ring as a one-piece modification, otherwise everything else in the kit is standard 251-D parts.
APR 22, 2007 - 12:42 AM
No I mean, since this is a one time limited edition "it will never ever be produced again" model, can you take a similar turret from another kit, and craft that on a regular D without too much additional modifications?
I love the way a 251 looks, although I've never ever built one, and this one looks very "aggresive".
So, should I wish to build one using a standard D, can I plop in a Schwebelaffette from a 250/9 or something like that?
APR 22, 2007 - 06:14 PM
Herbert,
Makes sense now, for you to get the right hybrid you'd have to take a 251-D and scratchbuild a roof top for it with turret ring and then could adapt a Hangelafette turret from either the 234/1 or Aufklarungspanzer 38(t) to get the right turret and gun mount. The 250/9 or 222 turret aren't the same layout/design in relation to the gun mount and interior and won't work on the 251 hull. The 250/9 turret has post mounts for the seats and gun whereas the 251/23, 241/1 turret has the seats "hanging" (hence the name of the mount) from the turret frame itself and uses a tank like turret ring for rotation.
APR 22, 2007 - 06:34 PM


A beauty Bill very nice finish on this one i like it a lot, i am yet to tackle one of dragons halftracks but i have 3 in the stash and it will be nice having this for reference when building one.
Ron.
APR 25, 2007 - 09:05 PM
Thanks Ron, the DML 251 series of kits present some interesting subjects although the accuracy/detail varies from the earlier to the later versions, they are all solid kits IMHO.
APR 26, 2007 - 01:56 AM
Copyright ©2021 by Bill Plunk. Images and/or videos also by copyright holder unless otherwise noted. The views and opinions expressed herein are solely the views and opinions of the authors and/or contributors to this Web site and do not necessarily represent the views and/or opinions of Armorama, KitMaker Network, or Silver Star Enterrpises. All rights reserved. Originally published on: 2007-04-22 00:00:00. Unique Reads: 29032

WEB HOSTING BY


Copyright ©2021 Armorama and Kitmaker Network, a subsidiary of Silver Star Enterprises
All Rights Reserved. Please read our Conditions of Use and Privacy Policy.
All Rights Reserved. Please read our Conditions of Use and Privacy Policy.