

1⁄35Changing the Gepard's Spots
5
Comments

INTRODUCTION
The Flakpanzer 38(t), sometimes known as a Gepard, was a stop-gap weapon using the M type chassis of the versatile 38(t) family in combination with a 2.0cm Flak 38 in an attempt to provide mobile Flak support for armored units. 140 were ordered in 1943 with many entering service in time for the Normandy invasion where they fared badly in combat, with the final 10 in the order actually being finished as Grilles instead. This build project consists of a 1/35 Alan kit as the base with resin hull conversion and update by Azimut, Flak 38 kit from Tristar, Armorscale Flak 38 barrel, Eduard PE detail, ModelKasten replacement sprockets and idlers, and ModelKasten tracks. This build will be finished as a representation of a vehicle in Normandy assigned to the 9th SS Hohenstaufen Division.hull conversion
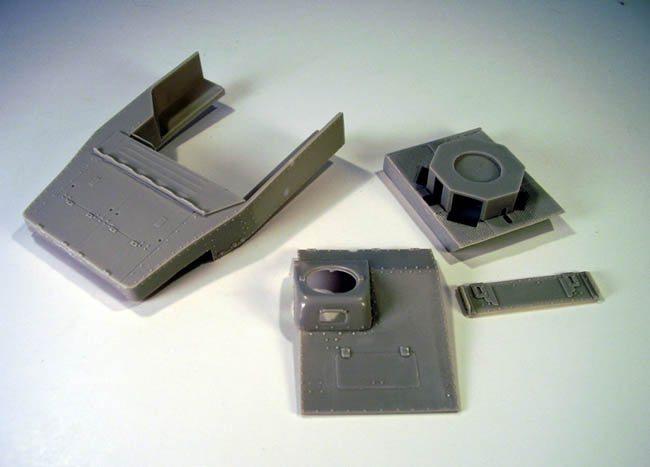
Currently the Alan kit is the only 1/35 styrene kit available for this vehicle and it shares a common hull with the Alan Grille M kit among other parts. As such, the upper hull has the later square sided drivers compartment as well as other inaccuracies in relation to a Gepard hull that also carry over into the design and layout of the fighting compartment. The Azimut conversion/upgrade set includes a complete upper hull as two separate pieces, a correct pedestal mount for the Flak 38, as well as the correct firewall and side panels for the Gepard arrangement vs. the fighting compartment of a Grille. A considerable amount of surgery using a razor saw was employed to adequately alter the Alan hull parts to accept the resin pieces, with some light casualty suffered along the way in the form of various nicks and cuts due to lack of proper attention at all times by the builder! The Azimut pieces are a close but not exact drop fit to the Alan parts and some putty and filling work using 0.5mm styrene was necessary to close up some of the resulting gaps/joins. The Azimut drivers hatches were not completely molded and deformed, rendering them unusable and necessitating the surgical adaptation of the Alan hatches and molded on hinge points to fit the area on the Azimut compartment. The Azimut hatch opening was slightly enlarged and the hinge points cut from the Alan hull and transferred with their position altered slightly to accept the Alan hatch plates in the closed position.Fighting Compartment
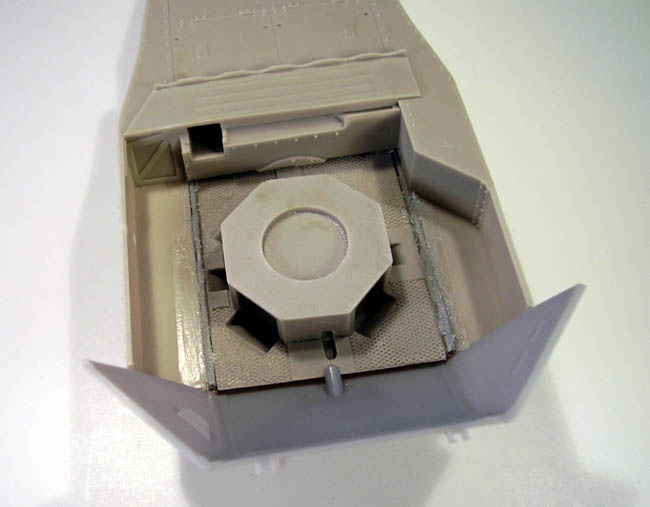
The Azimut pieces replaced virtually the entire lower portions of the fighting compartment with the exception of the lower hull sides serving as a support point for the large resin gun mount pedestal. This piece is a solid and heavy block of resin and as such required a very strong bond to hold it in place. This was achieved with the use of Apoxysculpt 2-part epoxy putty rolled into thin strips and sandwiched between the resin and styrene and allowed to dry rock hard over a couple of hours once in position. The pedestal has the correct ammo box slots for production vehicles vs. the Alan kit design and is molded with a diamond tread pattern as well but this pattern does not extend to the full areas of the compartment as it should. The Eduard PE set includes a floor plate insert designed for the Alan pedestal layout and was used to extend the pattern but required some minor modifications with the Dremel to achieve the correct fit. Portions of the Alan pedestal were removed to form the framework of the perpendicular ammo racks with two of the Alan ammo boxes cut down and modified to fit on the right side of the compartment. Additional ammo boxes provided in the Tristar kit were installed in the right and left side brackets constructed from the Eduard set. The remaining pedestal ammo holders were filled using Azimut resin boxes designed to fit in the areas provided with only minor sanding/adjustment required. Lastly, the Eduard radios and brackets were constructed and installed in place of the Alan kit parts with wiring provided in the form of fine solder secured with CA. The spare barrel box from Tristar was also employed with a small modification in the form of 3 angled shims made from sheet styrene added to allow it to be installed at the proper angle at the front of the compartment.

About the Author


FROM: TEXAS, UNITED STATES
Like many, I started out in the hobby as a kid building airplanes to hang from my bedroom cieling. I took a long break from the hobby, returning in 2001 with an interest in armor inspired mostly by online gaming. WW2 armor, 1/35 scale, is my preferred genre with a special taste for the stranger vehi...
Comments


Interesting & informative article & nice finished model. I didn't realise the Alan model had so many errors on it! Puts my OOB build in perspective, mind you I thought that was hard enough!
JAN 06, 2007 - 01:39 AM

Thanks for the comments Dave!
Hohenstaufen,
I originally picked up the Alan kit on a sale for around $15 if memory serves me correctly...and then it quietly sat for a while until the moment was right and I felt ready to build it. It wasn't until I started to look into the history and features of the Gepard that I realized where the areas for potential improvement were and then had to decide if I wanted to take the plunge or not to correct it or just build it as is. Turned out to be the most involved $15 project I've ever worked on, at least the story I've kept to for my wife at any rate. :-)
JAN 06, 2007 - 03:01 AM

Copyright ©2021 by Bill Plunk. Images and/or videos also by copyright holder unless otherwise noted. The views and opinions expressed herein are solely the views and opinions of the authors and/or contributors to this Web site and do not necessarily represent the views and/or opinions of Armorama, KitMaker Network, or Silver Star Enterrpises. All rights reserved. Originally published on: 2007-01-06 00:00:00. Unique Reads: 24998

WEB HOSTING BY


Copyright ©2021 Armorama and Kitmaker Network, a subsidiary of Silver Star Enterprises
All Rights Reserved. Please read our Conditions of Use and Privacy Policy.
All Rights Reserved. Please read our Conditions of Use and Privacy Policy.