

Campaigns: Active Campaigns
Campaigns that are either in planning or underway should be grouped here.
Campaigns that are either in planning or underway should be grouped here.
Hosted by Richard S.
Bundeswehr 2020 Group Build

GulfWarrior

Joined: January 05, 2010
KitMaker: 1,051 posts
Armorama: 1,029 posts

Posted: Saturday, July 25, 2020 - 02:13 PM UTC
Thanks for the tip. I assume youre talking about one drop per paint cup?


GazzaS

#424

Joined: April 23, 2015
KitMaker: 4,648 posts
Armorama: 2,248 posts

Posted: Saturday, July 25, 2020 - 04:23 PM UTC
Torsten,
Nice work... yes, the M110 is a big beast. Thank you for the reference picture. I think these guys are wearing the Filzlaus?
Richard,
Your Dingo looks pretty good!
Peter,
Thanks for the reco... Think I'll stick with the kit tracks.
Gaz
Nice work... yes, the M110 is a big beast. Thank you for the reference picture. I think these guys are wearing the Filzlaus?
Richard,
Your Dingo looks pretty good!
Peter,
Thanks for the reco... Think I'll stick with the kit tracks.
Gaz
Removed by original poster on 07/26/20 - 07:00:44 (GMT).

chnoone
Joined: January 01, 2009
KitMaker: 1,036 posts
Armorama: 1,033 posts
Posted: Saturday, July 25, 2020 - 07:01 PM UTC
Quoted Text
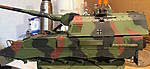
Here is the PzH 2000 covered with dust coming back from a training session with the muzzle covered and the gun secured on the travel lock. The flashing light is one the rear of the turret.
I consider this one complete if you have no further remarks.
Olivier


..... very nice !
U're good to go

Reminds me to finish mine .....

Cheers
Christopher

chnoone
Joined: January 01, 2009
KitMaker: 1,036 posts
Armorama: 1,033 posts
Posted: Saturday, July 25, 2020 - 07:34 PM UTC
..... and a few other BW projects
Chefs
Christopher
Chefs
Christopher

Tank1812
Joined: April 29, 2014
KitMaker: 1,112 posts
Armorama: 886 posts
Posted: Saturday, July 25, 2020 - 10:43 PM UTC
Quoted Text
Thanks for the tip. I assume youre talking about one drop per paint cup?
That is correct.
Also if you didnt know, windex or cheap window clearer will clean up Vallejo and Tamiya paints very nicely in the airbrush. I shot a little alcohol afterwards to prevent any issues. I also have windex wet qtip on hand for any tip clogging issue for both just Incase.
GulfWarrior
Joined: January 05, 2010
KitMaker: 1,051 posts
Armorama: 1,029 posts
Posted: Sunday, July 26, 2020 - 02:00 AM UTC
Ive been using Windex for cleaning my airbrush and alcohol for thinning my Tamiya paints for years. Ive recently started using Vallejo Model Air for certain colors and started a using a double action airbrush along with my trustee Paasche H.
Thanks again for the tip. I guess an old dog can learn a new trick now and then!


Thanks again for the tip. I guess an old dog can learn a new trick now and then!

yeahwiggie

Joined: March 24, 2006
KitMaker: 2,093 posts
Armorama: 1,359 posts

Posted: Sunday, July 26, 2020 - 02:53 AM UTC
Quoted Text
Good to see some old kits getting a viewing Ron.
The Shep Paine build and proposed old timer one for next year shows plenty of guys have stuff in the stash, they just need incentive to move it to the bench.
Yeah, it sure is relieving to just build something a little older straight out of the box. Not go bezerk on complicating stuff or worry to much on details.
The build is quite straight forward, no real issues or pitfalls. The fit in some places is not exactly perfect, but then again it is a 40 years old kit! I did experience quite some moulding seams though, many of them on the small parts. For those really wanting to do an extra effort, there are plenty of places for extra detailing or add in's. I just did not want to.
I chose to glue everything in place, hoping those small parts would be easier to reach and handle for further cleaning.


Ready for paint!

GulfWarrior
Joined: January 05, 2010
KitMaker: 1,051 posts
Armorama: 1,029 posts
Posted: Sunday, July 26, 2020 - 07:23 AM UTC
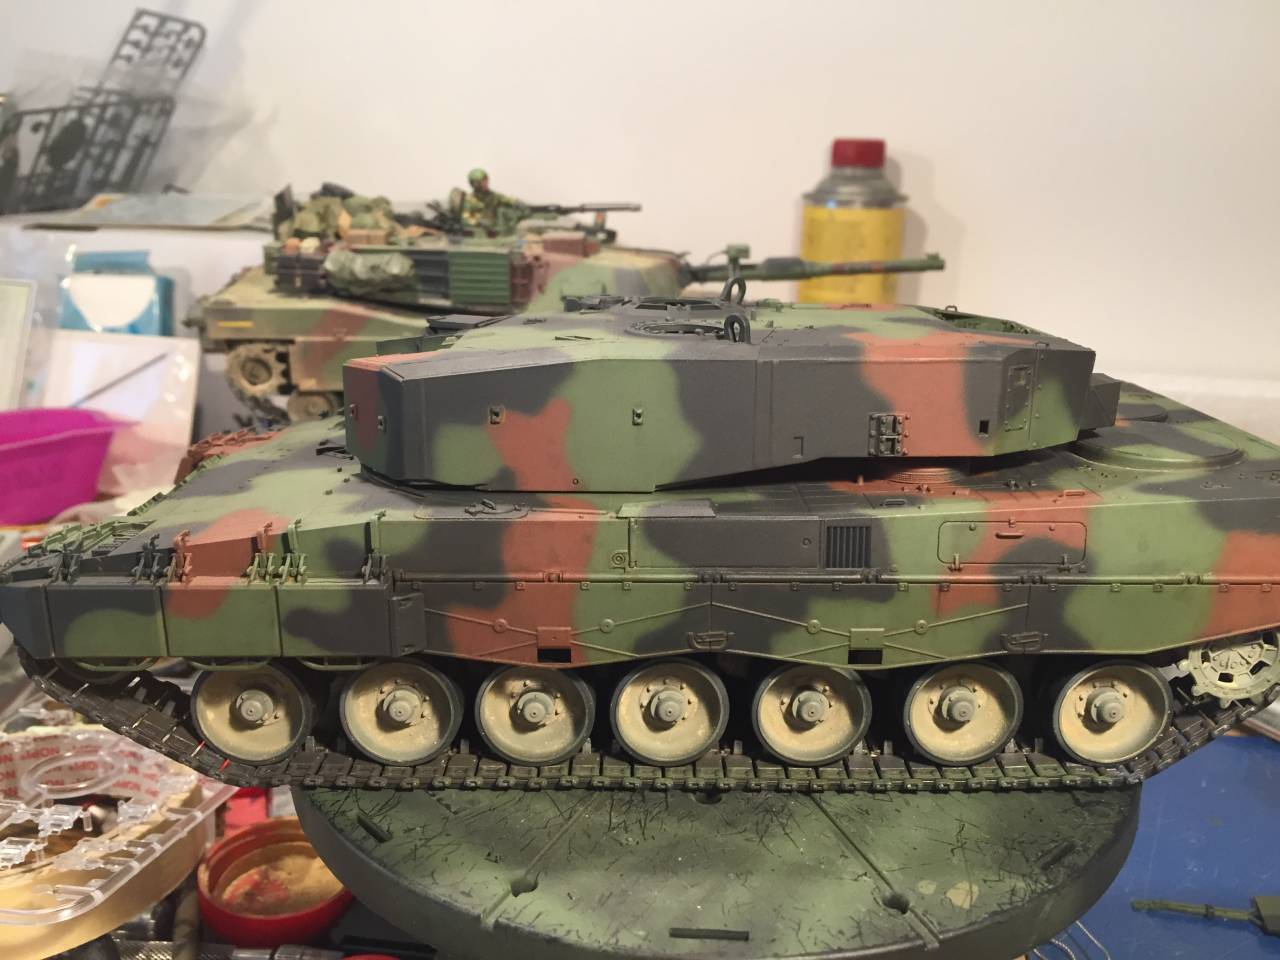
I got the green finished today.

The silly putty masking turned out better than I thought it would. I've got to touch up a couple places but all in all it didn't turn out too terrible!
I'm going to let it sit for a couple days while I work on the 2S1 Gvozdika. Then I'll start masking the dark tan. Thankfully there's a LOT less of that!
barkingdigger

#013

Joined: June 20, 2008
KitMaker: 3,981 posts
Armorama: 3,403 posts
Posted: Wednesday, July 29, 2020 - 08:23 PM UTC
Some great-looking models here! (I have a soft spot for the Tamiya 1A4...) I needed a little "head cleaner" to de-stress yesterday and decided to start gluing plastic! Mine is the Meng 1A3/4, being built pretty much OOB as an A3 to fill a gap in the line-up on my shelf. A few hours has got the hull mostly done, but so far the only pic I have is the box:


BlackWidow

Joined: August 09, 2009
KitMaker: 1,732 posts
Armorama: 326 posts
Posted: Thursday, July 30, 2020 - 04:19 AM UTC
Tom, there's a saying going around and you might have heard it somewhere before: "You just can't have too many Leopards".
Though I'm more a fan of the Leopard 2 ....
Well folks, the end of the assembly line is coming nearer and nearer for my M 110 ....


There's only the crew seat missing now, everything else is attached. I'm still looking for some touch ups to do before decaling. Everything should be done by next weekend, I guess. Next weekend, not this coming one ....
Torsten
Though I'm more a fan of the Leopard 2 ....
Well folks, the end of the assembly line is coming nearer and nearer for my M 110 ....
There's only the crew seat missing now, everything else is attached. I'm still looking for some touch ups to do before decaling. Everything should be done by next weekend, I guess. Next weekend, not this coming one ....
Torsten

GulfWarrior
Joined: January 05, 2010
KitMaker: 1,051 posts
Armorama: 1,029 posts
Posted: Thursday, July 30, 2020 - 07:09 AM UTC
Looks good Torsten! 
barkingdigger
#013
Joined: June 20, 2008
KitMaker: 3,981 posts
Armorama: 3,403 posts
Posted: Friday, July 31, 2020 - 05:19 AM UTC
Quoted Text
Tom, there's a saying going around and you might have heard it somewhere before: "You just can't have too many Leopards".
Oh how true! A couple evenings has got me this far:


Other than replacing a few moulded-on handles, the tow-cable string, and the rubbish exhaust grilles (with old but good Italeri ones!) this is mostly still OOB...
yeahwiggie
Joined: March 24, 2006
KitMaker: 2,093 posts
Armorama: 1,359 posts
Posted: Friday, July 31, 2020 - 06:37 AM UTC
The ensuing discussions regarding "olivgelb" or olive yellow strongly reminds me of the never ending discussion on German "dark yellow" or Russian "green" with as many opinions as contributors.
The colour is question is the Bundeswehr Gelboliv RAL 6014
Some of the discussions:
Panzerbär
Missing Lynx
Armorama
And then you search the internet....
And these are just the first hits. Now you tell me..


Plus some useful walkarounds of 2 separate 1A4's and here too you immediately can see the huge difference in colour and sheen. One being almost grey and completely matt, the other much more olive drab with a sheen.
Prime Portal Ulrich Wrede

Prime Portal Scott Tremblay

Got this mix from Armorama;
Two parts Tamiya XF-51 Khaki Drab
One part Tamiya XF-74 JGSDF Olive Drab
Half part Tamiya XF-57 Buff
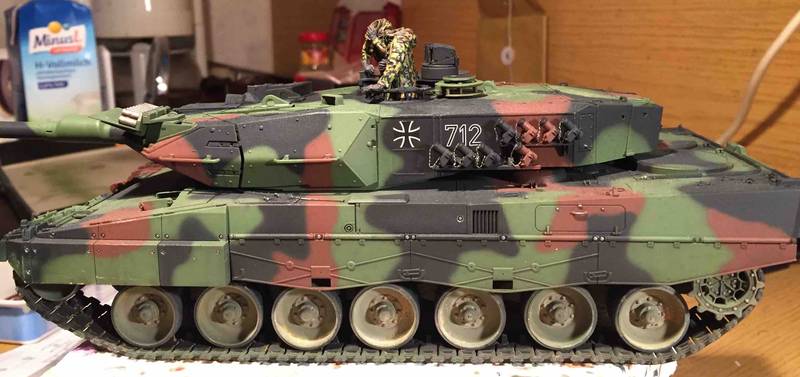
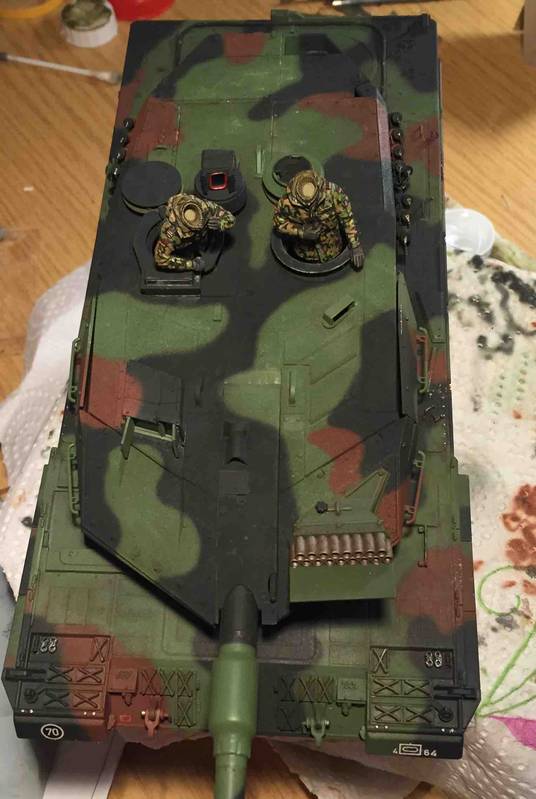
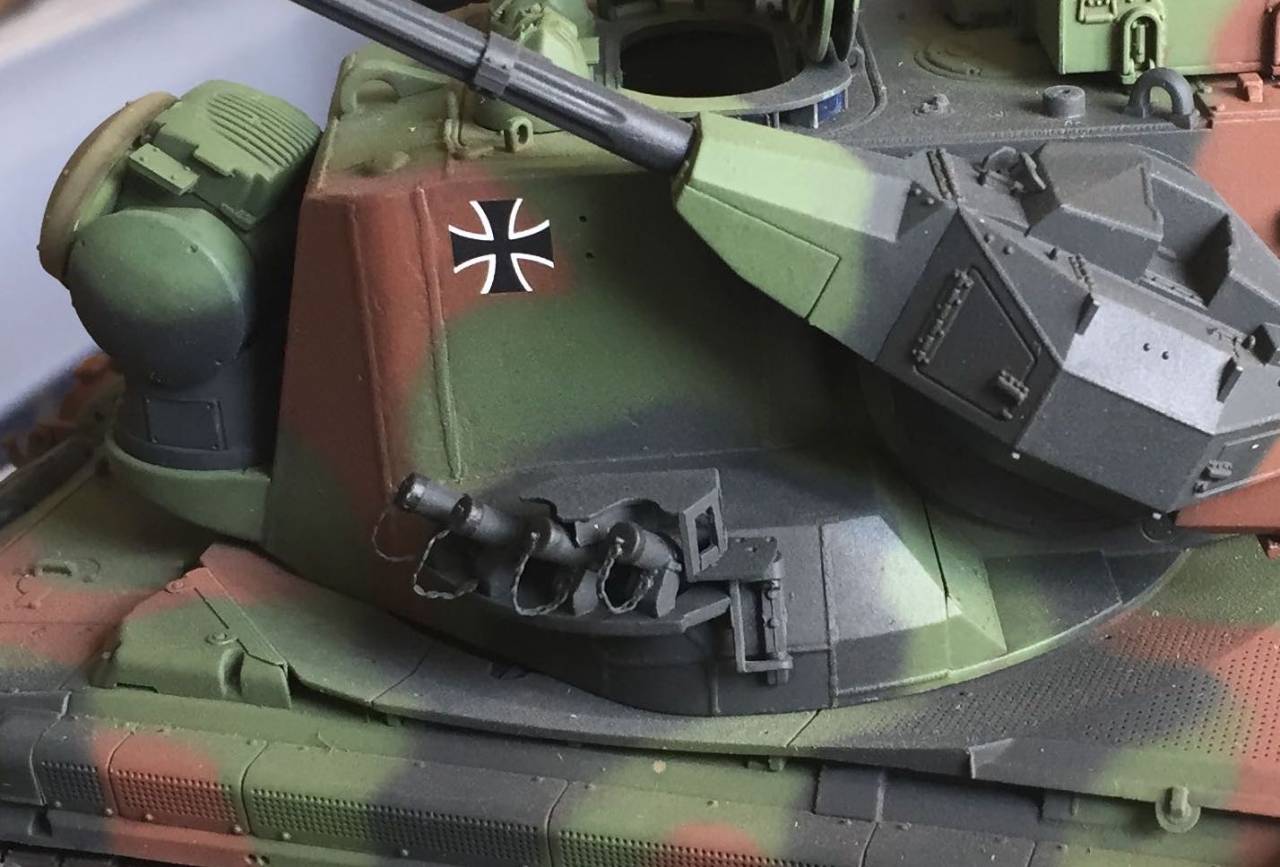
However, given the vast differences, spanning almost the entire olivgreen scale, I went for my own mix, using what I had at hand; Tamiya's XF-51 Khaki Drab with a dash of XF-4 Yellow Green. I used pure khaki drab at first, because it was suggested, but found the colour to greyish brown. The mix is rather on the yellow side.
The wading tube is the original plastic, the tank the mix and the cover behind the main gun the khaki drab. I experimented with a neutral wash on the underside of the turret, making the colour darker and suppressing the yellow.


The colour is question is the Bundeswehr Gelboliv RAL 6014
Some of the discussions:
Panzerbär
Missing Lynx
Armorama
And then you search the internet....
And these are just the first hits. Now you tell me..
Plus some useful walkarounds of 2 separate 1A4's and here too you immediately can see the huge difference in colour and sheen. One being almost grey and completely matt, the other much more olive drab with a sheen.
Prime Portal Ulrich Wrede
Prime Portal Scott Tremblay
Got this mix from Armorama;
Two parts Tamiya XF-51 Khaki Drab
One part Tamiya XF-74 JGSDF Olive Drab
Half part Tamiya XF-57 Buff
However, given the vast differences, spanning almost the entire olivgreen scale, I went for my own mix, using what I had at hand; Tamiya's XF-51 Khaki Drab with a dash of XF-4 Yellow Green. I used pure khaki drab at first, because it was suggested, but found the colour to greyish brown. The mix is rather on the yellow side.
The wading tube is the original plastic, the tank the mix and the cover behind the main gun the khaki drab. I experimented with a neutral wash on the underside of the turret, making the colour darker and suppressing the yellow.
BlackWidow
Joined: August 09, 2009
KitMaker: 1,732 posts
Armorama: 326 posts
Posted: Friday, July 31, 2020 - 07:43 AM UTC
Ron, don't believe everything that is written or shown on the internet .... 
If you can get the blue Aqua Color cubes from Revell in Sweden, look for their No. 42 Gelboliv. That's the most accurate you can get. I have here an official RAL Color Chart and there RAL 6014 looks very much like Revell 42 (in fact it's vice versa .... ) Have a look at my M 110, it's painted all over with Revell 42.
Of course my monitor is not calibrated, but from the colour plate shown in your posting I would go for the left in the lowest row. I hope this will help you a bit. I'll try to make a photo of that colour in the RAL Chart tomorrow during day light.
Greetings to beautiful Dalarna!
Torsten
If you can get the blue Aqua Color cubes from Revell in Sweden, look for their No. 42 Gelboliv. That's the most accurate you can get. I have here an official RAL Color Chart and there RAL 6014 looks very much like Revell 42 (in fact it's vice versa ....
) Have a look at my M 110, it's painted all over with Revell 42.Of course my monitor is not calibrated, but from the colour plate shown in your posting I would go for the left in the lowest row. I hope this will help you a bit. I'll try to make a photo of that colour in the RAL Chart tomorrow during day light.
Greetings to beautiful Dalarna!
Torsten
yeahwiggie
Joined: March 24, 2006
KitMaker: 2,093 posts
Armorama: 1,359 posts
Posted: Saturday, August 01, 2020 - 05:18 AM UTC
I am calling this campaign done too for my part.
I ran into some difficulties, mainly due to the clear coats I used. The glosses turned out streaky and the satin gritty! I assume that the age of those clear coat might have to do with that, plus that I applied them with a brush. I am hesitant to do it with an airbrush, because I heard and read a lot about them turning a milky white.
First was a coat of clear gloss, then the decals. These are quite thick and have a tendency of silvering, despite the gloss. I then applied a dark brown wash. This went onto the tracks as well. When all had dried I added a coat of satin varnish, followed by a neutral grey wash on certain parts to break the green monotony. The contact areas between track and wheels were done with natural steel and the outside got a light dusting with rust powder. That unfortunately brings put the casting seams on the edges of the vinyl tracks, something that is really hard to remove.
I then picked out the tools with a matt varnish.
The kit has a few distinct drawbacks. One is that the hull front does not close entirely, leaving a gap. In hindsight I should have glued that in place before painting and have left off the sideskirts for installing the tracks instead. Also the headlight are solid castings, meaning you have to paint them. Never a good thing, I think.
I like how the colour turned out, though.
All in all not too bad for a 40 year old kit. It was a fun build, that I enjyed.
GulfWarrior
Joined: January 05, 2010
KitMaker: 1,051 posts
Armorama: 1,029 posts
Posted: Saturday, August 01, 2020 - 05:26 AM UTC
Not bad! Not bad at all!
terminators

Joined: February 20, 2012
KitMaker: 1,932 posts
Armorama: 1,907 posts
Posted: Saturday, August 01, 2020 - 06:02 AM UTC
Nice work yeahwiggie. I like the tracks. A little issue with those pin marks on the smoke launchers. Same problem on my TPZ Fuchs kit, I have replaced them with Trumpeter ones.
petbat
Joined: August 06, 2005
KitMaker: 3,353 posts
Armorama: 3,121 posts
Posted: Saturday, August 01, 2020 - 08:02 AM UTC
Wow Guys. Had a few issues on the PC the last couple of days and missed so many posts here. Ron, Richard, Tom and Torsten, just outstanding work guys.
Great job finishing the Leo Ron. Very nice indeed. I love the colour you mixed. Access to the Gallery is giving issues again (2 of us have had trouble getting our finished Shep Paine pics uploaded in time) so if you haven't already done so, don't forget to add your pics there. Thanks for joining in.
The M110 is really beefy with the longer barrel Torsten.
Nice choice on the Leo Tom. I am envious, as that is a kit I have wanted to pic up myself. It is a good base to build and Aussie AS1 Leopard from.
Glad to see your venture into Silly Putty met with your approval Richard.
Alex, there are several sets of Modern German grenade launchers on the market if you now need to replace the Trumpeter ones .
Well I have finally cleared the bench enough to lay some paint on the PZH 2000. I hope to have decent progress this week.
Keep up the great work fellows.
Great job finishing the Leo Ron. Very nice indeed. I love the colour you mixed. Access to the Gallery is giving issues again (2 of us have had trouble getting our finished Shep Paine pics uploaded in time) so if you haven't already done so, don't forget to add your pics there. Thanks for joining in.
The M110 is really beefy with the longer barrel Torsten.
Nice choice on the Leo Tom. I am envious, as that is a kit I have wanted to pic up myself. It is a good base to build and Aussie AS1 Leopard from.
Glad to see your venture into Silly Putty met with your approval Richard.
Alex, there are several sets of Modern German grenade launchers on the market if you now need to replace the Trumpeter ones
. Well I have finally cleared the bench enough to lay some paint on the PZH 2000. I hope to have decent progress this week.
Keep up the great work fellows.

barkingdigger
#013
Joined: June 20, 2008
KitMaker: 3,981 posts
Armorama: 3,403 posts
Posted: Saturday, August 01, 2020 - 08:19 AM UTC
Hi Ron,
Great finish on your Leo! But if the hull top is still loose you want to pop it off and swap the front roadwheel and the idler. Roadwheels had eight bolts, and the idler had 16...
Great finish on your Leo! But if the hull top is still loose you want to pop it off and swap the front roadwheel and the idler. Roadwheels had eight bolts, and the idler had 16...
yeahwiggie
Joined: March 24, 2006
KitMaker: 2,093 posts
Armorama: 1,359 posts
Posted: Saturday, August 01, 2020 - 06:05 PM UTC
Thanks guys!
I think I will stick to this routine of doing such a build in between every once in a while. It felt good to actually finish something fast and uncomplicated. Good for one's motivation!
@ Tom; I will do that!

I think I will stick to this routine of doing such a build in between every once in a while. It felt good to actually finish something fast and uncomplicated. Good for one's motivation!
@ Tom; I will do that!
GazzaS
#424
Joined: April 23, 2015
KitMaker: 4,648 posts
Armorama: 2,248 posts
Posted: Saturday, August 01, 2020 - 09:27 PM UTC
Plugging away on my M47.


Happy Modelling!
Happy Modelling!
BlackWidow
Joined: August 09, 2009
KitMaker: 1,732 posts
Armorama: 326 posts
Posted: Monday, August 10, 2020 - 07:52 AM UTC
Good progress on your M47, Gaz!
Well folks, I call this monster done. Just a bit of pastel chalk to give it a slightly dusty look and that's it.
Schwere Feldhaubitze M 110 A-2, 5./FArtBtl 11, Hannover, early 1980's
Kit is Italeri 1/35


Happy modelling everyone!
Torsten
Well folks, I call this monster done. Just a bit of pastel chalk to give it a slightly dusty look and that's it.
Schwere Feldhaubitze M 110 A-2, 5./FArtBtl 11, Hannover, early 1980's
Kit is Italeri 1/35
Happy modelling everyone!
Torsten
GulfWarrior
Joined: January 05, 2010
KitMaker: 1,051 posts
Armorama: 1,029 posts
Posted: Monday, August 10, 2020 - 09:50 AM UTC
Very nicely done, Torsten!
GazzaS
#424
Joined: April 23, 2015
KitMaker: 4,648 posts
Armorama: 2,248 posts
Posted: Thursday, August 13, 2020 - 08:57 AM UTC
Torsten,
Great job! I was in a battalion that had a few batteries of the 8-inch gun. I was on the M109A3 at the time.
Here are more shots of my M47 with painting started on the tracks.


I'm going for the look of a vehicle which has sat in garrison long enough for rust to begin forming on the tracks. The pink on the paint is the base color of the fresh rust.
Great job! I was in a battalion that had a few batteries of the 8-inch gun. I was on the M109A3 at the time.
Here are more shots of my M47 with painting started on the tracks.
I'm going for the look of a vehicle which has sat in garrison long enough for rust to begin forming on the tracks. The pink on the paint is the base color of the fresh rust.
 |

WEB HOSTING BY


Copyright ©2021 Armorama and Kitmaker Network, a subsidiary of Silver Star Enterprises
All Rights Reserved. Please read our Conditions of Use and Privacy Policy.
All Rights Reserved. Please read our Conditions of Use and Privacy Policy.