Golden Memories (campaign idea)
England - South West, United Kingdom
Joined: June 29, 2019
KitMaker: 604 posts
Armorama: 506 posts
Posted: Wednesday, February 05, 2020 - 10:09 AM UTC
So, the hull is together and the wheels, sprockets and idlers are done.

Also scratch built the side basket for the hull side next to the engine. I'm pretty happy with it, as these were always locally made by crews in camp.
The nice thing about CVRT's before they did the upgrade and they all got the Sabre bins for sides and front was that crews used all sorts of stuff for stowage improvements. Old ammo boxes, Chieftain end bins, Chieftain long bins cut in half, old tool boxes. All were bolted to the sponsor plate and or on to the hull side using the Veh tool fitting points.
Will get more done over the next few days. Enjoy
Sofiya, Bulgaria
Joined: November 24, 2017
KitMaker: 46 posts
Armorama: 46 posts
Posted: Wednesday, February 05, 2020 - 07:20 PM UTC
Quoted Text
Love the red-wine-seal-foil

In vino veritas!

Sofiya, Bulgaria
Joined: November 24, 2017
KitMaker: 46 posts
Armorama: 46 posts
Posted: Wednesday, February 05, 2020 - 07:29 PM UTC
The headlights:

The windshield is on place:

And some general view (the cab is not glued):

Sofiya, Bulgaria
Joined: November 24, 2017
KitMaker: 46 posts
Armorama: 46 posts
Posted: Wednesday, February 05, 2020 - 07:31 PM UTC
A couple of pictures - for size comparison:


#490
Sofiya, Bulgaria
Joined: September 22, 2016
KitMaker: 1,432 posts
Armorama: 1,390 posts
Posted: Friday, February 07, 2020 - 12:49 AM UTC
Awesome!
I started construction of GAZ-66 chassy and will post first pictures this weekend,

Sofiya, Bulgaria
Joined: November 24, 2017
KitMaker: 46 posts
Armorama: 46 posts
Posted: Friday, February 07, 2020 - 02:47 AM UTC
The custom made PE parts - mirrors, wipers and caps for the tanks.

BTW caps are already on their places:


North Carolina, United States
Joined: April 29, 2014
KitMaker: 1,112 posts
Armorama: 886 posts
Posted: Friday, February 07, 2020 - 03:20 AM UTC
Noice build and pe set!
How did you do the weathering on the wheels?
England - South West, United Kingdom
Joined: June 29, 2019
KitMaker: 604 posts
Armorama: 506 posts
Posted: Friday, February 07, 2020 - 04:21 AM UTC
Those extra little details bring it to life, looking very good. There is no way I could or would even consider PE for 1/72 ... The bits I'm doing in 1/35 makes my eyes and fingers ache ...and my temper go into the red scale lol...
England - South West, United Kingdom
Joined: June 29, 2019
KitMaker: 604 posts
Armorama: 506 posts
Posted: Friday, February 07, 2020 - 06:45 AM UTC
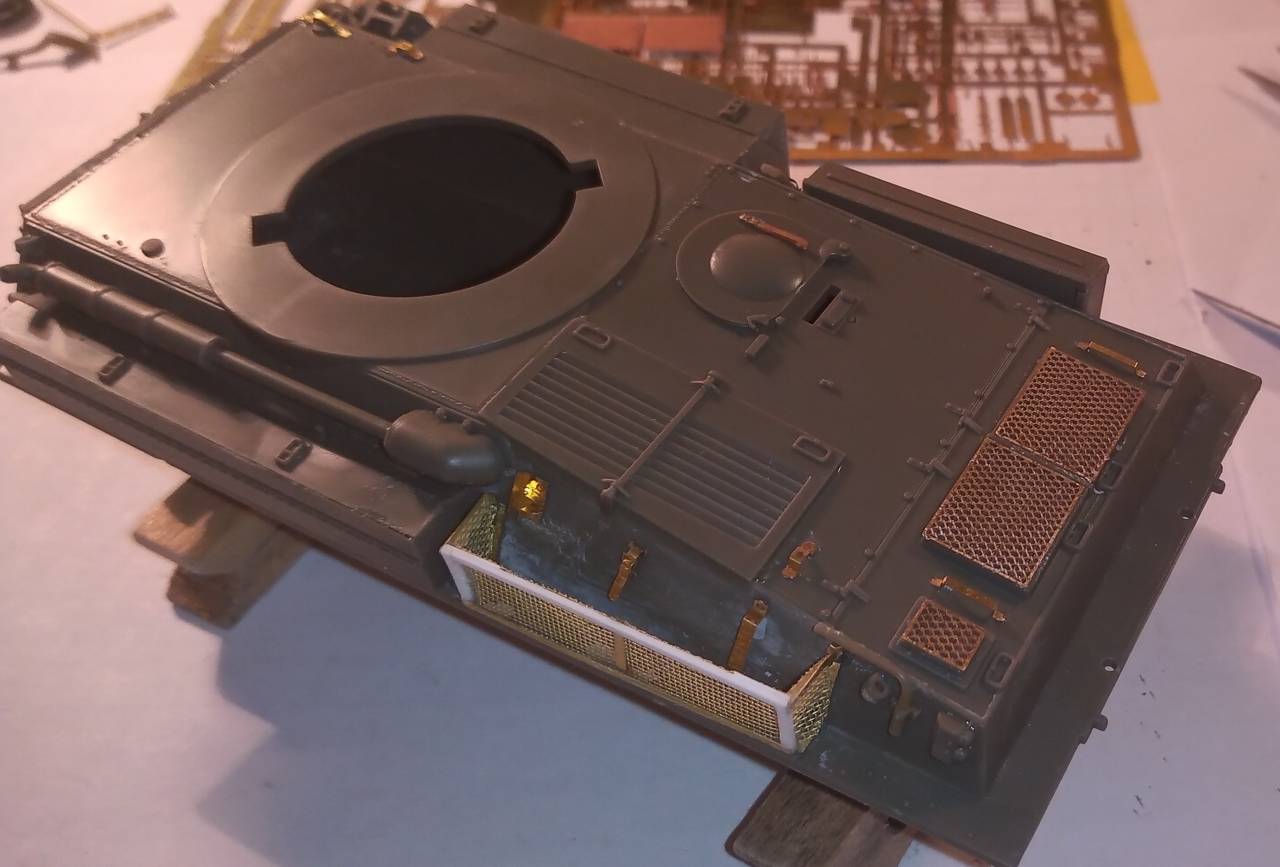
A little bit more done now hull is together with the lower half. Rear side bins added and my scratch built side basket and tool holder on the hull.

The detailing is actually pretty good on the AFV Scimitar, particularly on the bins for locks and hasps etc, so I think I can leave a fair bit of the PE off the wagon. I will do various pics just to show what PE I did use.
England - South West, United Kingdom
Joined: June 29, 2019
KitMaker: 604 posts
Armorama: 506 posts
Posted: Saturday, February 08, 2020 - 05:29 AM UTC
Some more minor bits added to the Scim, left hand hull bins and some PE

Also some more added to the engine decks. There will be slot of PE left over from this as like I said before, so many of the castings are really well detailed.
#490
Sofiya, Bulgaria
Joined: September 22, 2016
KitMaker: 1,432 posts
Armorama: 1,390 posts
Posted: Sunday, February 09, 2020 - 05:31 PM UTC
My build progress.
While some participants are ready and others almost ready with their kits, I managed to finish OOB construction of GAZ-66 chassy and engine:


Both come nicely detailed from the box, yet I'm tempted to add some cables and hydraulic lines.
Will see...
England - South West, United Kingdom
Joined: June 29, 2019
KitMaker: 604 posts
Armorama: 506 posts
Posted: Sunday, February 09, 2020 - 09:31 PM UTC
You have it looking good so far Angel .... very well detailed ....is the engine going to be in view or under the cover still ?
That distributor cap is crying out for some HT leads

and doing cables and hydro lines on the chassis ...... go on .... you know you want to haha

#490
Sofiya, Bulgaria
Joined: September 22, 2016
KitMaker: 1,432 posts
Armorama: 1,390 posts
Posted: Monday, February 10, 2020 - 03:31 AM UTC
Thanks John!
The "detailing" glory goes to Trumpeter.
I have not had to interfere sofar(apart from cleaning some mold seams and aplying Mr.Surfacer 500 here and there).
GAZ-66 is COE truck.Its cabin can be tilted forward, giving access to the engine.
The kit does not offer this tilting cab option, but after a careful inspection of sprues and some Manual cross-checks, I found that all(well- almost all...) required features are available as molded parts.
Thus I think I'll be able to build the cabin movable- I'll only need to drill some 0,4 mm holes, find a way to wind 3 curved springs and copy the panel with the gear shift lever.
To your question whether the engine will be visible: with cabin down- not at all, but with cabin up- a good portion of it's rear part(incuding HT leads) will be visible
As usual-I'll spoil a perfect straightforward build with some unnecessary detailing complications
Sofiya, Bulgaria
Joined: November 24, 2017
KitMaker: 46 posts
Armorama: 46 posts
Posted: Wednesday, February 12, 2020 - 07:57 PM UTC
Quoted Text
Noice build and pe set!
How did you do the weathering on the wheels?
Thanks, mate!
I weathered wheels in very simple way. Paint them with diluted enamel paint (Humbrol #72), and after 2-3 minutes wipe the excess paint with ... a finger.
That is the whole sophisticated technique!
Sofiya, Bulgaria
Joined: November 24, 2017
KitMaker: 46 posts
Armorama: 46 posts
Posted: Wednesday, February 12, 2020 - 08:07 PM UTC
England - South West, United Kingdom
Joined: June 29, 2019
KitMaker: 604 posts
Armorama: 506 posts
Posted: Thursday, February 13, 2020 - 12:48 AM UTC
I have to say ST that little beauty is looking very very good. Amazing detail all over it and final finish and weathering is superb. Love the little details like rust on the sidesteps of the cab and the cargo/stowage in the rear.
Dio base is the icing on the cake that brings it to life. Well done on a great job. Would be good once you get time to give us all a bit of a back story about times and where/ you used it.
Will have to sort out how to give the campaign ribbons to everyone who completes...
England - South West, United Kingdom
Joined: June 29, 2019
KitMaker: 604 posts
Armorama: 506 posts
Posted: Thursday, February 13, 2020 - 12:51 AM UTC
ST, where did the projector draw its power from, straight from the truck but with engine running or are there battery banks in the rear ?
North Carolina, United States
Joined: April 29, 2014
KitMaker: 1,112 posts
Armorama: 886 posts
Posted: Thursday, February 13, 2020 - 12:58 AM UTC
The simplest techniques are usually the best, thanks for sharing.
I do like the build , kit and base.
Sofiya, Bulgaria
Joined: November 24, 2017
KitMaker: 46 posts
Armorama: 46 posts
Posted: Thursday, February 13, 2020 - 02:59 AM UTC
Quoted Text
ST, where did the projector draw its power from, straight from the truck but with engine running or are there battery banks in the rear ?
Hi John
There is a generator in the box at the front/right corner. The amperage is 150A. There is no such a battery with such a power. :-)
On the rear/left side you can see the additional tank with the fuel for the generator.
England - South West, United Kingdom
Joined: June 29, 2019
KitMaker: 604 posts
Armorama: 506 posts
Posted: Thursday, February 13, 2020 - 11:44 AM UTC
That makes sense now as I did wonder about the 2nd fuel tank at the rear.
I got in a few hours tonight on the Scimitar. Some kit parts on turret and hull.

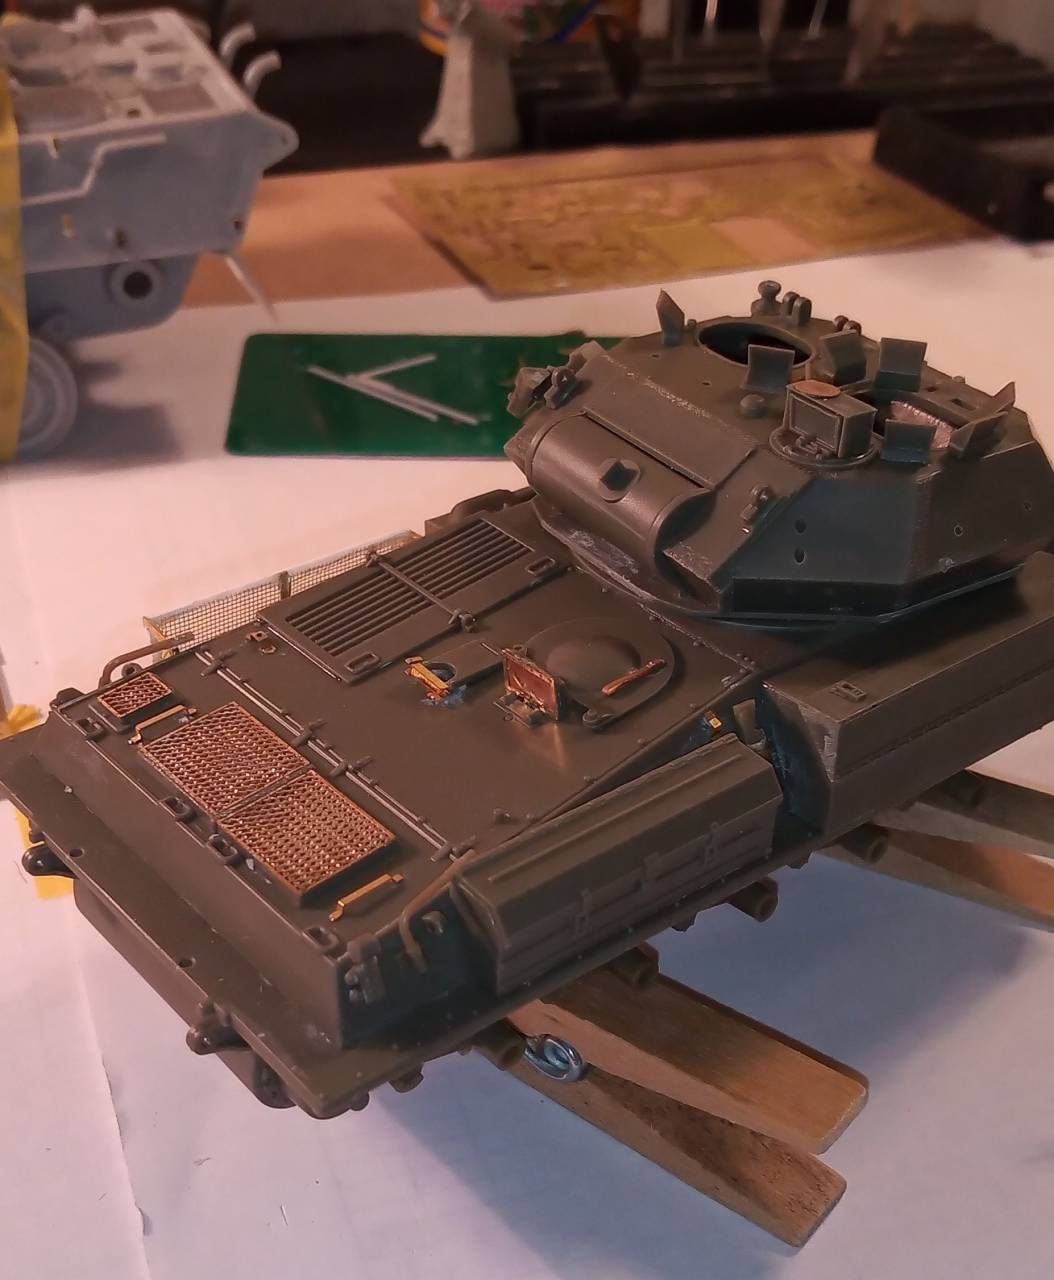
Side lights and mirror arms minus mirrors, and some PE to DVRs sight above.
Then finished off with the turret side bins, and some fiddly turret PE and kit parts.
England - South West, United Kingdom
Joined: June 29, 2019
KitMaker: 604 posts
Armorama: 506 posts
Posted: Tuesday, February 18, 2020 - 11:31 PM UTC
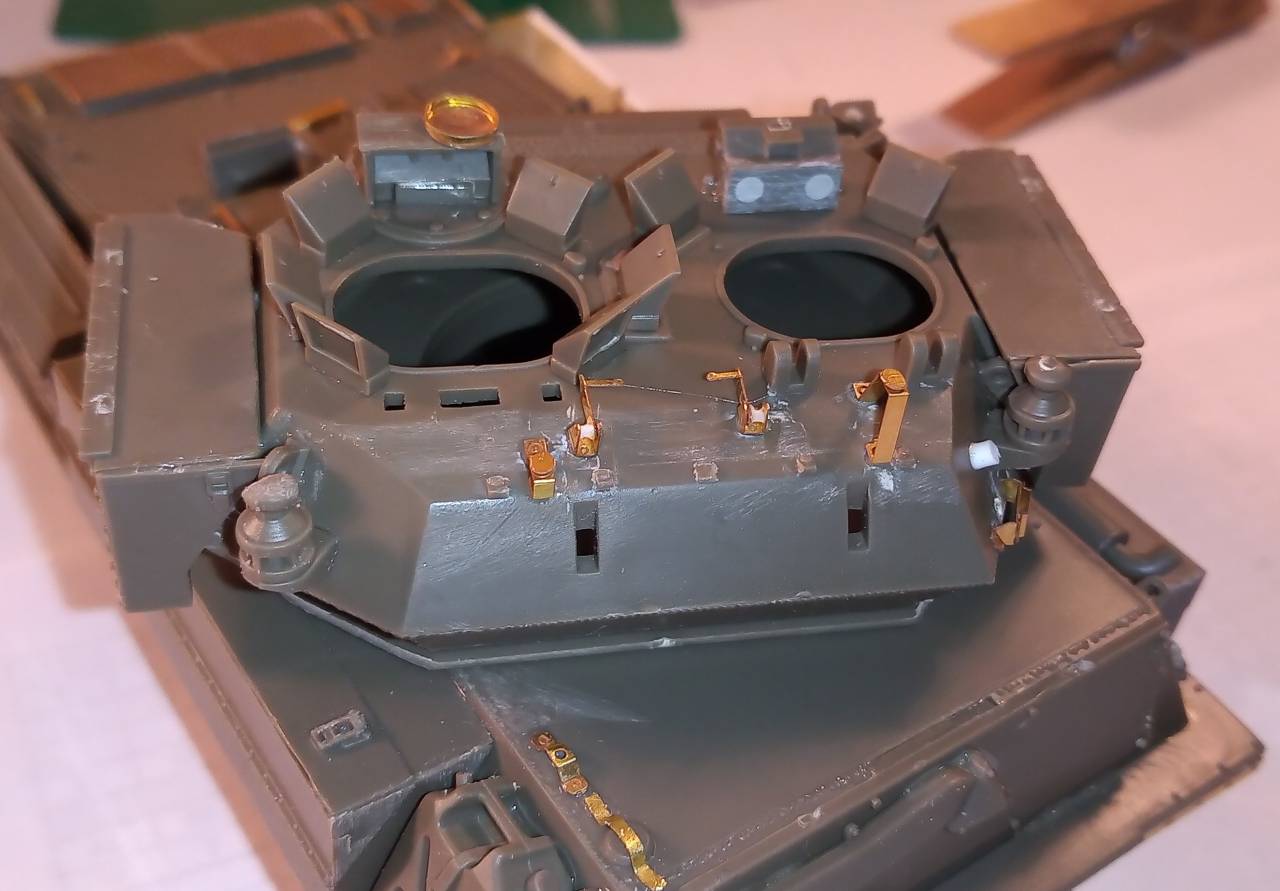
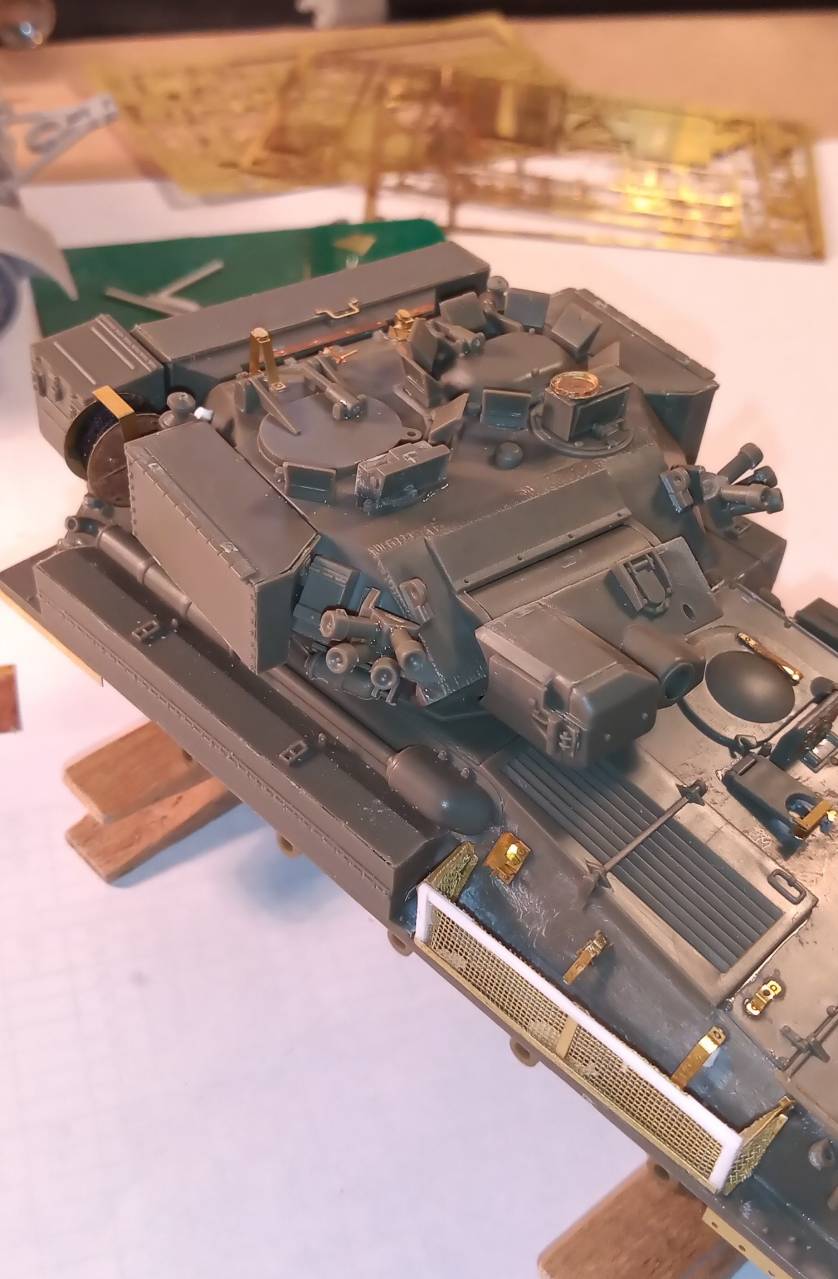
So, Ive got a few more bits done on the CVR, mostly turret detailing with a few bits on the hull.
Its all going together nicely with no major issues with any of the fit.
below is the completed D10 reel with cable added and secured to the side of the bin. D10 reels were meant to be fitted on the rear quarter of the turret on the gunners side as the external junction box has its connector there. however, you will see images of the reel placed in various positions depending how the crew wanted it.
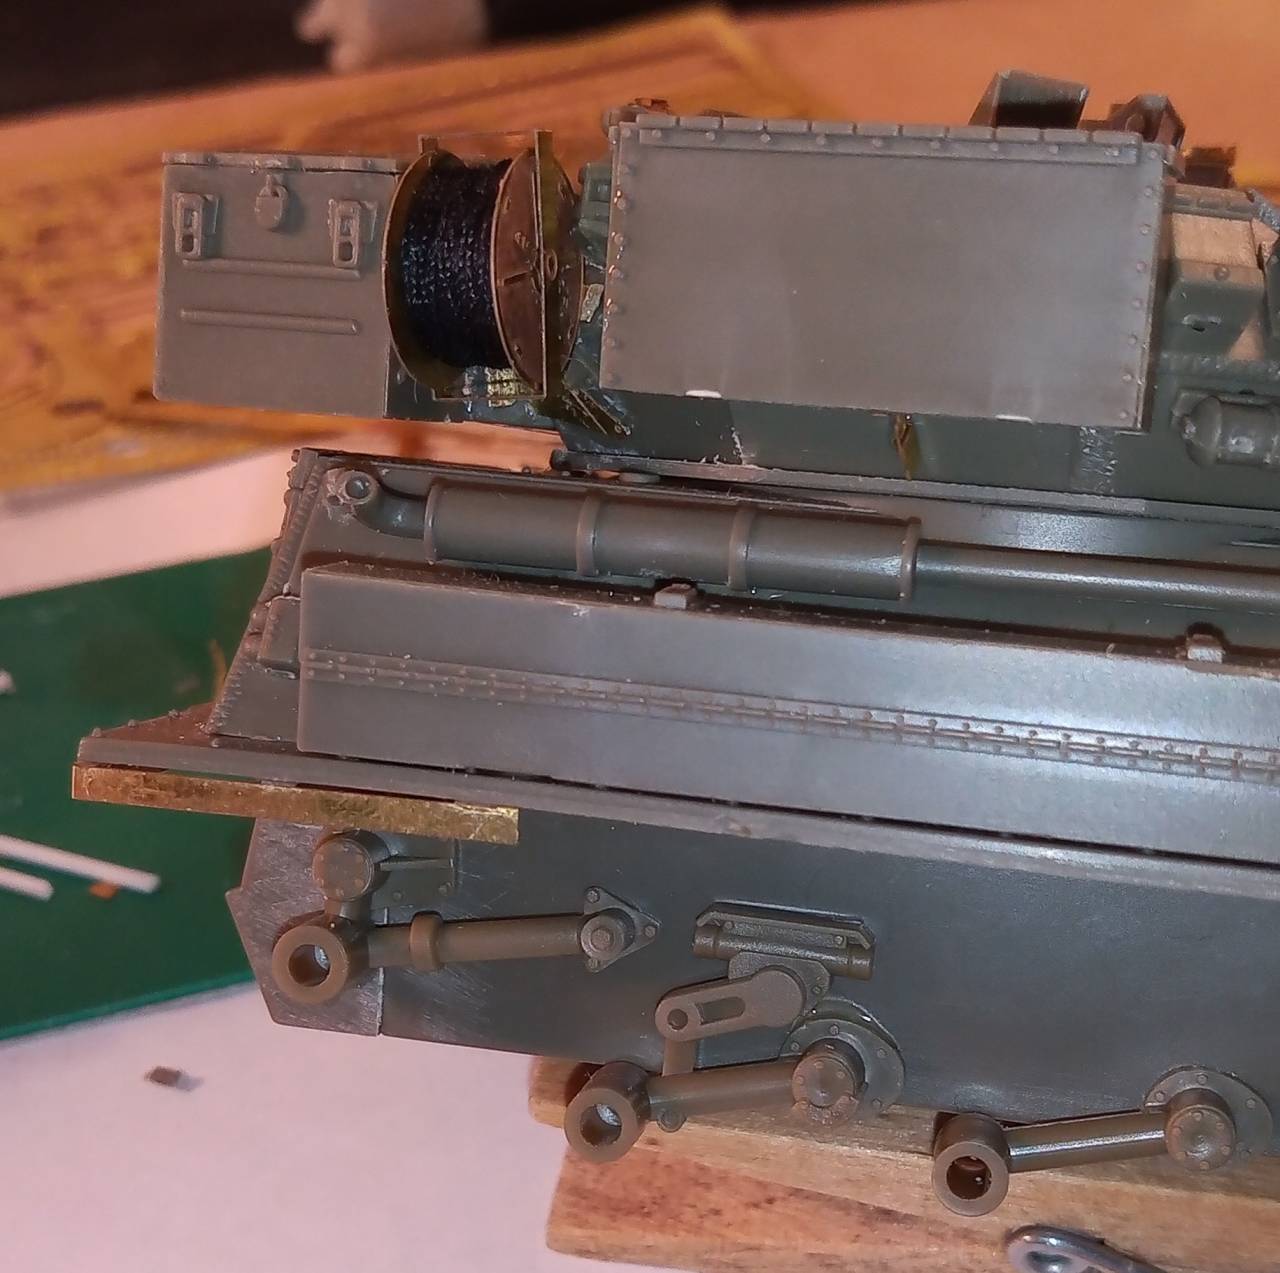
Below is the rear hull bin with added securing points and catches from the PE set and a scratch cover made from lead foil, shaped and with eyelets made for securing cord to be added later.

And the almost completed turret with the add on's from the PE and kit parts, less the barrel and barrel cradle.
#490
Sofiya, Bulgaria
Joined: September 22, 2016
KitMaker: 1,432 posts
Armorama: 1,390 posts
Posted: Wednesday, February 19, 2020 - 12:18 AM UTC
Superb detailing John!
And well done, Svetoslav!
That road on a hill reminds me of some(bumpy) midnight rides...
#490
Sofiya, Bulgaria
Joined: September 22, 2016
KitMaker: 1,432 posts
Armorama: 1,390 posts
Posted: Wednesday, February 19, 2020 - 07:34 AM UTC
Just to show that I'm not really idling on my participant in this Campaign:
I built the cabin and scratchbuilt the engine driven generator:


I also built one of the Commander comm. switchboxes (need to scratchbuild the other too):

In several sessions- using Blue Stuff and Milliput- I copied some radiosets(R-111 and R-123) from Trumpeter's BTR-60PU.I'll need to scratchbuild the third set used (R-130)- it is not present in Trumpeter's kit.

Because I decided to build the cabin in raised position, I needed to copy the gear shift panel from cabins floor(it does not raise with the cabin).I produced a copy but then managed to achieve a very clean separation of master panel from cabins floor:

Now I have 2 pieces to choose from
England - South West, United Kingdom
Joined: June 29, 2019
KitMaker: 604 posts
Armorama: 506 posts
Posted: Wednesday, February 19, 2020 - 09:36 AM UTC
A great start Angel, some very skillful scratch building from the start.... It looks very intricate what's been done so far. Love the radios.
It will add so much more realism, keep up the great work mate.
England - South West, United Kingdom
Joined: June 29, 2019
KitMaker: 604 posts
Armorama: 506 posts
Posted: Thursday, February 20, 2020 - 09:35 AM UTC
I have finally finished the detailing for the rear bin. Working with the lead foil was time consuming, everytime I touched it or applied to much pressure it was bent out of shape...but eventually..
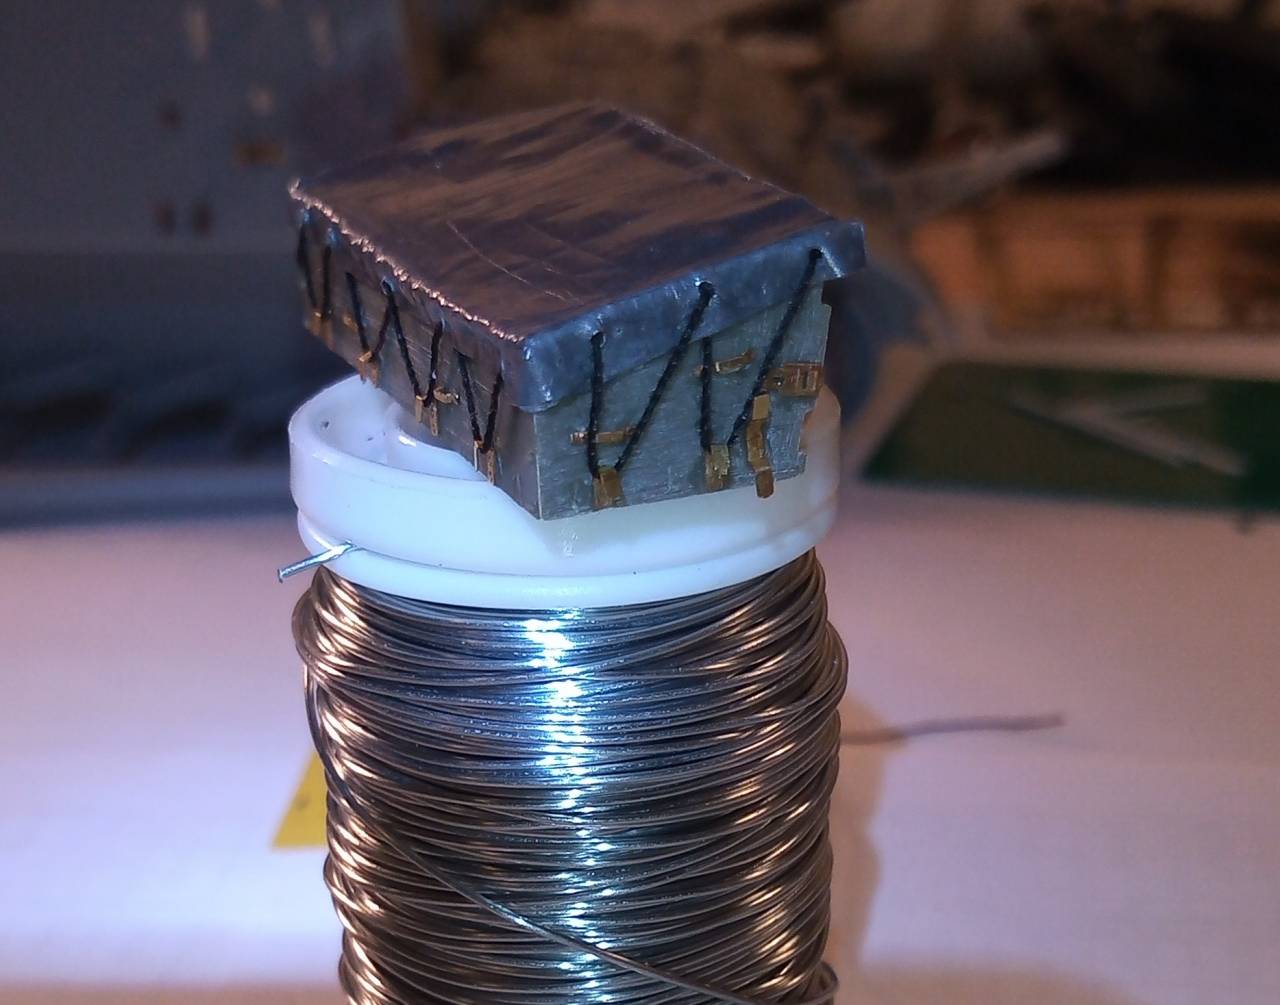
Threading the cotton was to say the least emotional lol, it kept twisting out of shape, but I'm pretty happy how it turned out.
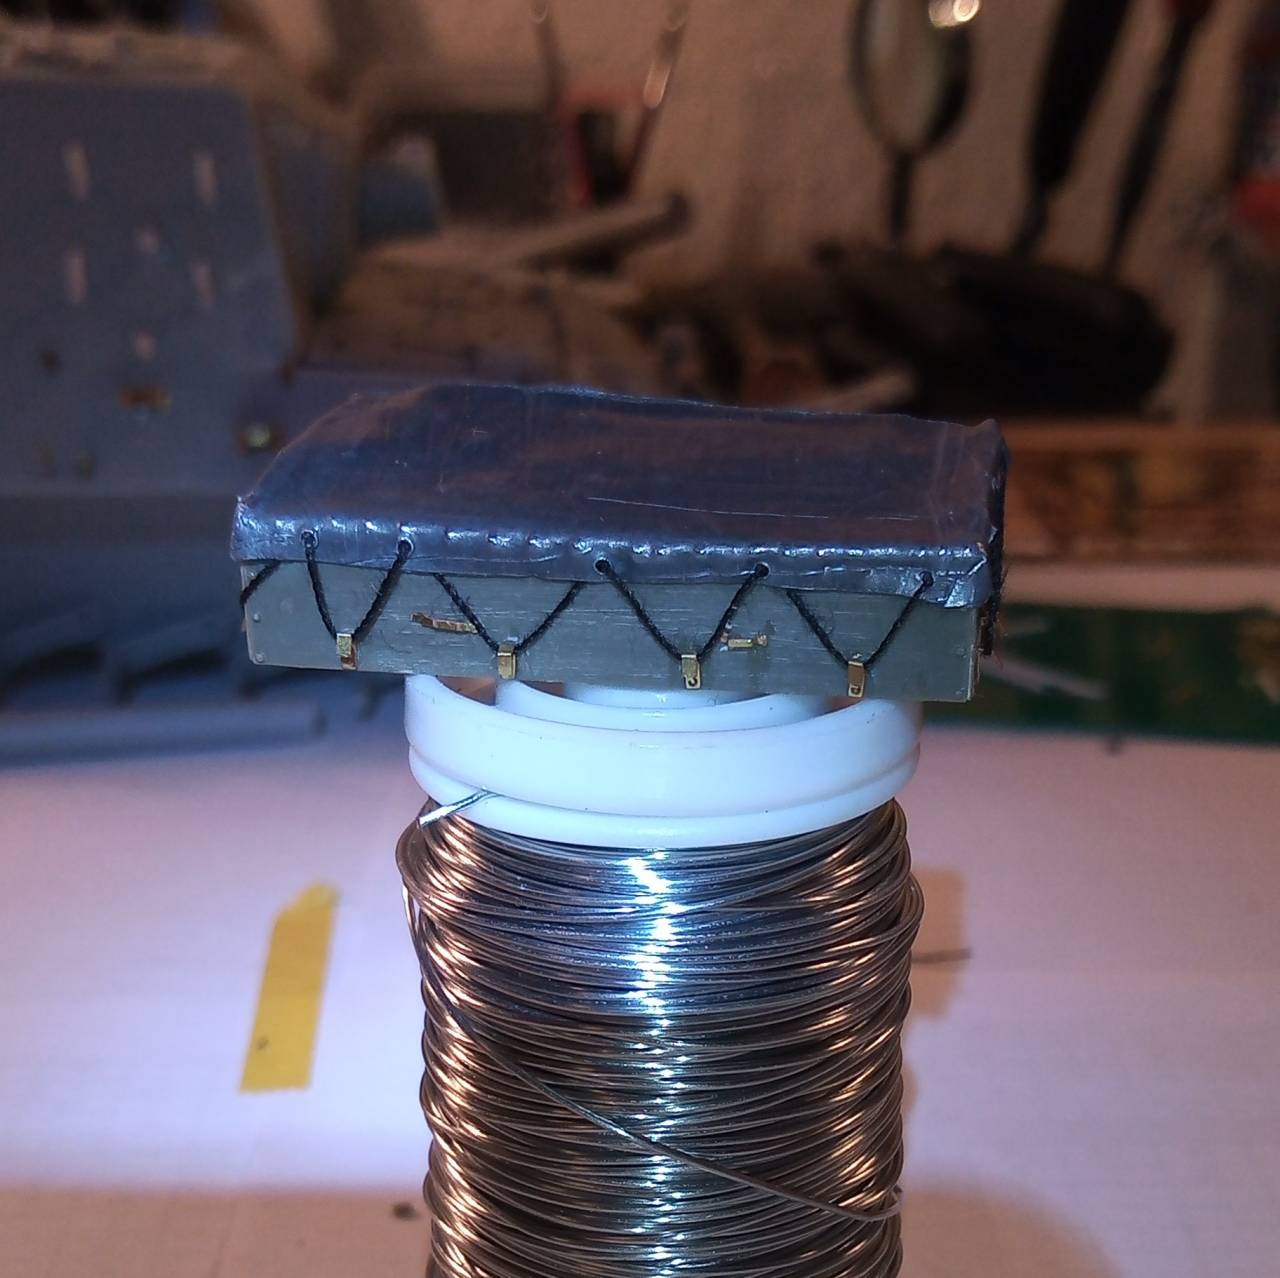
It took longer than I hoped as I had to reshape the top cover a few times. I dry looped the thread around the hooks then superglued the lead foil cover from inside the bin,then pulled the thread tight and secured the loose end.
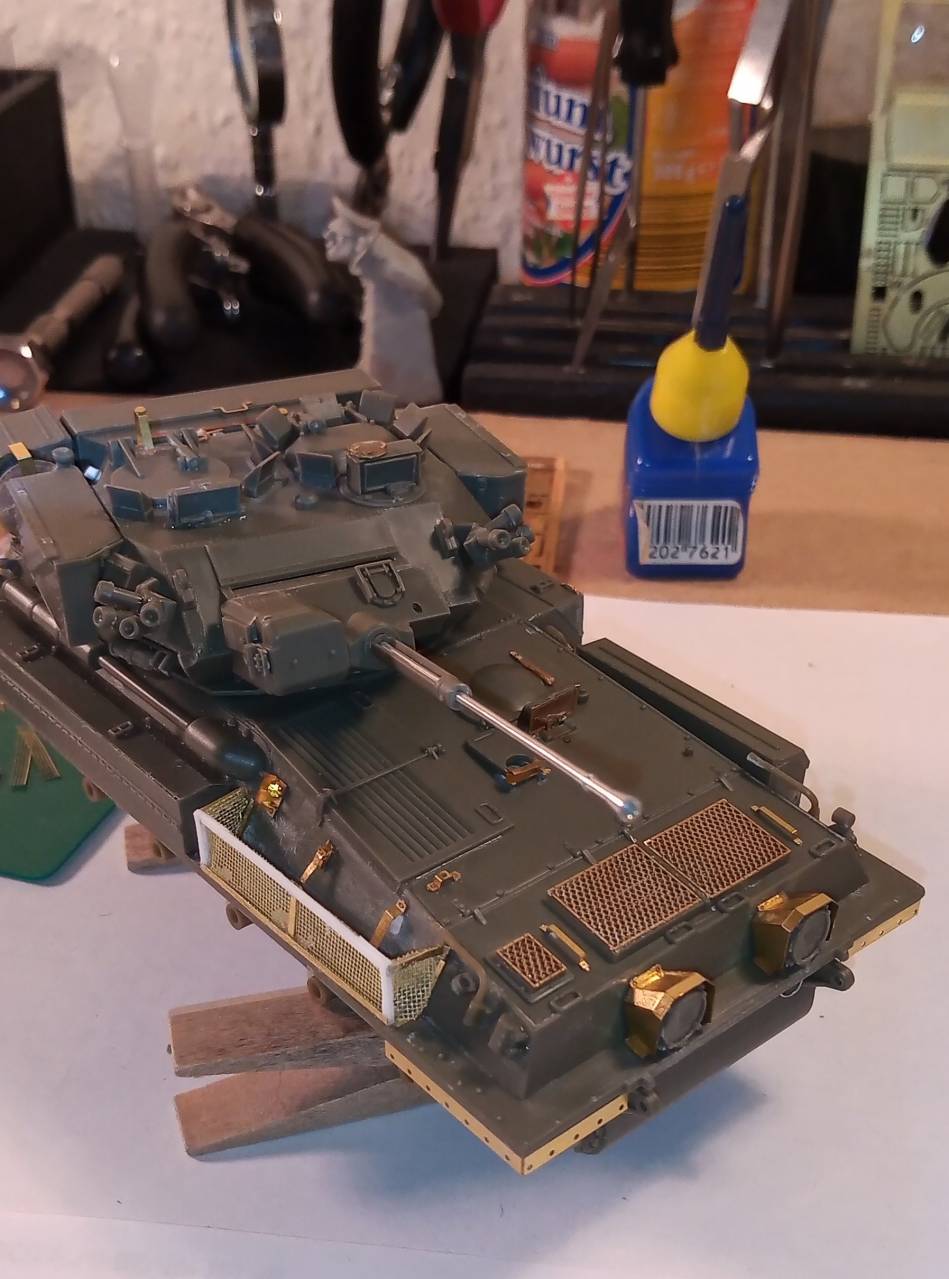
Above is a shot showing headlight guards and barrel cradle and barrel fitted.

Last image is just showing the last few pieces to fit before primer coat. For the sharp eyed sleuths you may notice the piece of Jagdtiger PE with some chopped cocktail sticks superglued to it... That's to wedge inside the rear bin to give it some height and bulge up the lead foil.
Will paint the exhaust first, then apply meshed heat shield before whole thing is primed. Will add mud flaps after final painting and all running gear and tracks are fitted.


