Armor/AFV
For discussions on tanks, artillery, jeeps, etc.
Golden Memories (campaign idea)
ayovtshev
#490
Visit this Community
Sofiya, Bulgaria
Joined: September 22, 2016
KitMaker: 1,432 posts
Armorama: 1,390 posts
Posted: Monday, May 25, 2020 - 04:55 AM UTC
Thanks Oliver!

I hope things went back to normal for you!

Your Marder is simply splendid!
I especialy like the way both antennaes are tilted backwards- they give the impression of a vehicle in a fast forward move!

Extremely well done,

TacFireGuru
Visit this Community
Colorado, United States
Joined: December 25, 2004
KitMaker: 3,770 posts
Armorama: 2,263 posts
Posted: Monday, May 25, 2020 - 09:59 AM UTC

Quoted Text

And Mike, like Angel I am impressed with the tidiness of your work area and the paint rack is very nice ... home made or bought ??. I always start with the intention of keeping mine as neat as I can, but usually fail on that task within an hour of starting lol,


I've knocked over a few things so I "try" to keep at least the direct area I'm working "cleaner" than the rest. The new blue cutting mat is only for the tools and kit(s) I'm currently working on...so that helps some.

The paint racks that the Tamiya bottles are in (above those are racks for Mig, AK, Vallejo, etc.) were purchased from Ammo of Mig (there are a few others out there that are almost identical). The rack below I made to hold the odds and ends tools and paints. The brush holder on the desk was also homemade as will another matching holder for pliers, cutters, and the like. It's nice to have a small woodshop in the garage.

Mike
Johnnych01
Visit this Community
England - South West, United Kingdom
Joined: June 29, 2019
KitMaker: 604 posts
Armorama: 506 posts
Posted: Friday, May 29, 2020 - 07:07 PM UTC
Some more work done. As promised, an info only update on the Chally 1 from my Germany days.


Base coat of tamiya NATO green now on it which will be finished with the NATO black. then it will be just detailing a few areas and decals which will be the Accurate Armour yellow TAC sign set and I will be doing some scratch covers for all the external stowage bins/baskets, then a light weathering to finish it off.

The CVRT Scimitar is also 95% finished now, just a few very minor details to complete, mainly fitting sprockets and tracks and mudflaps, then the AA TAC signs and light weathering. ....
enjoy and stay safe guys
TacFireGuru
Visit this Community
Colorado, United States
Joined: December 25, 2004
KitMaker: 3,770 posts
Armorama: 2,263 posts
Posted: Tuesday, June 09, 2020 - 05:52 AM UTC
I'd probably be done with assembly by now, but...PE. Three sheets just for the exterior. BUT, ultimately worth it.

PE air cleaner brackets, scratched the muffler "tube" and added the intake and exhaust pipe from the kit part, and brackets, hinge, and lock for one of the toolboxes. I still need to add the straps that go around the air cleaner and add that scratch filter.


WAAAAY to windy today in Colorado Springs to work on building my gazebo so I'm getting some bench time.

Fiddly and (sometimes) frustrating, but still enjoying the build.

Mike
Removed by original poster on 06/09/20 - 20:07:50 (GMT).
Johnnych01
Visit this Community
England - South West, United Kingdom
Joined: June 29, 2019
KitMaker: 604 posts
Armorama: 506 posts
Posted: Tuesday, June 09, 2020 - 08:11 AM UTC
Coming along nicely there Mike, I think PE wears everyone down mate...I look at some of the miniscule bits and shudder just contemplating putting them together... And usually give up lol....keep up the great work though.

The Scimitar is almost on the final leg now, tracks are on, but I'm struggling getting the sag anywear near right ... I'm at the glueing some thin wire to the hull, then onto the track to get the sag right stage at the moment...we shall see.

Once I've sorted that out it will mudflaps on, decals from accurate armour and then weathering..


ayovtshev
#490
Visit this Community
Sofiya, Bulgaria
Joined: September 22, 2016
KitMaker: 1,432 posts
Armorama: 1,390 posts
Posted: Tuesday, June 09, 2020 - 08:26 AM UTC
I second John, Mike!
Very nice work with the fiddly PE and the scratchbuilt muffler looks perfect!

Frederick,
I read the story about your dad with great interest!
I also read everything I found about USS Houston and will realy love to see the build of this Golden Memory!

petbat
Visit this Community
Queensland, Australia
Joined: August 06, 2005
KitMaker: 3,353 posts
Armorama: 3,121 posts
Posted: Tuesday, June 09, 2020 - 09:15 AM UTC
These builds are all looking fantastic guys.
Antilles
Visit this Community
Nordrhein-Westfalen, Germany
Joined: March 22, 2015
KitMaker: 671 posts
Armorama: 45 posts
Posted: Thursday, June 11, 2020 - 10:25 PM UTC
John and Angel: Thank You very much. Glad You like it.

John: Neither nor. I have been in the Panzerinstandsetzung (tank maintenance) and learned first on the Marder in Hamburg in 1993.

By the way, colour on Your Scimitar looks spot on!

Mike: The PE-parts look really nice. Great improvement!

Oliver
GulfWarrior
Staff MemberCampaigns Administrator
ARMORAMA
Visit this Community
Texas, United States
Joined: January 05, 2010
KitMaker: 1,051 posts
Armorama: 1,029 posts
Posted: Friday, June 12, 2020 - 01:20 AM UTC
The Scimitar looks awesome, Mike. That was one of the very first kits I built way back in the 90s when I first got started building models.

Very nicely done!


Johnnych01
Visit this Community
England - South West, United Kingdom
Joined: June 29, 2019
KitMaker: 604 posts
Armorama: 506 posts
Posted: Friday, June 12, 2020 - 01:39 AM UTC
The Scimitar is mine Richard lol.... But thanks though...
It's almost done now. I have sorted out the track sag to a place I'm happy with.
Ended up using some flower arranging wire and painting it to match the hull and tracks.
Mudflaps are on and now just waiting for the decal for the Sqn tac signs for the turret side bins.
The rear turret c/s plate and convoy plate will be done by hand, as that's how we always did it, or we'd use a rough cut out cardboard stencil. Troops love to improvise lol.
Will do some more pics over weekend, then some more work on the Chally 1 and build a photo campaign Panther...
Johnnych01
Visit this Community
England - South West, United Kingdom
Joined: June 29, 2019
KitMaker: 604 posts
Armorama: 506 posts
Posted: Sunday, June 14, 2020 - 09:36 PM UTC
An update now I can load pics again.

The Scimitar is now very nearly done.
Decals are on and I am at last happy with the sag on the tracks.
I will be leaving the wagon free from any stowage as that's how they were when we were back in camp. The wagons would be totally de-kitted and everything put away in the troop cages.


Just left with a very light weathering to do and that will be this one done.
ayovtshev
#490
Visit this Community
Sofiya, Bulgaria
Joined: September 22, 2016
KitMaker: 1,432 posts
Armorama: 1,390 posts
Posted: Monday, June 15, 2020 - 03:37 AM UTC
Awesome job on the Scimitar, John!

Johnnych01
Visit this Community
England - South West, United Kingdom
Joined: June 29, 2019
KitMaker: 604 posts
Armorama: 506 posts
Posted: Monday, June 15, 2020 - 09:14 AM UTC
Thanks Angel, I have now weathered it and finished all the bits I needed so I'm calling this one done now.
I was in C Sqn but spent some time with A Sqn playing enemy for them in C/S 11.

All paints used were tamiya and a very light oil wash before finishing it all with the MIG pigments.
Kit went together nicely and I'm happy with how the track sag turned out.
Hope to get some time on the Challenger 1 and then very hopefully I can get the CVRT Striker sorted out from Andreas in Germany, as that was my usual command when I was back in the UK.


Enjoy and stay safe
petbat
Visit this Community
Queensland, Australia
Joined: August 06, 2005
KitMaker: 3,353 posts
Armorama: 3,121 posts
Posted: Monday, June 15, 2020 - 09:41 AM UTC
Looks Fantastic John. Nice and dirty...

Silly question, and one a little off topic if I may... A while back I started a detail and conversion job on the Accurate Armour Striker for Angel's 'Resin' group build, but stalled on it. I want to get back to it. Seeing you crewed in one, I thought you may be able to help me.

This is the vehicle I am trying to depict:


My question is, is the part I have circled a mesh stowage basket of some kind or something bundled in net? I know the crews could pretty much slap on what they could find, but I thought you may know if there was a reasonably 'standard' fit out of permanent stowage like baskets. Okay if you can't help, just taking an opportunity!!
Johnnych01
Visit this Community
England - South West, United Kingdom
Joined: June 29, 2019
KitMaker: 604 posts
Armorama: 506 posts
Posted: Monday, June 15, 2020 - 07:34 PM UTC
Hi Peter and thanks for the comments. it was quite an enjoyable build and has brought back at lot of forgotten memories from those days.

In answer to your question.

That appears to be a local manufacture (probably pre-deployment and troop wide additions) mesh cage/baske, which starts at the end of the air bottle box and finishes just behind and underneath the operators hatch. There is one on the other side which finishes just under the Comds hatch.

I cant quite make out the unit but it appears that their Strikers have unit wide additional stowage boxes fitted to both hull sides towards the rear over the 3/4th wheel positions. (possibly a legit mod)
They also seem to of had the upper hull sponson plates removed. This was probably a late retro mod as I have seen other Strikers after the mid life extension refit with their upper hull sponson plates removed as well.
Both these features were not done on my units Strikers when I was on them.

On the pic you can see the launch bins in up firing postion, and atop that you can see a CVRT Samaritan roof bin which has been fitted.

External stowage was pretty much down to the crew and they would add on what they could and where was possible.

The only standard stowage on a pre 1st Gulf war Striker was the bin on the rear door, a CVRT Spartan rear door mesh cage which was fitted on top most Launch bins, and CVRT Sabre bins which were fitted on the front sponson plate either side and between the headlights.

Crews would demand Samaritan top bins and Chieftain Long bins and cut them half and fit them, or large mesh baskets and put on the launch bins.

On my wagon, I had the usual rear door stowage box, a large mesh basket on top of the launch bins and I had a half a Chieftain long bin secured to rear of the mesh basket just above the launch bin vent doors.

One point to note is we never tried to carry to much weighty stuff in the launch bins baskets as this would affect their lift/speed rate when we tried to raise them for firing.
petbat
Visit this Community
Queensland, Australia
Joined: August 06, 2005
KitMaker: 3,353 posts
Armorama: 3,121 posts
Posted: Monday, June 15, 2020 - 10:27 PM UTC
Thanks for the info John, you went more than the extra mile there!

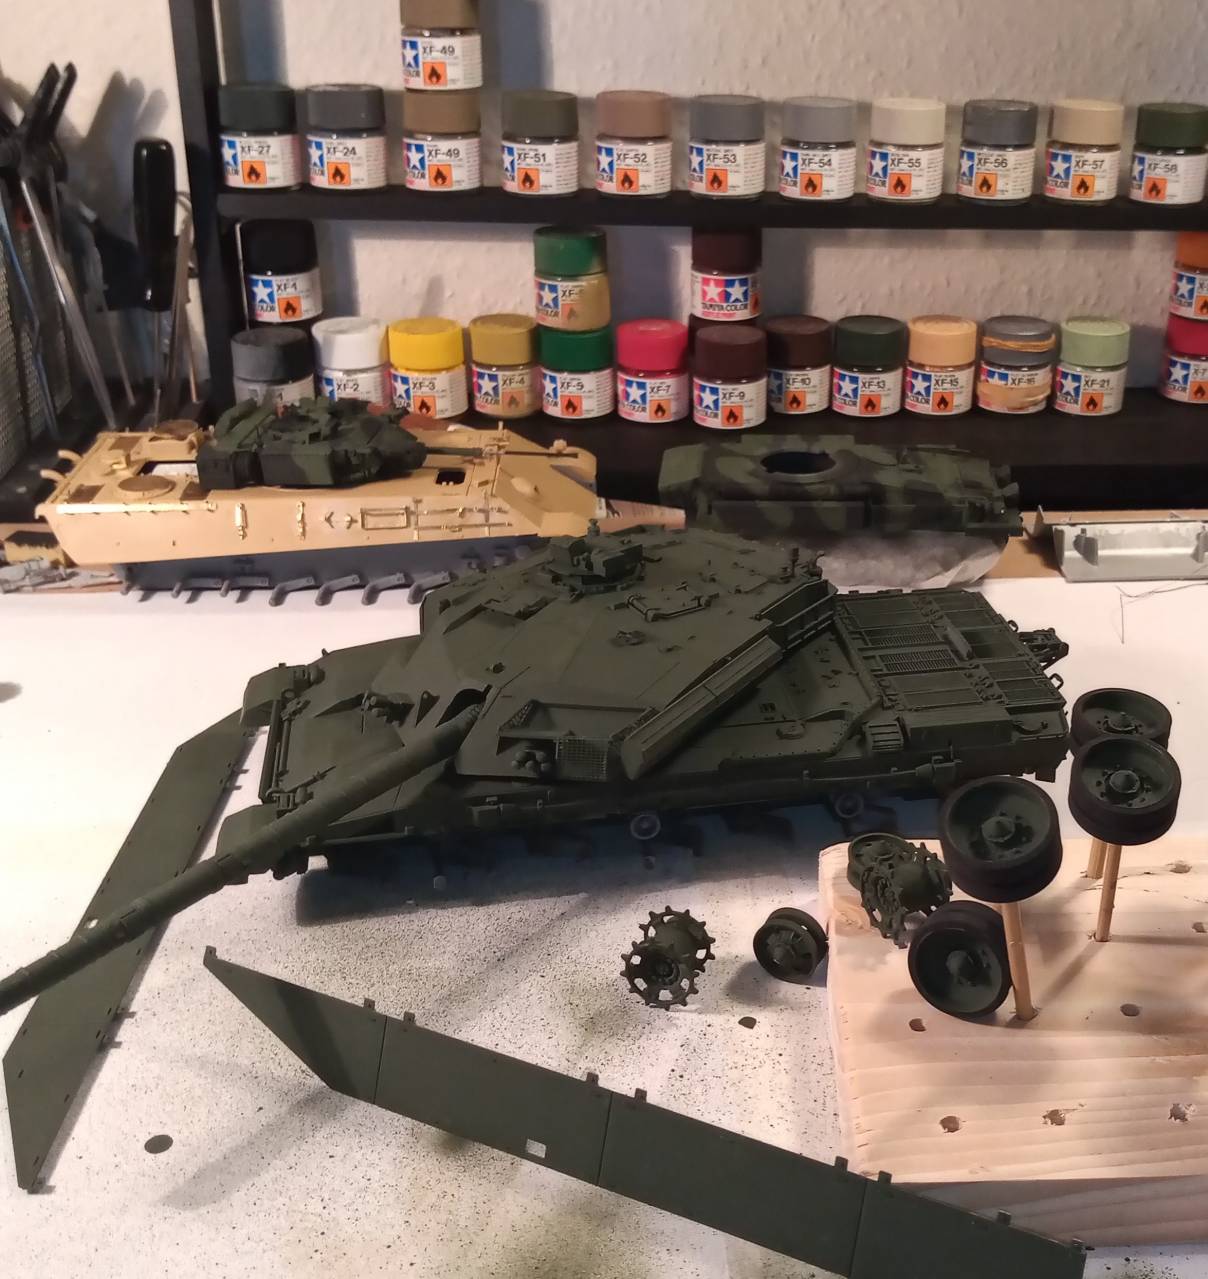
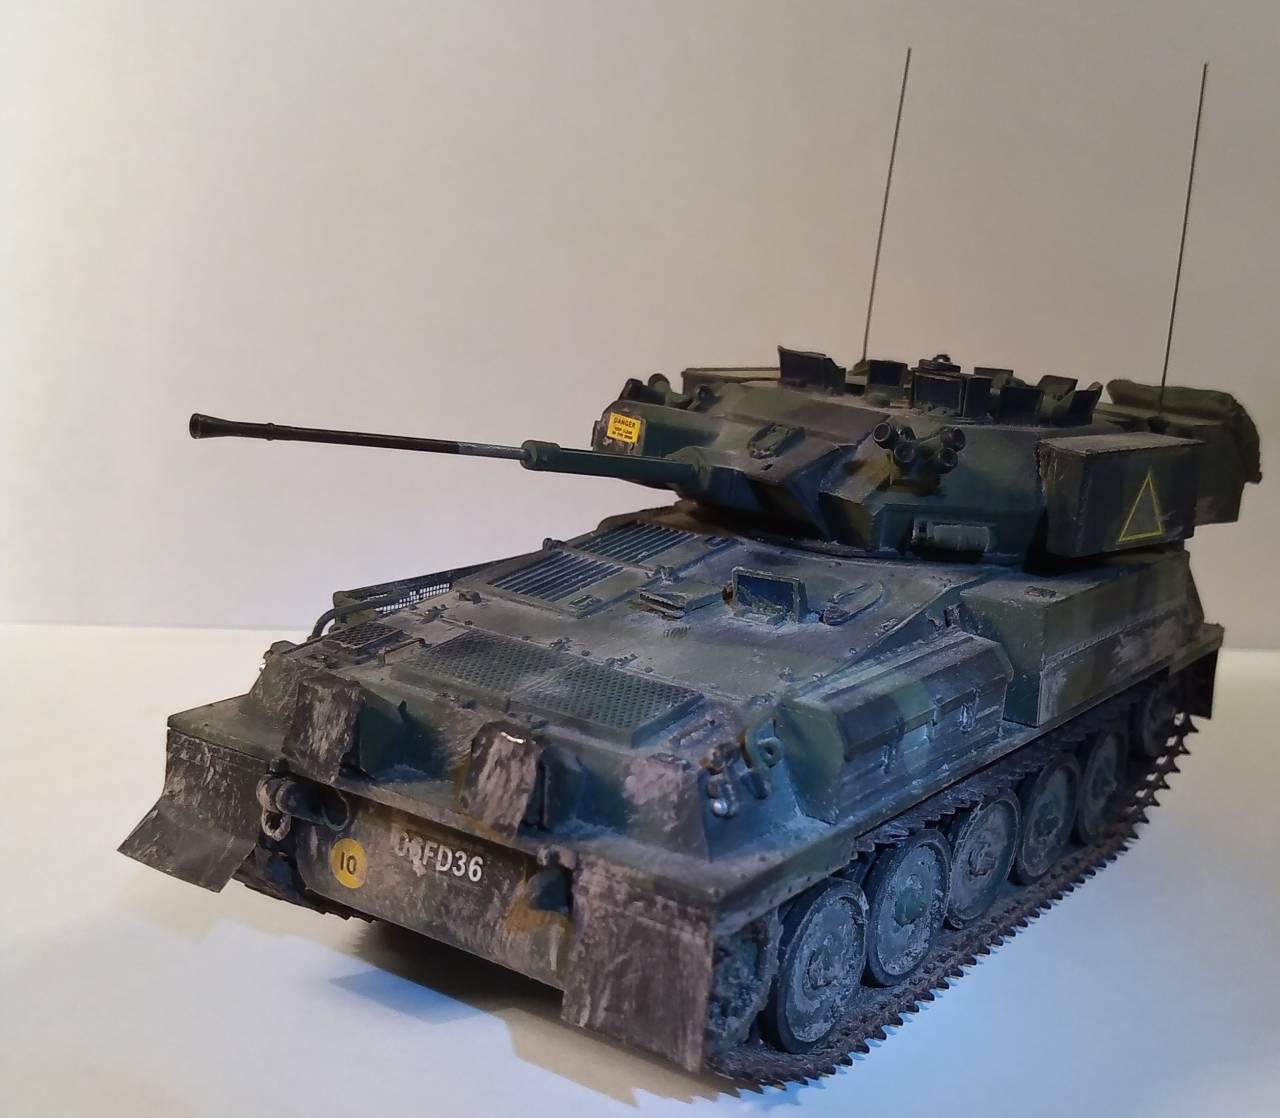
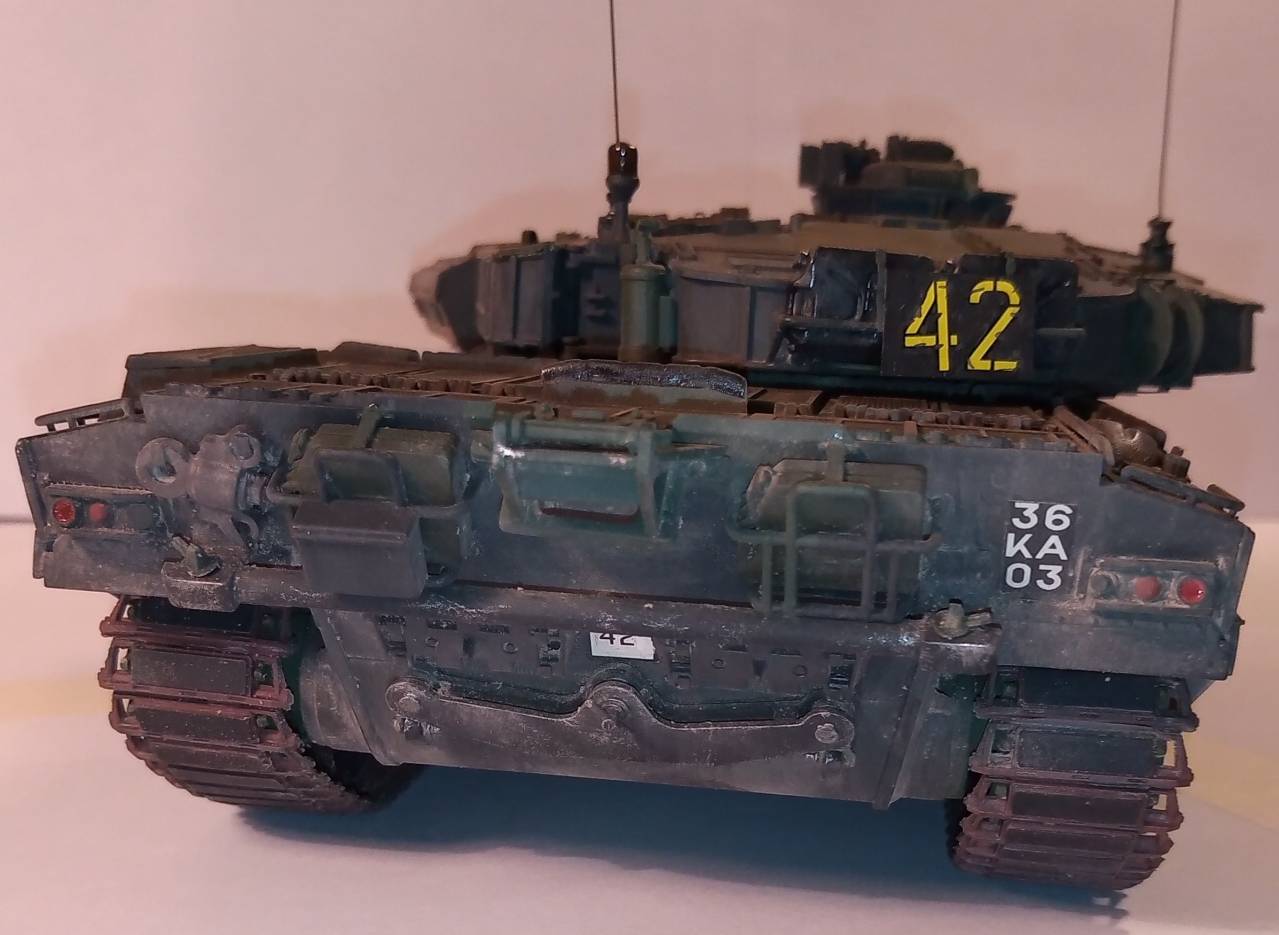
The Accurate Armour kit is near 30 years old now and shows the signs of its heritage. A lot of flaws, bubbles, broken bits, etc.

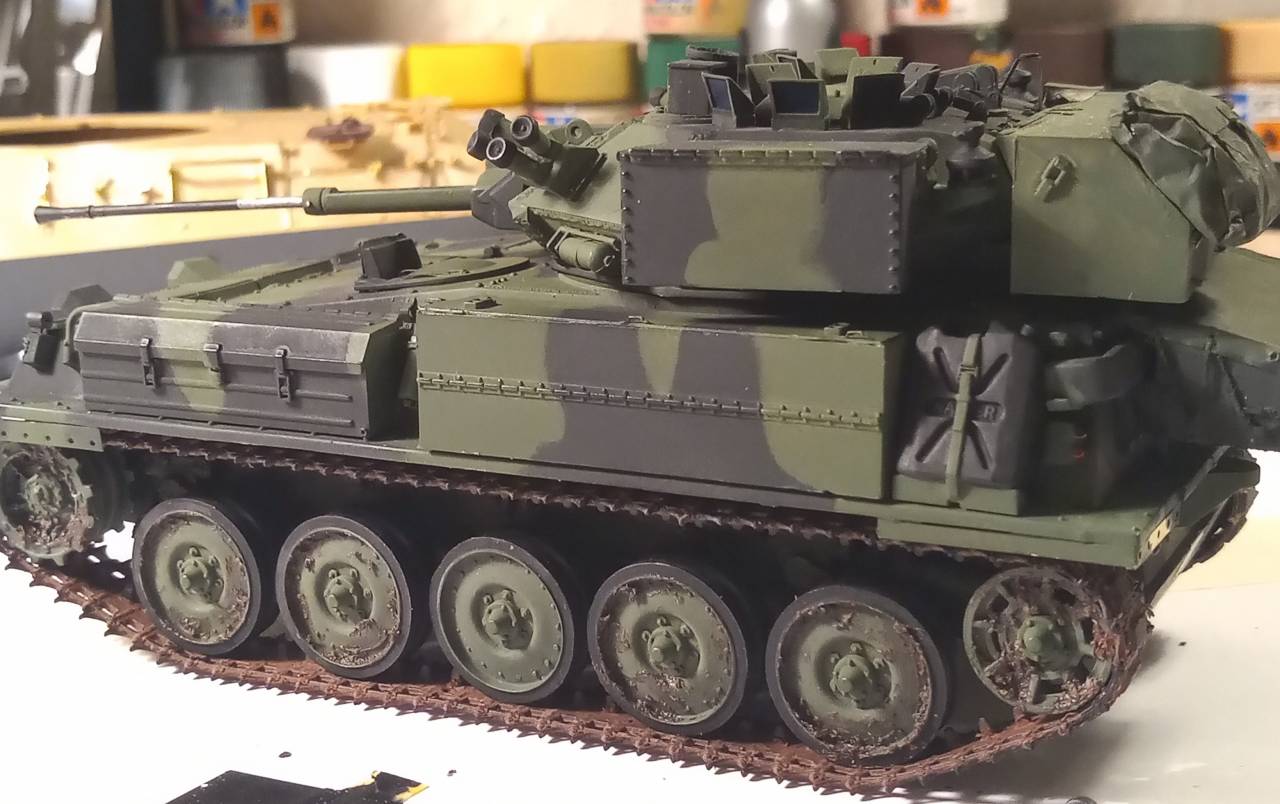
I have a spare long bin from the Tamiya Challenger 1 which I think is a Chieftain bin anyway. I intend to cut it down to make the half bins. I also have some brass mesh and strip to make some baskets.

I also have a set of AFV Club roadwheels which were spares in the M113 MRV kit. The turret parts for that kit were on the sprue with the wheels. I needed to modify the resin torsion arms to fit them and decided to drill and pin them at the same time, so I can adjust the height properly later.

AFV Club give you two types of Drive Sprocket and Idler in their CVR(T) kits, so my Scorpion kit has been a donor for the 'late' version ones, as well as antennae mounts. I cast up the AFV Club sprocket mounts - all the Accurate Armour stuff was off register or way too basic.

I used some Eduard headlight covers from somewhere (?) but I am not happy with the result. I can do better in styrene.

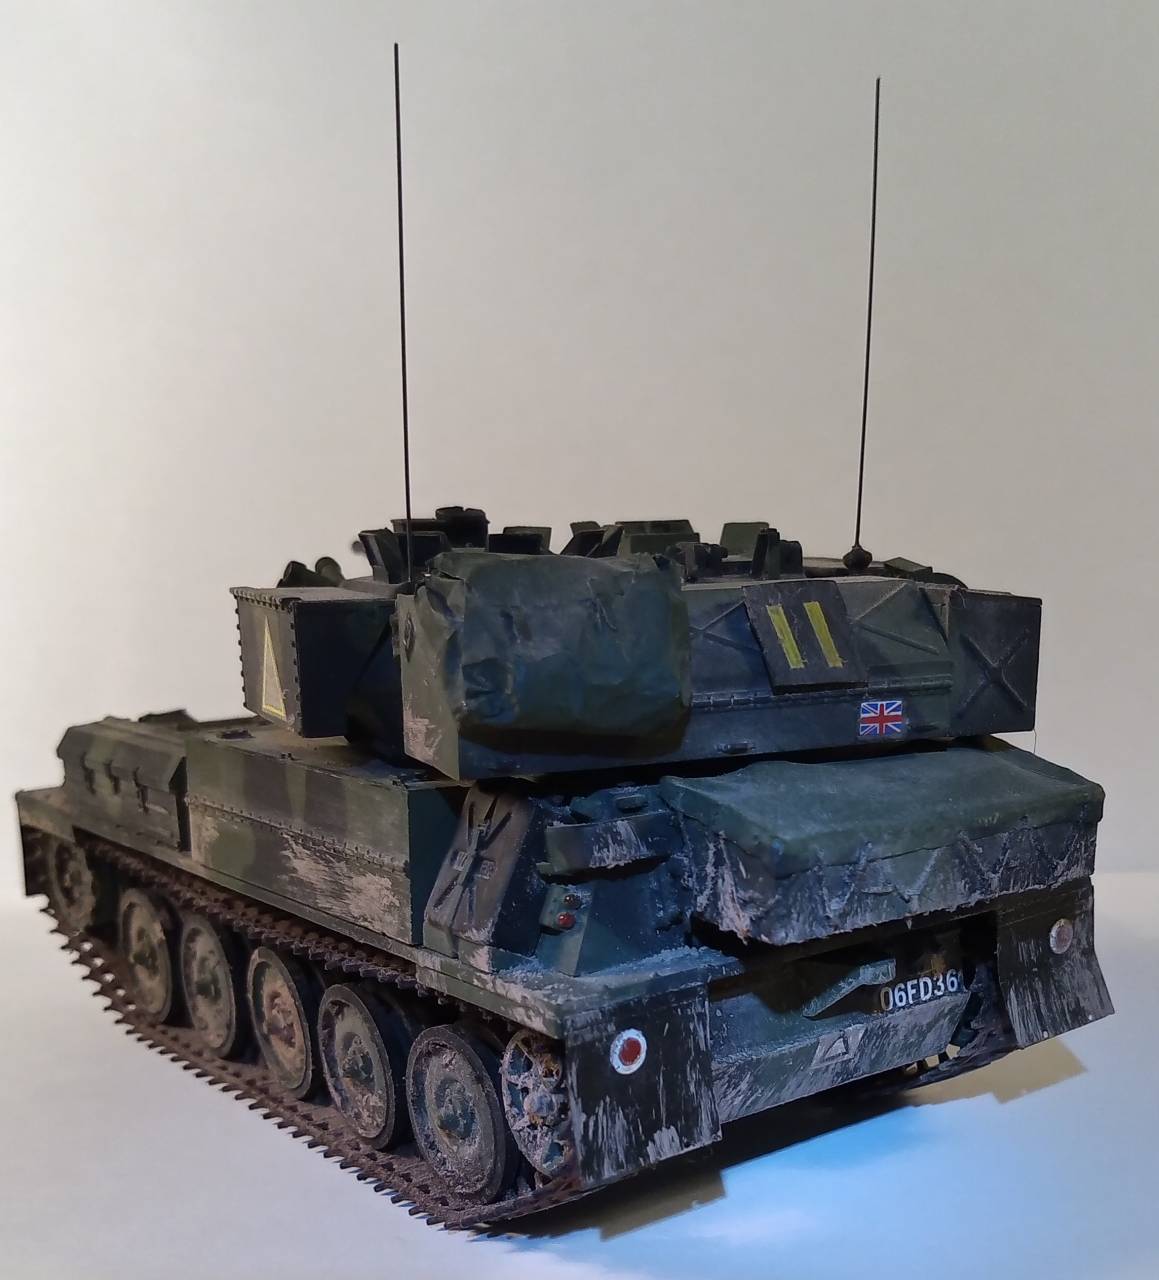
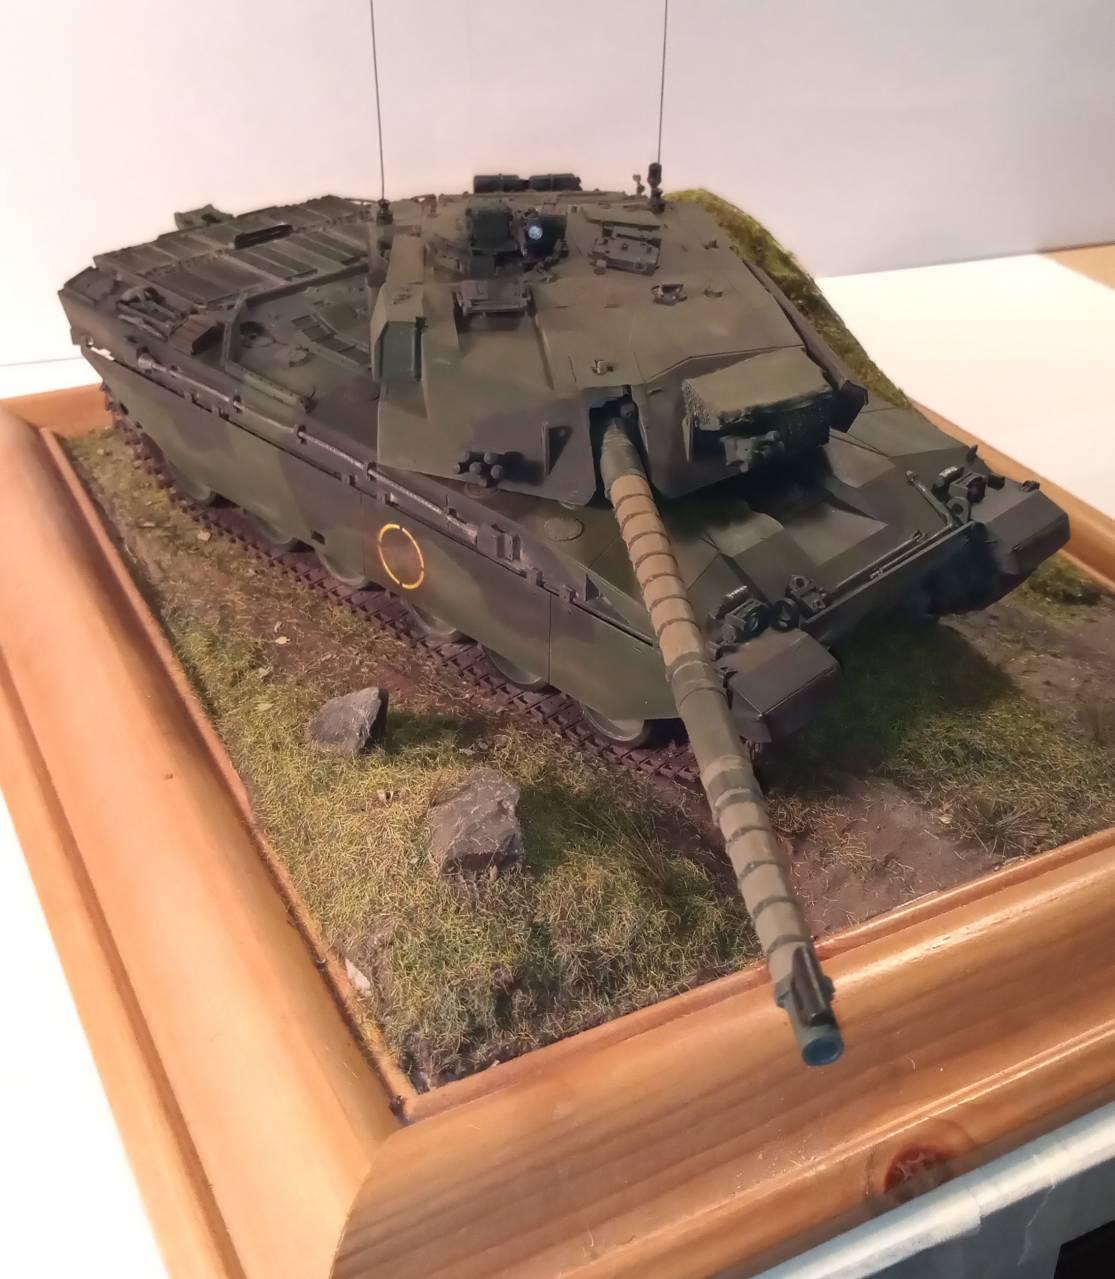
I have already built the basket for the top of the launcher.

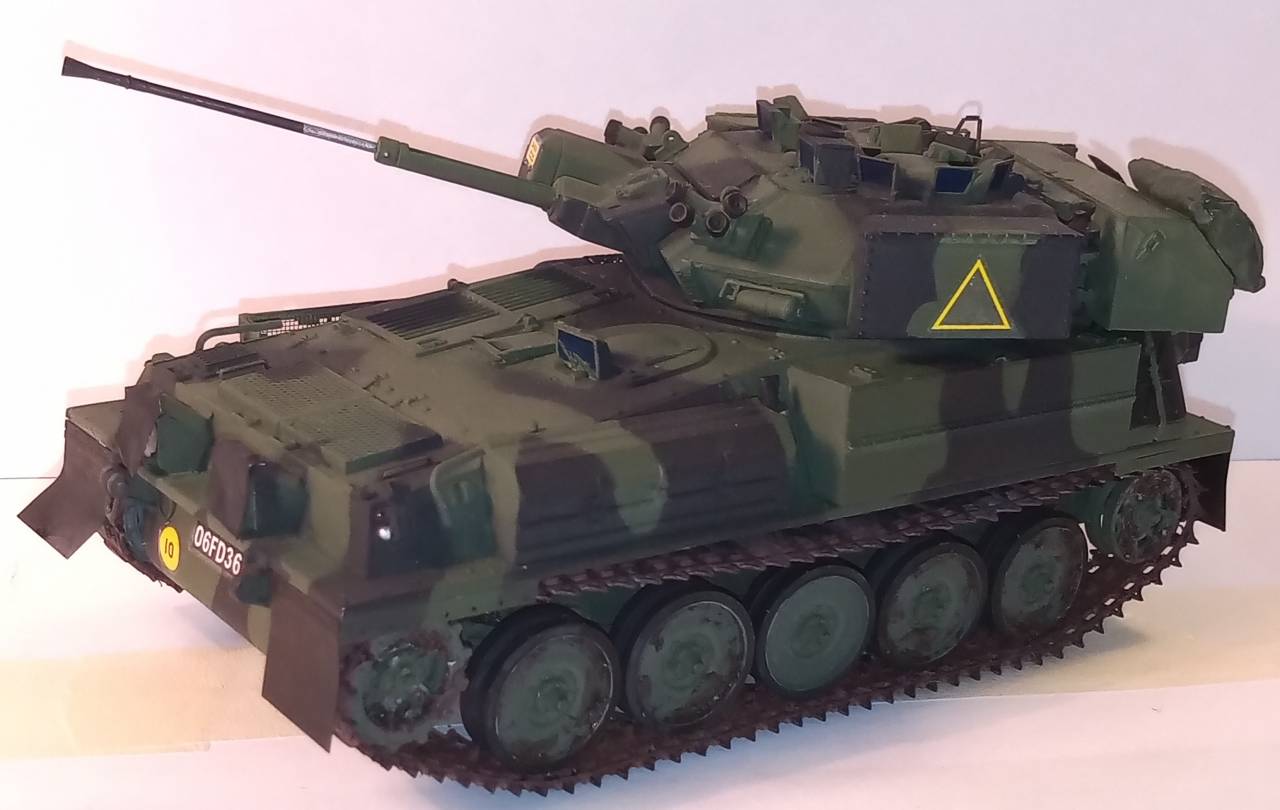
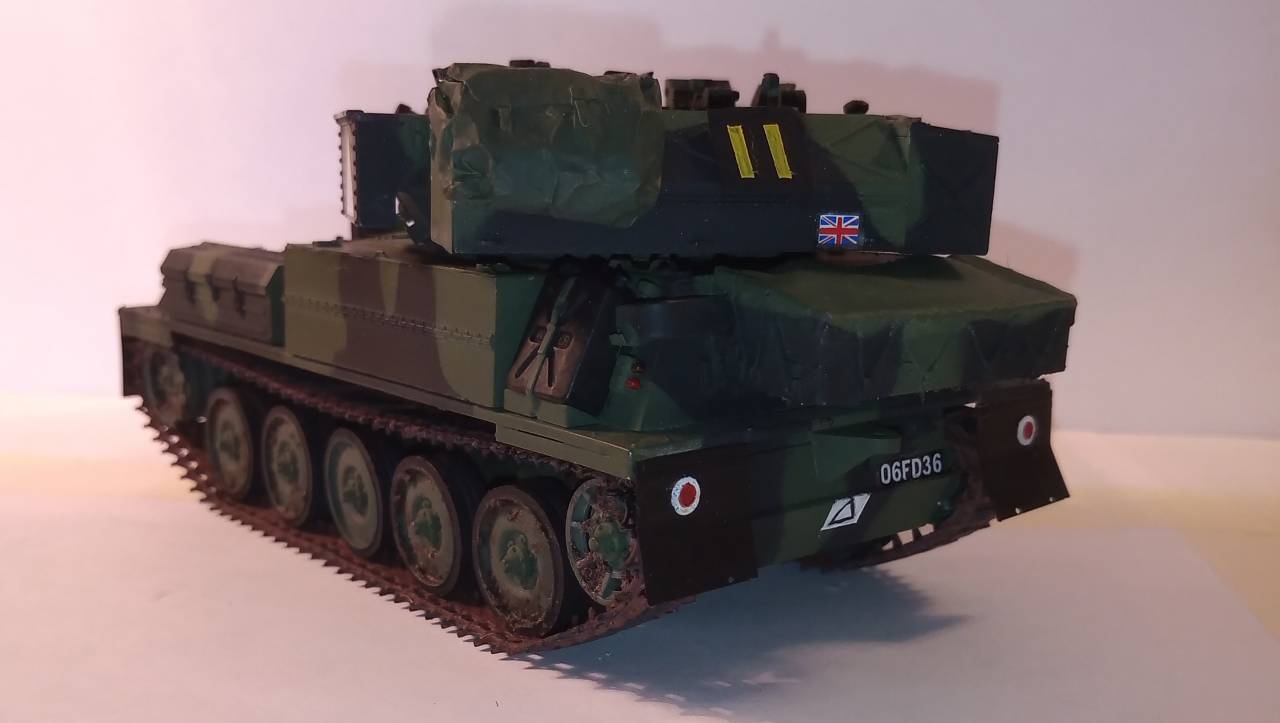
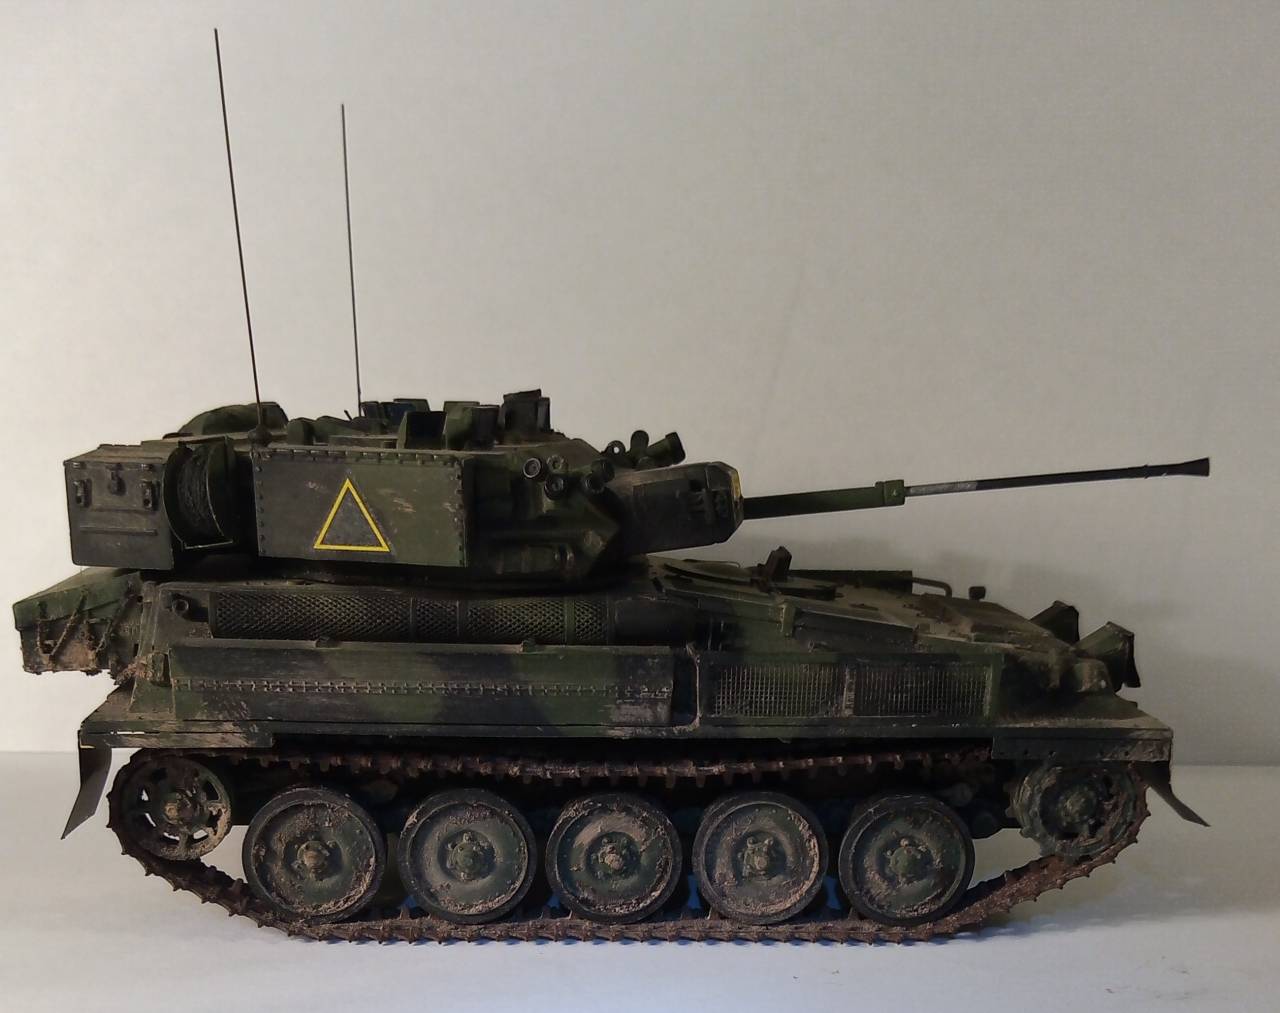
This is the sorry state it is in now:


I think you have helped me make my selection for the 2020 Unfinished Business Group build...

Thanks again
petbat
Visit this Community
Queensland, Australia
Joined: August 06, 2005
KitMaker: 3,353 posts
Armorama: 3,121 posts
Posted: Monday, June 15, 2020 - 10:46 PM UTC
Sorry for derailing the thread guys. Hope it was okay.
Johnnych01
Visit this Community
England - South West, United Kingdom
Joined: June 29, 2019
KitMaker: 604 posts
Armorama: 506 posts
Posted: Monday, June 15, 2020 - 11:37 PM UTC
Thats not a problem Peter, and I am glad to help if I can.

Your Striker looks fine with what you have a done. I am hopefully getting the resin one as well from Andreas in Germany. Did you remove the front half of the upper sponson ?

Reason ask is that I have only ever seen the mid life extension vehicles with that done (and even then not all Strikers had the sponson removed), and those have the diesel engine fitted, and if the diesel retro fit engine is the version you are doing that has the raised air intake vents over the transmission compartment, and also the enlarged air intake mod on the side of the hull.

As to stowage, your Samaritan top bin looks fine, and to be honest, I would leave the half Chieftain long bin off it, it was rare to see them fitted at all. Even in my Regt, only about 2 of us out of 12 strikers had one fitted, and even then, I took it from the launch bins and refitted on the sponson plate in front of the air bottle box like the one we started this chat about. Most of the wagons just had mesh/wire baskets made for that area (to run along the sponson).

Stowage was never a big issue on a Striker as we had plenty of room internally for all our crap. All I allowed in the basket on the launch bins was webbing for me and the operator, and our cam net rolled up in a tank sheet and a spare water jerrycan. the driver would have his webbing slung around one of the MBSGD's on the front.

Dont be under the impression you need to go mad with the stowage as sometimes less is more.
petbat
Visit this Community
Queensland, Australia
Joined: August 06, 2005
KitMaker: 3,353 posts
Armorama: 3,121 posts
Posted: Tuesday, June 16, 2020 - 02:53 PM UTC
This is Accurate Armours own pics from their website. If by 'upper half of the sponson' you mean this bit in red, then yes:


In the second pick you can just make out a mould blemish which is a blob that should not be there. My example had huge blobs all along where the mould had probably been ripped off at some stage so the 'undercut did not exist at all. Also what was there had significant air bubbles at the edge and they just crumbled away. Only option was to replace and consider fabricating with styrene strip. Then I noticed the pic of the vehicle I was looking at, had had this removed:

Here is another pic of the vehicle:


Johnnych01
Visit this Community
England - South West, United Kingdom
Joined: June 29, 2019
KitMaker: 604 posts
Armorama: 506 posts
Posted: Tuesday, June 16, 2020 - 06:27 PM UTC
Hi Peter, that was a fair compromise if it was as badly damaged as that and by far the easiest solution. once it is all painted up it wont be noticeable anyway unless its to a very trained eye lol.

I hope the one I get from Andreas doesnt have the same cast defects, as that will mean I am going to have to do the styrene strip trick to make it the same as mine.

I too luckily had a donor CVRT Scimitar from AFV through an ebay cockup and hopefully I will be using the tracks (now I have sussed out how to achieve the required sag) and perhaps the wheels from that for the resin Striker once I get hold of it.

Would also love to see any further pics of your Striker as it develops.
Johnnych01
Visit this Community
England - South West, United Kingdom
Joined: June 29, 2019
KitMaker: 604 posts
Armorama: 506 posts
Posted: Tuesday, June 16, 2020 - 08:10 PM UTC
Angel, when you read this can you try and contact Svetoslav and see if he can post some pics of his finished search light wagon in the campaign gallery ? I did try a while ago but not heard back from him. cheers
ayovtshev
#490
Visit this Community
Sofiya, Bulgaria
Joined: September 22, 2016
KitMaker: 1,432 posts
Armorama: 1,390 posts
Posted: Tuesday, June 16, 2020 - 09:55 PM UTC
NP, John!
Will call him and make him an offer he can't refuse

Splendid job on the Scimitar, BTW!
And your "off-topic" discussion with Peter about the Striker is also very interesting!

Johnnych01
Visit this Community
England - South West, United Kingdom
Joined: June 29, 2019
KitMaker: 604 posts
Armorama: 506 posts
Posted: Wednesday, July 08, 2020 - 06:35 PM UTC
Hi guys, just for info only, here are some pics of my Challenger 1 C/S 42, that I was crewed on as a loader, then Commander.


As before, this isnt included in this campaign, pics and updates were info only as 42 has many found memories from my time in W Germany in Detmold then Sennelager.

Now ... hopefully the CVRT Striker will be next for more memories ..........

Hope everyone is safe and well.

Johnnych01
Visit this Community
England - South West, United Kingdom
Joined: June 29, 2019
KitMaker: 604 posts
Armorama: 506 posts
Posted: Thursday, August 06, 2020 - 01:02 AM UTC
I have now luckily received the long awaited CVRT Striker from Andreas in Germany who was kind enough to sell it to me. Will be referencing some old pics of when I was on my old one ( 34b) in Windsor as I want this as close to perfect as I can get it ...so ... Slowly slowly and some careful planning...

Also, it's my first full resin kit so a bit of research needs doing on that as well. Any advice appreciated on resin builds !!

Stay tuned. I will also be doing the striker as a build review/picture feature.