Armor/AFV: Axis - WWII
Armor and ground forces of the Axis forces during World War II.
Hosted by Darren Baker
Bronco 1/35 Turan II Review Blog
JPTRR
Staff MemberManaging Editor
RAILROAD MODELING
#051
Visit this Community
Tennessee, United States
Joined: December 21, 2002
KitMaker: 7,772 posts
Armorama: 2,447 posts
Posted: Monday, September 17, 2018 - 02:44 PM UTC
Matthew,

An exceptional blog! So very glad you are tackling this model. Great work on it. It looks like a handful!
firstcircle
Visit this Community
England - South East, United Kingdom
Joined: November 19, 2008
KitMaker: 2,249 posts
Armorama: 2,007 posts
Posted: Monday, September 24, 2018 - 09:41 AM UTC
Thanks Omar, and Fred; I'm not sure it will be done that quickly, but we are now at the stage where there's more painting than building to be done.

Small update, although representing a fair amount of fiddly work. Tackling the two big side skirts. These, obviously, come in one piece, but originally were made up of four panels.


The side skirts do a good job of obscuring the nice complex suspension, so I went for chopping one rear panel off to provide a better view on one side.
Having done that and sanded them down a bit, the 23 hangers are formed and glued on:


So I thought about whether I should be checking the fit against the plastic hangers on the track guards while doing this, but decided I'd just get on with it and fix any problems afterwards, and the happy go lucky approach fortunately turned out OK, as the little hooks aligned perfectly well with the little loops, and the skirts hang in place:


CMOT
Staff MemberEditor-in-Chief
ARMORAMA
Visit this Community
England - South West, United Kingdom
Joined: May 14, 2006
KitMaker: 10,954 posts
Armorama: 8,571 posts
Posted: Monday, September 24, 2018 - 08:09 PM UTC
As always Matthew I am impressed with your attention in getting everything just right, keep up the great work.
firstcircle
Visit this Community
England - South East, United Kingdom
Joined: November 19, 2008
KitMaker: 2,249 posts
Armorama: 2,007 posts
Posted: Wednesday, October 03, 2018 - 09:51 AM UTC
Cheers Darren, not everything goes right of course

The last bit of construction before painting is to fit the tow cable. Some modellers might fit this after painting I suppose, but I anticipated a fair amount of glue being used. These are the components to be fitted:


The string is a problem in that it has unravelled where it was loosely knotted, added to which the ends have frayed. Trying to trim the end resulted in something that really didn't look like it was ever going to go into the tiny hole in the ferrule of the towing eye. Therefore it was rejected, and instead I took a length of (0.5mm?) copper wire, about three times as long as was needed, bent it in half, the bent end was held still with pliers, the other end clamped in a pin vice drill, and twisted until even. It was carefully bent and test fitted and trimmed to length:


The ends of the cable were filed a little thinner and fitted into the eyes / shackle / hook assembly:


The cable was refitted and glued, and the ends arranged and cemented in place. The clamping was too much and broke the eye, necessitating a bit of repair work.


This was all on a Sunday, and I was aiming to start priming, but there's always more preparation before that, like test fitting the turret armour:


A fair amount of re-bending the brackets, and tweezer work was required, but eventually the three panels went on in something like alignment, and none of the brackets fell off. Note the bent in angle of the front third of the side panels.

I have a lot of components to be painted separately, and these were all mounted on cocktail sticks. Again, I know some modellers favour attaching everything and then painting. However, this is the breakdown of those parts:


firstcircle
Visit this Community
England - South East, United Kingdom
Joined: November 19, 2008
KitMaker: 2,249 posts
Armorama: 2,007 posts
Posted: Wednesday, October 03, 2018 - 10:05 AM UTC
With all of the preparation done, I then primed almost everything in two sessions, using Mr Surfacer 1500 thinned with about 40% cellulose thinners. It's hot enough to melt the expanded polystyrene the cocktail sticks are stuck in, but not the model. It dries very fast and is very forgiving.


The turret (Mr Pinhead):


The above shot shows the slight mess I made around the gun mount.

Then the skirts, one side only done so far. These big perforated metal sheets take a lot of paint before they are fully covered, and it has to be applied at various angles to hit the insides of all of the holes.


A few touch ups to be done, especially as it's the nooks and crannies that I want the blackest, but it's almost there. After about 40 minutes or an hour at most of spraying solvent with the gloves, goggles and vapour mask on I have to give it a rest and let my face get back to its normal shape, so it takes a few days to complete.
CMOT
Staff MemberEditor-in-Chief
ARMORAMA
Visit this Community
England - South West, United Kingdom
Joined: May 14, 2006
KitMaker: 10,954 posts
Armorama: 8,571 posts
Posted: Thursday, October 04, 2018 - 08:12 AM UTC
Keep up the great work buddy.
ColinEdm
Staff MemberAssociate Editor
ARMORAMA
Visit this Community
Alberta, Canada
Joined: October 15, 2013
KitMaker: 1,355 posts
Armorama: 1,229 posts
Posted: Thursday, October 04, 2018 - 11:42 AM UTC
It is coming along great Matthew.
firstcircle
Visit this Community
England - South East, United Kingdom
Joined: November 19, 2008
KitMaker: 2,249 posts
Armorama: 2,007 posts
Posted: Saturday, November 10, 2018 - 09:00 AM UTC
After an interruption for a 1/72 build, I've got around to doing some painting on this one. A bit of a saga around trying to use the Hungarian AFV panel lighting set from Hataka which I thought I would give a go as it supposedly provides the correct colours for this build. It's one of Hataka's "red line" series of purely water based acrylics, similar to Vallejo's Model Air. I had read somewhere about them working well with Mr Hobby Levelling Thinner, so having obtained the paints and the thinner, I turned the first batch of paint into green blancmange. Levelling thinner is designed for lacquer based paints, so either someone else had become confused, or perhaps also I had, failing to notice that the red on the packet was red, and not orange. (Hataka's ranges are Blue, Red and Orange... why not Green... or Purple...??)

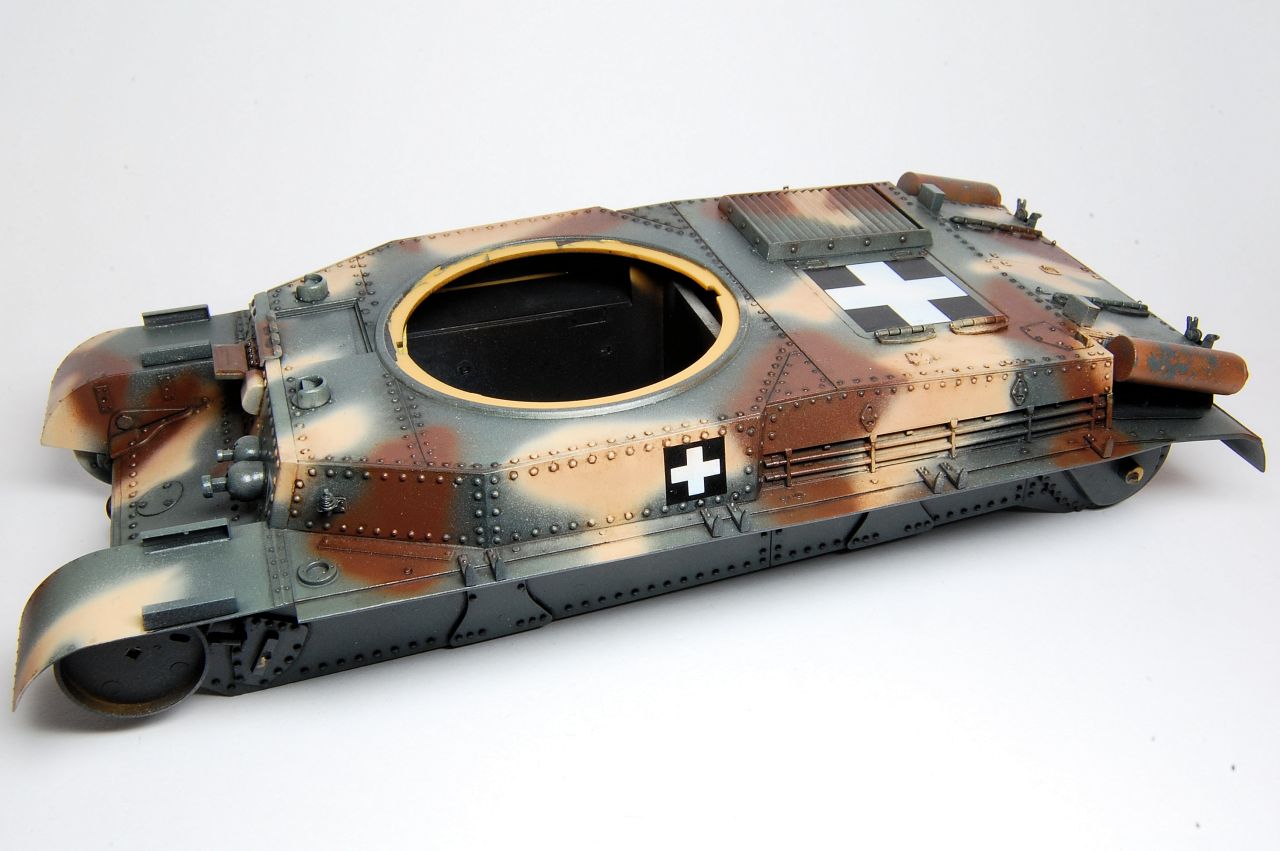
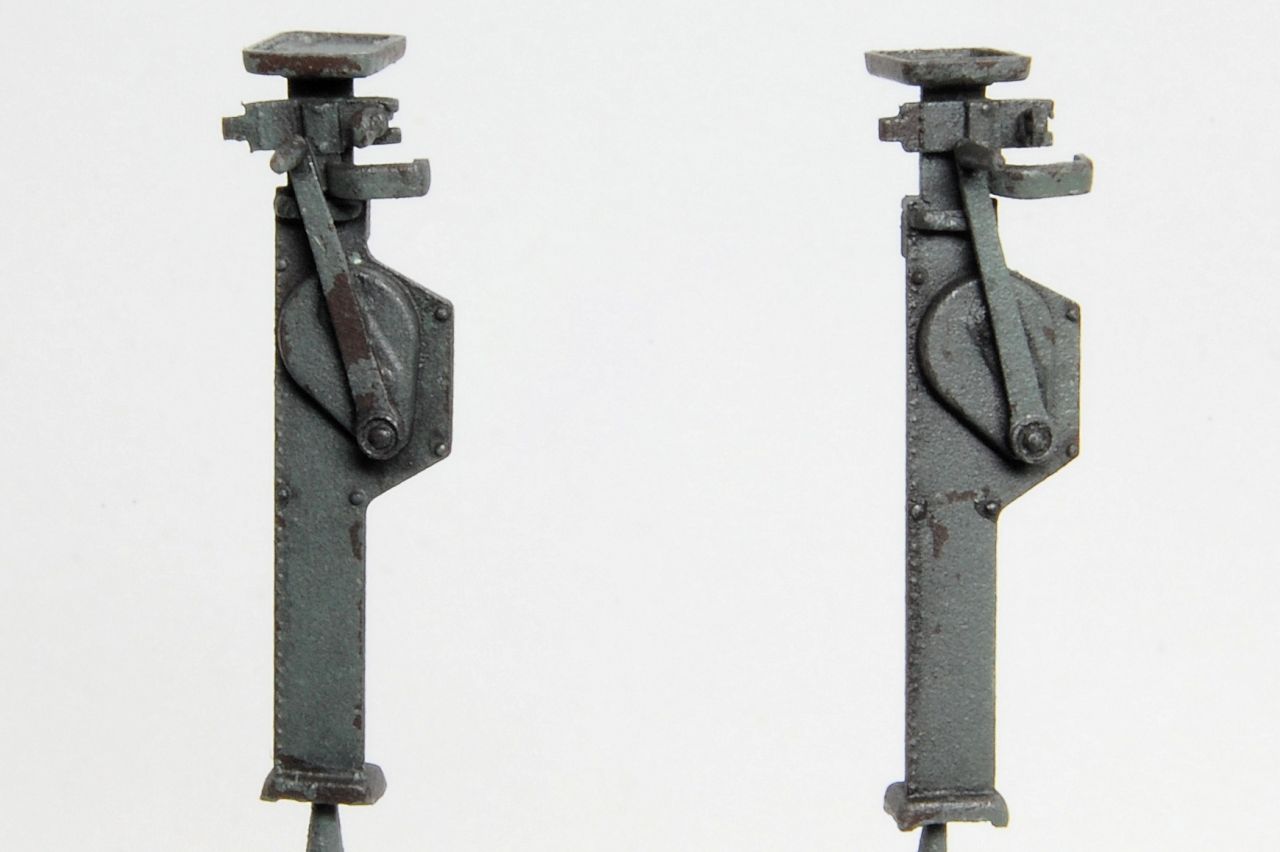
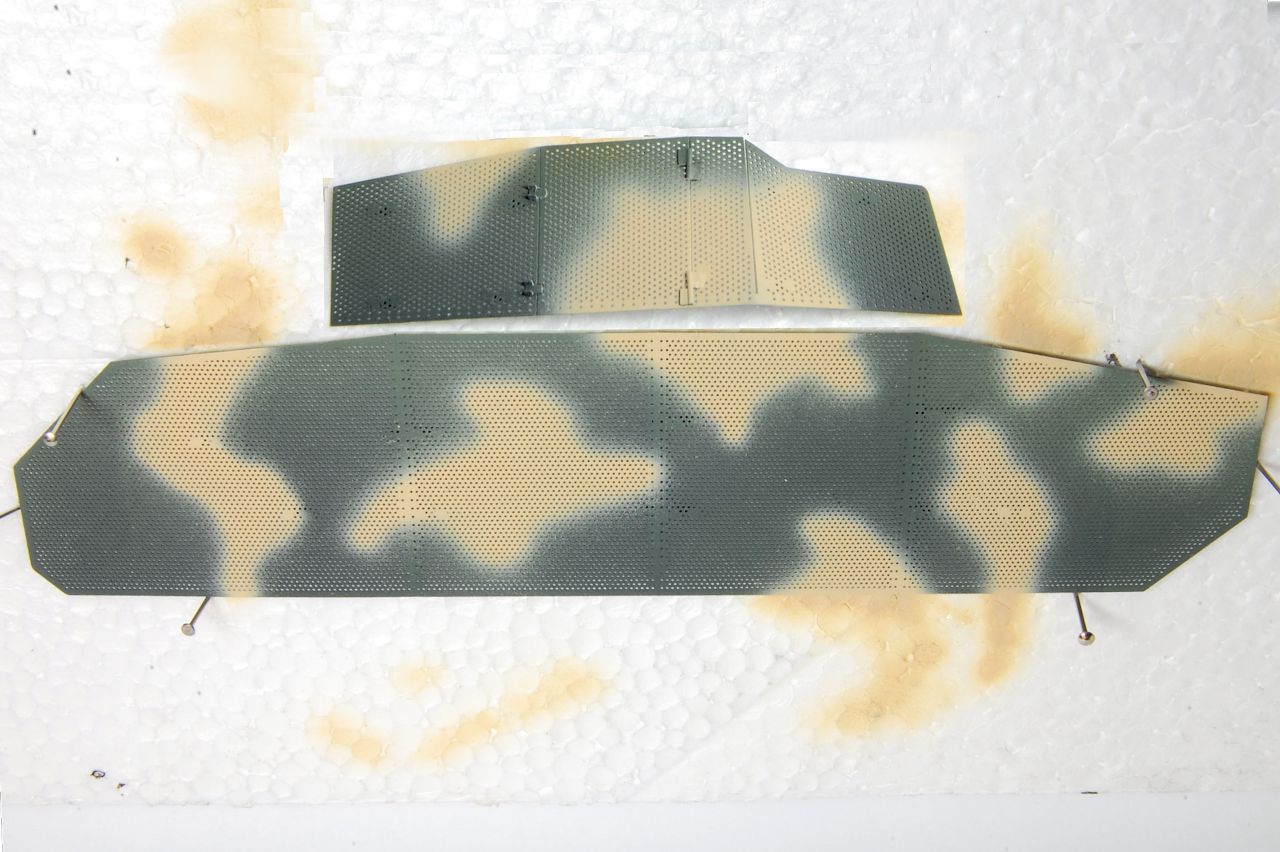
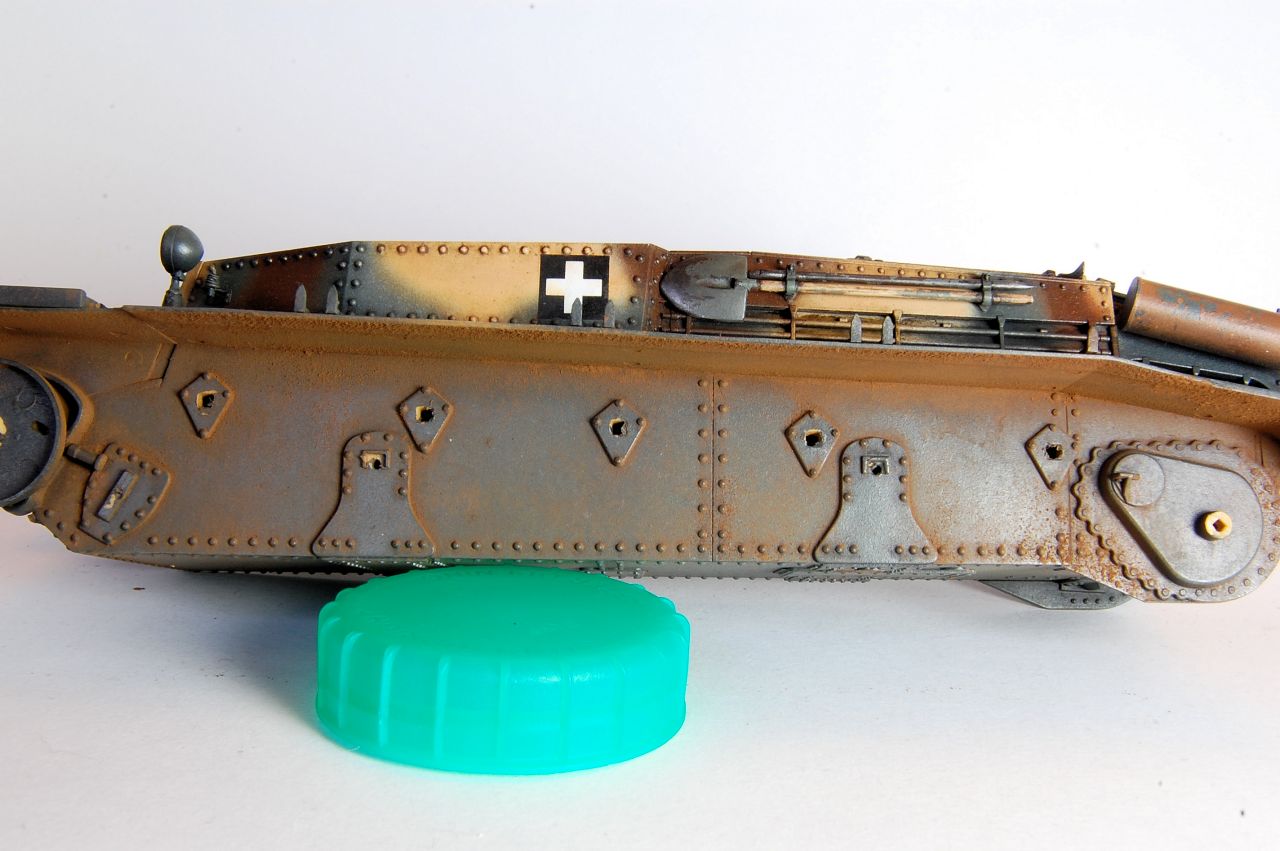
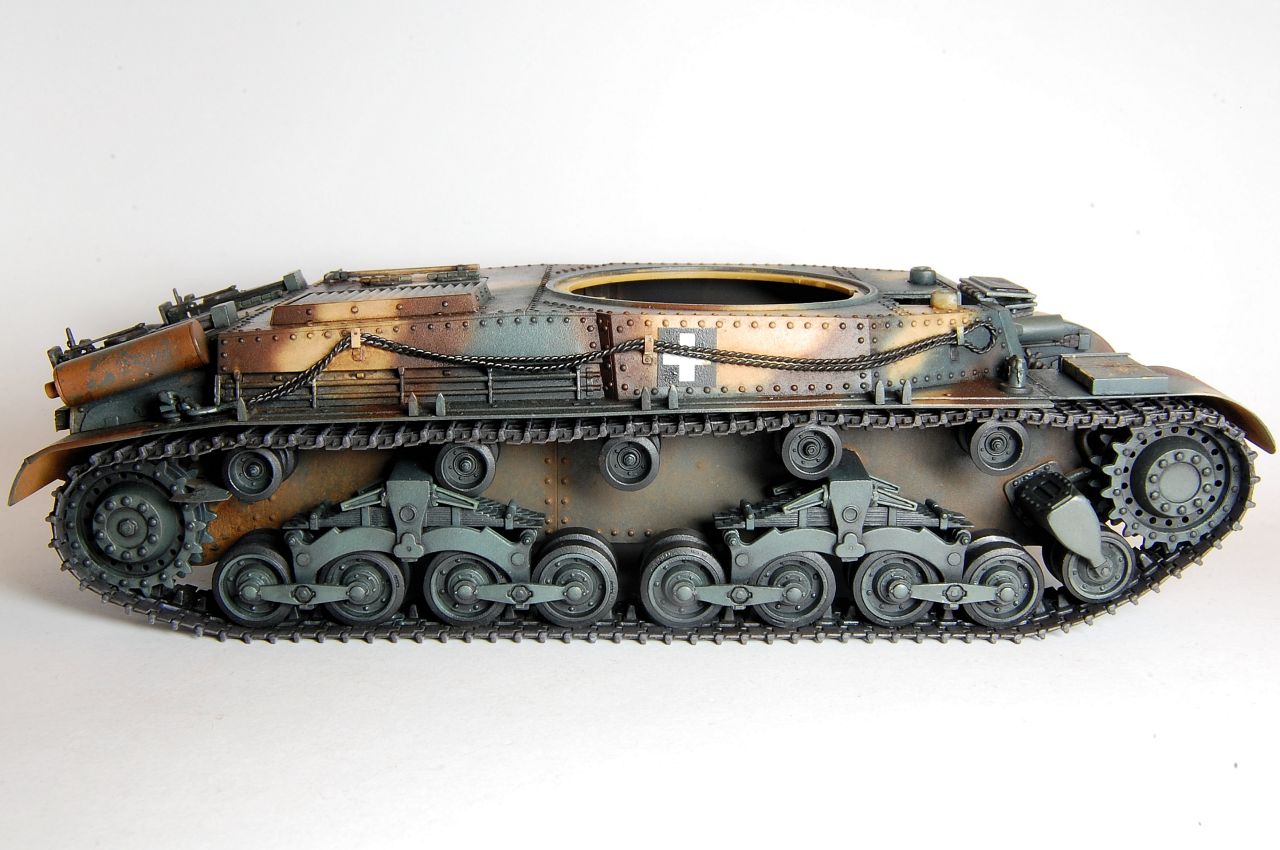
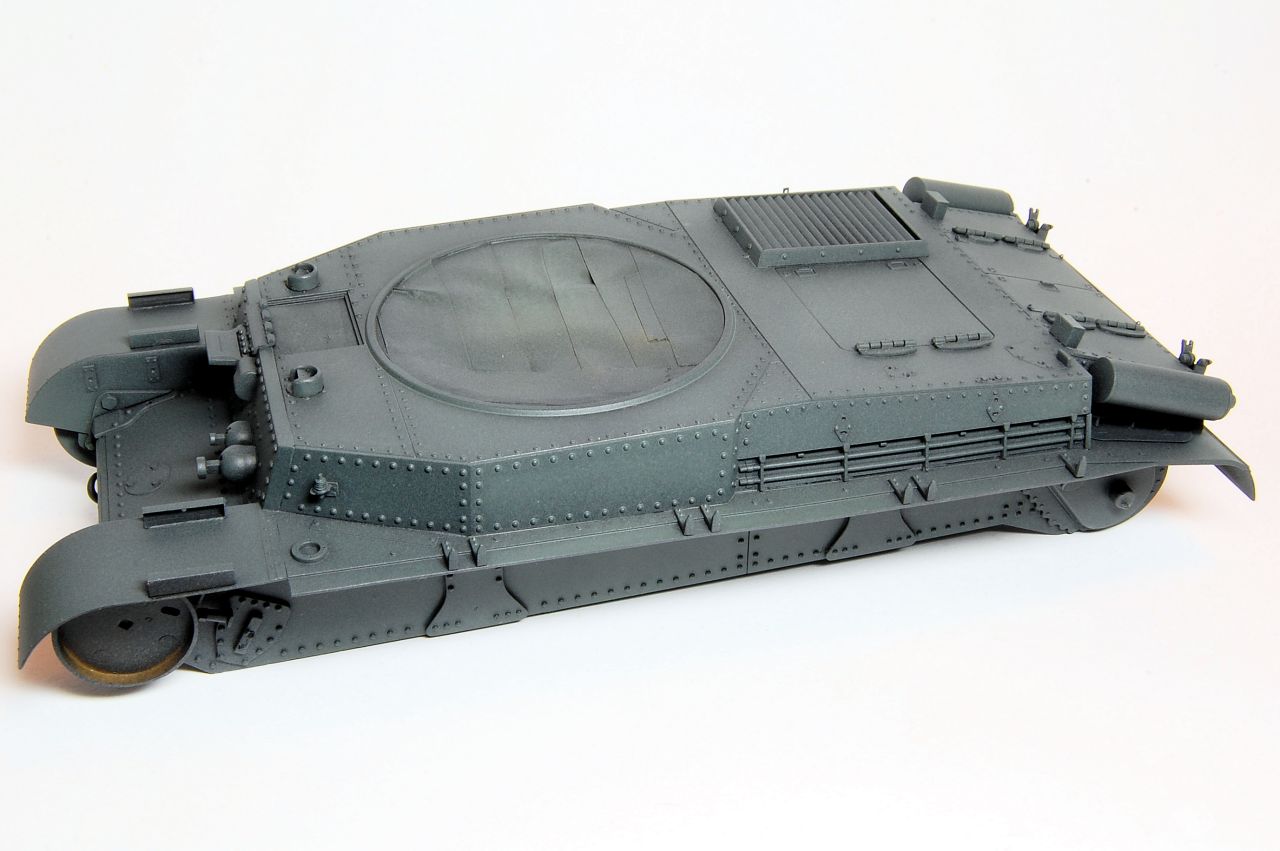
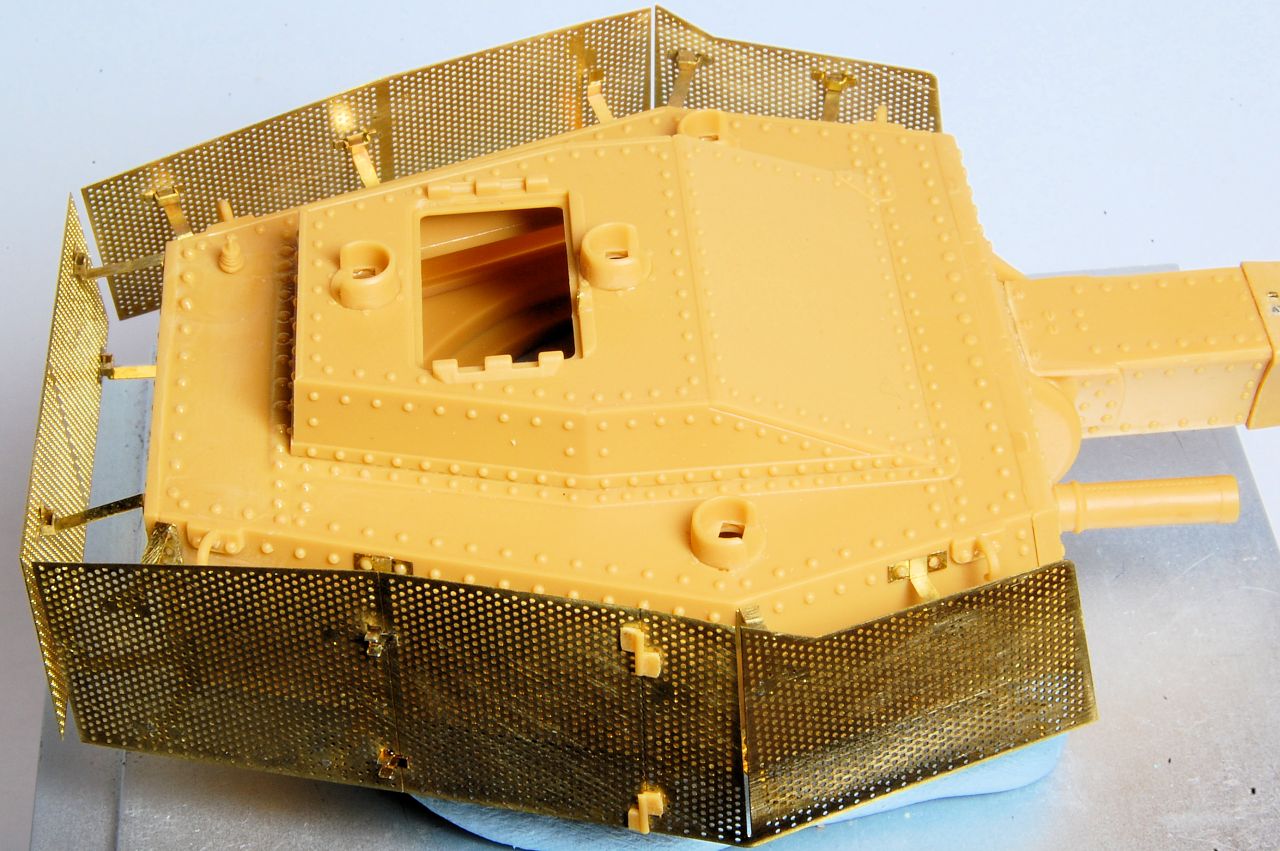
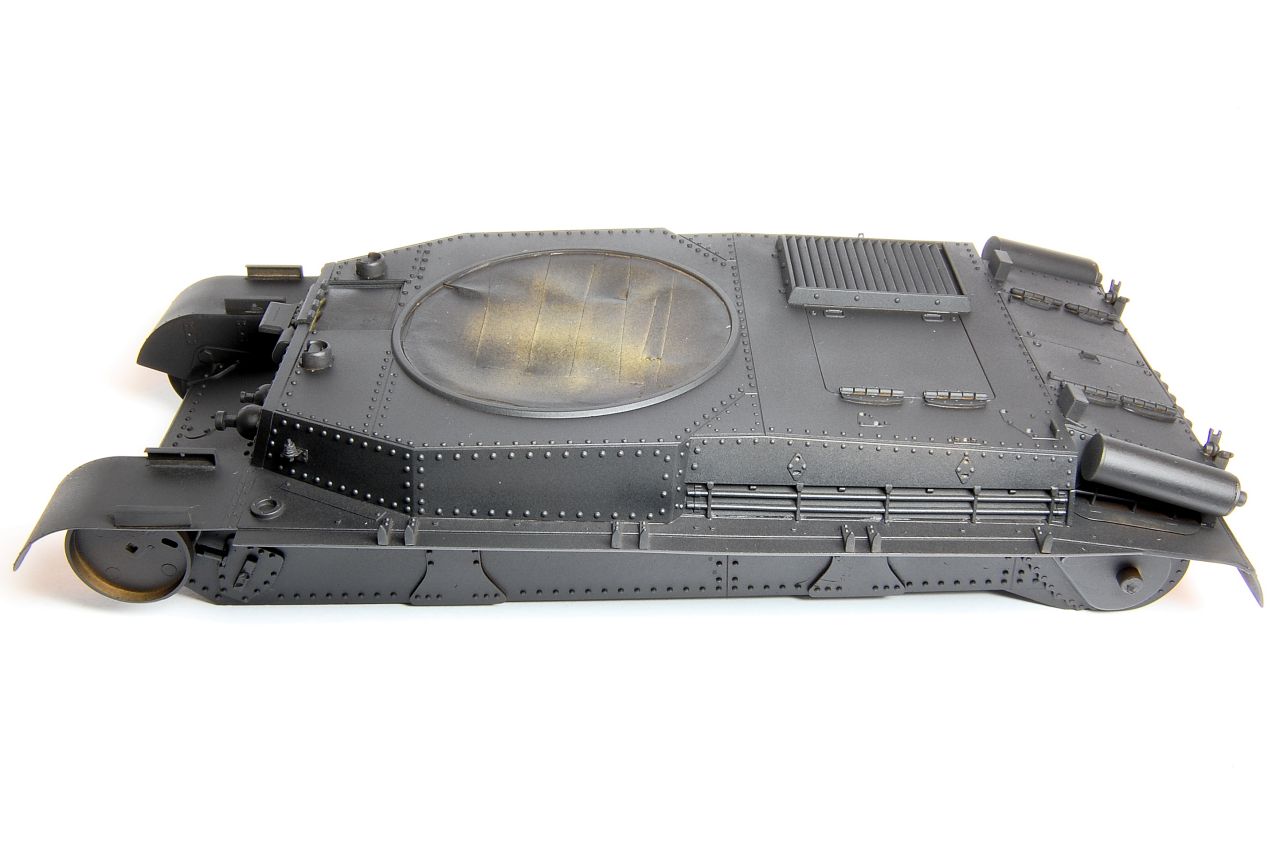
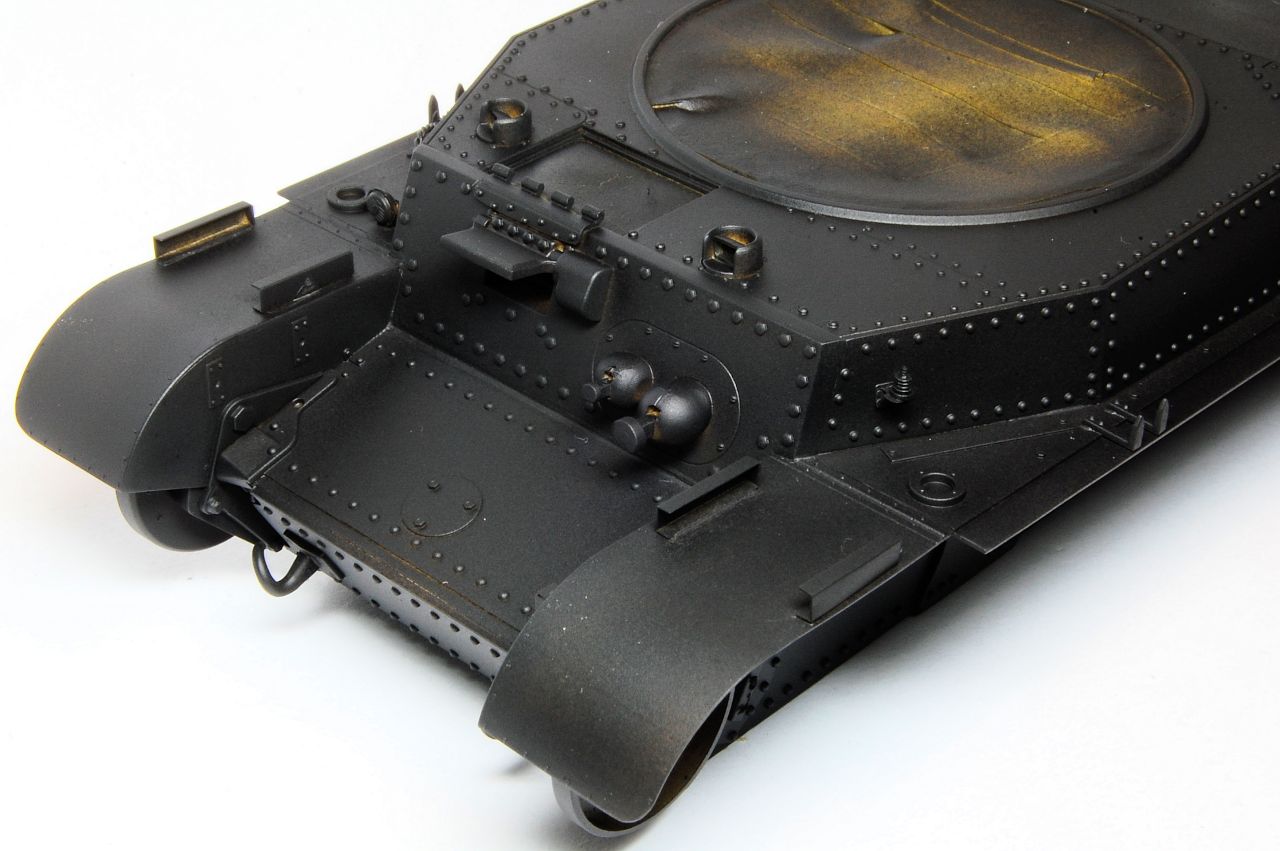
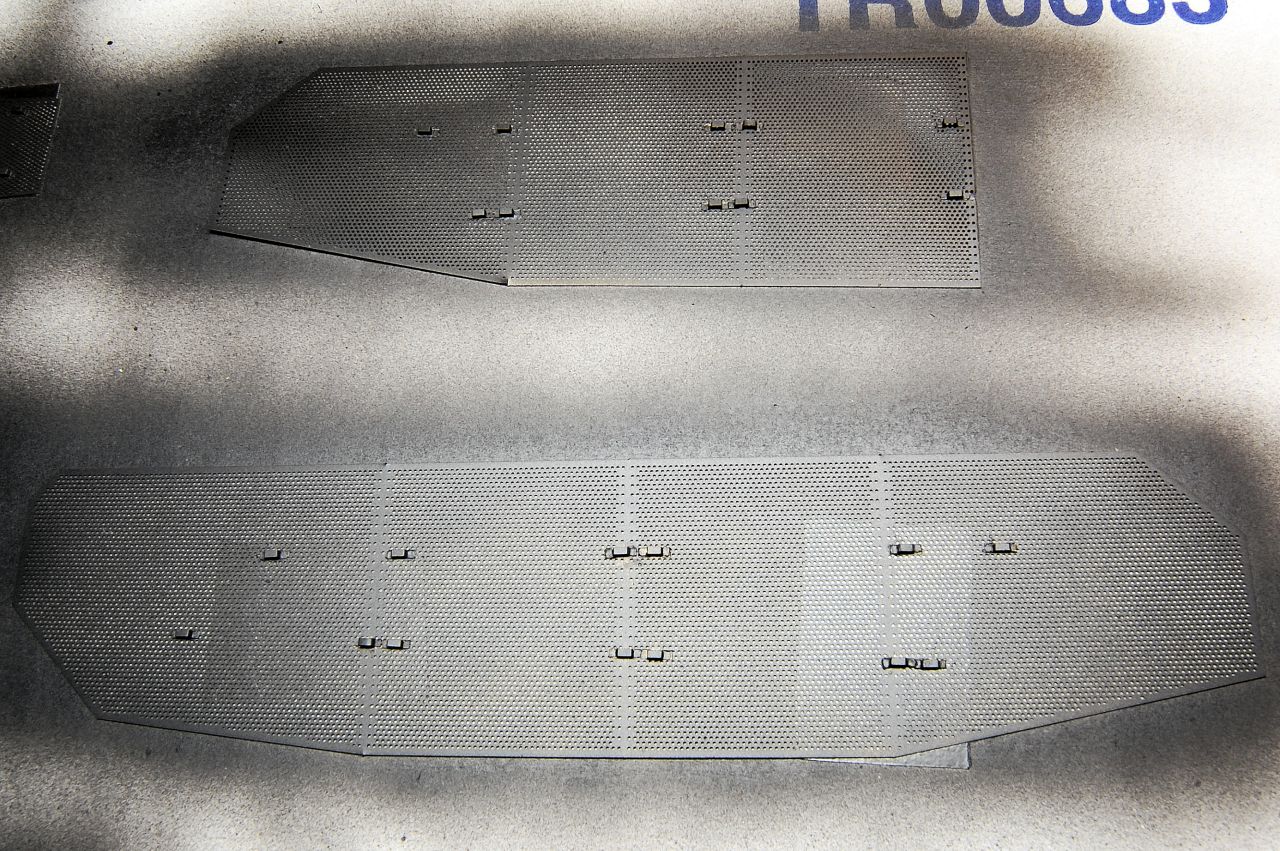
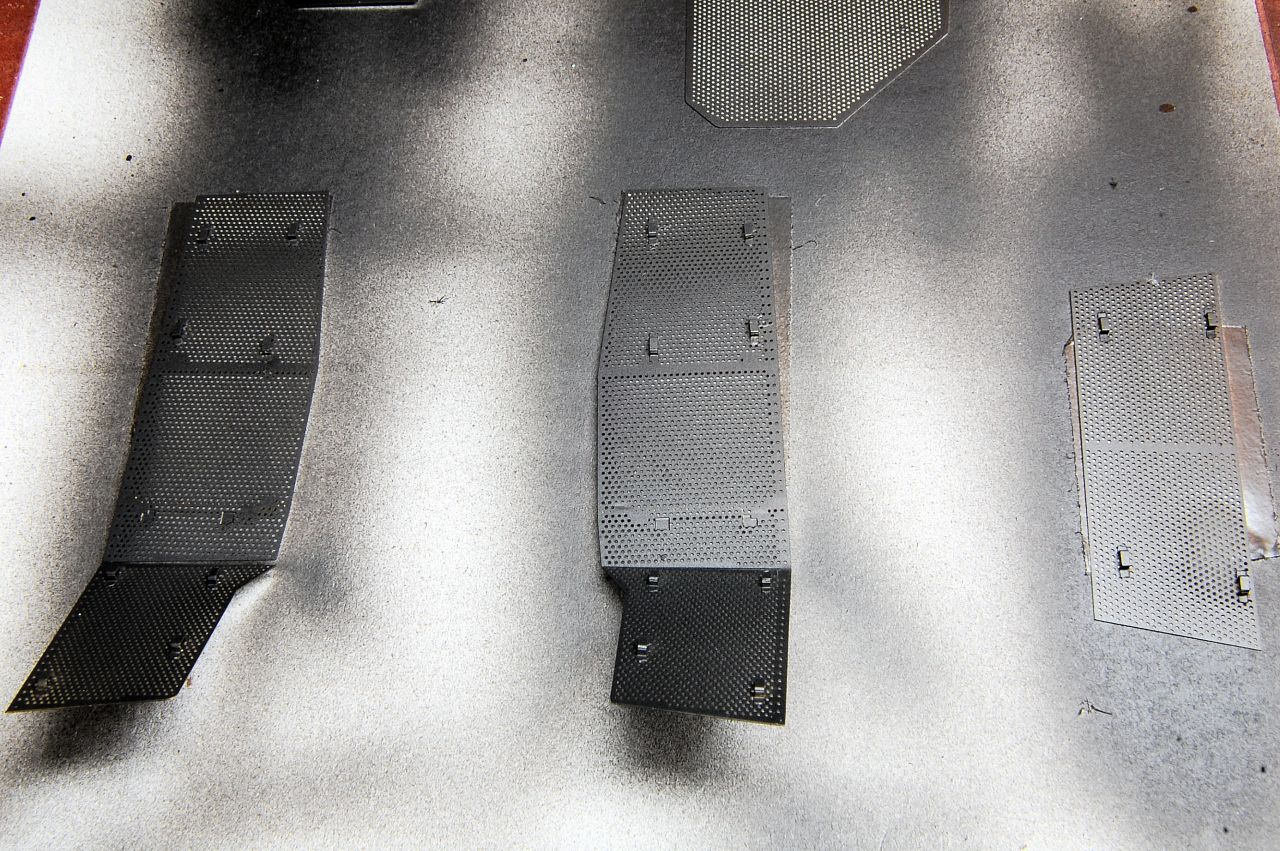
After removing the blancmange from, and thoroughly drying, the airbrush, I mixed the Green Base paint with increasing amounts of Liquitex Slo-Dri retarder, but no thinner,, until it flowed consistently at about 20psi without tip drying. The result was satisfactory, a very matt, very slightly grainy, shade of bluish green:


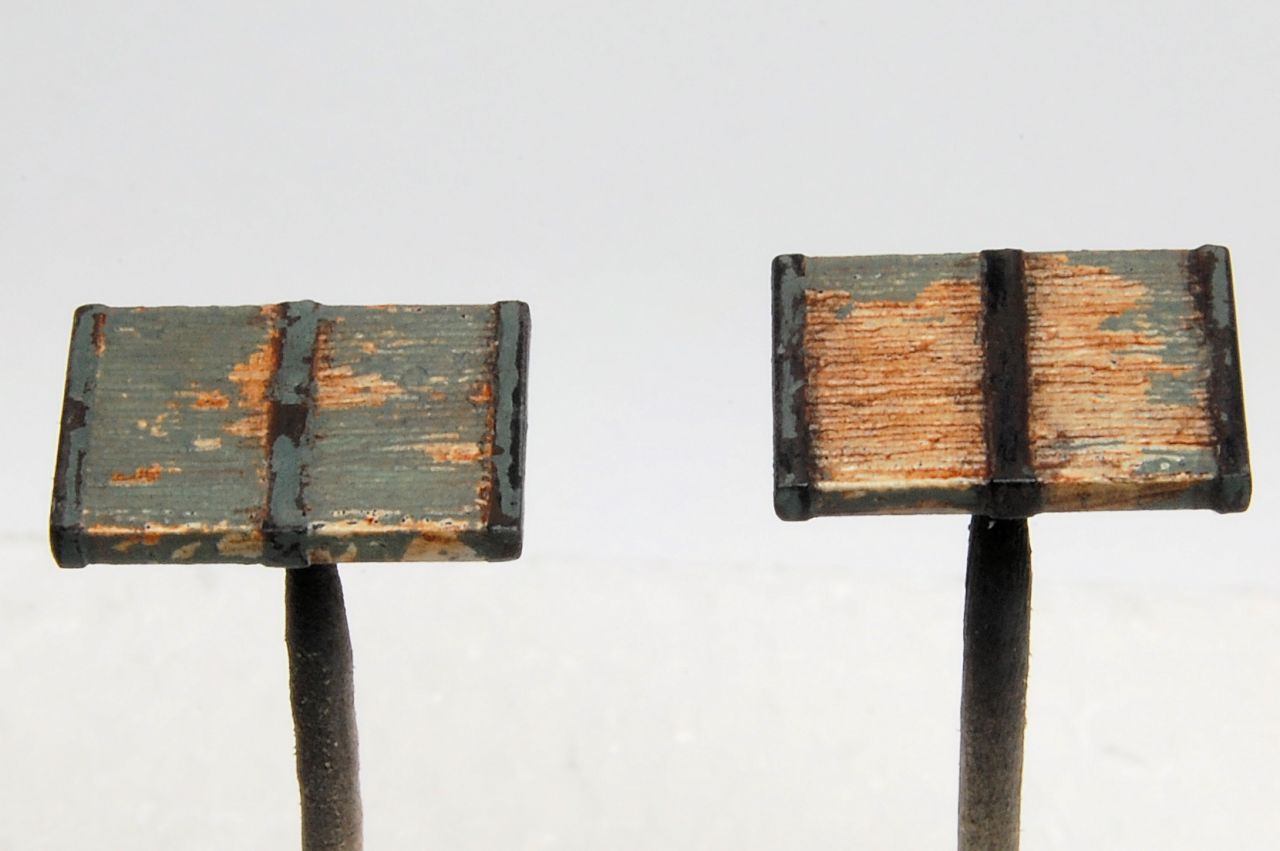
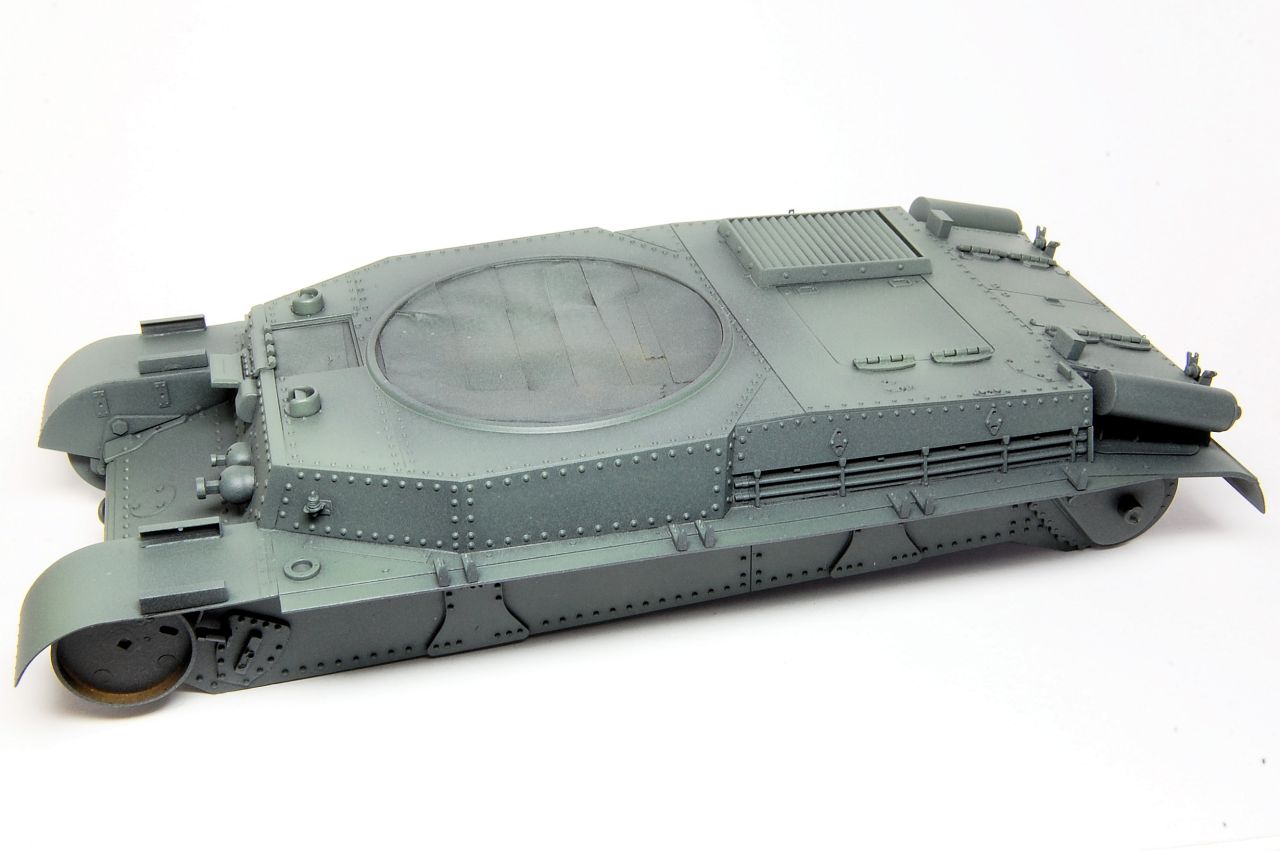
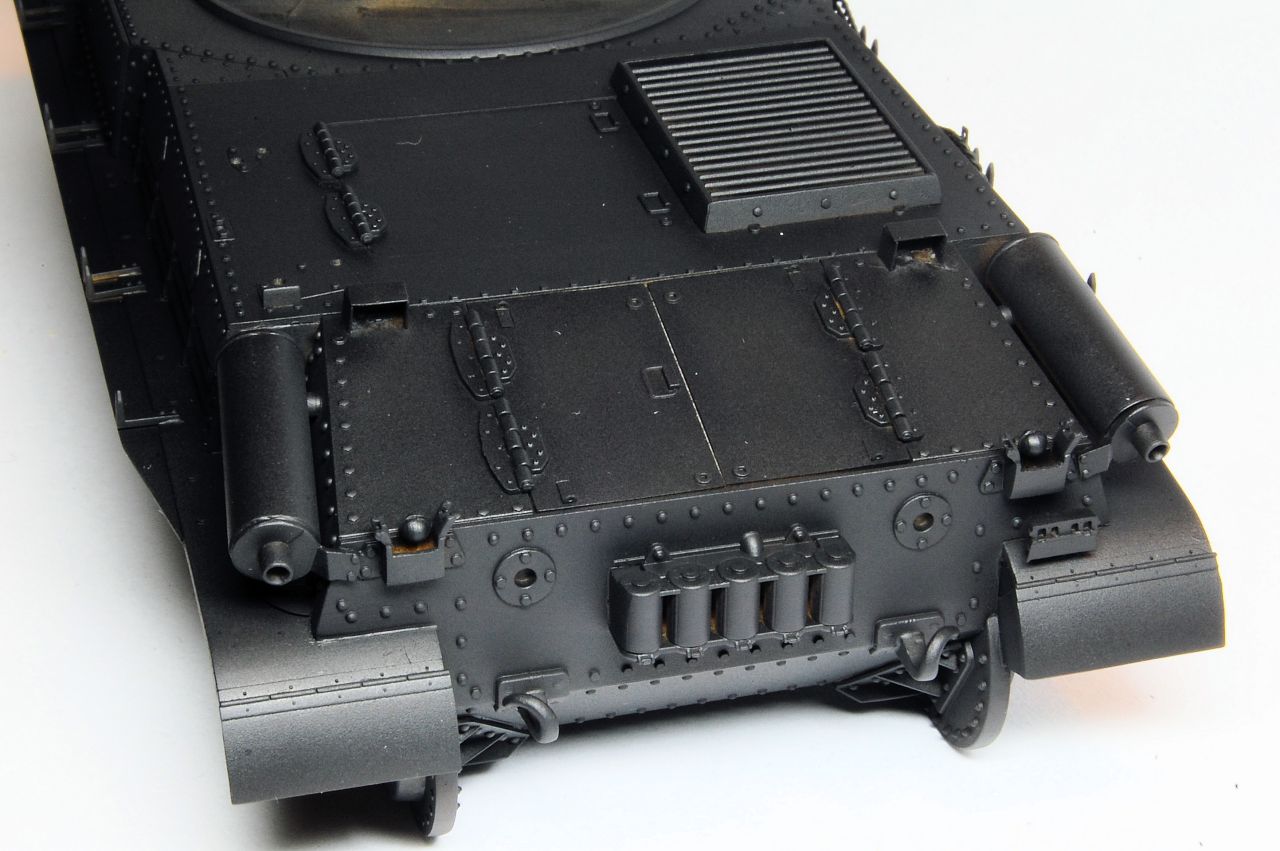
The Green Flash paint was mixed the same way, and some colour variation was added, pretty subtle, the Green Flash being more green, less blue-grey:


Midweek I had a day off and sketched out a plan of the camouflage pattern, and thought I'd get comfortable with spraying the Sand Base paint. I started off mixing it the same way as with the green, adding progressively more retarder, and test spraying from about an inch away with around 12psi to avoid spidering. I could only ever paint like that for about 20 seconds at a time before the tip of the needle had a build up of dried paint that had to be cleaned off. Opening up the trigger would allow paint to flow, and I suppose that's how I painted the green base coat, with broad strokes, but it was just too inconstant to allow close up thin lines to be sprayed. I tried mixing with all the potential substances that I have, but all produced exactly the same result.

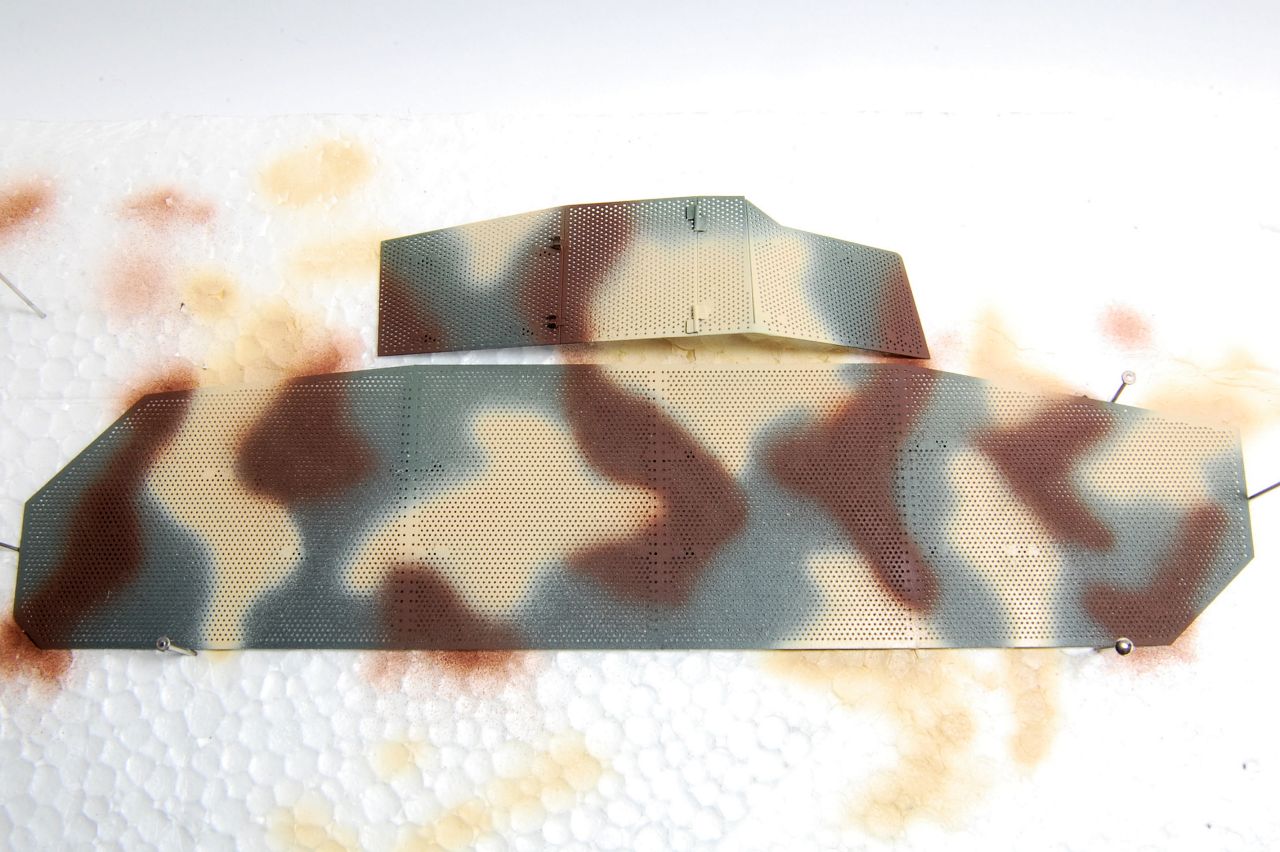
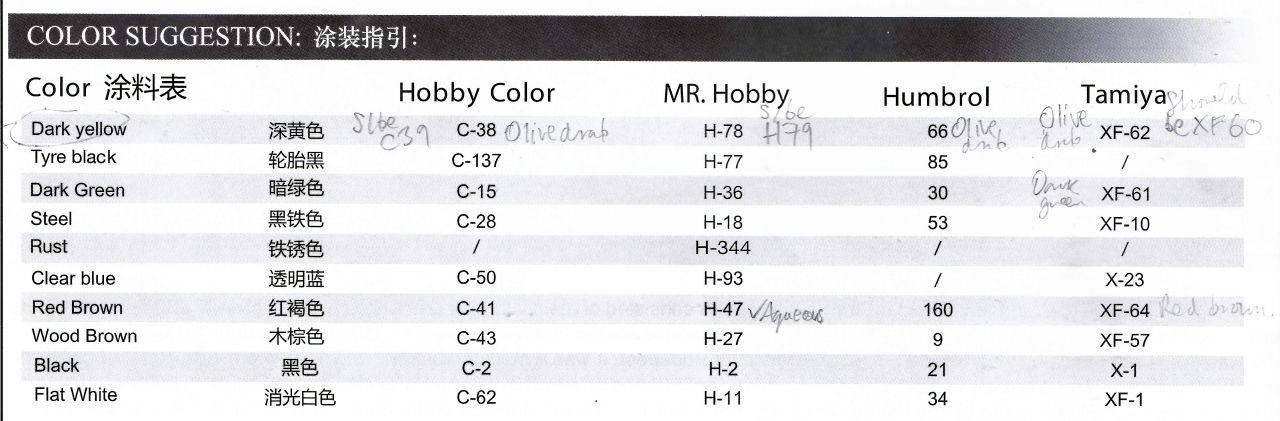
So not wanting to use Bronco's suggested Tamiya dark yellow, which is nothing like the Hataka sand colours, which are much more orangey sandy with no greenish tone, I toyed with ordering some other paints, but having spent several hours messing around with the Hataka sand, I was getting impatient, so I took an old 5% full bottle of Tamiya Buff, topped it up to about 10% full with Wooden Deck Tan (more orangey) and then up to about 15% full with Mr Hobby Color Sand (the really stinky lacquer one) and finally thinned it with Mr Levelling Thinner. These don't mix immediately but do if given a good shake.

So this mix took me to somewhere not far from the Hataka Sand colour, and also flowed acceptably under this low pressure. It has to be said, that even this paint mix tip dried, but after more like two minutes of painting, rather than 20 seconds, so it was usable. I could tell when it was about to start as it started whistling and small threads of dried paint were expelled. This could have been due to contamination from the water based acrylic; ideally the airbrush should be completely dry when changing from one type of paint to the other (or use a different a/b).

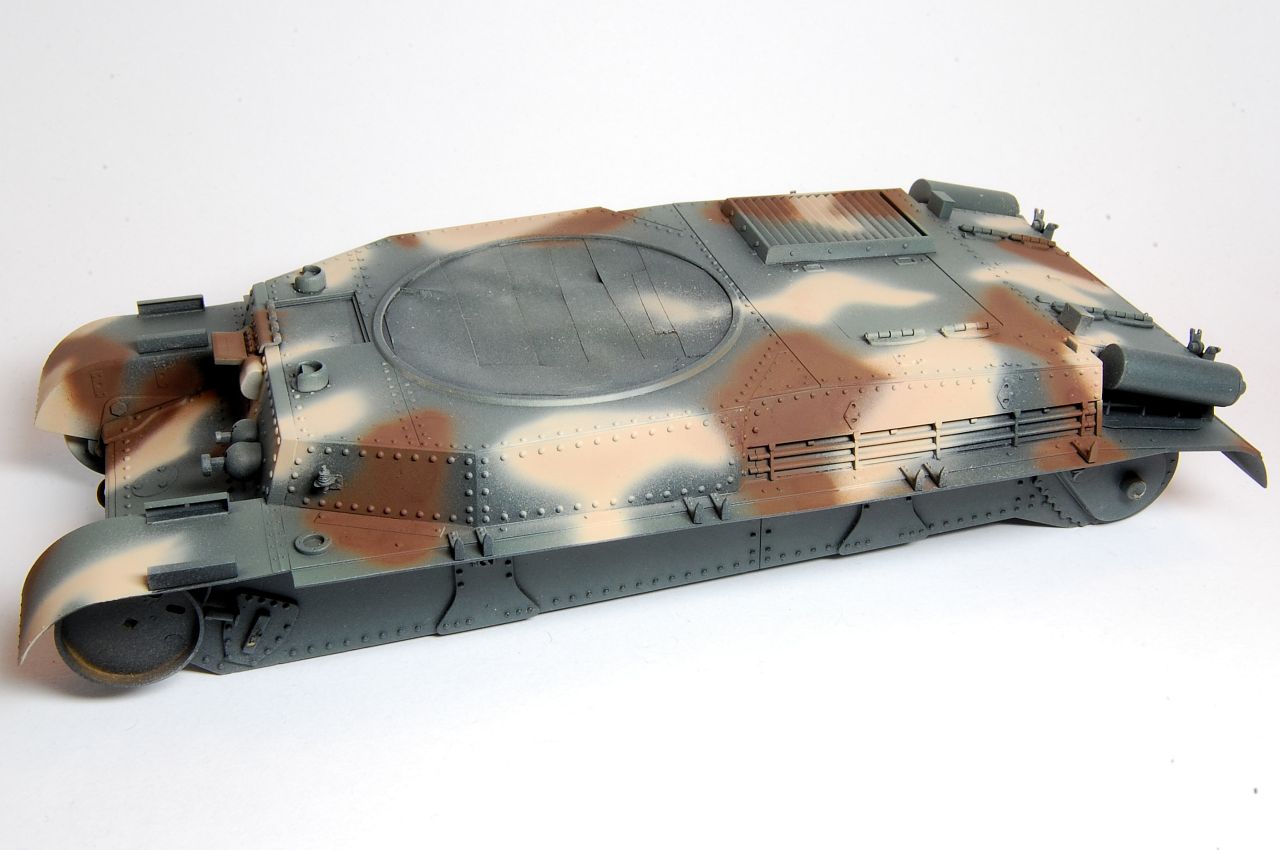
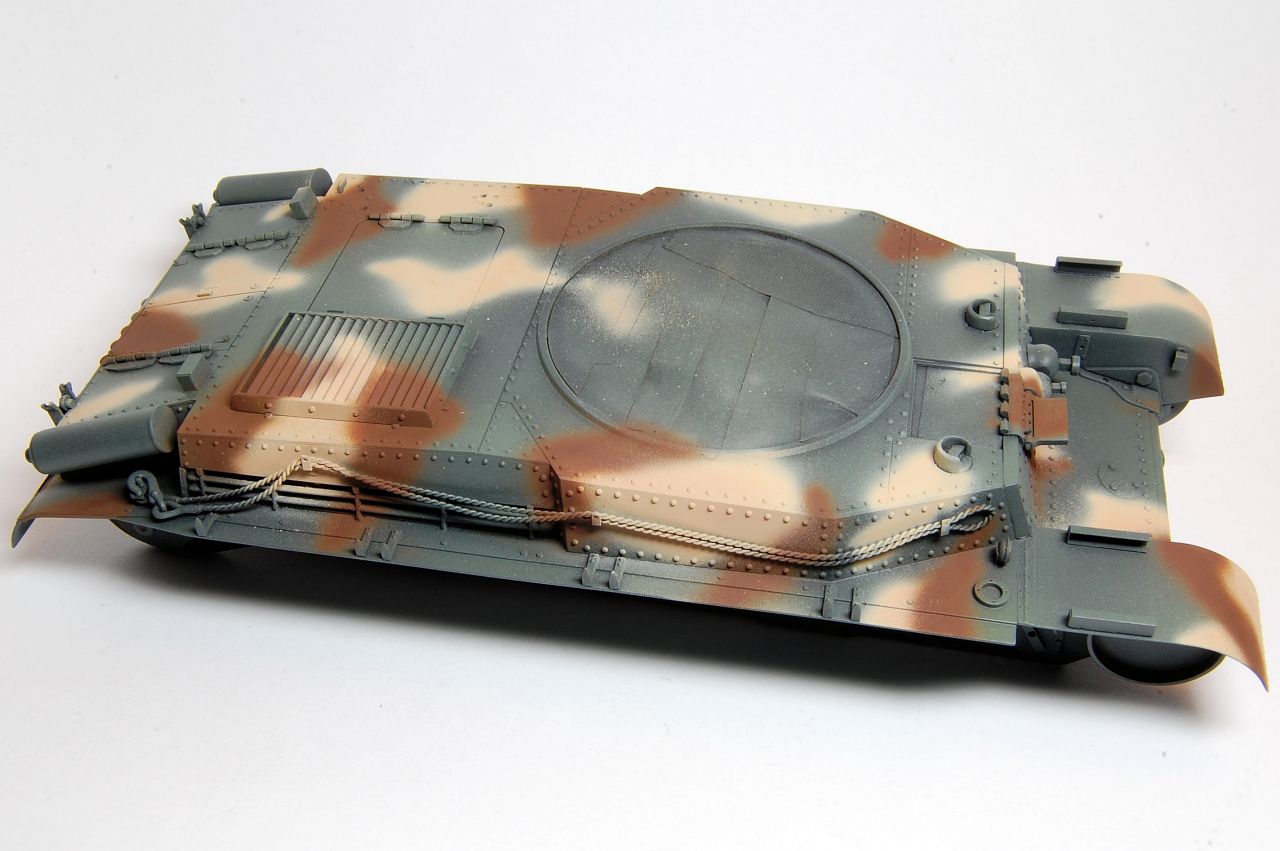
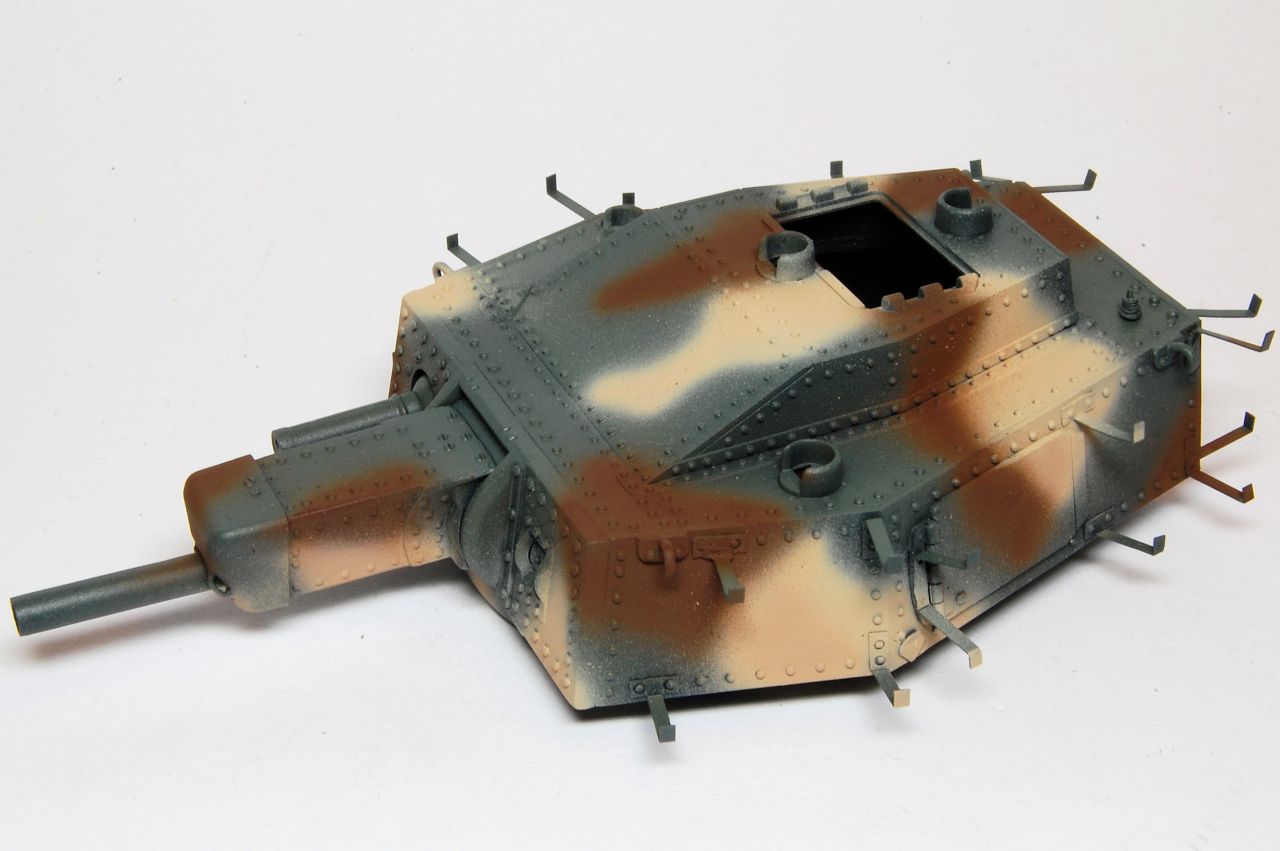
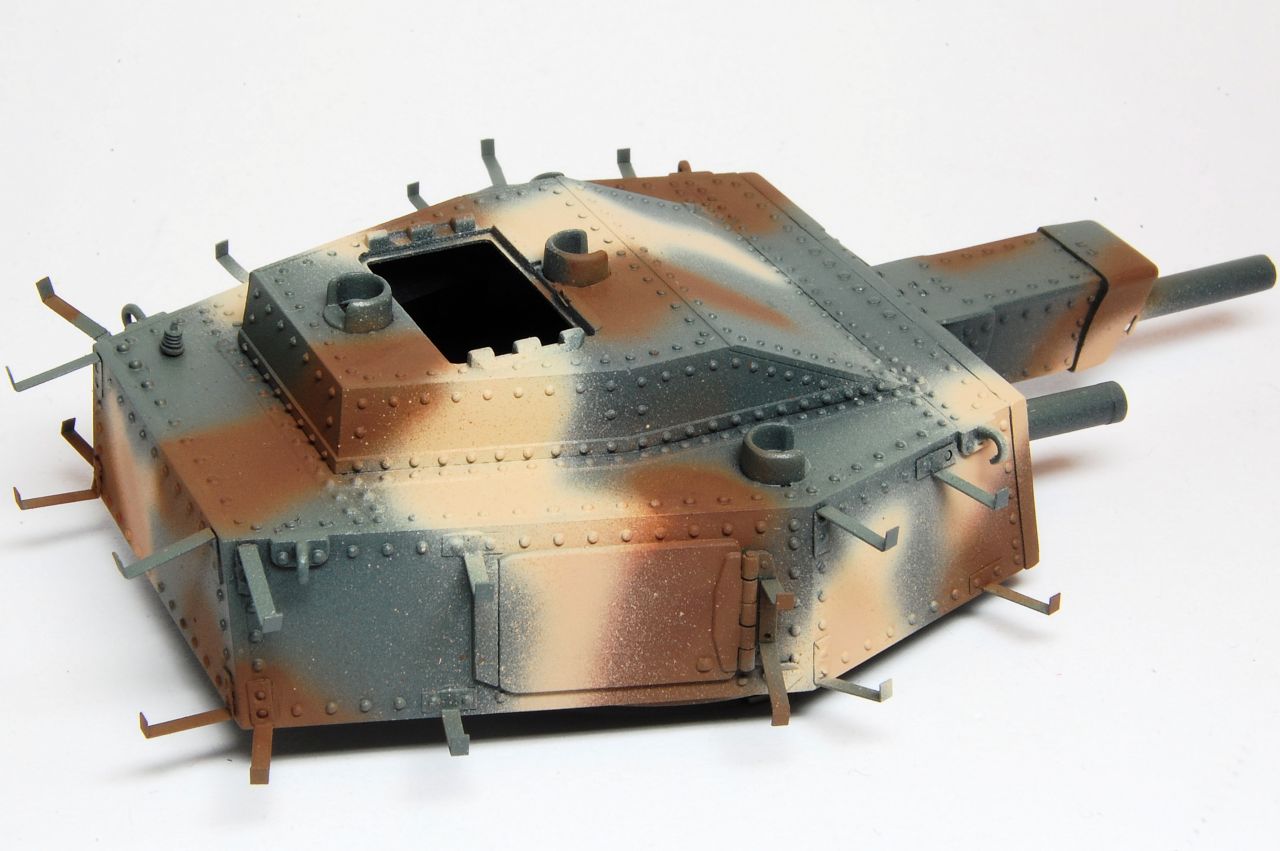
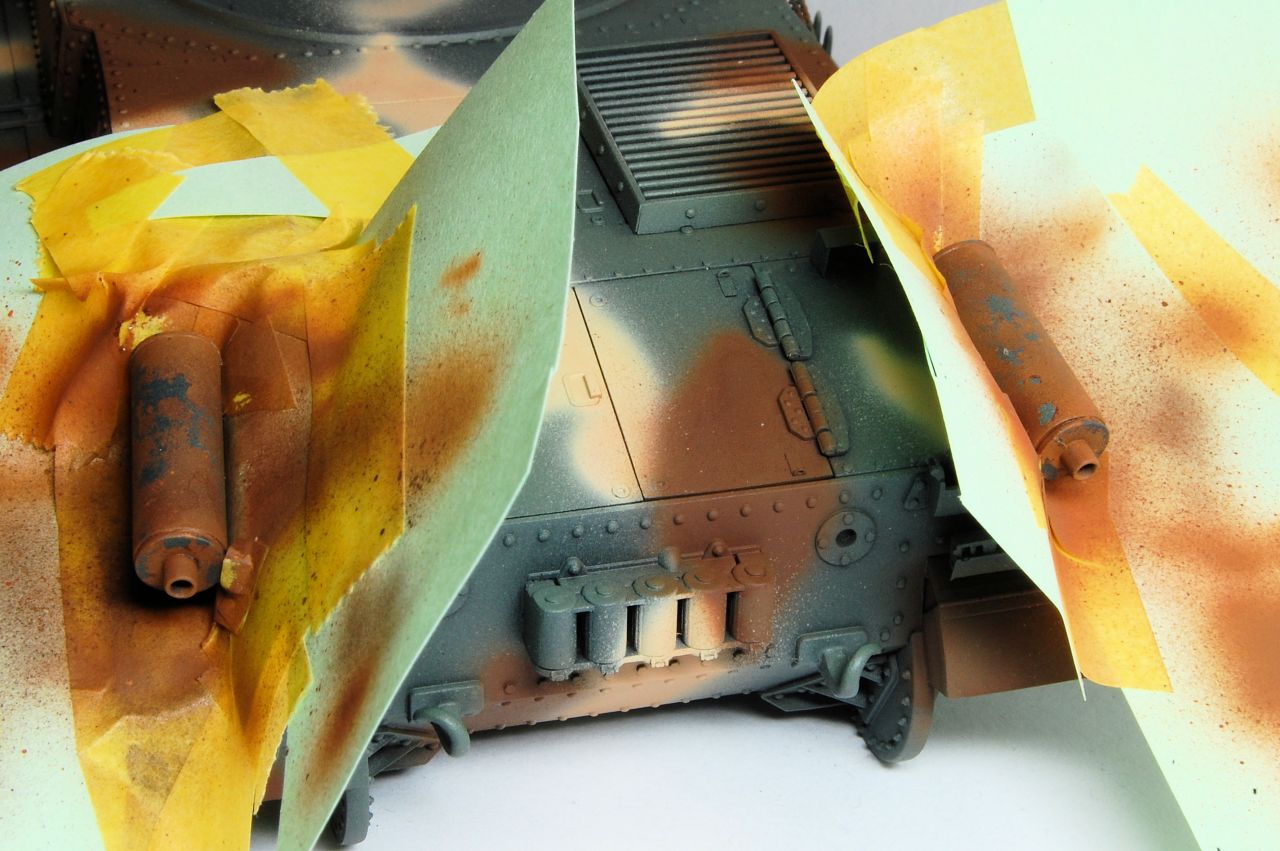
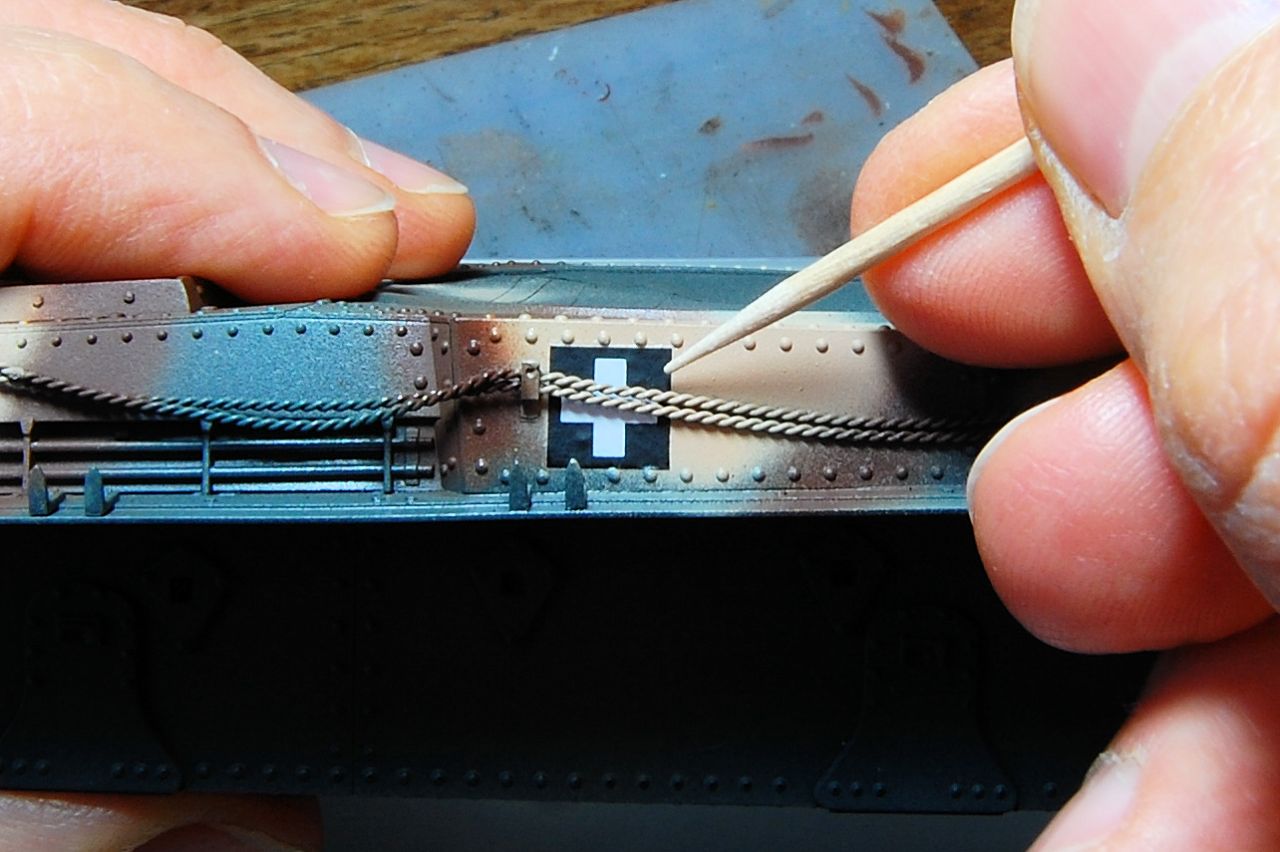
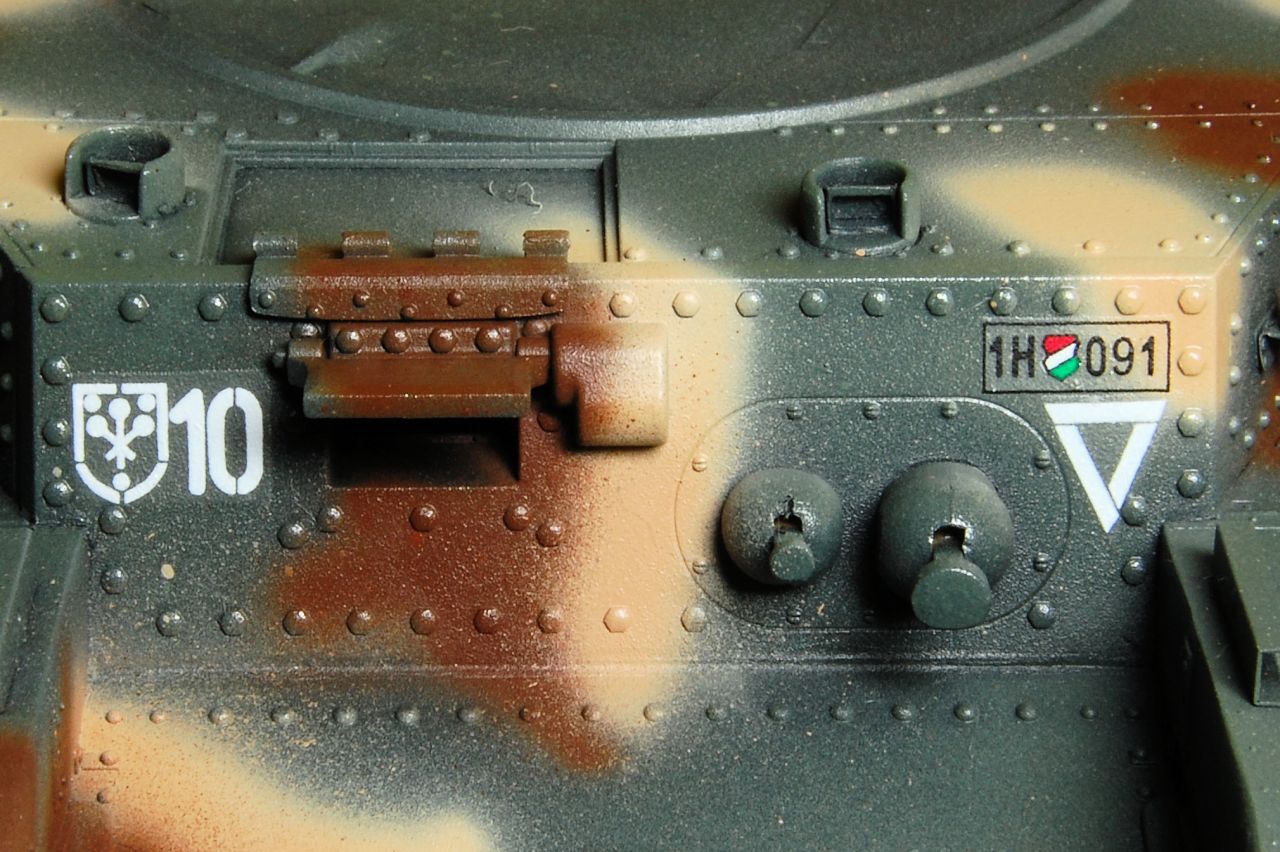
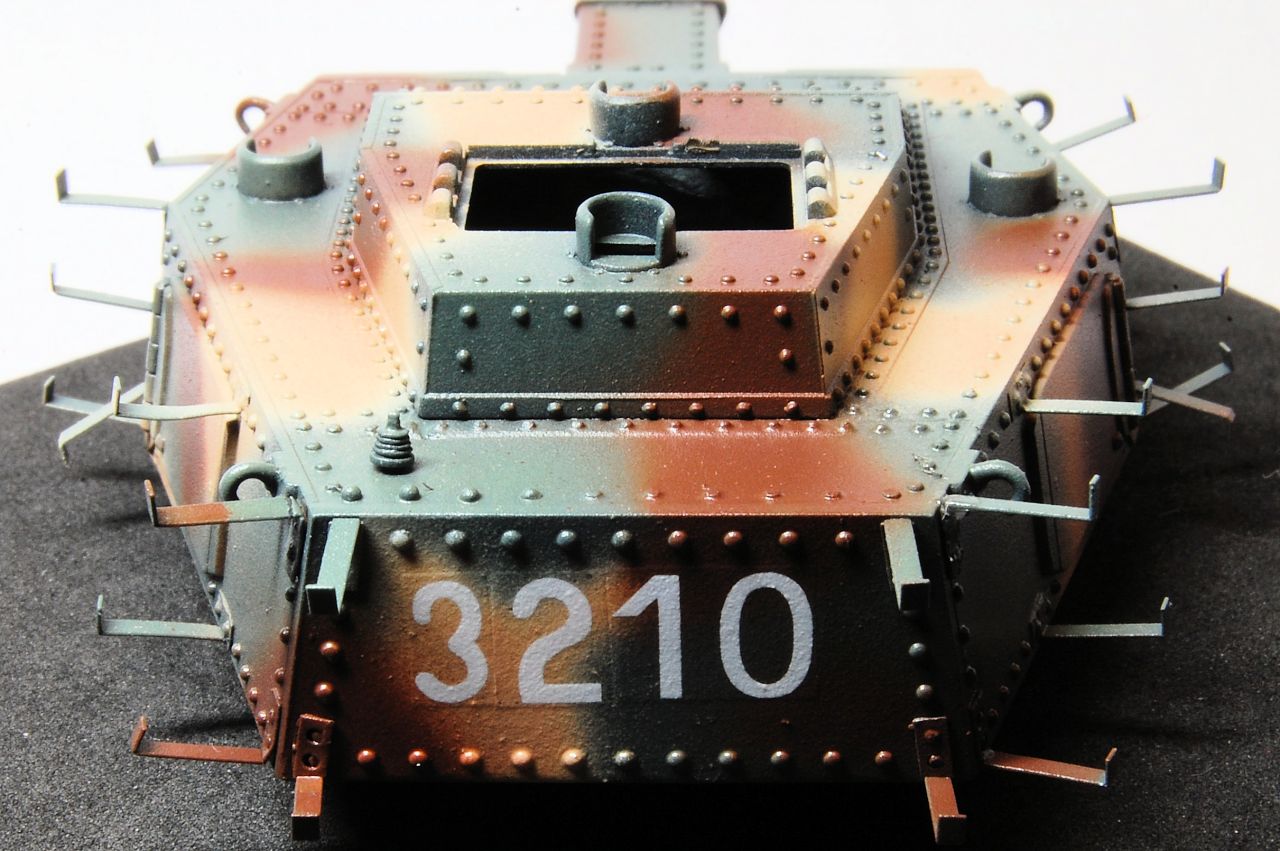
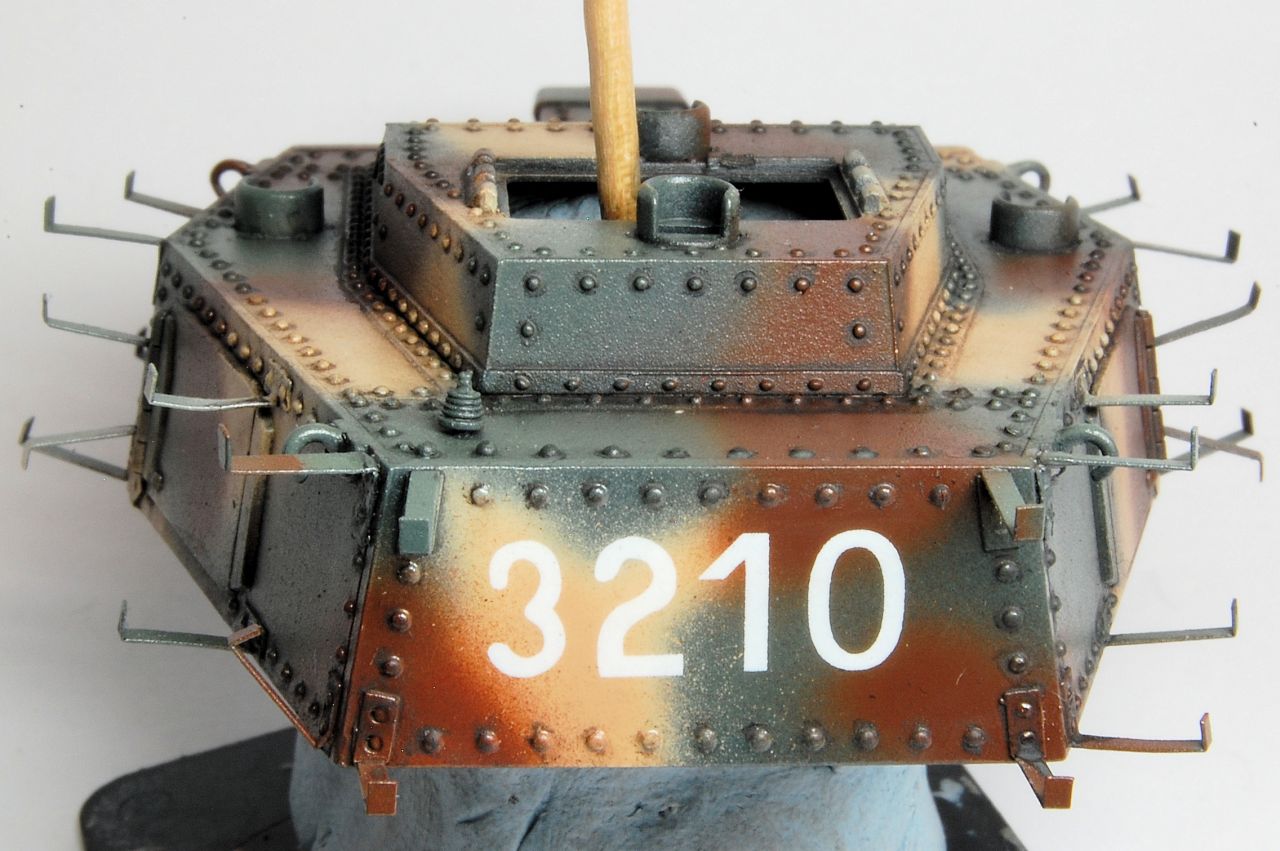
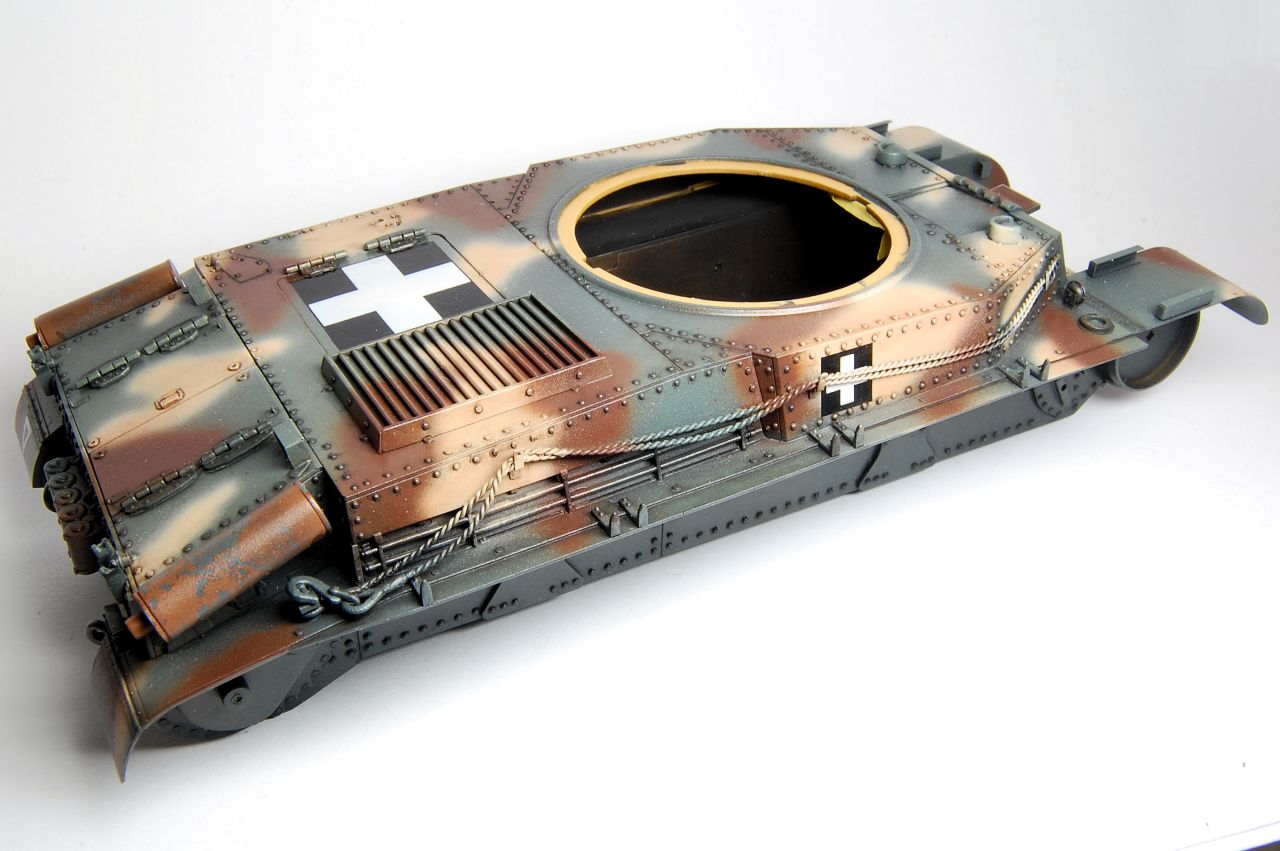
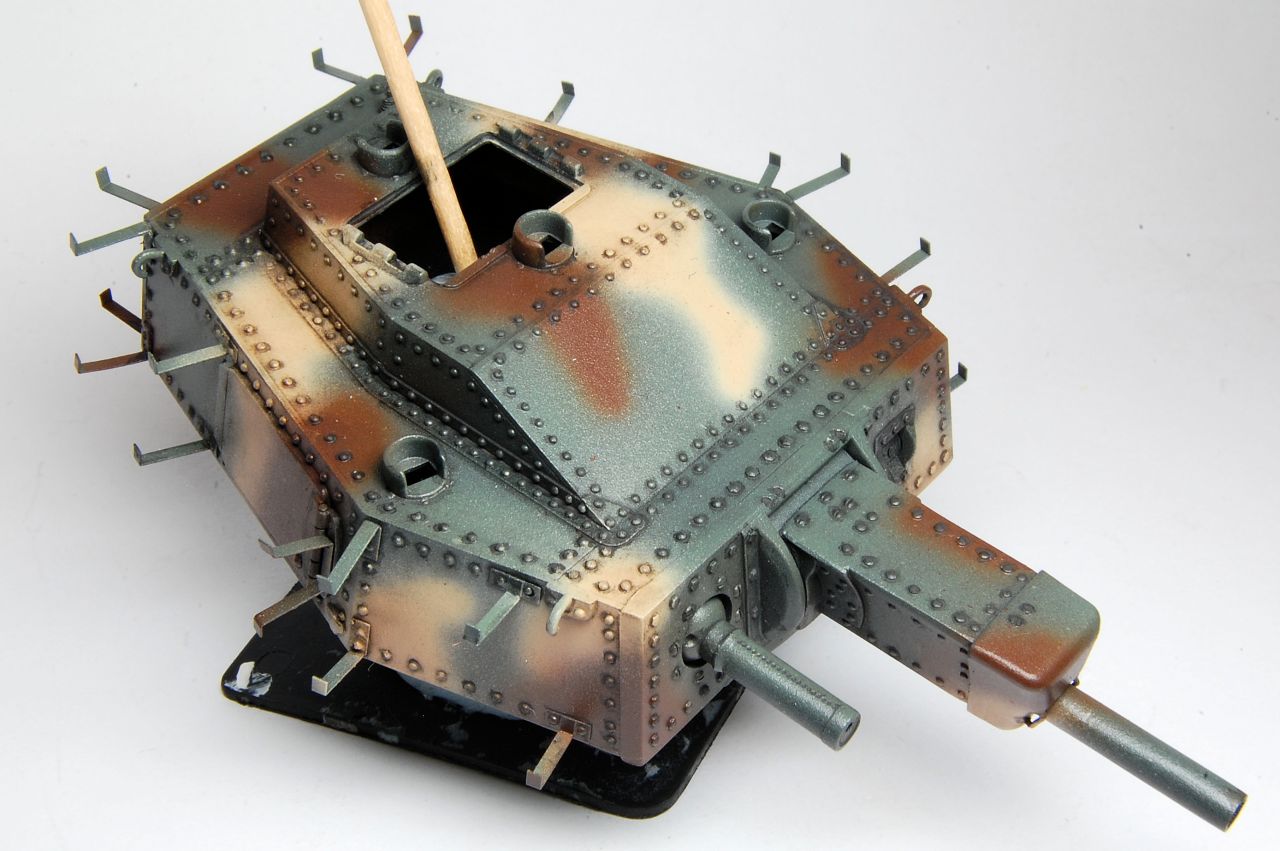
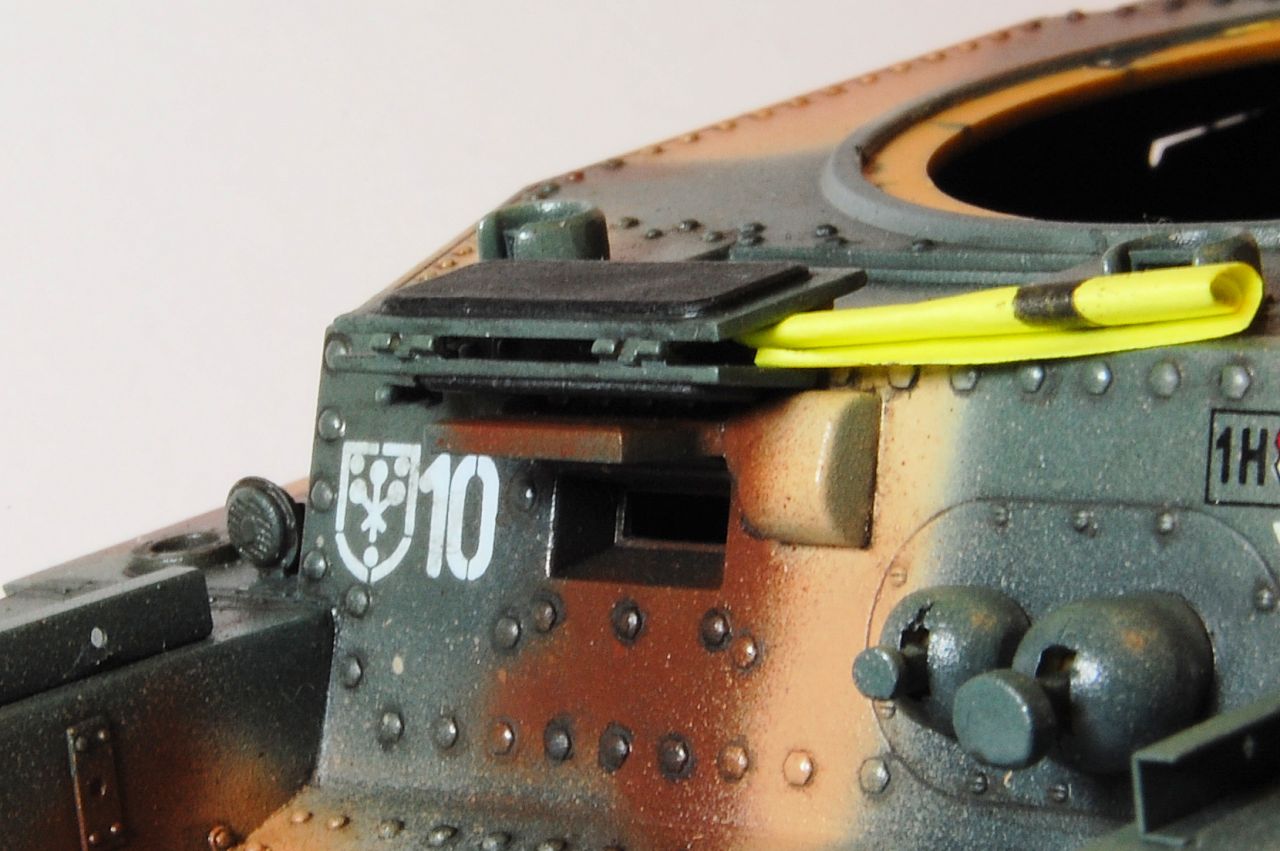
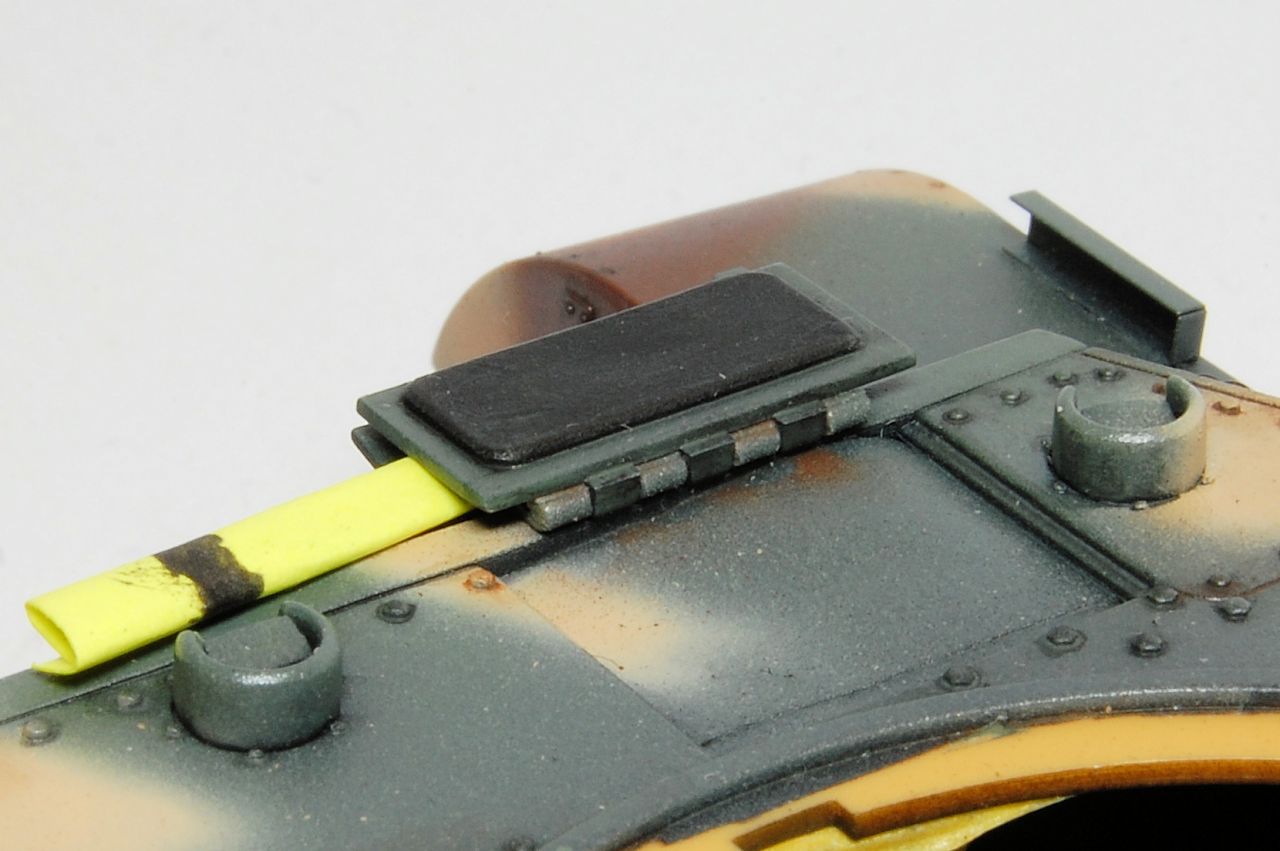
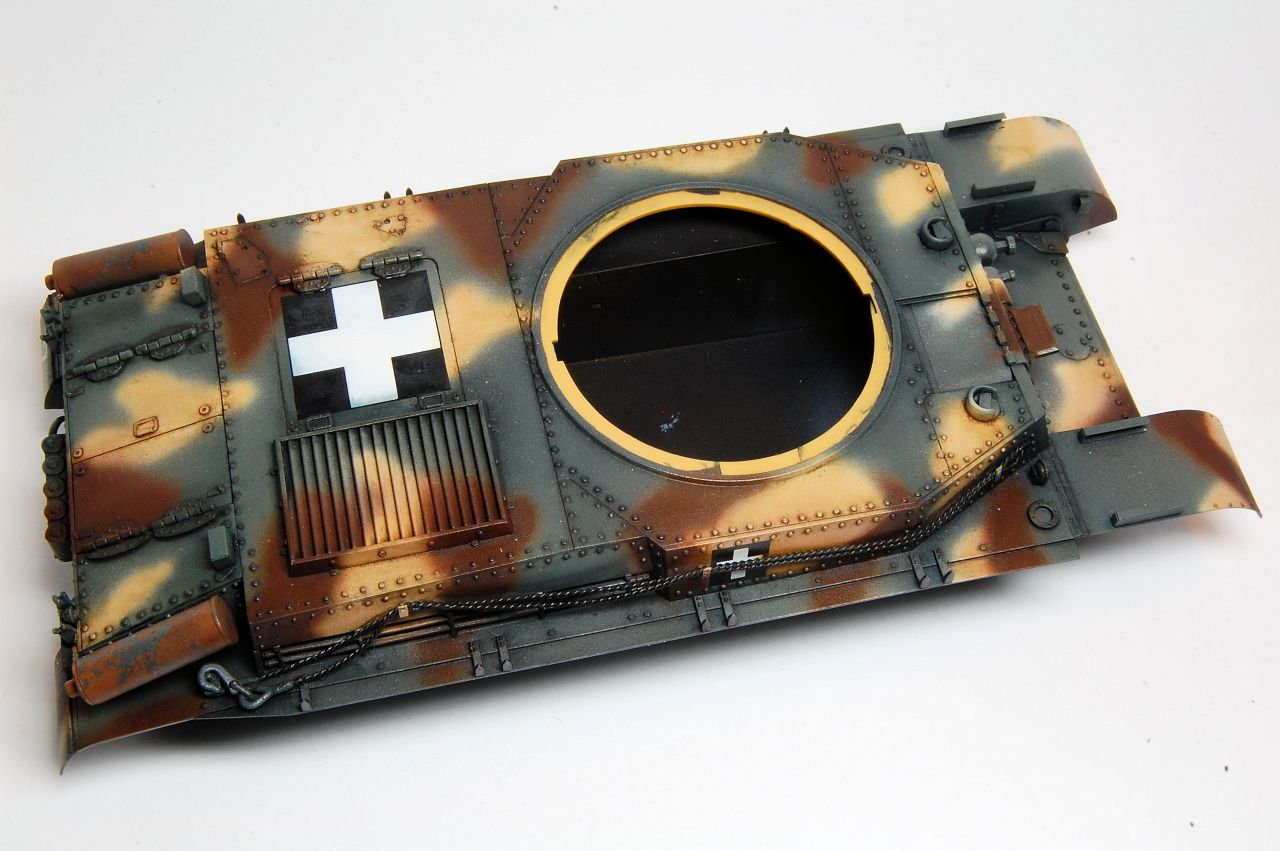
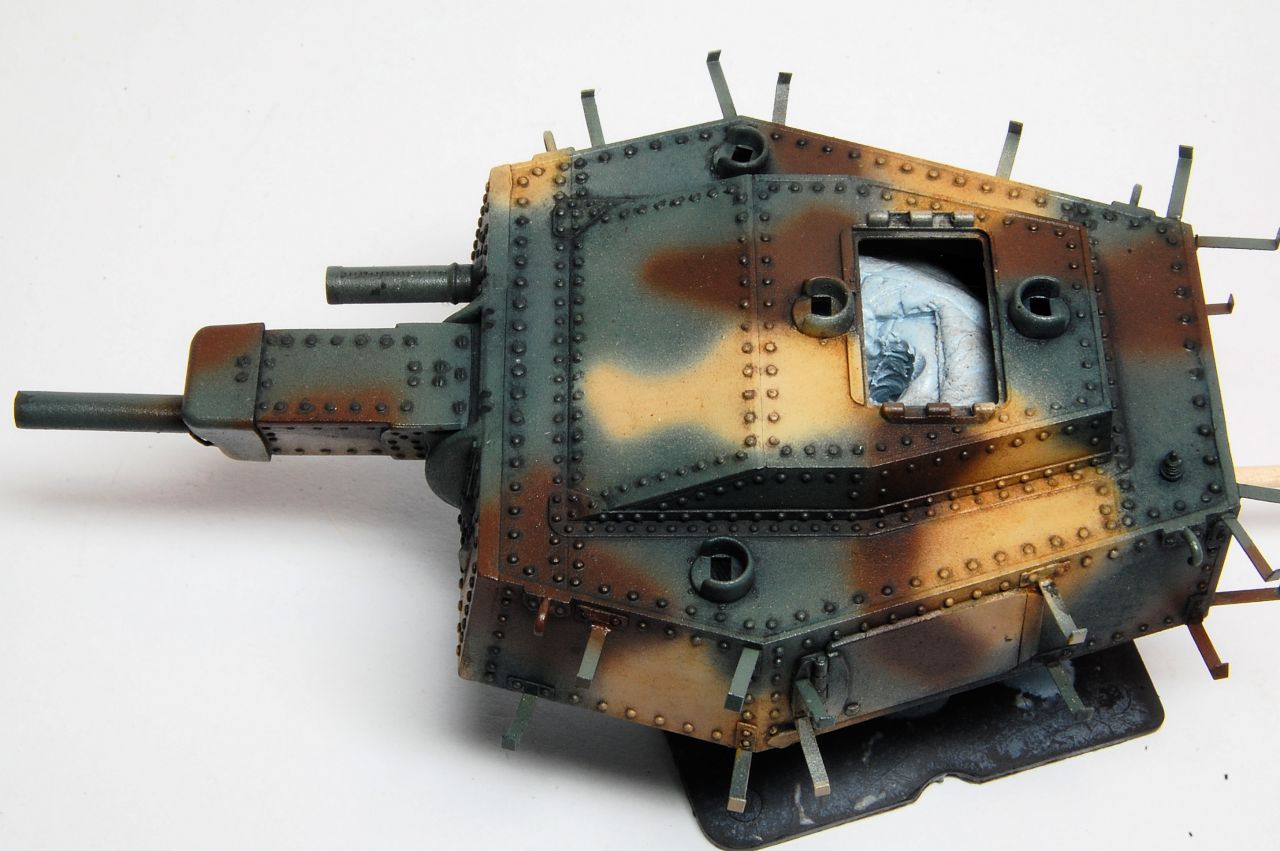
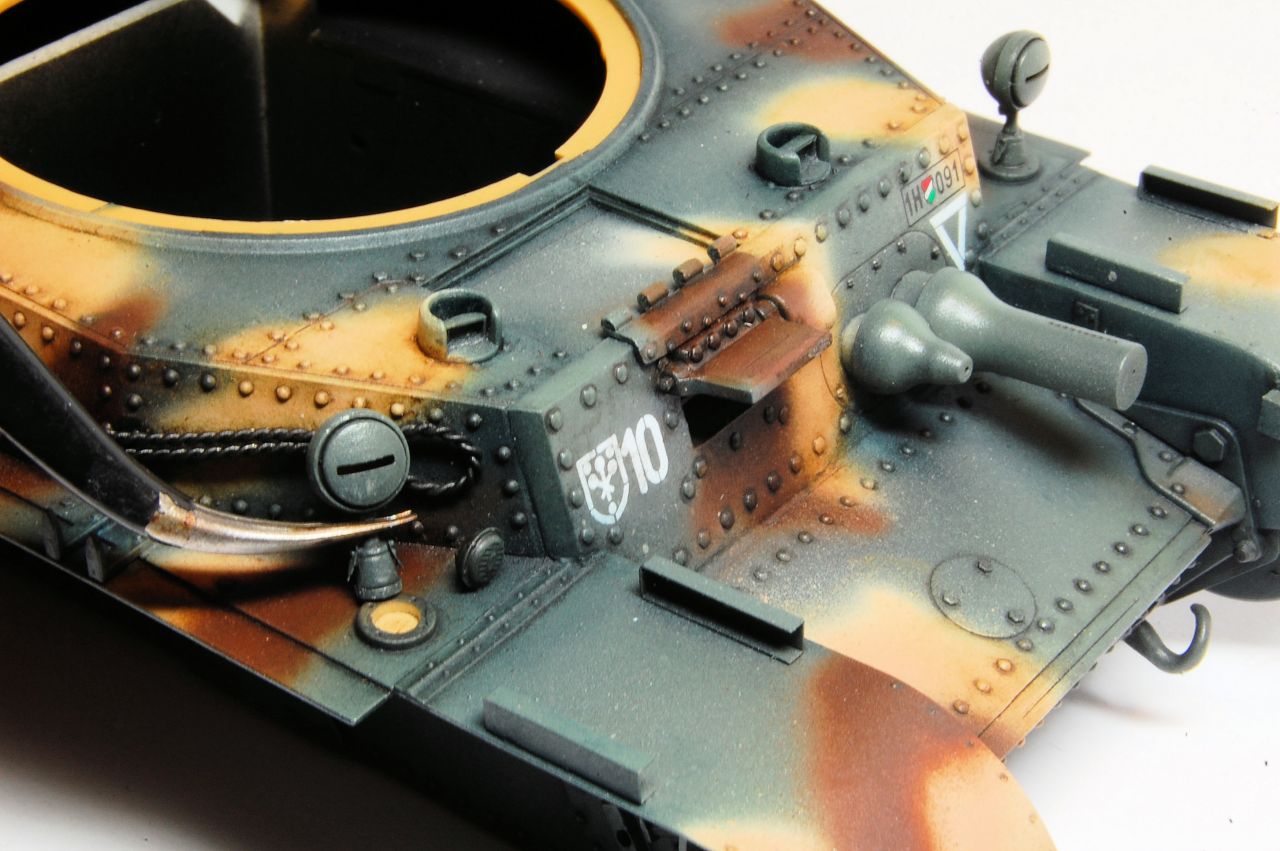
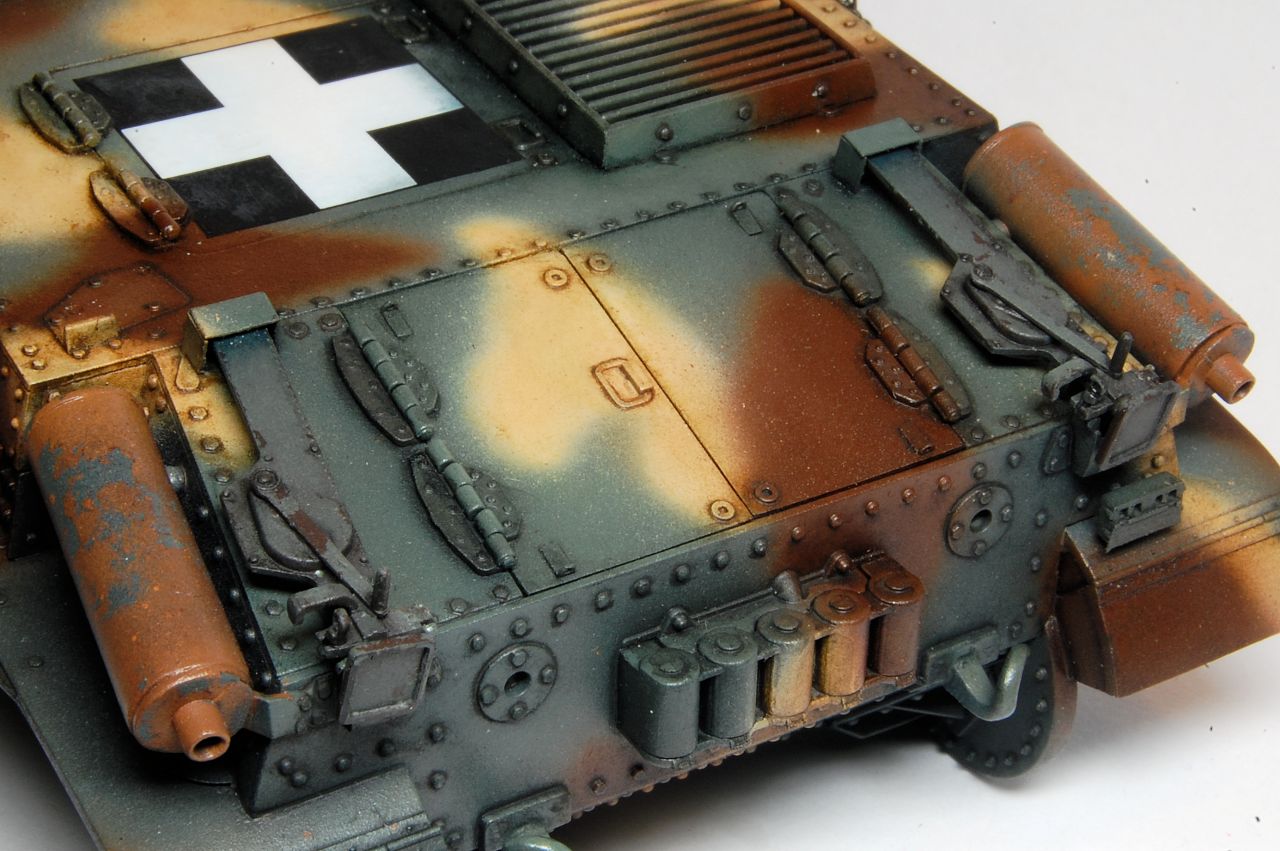
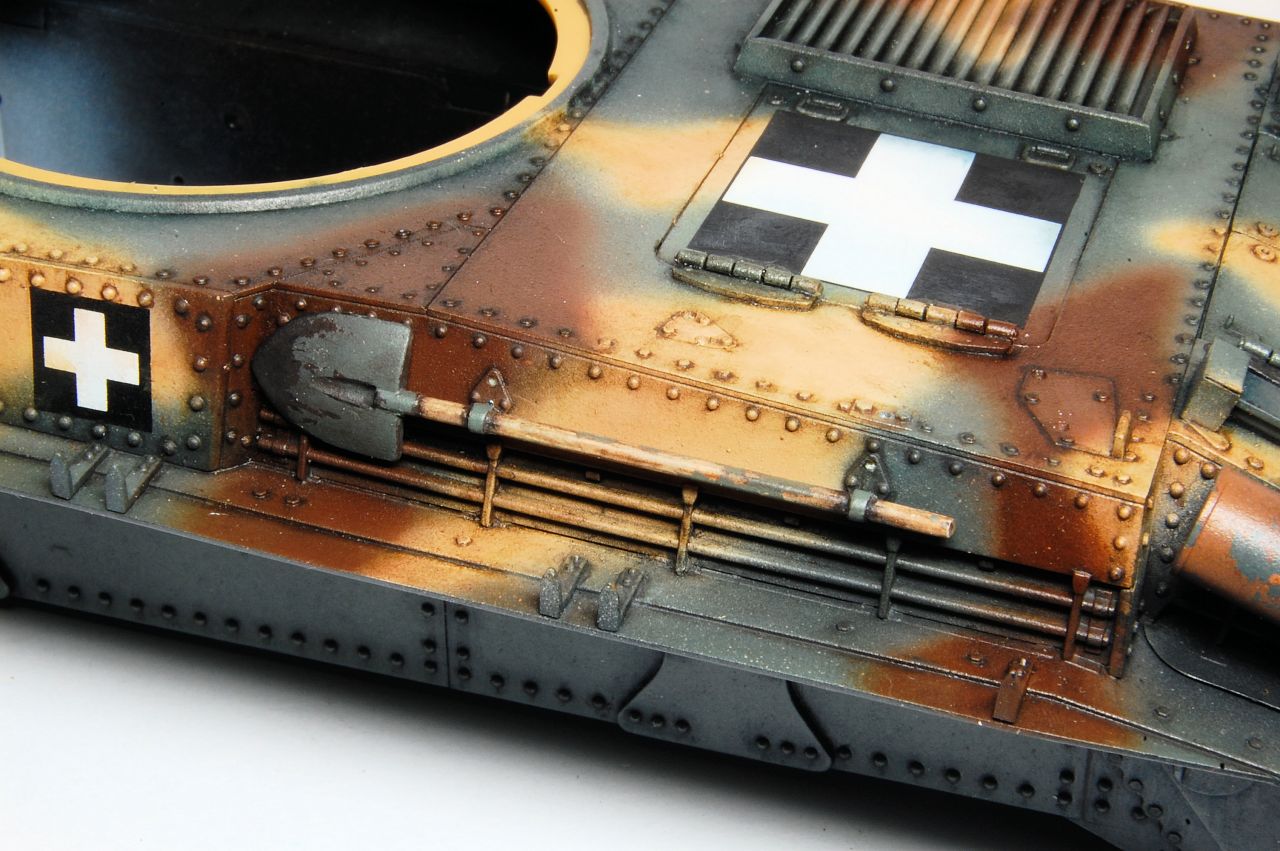
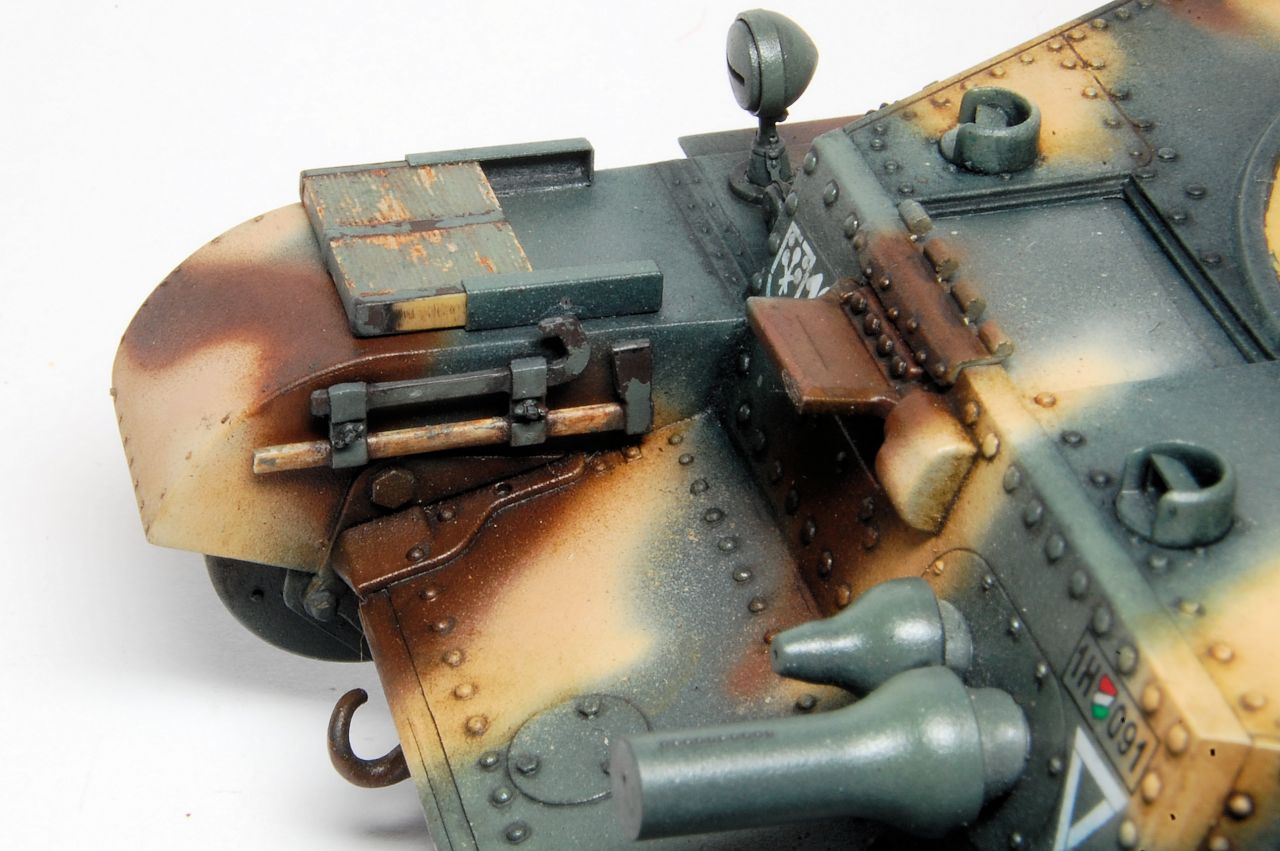
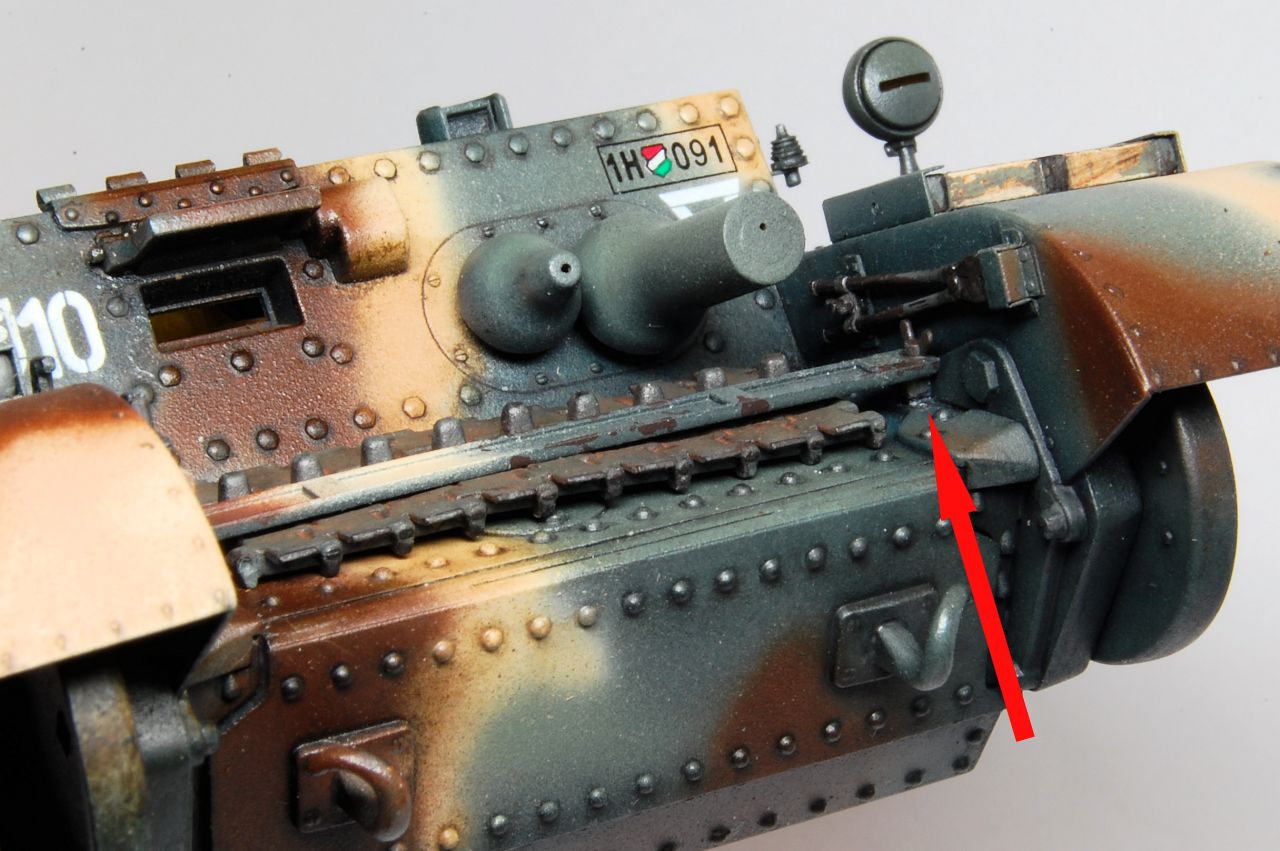
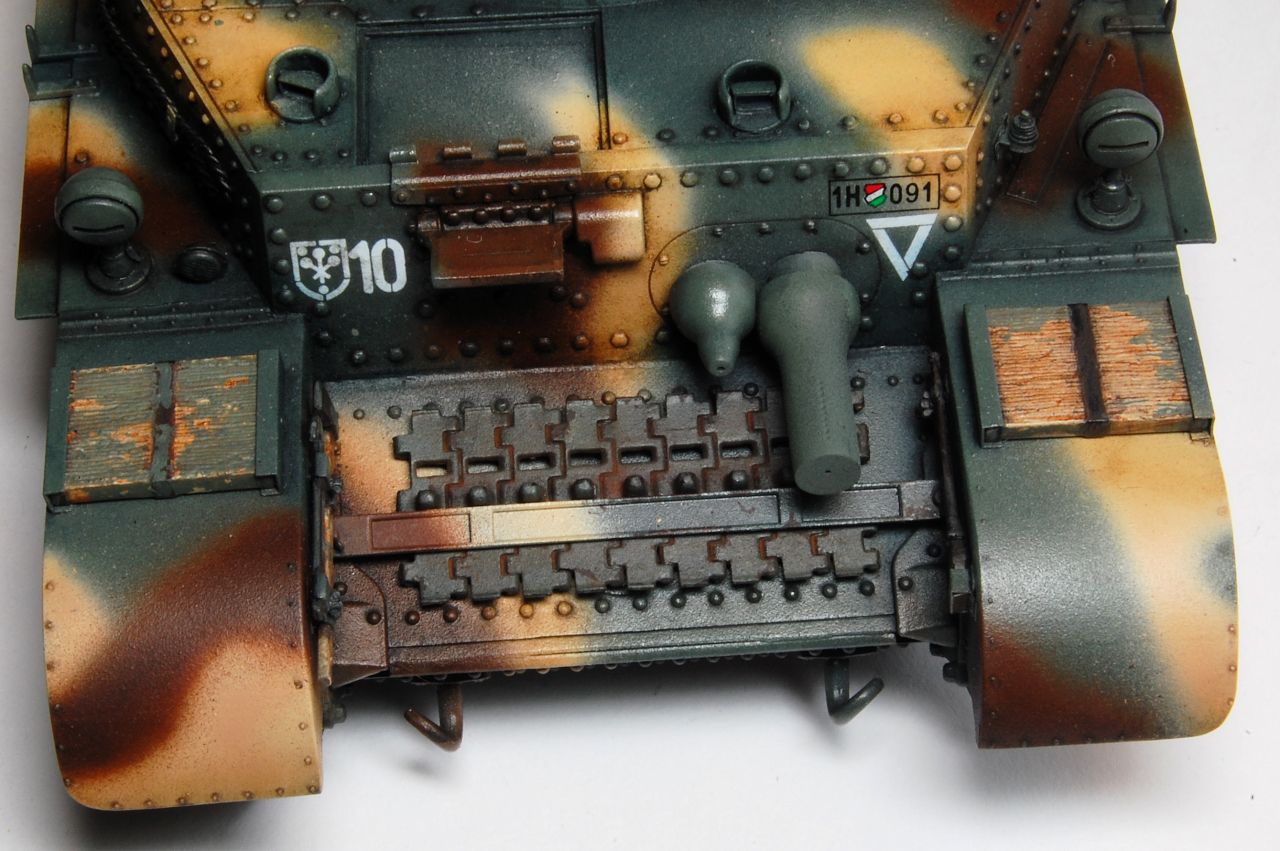
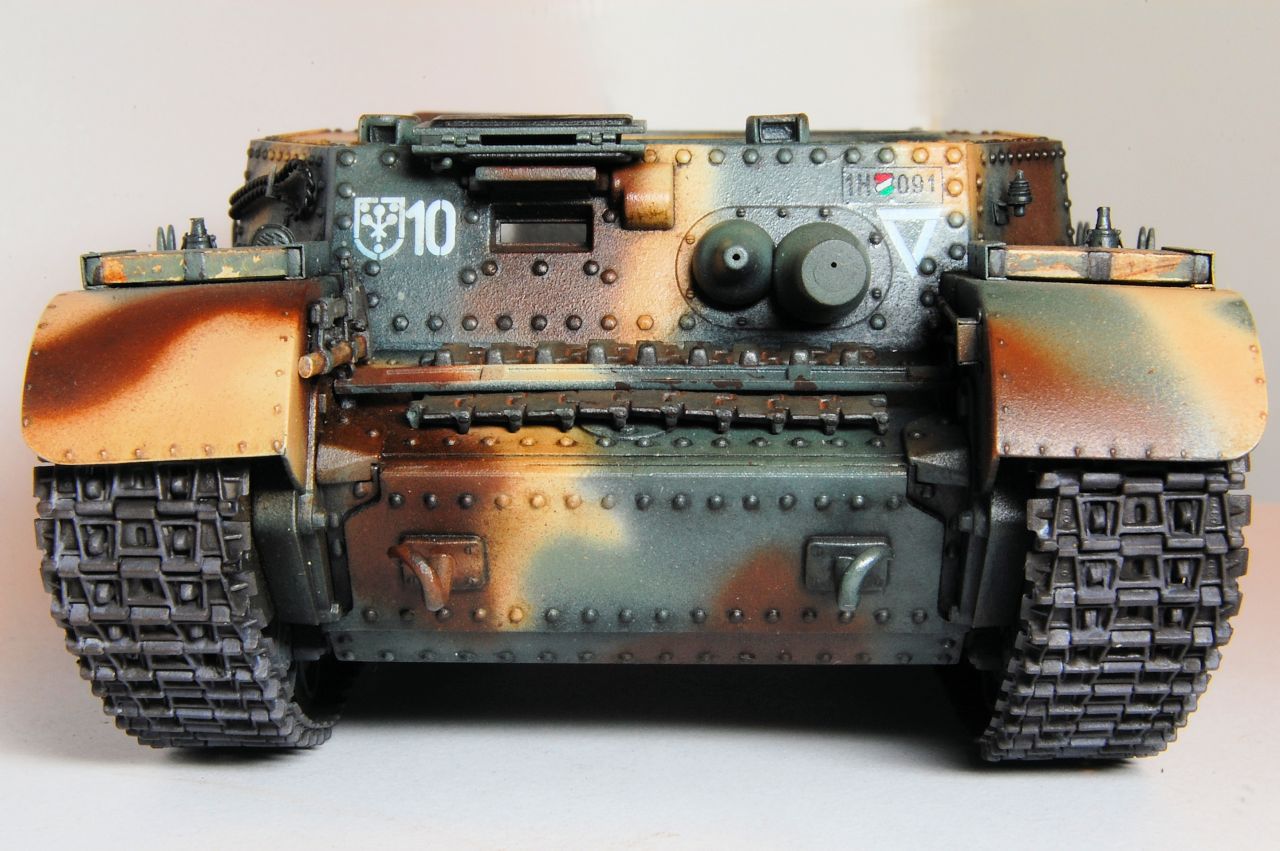
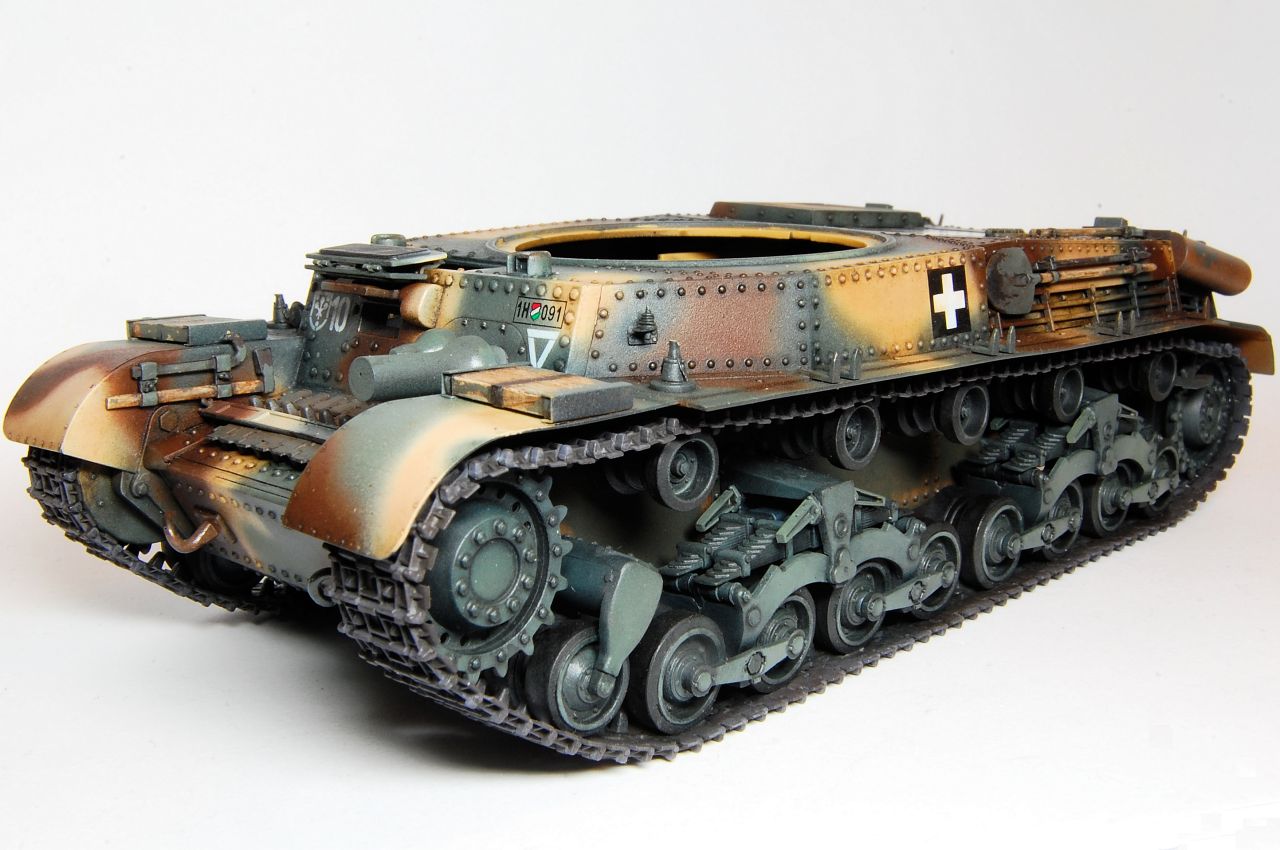
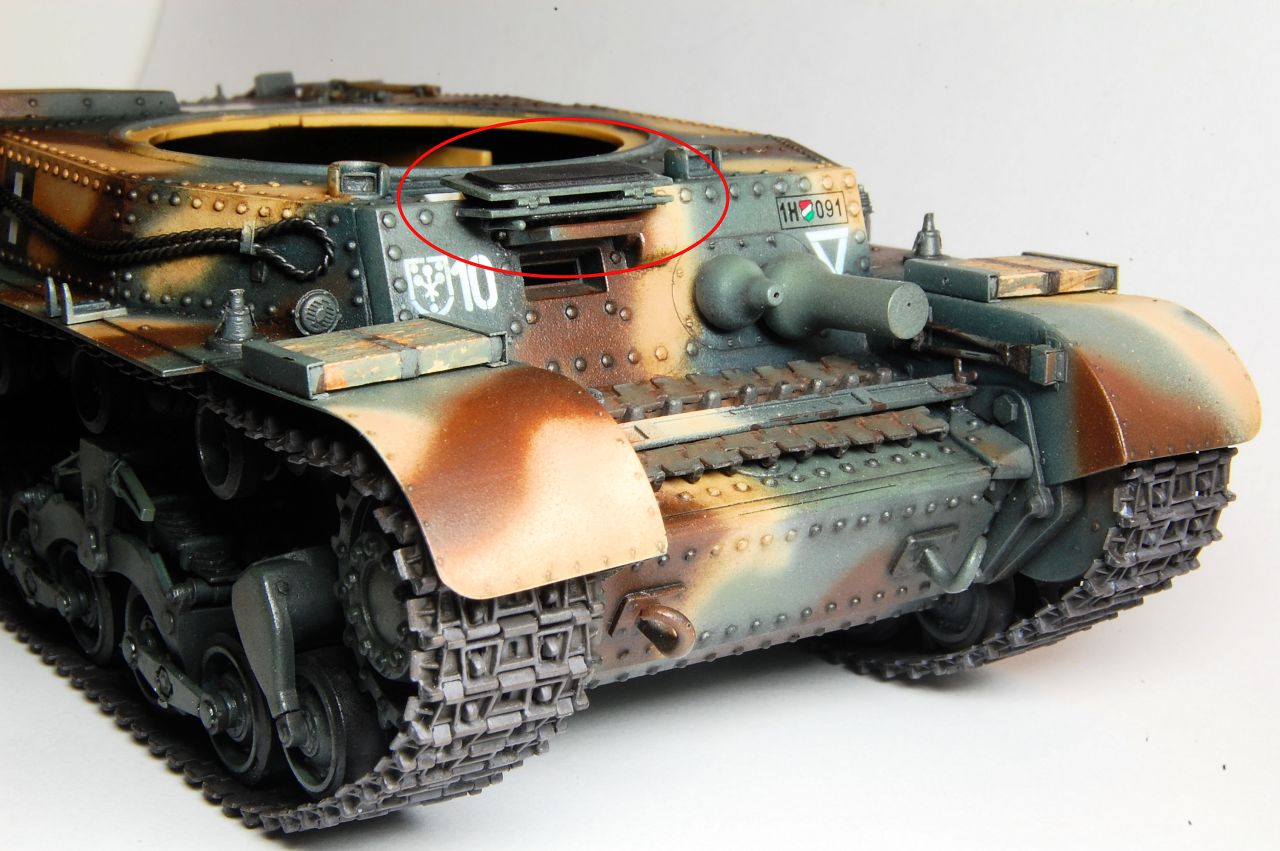
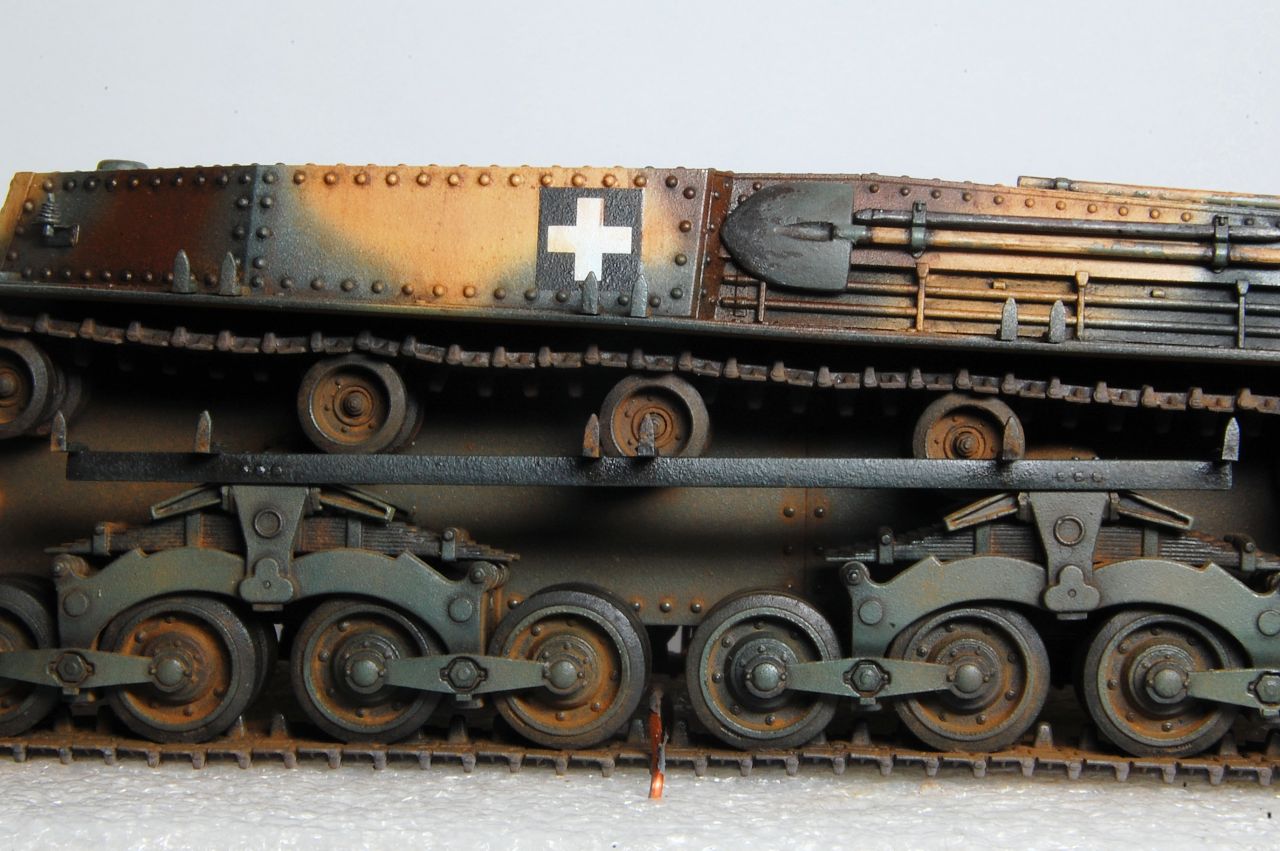
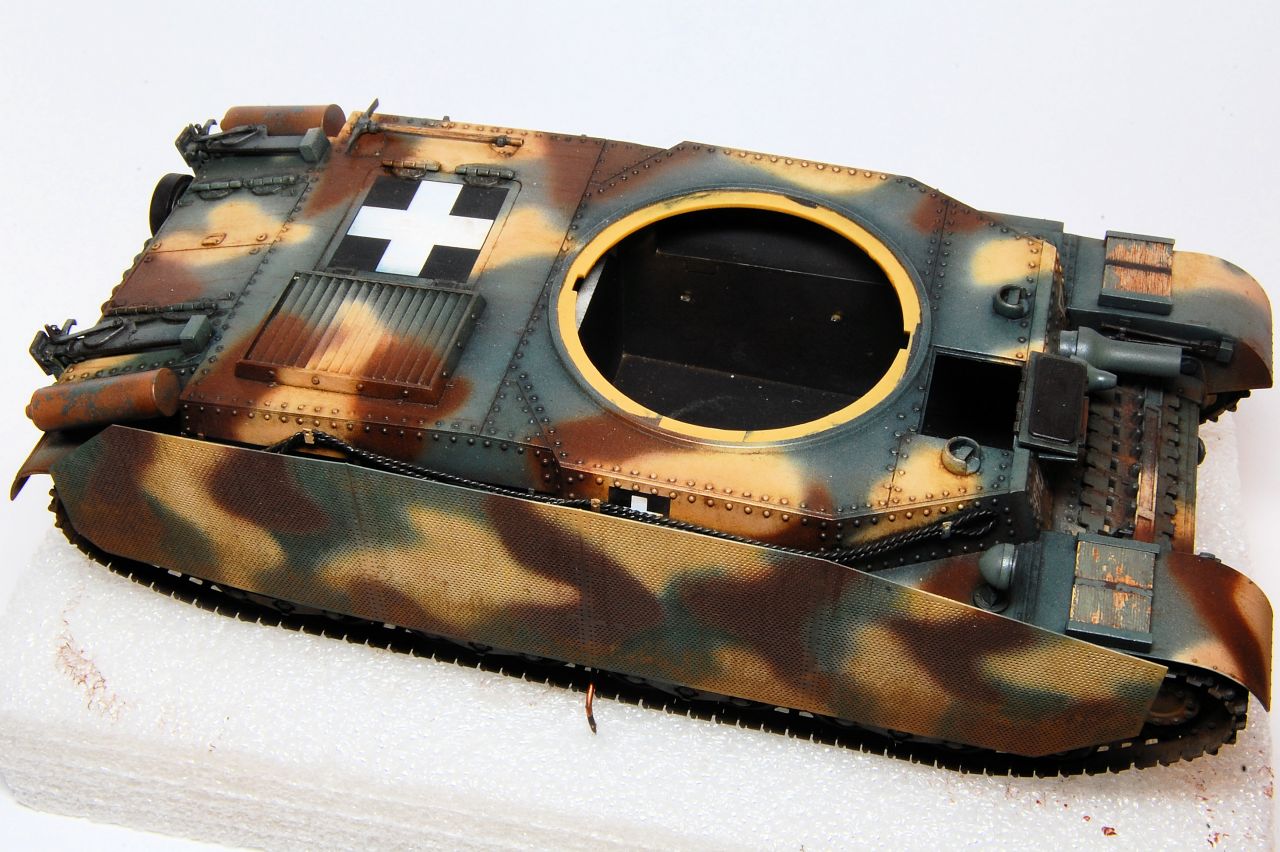
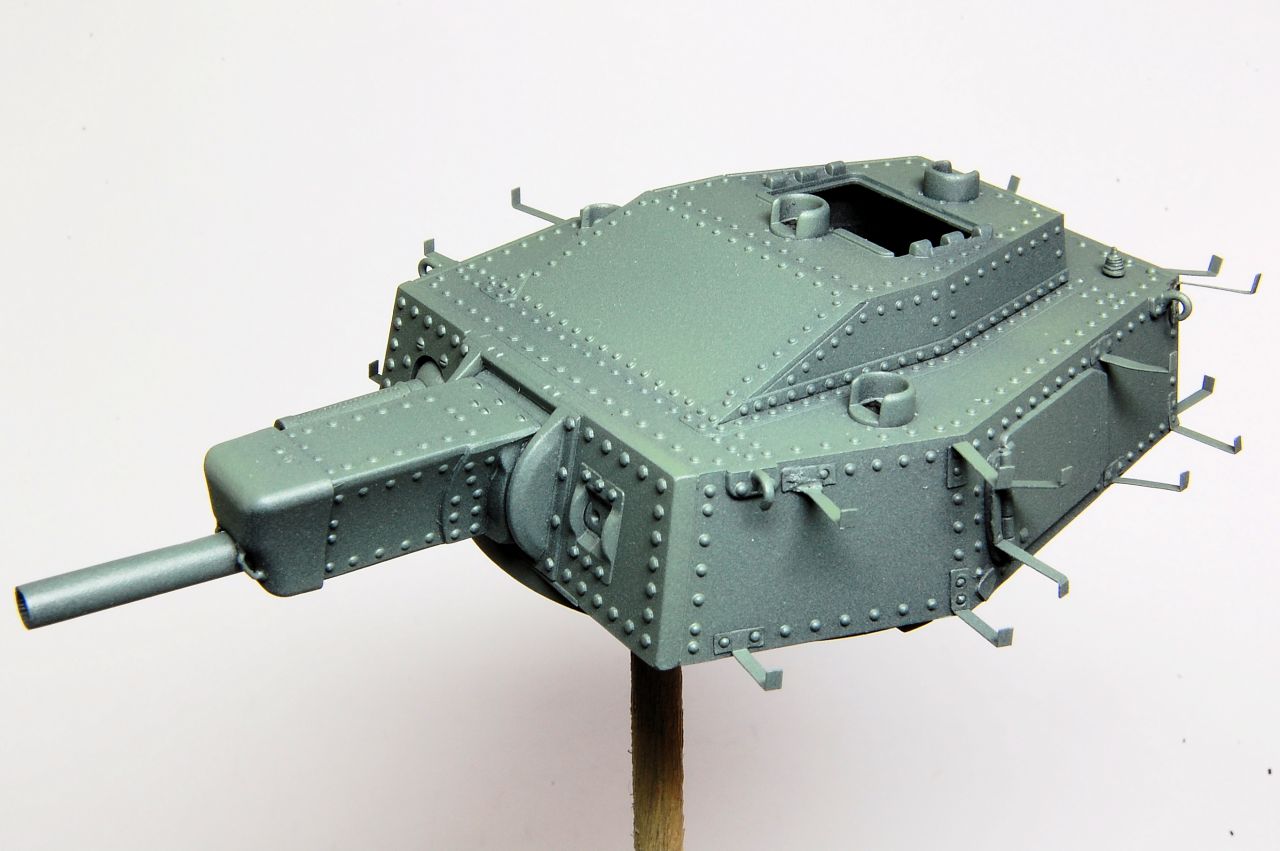
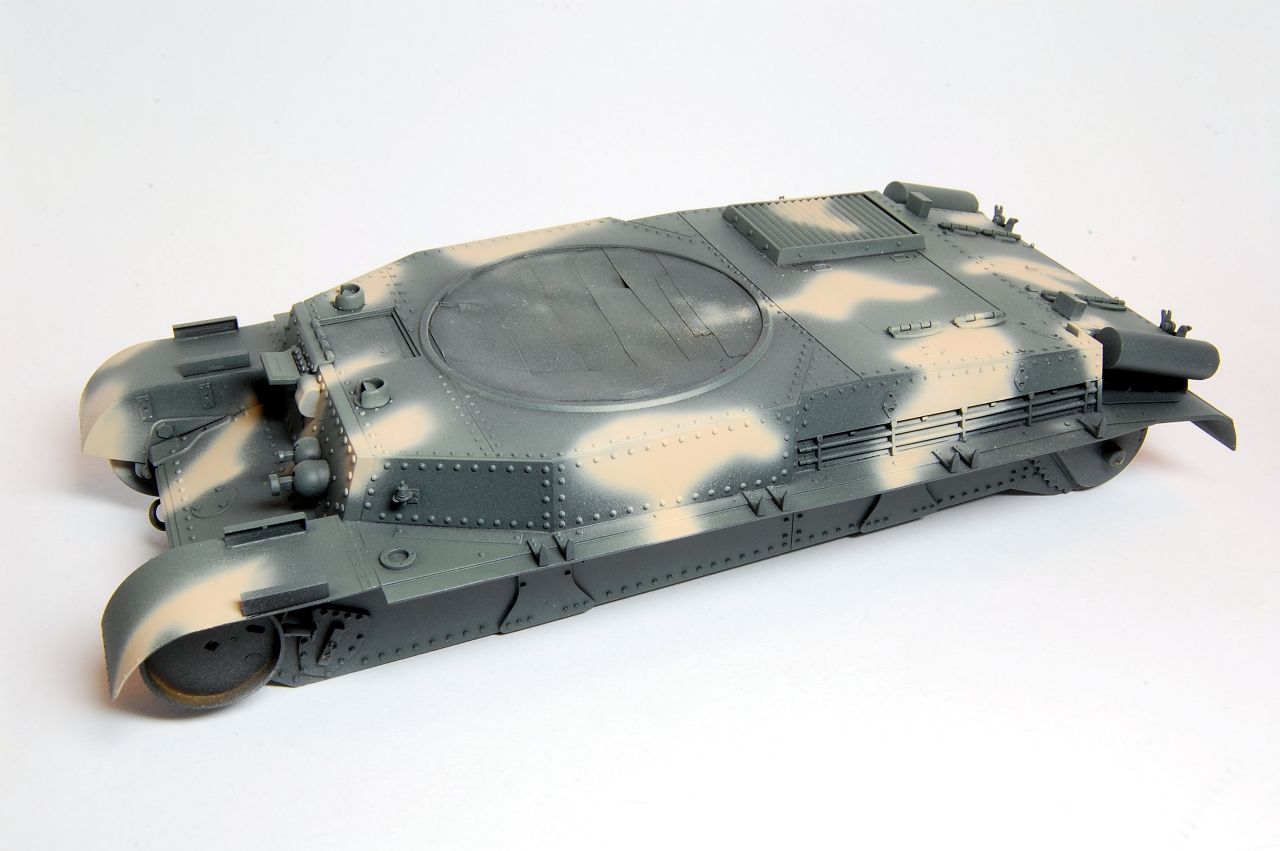
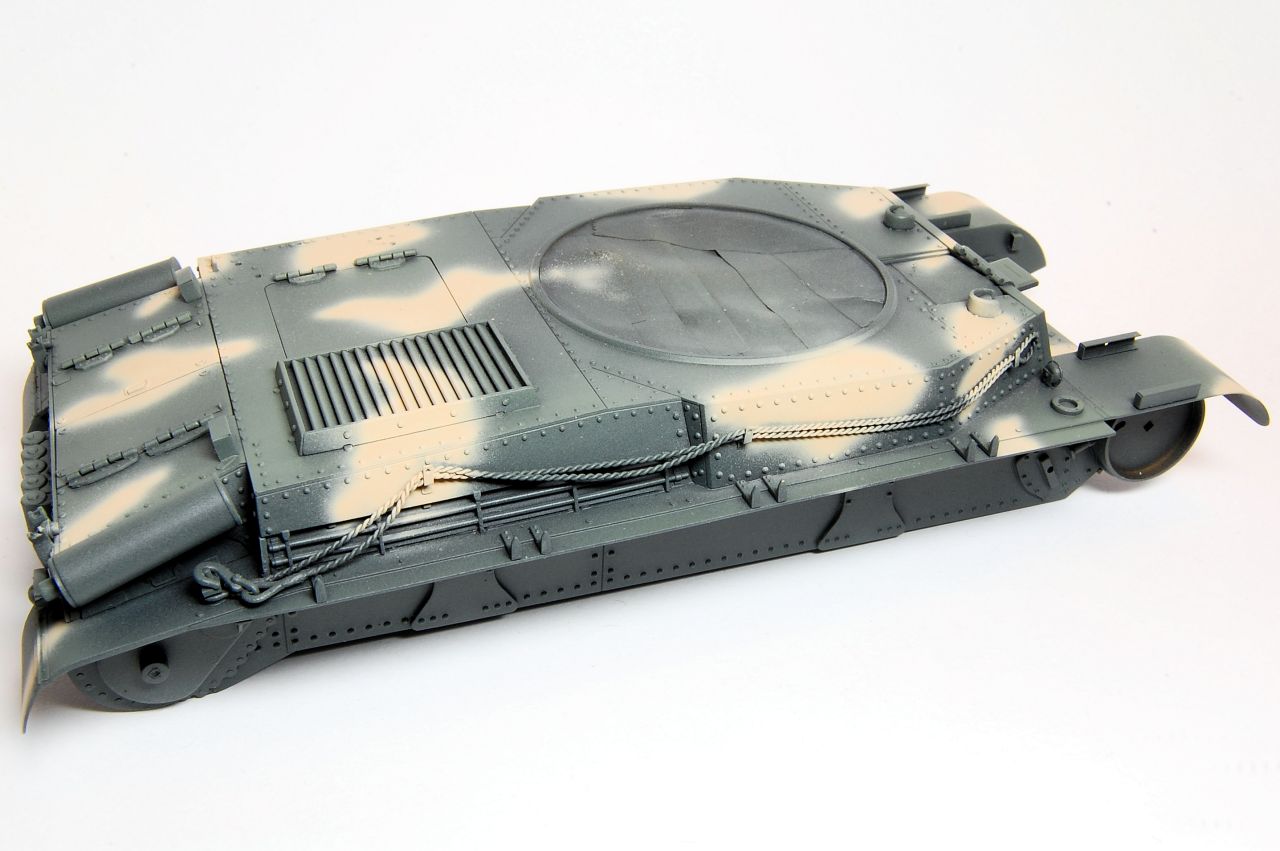
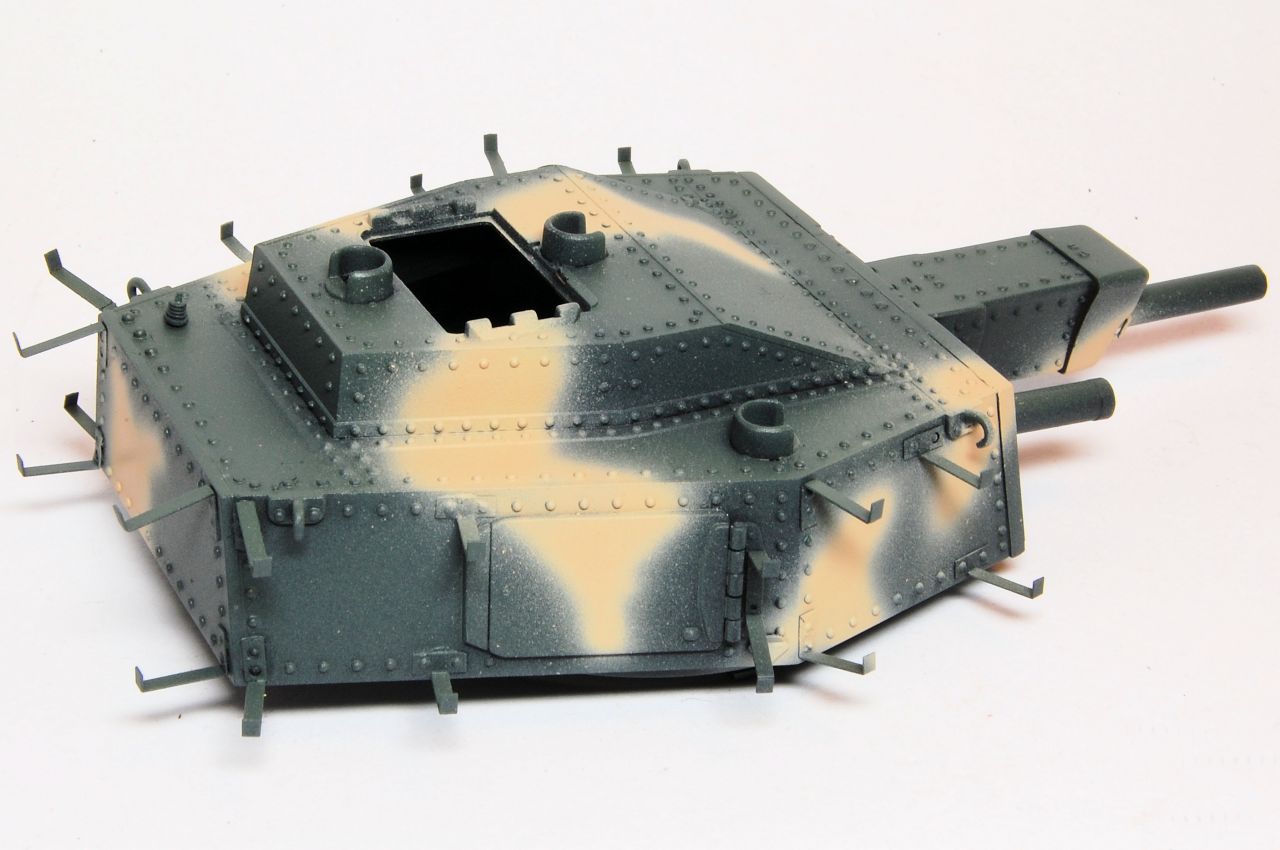
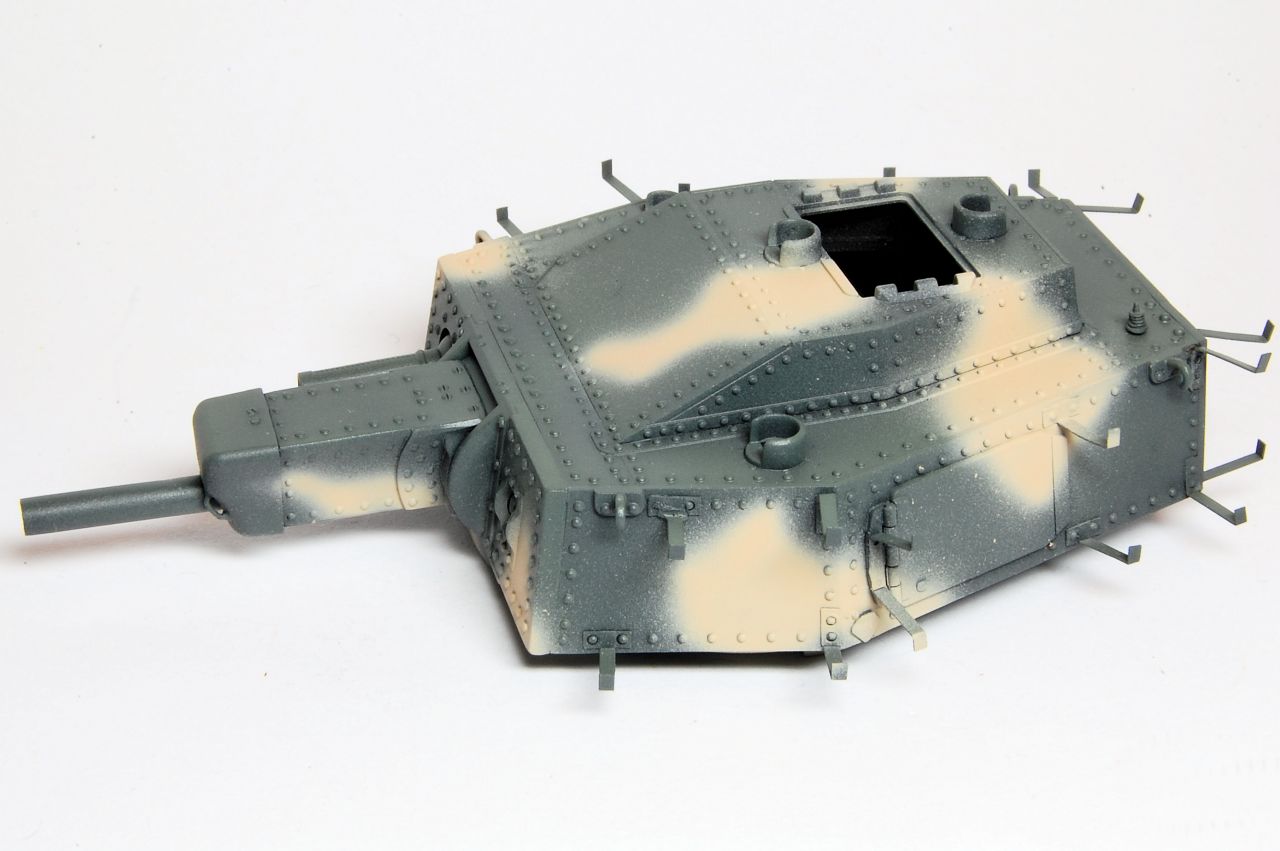
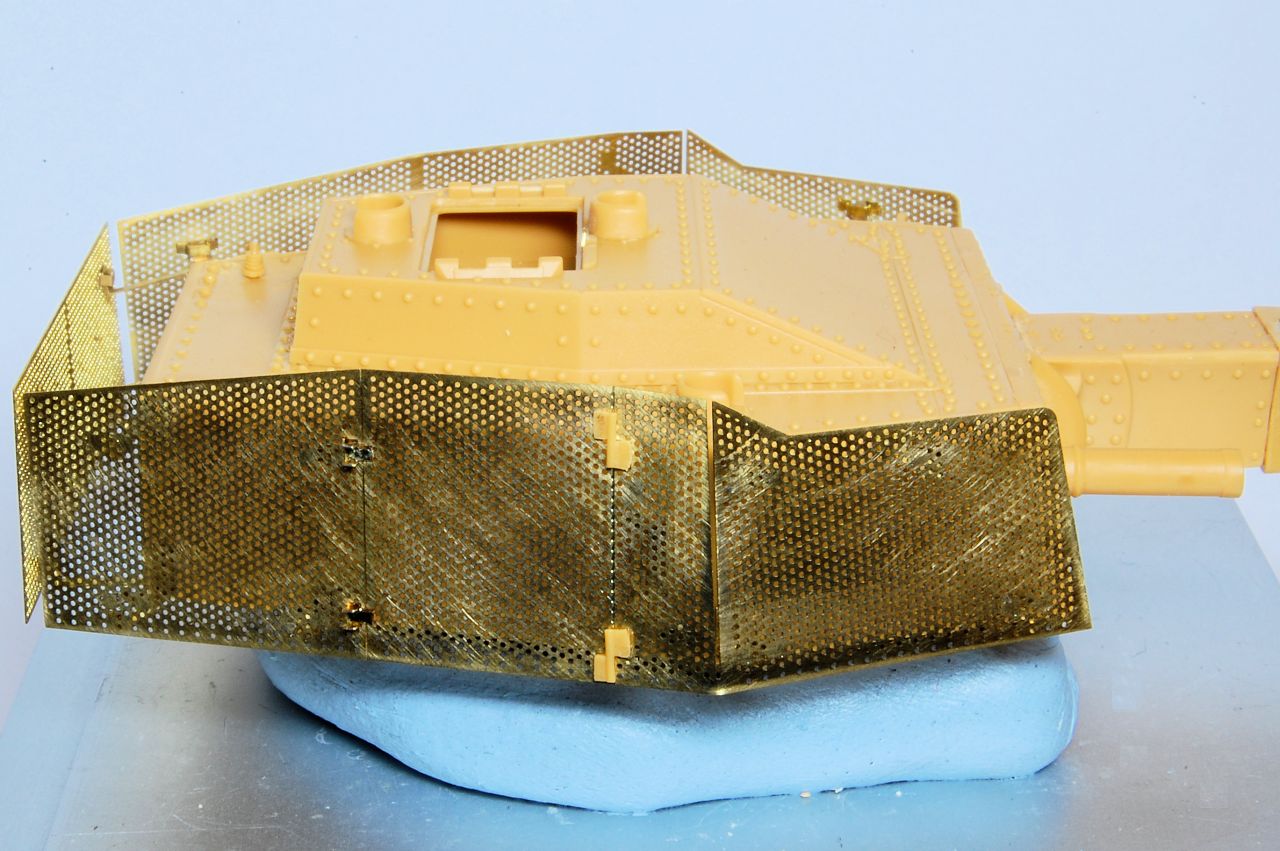
Anyway, WWII Hungarian three colour camouflage: the instructions show a hard edge and I've previously used blue tack to mask a 1/72 Turan. Photos seem to show however that the colours were hand sprayed, not masked, but the edge is only a little soft. I thought about thick blue tack masking so that the paint doesn't quite spray to the edge, giving a semi soft line, but a) couldn't be bothered masking it, especially with all those armour stays on the turret, b) blue tack tends to influence the pattern and the shapes often look a bit sausage like, c) probably would end up with some hard and some soft lines. Decided therefore to free hand it, hence the saga above.

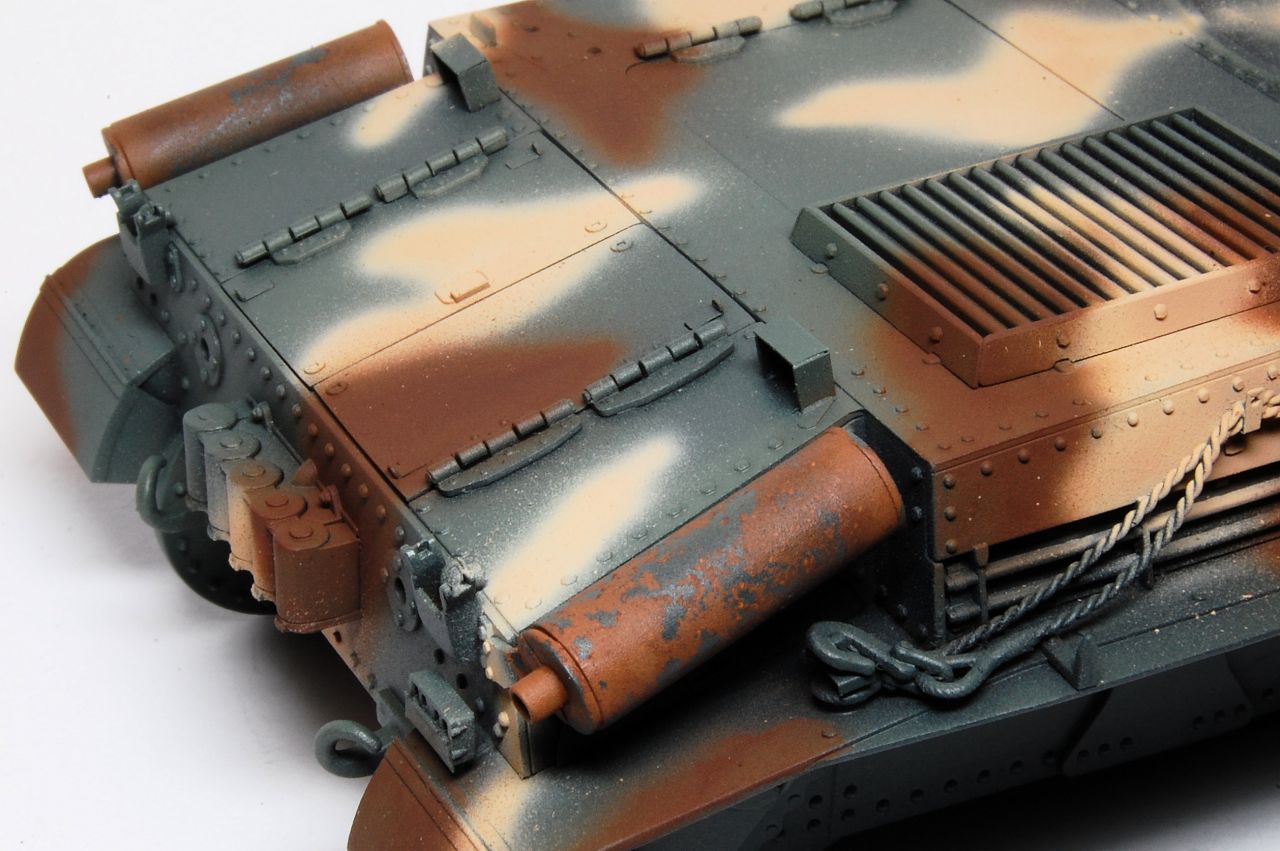
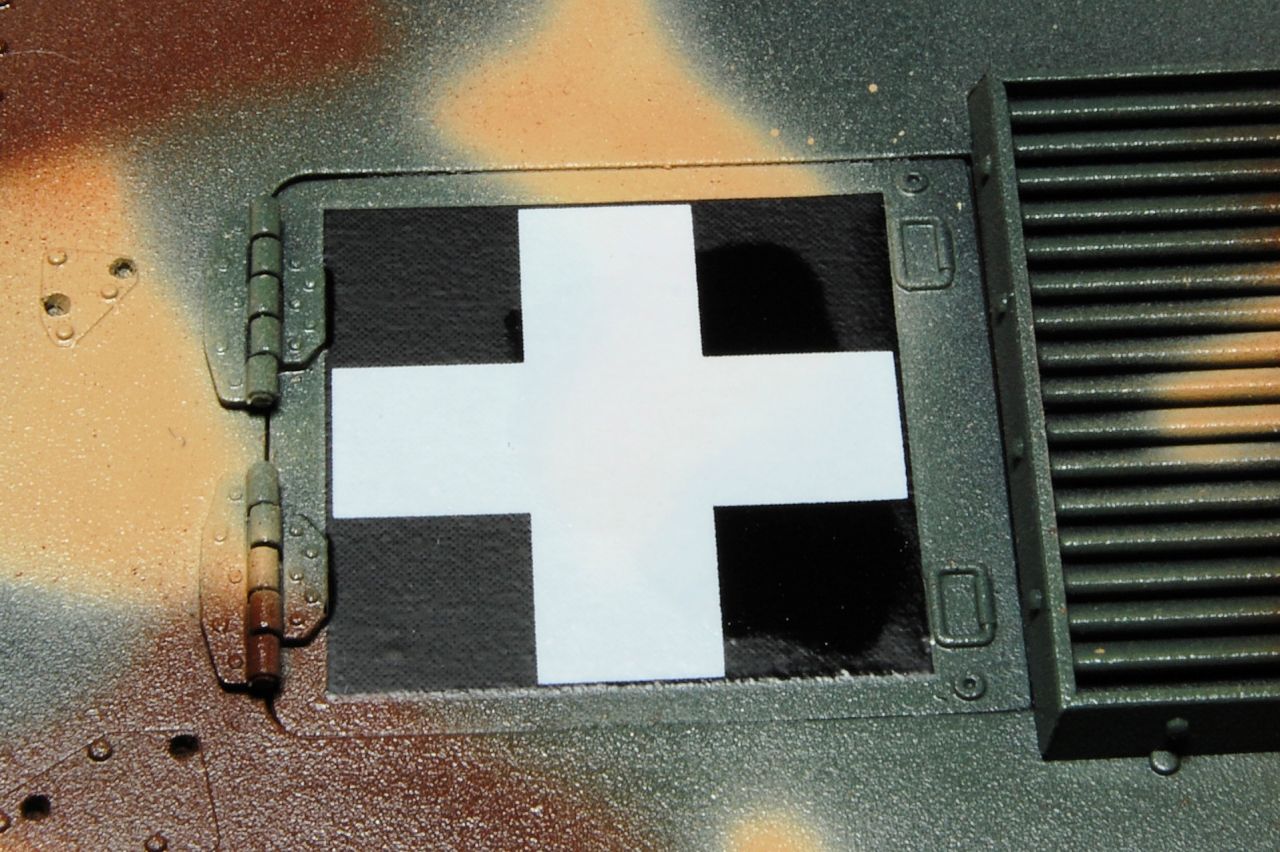
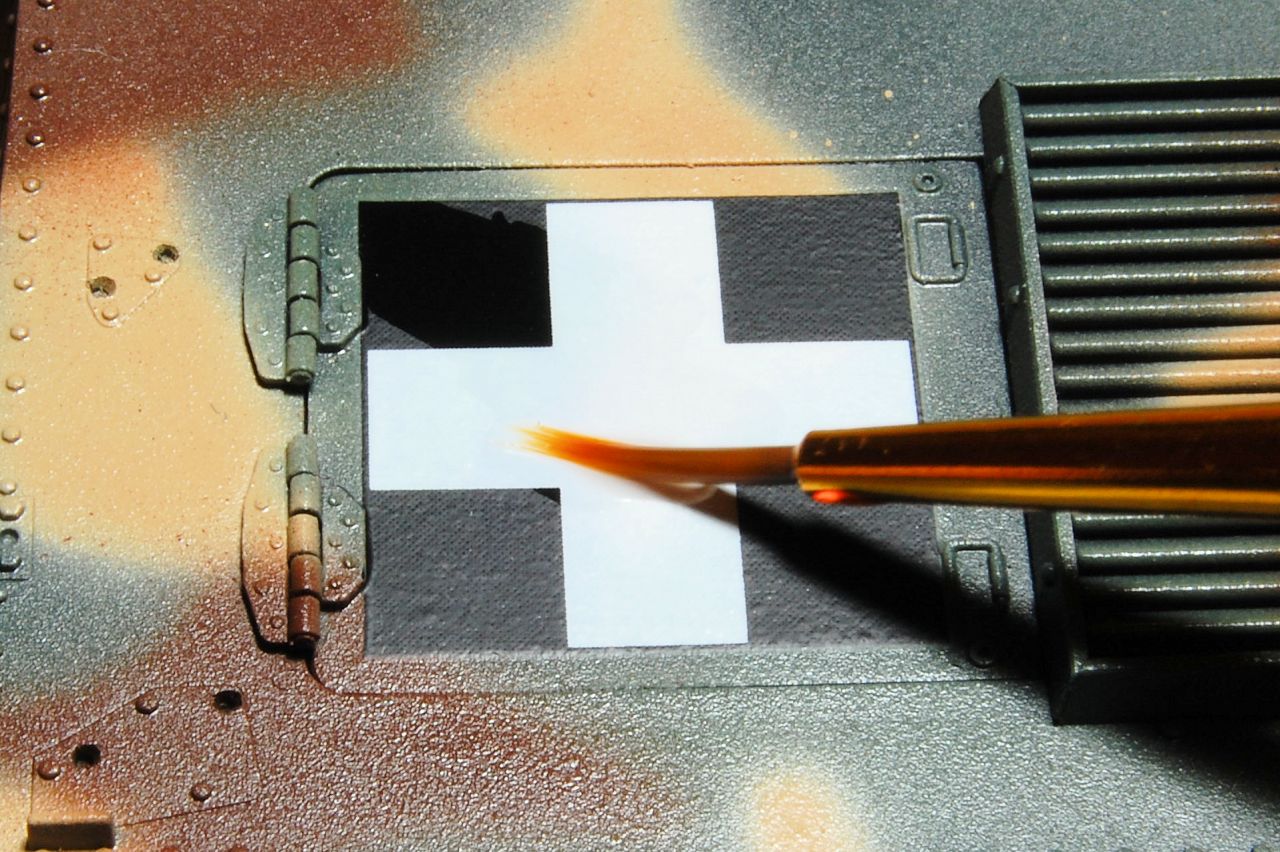
The finish should be harder edged than this, but it's a start and seems OK. I'll add some variation to this colour next, then do the red-brown colour.


firstcircle
Visit this Community
England - South East, United Kingdom
Joined: November 19, 2008
KitMaker: 2,249 posts
Armorama: 2,007 posts
Posted: Tuesday, November 13, 2018 - 10:48 AM UTC
I should mention the paint guide, if only to point out that some misreading seems to have occurred by whoever compiled it for Bronco.


The top row is meant to be dark yellow, but all the codes given are for olive drab shades: Tamiya Dark Yellow should be XF-60, Hobby Color (Aqueous) should be C39, Mr Hobby (Lacquer) should be H-79, while Humbrol's is Matt 24 (I think?)
Tamiya is given as a blank for Tyre Black... NATO black perhaps or X-18 semi gloss black?
For Steel things are a bit confused: both Mr Hobby paints are silvery steel colours, while the Humbrol is gun metal, but the Tamiya is XF-10 Flat Brown, while against Rust, Tamiya get a blank again - perhaps that should be the Flat Brown?
Anyway, suffice to say the paint guide needs some checking and interpretation.

And on the subject, I went with Tamiya XF-10 Flat Brown for the "red brown" camouflage as it seemed the closest to the brown in the Hataka set, and as I said before I want to avoid the camo looking too "German". (Plus I've got a new bottle of it )


firstcircle
Visit this Community
England - South East, United Kingdom
Joined: November 19, 2008
KitMaker: 2,249 posts
Armorama: 2,007 posts
Posted: Tuesday, November 13, 2018 - 11:08 AM UTC
Made a start with rusting the exhausts. Ideally it be should be the other way round, rust colours on first, followed by base coat, but I think it should be OK once more paints and pigments are added later. So this was AK chipping fluid, three coats sprayed on, then the three Panzer Aces rust shades applied. Chipping was done after a few minutes with a small angled brush:


I should give a mention to this book, which is an interesting, highly illustrated, well written, if occasionally imperfectly translated into English, and useful reference while building this kit. Though only around 15 or so pages of the 120+ total are concerned directly with the Turan, some of the photos are very good, and there are decent line drawings and nice colour profiles and colourised photos.


I wonder what became of these two...

CMOT
Staff MemberEditor-in-Chief
ARMORAMA
Visit this Community
England - South West, United Kingdom
Joined: May 14, 2006
KitMaker: 10,954 posts
Armorama: 8,571 posts
Posted: Tuesday, November 13, 2018 - 12:47 PM UTC
Looking good as always bud.
firstcircle
Visit this Community
England - South East, United Kingdom
Joined: November 19, 2008
KitMaker: 2,249 posts
Armorama: 2,007 posts
Posted: Thursday, November 15, 2018 - 08:22 AM UTC
Decals:


The sheet provides for five specific vehicles for the colour schemes shown. There's a choice of registration plate for the all over green scheme, and the two camouflaged schemes for 2nd Armoured Division are for two tanks from the same unit, so there's scope if someone wanted to build a diorama featuring two Turan IIs. The book mentioned above includes a photo of the two 2nd Armoured Div tanks knocked out on rail flat cars.

As well as registration plates (like Italian tanks, Hungarian tanks had road vehicle numbers, like cars and trucks) for specific vehicles, there are also two plates with blanks that can be filled in with the spare numerals.

So a pretty comprehensive decal sheet. As soon as I started to apply them however I noticed a few issues. One is that the decals are quite thick; that kind of thick where there's no chance of the decal folding back on itself when you're about to apply it.

Photos of camouflaged Turans with side skirts suggest that the crosses were only applied to the tank sides, not the skirt, so here is one going on, being slide under the tow cable, notice how it really only just fits between the rivets:


Placing one of the individual numbers on to the reg plate at the rear. These work well, and it didn't matter like I thought it might that the decals are thick.


The big cross on the rear deck; the digitised printing pattern is noticeable at this magnification but not really at normal viewing size. Notice again how it just squeezes in between the hinges and the handles.


One of the problems with thick decals is them not clinging so tightly, and unfortunately repeated applications of Micro Sol didn't really do much:


Decals at the front. Notice the tiny mis-registration of the white in the Hungarian flag motif. These also illustrate the other issue which is that I think all the decals are a bit too big, as if they're 1/32 instead of 1/35.


Compare with the photo below, which is one of the specific tanks that decals are provided for, and I think you can see how the decals on the kit seem to fit a bit too tightly into the spaces. The white shield also looks to be slightly the wrong shape.


firstcircle
Visit this Community
England - South East, United Kingdom
Joined: November 19, 2008
KitMaker: 2,249 posts
Armorama: 2,007 posts
Posted: Sunday, November 25, 2018 - 06:16 AM UTC
A bit more on those thick decals. The turret numbers were particularly noticeable, especially as I'd hacked them to make a different number.

A few evenings were spent coating that plate with Klear, then the following evening abrading it using a fibre glass pencil and recoating it, three or so times until any ridges were removed. The fibre glass pencil was perfect for a very controllable, smooth, but significant abrasiveness without any risk of removing any rivet detail, or those brackets.
This photo is also after the first pin wash:


I notice now that I bent another bracket, and how imperfect the pin wash looks close up. This pinwash is the first painting after the base coat > clear coat and made me appreciate just how many rivets and bolts there are. It's taken about a week and I can see there's still a few been missed. Different washes were used for the different camo colours, so dark brown on the sandy areas, dark green on the green and black on the brown.


CMOT
Staff MemberEditor-in-Chief
ARMORAMA
Visit this Community
England - South West, United Kingdom
Joined: May 14, 2006
KitMaker: 10,954 posts
Armorama: 8,571 posts
Posted: Sunday, November 25, 2018 - 08:55 AM UTC
Very good save there Matt as I would not have tackled the decal issue you have resolved.
firstcircle
Visit this Community
England - South East, United Kingdom
Joined: November 19, 2008
KitMaker: 2,249 posts
Armorama: 2,007 posts
Posted: Sunday, November 25, 2018 - 10:12 AM UTC

Quoted Text

Very good save there Matt as I would not have tackled the decal issue you have resolved.


Darren, I seriously considered removing it but did a search on "thick decals" on Armorama and found that solution suggested.
:)
I notice that AK have started marketing their own fibreglass pencil, though it looks the same as any other, I think.
firstcircle
Visit this Community
England - South East, United Kingdom
Joined: November 19, 2008
KitMaker: 2,249 posts
Armorama: 2,007 posts
Posted: Wednesday, December 05, 2018 - 11:05 AM UTC
The tracks and wheel units had been sitting patiently wired on to the foam blocks, but have recently had the tyres painted black, and a black pin wash, both Humbrol enamel. Now I want to get the tracks painted, and was looking into what might an appropriate colour. There don't appear to be any genuine colour photos of this tank of good enough quality to show the colour, and I was reading the "How to paint tank treads" pinned thread in the Painting and Weathering Forum, especially the recent contributions regarding manganese steel. So although a common colour to use is a grey / brown, that looked a bit too much like iron oxide rust, and I wanted to get something greyer. Having started with Vallejo German Camo Black Brown I over sprayed with thinned Dark Rust, and then with LifeColor Worn Black, then with very light angled sprays of AK Dust Effects.

So this is the resulting "unweathered" track that now needs some dark washes and maybe some dried earth...


The driver hatch and turret hatch halves have been sitting around, now I want to get them prepared for fixing in place, first the driver hatch needs to be assembled and touched up with paint before being attached. It folds in half and then forwards, so that the rear section ends up underneath, resting on the open visor, so the angle of the join needs to be set correctly:


In painting the tools, I again found it hard to tell if they should be wood finish or painted, so went for a kind of compromise of heavily chipped paint. Started with this:


Then used chipping fluid and sprayed it all the green base colour. This didn't work that well as the wood is so pale it took too much of the Hataka paint to get sufficient coverage, so that when chipped it came off in big chunks.


Chipping is more subtle on the jacks:


... and the jack blocks:


firstcircle
Visit this Community
England - South East, United Kingdom
Joined: November 19, 2008
KitMaker: 2,249 posts
Armorama: 2,007 posts
Posted: Wednesday, December 19, 2018 - 03:50 AM UTC
Hi again, I seem to have spent a while doing oil paint stuff, which has resulted in a hopefully enhanced appearance including toning down the somewhat ragged overspray in places.


Still haven't knocked any brackets completely off the turret yet.


Started adding more hull details, including the bow machine guns which slotted on with a little force. Also the headlamps, and I was reminded of one reason for not attaching them earlier, which is that the thin part of the stem is very thin and delicate. The small bits of PE on the base are meant to represent the means by which the demountable headlamps were held in place, so if you wanted to represent them not being in place, photos suggest that you could cut away the lamp and about half of the stem. I suppose there would be some kind of electrical connection, but it may be that the clips should still be in the same vertical position in order to hold in place some covering for that connection; I can't see that it would be left open.


The pair of jacks were added, with CA glue fastening the top end inside the box like stowage, and polystyrene cement holding the clips together at the base end overhanging the rear.


Also started adding tools, drilling the mounting holes a little bigger; shovel at the back, axe and track tool at the front:


Also above the jack block is being pushed into place; no glue is needed here as the fit is tight, and it can be seen that I sanded down the sides (and underneath) to get it to slide into place. The last thing I wanted here was for the jack block holder to detach from the track guard.

As it was time to do some touching up of a few small bits (spare track holder, hatch lids) with the camouflage colours, the side skirts were also painted, starting with the Mr Color sand:


Some care is needed regarding the tiny holes (I think they're about 0.3mm) in that thick paint applied too heavily can start to bridge the gaps. The holes can actually be seen to apparently reduce in size, but waiting for the paint solvent to evaporate then shrinks the paint back down. Then the Tamiya Flat Brown:


Other side, with the missing rear panel, plus the plate for the back of the turret:


CMOT
Staff MemberEditor-in-Chief
ARMORAMA
Visit this Community
England - South West, United Kingdom
Joined: May 14, 2006
KitMaker: 10,954 posts
Armorama: 8,571 posts
Posted: Wednesday, December 19, 2018 - 06:24 AM UTC
This is looking really Matt and I would be proud to have it on my shelf, well done thus far.
firstcircle
Visit this Community
England - South East, United Kingdom
Joined: November 19, 2008
KitMaker: 2,249 posts
Armorama: 2,007 posts
Posted: Sunday, January 06, 2019 - 11:22 AM UTC
Thanks, Darren, for your encouragement, it is appreciated.

While working on the braille scale IBG Turan II, I was referring to the Bronco instructions and realised I'd managed to leave some parts unassembled. Parts C35, 36 and 37 shown in the instructions image below, all the way back in step 4; they need to be attached at the diamond shape circled:


Although the suspension has been painted, this seems relatively easy to fix, especially as the track units are still separate. So I've started assmembling them (below), and will wait for them to set before priming and painting, then attaching them and blending in.
firstcircle
Visit this Community
England - South East, United Kingdom
Joined: November 19, 2008
KitMaker: 2,249 posts
Armorama: 2,007 posts
Posted: Tuesday, January 15, 2019 - 09:25 AM UTC
So priming, base coating and attaching these parts that I forgot was something of a time consuming chore, not helped by having had some minor eye surgery which has resulted in a certain amount of double vision (well, worse than it is normally anyway. ) Once set I'll blend them in at the same as weathering the side skirt armour.


Attaching the spare track links to the front seemed like it should be so easy. So if done as per the instructions, it would have been right near the start, but notice that the section of track provided is dead flat (it's not made out of the separate links) yet lies on top of a bolted cover in the centre of the plate, so it cannot actually lie flat. Photos of the real thing sometimes seem to show it apparently lying dead flat, but this nice photo does show it slightly humped in the centre, and then a slight gap on the right between the track and the bar clamping it in place:


So that's what I went for, but note that the tiny pip underneath the wing nut isn't long enough to contact the hole in the plate beneath it, so a small section of 0.8mm rod was added in, arrowed, and still a bit shiny from the glue. The wire cutters were then added just above, on the right.


Removed by original poster on 03/05/19 - 23:16:17 (GMT).
firstcircle
Visit this Community
England - South East, United Kingdom
Joined: November 19, 2008
KitMaker: 2,249 posts
Armorama: 2,007 posts
Posted: Tuesday, March 05, 2019 - 11:31 AM UTC
My previous observation about the missing rivets was wrong, so I have deleted it. They are there, just hidden by the overlapping plate.

I decided no more procrastinating about attaching the track units, like by building small scale replicas of this kit, so I did some dust on the side plates in preparation:


Then, in common with so many blogs and magazine articles where there are many photos of all the other stages, the ugly stage of wrestling the tracks into place is just suddenly done. One of the links came apart, unfortunately at the front, but I just about managed to get it reattached without too much mess, and it is almost still straight.


Much more used to building small scale tanks, I find 1/35 tank tracks kind of creaky, and to make sure they sit straight (as possible) and with the tracks flat on the ground, I used a hairdryer to warm everything up, then added a lot of weight on top and left it for 24 hours. Mostly it looks acceptable, I think:


The metal mudscrapers which sit between the last return roller and the idler were attached with one of those moves that you need to practice several times before adding the glue:


The open driver's hatch was also added:


What was I saying about the headlamps being delicate? I broke both of them. I also managed to lose the sledgehammer.
CMOT
Staff MemberEditor-in-Chief
ARMORAMA
Visit this Community
England - South West, United Kingdom
Joined: May 14, 2006
KitMaker: 10,954 posts
Armorama: 8,571 posts
Posted: Tuesday, March 05, 2019 - 08:47 PM UTC
You do great work Matt and I like they way you present the stages.
ColinEdm
Staff MemberAssociate Editor
ARMORAMA
Visit this Community
Alberta, Canada
Joined: October 15, 2013
KitMaker: 1,355 posts
Armorama: 1,229 posts
Posted: Thursday, March 07, 2019 - 01:01 AM UTC
Looking great Matt, looking forward to seeing the finished product!
firstcircle
Visit this Community
England - South East, United Kingdom
Joined: November 19, 2008
KitMaker: 2,249 posts
Armorama: 2,007 posts
Posted: Sunday, March 24, 2019 - 10:14 AM UTC

Quoted Text

...looking forward to seeing the finished product!


Thanks Darren and Colin, almost, but not quite there.

Coming back to the side skirt hangers that were constructed months ago, but have been left until after the wheel / track units were attached because they need to be positioned very precisely in relation to the hooks on the track guards, in line with the eyelets on the back of the skirts. Plus I'd forgotten to paint the outer side, which I did today:


Starting with the skirt with the missing rear panel as it is a bit easier to see what's going on behind it, the rack was hooked dry, no glue, into the eyelets.


Paint carefully scraped off the bogies:


The upper eyelets on skirt, with lower rack attached, was then offered up to the hooks on the track guards and the correct position of those three rivets on the right was noted. The lower rack was removed from the skirt and cemented into place:


The same process on the other side, but a bit harder with the full length side skirt. This is the kind of view available of what's going on behind the skirt while working out the correct position of the rack:

Looking at the eyelets on the skirt, the only pair that should sit directly perpendicular is circled below, but even here, the lower one has to be slightly behind.


The skirt was gently hung on the now cemented but not fully cured racks for this photo.