

This is just mind blowing to me and fun to watch. Too many things going on in my life lately to actually feel like sitting down at the bench. So I am happy modeling vicariously through your excellent work. Drive on brother,I am enjoying the show.
J
Hosted by Darren Baker
Somewhere North

jrutman

Joined: April 10, 2011
KitMaker: 7,941 posts
Armorama: 7,934 posts
Posted: Tuesday, December 19, 2017 - 09:38 PM UTC

maartenboersma

Joined: October 10, 2010
KitMaker: 764 posts
Armorama: 742 posts
Posted: Tuesday, December 19, 2017 - 09:50 PM UTC
The T-55 looks fantastic !
Removed by original poster on 12/21/17 - 00:37:48 (GMT).

ColinEdm


Joined: October 15, 2013
KitMaker: 1,355 posts
Armorama: 1,229 posts
Posted: Wednesday, December 20, 2017 - 05:44 AM UTC
[img] [img]
[img]
[img]
zorrolobo

Joined: May 31, 2013
KitMaker: 1,457 posts
Armorama: 1,440 posts
Posted: Wednesday, December 20, 2017 - 08:52 AM UTC
Hi Nick. Great job. Do you have any links to the reference pictures of the BRDM-2 that you based your model on? I am working on a similar project and need more reference pics to the Syrian BRDM-2. Keep up the good work! Cheers!
ti

Joined: May 08, 2002
KitMaker: 2,264 posts
Armorama: 1,763 posts
Posted: Friday, December 22, 2017 - 01:08 AM UTC
Quoted Text
Hi guys -
Thanks for having a look, and sorry about the delay in posting.
Work has been a headache.....I just haven't been in the mood to do much...but, since the last post, I've made progress -
Tim - hahaa! either barney rubble or nick the blockhead!!
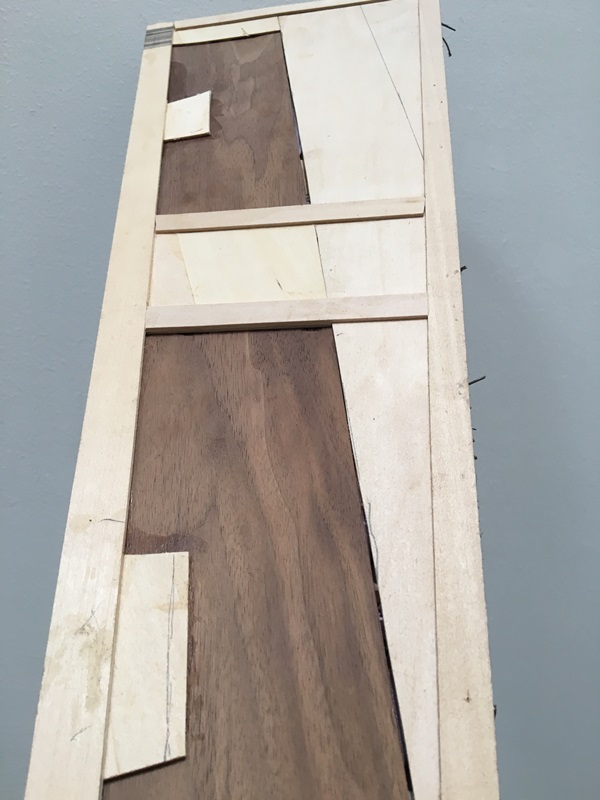
Hi Charles - - thanks for stopping - by and leaving some comments - about your question, you'll see below each that section of debris is built on little modules (the pic is of the underside) - using scrap material (bass wood etc) for the base. It's fairly light and durable, and easy enough to modify if needed.
Hi Mike and Jerry - yes, random, it's really hard to believe how hard it is to stay random. Jerry, i remember once you summarizing the situation pretty well - expressing that subconsciously, your mind is looking for order - and unless you go out of your way to break the order, you will indeed create a pattern - it's funny - I've seen this - completely unintentionally, objects being placed in the same orientation and equidistant from each other! you know if we (i) tried to do it would be next to impossible - lol - also...on a separate but related note, I've noticed when painting camo on uniforms, or chips on armor, the brush strokes can slip into patterns as well - same length, shape, direction and angle -weird eh?
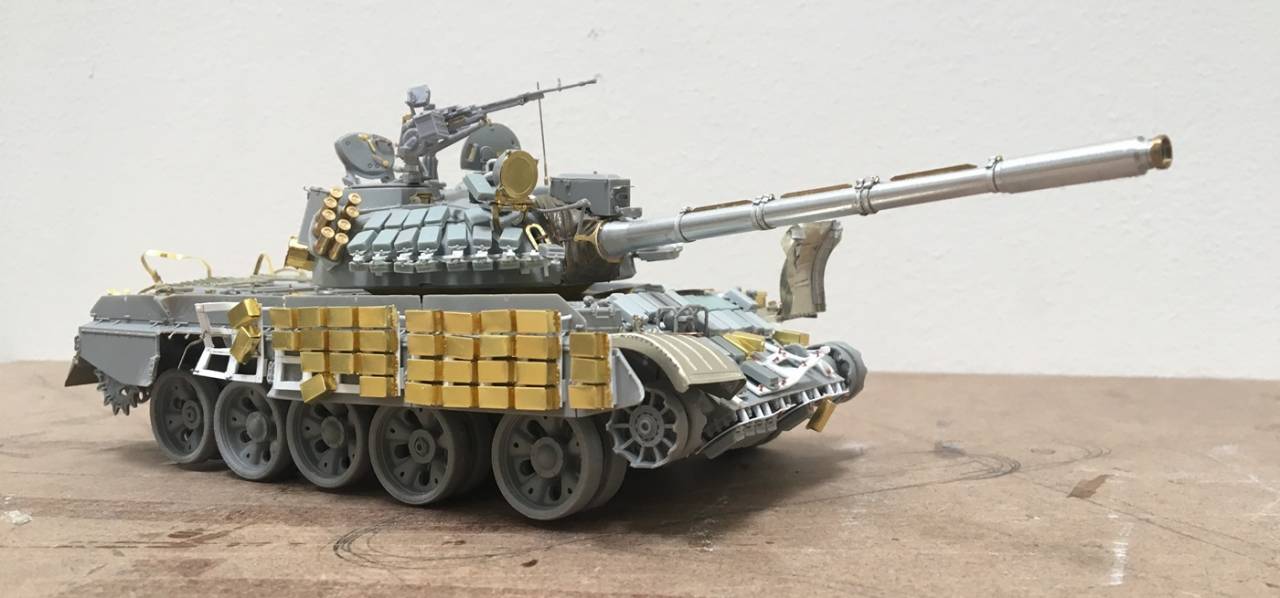
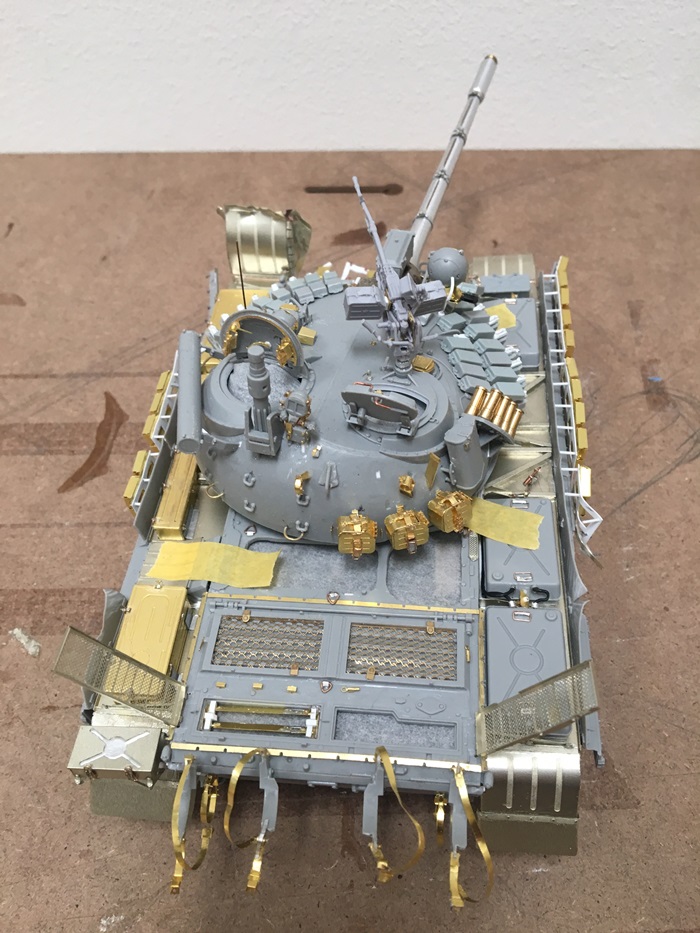
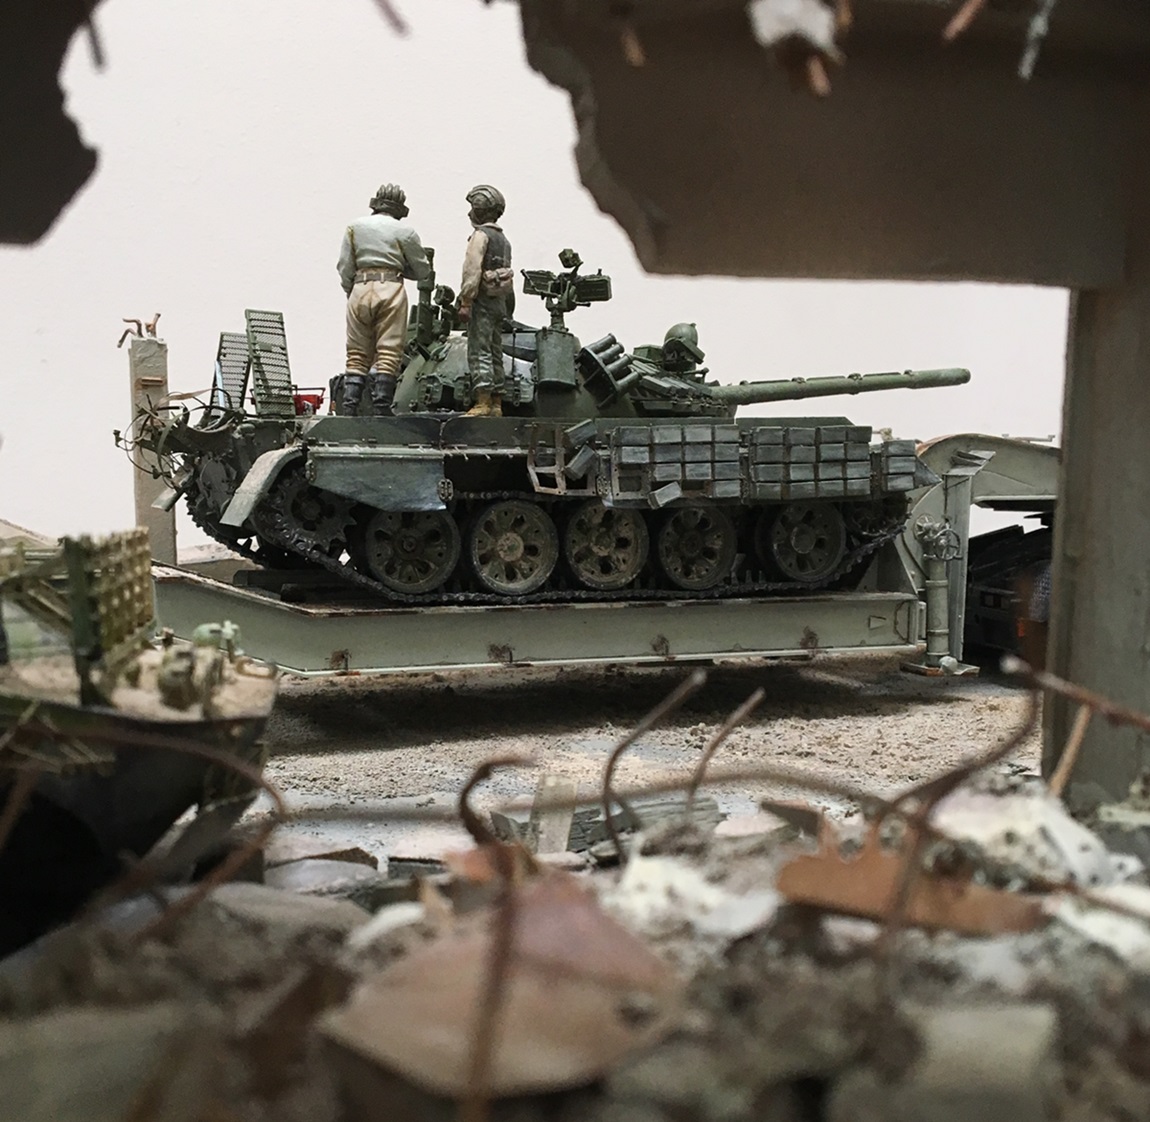
Ok - enough - please see some updates below - starting with T-55 number two, done:
And there you have it! another T-55 - - I've really enjoyed these builds - so much so, that I'm considering another for this dio! they're fun to build and a challenge to deconstruct and then weather -
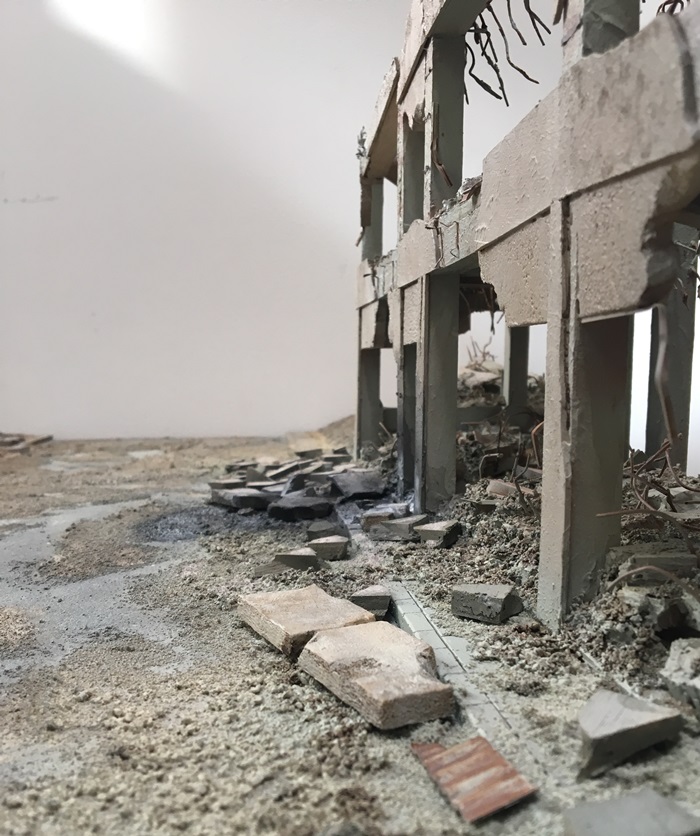
And - back to the dio. Charles asked about the base of the modules, please see below:
I've been on a real kick lately to use anything I have laying around before I buy new stuff - even remnants of strip wood. This is the underside of one debris module - as for the top of the debris module:
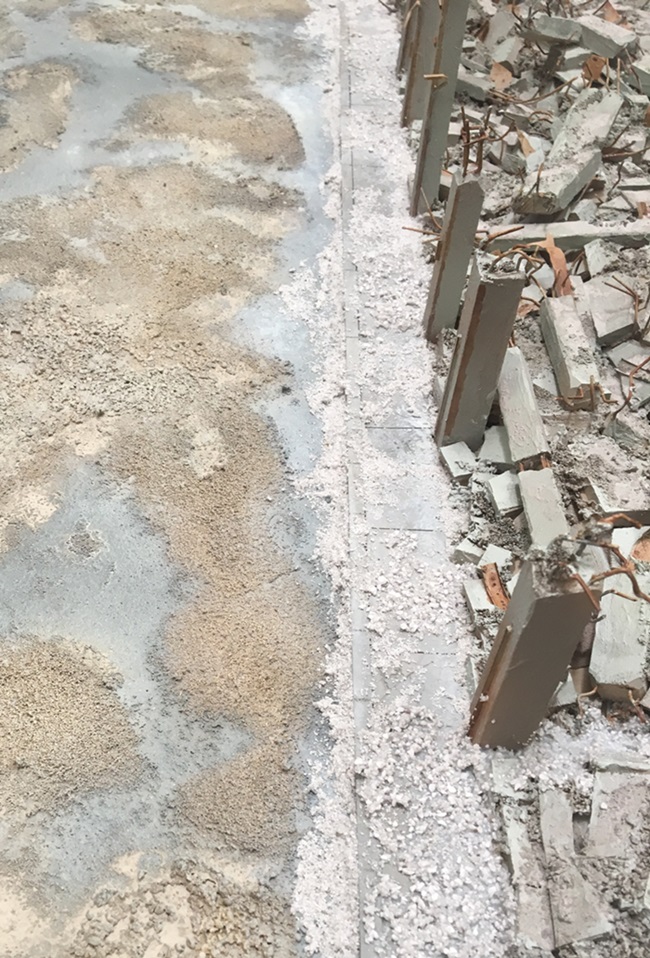
Above you can see the light colored textured material - it's just uncolored pumice gel.
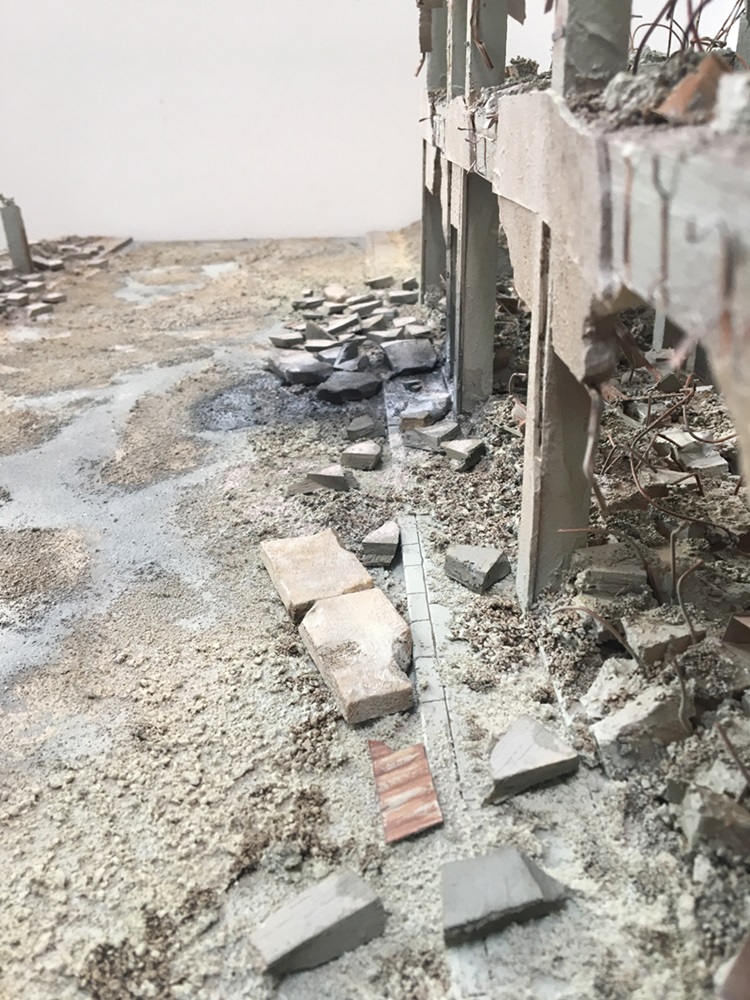
and above, some paint added - and the dark area, where the burned AFV will be placed.
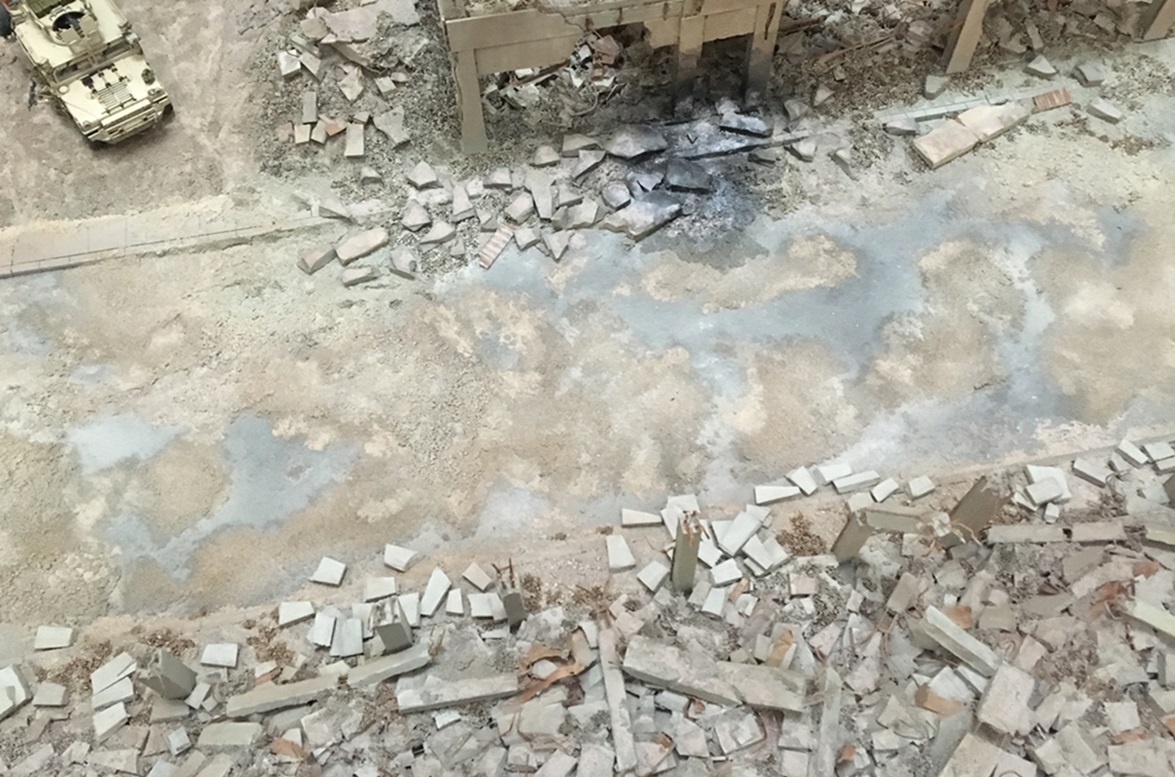
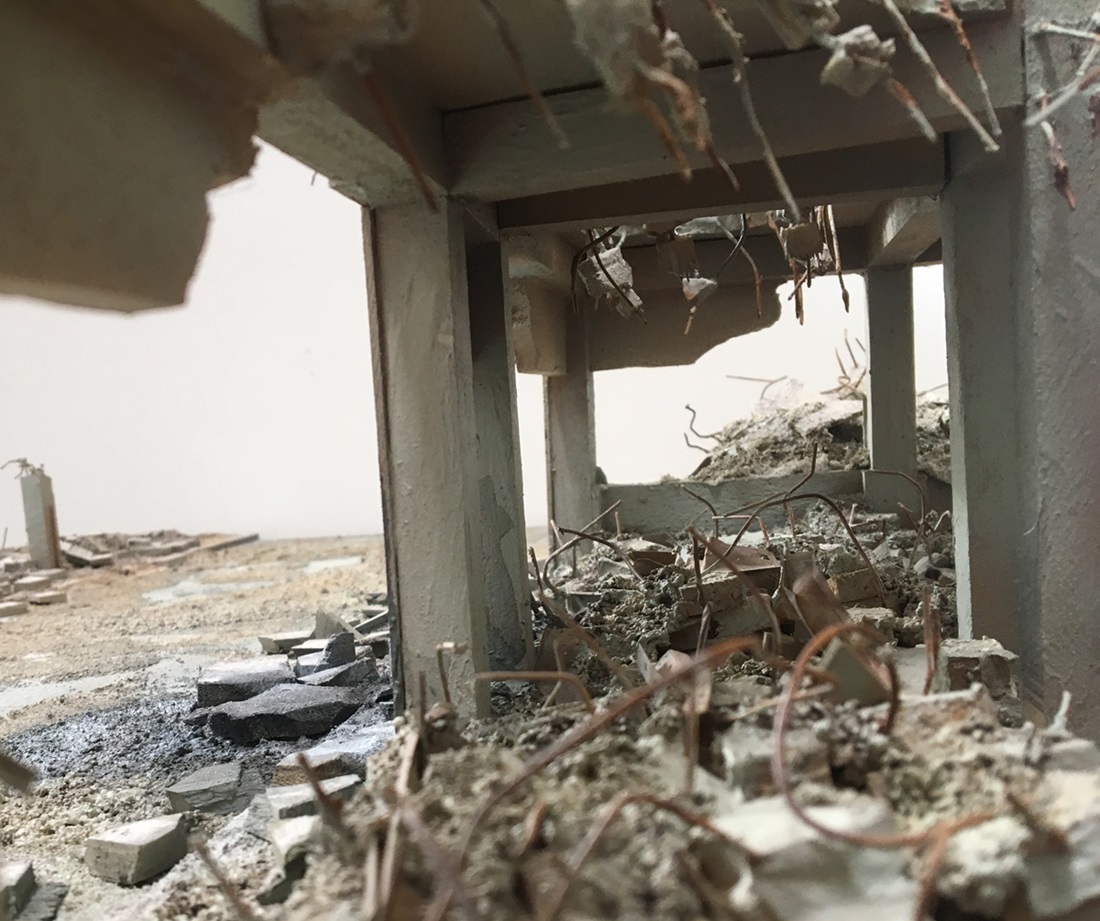
Above, you'll see a bit more of the street- the pumice gel is painted and another layer of painted but unweathered debris added (along the left side of the street - visually it really pops out!). This "shiny new" debris will first get a wash of grimy dust, and then more and more pigment!
thanks for checking it out - next time...maybe another T-55??!! lol
Nick


Masterpiece! Masterpiece! Masterpiece!!! Oh, did I say Masterpiece?!!!!! I love it. BTW, you did use plaster of Paris or wall filler for the ground/road work?


zontar
Joined: August 27, 2006
KitMaker: 1,646 posts
Armorama: 1,557 posts
Posted: Tuesday, January 02, 2018 - 07:23 AM UTC
Nick,
So far everything about this is awesome. Really top notch work as always.
How did you do the roadway? Is it a relatively flat asphalt with blotches of gel/sand/pigment scattered about? Which actual materials did you use?
Thanks, zon
So far everything about this is awesome. Really top notch work as always.
How did you do the roadway? Is it a relatively flat asphalt with blotches of gel/sand/pigment scattered about? Which actual materials did you use?
Thanks, zon

matt
Joined: February 28, 2002
KitMaker: 5,957 posts
Armorama: 2,956 posts
Posted: Tuesday, January 02, 2018 - 04:28 PM UTC
I second Colin's remarks!!!
Simply outstanding progress.
Simply outstanding progress.
kurnuy

Joined: August 22, 2009
KitMaker: 1,491 posts
Armorama: 997 posts

Posted: Wednesday, January 03, 2018 - 01:30 AM UTC
Hi Nick ,
seriously i have to echo all the others , amazing projects time after time ..... great work on the vehicles and T-55 . Fantastic scene ..... Hollywood hase '' The Lion King '' but here on Armorama i call you '' The dio King ''

A lot of respect !
Kurt
seriously i have to echo all the others , amazing projects time after time ..... great work on the vehicles and T-55 . Fantastic scene ..... Hollywood hase '' The Lion King '' but here on Armorama i call you '' The dio King ''
A lot of respect !
Kurt
Pongo_Arm
Joined: January 27, 2017
KitMaker: 147 posts
Armorama: 147 posts
Posted: Friday, January 05, 2018 - 04:45 AM UTC
Could you post a picture of your work beside a small car so we can get a sense of the scale...lol
Amazing work
Amazing work
Stickframe

#362
Joined: December 01, 2013
KitMaker: 1,661 posts
Armorama: 1,202 posts

Posted: Tuesday, February 06, 2018 - 06:03 AM UTC
Hello fellow model builders -
First, thanks to each of you for taking a few minutes to leave your comments - I really appreciate them! I don't have much time to post today, so I'll get into this:
First, in regard to the BRDM and the slat/bar armor, please see below:

I found two examples, but the one shown was the greater influence to what i did. You'll note the "ripped" armor, and general layout of the armor.
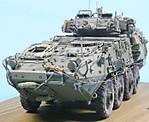
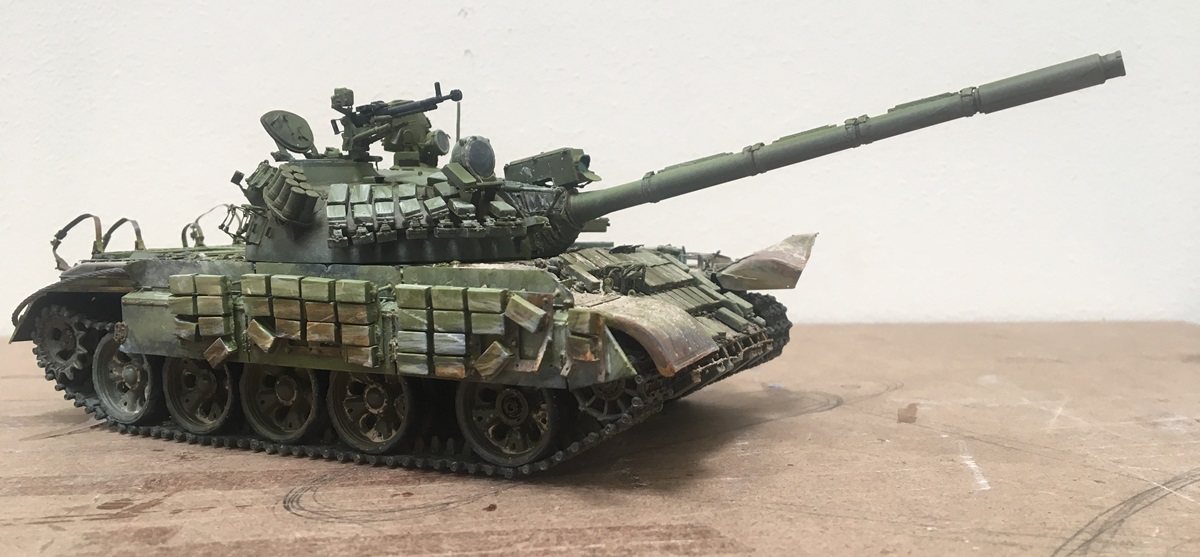
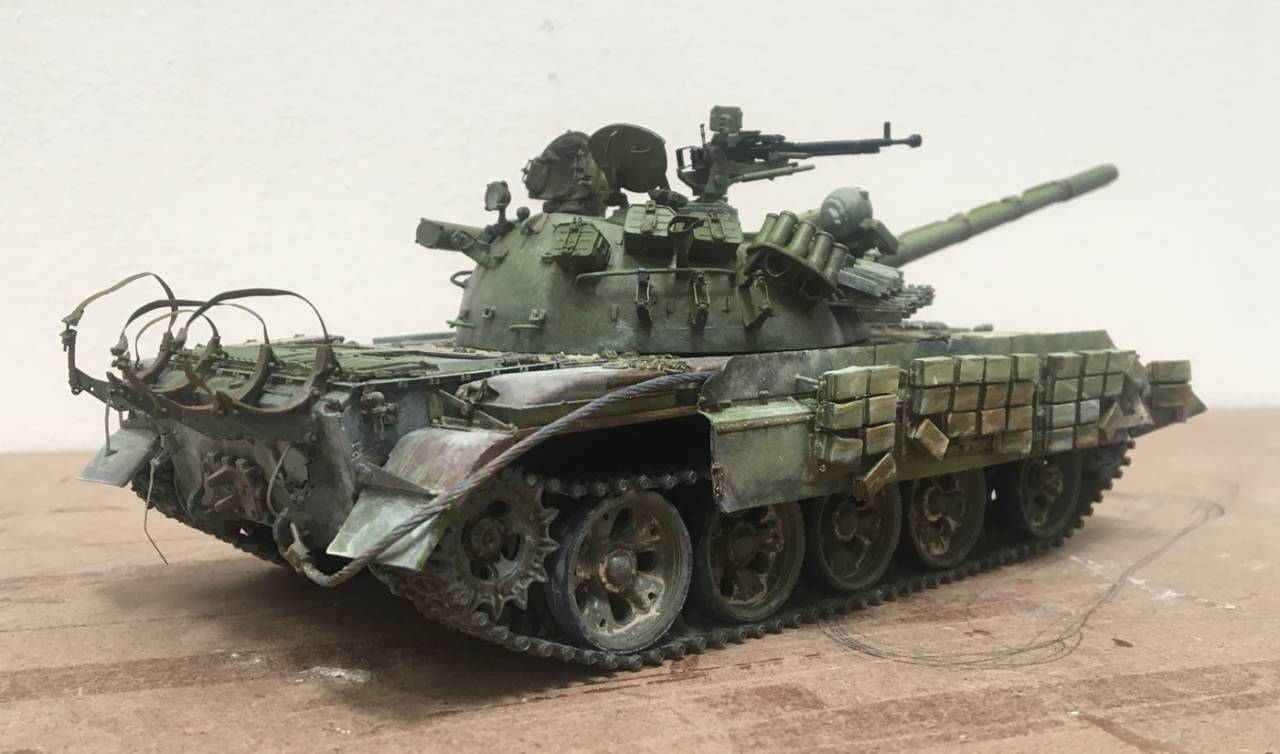
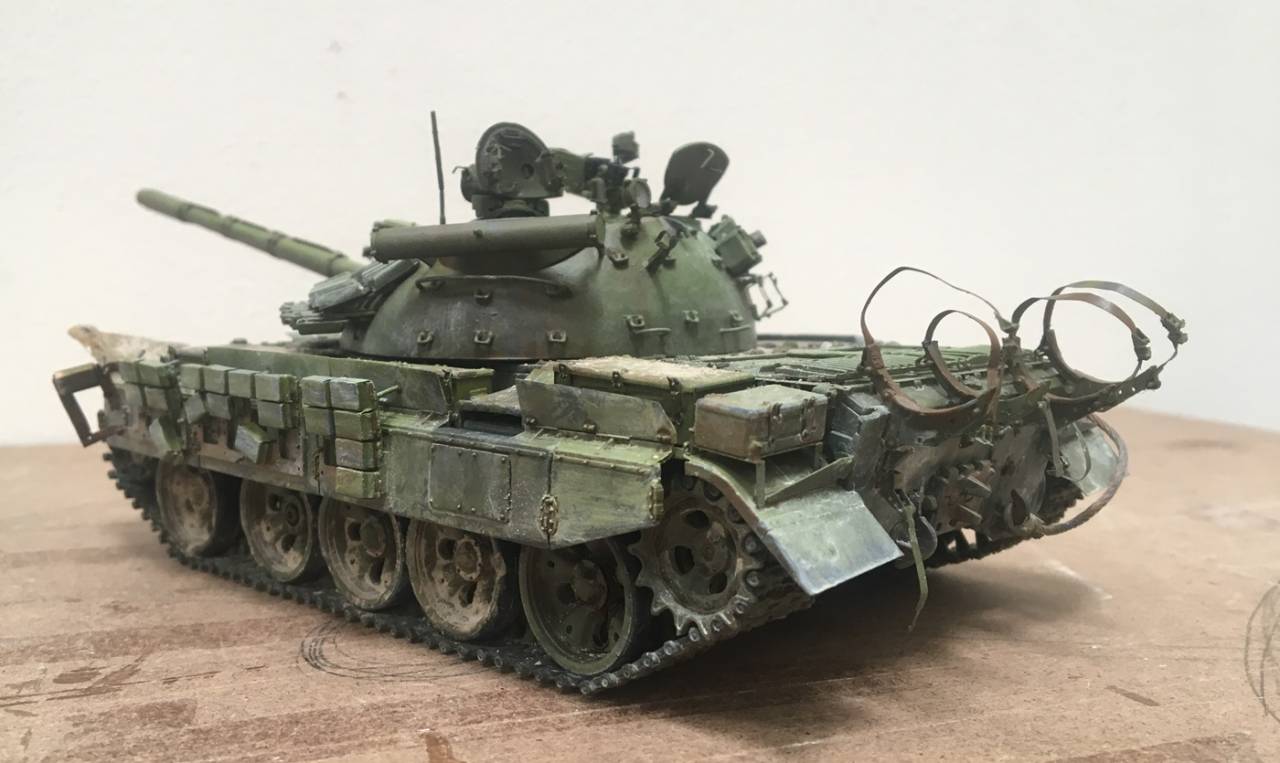
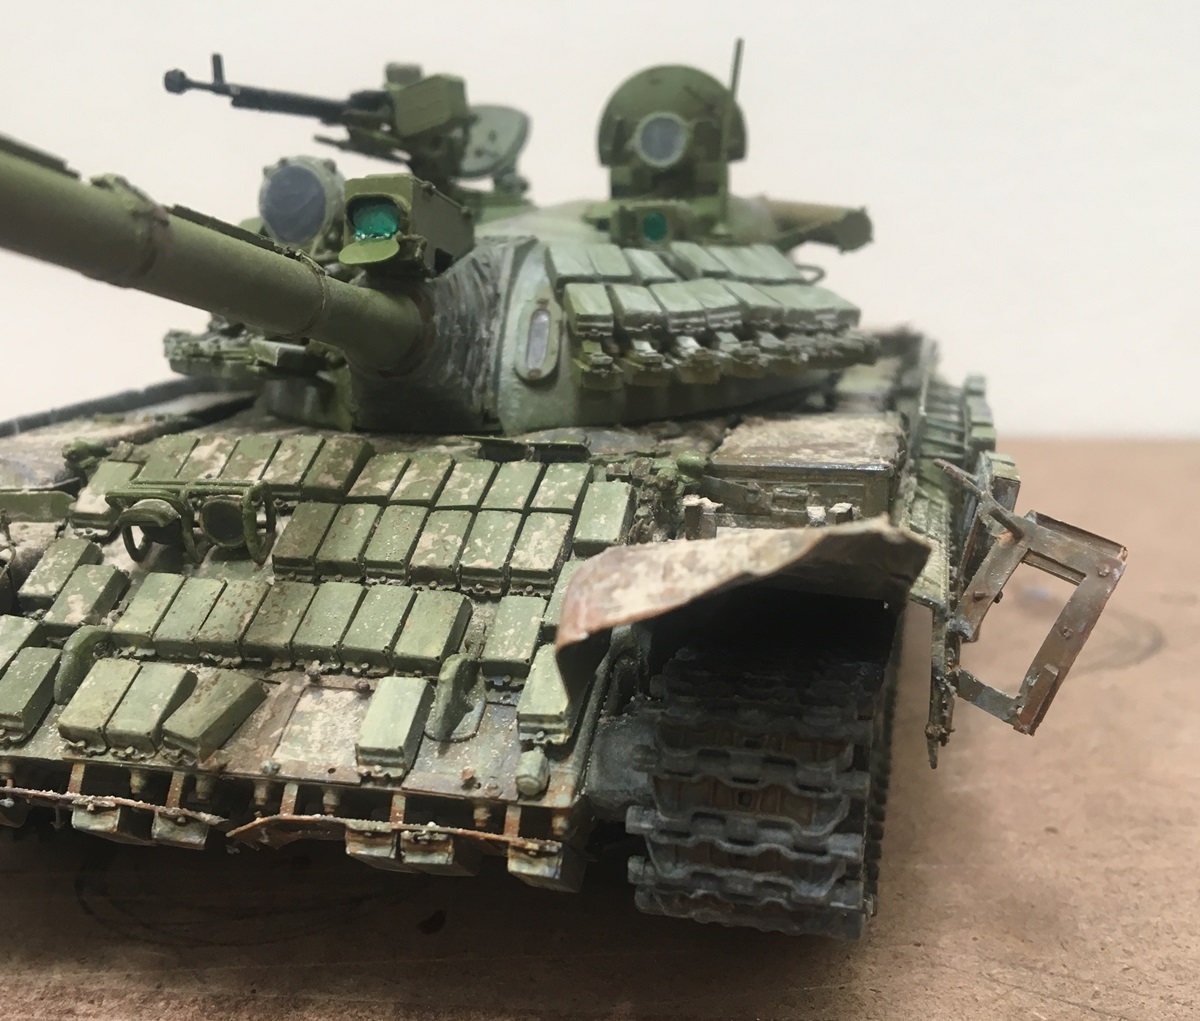
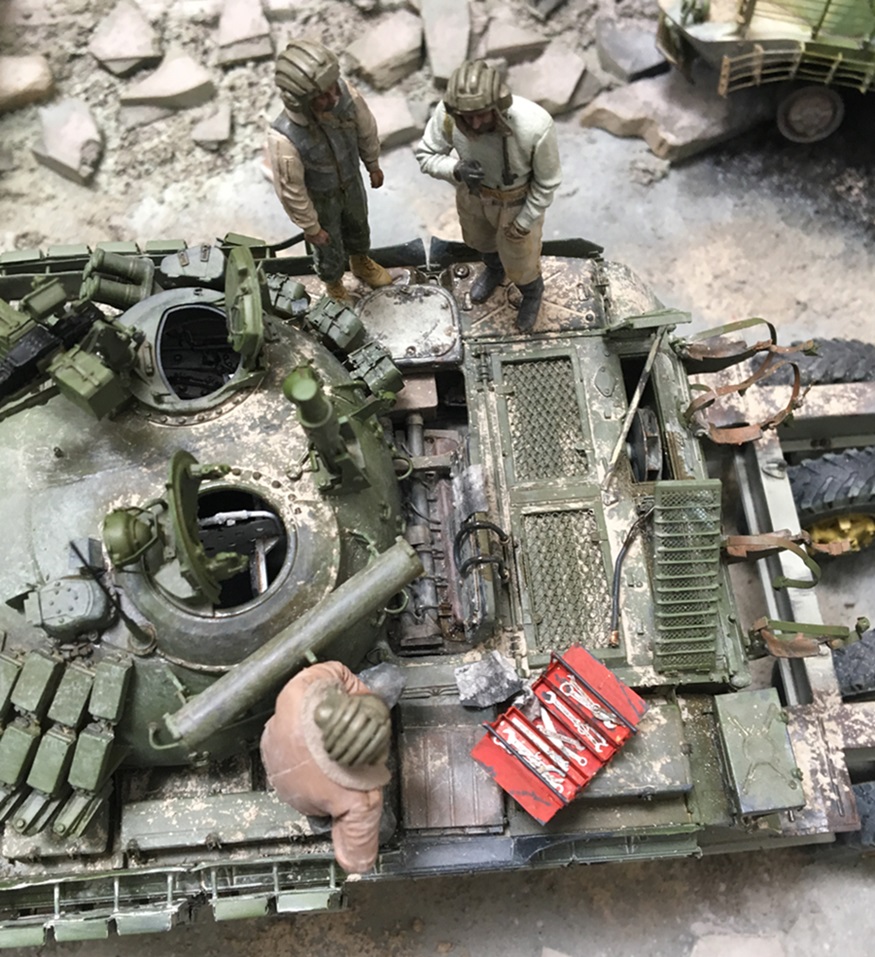
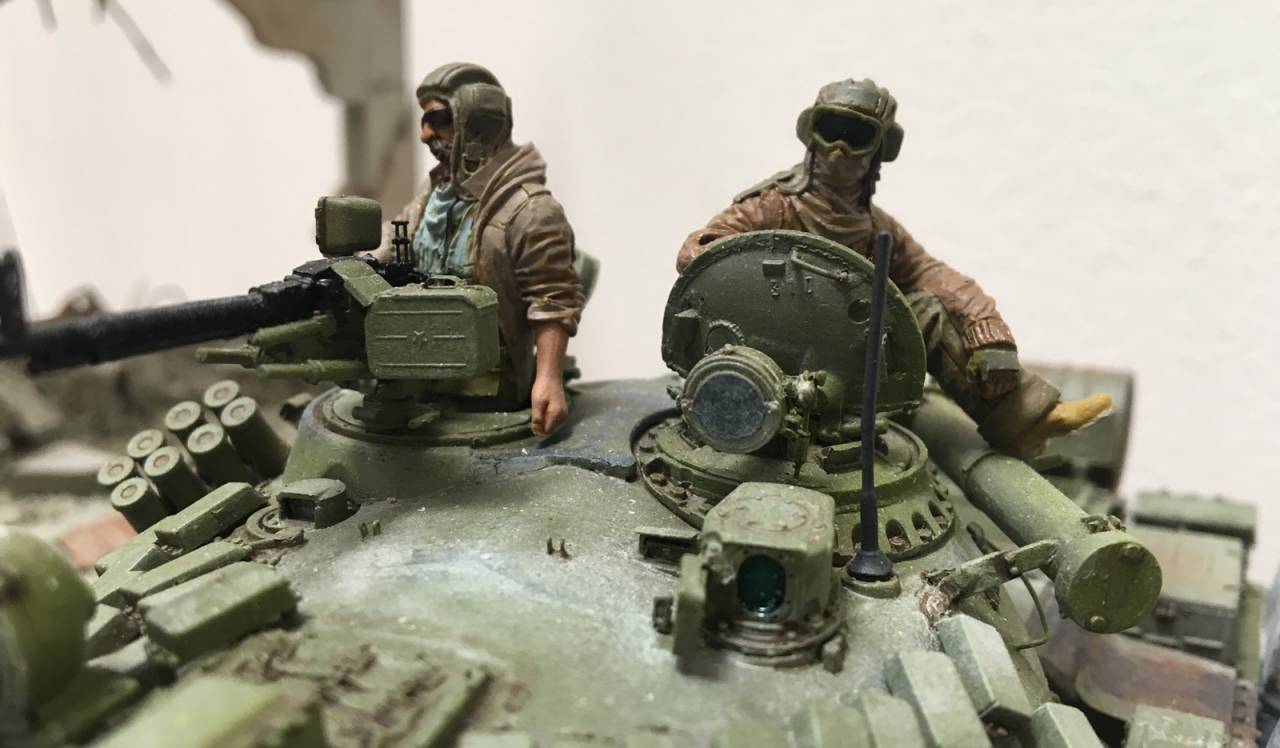
OK - now, on to current work. I did decide to build one more T-55 with plenty of scratch work - lessons learned from the last, and some experimenting with things I hadn't yet tried - like an engine:
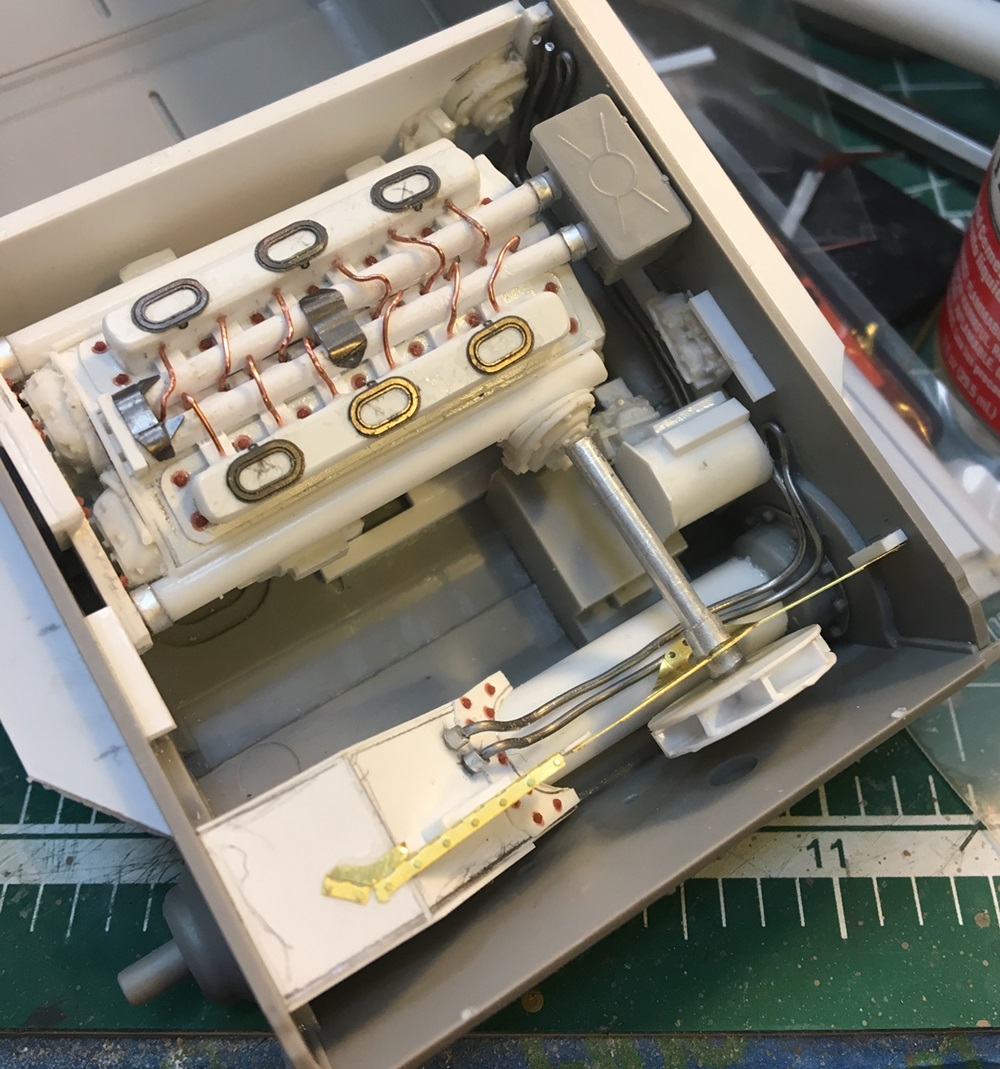
Looking around online enough, I found images to at least guide me in the right direction, a technique i kept using:
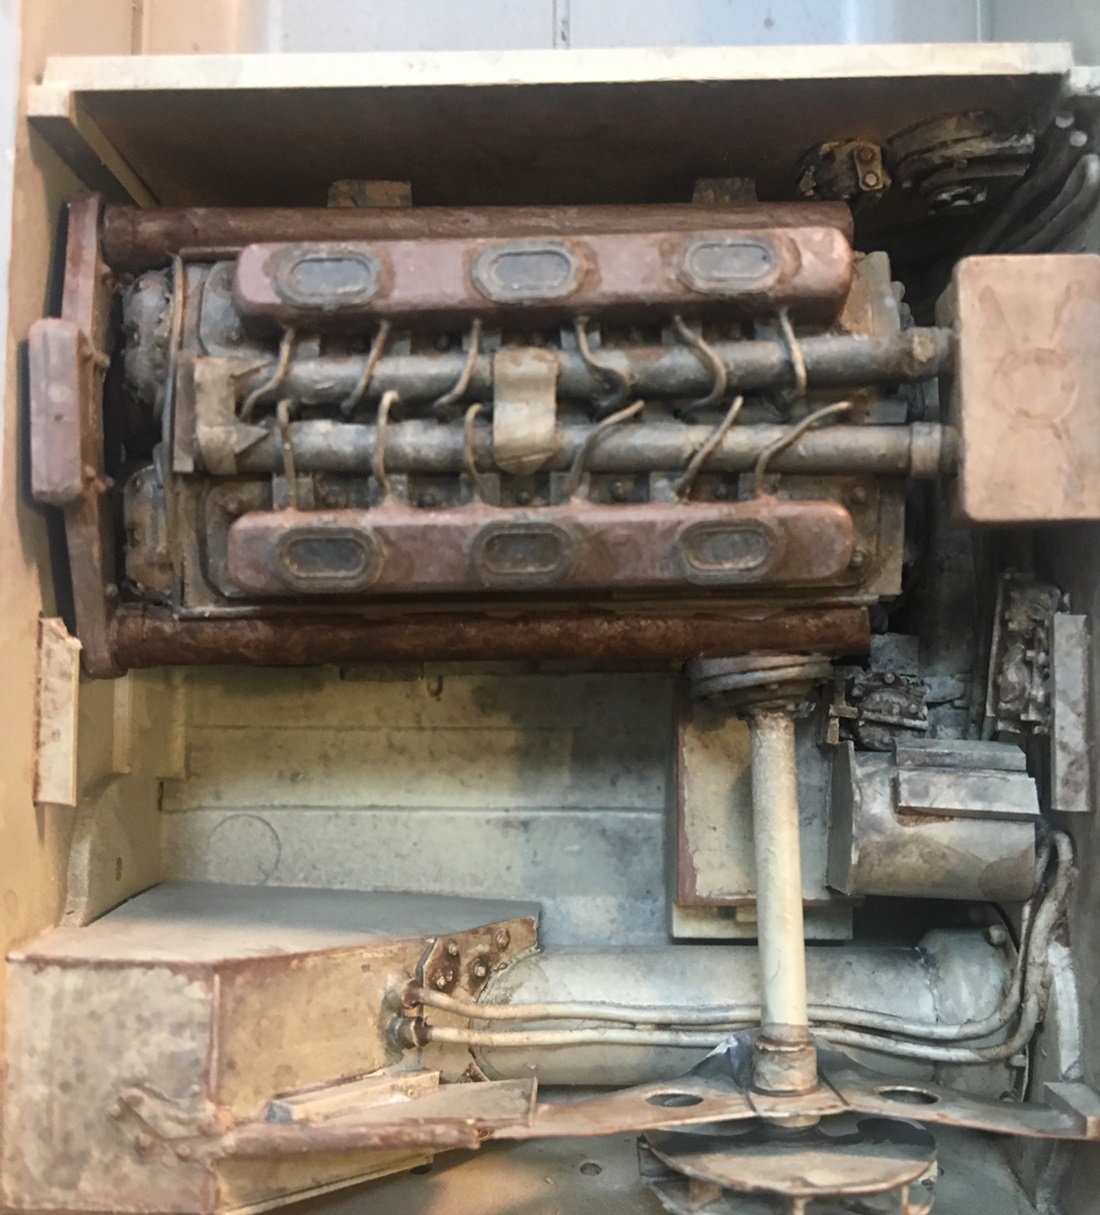
Sorry this is a bit out of focus, but, you get the point....Next:
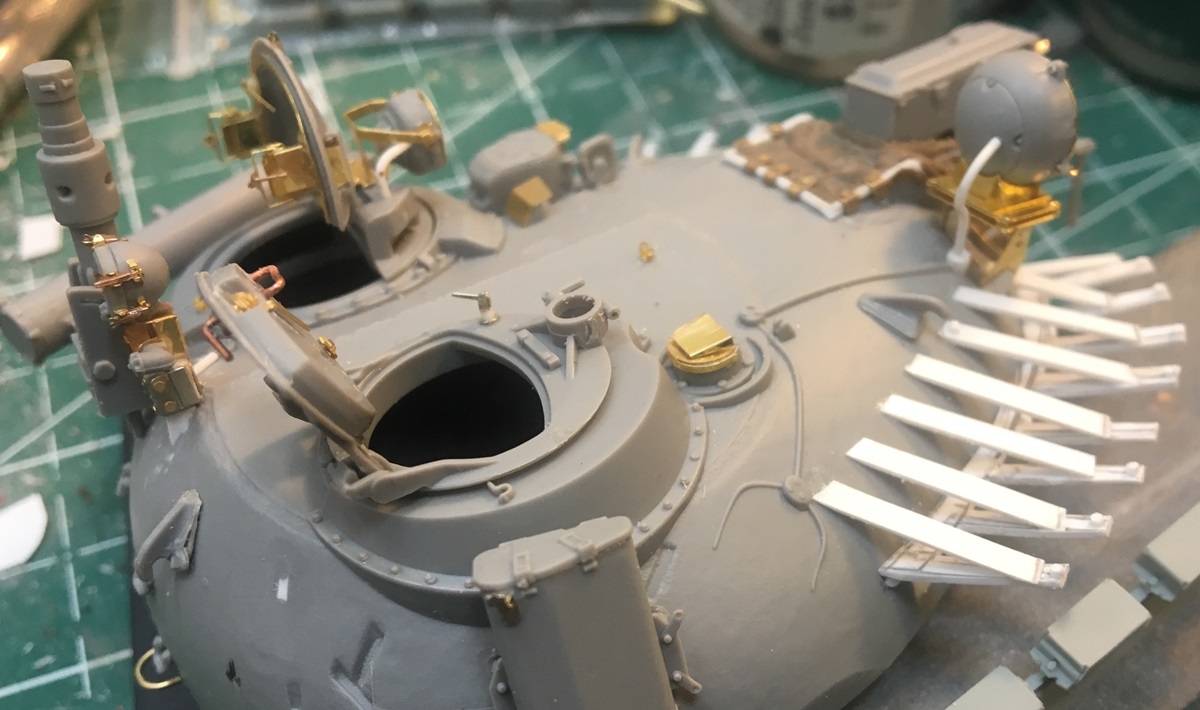
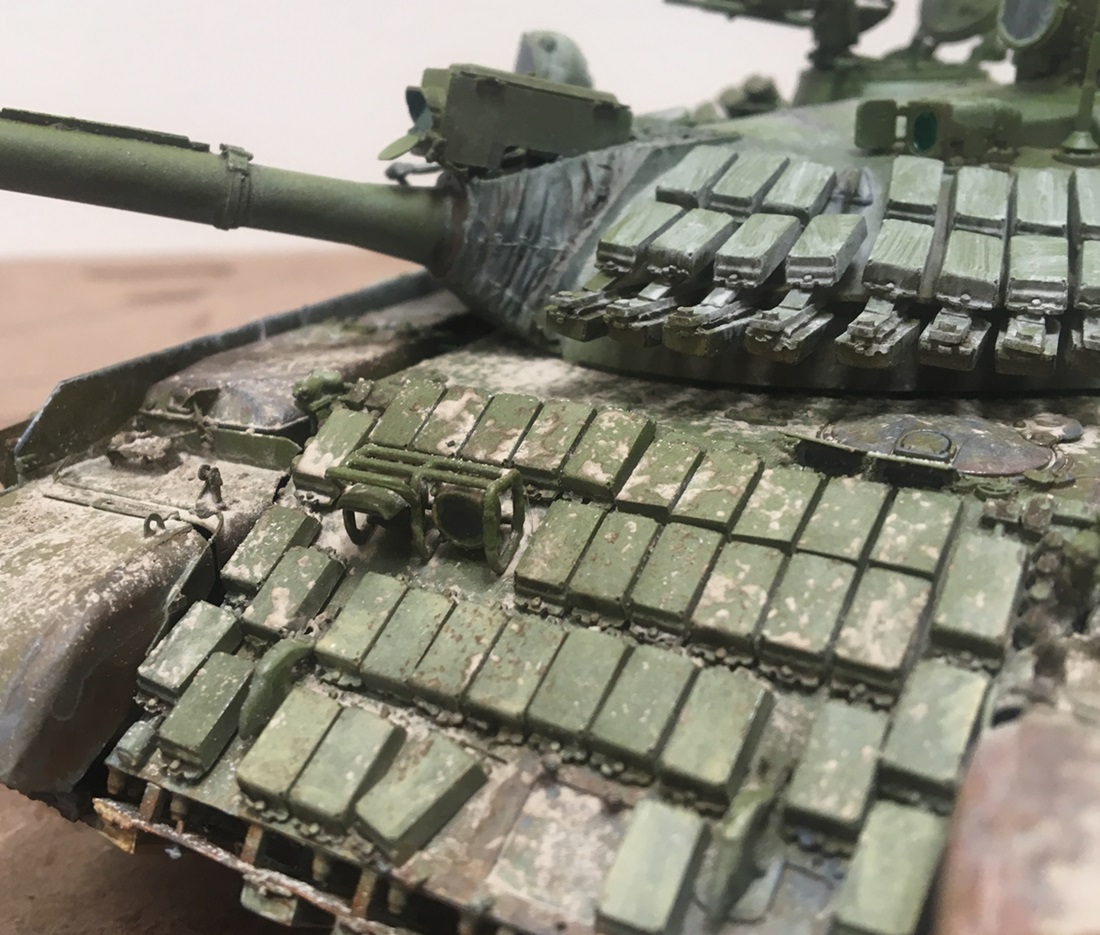
Working the turret up to meet the need - the obvious evergreen is the framework to be used for ERA blocks...

And while I was at it, decided to do a bit of space filling in the turret...while not the Mini-Art version, using pics found on-line, I made progress.
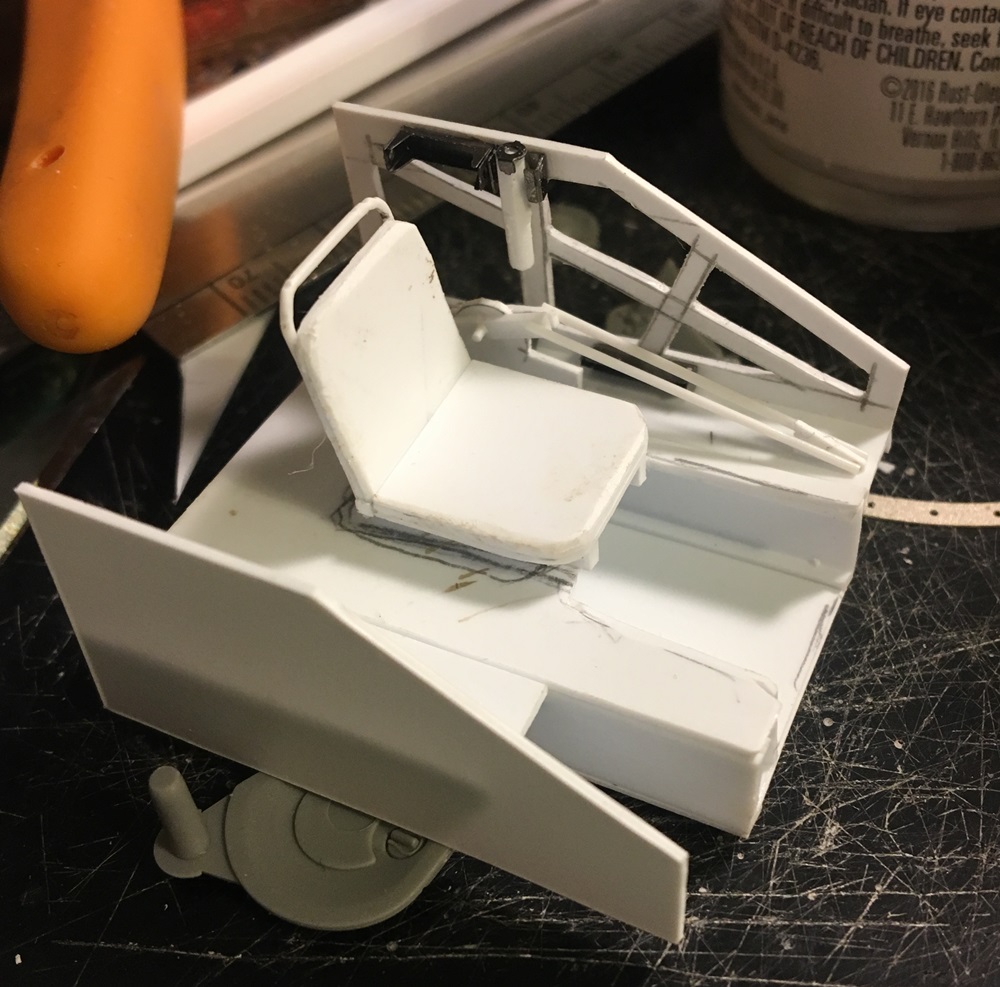

And as you can see above, a "light" interpretation of the drivers area...and below, the finished interior of the turret:
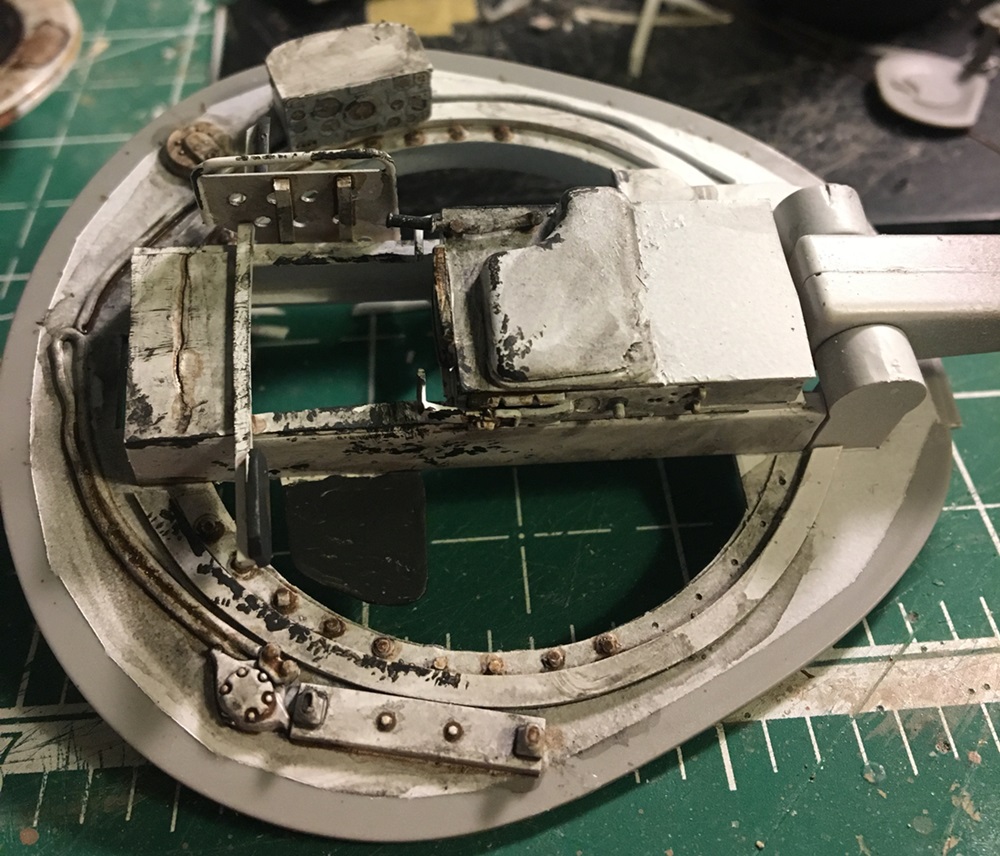
While none of my interior parts are likely all that precise, I think they convey the look, and the they were really interesting to try - then, back to the outside:
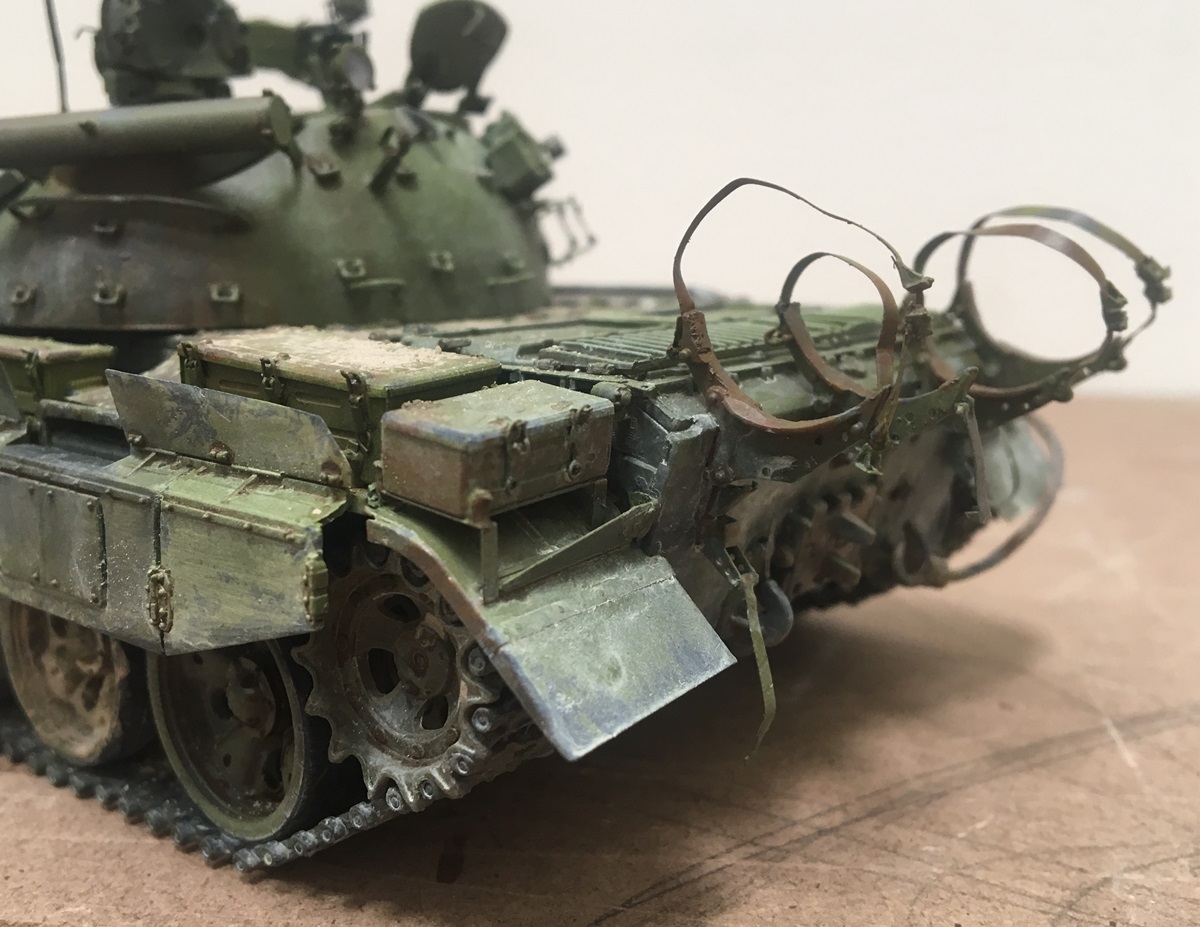
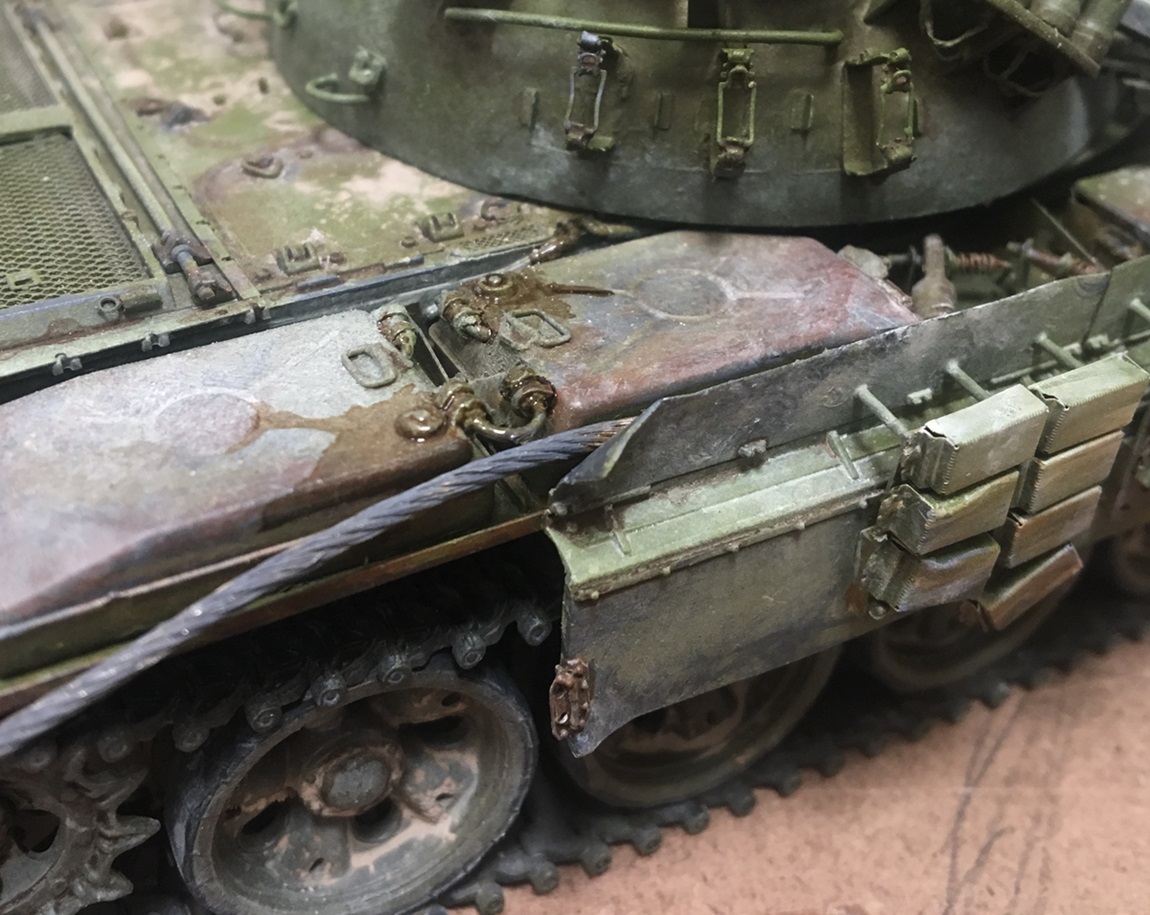
Like the previous 2, this one received modifications - yes...believe it or not, I really like the Aber details...
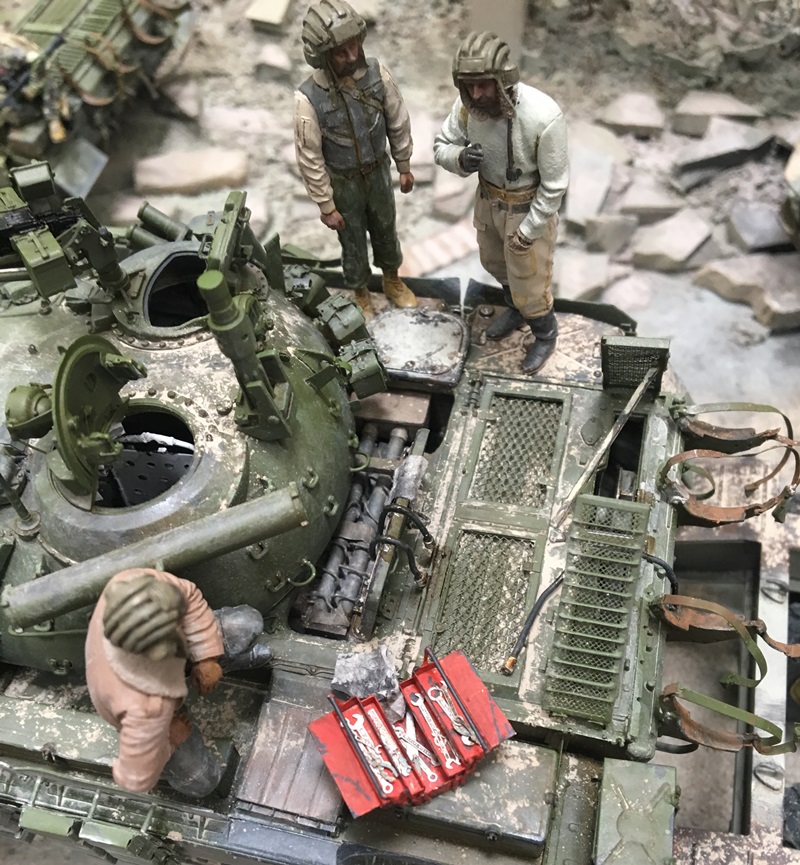
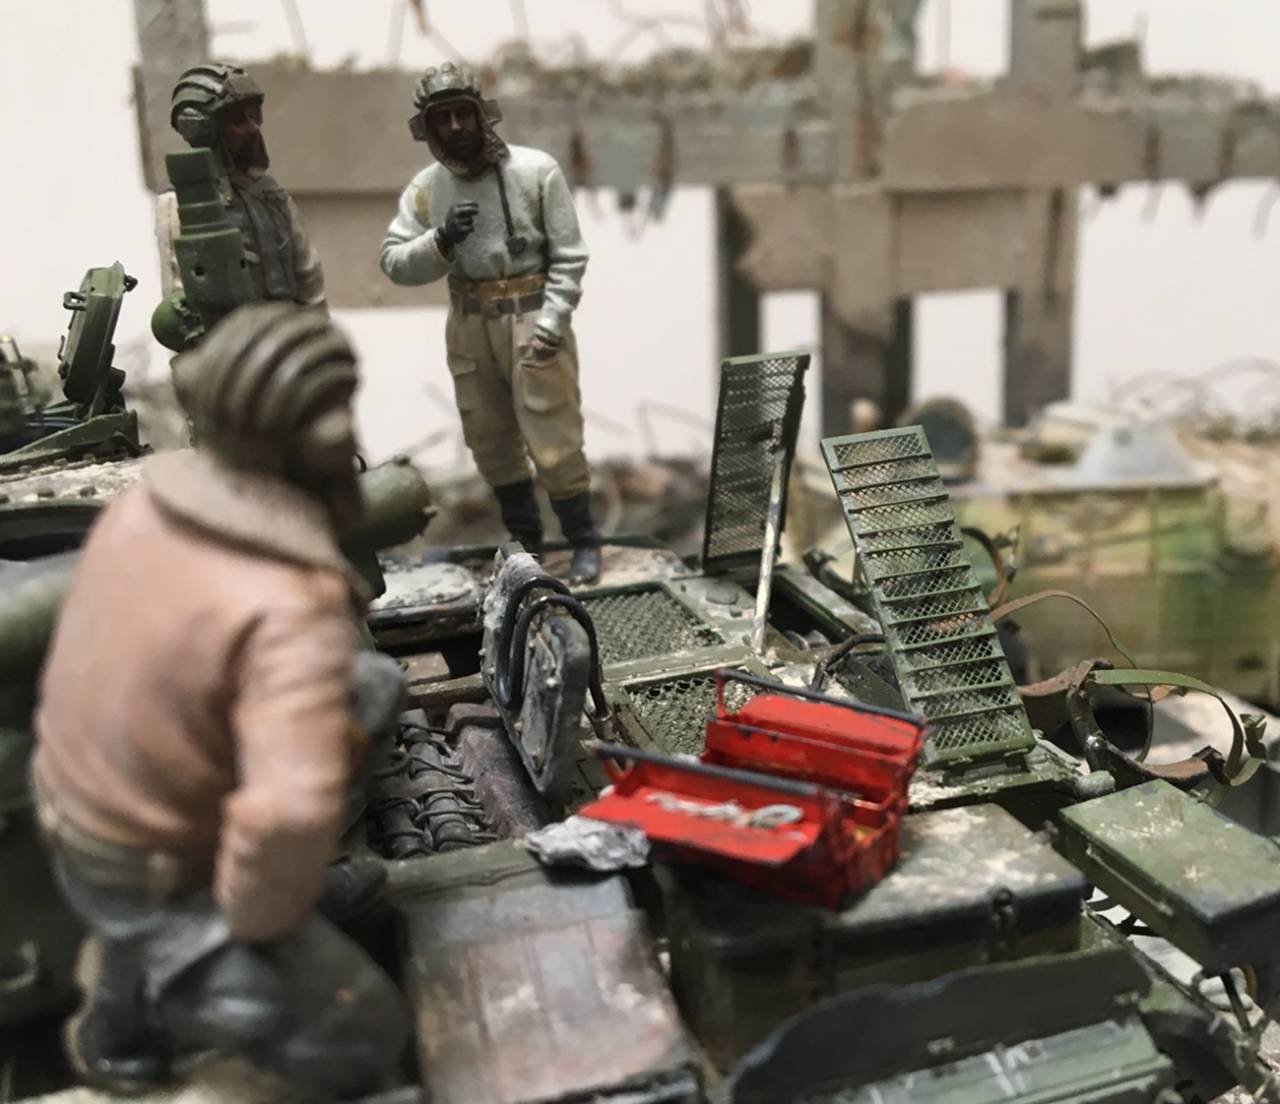
As this is indeed a dio, back to that. First, some figures:
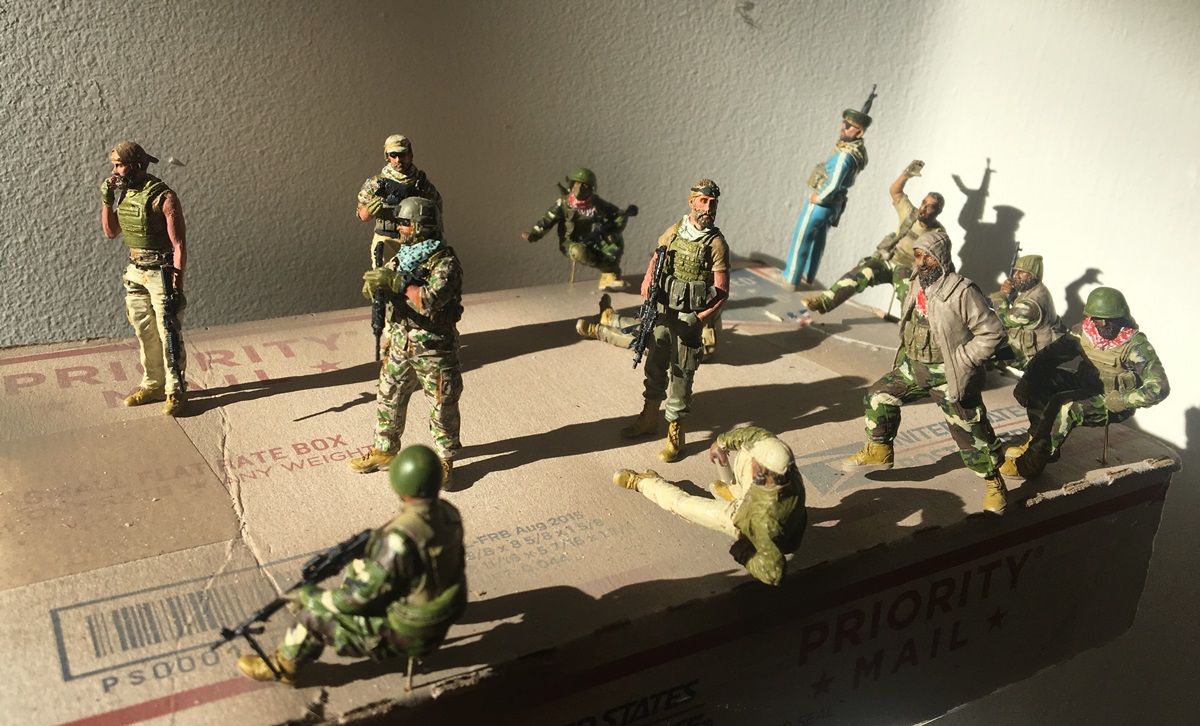
I'm sure many of you are familiar with some of these guys - they seem to be scene here and there...all in all, nice figures...
And, more work on the dio:
Above - this amount really to more paint and pigment..and experimenting to get the right look. I used these pigment products for color/light texture:
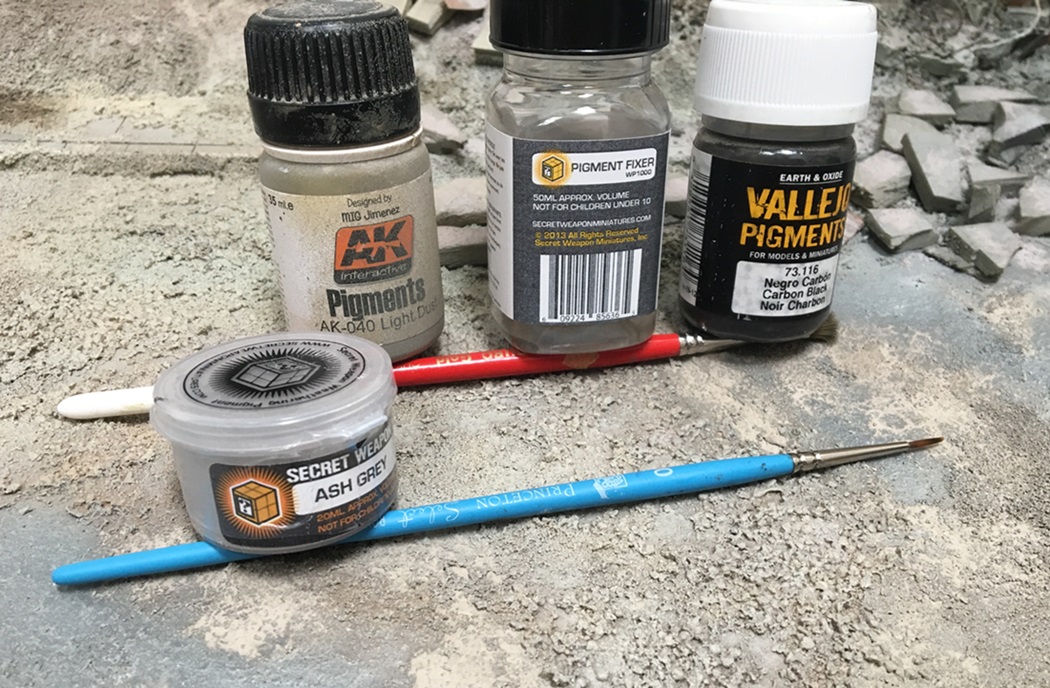
and, Charles, for the heavy textures, each of these -
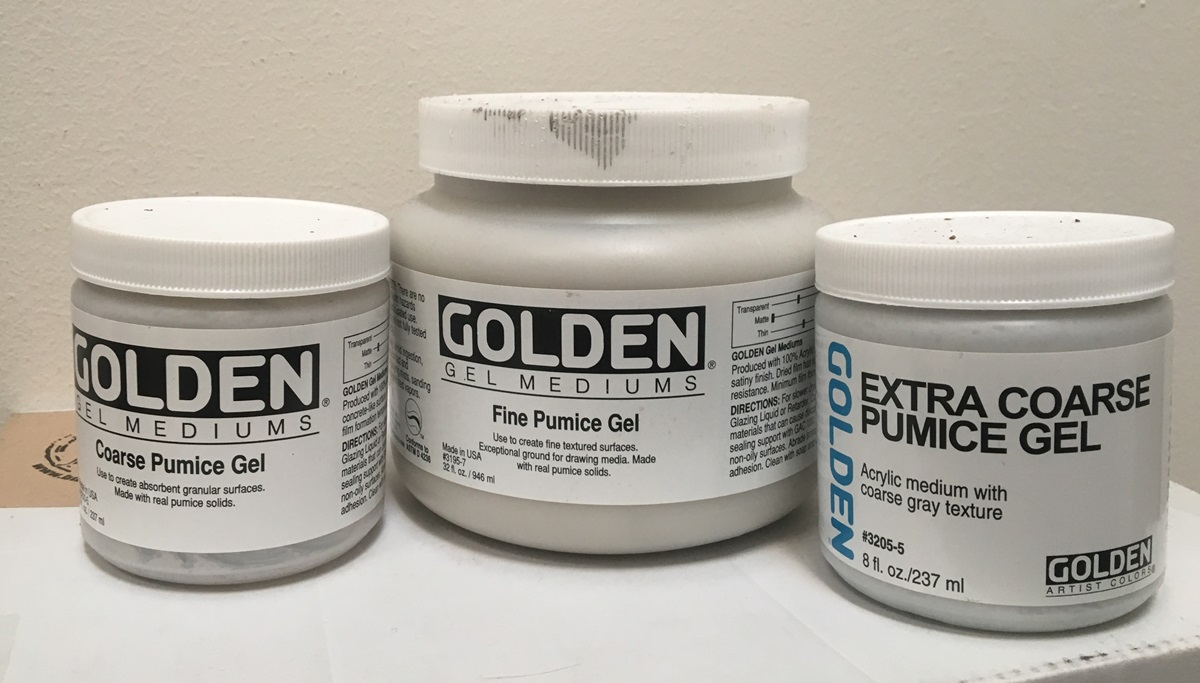
It takes some practice to use these products, but once you figure it out, they work fine. I will sat though, NOT cheap - but each jar lasts a while.
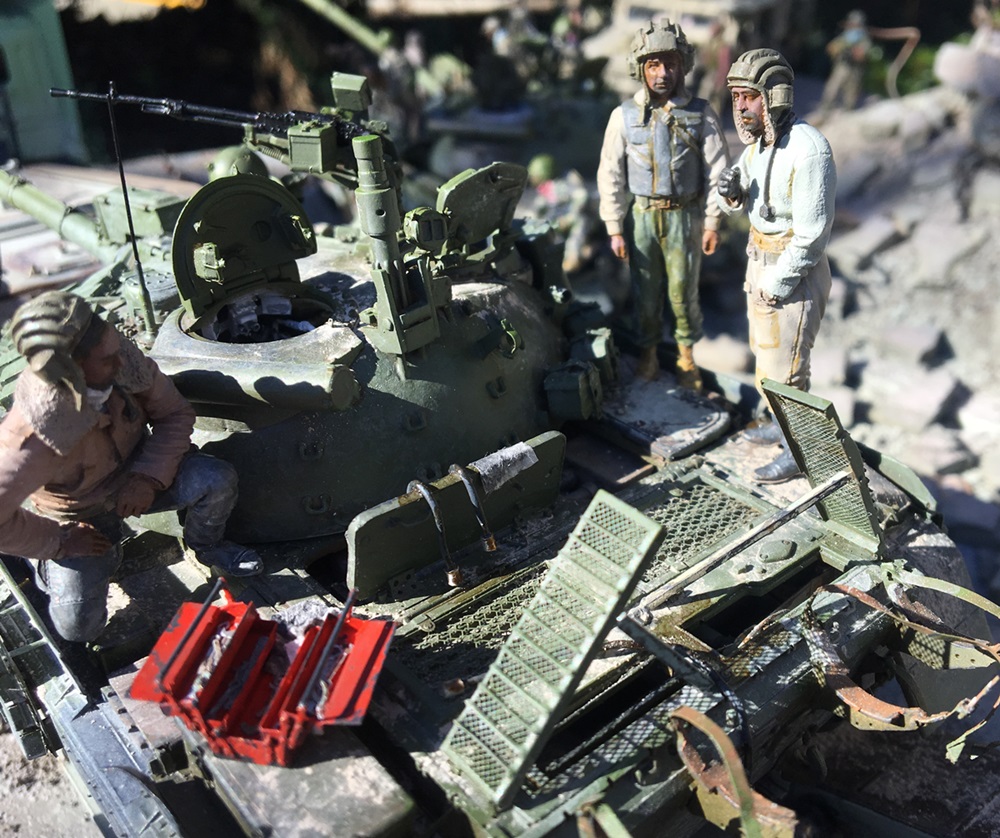
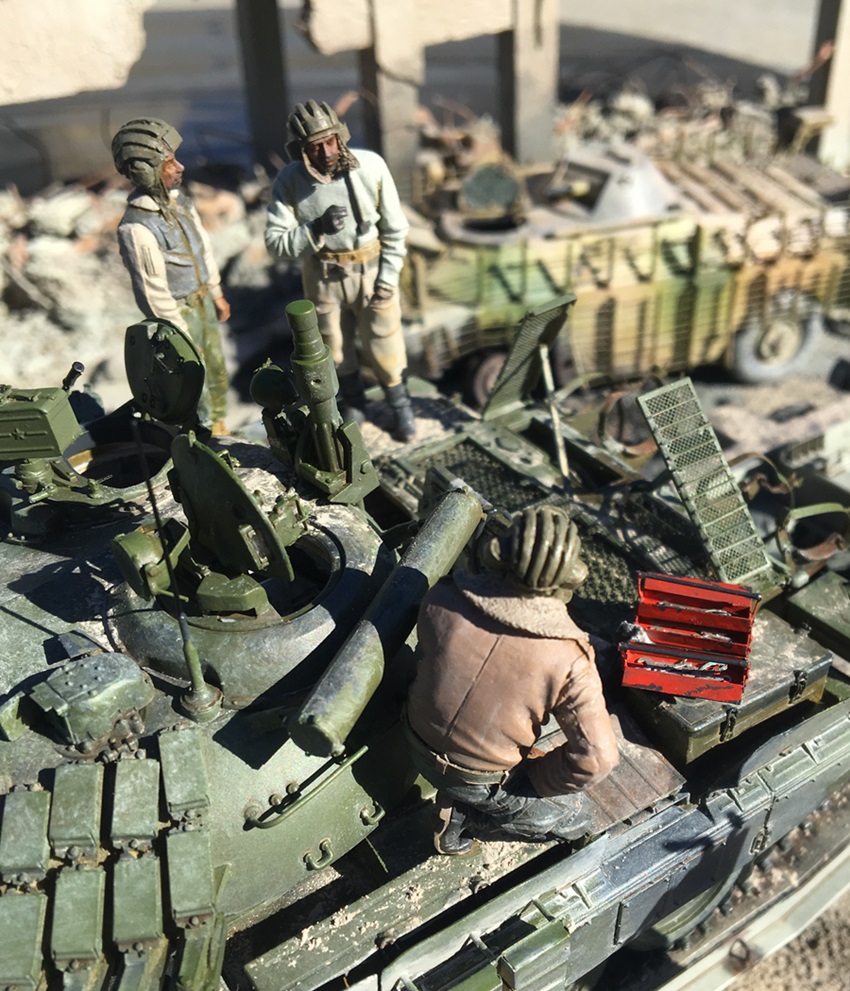
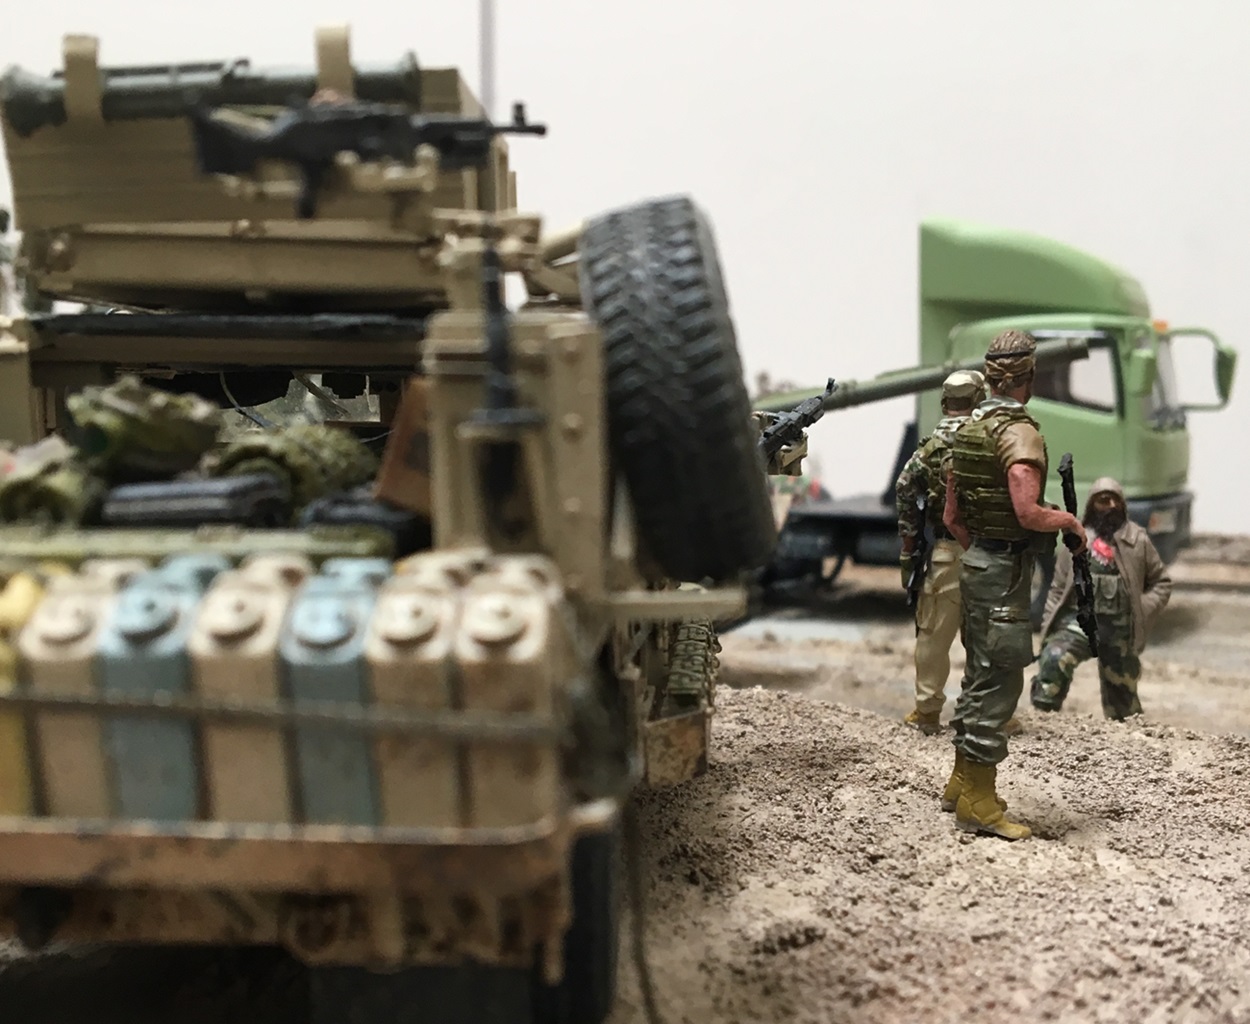
Finally - where this is heading:
So...after all the work to get the engine in, and visible...you really have to go out of your way to see it!...even leaving the rear grill elevated, you really can't see much of what is under them...oh well...fun to try! And, outdoors, with some sun:
I've taken more outdoor pics - but need to sort, crop etc - for next time! but, for now, you can see where I'm heading with this.
thanks for having a look
Nick
First, thanks to each of you for taking a few minutes to leave your comments - I really appreciate them! I don't have much time to post today, so I'll get into this:
First, in regard to the BRDM and the slat/bar armor, please see below:
I found two examples, but the one shown was the greater influence to what i did. You'll note the "ripped" armor, and general layout of the armor.
OK - now, on to current work. I did decide to build one more T-55 with plenty of scratch work - lessons learned from the last, and some experimenting with things I hadn't yet tried - like an engine:
Looking around online enough, I found images to at least guide me in the right direction, a technique i kept using:
Sorry this is a bit out of focus, but, you get the point....Next:
Working the turret up to meet the need - the obvious evergreen is the framework to be used for ERA blocks...
And while I was at it, decided to do a bit of space filling in the turret...while not the Mini-Art version, using pics found on-line, I made progress.
And as you can see above, a "light" interpretation of the drivers area...and below, the finished interior of the turret:
While none of my interior parts are likely all that precise, I think they convey the look, and the they were really interesting to try - then, back to the outside:
Like the previous 2, this one received modifications - yes...believe it or not, I really like the Aber details...
As this is indeed a dio, back to that. First, some figures:
I'm sure many of you are familiar with some of these guys - they seem to be scene here and there...all in all, nice figures...
And, more work on the dio:
Above - this amount really to more paint and pigment..and experimenting to get the right look. I used these pigment products for color/light texture:
and, Charles, for the heavy textures, each of these -
It takes some practice to use these products, but once you figure it out, they work fine. I will sat though, NOT cheap - but each jar lasts a while.
Finally - where this is heading:
So...after all the work to get the engine in, and visible...you really have to go out of your way to see it!...even leaving the rear grill elevated, you really can't see much of what is under them...oh well...fun to try! And, outdoors, with some sun:
I've taken more outdoor pics - but need to sort, crop etc - for next time! but, for now, you can see where I'm heading with this.
thanks for having a look
Nick
jrutman
Joined: April 10, 2011
KitMaker: 7,941 posts
Armorama: 7,934 posts
Posted: Tuesday, February 06, 2018 - 06:20 AM UTC
Inspired brilliant work once again. I am taking notes on your rubble for sure ! I am afraid to use too much pigment though. I never can get it to look right for some reason. Yours looks like it "belongs".
J
J
zorrolobo
Joined: May 31, 2013
KitMaker: 1,457 posts
Armorama: 1,440 posts
Posted: Tuesday, February 06, 2018 - 06:45 AM UTC
Keep it up! Nice work!

cheyenne
Joined: January 05, 2005
KitMaker: 2,185 posts
Armorama: 1,813 posts
Posted: Tuesday, February 06, 2018 - 03:06 PM UTC
Very cool Nick !!!
Your pe work is outstanding and your outside camera shots are very convincing vs the real deal .
Your pe work is outstanding and your outside camera shots are very convincing vs the real deal .

Dioramartin

Joined: May 04, 2016
KitMaker: 1,476 posts
Armorama: 1,463 posts
Posted: Tuesday, February 06, 2018 - 03:23 PM UTC

ReconTL3-1
Joined: June 07, 2006
KitMaker: 726 posts
Armorama: 687 posts
Posted: Wednesday, February 07, 2018 - 02:03 AM UTC
Excellent work, Nick! Your attention to detail is outstanding and the effects you have created with the rubble looks real. I wish I had your modeling skills with vehicles and buildings.
Again, excellent work!
Cheers,
James
Again, excellent work!
Cheers,
James
Stickframe
#362
Joined: December 01, 2013
KitMaker: 1,661 posts
Armorama: 1,202 posts
Posted: Saturday, February 10, 2018 - 02:35 AM UTC
Hi guys - thanks for dropping in and leaving your thoughts - I really appreciate it!
Each of you have posted some amazing work on your blogs - I think I've drawn inspiration from each of you at one time or other! It's a fun hobby and great forum.
I've taken lots of photos of the now completed project - I went outside for the sunlight - which always amplifies the good, and less good...! Unlike Jerry's current project - I didn't use a backdrop - I should have - maybe even a simple beige to blue/grey panel.
The reason? Well, when outside, on a dio with no solid walls to block the background, all of the real scale background just doesn't disappear! Trees, shrubs, hippies, buildings, hipsters, light posts, kids, cars, dogs, moms with kids, trucks, bike riders, cops - everything in my neighborhood! While all fine in real life....not great for pictures of a 1/35 world!
Hopefully I'll post the images next week some time....for now thinking about what's next. Maybe finish the Bladerunner? Start getting serious about Mike K's scratch building campaign? Or - start something else?
Thanks for dropping by -
Nick
jrutman
Joined: April 10, 2011
KitMaker: 7,941 posts
Armorama: 7,934 posts
Posted: Saturday, February 10, 2018 - 02:42 AM UTC
Quoted Text
Hi guys - thanks for dropping in and leaving your thoughts - I really appreciate it!
Each of you have posted some amazing work on your blogs - I think I've drawn inspiration from each of you at one time or other! It's a fun hobby and great forum.
I've taken lots of photos of the now completed project - I went outside for the sunlight - which always amplifies the good, and less good...! Unlike Jerry's current project - I didn't use a backdrop - I should have - maybe even a simple beige to blue/grey panel.
The reason? Well, when outside, on a dio with no solid walls to block the background, all of the real scale background just doesn't disappear! Trees, shrubs, hippies, buildings, hipsters, light posts, kids, cars, dogs, moms with kids, trucks, bike riders, cops - everything in my neighborhood! While all fine in real life....not great for pictures of a 1/35 world!
Hopefully I'll post the images next week some time....for now thinking about what's next. Maybe finish the Bladerunner? Start getting serious about Mike K's scratch building campaign? Or - start something else?
Thanks for dropping by -
Nick
Whatever you decide to move on to it will be fun to watch !
SF-07-18D

Joined: December 19, 2016
KitMaker: 366 posts
Armorama: 300 posts
Posted: Saturday, February 10, 2018 - 03:26 AM UTC
It's like been on the ground!! Some pics are absolutely realistic, the ones with the rubble are amazing.
Hoping to see this terrific work finished!
Cheers!
Hoping to see this terrific work finished!
Cheers!


justsendit
Joined: February 24, 2014
KitMaker: 3,033 posts
Armorama: 2,492 posts
Posted: Saturday, February 10, 2018 - 11:49 AM UTC
Nick, This stuff just never gets old. I imagine you must have an entire warehouse stocked full of building materials and adhesive products by now. ... Keep on slingin that Evergreen and brass!
Cheers!🍺
mike
Cheers!🍺
mike
Dioramartin
Joined: May 04, 2016
KitMaker: 1,476 posts
Armorama: 1,463 posts
Posted: Saturday, February 10, 2018 - 02:36 PM UTC
Ive only got a few green cells remaining after your last pics & not knowing the terrain around Chateau Stick (hipsters? you have clothes-lines?) this may well be the dumbest suggestion but
is it possible to tilt the base so the far edge points skywards? Ive had to do same for years - around 15-20˚ from horizontal which is lucky because anything more rakish & things start falling off it if theyre not nailed down. Whatever, sounds like your shoots over already so looking forward to seeing the results 
Stickframe
#362
Joined: December 01, 2013
KitMaker: 1,661 posts
Armorama: 1,202 posts
Posted: Tuesday, March 27, 2018 - 12:15 AM UTC
Hi gents -
First, thanks for all the positive words - I appreciate them!
I'm calling this one done.
This project is in my opinion both a success and (**photos) something of a failure - -the picture taking opportunity - not the build (**In response to Jerry's note below - the model/dio not a failure - me not thinking about how to photograph it so that it shows the build better - not great by me! I've built a few dios, I probably tried some other approach to get the mid-ground right! or at least some way to allow for the outdoor pics to do their thing - that is to show the full extent of the work more effectively**_
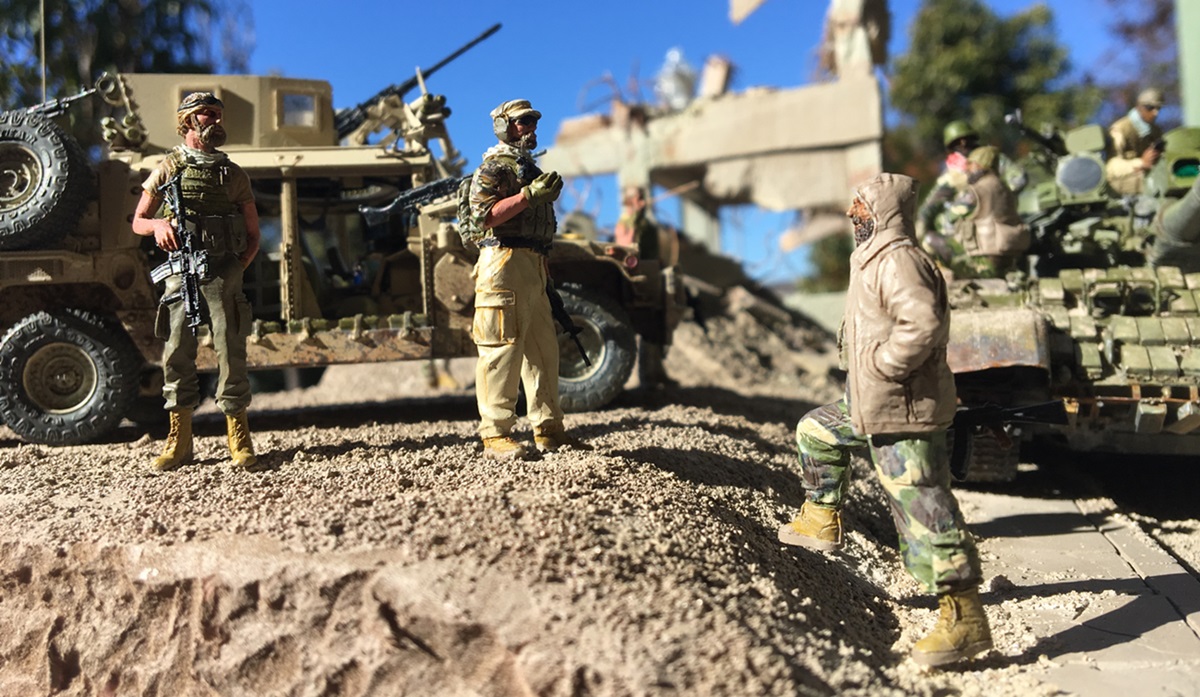
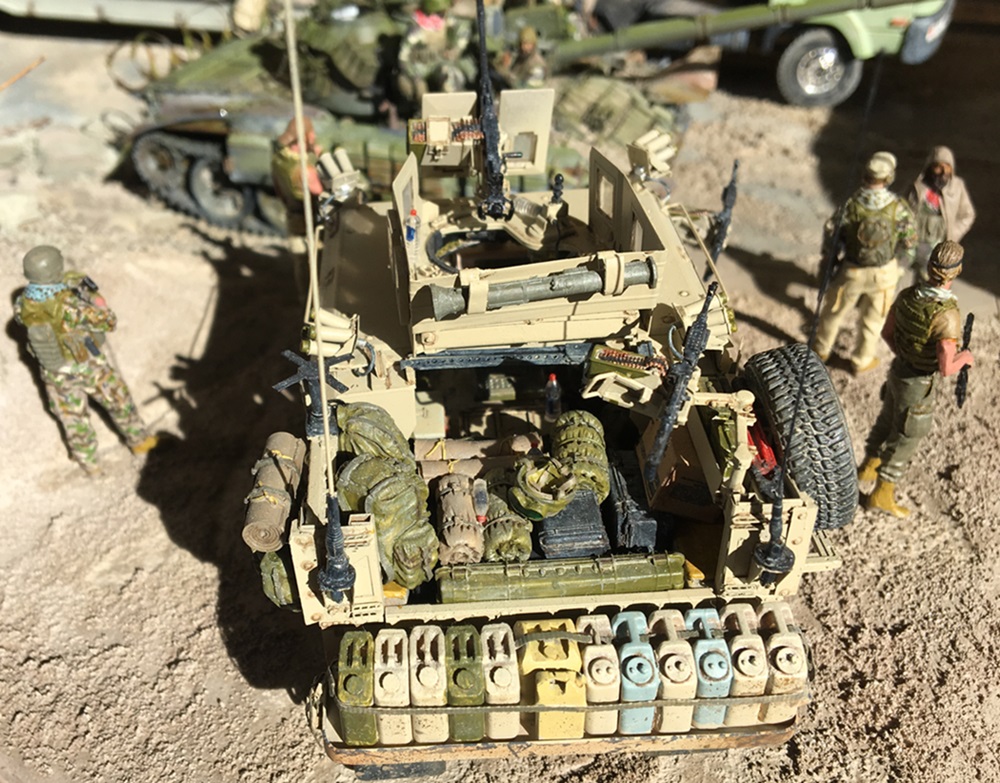
On the plus side, the dio and the models in it - lots of fun to build and pretty challenging - I really enjoyed the T-55s and all the detail that went into them (same with the SOCOM DMV), same for the demolished landscape, which was something new for me.
On the minus side, the photos...the lack of a backdrop is a real bummer, in that this build generally photographs really well outside - EXCEPT, as there is so much demolition, the models and figures are essentially being placed on a flat surface - with no vertical middle ground. Consequently - anything and everything in the background is immediately evident!
I did try, as Tim suggested, tilting the base toward the skyline - but not much luck there - the more I "lost" bad background images, the larger and more apparent the foreground shadows caused by me became....who knows...Maybe I'll rig up some sort of a backdrop someday - I did for the Battle of Debecka Pass dio - which worked fine - sort of; the day I took the outdoor photos, and I'm not kidding, it was overcast, windy, and raining - on the dio and me! so, the results were pretty cool in general(real water on the grass, vehicles, etc) but not easy to replicate!
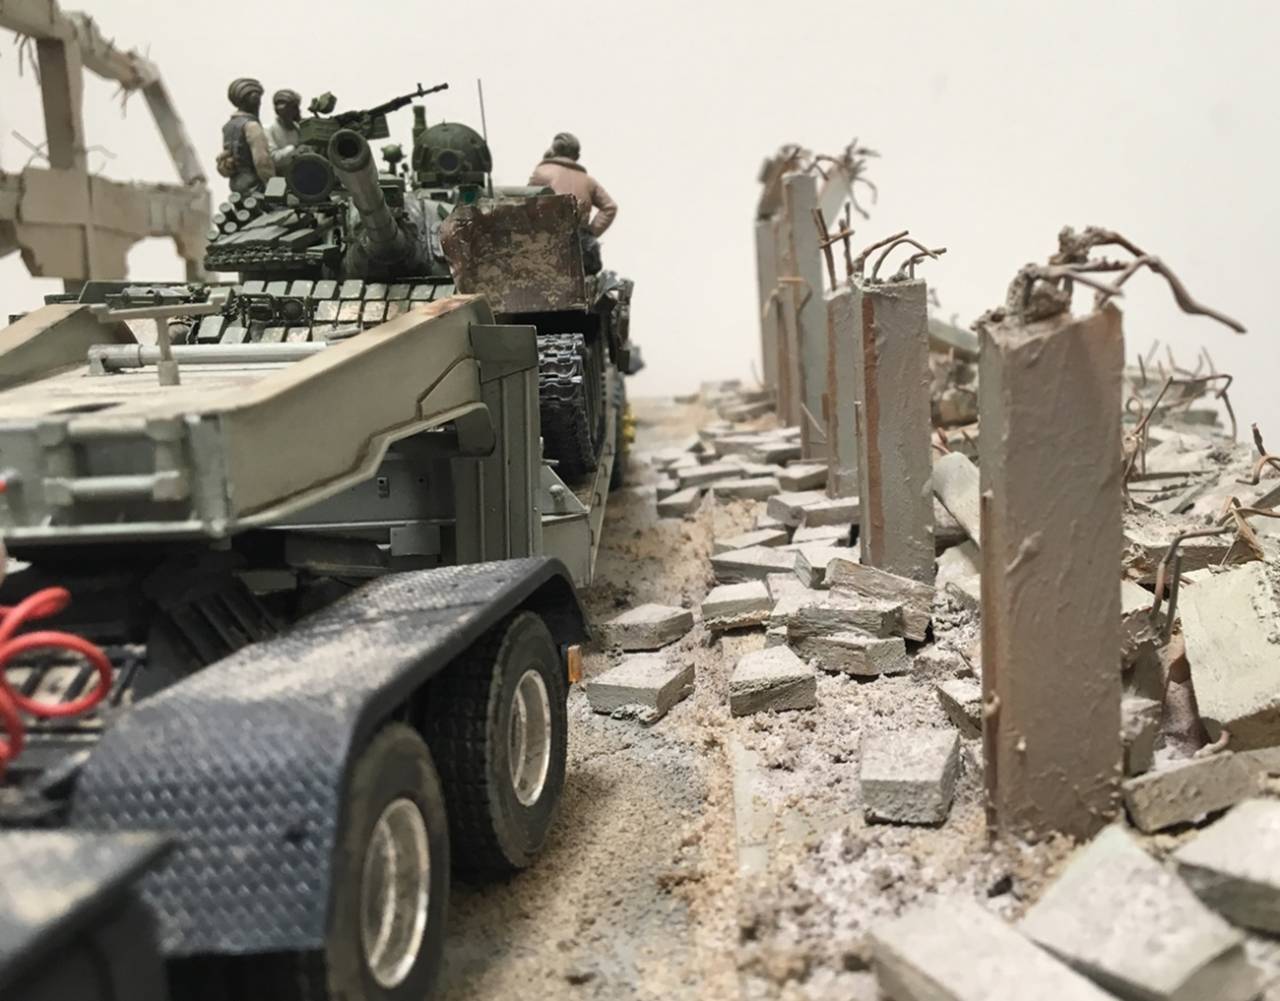
OK - enough - take a look:
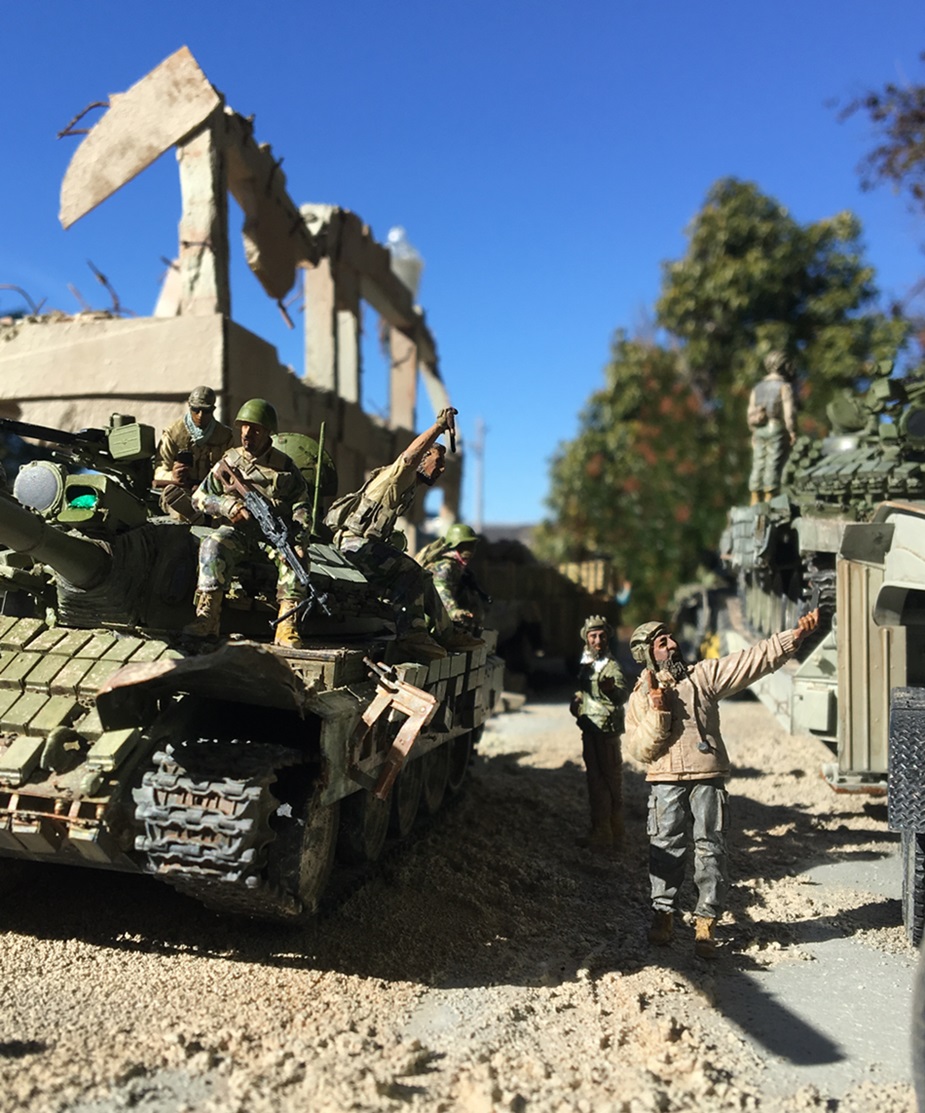
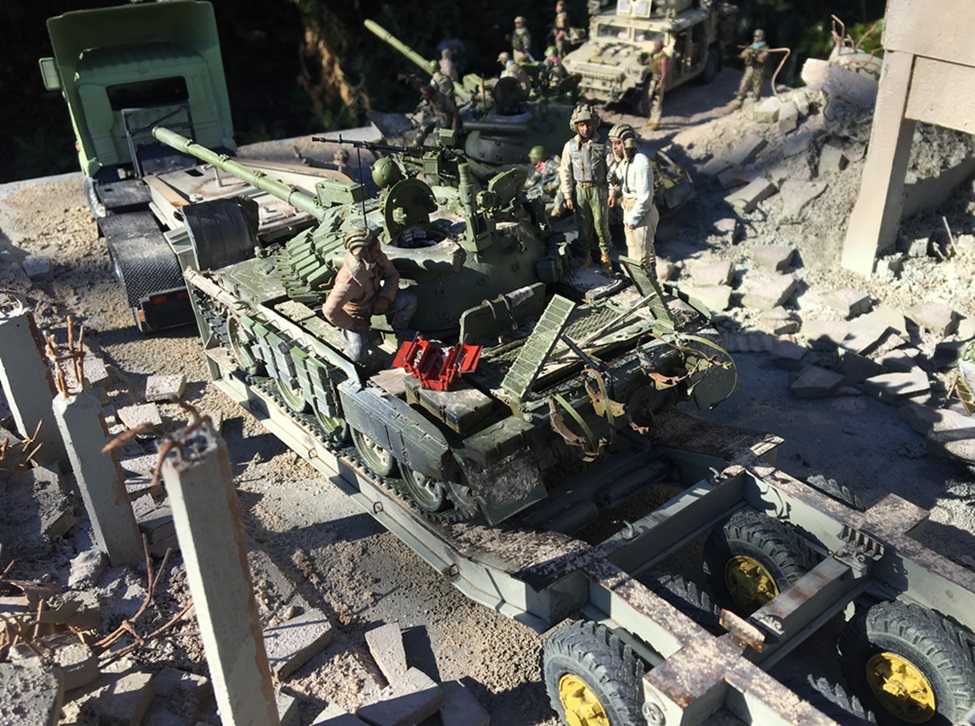
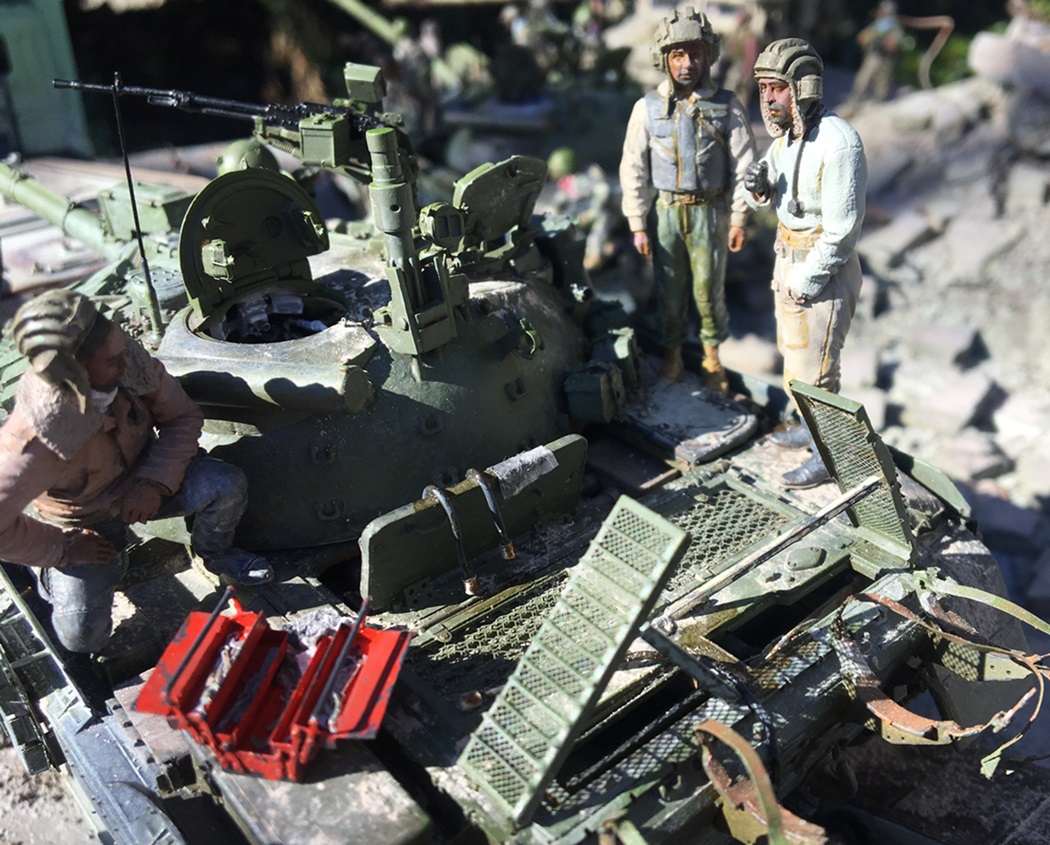
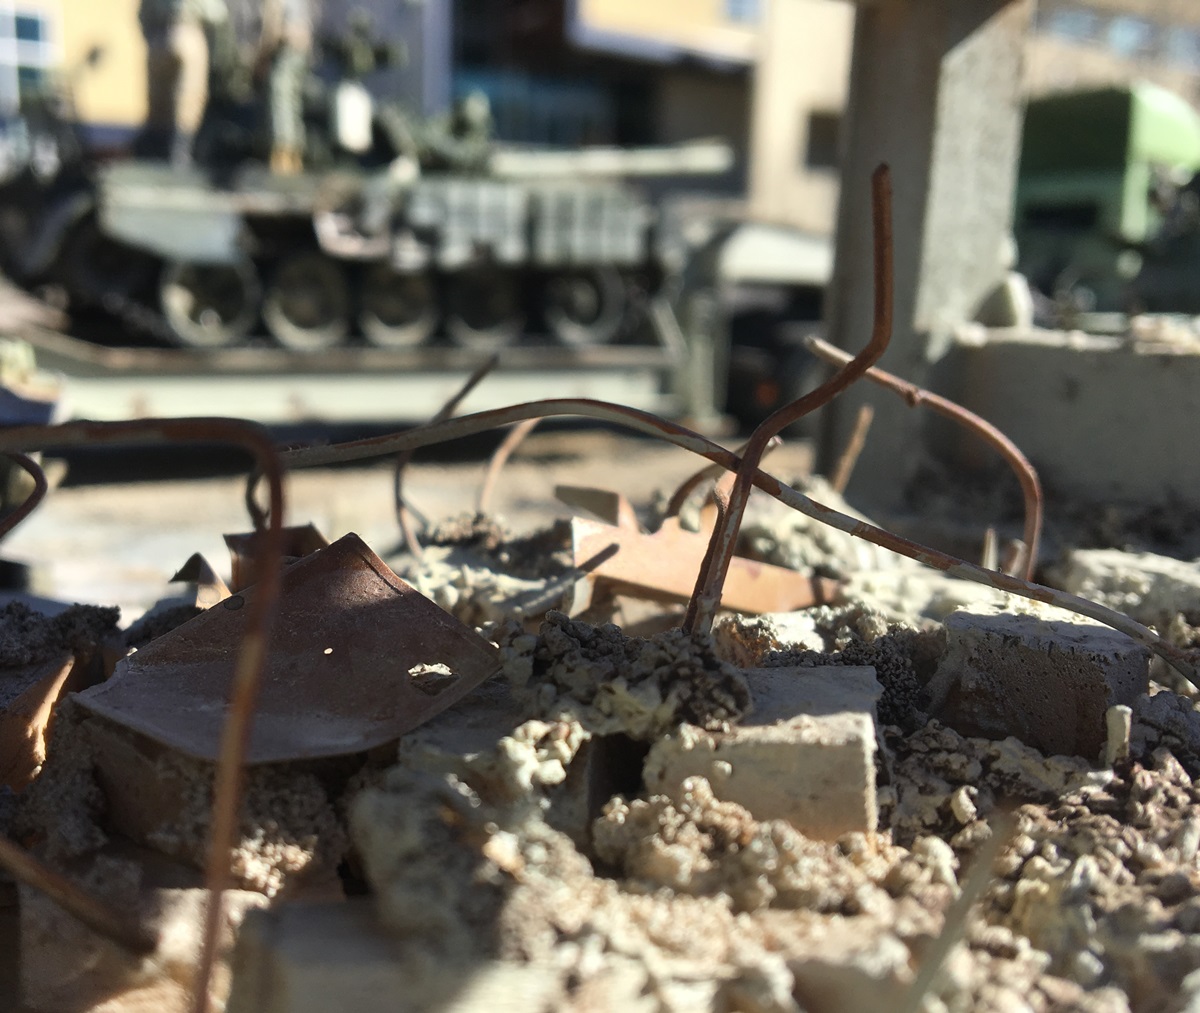
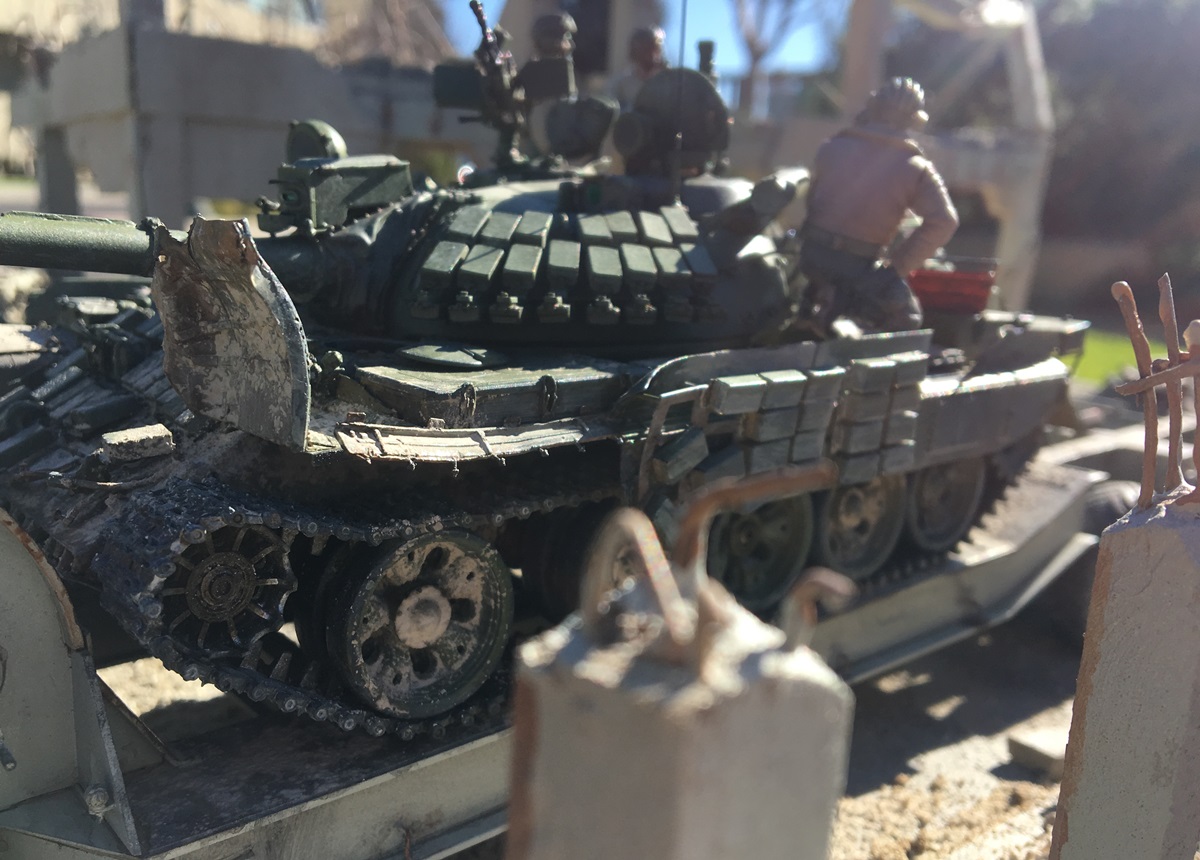
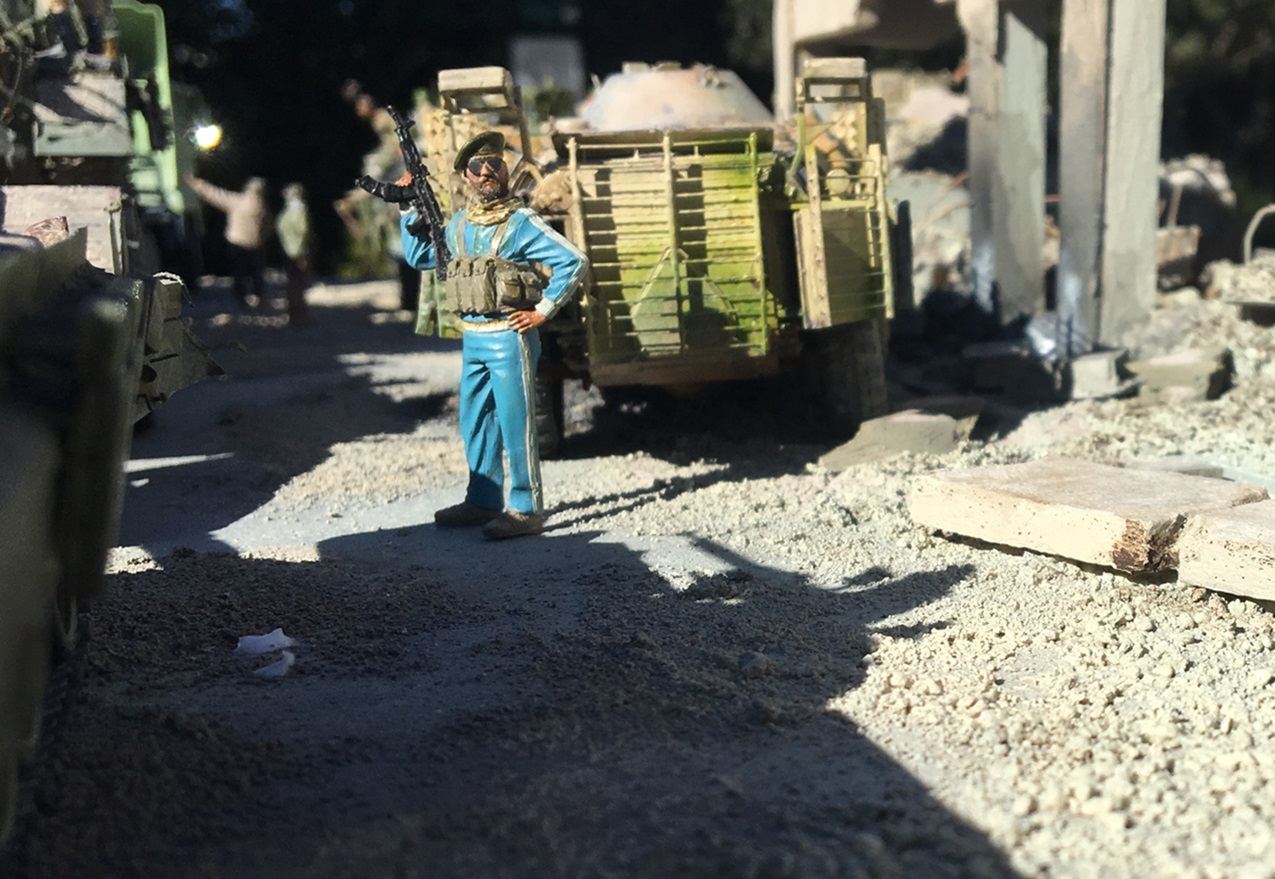
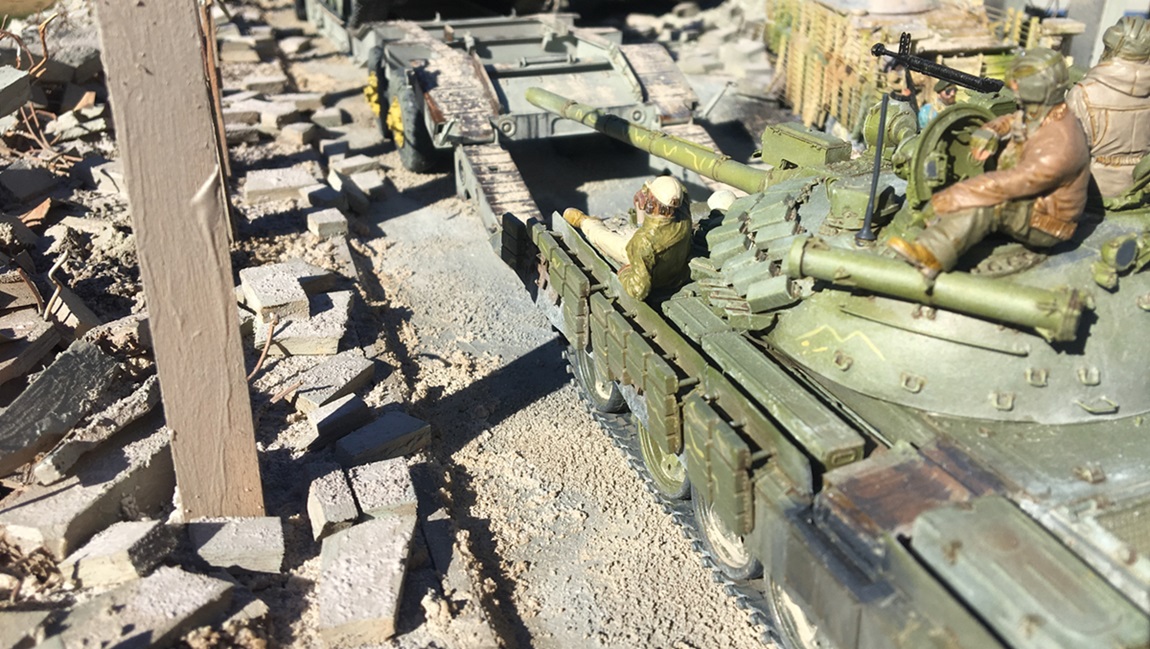
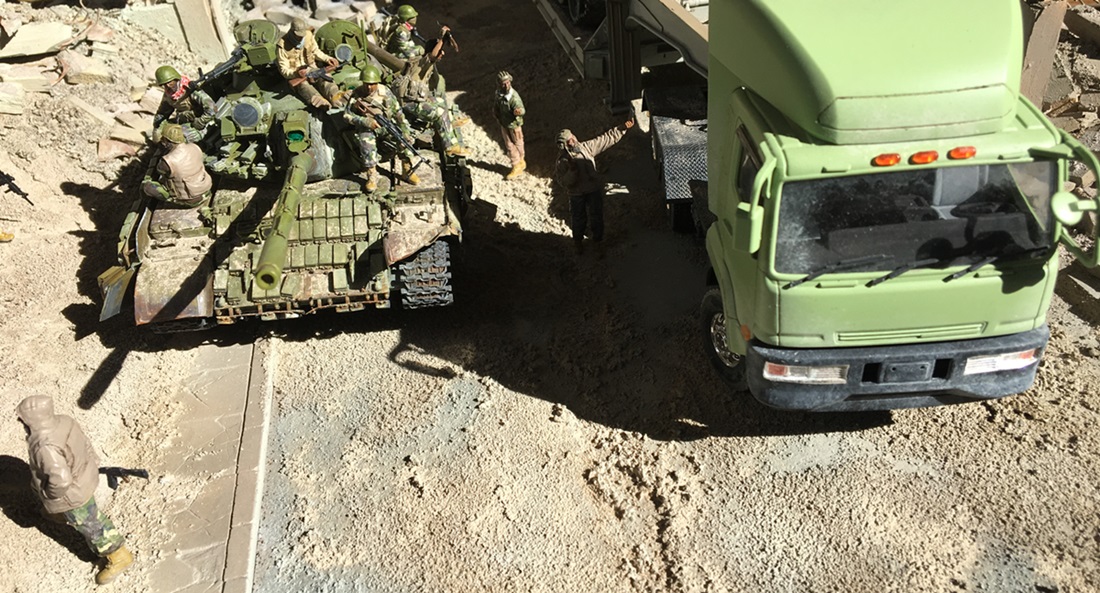
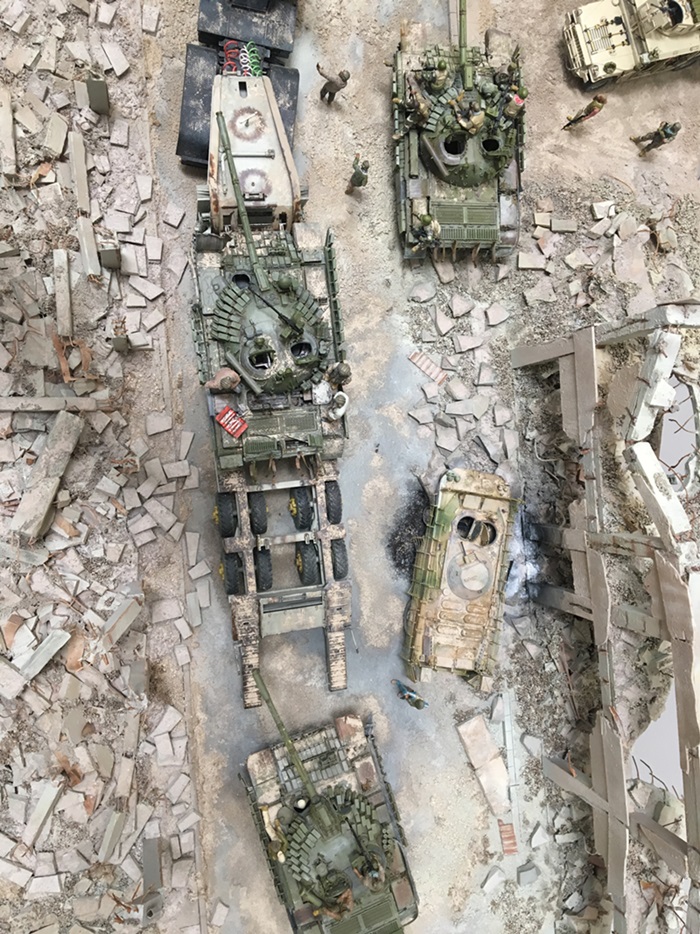
Hope you like them - the weird high level views come out of desperation while cropping the pics - these are the few that don't prominently feature my neighbors, the mailman, giant plants, buildings, cars, fences etc in the background!!
Ok - below, a few from indoors - on the normal white background:

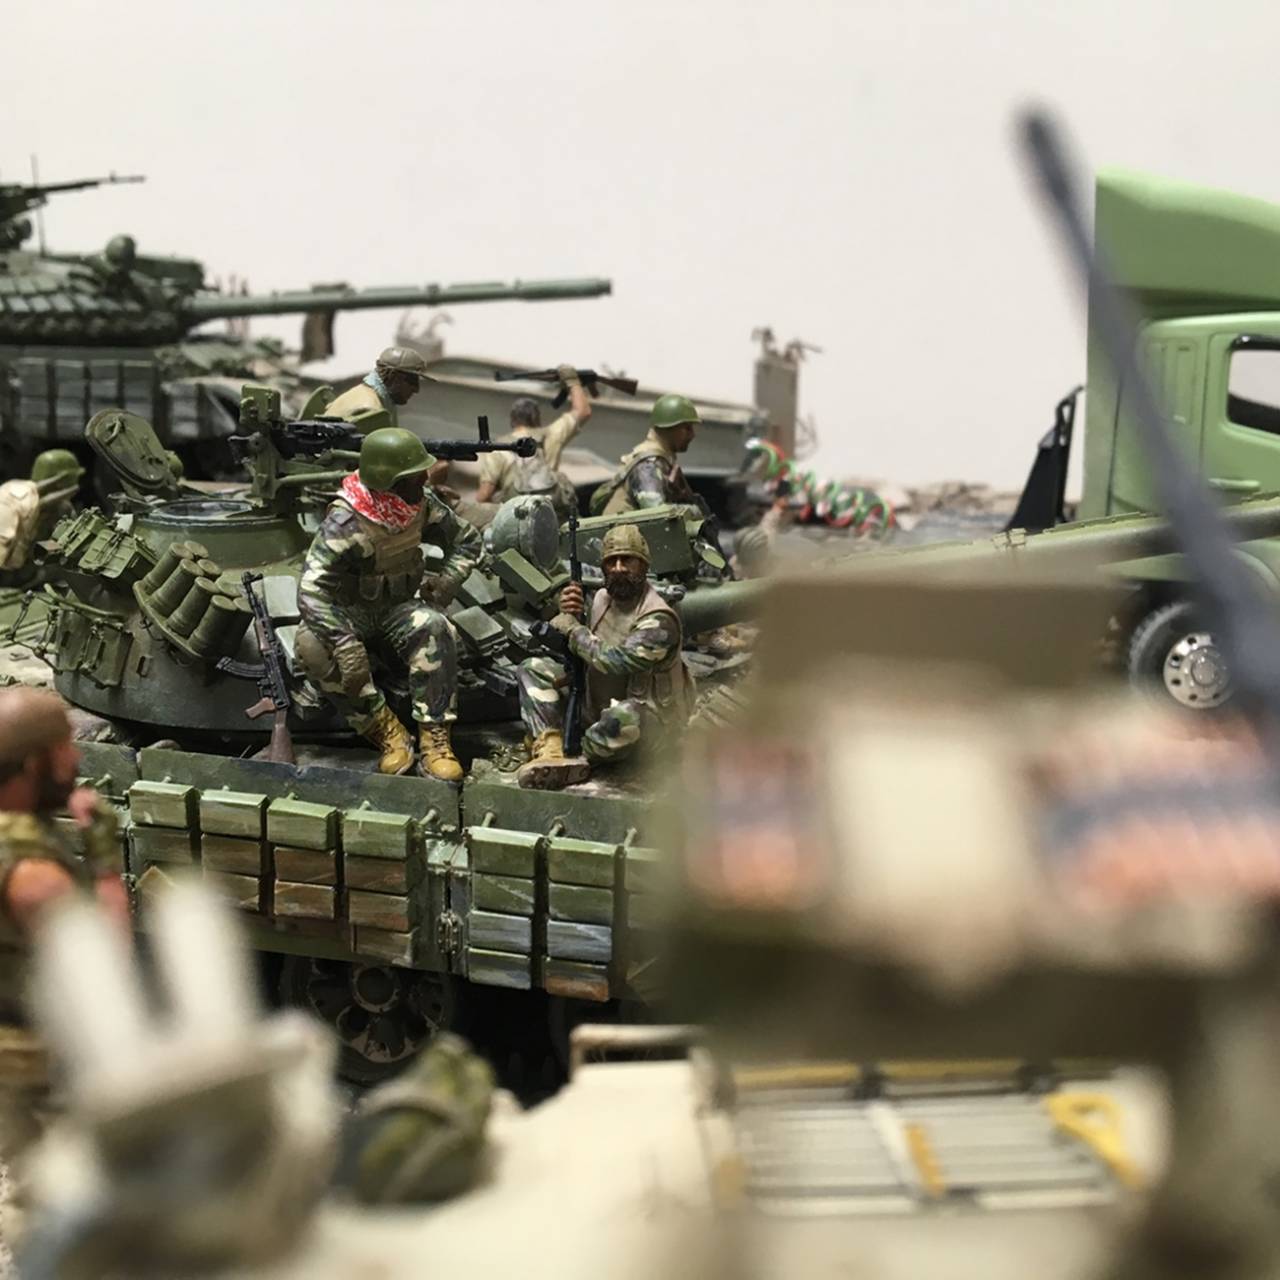
That's all folks!
Thanks for having a look - time to start thinking about what to do next -
cheers and happy model building
Nick
First, thanks for all the positive words - I appreciate them!
I'm calling this one done.
This project is in my opinion both a success and (**photos) something of a failure - -the picture taking opportunity - not the build (**In response to Jerry's note below - the model/dio not a failure - me not thinking about how to photograph it so that it shows the build better - not great by me! I've built a few dios, I probably tried some other approach to get the mid-ground right! or at least some way to allow for the outdoor pics to do their thing - that is to show the full extent of the work more effectively**_
On the plus side, the dio and the models in it - lots of fun to build and pretty challenging - I really enjoyed the T-55s and all the detail that went into them (same with the SOCOM DMV), same for the demolished landscape, which was something new for me.
On the minus side, the photos...the lack of a backdrop is a real bummer, in that this build generally photographs really well outside - EXCEPT, as there is so much demolition, the models and figures are essentially being placed on a flat surface - with no vertical middle ground. Consequently - anything and everything in the background is immediately evident!
I did try, as Tim suggested, tilting the base toward the skyline - but not much luck there - the more I "lost" bad background images, the larger and more apparent the foreground shadows caused by me became....who knows...Maybe I'll rig up some sort of a backdrop someday - I did for the Battle of Debecka Pass dio - which worked fine - sort of; the day I took the outdoor photos, and I'm not kidding, it was overcast, windy, and raining - on the dio and me! so, the results were pretty cool in general(real water on the grass, vehicles, etc) but not easy to replicate!
OK - enough - take a look:
Hope you like them - the weird high level views come out of desperation while cropping the pics - these are the few that don't prominently feature my neighbors, the mailman, giant plants, buildings, cars, fences etc in the background!!
Ok - below, a few from indoors - on the normal white background:
That's all folks!
Thanks for having a look - time to start thinking about what to do next -
cheers and happy model building
Nick
jrutman
Joined: April 10, 2011
KitMaker: 7,941 posts
Armorama: 7,934 posts
Posted: Tuesday, March 27, 2018 - 12:29 AM UTC
I wish my "failures" looked as good as this ! Mn that is a ton of detail and a mountain of work right there !
J
J
Stickframe
#362
Joined: December 01, 2013
KitMaker: 1,661 posts
Armorama: 1,202 posts
Posted: Tuesday, March 27, 2018 - 01:35 AM UTC
Ha - thanks, Jerry - yeah, I re-read what I wrote and made some edits above - I really like the build and some parts of it in particular - but, as I've built a few of these big dios, I should have been able to figure out how to take better pictures of of it!! or, how to set it up for better pics. There's a lot of work in there, and I think a lot of it is lost because I can't figure out how to realistically photograph it.....
I didn't/don't want to take hovering, low air pics that show the build, but from largely unrealistic vantage points. How's that for self imposed rule?? maybe not a very good idea, but it is part of the story of how I want my builds to be seen.....
Thanks for dropping by and taking a minute to comment -
cheers
Nick
SF-07-18D
Joined: December 19, 2016
KitMaker: 366 posts
Armorama: 300 posts
Posted: Tuesday, March 27, 2018 - 02:12 AM UTC
Hi Nick!
It's a mindblowing diorama. Impressive! I like the pics on the outside, but you can try to shoot (if you're using a reflex camera) with a high aperture (lower f number you can) and you will get a background completely blurry.
Again, superb dio!
It's a mindblowing diorama. Impressive! I like the pics on the outside, but you can try to shoot (if you're using a reflex camera) with a high aperture (lower f number you can) and you will get a background completely blurry.
Again, superb dio!
 |

WEB HOSTING BY


Copyright ©2021 Armorama and Kitmaker Network, a subsidiary of Silver Star Enterprises
All Rights Reserved. Please read our Conditions of Use and Privacy Policy.
All Rights Reserved. Please read our Conditions of Use and Privacy Policy.