Campaigns: Active Campaigns
Campaigns that are either in planning or underway should be grouped here.
Hosted by Richard S.
Best of Both Worlds
metooshelah
#011
Visit this Community
Jerusalem, Israel
Joined: February 06, 2009
KitMaker: 1,507 posts
Armorama: 1,304 posts
Posted: Saturday, April 16, 2016 - 07:31 PM UTC

Quoted Text


Box says Hobby Boss but its a Tri Star kit
I got a small start on it this morning


haha, i didn't get that at the start. i was looking at the picture "oh nice, a tristar kit" and then i see the hobbyboss logo and was totally confused
YellowHammer
#513
Visit this Community
Alabama, United States
Joined: March 28, 2006
KitMaker: 554 posts
Armorama: 172 posts
Posted: Monday, April 18, 2016 - 09:01 AM UTC
Hey Guys,
Nathan has asked us to post our start photos in the campaign gallery. I'm a newb when it comes to uploading photos to campaign galleries. I searched the site for how-tos. The search gave me all sorts of links to various build blogs but I didn't find a blog on how to upload to campaign galleries. I went to the campaign gallery page and hit the upload photo button but it took me to my home gallery folder. I went to the campaign page but didn't see any info or links for uploading the photos. I started another topic to ask for help. I've received one reply so far from Damien who recommended I make sure I was logged onto the campaign page and make sure the size of the photo meets requirements. I was logged in on Armorama and Kitmaker. I don't see another log in option when I'm on the Armorama campaign page or the Kitmaker campaign gallery page. I'm enlisted on the campaign page. Am I missing something?
The photo is 600x800 pixels, 236 kb so the size should not be a problem.

I've noticed no one else in the campaign has posted any photos to the gallery either. Could this be a technical issue. Can some of you experienced folks tell me where I've gone wrong?

Thanks
John
tatbaqui
Staff MemberNews Writer
ARMORAMA
#040
Visit this Community
Metro Manila, Philippines
Joined: May 06, 2007
KitMaker: 2,713 posts
Armorama: 2,451 posts
Posted: Monday, April 18, 2016 - 10:29 AM UTC

Quoted Text

Hey Guys,
Nathan has asked us to post our start photos in the campaign gallery. I'm a newb when it comes to uploading photos to campaign galleries. I searched the site for how-tos. The search gave me all sorts of links to various build blogs but I didn't find a blog on how to upload to campaign galleries. I went to the campaign gallery page and hit the upload photo button but it took me to my home gallery folder. I went to the campaign page but didn't see any info or links for uploading the photos. I started another topic to ask for help. I've received one reply so far from Damien who recommended I make sure I was logged onto the campaign page and make sure the size of the photo meets requirements. I was logged in on Armorama and Kitmaker. I don't see another log in option when I'm on the Armorama campaign page or the Kitmaker campaign gallery page. I'm enlisted on the campaign page. Am I missing something?
The photo is 600x800 pixels, 236 kb so the size should not be a problem.

I've noticed no one else in the campaign has posted any photos to the gallery either. Could this be a technical issue. Can some of you experienced folks tell me where I've gone wrong?

Thanks
John


John,

I just uploaded the below pic in the campaign gallery:


The gallery link for the Best of Both Worlds

I'm guessing you may not be logged-on to the KM Gallery. From my experience here, you may be logged-on to Armorama but not necessarily with KM Gallery.

I take cue whenever I see the word Login on the upper right hand of the KM Gallery page. If otherwise then it means you're good to go, and you can start uploading pics.

No pics posted on the campaign gallery? -- I believe no one has completed a build as yet. In-progress pics are typically posted in the campaign thread itself.

Cheers,

Tat
YellowHammer
#513
Visit this Community
Alabama, United States
Joined: March 28, 2006
KitMaker: 554 posts
Armorama: 172 posts
Posted: Tuesday, April 19, 2016 - 08:42 AM UTC
Tat,
Thanks for the reply. You were correct about me not being logged onto the Kitmaker Gallery. Earlier when I went to the Kitmaker campaign gallery I had the "Welcome Yellowhammer" statement so I thought I was signed in there as well. Live and learn. I was able to post my start photo but based on your comment, should we wait for the final photos for posting?
Thanks
John
tatbaqui
Staff MemberNews Writer
ARMORAMA
#040
Visit this Community
Metro Manila, Philippines
Joined: May 06, 2007
KitMaker: 2,713 posts
Armorama: 2,451 posts
Posted: Tuesday, April 19, 2016 - 01:41 PM UTC
You're welcome John.

No need to wait till you finish your build. Do post your in-progress pics here in the campaign thread. As in all campaigns, participants are encouraged such that experiences may be shared, critiques / feedback given, all in the spirit of having a good, fun build.

Once you decide your build is done, put a pic or two in the campaign gallery so you get the ribbon by the end of the campaign

Cheers,

Tat


metooshelah
#011
Visit this Community
Jerusalem, Israel
Joined: February 06, 2009
KitMaker: 1,507 posts
Armorama: 1,304 posts
Posted: Wednesday, April 20, 2016 - 04:49 AM UTC
Yep, all participants are encouraged to upload their progress pictures to the gallery, so our campaign could be shared with the entire community. I just wanted to have the first picture for a "this is where we started" kind of thing. I thought it would be nice to see how from a small mess of parts out came a wonderful model.
ltb073
Visit this Community
New York, United States
Joined: March 08, 2010
KitMaker: 3,662 posts
Armorama: 3,078 posts
Posted: Saturday, April 23, 2016 - 07:30 PM UTC

Quoted Text

Yep, all participants are encouraged to upload their progress pictures to the gallery, so our campaign could be shared with the entire community.


I normally only upload a finished picture to the gallery as im out of space and have to delete old pics for new ones so i post my progress in the tread
Got the lower Hull complete starting to think I should have used this Kit in the 500+ Campaign
andromeda673
Visit this Community
Wisconsin, United States
Joined: July 30, 2013
KitMaker: 584 posts
Armorama: 525 posts
Posted: Wednesday, May 04, 2016 - 07:11 AM UTC
Alright boys, I'm off and running with the following Tamiya kit. I'm really looking forward to build this, maybe because it's armor and not a main battle tank.

Regardless, being built out of the box, and I may, strong maybe at best, might add the legend stowage kit.


Thanks for looking, and sorry for the crappy lighting on the last picture.

Kanguroo
Visit this Community
Vietnam
Joined: May 07, 2006
KitMaker: 416 posts
Armorama: 312 posts
Posted: Wednesday, May 04, 2016 - 07:09 PM UTC
Hi,

I start the campaign with the amphibious BRDM-1, from Moscow's Eastern Express, not Peking's Trumpeter. Hope to complete it.


Regards,
K.
andromeda673
Visit this Community
Wisconsin, United States
Joined: July 30, 2013
KitMaker: 584 posts
Armorama: 525 posts
Posted: Thursday, May 05, 2016 - 01:47 AM UTC
looking forward to this one for sure!
andromeda673
Visit this Community
Wisconsin, United States
Joined: July 30, 2013
KitMaker: 584 posts
Armorama: 525 posts
Posted: Sunday, May 08, 2016 - 05:52 AM UTC
made some more progress throughout today, pretty straight forward Tamiya kit.

This kit has been alot of fun so far, and I think I will end up pulling the trigger on the legend stowage for it. Which I was on the fence about.

Thanks for looking!


ltb073
Visit this Community
New York, United States
Joined: March 08, 2010
KitMaker: 3,662 posts
Armorama: 3,078 posts
Posted: Saturday, May 14, 2016 - 09:44 PM UTC
My progress
 photo P1090864_1.jpg
 photo P1090866.jpg photo P1090869.jpg
Off to primer then I need to work on the tracks. Instructions say not to use glue Yeah right ill have 196 track links all over the place
eMan
#298
Visit this Community
Hong Kong S.A.R. / 繁體
Joined: August 08, 2002
KitMaker: 1,182 posts
Armorama: 665 posts
Posted: Thursday, May 19, 2016 - 01:41 PM UTC
Started to build my entry ZBD-05 Amphibious IFV.

andromeda673
Visit this Community
Wisconsin, United States
Joined: July 30, 2013
KitMaker: 584 posts
Armorama: 525 posts
Posted: Friday, May 20, 2016 - 10:27 PM UTC
well I was able to finally finish construction today, now it's time to roll it into the paint barn. I may get that done today or this weekend, we will have to see what time will allow.

Thanks for looking.


tatbaqui
Staff MemberNews Writer
ARMORAMA
#040
Visit this Community
Metro Manila, Philippines
Joined: May 06, 2007
KitMaker: 2,713 posts
Armorama: 2,451 posts
Posted: Wednesday, May 25, 2016 - 02:51 PM UTC
Hello,

My start pics:


More to come.

Cheers,

Tat
andromeda673
Visit this Community
Wisconsin, United States
Joined: July 30, 2013
KitMaker: 584 posts
Armorama: 525 posts
Posted: Friday, May 27, 2016 - 09:03 AM UTC
Made some more progress tonight, for whatever reason my labtop will no longer read and accecpt my SD card from my digital camera, so I had to use my trusty old Iphone 6 plus. Not too bad of a picture though.

Tomorrow I should be able to wetsand and then get the gloss coat down for the decals.

andromeda673
Visit this Community
Wisconsin, United States
Joined: July 30, 2013
KitMaker: 584 posts
Armorama: 525 posts
Posted: Saturday, May 28, 2016 - 03:26 AM UTC
well made more progress today, and finished up my build!

It dawned on me after I uploaded the pictures that I didn't take one of the other side being decaled up. Regardless, thanks for letting me be part of the build.


tatbaqui
Staff MemberNews Writer
ARMORAMA
#040
Visit this Community
Metro Manila, Philippines
Joined: May 06, 2007
KitMaker: 2,713 posts
Armorama: 2,451 posts
Posted: Sunday, May 29, 2016 - 03:23 PM UTC
Congrats on your finish G!

Of all places to get a dimple


Anyways I've plugged it up and did a bit of sanding. Here's where I am so far:


The build's quite straightforward. Had to weigh down the upper and lower hull halves for a good fit -- no major issues encountered nonetheless.

The interior is quite bare, so I plan to finish this with the canvas roof on. It has clear parts for the headlamps -- will put that on towards the end.

Cheers,

Tat
tatbaqui
Staff MemberNews Writer
ARMORAMA
#040
Visit this Community
Metro Manila, Philippines
Joined: May 06, 2007
KitMaker: 2,713 posts
Armorama: 2,451 posts
Posted: Friday, June 03, 2016 - 02:07 PM UTC
Hello,

Had a change of plans -- decided to finish this one with the canvas / tarp down. That said, I thought of improving the look of the interior, especially the seats. Interior pics I've seen have some thin seat cushions though am not sure if such were historically correct. Nonetheless I thought it would help spruce up the otherwise plain interior so I went with some half-rounds to depict it.


Sanded it down, still a bit on the lumpy side -- but it'll do

Cheers,

Tat
ltb073
Visit this Community
New York, United States
Joined: March 08, 2010
KitMaker: 3,662 posts
Armorama: 3,078 posts
Posted: Saturday, June 04, 2016 - 07:29 PM UTC
Made some progress and found a Dragon figure to be the Commander
 photo P1090874.jpg
The tracks for this kit are the worst pieces of $*it i have ever seend
YellowHammer
#513
Visit this Community
Alabama, United States
Joined: March 28, 2006
KitMaker: 554 posts
Armorama: 172 posts
Posted: Sunday, June 05, 2016 - 12:04 AM UTC
Het Guys,
That LVTP-7 looks great. Sal and Tat, you're making great progress. I finally got a little bench time in this weekend to work on my weasel. Real straight forward build. This is an old kit though. The decals are yellow and curled so I'll be robbing my parts bin for some stars and registration numbers. I've got some jeep instrument decals from archer I'm hoping I can use. I've left the engine cover off to make it easier to mount the decals.

I bought the kit used off ebay. The window for the windshield is missing. I can cut another from clear styrene or I'm thinking of maybe putting a canvas covering on the windshield or removing it altogether. I've found several period photos to support all the options.


This photo shows my build so far.


This shows my major issue so far. The kit hull comes in left/right sides which leaves a long join seam when glued together. I've been putting in a lot of time to putty and sand to get it smooth.


Here it is with a coat of primer. More work to do on the join seam. Also noticed slight dimples in the seat cushions. I'm thinking of using this vehicle in a dio transporting wounded so I'm not sure how much effort I'll put into the seats at the moment. Depends on what seated figures I can find to fit. Also I don't plan on installing a radio.

Comments welcome
John
tatbaqui
Staff MemberNews Writer
ARMORAMA
#040
Visit this Community
Metro Manila, Philippines
Joined: May 06, 2007
KitMaker: 2,713 posts
Armorama: 2,451 posts
Posted: Sunday, June 05, 2016 - 07:25 AM UTC
Thank John. Indeed, seams are a pain, dimples even more. I don't rely on pure putty to fill gaps. If possible I force bits of styrene, and sand to shape. I'll just put putty as the final seal. For dimples I'd drill a hole and stick a rod in, sand, then putty. A bit tedious but I get better results compared to doing several putty + sanding sessions. Cheers, Tat
YellowHammer
#513
Visit this Community
Alabama, United States
Joined: March 28, 2006
KitMaker: 554 posts
Armorama: 172 posts
Posted: Sunday, June 05, 2016 - 07:42 AM UTC
Thanks Tat. I'll give it a try.
GaryKato
Visit this Community
California, United States
Joined: December 06, 2004
KitMaker: 3,694 posts
Armorama: 2,693 posts
Posted: Sunday, June 12, 2016 - 01:48 AM UTC
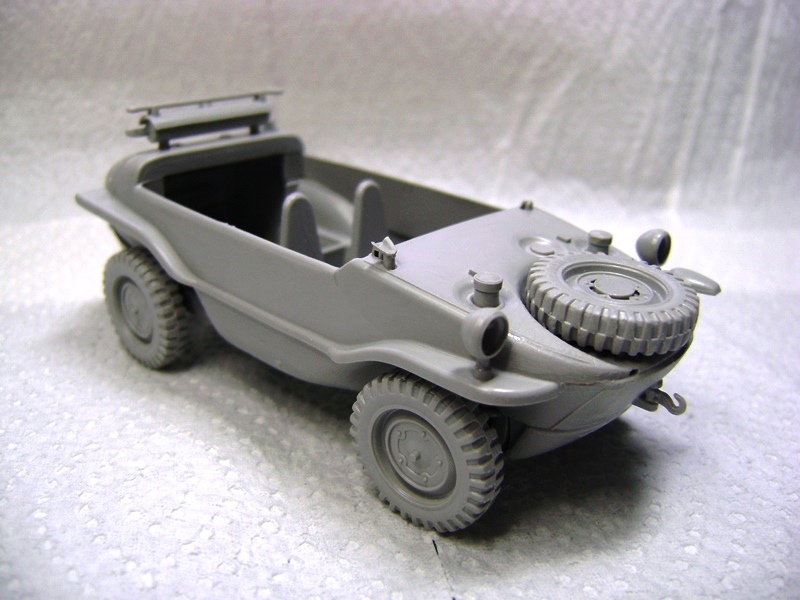
Going against my better judgement, I will attempt a build of Tamiya's 1/35 LVTP7A1 for this campaign. It will be built OOB in a winter camouflage. It looks simple enough to achieve but it will be the first time doing a camouflage pattern with my airbrush. I haven't done a camouflage pattern since I built an Airfix 1/72 Pe-2 several decades ago. The paints for the camouflage are on order.

The Plan

- Put everything together except for wheels, tracks,and the fenders.
- Paint the camouflage (hull, wheels, fenders)
- Paint hull details, tires, tracks
- Gloss coat (hull)
- Apply decals
- Apply clear flat coat (hull, wheels, fenders, track)
- Add wheels, tracks, fenders to hull
- Paint clear areas (Periscopes, lights)
- Add antennas

We shall see how Reality affects the plan.


AmTrac1833
#431
Visit this Community
Florida, United States
Joined: February 20, 2014
KitMaker: 376 posts
Armorama: 311 posts
Posted: Sunday, June 12, 2016 - 03:01 AM UTC
I'm liking all the AmTracs! I need to get off my duff and make headway with my LVT. Couple other builds jumped ahead in line but I plan on getting some time in on my LVT4 this week.