_GOTOBOTTOM
Armor/AFV
For discussions on tanks, artillery, jeeps, etc.
REVIEW
AFV Club Sd.Kfz. 251/21 Ausf. D
c5flies
Visit this Community
California, United States
Joined: October 21, 2007
KitMaker: 3,684 posts
Armorama: 2,938 posts
Posted: Thursday, August 13, 2009 - 03:17 PM UTC
Russ Amott provides an In-Box review of the Sd.Kfz. 251/21 Ausf. D by AFV Club, and shares a partial build of the kit.

Link to Item


If you have comments or questions please post them here.

Thanks!
Jmarles
Visit this Community
British Columbia, Canada
Joined: November 02, 2008
KitMaker: 1,138 posts
Armorama: 953 posts
Posted: Thursday, August 13, 2009 - 03:37 PM UTC
Thanks for the review, I have this kit as part of the 3-in-one pack. I have heard the dimensions are slightly off, but apparently so are the other manufacturers, so I am not too worried about a couple of scale inches....a very cool,version.....anyone know what camo scheme these would have?
Grindcore
Visit this Community
New York, United States
Joined: September 23, 2006
KitMaker: 389 posts
Armorama: 358 posts
Posted: Thursday, August 13, 2009 - 04:50 PM UTC


Scanned this pic out of SS Armor on the eastern front I think. I'm going to start working on this soon. I love the fact that it has both a 251/17 late, and the 251/22 in the same pic. I'm trying to track down some figures to put with it.

The camo is cool looking too, I don't see any markings on it though.

Anyone one now what unit it is? The Fedorowicz book says Hungary but in Anthony Beevor's the fall of Berlin 1945 he has the same pic captioned as Pomerania.
russamotto
Visit this Community
Utah, United States
Joined: December 14, 2007
KitMaker: 3,389 posts
Armorama: 2,054 posts
Posted: Friday, August 14, 2009 - 05:49 AM UTC
The photo looks like the one used in the kit instructions, late model gun shield. The instructions just say "Eastern Front 1945". I don't know how well any of the German army units would have been organized at that point in time.

Just a couple of updates on the build. My camera is down right now so I don't have any accompanying pictures. First, I goofed. The supplied vinyl tracks are sided with one side being one link shorter. One track length has a square tab and one a circular tab to differentiate. Some of the mold seams go along the edges of the kit parts which leaves the parts slightly over sized so dry fitting is critical. Also, with the kit instructions, step 18, assembly of the ammo boxes. For the two side bins it shows bin top part F28 for the left bin and F34 for the right bin. It should say F34 for the left bin and F31 for the right.

As for figures to go with this, I purchased the DML Cherkassy set, which I also reviewed. I am looking for another to go with them. I am doing the late gun shield variant.
DT61
Visit this Community
Ontario, Canada
Joined: September 18, 2005
KitMaker: 1,226 posts
Armorama: 819 posts
Posted: Saturday, August 22, 2009 - 12:04 PM UTC
Russ,

Great review and I look forward to seeing your build take shape.

Have a safe shift sir.

Darryl
russamotto
Visit this Community
Utah, United States
Joined: December 14, 2007
KitMaker: 3,389 posts
Armorama: 2,054 posts
Posted: Friday, August 28, 2009 - 05:53 AM UTC
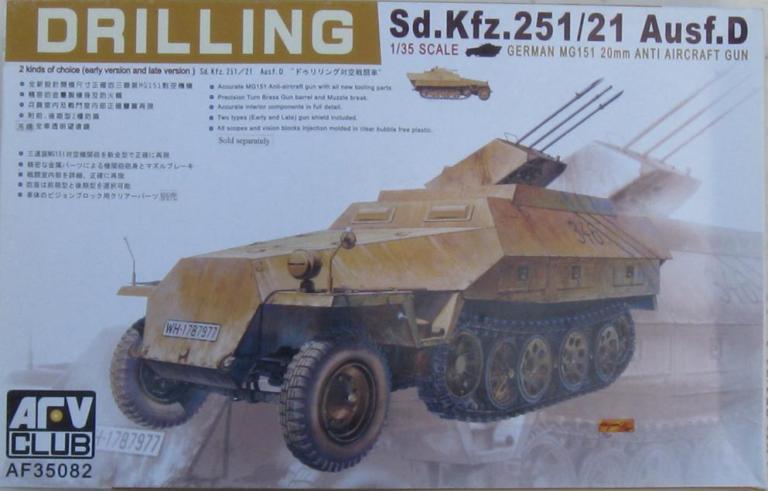
I figured I would post a few images and comments to the review attachment to tie it all in. The forward hull, fenders and side hull storage bins should all be fit at the same time as there are some minor fit issues. If there is a two or three week interval as on my kit, it will be harder to adjust parts. I painted the interior and added some weathering in the form of dirt/mud. As these were relatively new vehicles in service for a short time there won't be much chipping or wearing down of paint. Here are some shots of the mostly completed hull.


Sorry the pictures are dark. One of the dearest children took the camera and dropped it or got it wet and now I can't adjust anything. It is fixed focus with random flash.

Fit of the gun mount parts is a bugger. Lots of small parts that will ping out of the tweezers and fly away. I have found parts to other kits I was looking for, money, kids toys, Jimmy Hoffa, the Roswell alien, the lost ark of the covenant, all the missing socks from the dryer, Amelia Earhart, my sanity, the 39 minutes from the Watergate tapes, several pins dropped into the carpet, bigfoot and three Japanese soldiers who never knew WWII was over, but not the missing parts to the gun. Maybe next time I loose something I will find the part I need now. They are small and might be hidden by the gun itself. As unfortunate as reality is, I believe these issues of fit and assembly are primarily user caused.

These are the figures I am working on for this kit. Two guys are just standing there looking at maps and pointing, just like everyone did in real life. Dragon makes a crew for this vehicle, but they are dressed for warmer weather. As this is a late production vehicle and I am doing the late version of that, It will be January or February 1945.

Grenadier37
Visit this Community
Texas, United States
Joined: June 02, 2008
KitMaker: 232 posts
Armorama: 45 posts
Posted: Friday, September 04, 2009 - 08:12 AM UTC
Thanks for the review and pics of the built kit Russ.

I don't have many 251s, but this one looks like a keeper...

HONEY, where's my wallet!?
russamotto
Visit this Community
Utah, United States
Joined: December 14, 2007
KitMaker: 3,389 posts
Armorama: 2,054 posts
Posted: Saturday, September 12, 2009 - 03:08 PM UTC
Here are a few more images of the build. The paint job was sort of an accident. I was doing a three tone and did the base coat white, middle coat dunkelgelb and top coat olivgrun. I then did a light wash over that. The thinner doesn't really affect Tamiya rattle can colors (top and bottom coats) but took the MM spraycan dunkelgelb right off. So now I have a two tone winter cammo scheme. The light got knocked off so I have to replace that. I haven't placed many of the small bits because I didn't want to loose them as well.


I'm almost finished with the 2cm drilling mount. Parts fit on this is difficult. The vinyl ammo belts aren't very flexible, are too large for the ammo box openings and there was a slight twist in the mold creating uneven alignment. The etch shield was very easy to form but the instructions say to put the outside flash hiders on before the shield. The shield won't fit over the plastic end rings. The entire assembly was movable until I installed the ammo belts, but it is fairly fragile so you will want to choose the final position and leave it there. I haven't finished painting the shield and still need to add the sight. Part E3, what looks like maybe a travel lock pin, is supposed to go on the front of the shield. It is very fragile. Two parts are supplied. I broke both trying to get them off the sprue.
Here is the temporary placement of the gun mount.


These are the Cherkassy figures to go with the vehicle. I modified the bread bag and made straps for the gas mask case. I still need to make slings for the guns. You can't see but I actually managed to hollow out the front ring sight. I re-scribed all the seams and under all the overlapping clothing.


Now I just need to figure out a diorama base.
russamotto
Visit this Community
Utah, United States
Joined: December 14, 2007
KitMaker: 3,389 posts
Armorama: 2,054 posts
Posted: Monday, September 21, 2009 - 03:25 PM UTC
The instructions don't call this out, but there is an etch cover for the sight, part G-1. Also, I used some of the other etch parts for the brackets for what I believe was the travel lock. I redid the paint job on the shield.


 _GOTOTOP