Introduction
The Japanese Type 97
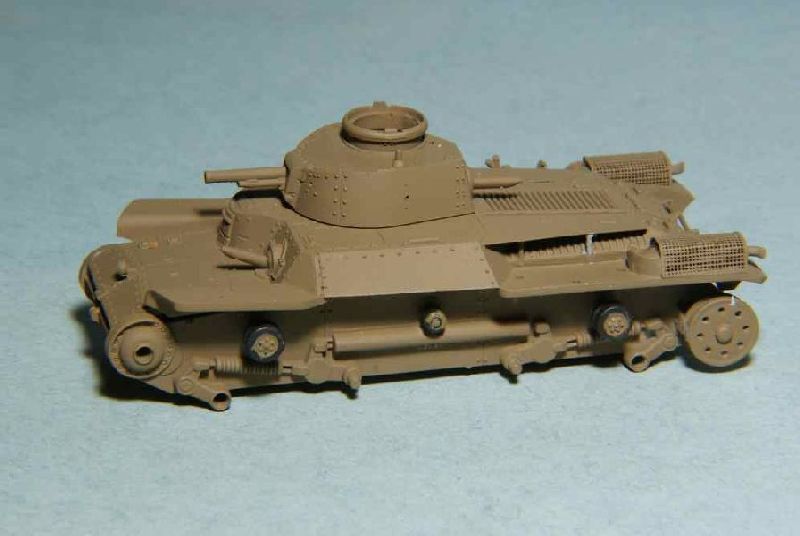
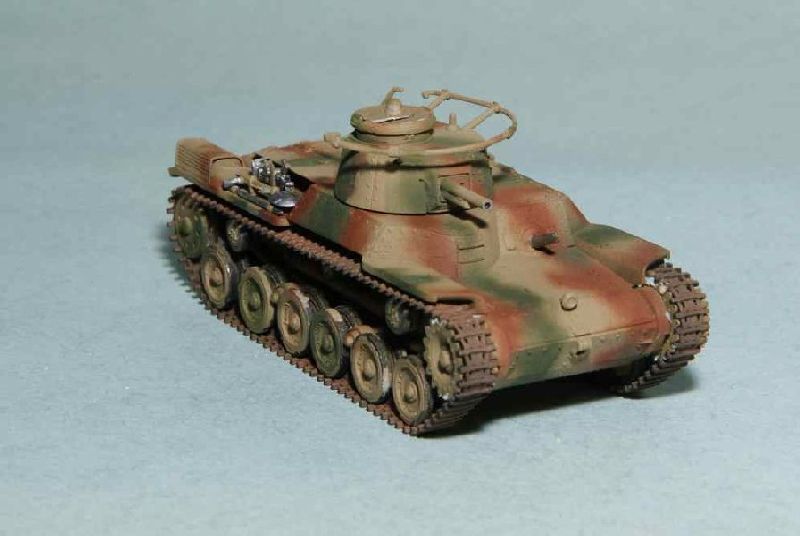
Chi Ha was to be the main Japanese medium tank of World War Two. Over 1100 of the original 57mm gun-armed models were produced by Mitsubishi between 1938 and 1942. Weighing in at around 16 tons the tank had a four-man crew and was powered by a Mitsubishi 12-cylinder diesel engine developing 170 horsepower.
By 1930s standards the tank was average, but was quickly surpassed by Allied armor by 1941. The tank was originally designed to fulfill the infantry support role and as such its main armament was the low-velocity 57mm gun. Secondary armament was provided by two 7.7mm machine guns with one mounted in the hull left front and the second in the turret rear. Armor was modest with an average thickness of 25 mm overall to a maximum of 33mm on the gun mantlet. The chassis was used as a base for several variants including an Armored Recovery Vehicle, Self Propelled Gun, Flail and Command Tank to name a few.
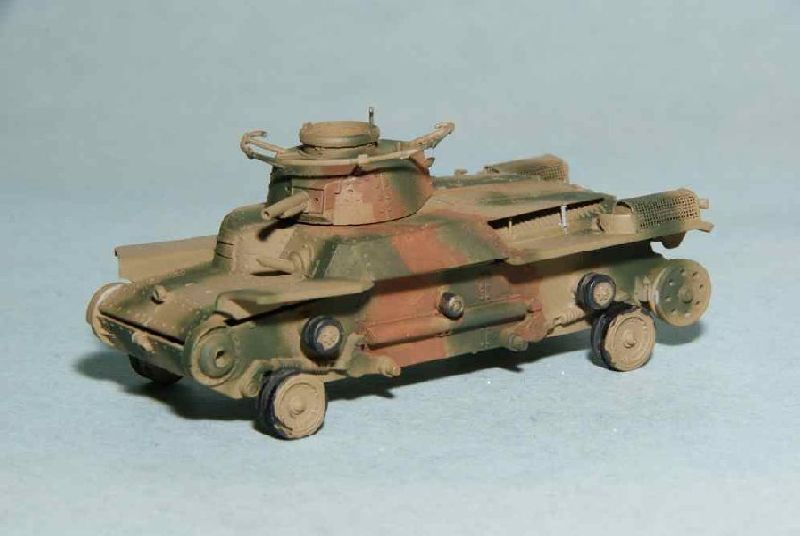
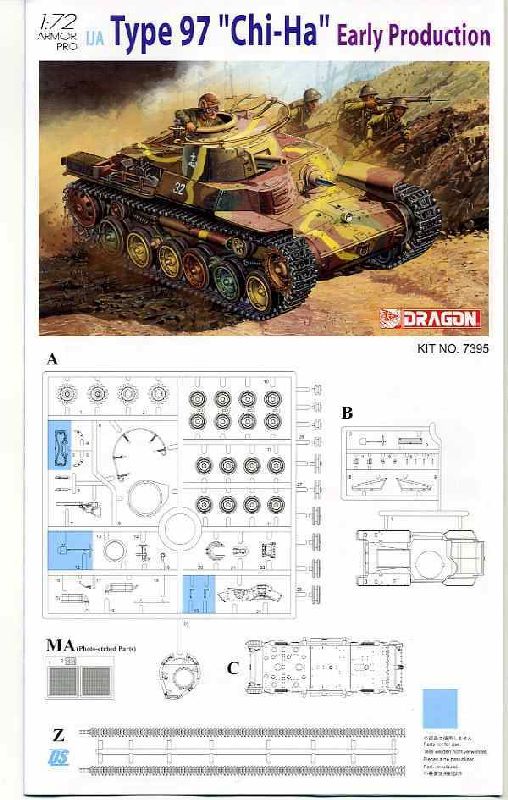
The subject of this review is the Dragon Models 1/72 Armor Pro IJA Type 97 Chi Ha Early Production, kit #7395.
Contents
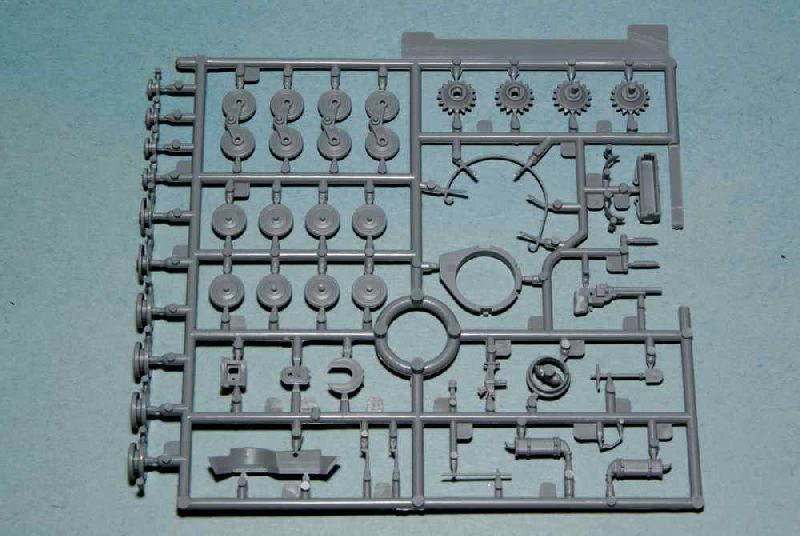
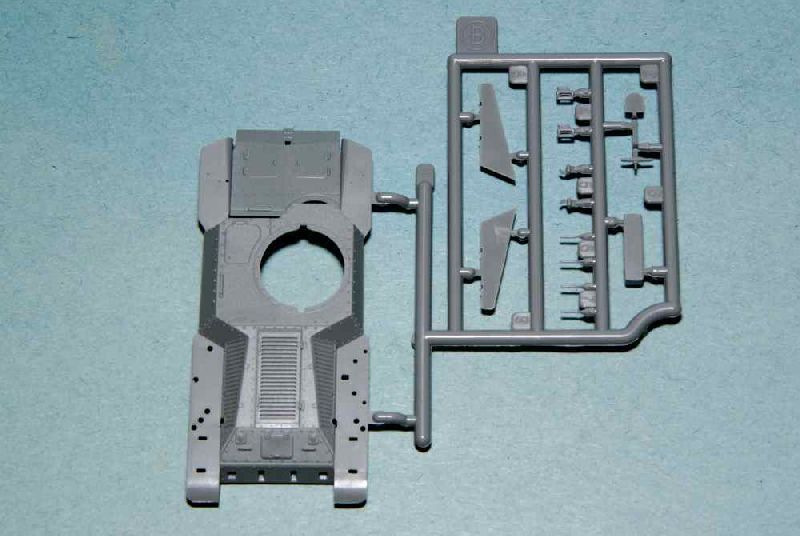
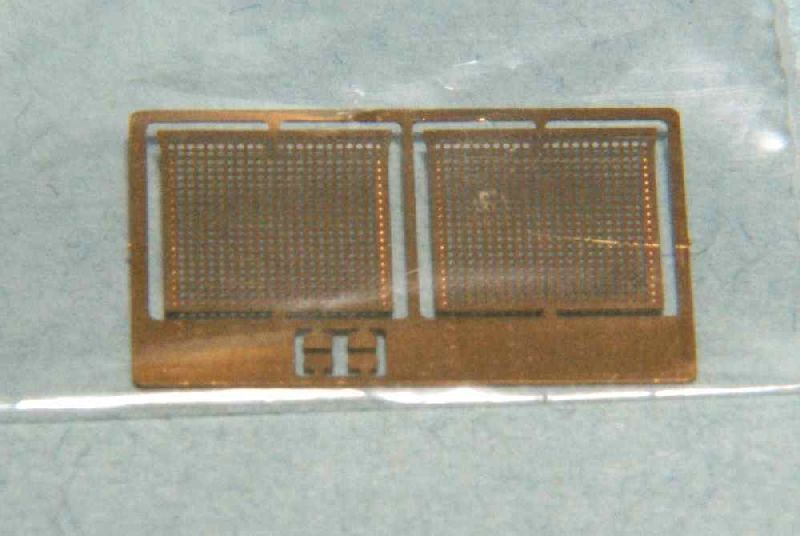
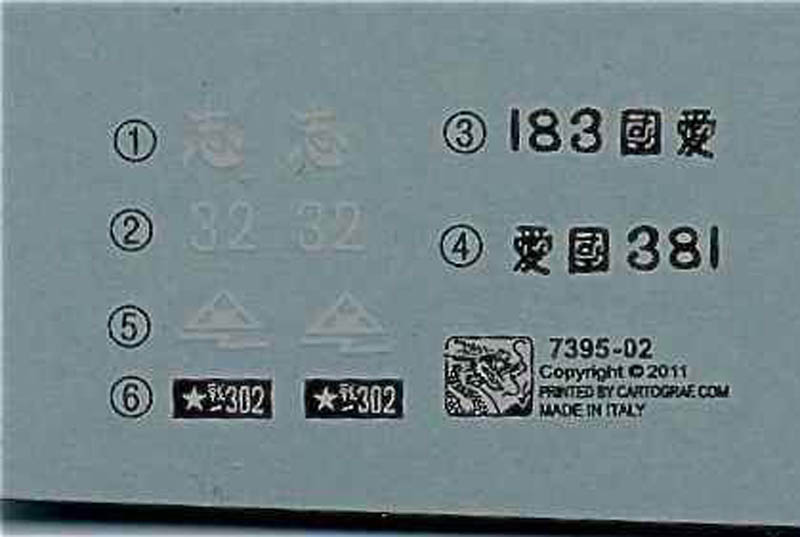
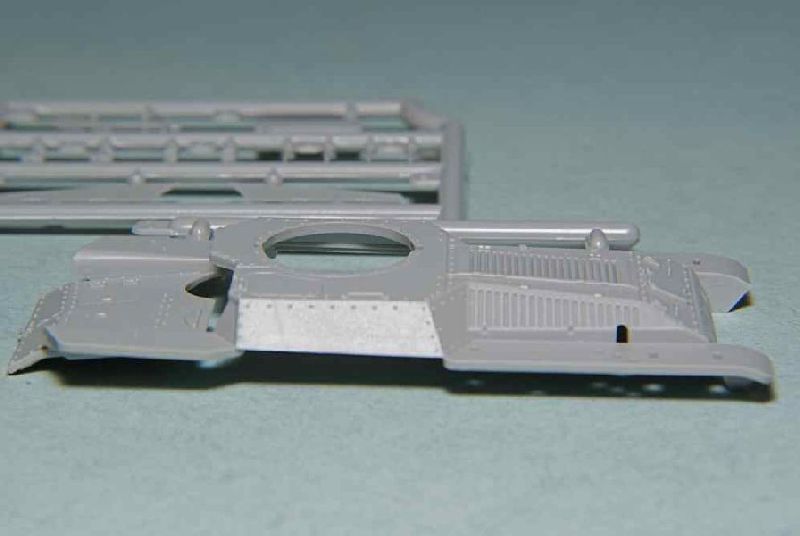
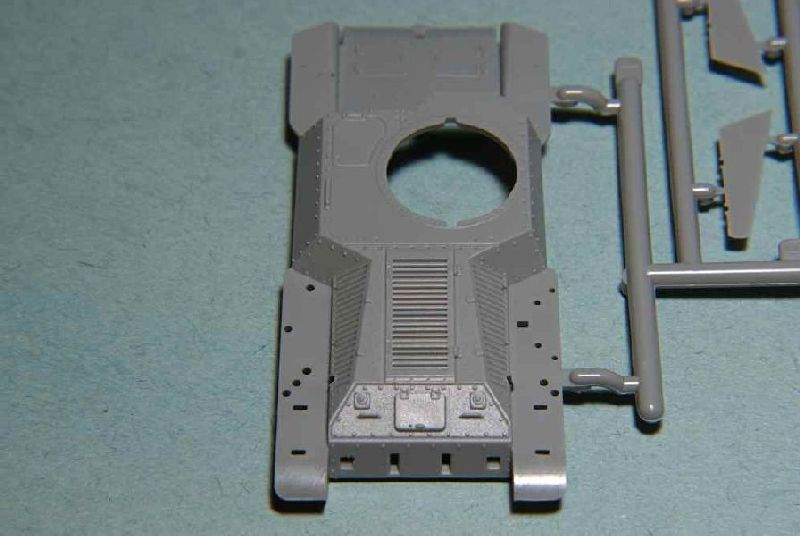
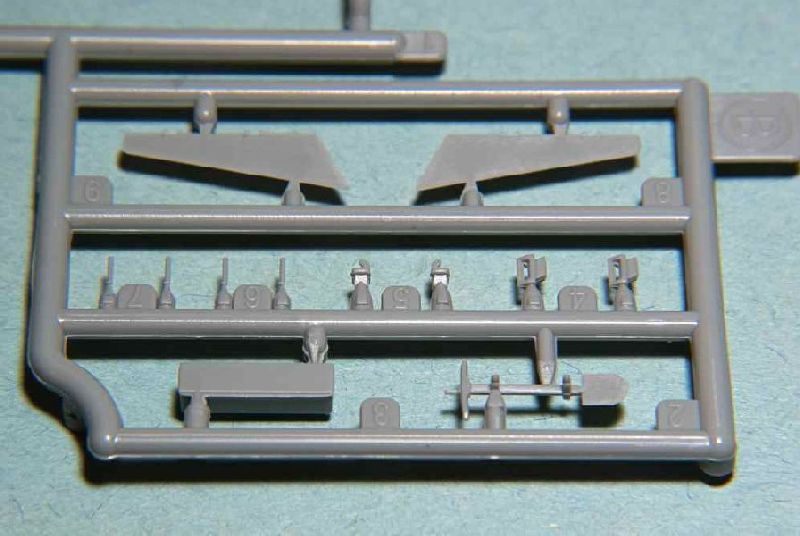
Included in the box are one medium-sized sprue, one smaller sprue with early production upper hull, and the lower hull - all moulded in standard Dragon light grey styrene and bagged separately. Mounted on the typical Dragon accessory card are the turret top, a small six-part PE fret, a sheet of Cartograph water-slide decals, and two Dragon DS styrene tracks.
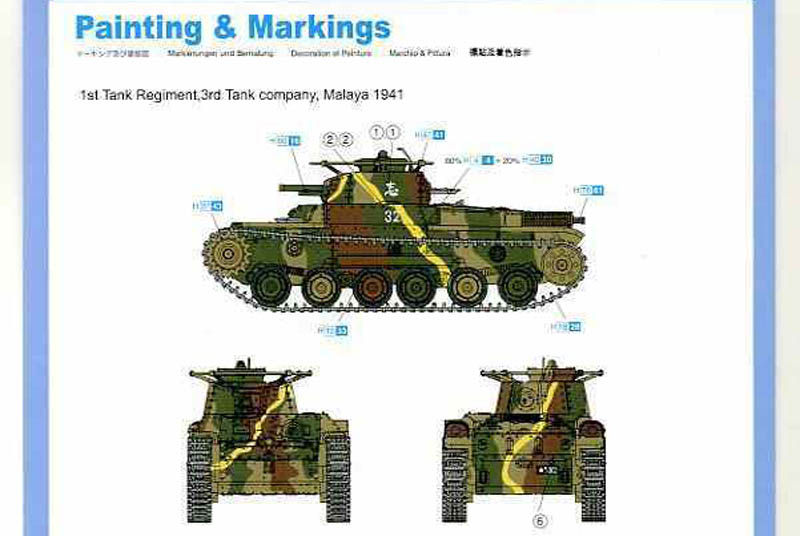
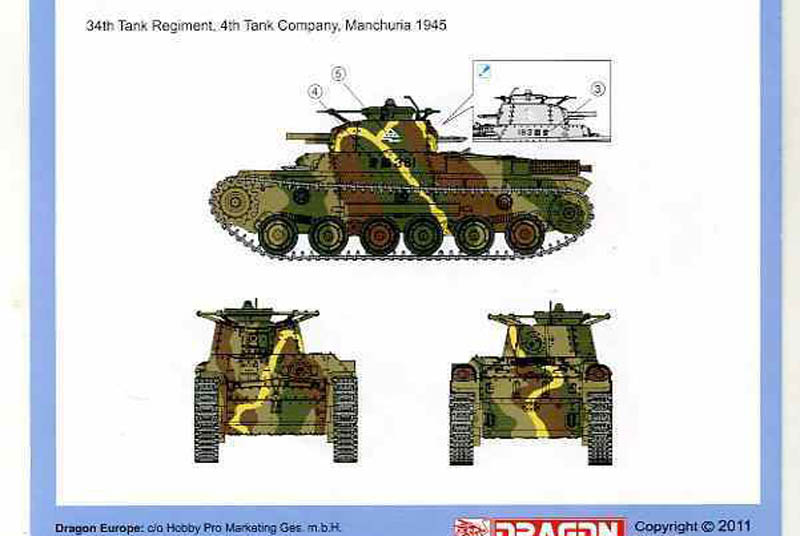
A four-sided instruction card is provided and displays a parts diagram, two pages with six assembly steps in the form of exploded-view line drawings (with arrows for parts placement), and one page showing painting and marking options. The painting and marking pictures are provided for two tanks, either for a tank of the 1st Tank Regiment, 3rd Tank Company, Malaya 1941 or for the 34th Tank Regiment, 4th Tank Company, Manchuria 1945. The colour references provided are for the GSI Creos Corporations Aqueous Hobby Color, the same companys Mr. Color, and Model Master enamels.
Review
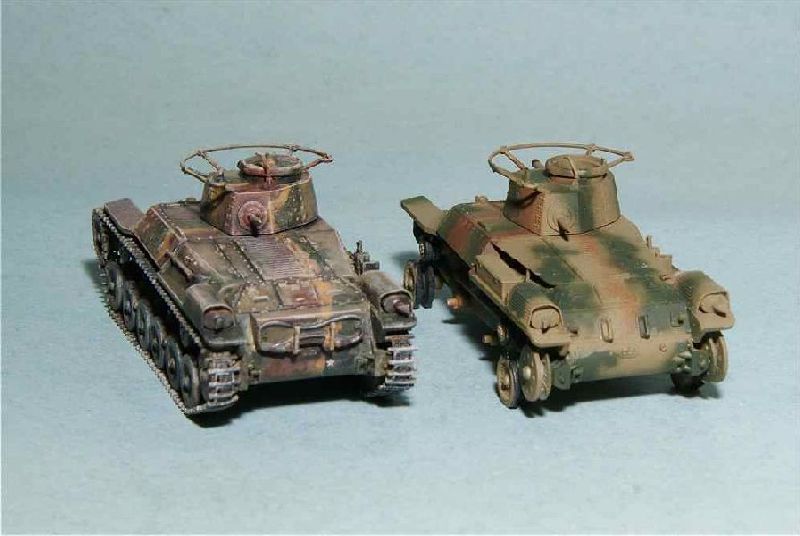
Having previously reviewed Dragons first Chi Ha kit
(here), this reviewer was somewhat surprised by this kits contents. The larger sprue included in the box contains a scant 49 parts. This sprue is identical to the previous release. A second smaller sprue carries a further 13 parts including the new upper hull. With a separately-bagged lower hull, turret and the DS tracks, total plastic parts count is 65. Of that total four parts are marked as unused. The PE fret contained two screens or guards for the tanks exhausts and four very small parts that are meant to adorn the turret cupola. Compared to previous parts counts in Dragon kits that I have reviewed, these last few kits appear to be a change in direction from the past.
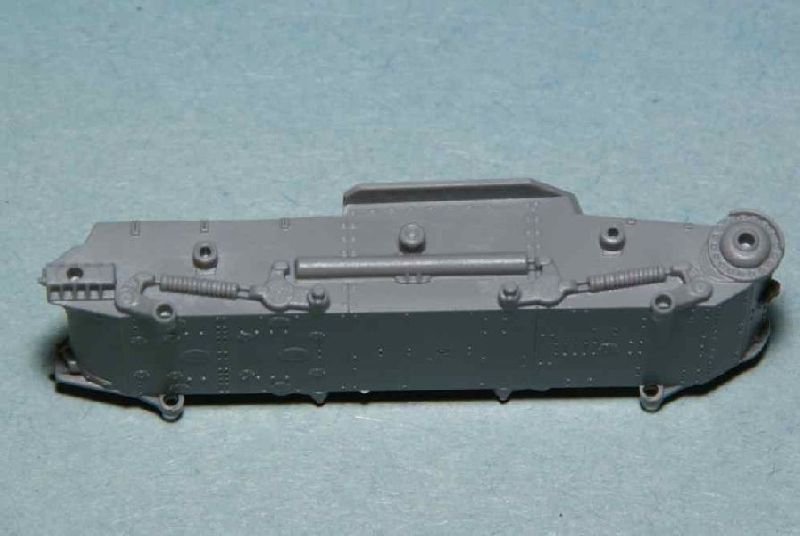
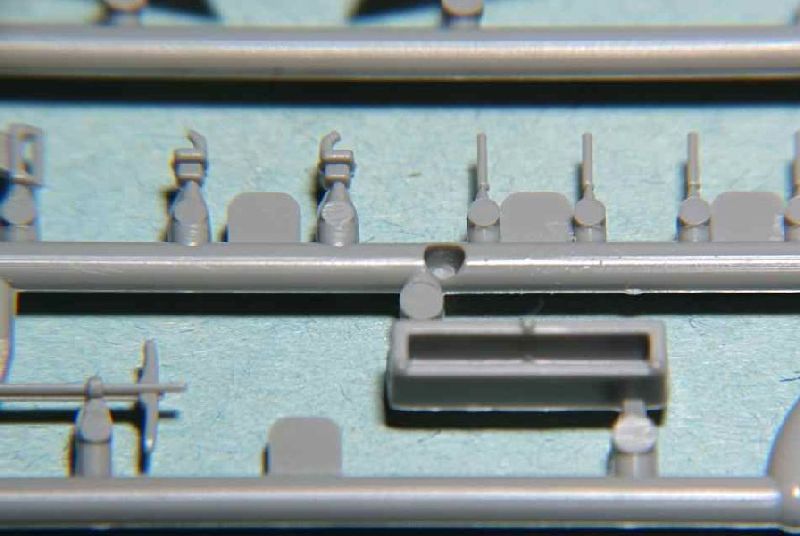
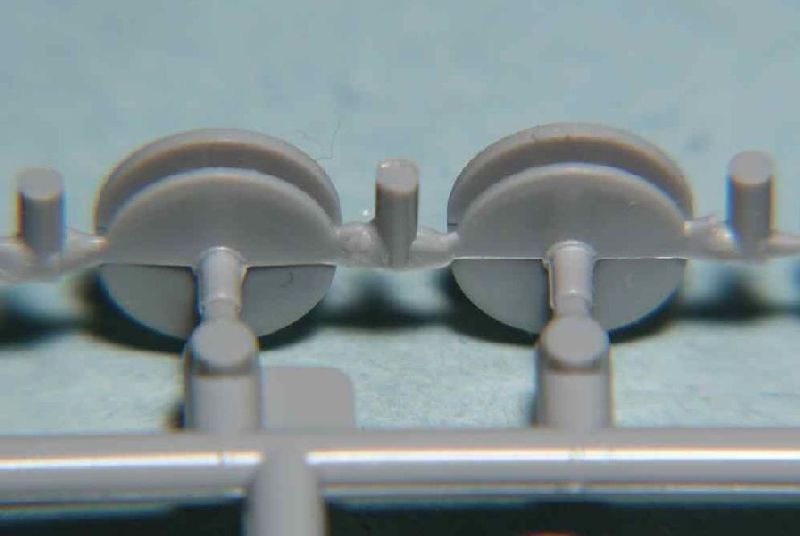
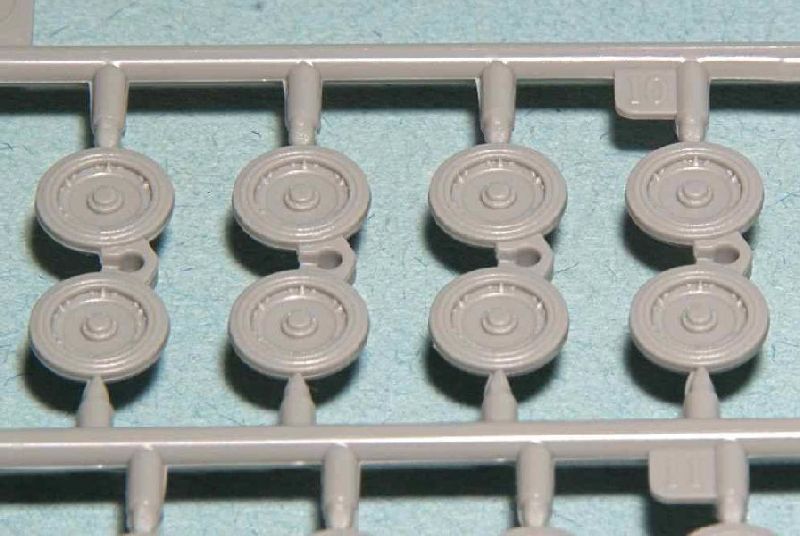
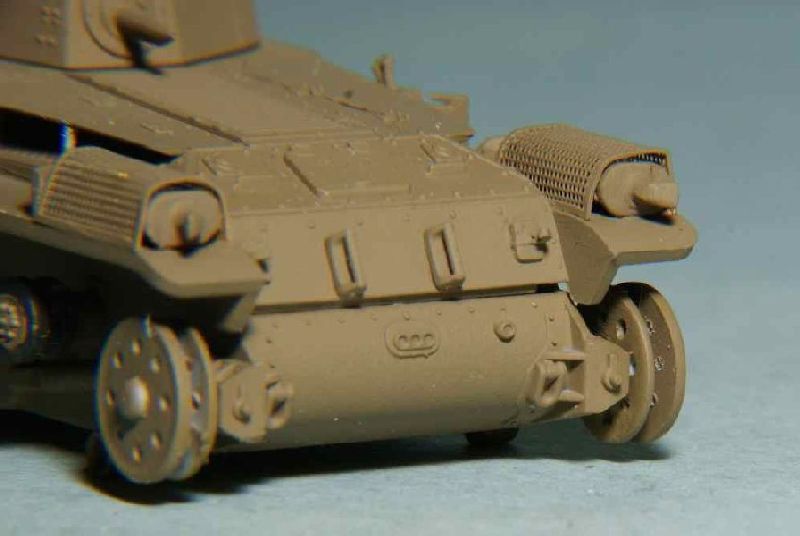
Moulding of the parts has to be seen to be believed. This is evident right down to the cast-on suspension springs and delicate rivet detail. Flash is all but nonexistent and mould seams are for the most part light and easily removed with a scraping of a sharp hobby knife. The only exceptions to this are the single road-wheel and return roller pairs that will require some sanding. There are a few light ejector pin marks but all live in areas that will not be seen after construction. The only sink holes that exist are on the interior of the lower hull and therefore of no concern.
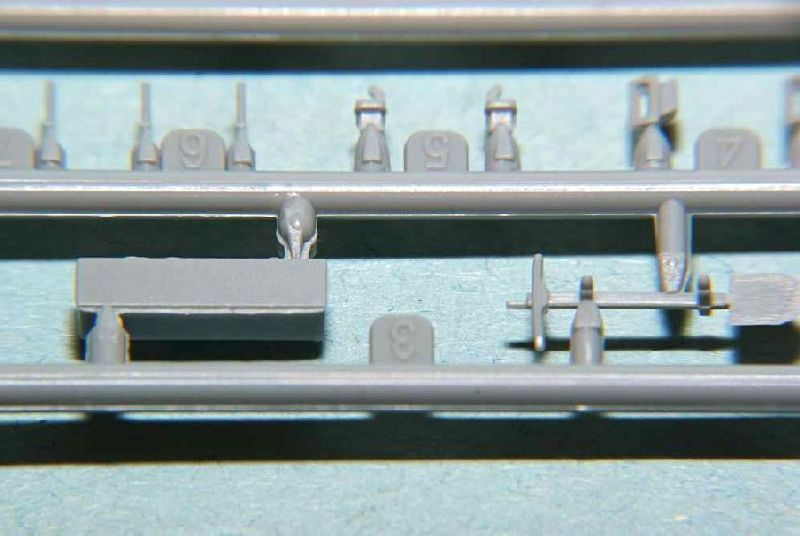
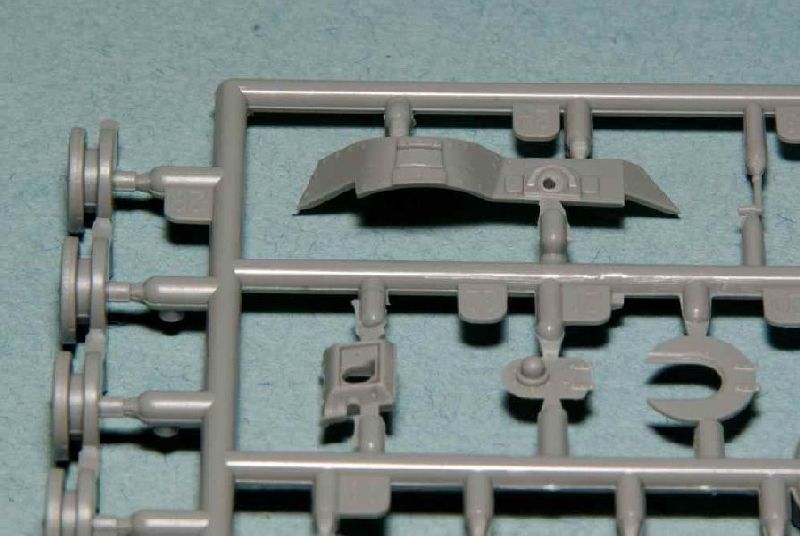
With this kit we also see that Dragon has moulded all the external tools as separate pieces. The only moulded-on details are a few grab handles.
Slide-moulding is used to create the pairs of return rollers, idlers and front/rear dual road wheels. One glaring omission is that all these parts have no detail on their rear or innermost surfaces. This might be fairly noticeable with the single pairs of road wheels. The rear idlers are also moulded as a pair with the inner wheel portion not having any lightening holes present.
Inspection of the sprues shows that attention has been paid to the sprue attachment points or gates. In the vast majority of cases they appear very small and should prove a pleasure to deal with when compared to previous kits.
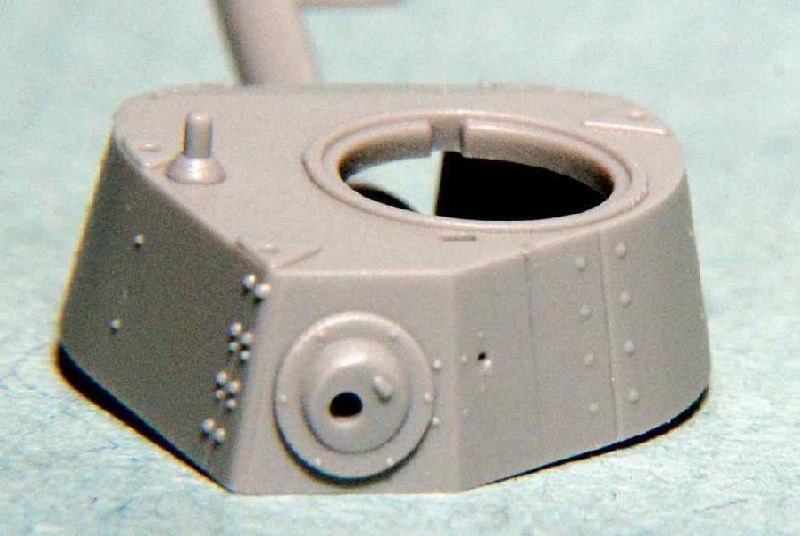
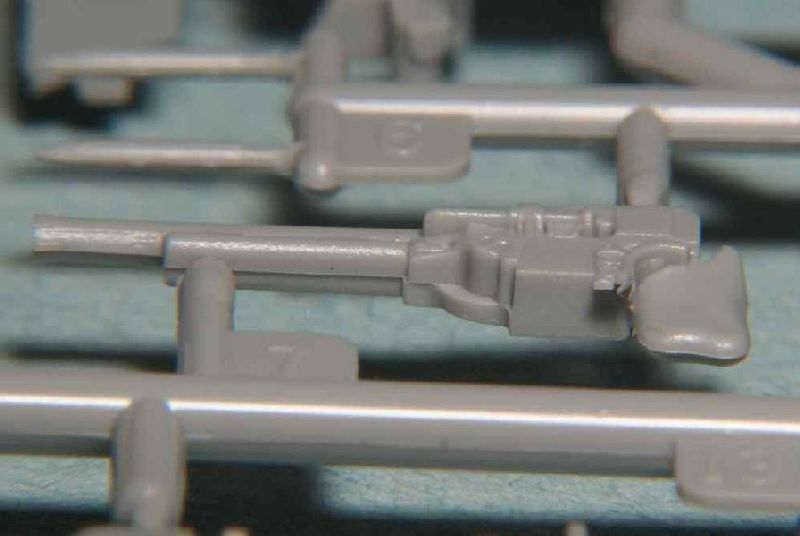
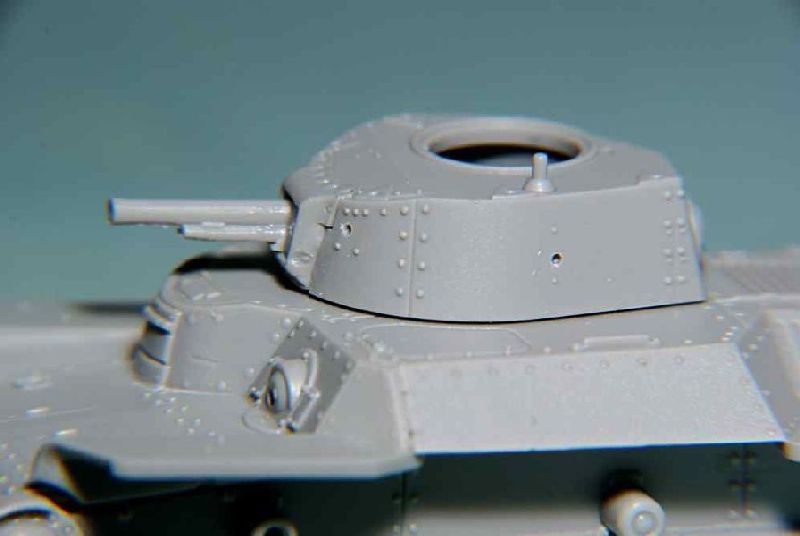
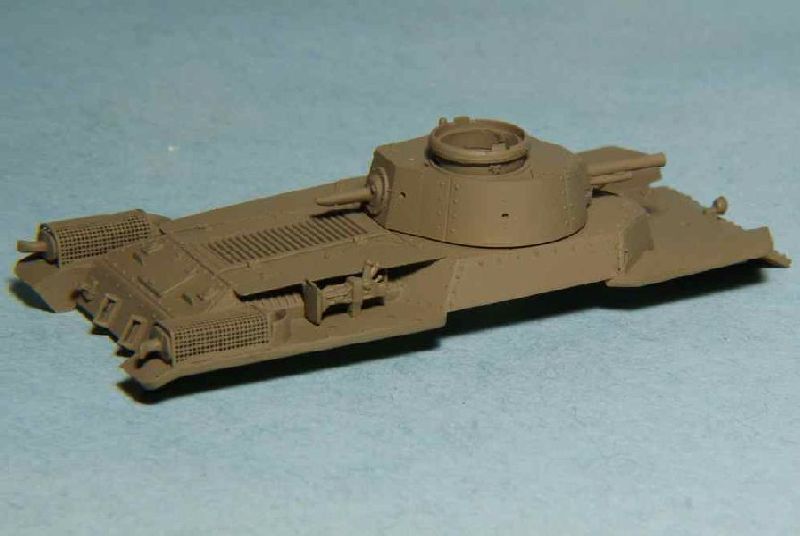
The turret main hatch is composed of two separate pieces and these can be attached in the open or closed position. While the main gun carries a beautiful breech and other details, the turret and hull interior are lacking any detail at all. As one has come to expect from Dragon, the bore of the main gun is hollow thanks to slide-moulding. All other hatches and ports are moulded-on - including the machine-gunners hatch - but their rendering is nicely done.
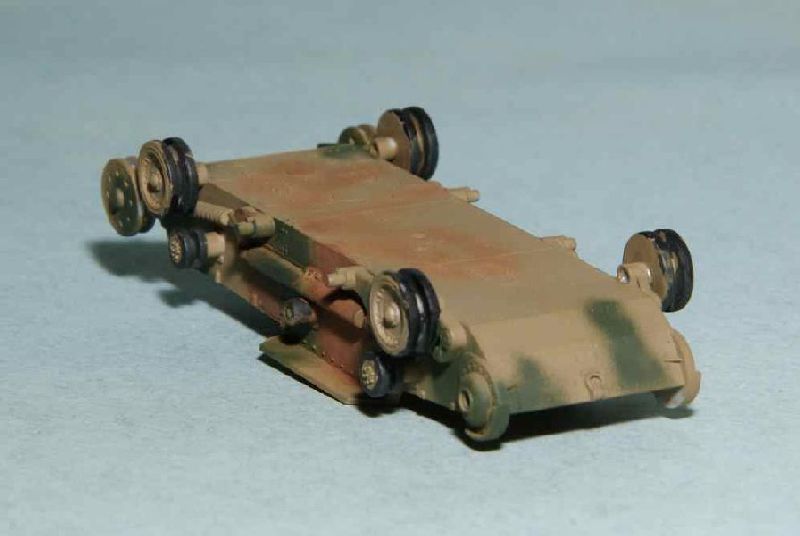
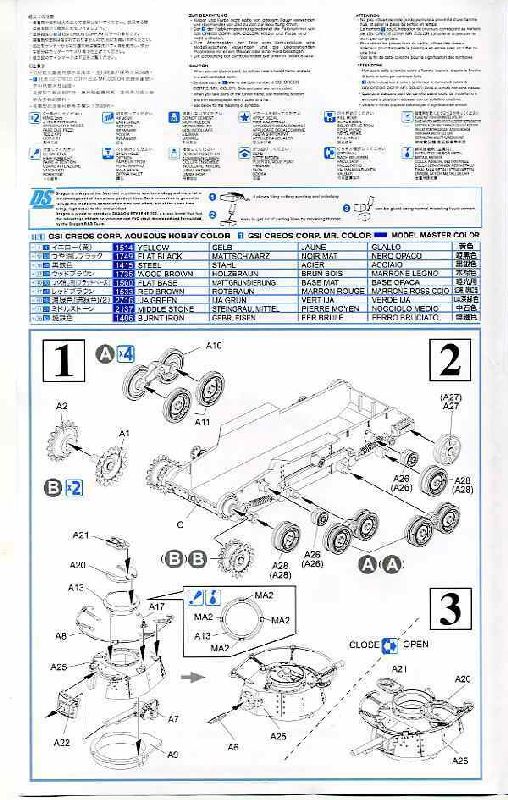
As stated previously, there are six construction steps. Steps 1 and 2 are the busiest and comprise the attachment of all the suspension components to the lower hull. All the bogies are pretty much universal so they shouldnt present a problem that normal assembly care cannot resolve.
Step 3 focuses on the complete construction of the turret. Here again everything looked straight forward with the exception of part A17, the turret top machine-gun pintle. The arrow in the diagram showing its placement is misleading to say the least. The arrow points to a position on the left turret side while the actual part should be positioned beside the rear of the cupola. This can be seen in the images of the turret on the box top side.
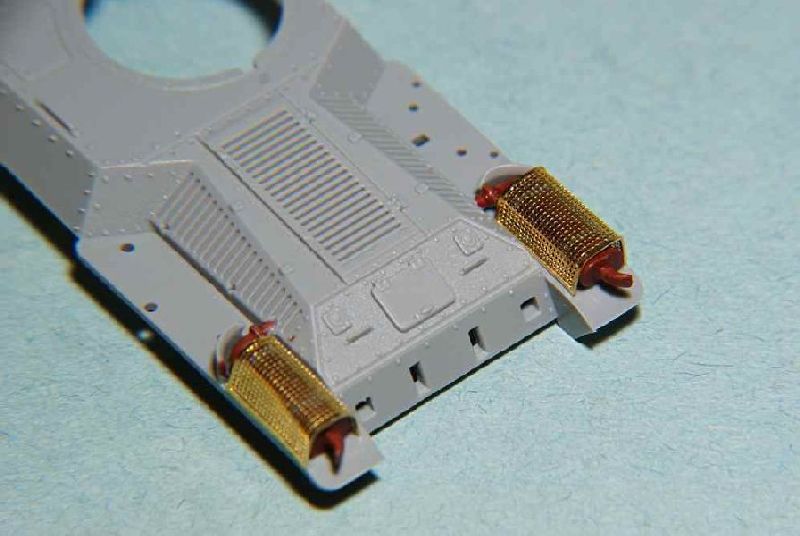
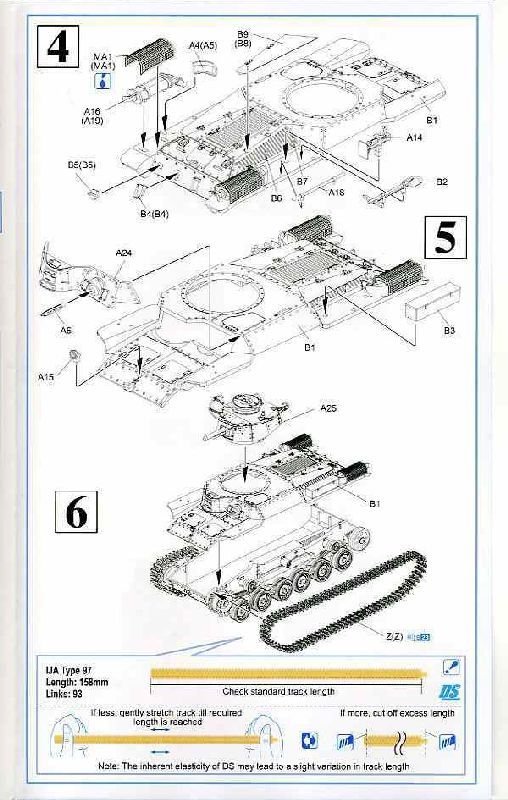
In step 4 and step 5, all the upper hull exterior pieces are added. The only issue that I can foresee here is the bending of the PE exhaust guards that fit over the mufflers.
Construction is completed in step 6 with the attachment of the upper to lower hull, turret placement and tracks.
One interesting point that I noted is that with this kit Dragon has placed an information box at the end of the construction diagrams giving pertinent information about the DS tracks. It informs the builder of the number of links expected for each track and also their required scale length in millimeters. A further two notes inform the builder that the track length may vary due to the elasticity of the material and that if necessary the tracks can be stretched to lengthen them.
Build Observations
[A full build log by the author can be found
here. - Ed]
Construction began with Step 1 by assembling the two drive sprocket halves. This involves cementing parts A1 and A2 (referenced in the instructions as subassembly B) together. A bit of care had to be taken as the mating features create a somewhat loose fit. Therefore it is important to make sure the drive sprocket teeth on each half line up and fit the track.
Next I started on the paired road wheels (subassembly A) using parts A10 and A11 (X2). Here again the fit of the pin on the A11 parts into the hole in A10 is a bit loose. The dual return rollers (A26) were then attached to each side. These had a slightly tighter fit and were easier to attach before any of the road wheels were glued on.
After studying the instructions and some dry fitting of the various main road wheel pieces I decided to attach the front and rear most road wheels (A28). These come as a single pair part and I surmised that with their nice snug fit they would facilitate in allowing for all the main road wheels to end up with their bottoms touching on a level plane.
Continuing with the suspension I decided to attach the rear idler pair (A27) to each side. As the lightening holes are not present on the inner wheel, a pin vice with an appropriately sized drill was used to drill out the missing holes. This was another case where the fit was a bit loose so one needs to be careful with their final orientation of these wheels. With the parts attached so far I was ready to attach the two tandem paired road wheels (subassembly B) to the hull. The fit of these parts was a bit loose so I decided to use tube gel glue for this purpose. Once these wheel-sets were attached I placed them on a flat surface and made sure that they were all positioned properly.
After the glue had dried I examined the suspension and found the single pairs of road wheels, front and back, did not rest fully on the surface. All four were slightly elevated while all the other road wheels sat flush. The discrepancy was a little less than half a millimeter and I could find no references to say if this was a feature of the actual suspension or a slight flaw. I decided to leave the road wheels as they were and hoped that with the tracks on it would look acceptable. Save for the gluing of the sprockets the suspension and lower hull was now complete.
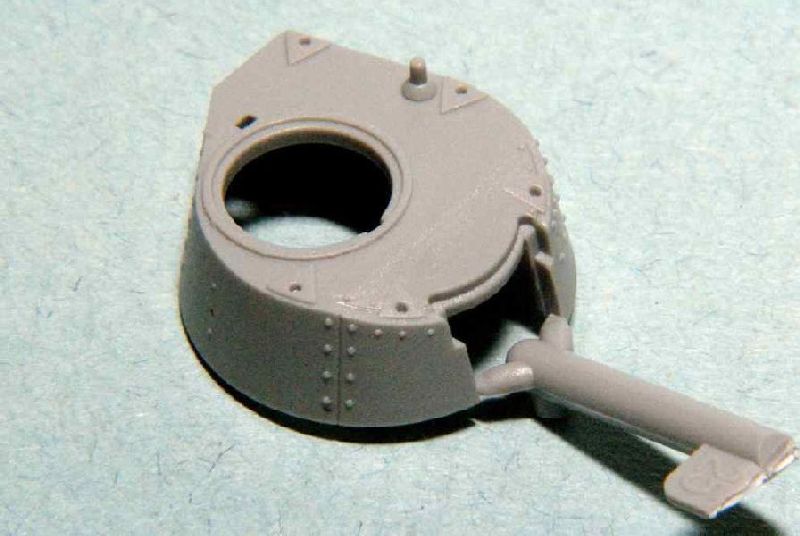
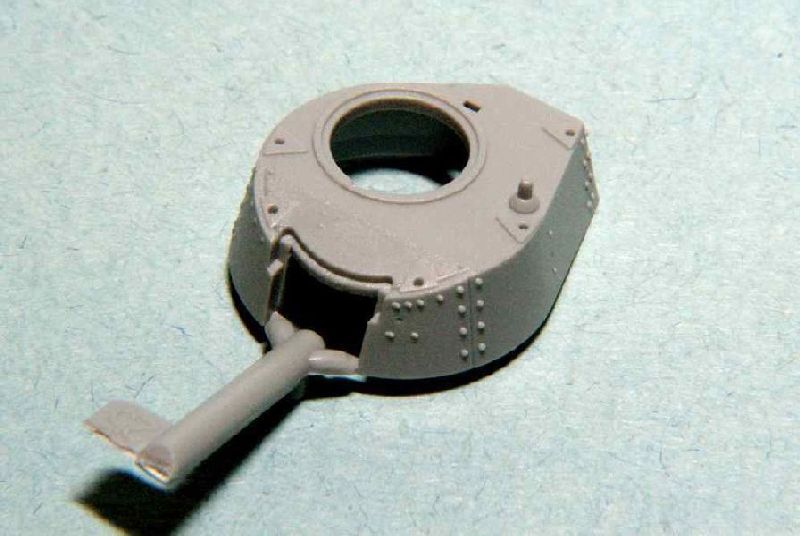
With step 3 attention was focused on the construction of the turret. My first action was to attach the gun to its mantlet. The gun slides into the mantlet with a nice snug fit and no provision is made for its elevation. This complete assembly was then attached to the upper turret body and once dry the lower turret was glued in place.
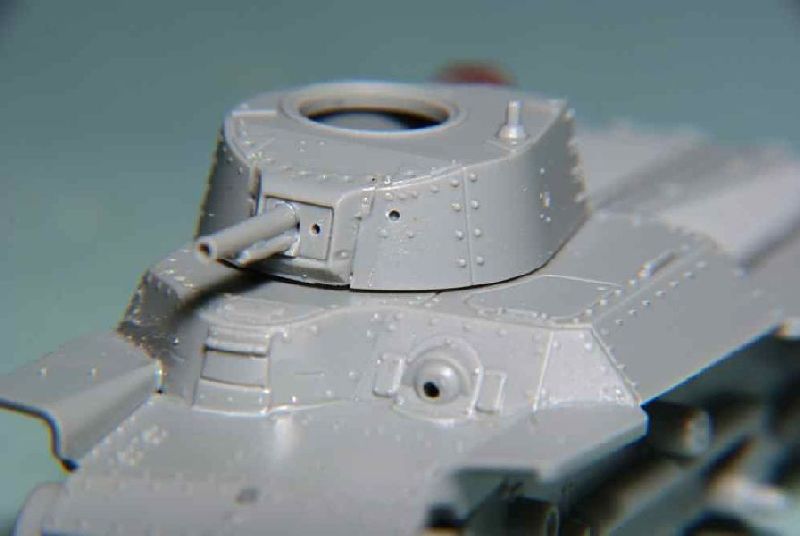
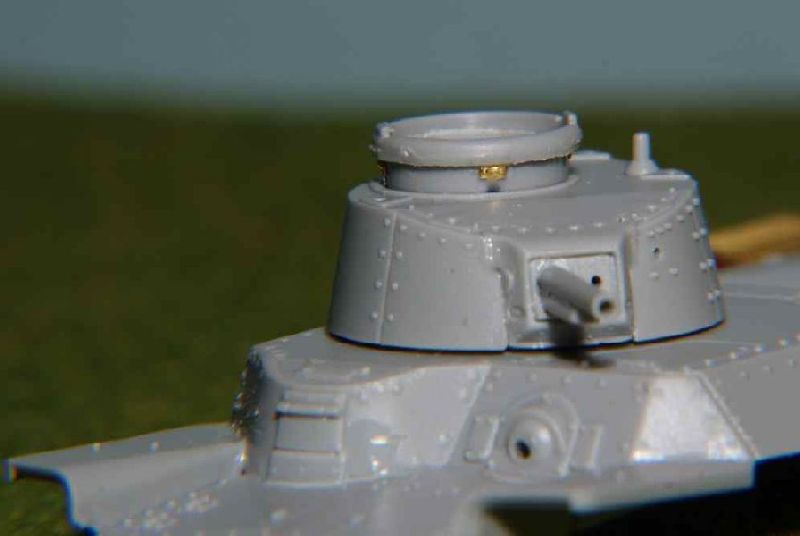
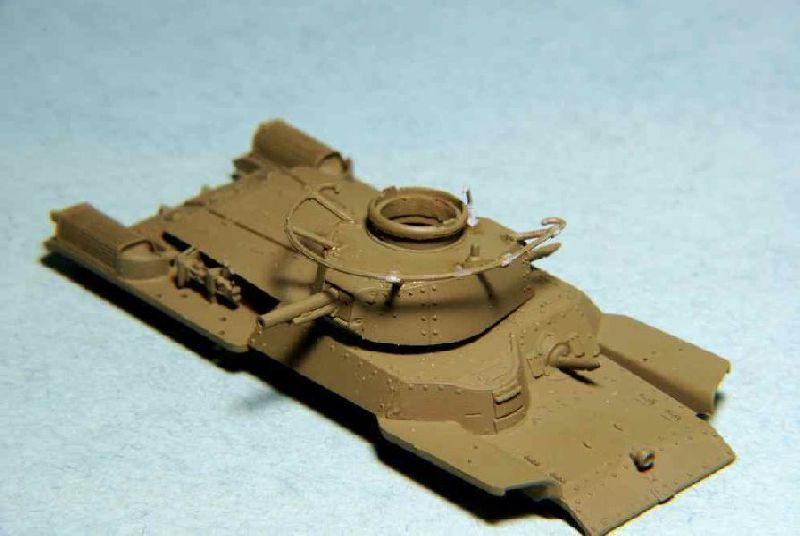
Next on the turret I attached the two hatch parts for the cupola (A20, A21). When building the tank with the main hatch closed, part A20 (the larger part) must go on first. This is because A21 will mate with its larger cousin. After doing some extensive scouring of images of the real vehicle it became evident that part A17 is part of a machine-gun mount. Its location is at the back of the cupola and a slot appears there into which a pin on the part is inserted. The pin on the part is extremely shallow so care will need to taken with positioning this part.
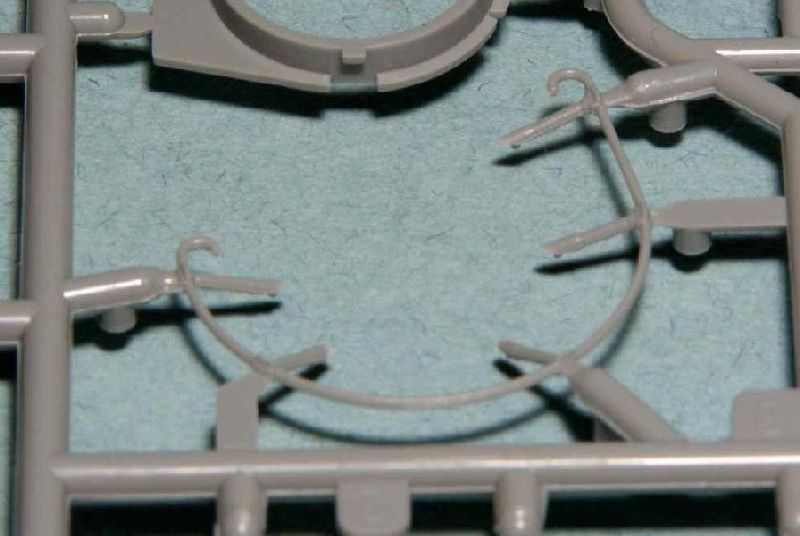
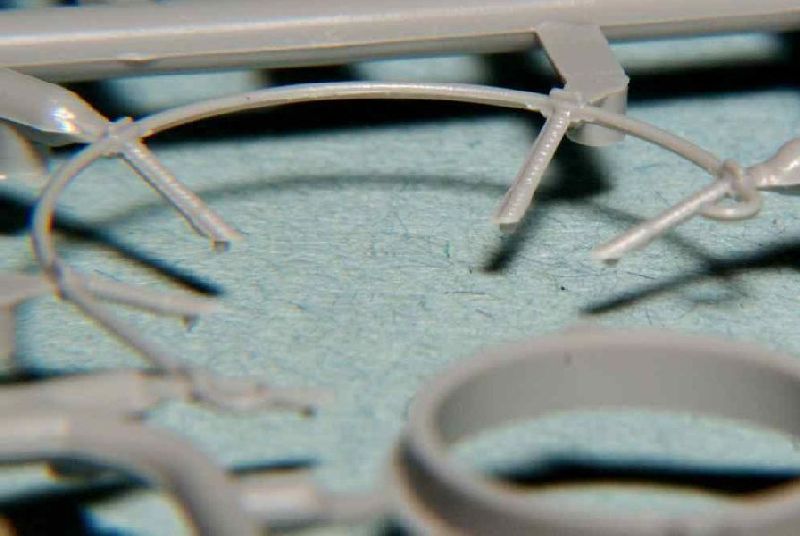
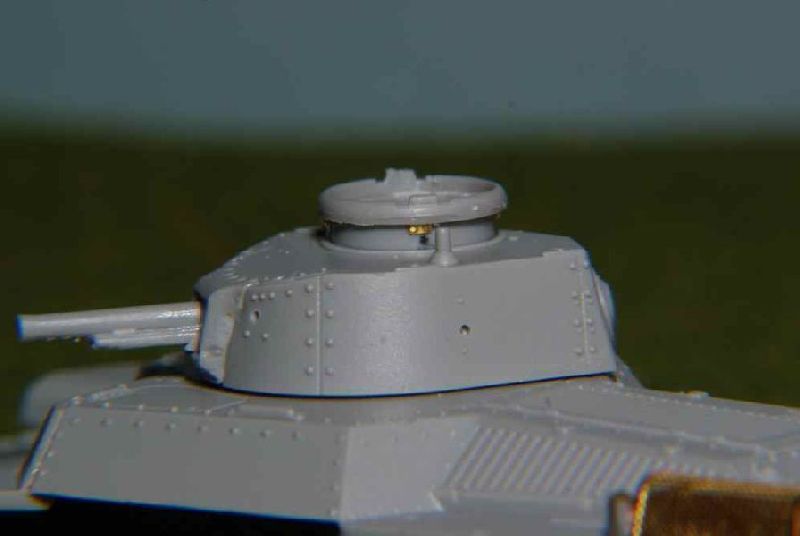
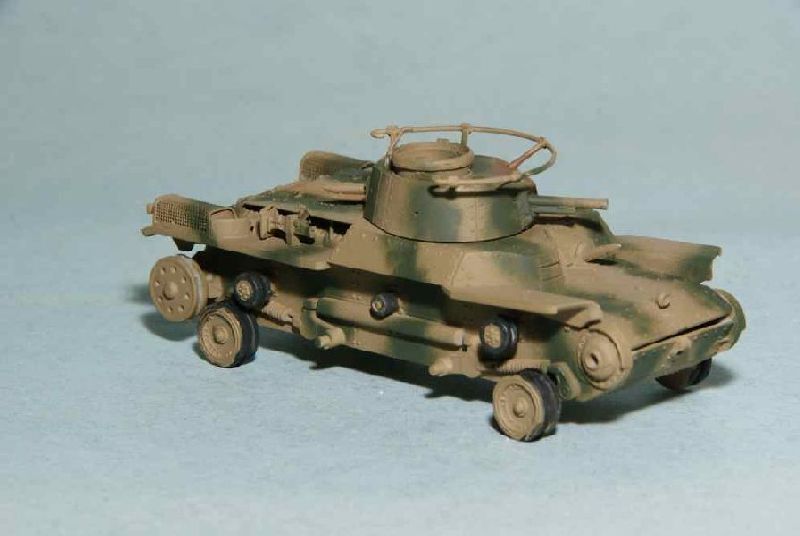
The second-to-last part to complete the turret was to attach the tubular antenna. This was an exercise in hand control as five pins on the five support arms must mate with their five respective holes in the turret top. The entire part is quite fragile but does show some flexibility. I glued it in stages starting at the right back and then successively inserting each mounting arm in turn. With the attachment of the turret-rear machine-gun the turret was complete.
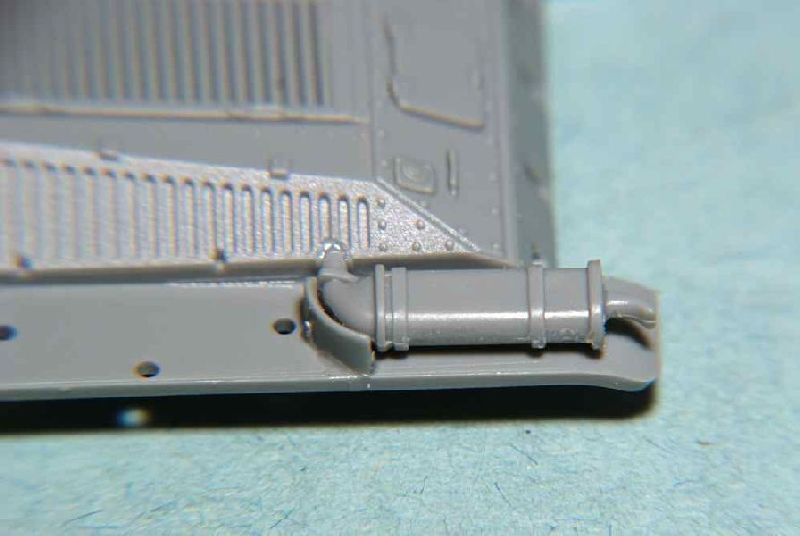
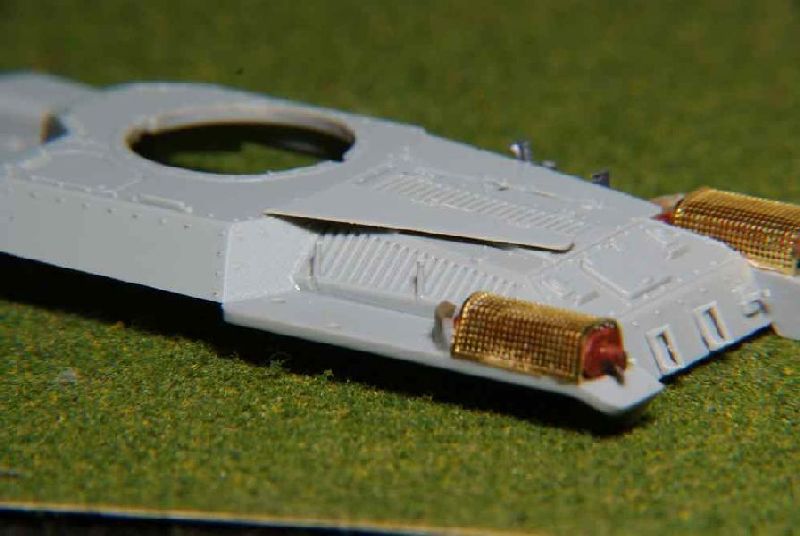
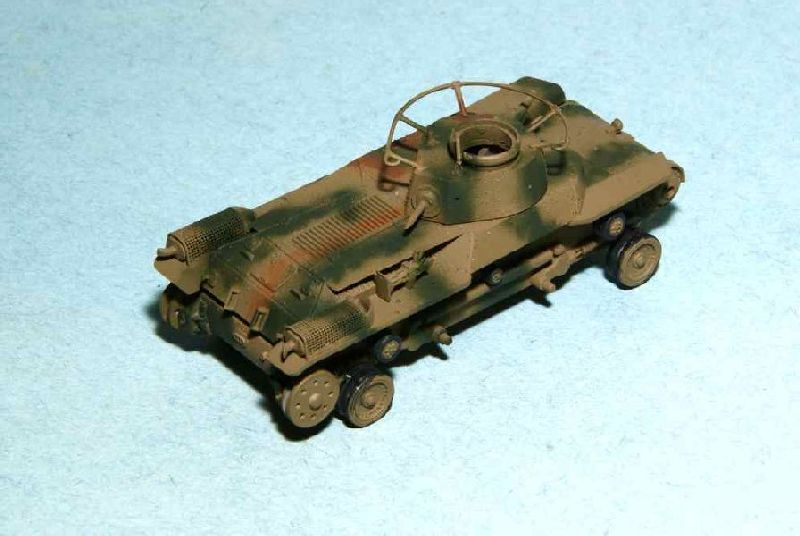
Steps 4 and 5 have the builder concentrate on the upper hull and its parts. I started this by attaching the front armor plate (A24). The two mufflers (A16, A17) and their rear part guards (A4, A5) were next but care will need to be taken with their positioning as the locating holes are larger than the tabs that mate with them. The shovel and pick tool (B2) fit nicely into its location as did the jack with minimum fuss. The fender-mounted pry bar, headlight, and a few remaining pieces were glued on and the build was nearing completion. The only issue I found was with what appear to be tow hooks that are mounted on the upper-hull rear. These parts marked B5 in the instructions are side specific and their open ends should face inward toward the centreline. A test fitting will be required to see which B5 part fits on which side.
Unlike the Dragon kit of the Late version, the rear hull is noticeably different. In the former the sides of the hull are basically flat plates. With this version there are louvers on the slanted sides of the engine compartment that will be covered by angled plates (B8, B9). These plates do not sit flush over the louvers but are held over them by very small pegs. These pegs (B6, B7) are also location-sensitive. The slightly longer B7 pegs fit in holes towards the front while the B6 are towards the rear of the tank.
Next was the forming and addition of the muffler screen guards. The little screens themselves bent quite easily and I used a scratch-built styrene form to the approximate dimensions of the muffler for the forming. However, if the mufflers are not glued on then the builder could use them as a form for the bending, although their shape and contours are not ideal for this process.
The last step (#6) is to attach the upper and lower hull to each other, put on the tracks and finally the turret. The hull halves didnt have a bad fit but the front part of the top piece (B) didnt sit quite properly with its lower counterpart. Some light sanding in a few areas rectified the situation.
The last thing to do was to put the tracks on. I have found it easier to leave the drive sprocket loose while test-fitting the tracks for length. The instructions state that the tracks should be 158 mm in length. Mine measured out almost perfectly to that length. I removed one track from its sprue and joined the ends and attempted a test fit. The track was a little tight going on but seemed to sit fairly well. While the instructions mention that the DS tracks can be stretched, I must caution the builder that these particular tracks are especially delicate, fine and thin.
Conclusions
With this kit I believe that we are now seeing a confirmation of a change in the way Dragon creates kits in Braille scale. Despite having a more limited parts count than some of their previous offerings, there is no sacrifice in detail. In fact, the details on this kit will in many ways rival their larger-scale brethren.
In the past Dragon kits have often suffered from excessively large sprue attachment points. With this kit it appears that there has been even more improvement over even their more recent releases.
This looks like a promising kit for any modestly-skilled modeller, but has definite potential for those with more skill. The latter might convert it into one of a number of variants that used this chassis (assault gun, flail, engineer). Having said that, it would not surprise this writer if Dragon did not have plans to use this base kit for more future versions of this vehicle. I would highly recommend this kit.


Comments