Introduction
It may seem odd to spend time reviewing an obsolete kit like this Panther given that newer models have been available for quite a few years, but these are still available in shops and on the web. When I acquired mine in a club raffle I found there were no comprehensive reviews on the internet, so I present the information in this review flawed though it might be in the hope that it can help the reader to make sensible choices regarding this kit. Let me preface this review by admitting that I am by no means the most knowledgeable expert on Panthers. I certainly dont know every nuance of their production, and I dont have a real one to measure.
History
Development of the Panther started with the D model, which had a letter-box style flap in the glacis for the hull machine gun. These were fielded before zimmerit anti-magnetic paste appeared. Next up came the A version that eventually evolved a number of improvements including a Kugelblende MG housing, a cast cupola, and of course the famous zimmerit paste on every surface likely to be within reach of enemy infantry. The later G variant added a chin to the mantlet and simplified the hull sides.
the kit
This kit represents the A model, as it would have been around the latter half of its production run. It started a series from Italeri that included the D (kit #290, re-released as #6473), the Jagdpanther (#275, re-released as #6275), and a Bergepanther (#285, re-released as #6472). At the time of its release the only other option was Tamiyas ancient and inaccurate Panther A from the late 1960s, although in recent years the Italeri kits have been eclipsed by new models from Dragon and Tamiya.
Contents
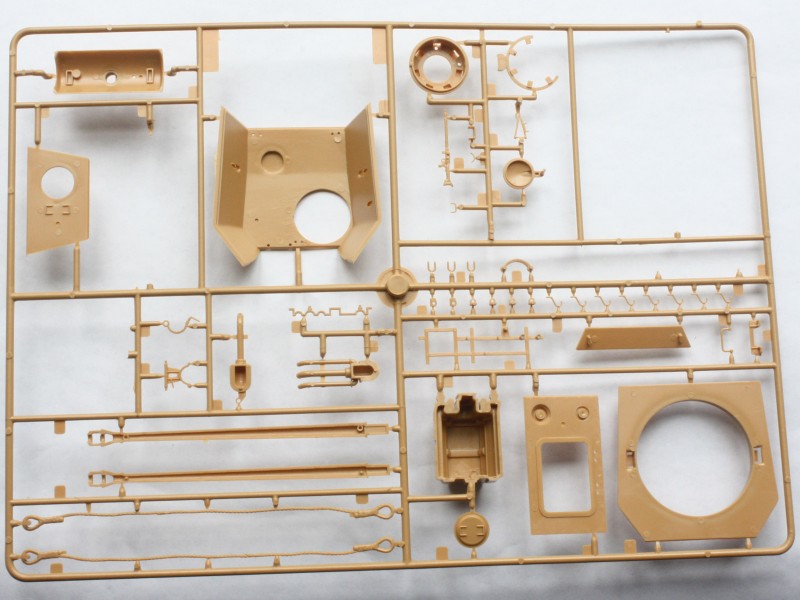
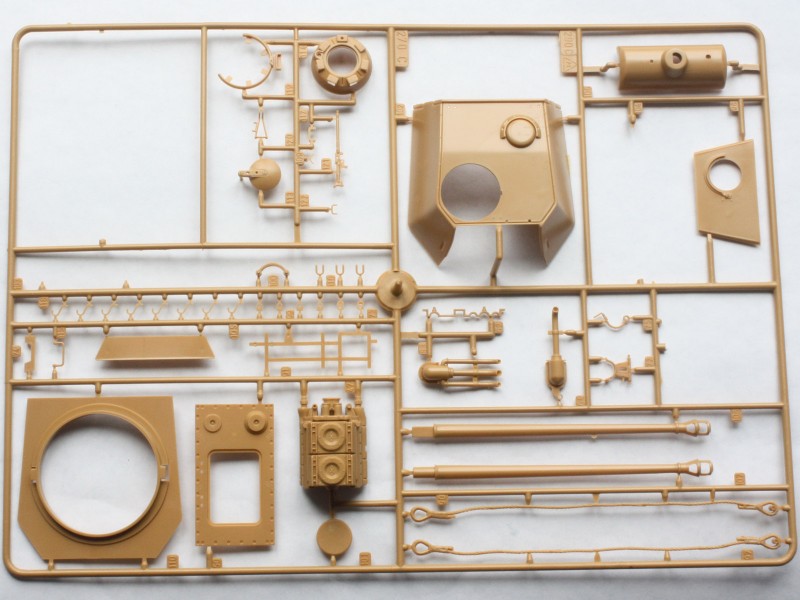
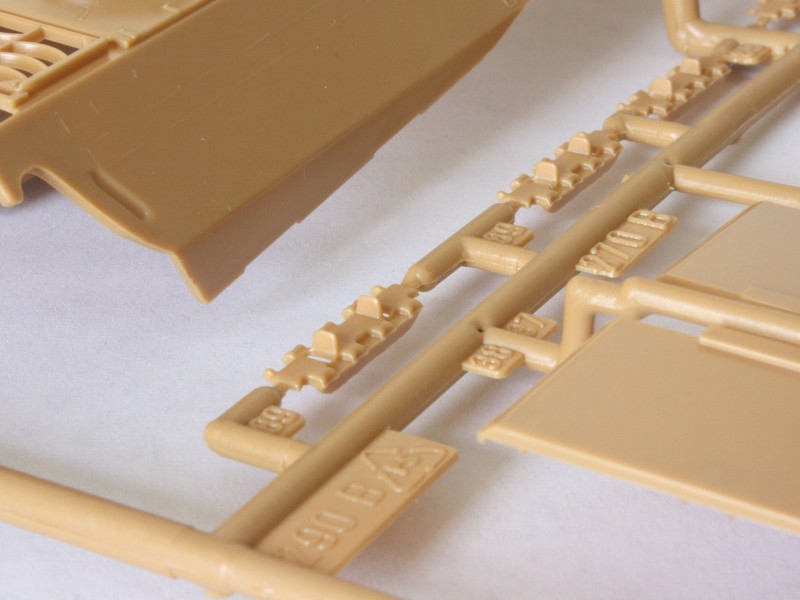
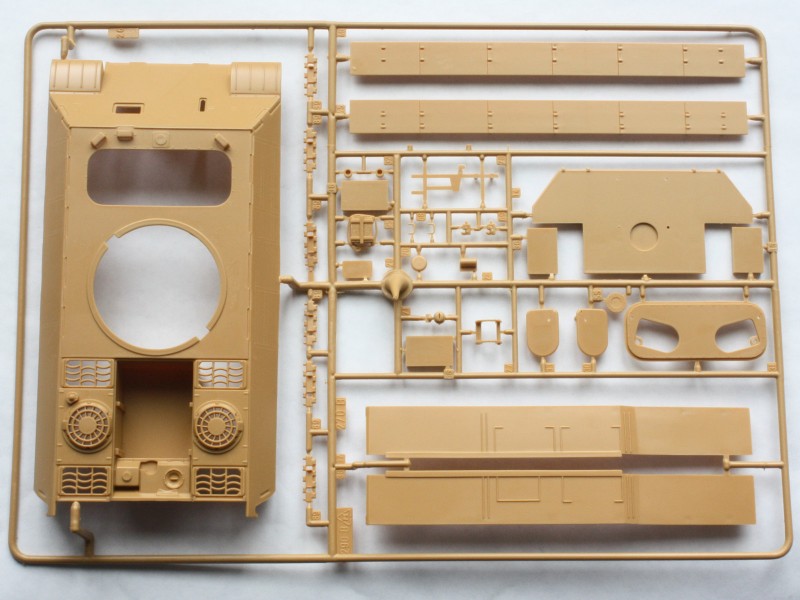
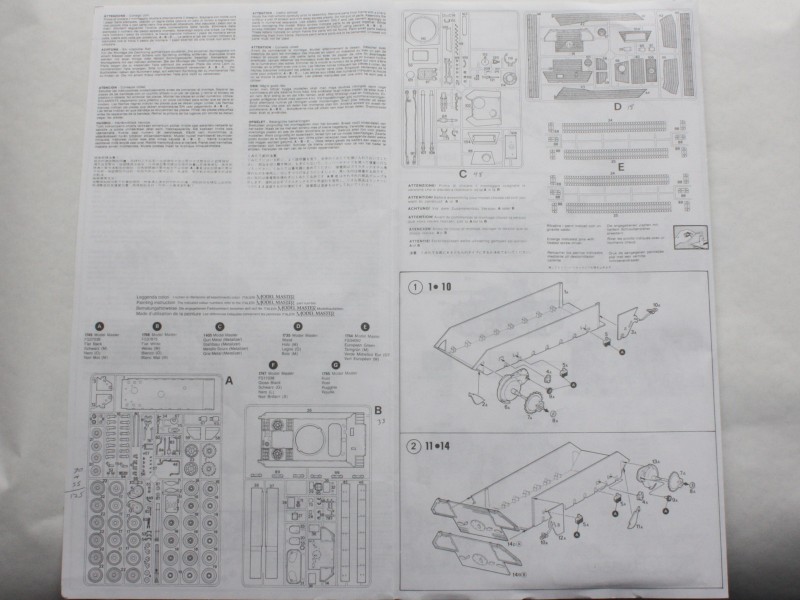
Inside the standard Italeri top-opening box are 191 parts in rather hard tan styrene on four sprues, 16 grey vinyl track parts on two sprues, and one decal sheet. Many of the sprues will be familiar to anyone who has built Italeris other Panther-based kits since the suspension parts are certainly common to all of them. Detail varies from crisp to soft, a typical problem with Italeri kits, but thankfully sink-holes are almost non-existent in my sample. There is a bit of flash to deal with, and there are some ejector-pin marks to address, but again not too many.
Review
Before I began to examine the parts breakdown I had a good look at overall dimensions. While there are no reviews of this kit on line, it does get oblique mentions in build articles and even a Jagdpanther review. Of the suggested flaws the most serious were that it was underscale and that the turret sits too far to the rear. So, I worked out a series of measurements based on a 1:48 scale set of drawings in George Bradford's German Late War Armored fighting Vehicles (thanks Frenchy!) and then checked them on 1:35 scale drawings from TANKPOWER 7, PzKpfw.V Panther vol.7 (Thanks Collin26!). Much to my surprise the kit seems to scale out reasonably well within the tolerance of my measuring devices (scale rules and Mk.I Eyeball) and the turret sits exactly where it should.
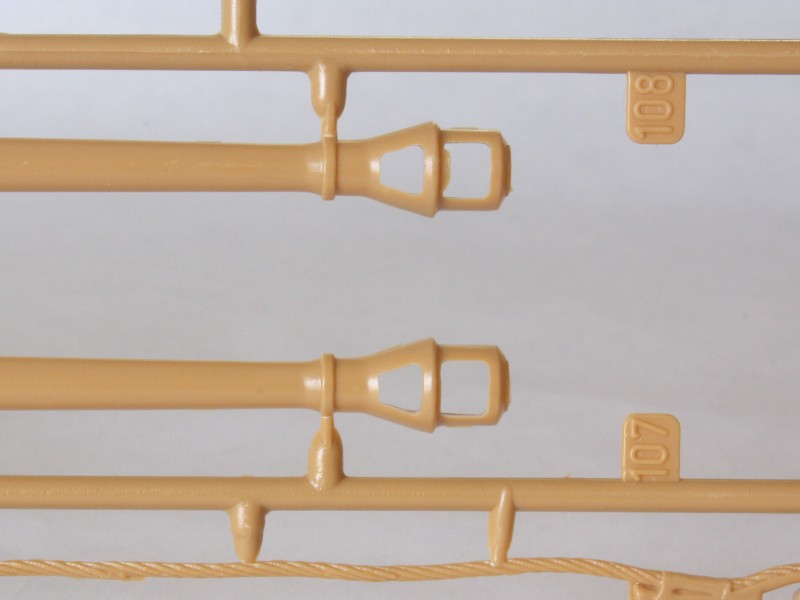
There is an issue regarding the zimmerit cladding that is supplied as appliqué parts since without them the kit is in theory slightly thin, but as these are less than a millimetre thick the dimensional difference is negligible. The real problem is that without the zimmerit the hull sides and glacis are way too smooth even for rolled plate. I also found reference to the lower hull in the Jagdpanther being better dimensionally because it came from the un-zimmed Panther D kit (#290), but on the hull/suspension sprue it clearly has tags for both the A and D kits so the hulls are all exactly the same. (Having built the Jagdpanther last year I recognised this sprue immediately!) In fact, there are only three measurable discrepancies I could find with the parts still on the sprues. First was the barrel length the drawings show the tube between the muzzle brake and mantlet to be 96mm in 1:35 scale, but the kit part is only 94mm long. The drawing jibes well with information posted in the Armor/AFV Forum by Gaston Marty who measured a real one back in June 2010,
Barrel Length
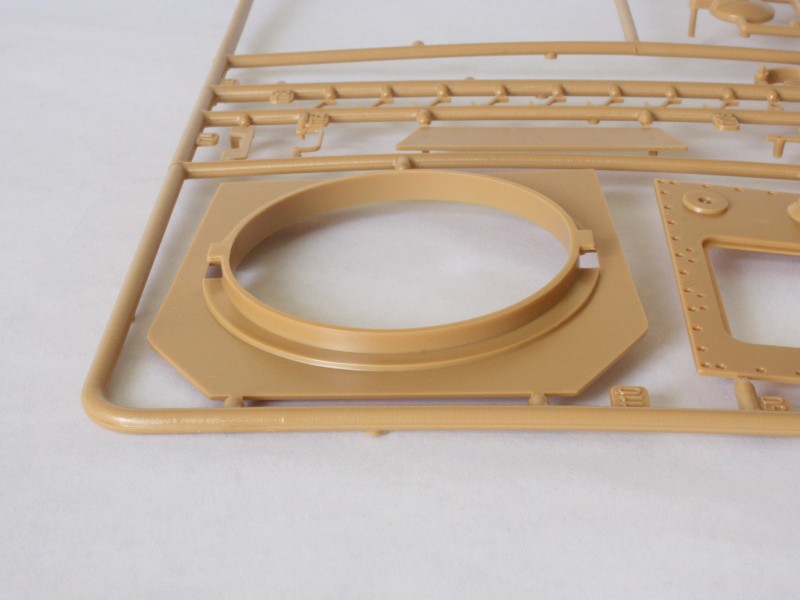
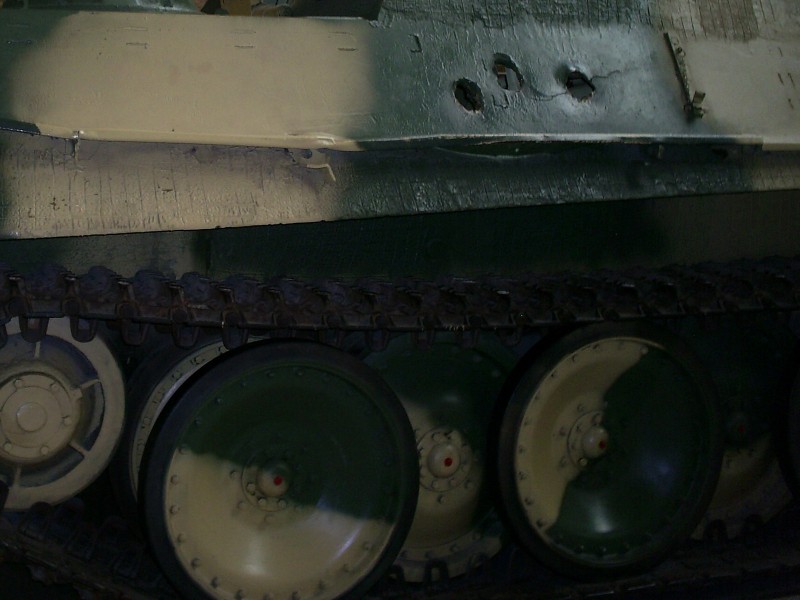
so it looks like a truly accurate barrel would need to be lengthened by 2mm just behind the muzzle brake if you think itd be visible enough to be worth the effort. Second is the diameter of the road wheels, which are about 1.4mm too big. The last issue is that the turret sits about 2mm too high because of moulded-on clearance rings under the turret and on the hull top the only real solution to these is a bit of carving.
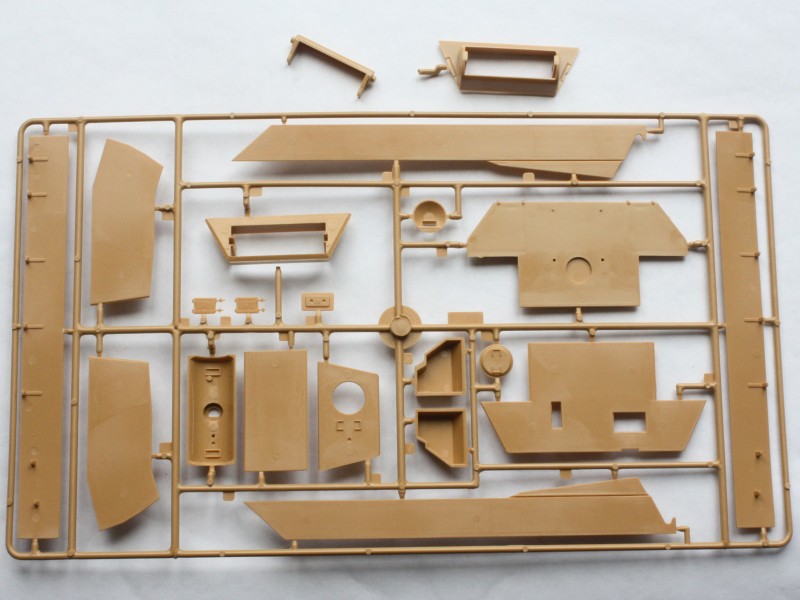
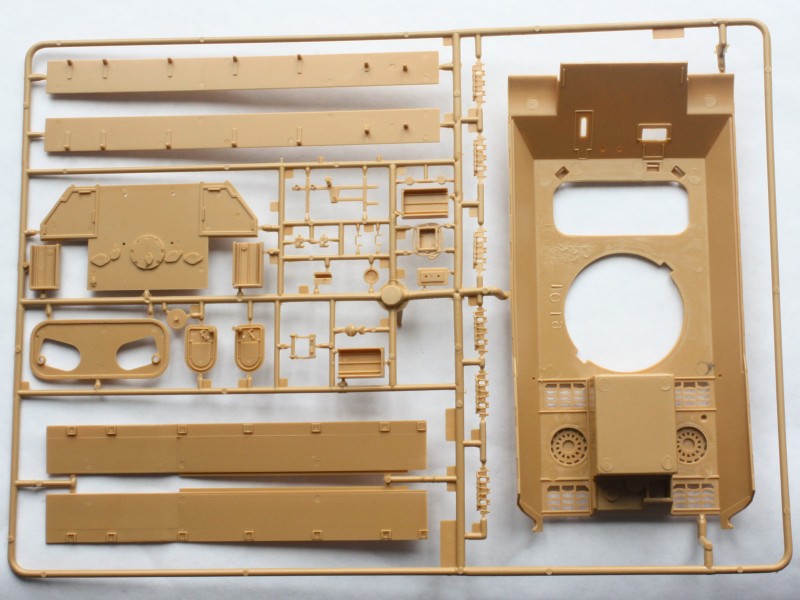
Starting at the bottom, the lower hull comes as a tub to which the rear plate and sponson floors are added. Here we get the first choice, as there are zimmed and un-zimmed rear plates to choose from. The rear ends of the sides are separate pieces so there is a vertical seam to fill. At the front the final drive covers are reasonable, and come with the little guide wheel just behind the drive sprocket. Unfortunately the lower lips of the sides behind the final drives are separate parts (to allow detailing) and these need to match up with parts added to the upper side because on the real thing these were just an extension of the side plate. This means a lot of filling and sanding to turn two parts into one
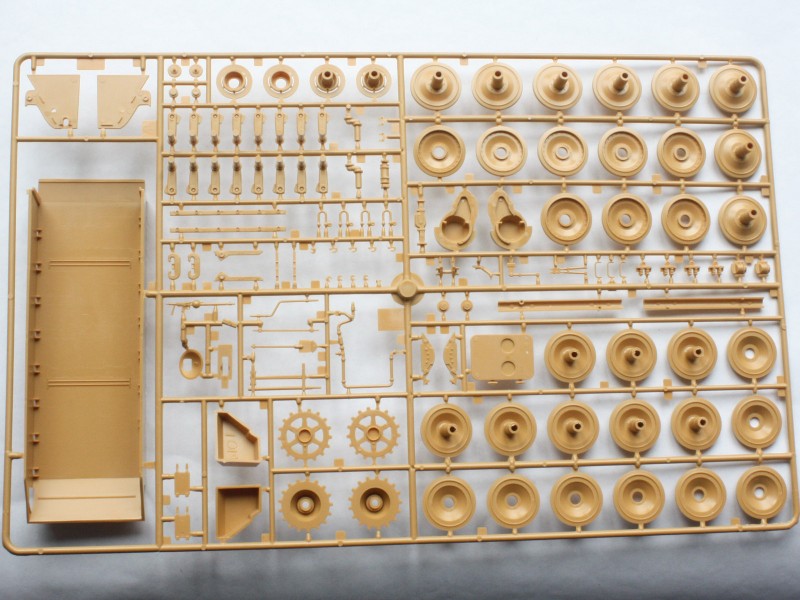
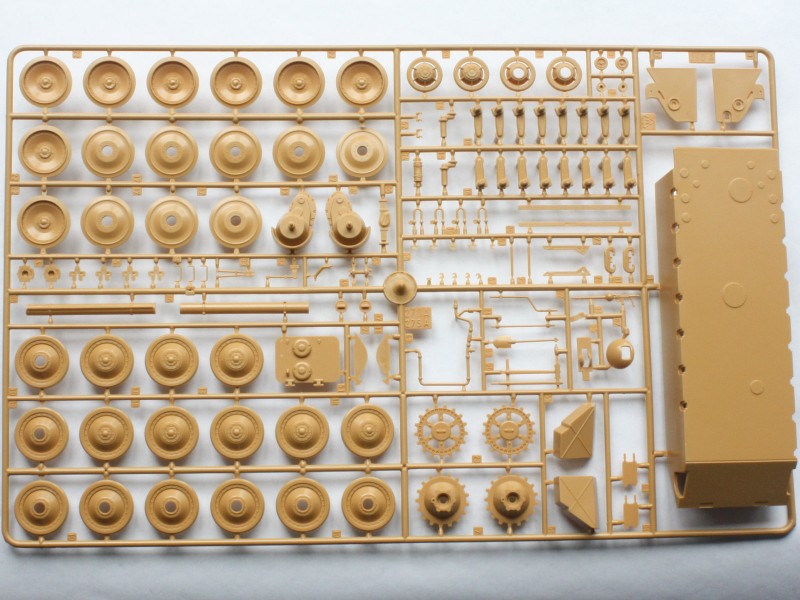
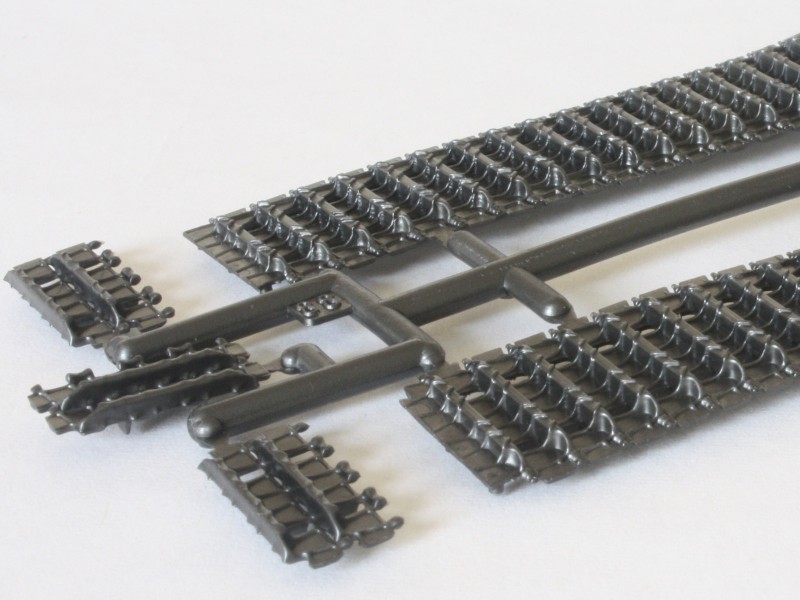
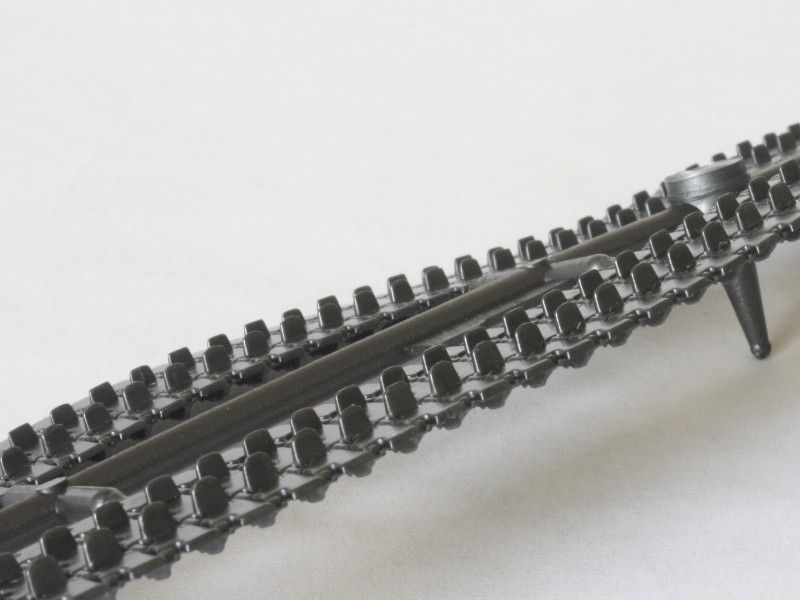
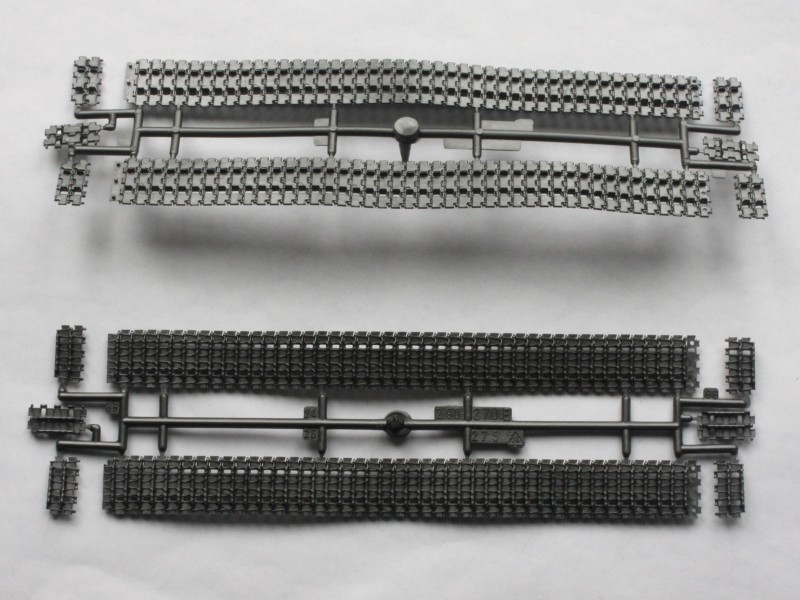
The suspension arms are all separate, and despite missing a large nut at the inboard end they are more than good enough unless you plan to model the tank upside down. They have shaped ends to get them aligned properly on the hull, but I found there was still some wiggle room, so be sure to set them against a straight-edge. With a little trimming of the ends they can be set at different angles to match uneven terrain. The road wheels come with the requisite 24 bolts around the rim, the eight mounting bolts near the centre, and eight bolts on the hub caps. The wheels as mentioned before are a tad too big, but this isnt really noticeable which is good because it is impossible to fix easily. What can be fixed is the very thin rubber on the outer wheels they lack the typical bulge near the rim. To fix it on my Jagdpanther I added a strip of Evergreen plastic around the rim and filed it to blend into the rubber. The rather harder problem is that the wheel hubs were about the only area of the kit to suffer sink-hole distortion. I think this will be a case for applying a bit of mud texturing to the running gear! Tracks come as vinyl strips, two per side, and are not bad although the guide horns are too small and solid rather than hollow. The real difficulty will be getting the classic sag to the upper run steel pins or tying it down are options. The spare links are also vinyl, so gluing them on will be tricky. In the past I have used Tamiyas individual Panther G links to replace the kit tracks, but these effectively double the price of the kit.
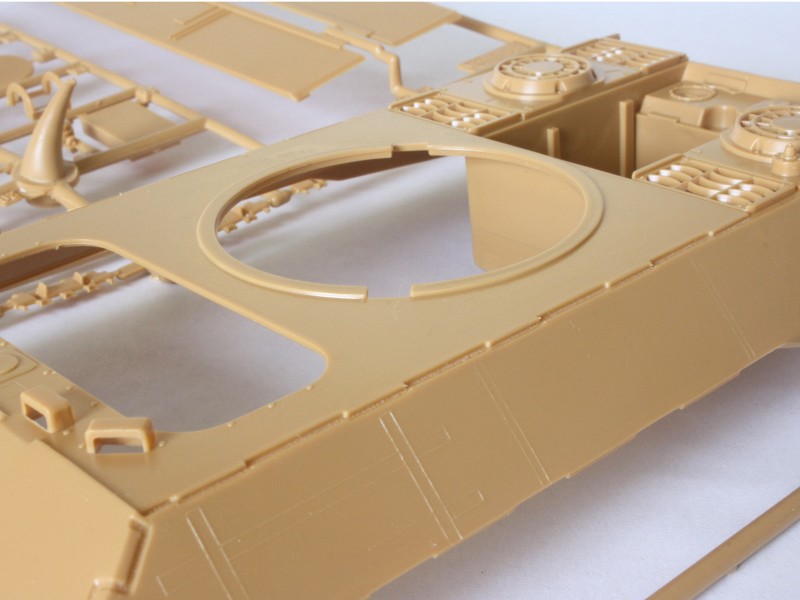
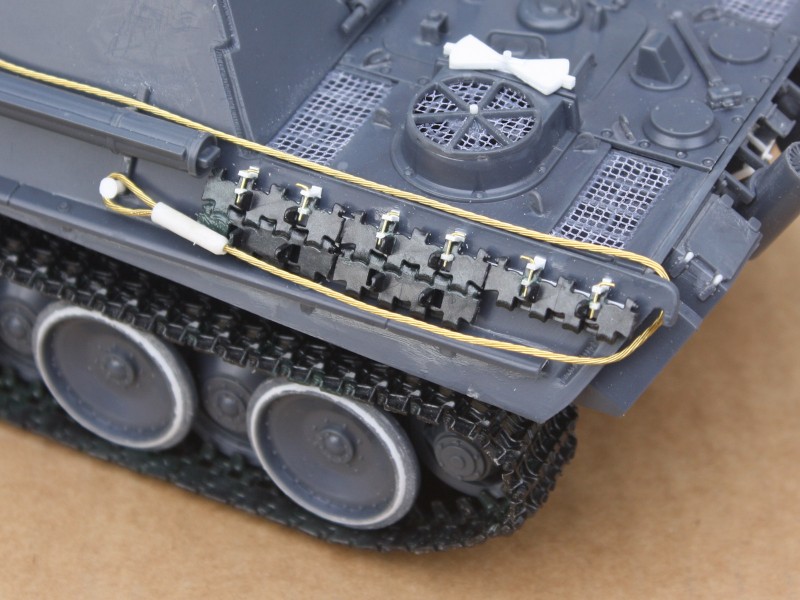
The upper hull has outlines for the tools moulded on as raised lines fortunately they will all be hidden by the zimmerit sheets. The tools themselves are adequate, but could use a little detailing on the clamps. The exception is the jack, which is rather lumpen. On the real thing the spare track holders are bent up from flat steel strips, with holes for locking pins. The kit parts are poor representations, and are best replaced with strip plastic bent and drilled out for brass wire pins. On the front I thought the drivers visor is a bit flat and should have beveled edges like the old Tamiya one, but a quick look at the Littlefield Panther restoration over on Toadmans Tank Pictures:
Toadmans Picture
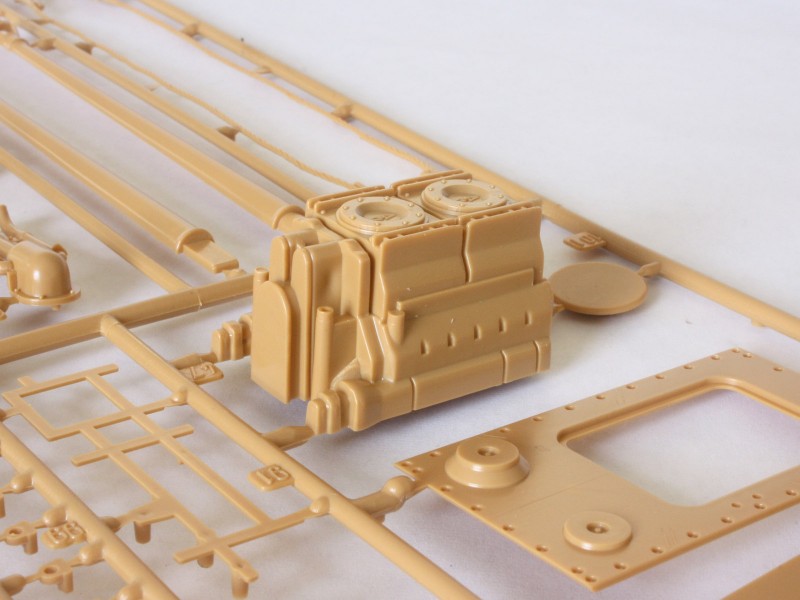
The picture showed that it indeed sits flat as modeled. Details on the engine deck are not bad, but it needs the screens over the fans and vents that Italeri forgot. (Ive used bridal veil for this in the past.) They did, however, provide an engine and a removable cover plate, not to mention shadow boxes to fill the space under the vents. Up front the drivers hatches look good, and are set in a separate plate just like the real thing. In front of them the periscope guards are a bit thick, and there are no periscopes to fill them, so a little creative plastic will be needed. Still, theres a reasonable gun travel lock.
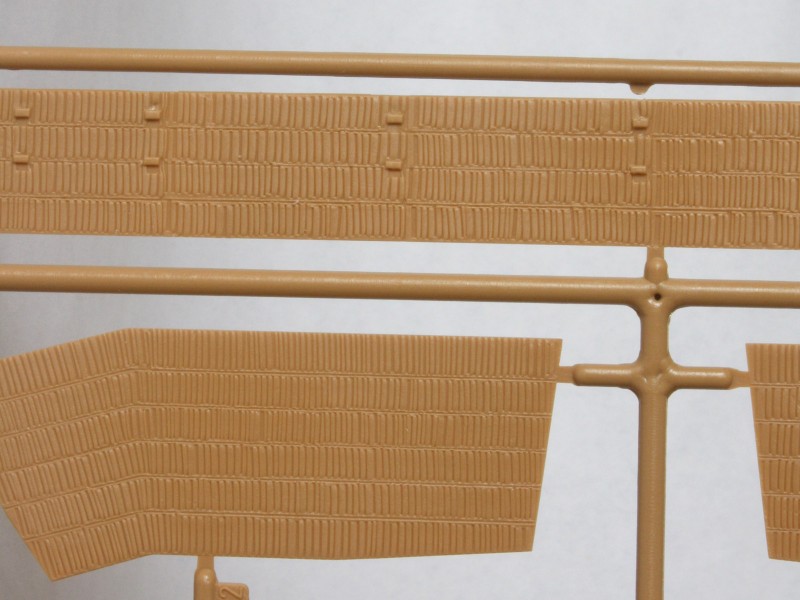
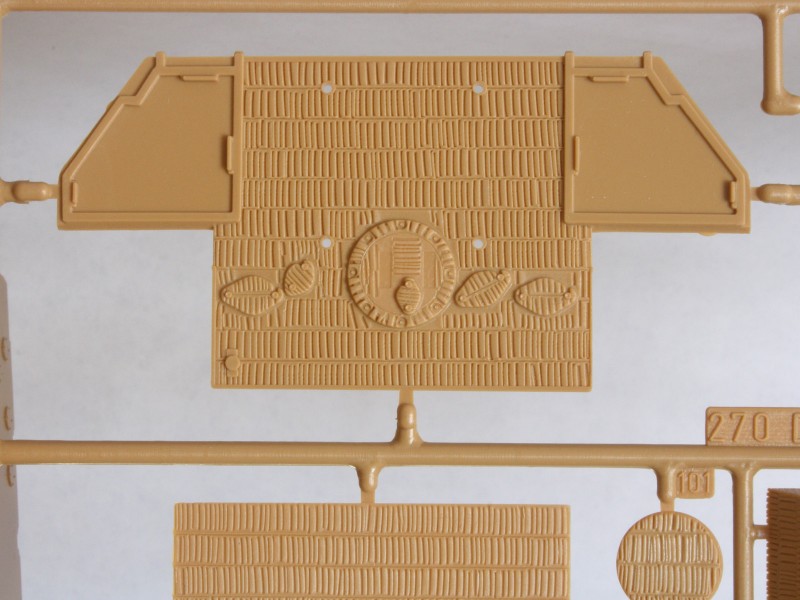
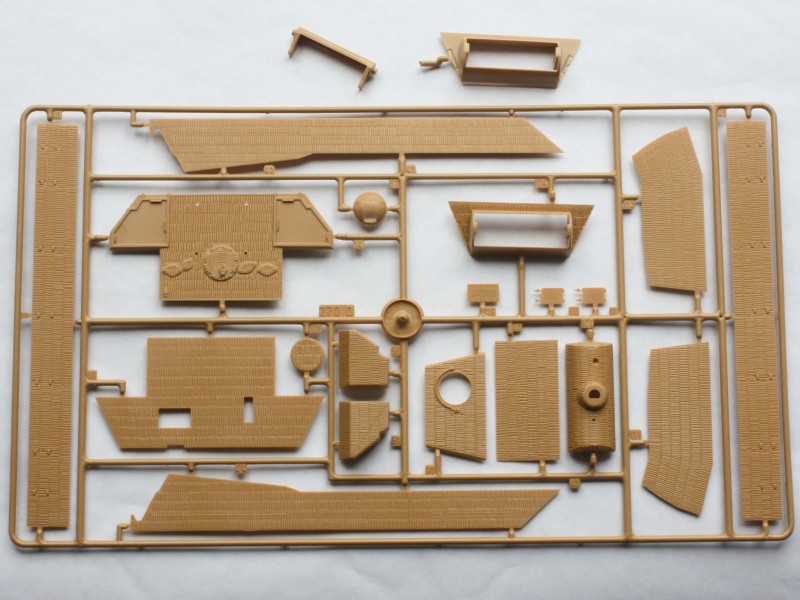
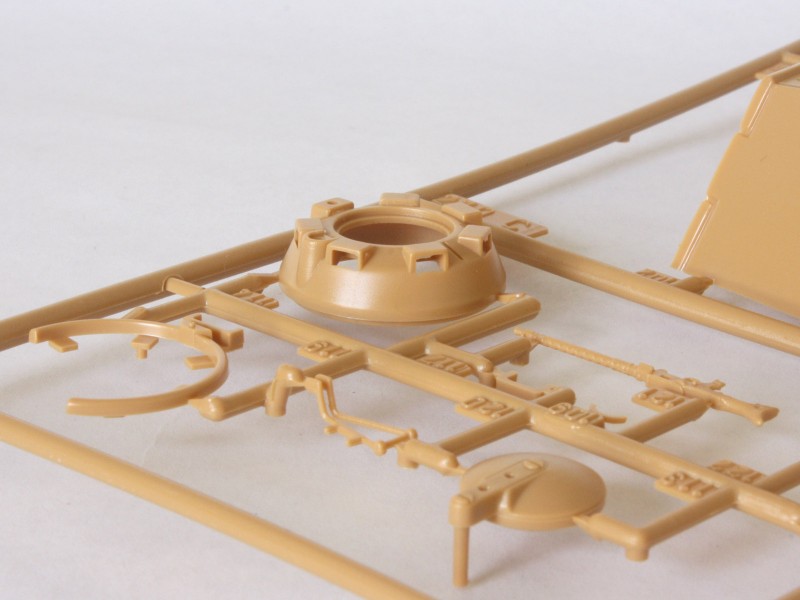
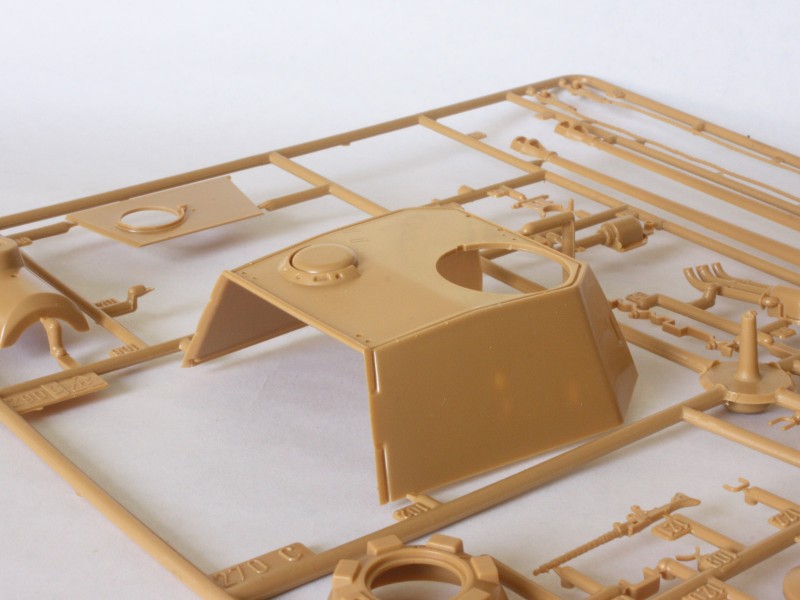
Italeri cast the turret with separate zimmerit sides that need to be bent to shape, and the kit includes zimmed replacements for the front and rear plates. The cupola is a bit smooth for a cast item, and lacks periscopes under the hoods. The ring for the machine gun is a bit thick, with the sliding bracket moulded on. While most of the turret details are reasonable, there is a separate cover for a periscope that really needs to be thinned down. Naturally it has no periscope under it, but as there is no gaping hole in the roof you get the choice to add one or leave it empty. There is a choice of mantlets (zimmed or smooth) and a typical two-piece gun tube that needs careful gluing and sanding to remove the seams. Its muzzle brake is part of the tube, and it includes a spurious raised ring where the real thing had a flush ring detectable only by the joints either side. Id lightly score along the two sides of this ring (to cut slight grooves) before filing it flush. A replacement metal barrel would help, but again that would make the kit a poor bargain. It could also hide under a canvas cover if the tank isnt modelled in combat
While Italeri provides a full set of zimmerit, it looks a bit perfect. Replacement sets of resin zimmerit are available, but again the cost is hard to justify. Brave folk can always create their own zimmerit from putty, of course, but Ill probably just damage the plastic stuff to add character. One thing I learned from the zimmerit in Italeris Tiger I kit is that it can benefit from a little gentle sanding on the back to thin it out naturally this does not apply to wholesale replacement parts like the hull rear or the mantlet!
Decals
Markings are included for two tanks one from 505th Panzer Regiment in Italy, 1944, and the other from the Grossdeutschland Division on the eastern front in 1944.
Conclusion
Over all this kit should build up fairly well for an early 1990s model, but there are areas where replacement aftermarket goodies would be useful to bring the detail up to modern standards. However, if I throw tracks, resin zimmerit, and a barrel at it the model would cost as much as its rather more complete Dragon rival without delivering the same level of crisp detail, so if I had that much money and really wanted a perfect Panther Id go for the Dragon kit. But as I have it already Ill put in a little extra effort to cope with the soft details and make a respectable model from this old Italeri kit at a third of the price.


Comments