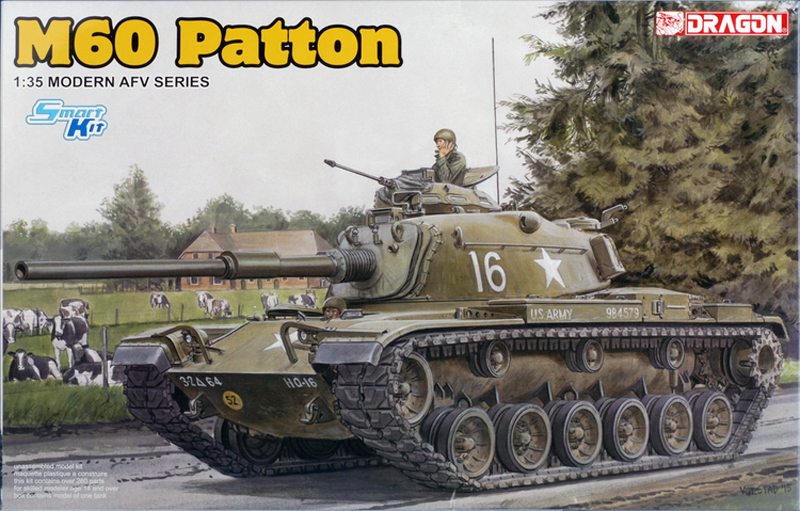
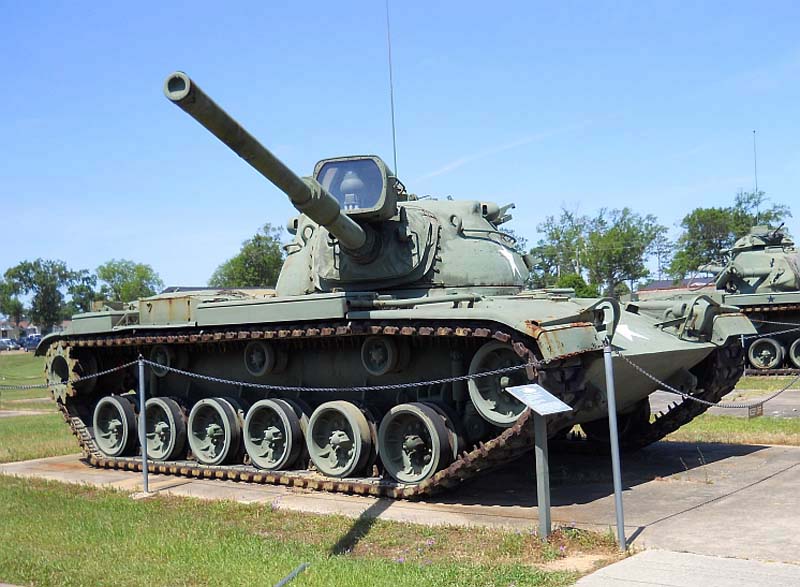
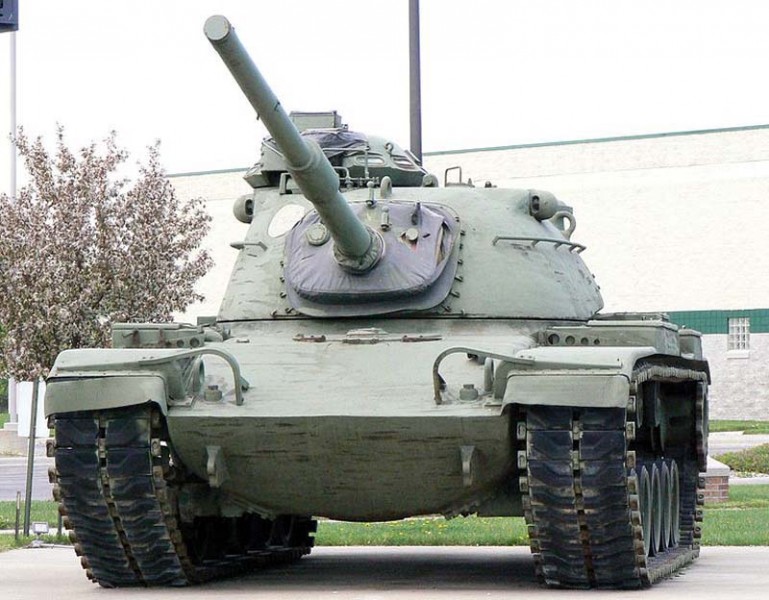
In 1957, the US began development of a new tank to match the Soviet Unions 100mm gunned T-54A medium tank which was first examined by the west during the Hungarian Revolution of 1956. Fulfilling this requirement with an interim tank resulted in the M60, which largely resembled the M48 it was based on, but had significant differences. The M60 mounted a 105 mm M68 main gun with the bore evacuator mounted towards the middle of the tube, compared with the M48's 90 mm M41, which mounted the bore evacuator towards the end of the tube right after its T-shaped muzzle brake. It also had a hull with a straight front slope whereas the M48's hull was rounded, had three support rollers per side to the M48's five, and had road wheels constructed from aluminum rather than steel, although the M48 steel wheels were often used as spare parts. The turret was a modified M48 turret to accept the larger 105mm gun with a squared-off back portion as opposed to the M48s rounded turret rear. This was due to the new M60 turret (which appeared on the M60A1) was not yet ready for use.
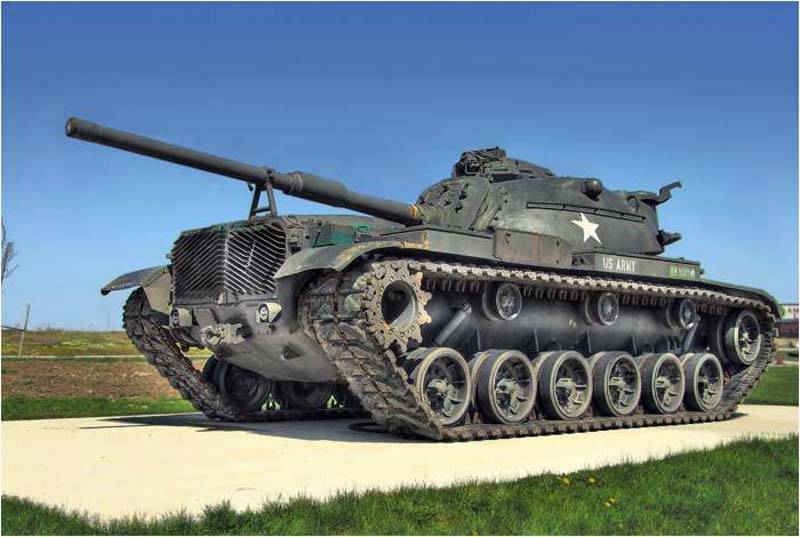
Originally designated the XM60, the new vehicle was put into production in 1959, standardized as the 105 mm Gun Full Tracked Combat Tank M60 on 16 March 1959, and entered service in 1960. The improved design incorporated a Continental V-12 750 hp air-cooled, AVDS-1790-2 diesel engine, extending operational range to over 300 miles while reducing both refuelling and servicing. Power was transmitted through a CD-850-6 cross drive transmission, a combined transmission, differential, steering, and braking unit. The M60 was first fielded to units of the US Army in Germany to counter the Soviet threat as part of the Cold War. It also served in many foreign armies to include Israel, and Iran.
Whats in the Box?
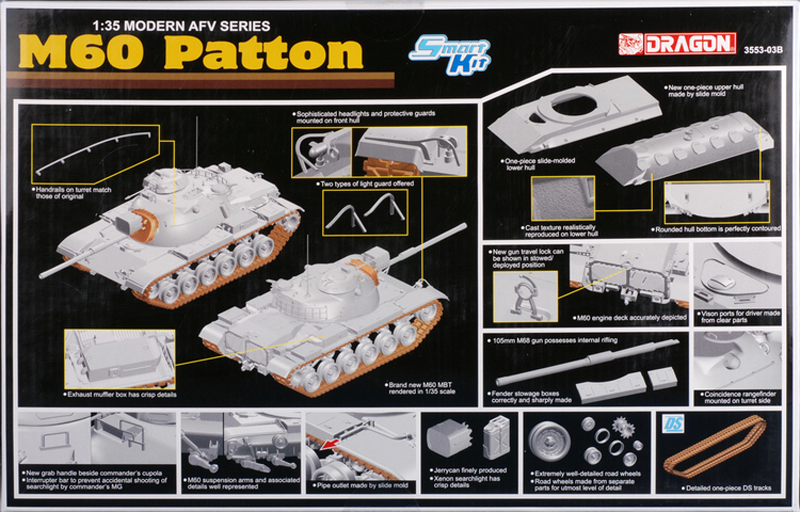
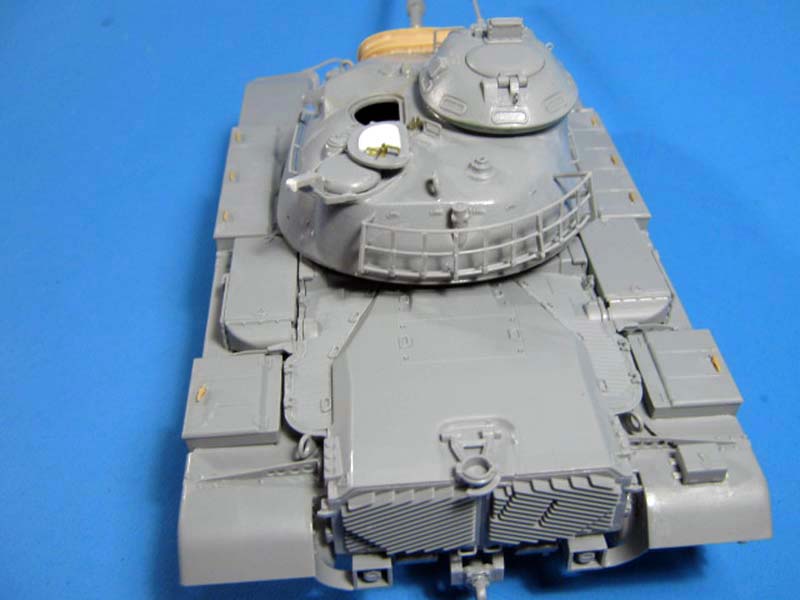
Dragon Models continues their Patton tank line with this kit of an early M60 tank. Previous to this release, the only way you could get an M60 was by using one of the many M60 kits (Tamiya, Academy, or Esci) and an expensive resin conversion set. This kit fills a gap with what looks to be a great model. Upon opening the box, you will not be disappointed with this kit.
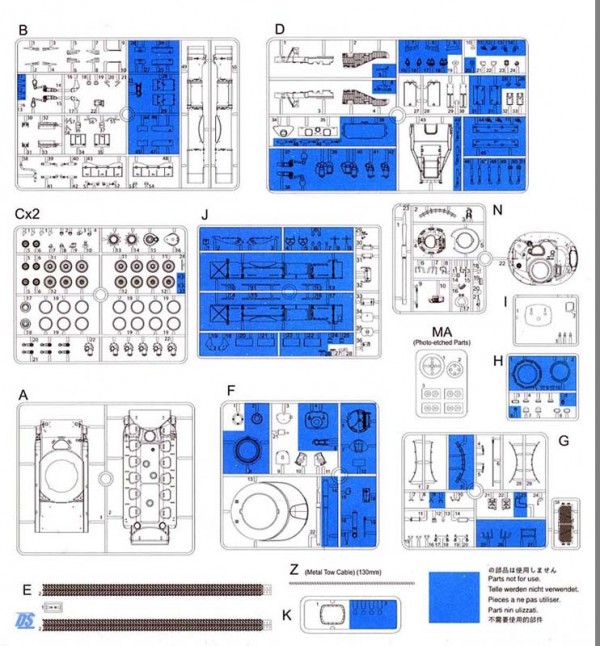
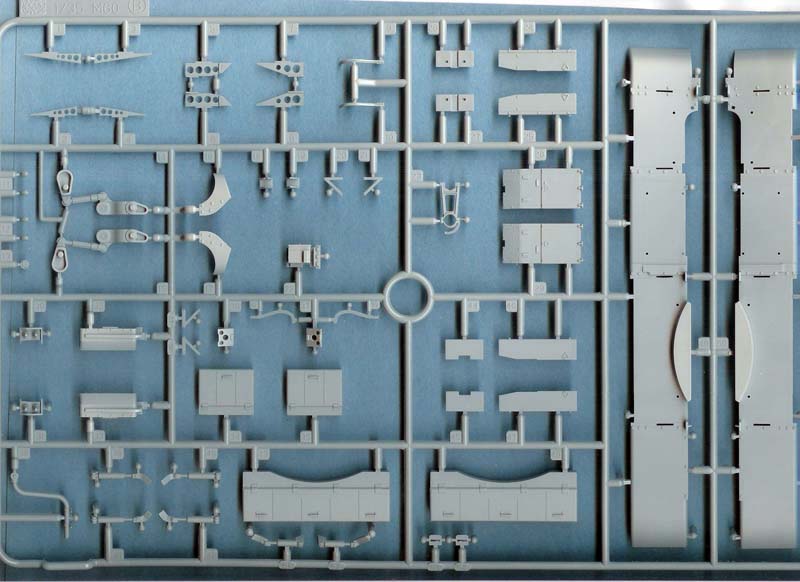
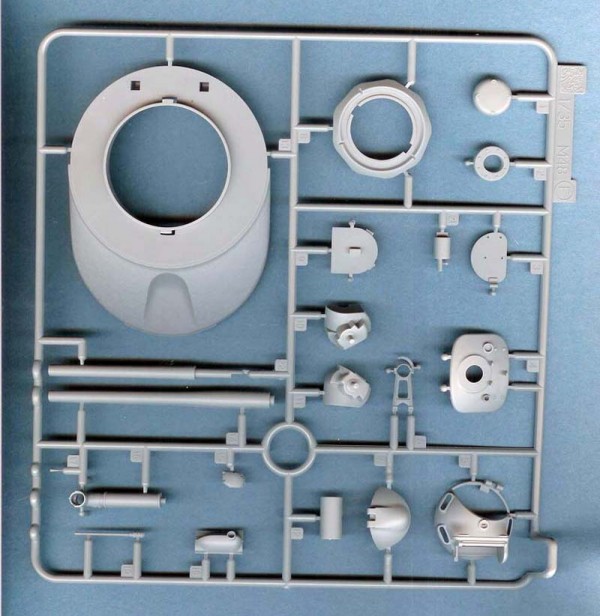
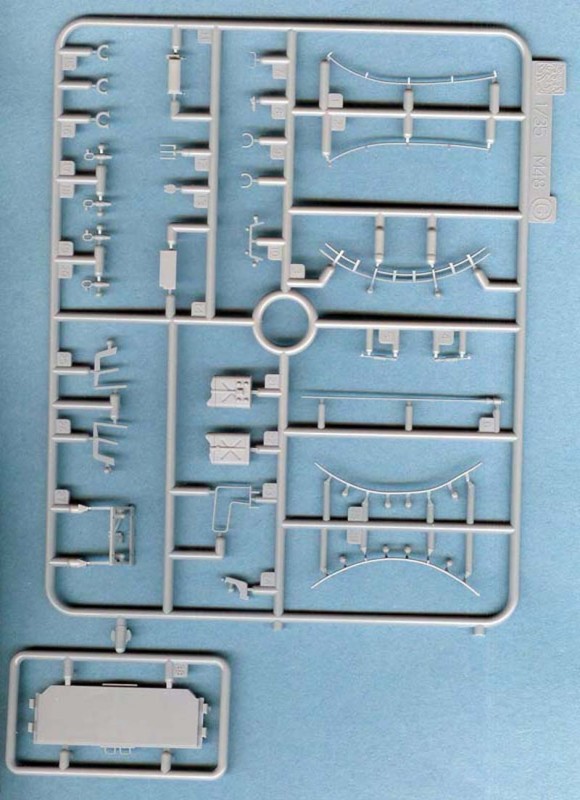
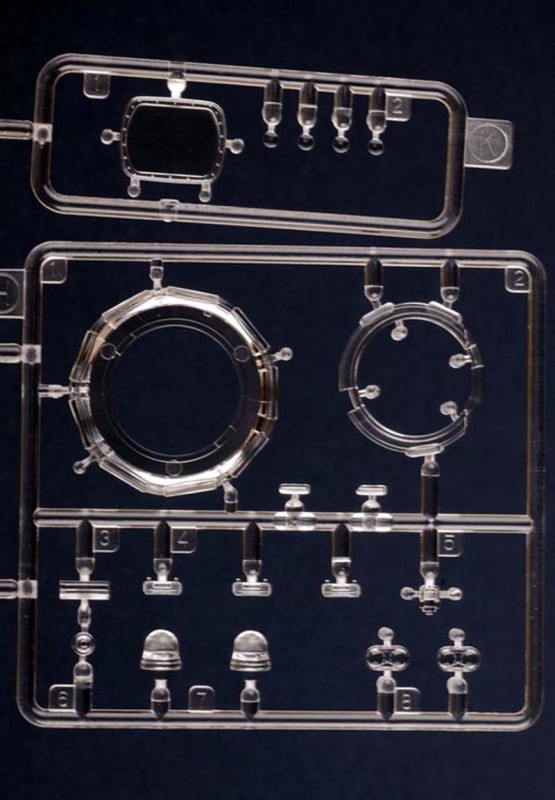
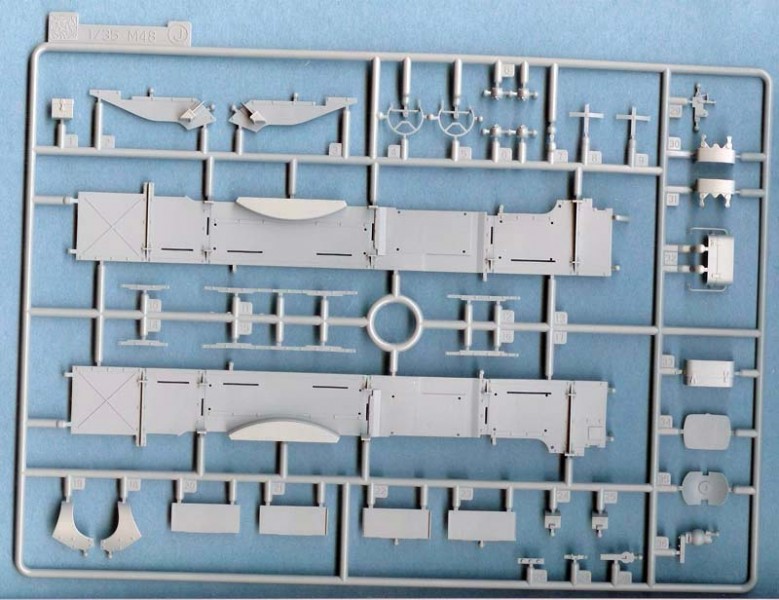
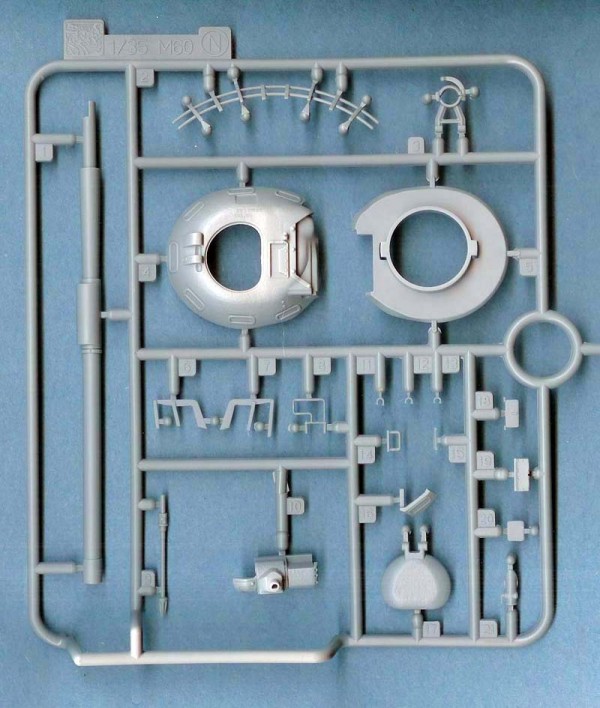
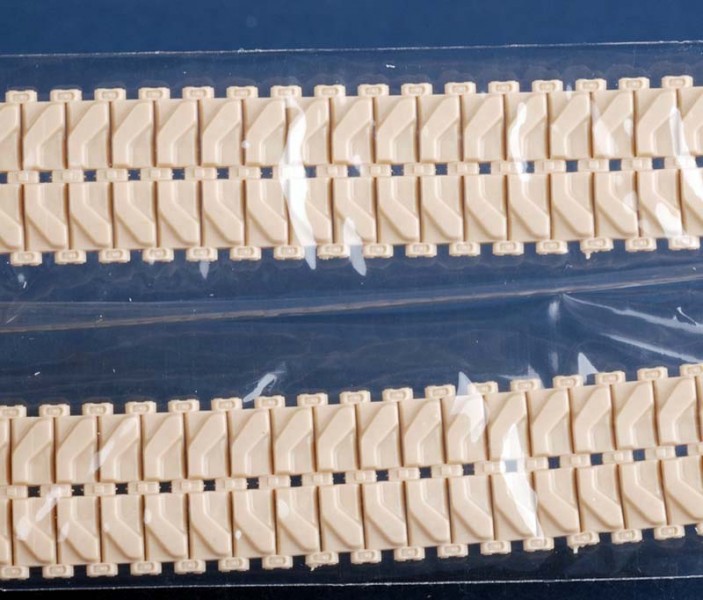
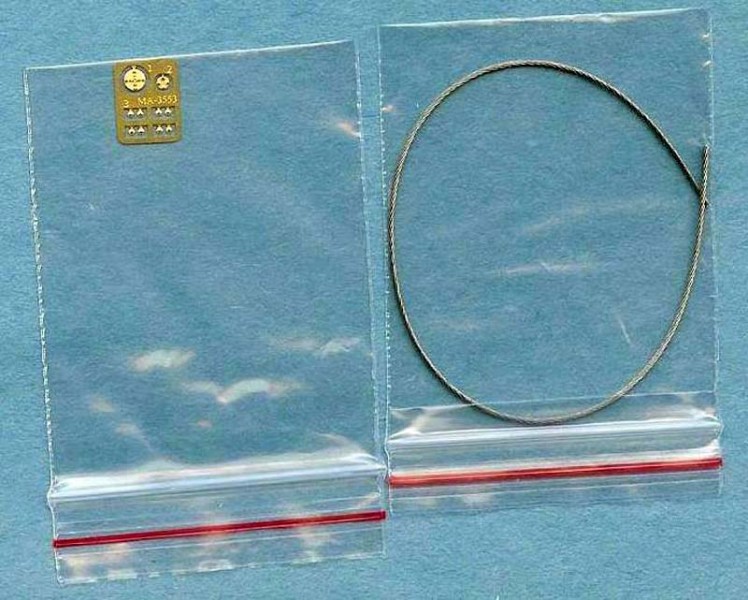
The kit comes on nine sprues of gray plastic with no visible flash. It also includes a set of T97 tracks in DS styrene, a length of braided wire for the tow cables, a set of 2 poly caps, a sprue of DS styrene parts for the mantlet dust cover, two clear parts sprues, a small sheet of PE parts, and a decal sheet which includes markings for two US Army tanks from 2-64 AR, 3 AD, Germany, 1964. The instruction sheet is the typical Dragon Models sheet with blue and black line drawings of the kit which are crowded, but readable. They have the numbers clearly shown with lines for easy placement of parts. The instructions cover the build in 17 steps.
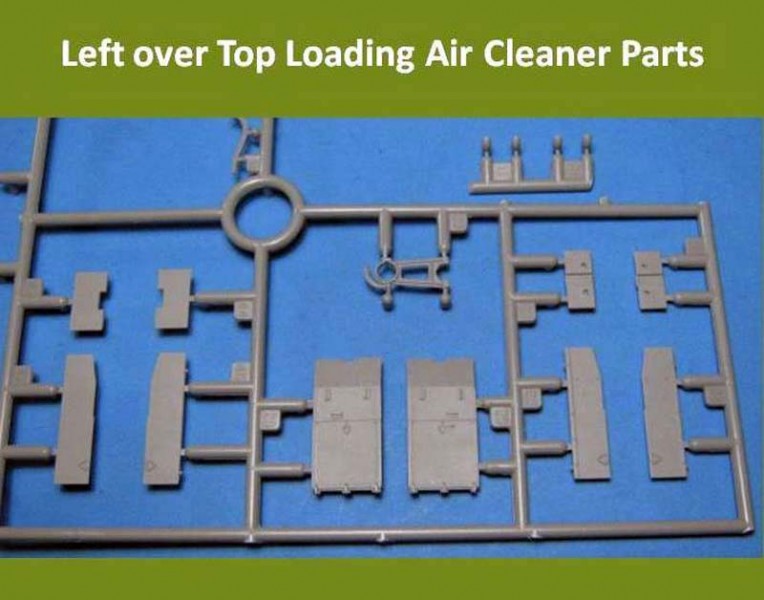
Dragon Models continues with their practice of adding, deleting, or swapping sprues from other kits to build different versions of their models. The extra (not used) parts left on the sprues are plentiful. You will have almost two complete sprues from their M48A3 kit left over. Also it appears they are planning later M60 versions with the parts left on the sprues. There are parts for a complete set of the later, top-loading air cleaners, the two added shock absorbers, additional headlight guards, and added tie-down points, which are all parts needed for an M60A1or an M60A3s. Hopefully more kits are to come.
The Kit Good and Bad
When the M60 kit came out, I had a discussion on another forum with our own Pawel Vodnik Krupowicz where we discussed the kit and its attributes. Pawel has extra insight in this area since he assisted Dragon Models in the design of the kit and gave them pointers on how to make it accurately. As you will see below, they listened to some of his ideas, and not others. Below is from Pawel:
So let's start with good things
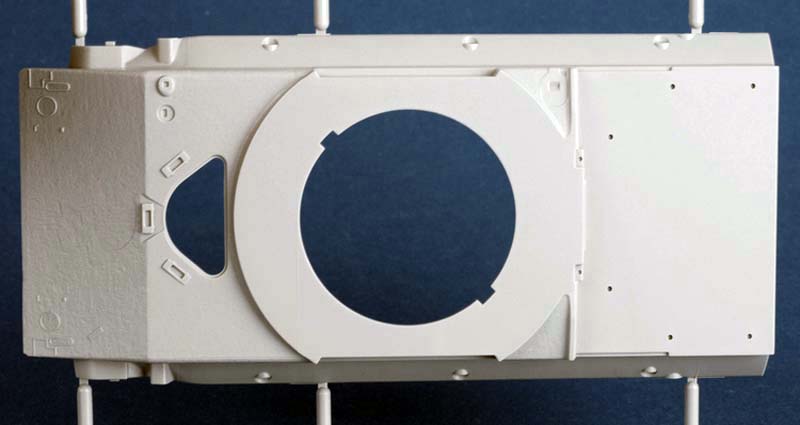
1. The hull is now longer than the M60A2 kit hull, which was very short. The slope of the hull front is closer to the correct angle. It still seems to be a bit (about 2mms) too short, but it is not that noticeable anymore. To be honest I don't know why the hull is still slightly too short. I gave Dragon Models the front hull armor angles from the Hunnicutt "Patton" book and they were supposed to use them to correct the hull. Either those angles in the book are wrong (I doubt it), or Dragon Models designer made a mistake. Or maybe the Dragon upper hull is not tall enough - if it is too low, then the correct angle would still give too short of a slope.
2. The distances between the road wheels are now equal, as they should be. The road wheels are a little bit too close to each other (so the whole suspension is just slightly "compressed"), but as the hull is a bit too short, it should all look proportionally correct.
3. The fuel filler cap on the left side of the hull has been eliminated.
4. The front fenders are now the correct width. The front hull is wider than it was in M60A2 kit. It is still slightly too narrow (less than 2mms), but it should look fine now with correctly sized fenders.
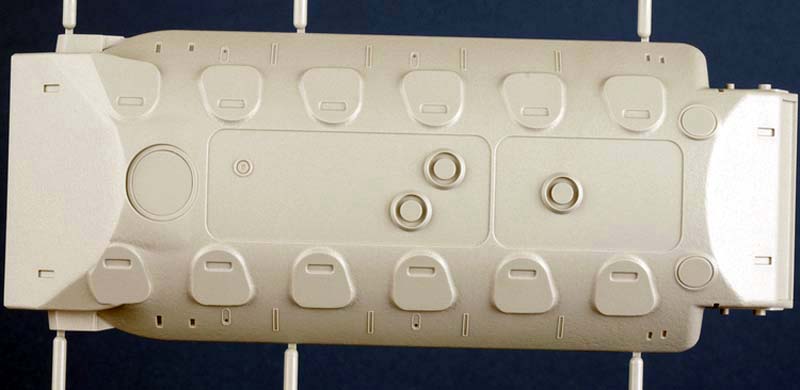
5. The escape hatch is now oval in shape. Other details on the hull bottom are also more correct now.
6. The rear hull doors are now correct for an M60.
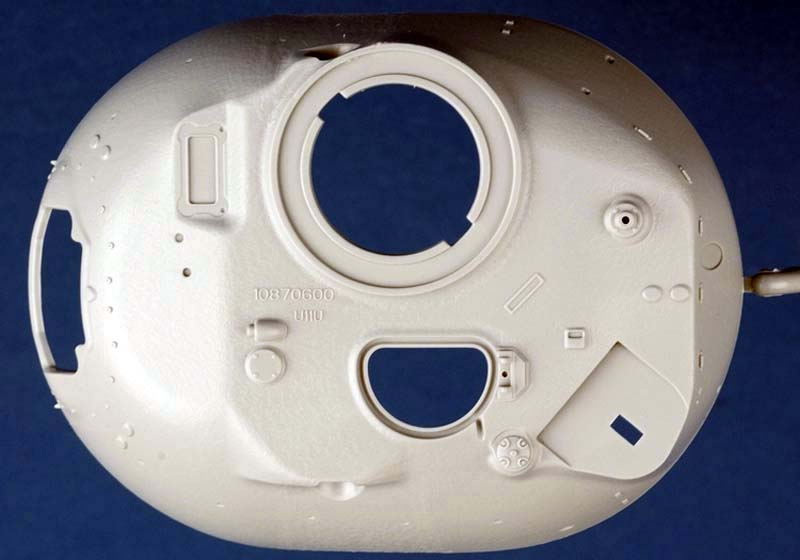
7. The turret shell is pretty good. Not perfect, but good. Only the right rear "corner" of the bustle should be more "pointy". Dragon made it a bit too rounded. A bit of epoxy putty and it can be improved.
And now bad things (other than those already mentioned above)
1. The shape of the lower hull front, around idler wheels and in front of first road wheel is quite bad. It probably can be corrected, but it would require a lot of filing and sanding. The idler axle mounts on the hull are completely wrong shape (copied from M48 hull).
2. Return roller positions are not quite correct. It should be easy to correct.
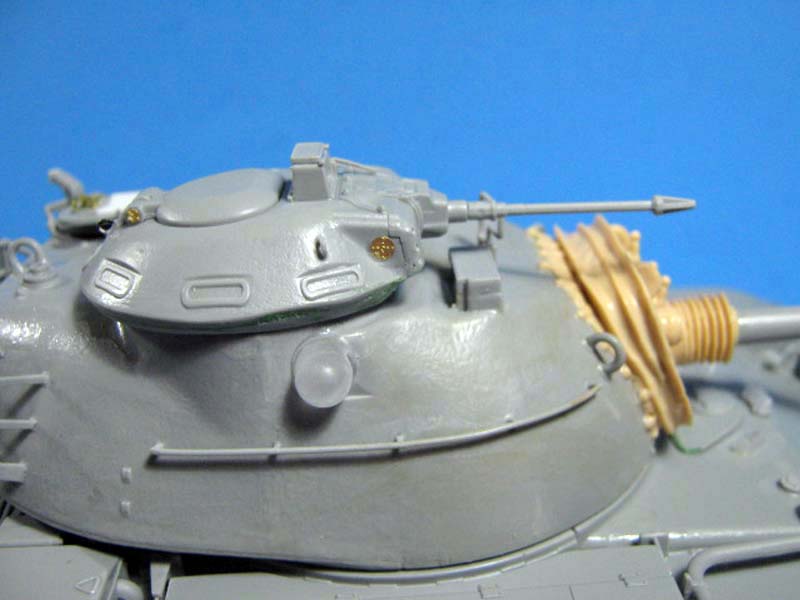
3. The gun barrel is just a piece of junk... It is correct in length, but way too thin. Actually it looks like the part in front of the bore evacuator is more or less correct, but the evacuator itself and the barrel part between it and the mantlet are MUCH too thin.
4. The DS mantlet cover is too large - it is the same part as was used in their M48 kits.
5. The commander's cupola is undersized and the shape seems a bit off too. No canvas cover is provided for the front and details of the cupola front don't look entirely correct. The M85 gun barrel is wrong, with awful too large flash hider.
6. The driver's hatch is still an M48 style. The M60 style hatch and its sliding mechanism are not included. But Dragon Models removed the pivot hole for the M48 hatch and a tab on which it was located. So now the hatch can only be attached closed. Apparently Dragon Models designers started modifications to correct the hatch, but abandoned them quickly for some reason. Unfortunately even if you close the hatch it still doesn't look right, as the M60 hatch should be symmetrical and the M48 hatch part and opening for it in the hull aren't.
7. The AN/VSS-1 searchlight is still too small, as it was in M48A3 kit.
So now we have the first M60 "slick" in plastic. And let's hope it's not the last. A decent looking model can be built from this kit, but replacing the gun barrel is a must. I also suggest replacing the gun mantlet cover and commander's cupola. Luckily all these parts are available from aftermarket manufacturers, although they are designed for other M60 (or M48 in the case of the mantlet cover) kits, so may require some adjustments to fit. Correcting the shape of the lower hull front and turret rear are probably not necessary, but if one decides to invest in aftermarket for this kit, then these improvements are worth the effort too IMHO.
Thanks Pawel for the insight and recommendations.
The Build
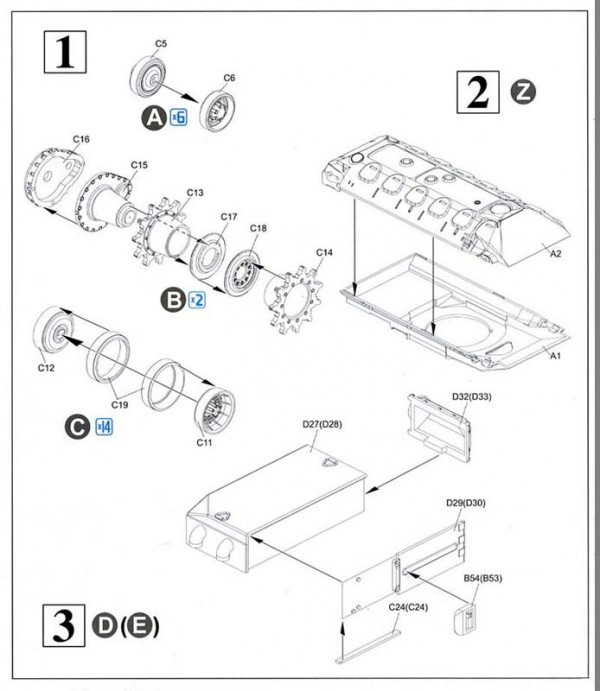
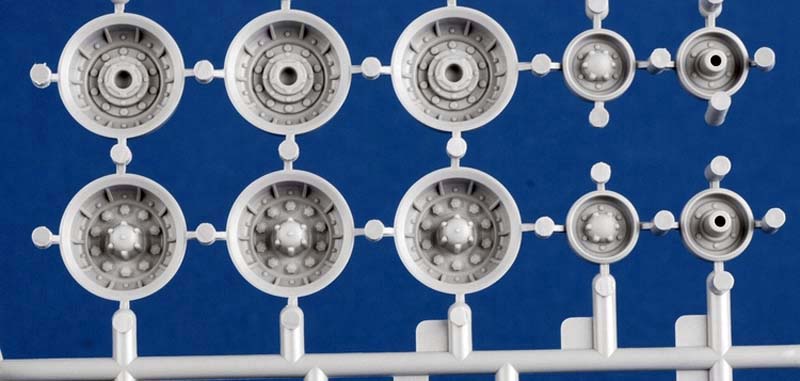
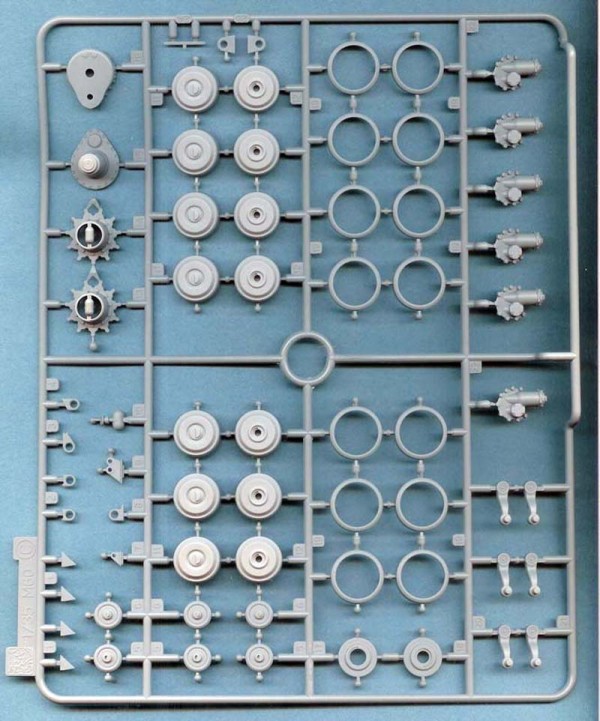
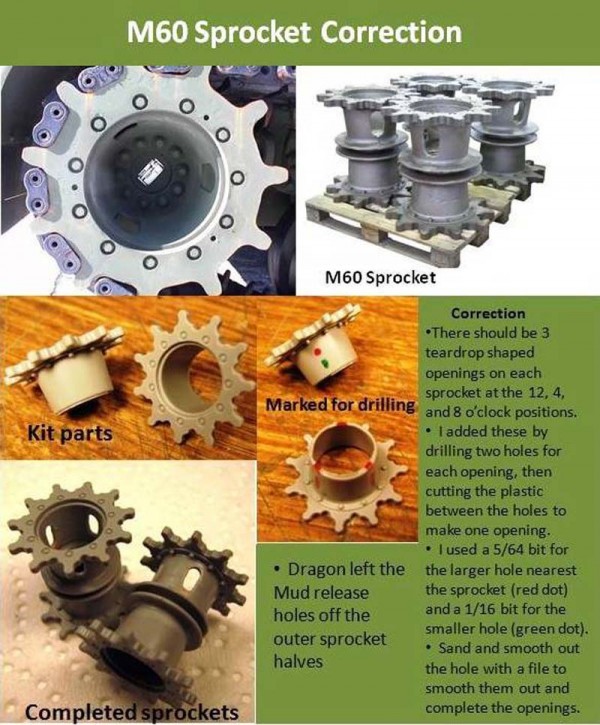
The build starts in step 1 with the familiar format of the building of the road wheels and rear sprockets. The road wheels are nicely done as two separate parts so that the proper undercut of the face is well represented. Also, the whole rubber tire portion is molded as a separate piece so they can be painted separately and joined after painting to give very clean lines. This is a nice feature. The faces of the sprockets are also nicely done, however again (as in their M48s) Dragon Models left off the three teardrop-shaped mud release holes in the sides of the outside halves (C14). These holes should be at the 12, 4, and 8 oclock positions. I added them by using a 5/32 bit for the larger end nearest the sprocket and a 1/16 bit for the smaller end. I then connect the two holes and file the opening smooth with a small file.
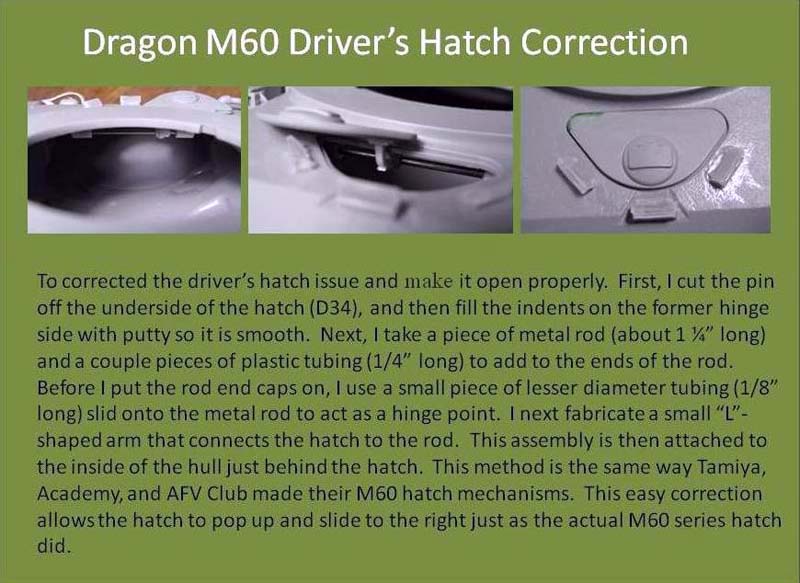
Step 2 continues by joining the upper and lower hulls together. I like this assembly sequence so the hull is solid when you start adding all the fiddly suspension pieces and other parts to it. In prior kits, many had you add all the details and then join the two hull parts. Before closing up the hull, I corrected the drivers hatch issue and made it open properly. First, I cut the pin off the underside of the hatch (D34), and then fill the indents on the former hinge side with putty so it is smooth. Next, I take a piece of metal rod (about 1 ¼ long) and a couple pieces of plastic tubing (1/4 long) to add to the ends of the rod. Before I put the rod end caps on, I use a small piece of lesser diameter tubing (1/8 long) slid onto the metal rod to act as a hinge point. I next fabricate a small L-shaped arm that connects the hatch to the rod. This assembly is then attached to the inside of the hull just behind the hatch. This method is the same way Tamiya, Academy, and AFV Club made their M60 hatch mechanisms. This easy correction allows the hatch to pop up and slide to the right just as the actual M60 series hatch did.
Step 3 builds the very nice side loading air cleaners. They go together well and are very nicely detailed.
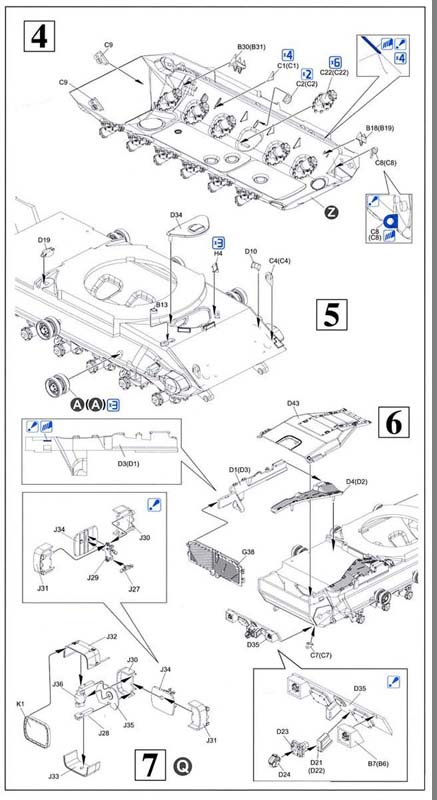
Step 4 begins the lower suspension construction. The suspension is very detailed and looks great. The separate bump stops and road wheel arm mount housings really bring up the level of detail. There are also hints at other M60 variants here. You are instructed to cut off four tabs along the centerline of the hull sides that are for large tie-down loops seen on later M60s. There is also a small tie-down ring at the rear of the hull near the sprocket that you are told to cut off and use the mount to fill a slot in the hull with. I left the ring as I have seen many M60s that had it. There are a lot of parts here, so take your time. The parts go together well and I had no issues with assembly or alignment.
Step 5 begins the upper hull. Here you add the drivers hatch (if you didnt fix it and attach it earlier) and some smaller details like the drivers periscopes and front lift rings. You also add 3 return rollers per side. These items went on without any problems.
Step 6 moves to the rear of the hull with the addition of the engine covers with louvered rear plate (which is an all-new part (G38) that correctly deletes the armored bars from the M48A3 Mod B rear plate), the taillights on the lower rear plate, and the lower rear plate itself with a very nice tow pintle parts attached to it. There are also a couple small tabs that need to be cut off the engine compartment side panels (D1, D3) to allow the fenders to fit properly. Also of note here, the taillight parts are mislabeled as B6 and B7. In actuality, they are B36 and B37.
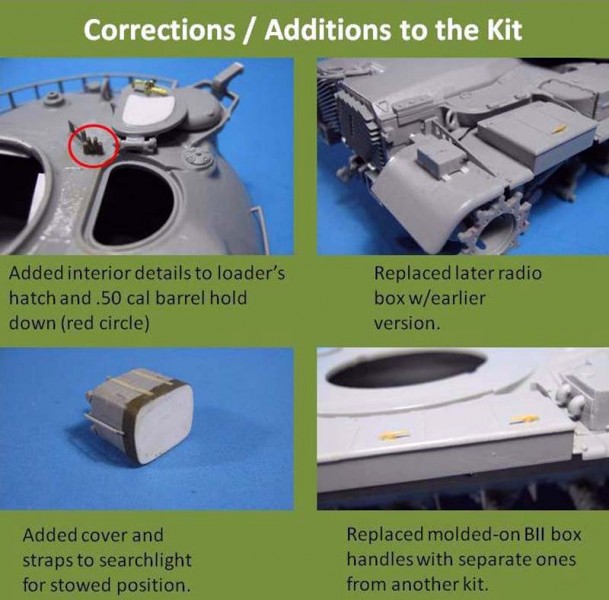
Step 7 has you build the searchlight. It looks very nice and goes together well. I added a cover to mine and will hang it off the storage bracket on the left rear of the turret.
Step 8 completes the suspension by adding the road wheel arms, shocks, and rear final drives and sprocket assemblies. Also shown is the attachment of the road wheels, which I will add after painting. There were no issues with alignment or fit of the parts.
Step 9 begins the construction of the separate fenders with the left side fender. It goes together well with mostly having to add the stiffening parts, supports, and a few smaller items to the large, single piece fender. You also add the BII boxes and air cleaner assemblies. Be sure to select the proper fender (B50) for an M60. There are two types of fenders in the kit, one set (M48A3) are not used.
Step 10 builds the right side fender (B49). On both sides, I replaced the molded on fender BII box handles with separate ones left over from an Academy kit. I think they look much better than the molded on ones.
Step 11 attaches both fenders to the hull. You also add the barrel travel lock and the radio box on the right rear fender. There is an issue here with the radio box. The directions have you add the later style, high mounted radio box (B22) seen on later M60s and M60A1s. If you want the early radio box, it is in the kit as an unused part (J1). I used this part and added four mounting tabs with bolts to attach it to the fender. I also used part J26 to complete the bolt plate on the right side of the engine cover (D43), which would otherwise be covered by the attached bolt plate on the later radio box mount (B22).
Step 12 adds the headlights and their guards to the front glacis plate. You also add the exhaust for the crew heater. You have a choice of thin (B9, B10 & B20, B21) or thick (B55, B56 & B57, B588) headlight guards here. I chose the thinner ones as I think they look better. Again, no issues were noted.
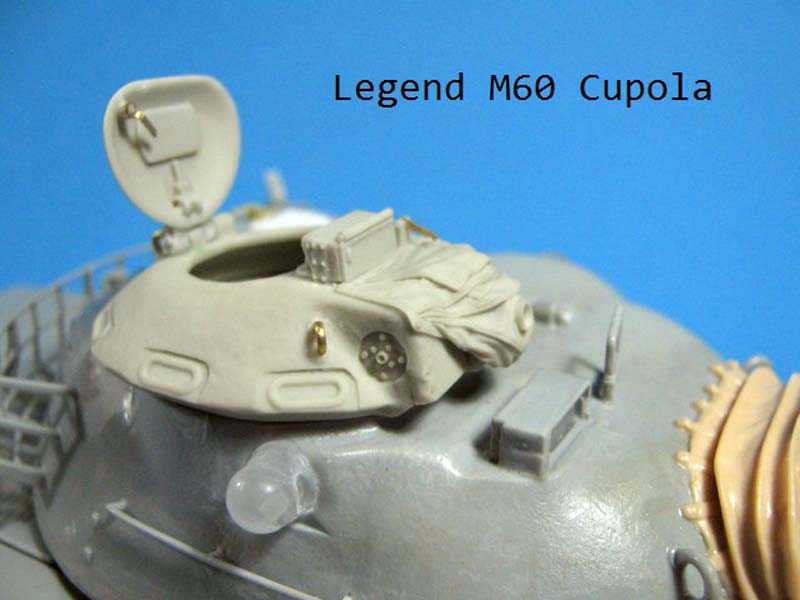
Step 13 builds the M19 commanders cupola. As noted above, the cupola does not look right when done. It also has no details on the inside of the cupola nor on the inside of the hatch, along with the barrel being oversized and no dust cover on the gun parts. Due to all this, I will be replacing the cupola with the much better Legend M60 Cupola (LF1249). This set is very nice with interior details for the main sight, intercom/radio box, bumper pads for the TC, and inner hatch details. To it I added the .50 cal bolt plate on the left side that was used when there were issues with the internal M85 .50 cal.
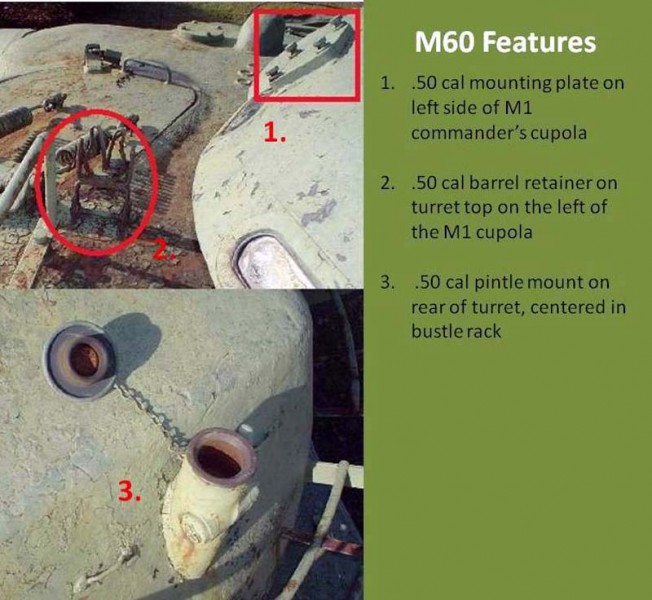
Step 14 begins the turret construction. Here you build the rear turret bustle rack from 5 separate pieces. Take care when assembling this part so it is correctly aligned and not twisted. It is easy to get this part crooked. The directions then would have you attach the basket to the upper turret shell only, waiting to join the two turret halves in step 16. I jumped ahead and added the inner gun mount and joined the two turret halves here so it is easier to handle as a whole part. You also add smaller parts such as range finder blisters, lift rings, and side rails. You also add the .50 cal pintle on the turret rear. Additionally, I added the missing .50 cal barrel retainer to the left of the M1 cupola that was used to hold the rear .50 cal in place when mounted and not in use.
Step 15 continues with the turret construction adding smaller items such as the gunners primary sight (made of clear plastic) and its covers, the turret fan intake housing, the storage bracket for the searchlight, tow cables, and water can. Another note, this is specifically a water can due to the flip-top lid as opposed to the more commonly modeled fuel can with a castellated, screw-on lid. You also add the loaders hatch in this step. I added inner hatch details (since Dragon Models gives you a smooth inner hatch surface) using a left over PE parts, some thin metal rod, and sheet styrene of the latch and head pad. This step is also straight forward with no issues or problems.
Step 16 completes the turret construction by adding the commanders cupola assembly. You also add the DS mantlet cover, the gun barrel, and the bottom of the turret. A note here on the barrel; as noted by Pawel, it looks a little thin. It does have the redeeming quality of being slide molded and there is rifling in the tip. It looks usable to me. The turret went together well with no putty needed to close up the turret halves. It is engineered very well. You also have the option to mount the searchlight on the mantlet cover or not. I chose to just add the mount pins and add the search light ton its storage mount on the left turret rear.
Step 17 completes the build by marrying the turret to the hull and adding the very nice set of DS T97 tracks. The tracks were a little loose and I found removing one link per side tightened them up nicely.
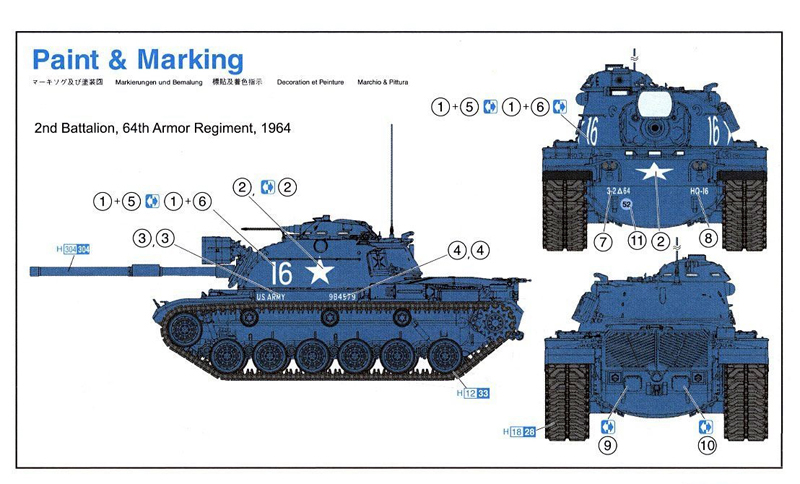
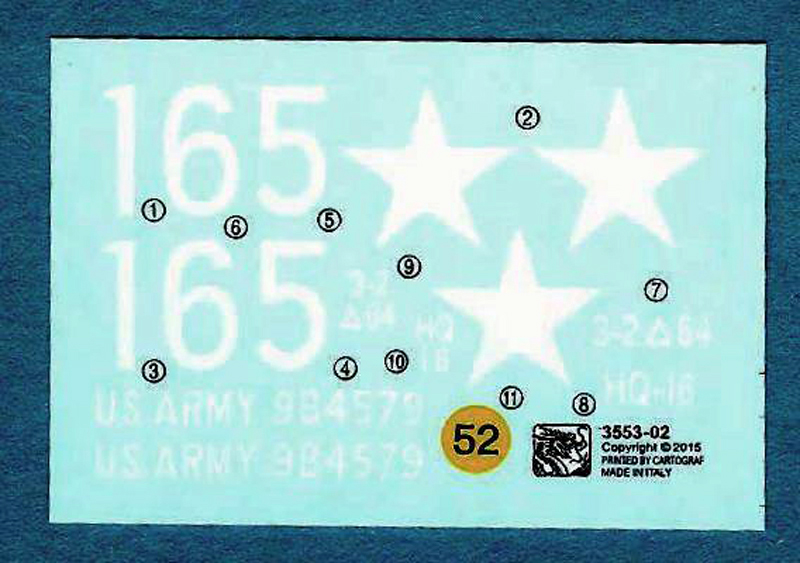
Decals
The last step (unnumbered) shows the decal placement and markings for two US Army tanks from 2-64 AR Bn, 3 AR Div, Germany, 1964. The color call-out for both tanks is for FS34087 OD Green which is the wrong color for Cold War era tanks, as most of them were in FS24087 semi-gloss or FS14087 gloss Olive Drab. This color appears darker than standard OD. I like either Testors Model Master Dark Green (FS34079) or Krylon Camo Colors Olive in a spray can to represent this color.
Conclusion
Overall this is a good kit that goes together well. There are no major issues with it and only a few minor ones that are easy to overcome. As noted, it can be corrected beyond what I did if the builder so desires. It looks really good once done as well. Anyone with average modeling skills will find this a joy to build. I highly recommend this kit to anyone who enjoys building Cold War-era tanks and vehicles.
SUMMARY
Highs: Nicely detailed suspension and hull. Good detail on the inside of the barrel with rifling molded in. The aluminum road wheels are nicely done with separate parts for the rubber tires.Lows: Some dimensions are off on the hull. The driver's hatch is not correct out of the box for an M60. The M19 cupola is undersized and not shaped correctly.Verdict: Overall, this is a solid kit. It needs some corrections, but not more than the average builder can fix. It will build into a decent kt out of the box and looks like an M60 when built.
Our Thanks to Dragon USA! This item was provided by them for the purpose of having it reviewed on this KitMaker Network site. If you would like your kit, book, or product reviewed, please contact us.
About Gino P. Quintiliani (HeavyArty) FROM: FLORIDA, UNITED STATES
Retired US Army Artillery Officer, currently a contractor at MacDill AFB in the Tampa, FL area. I have been modelling for the past 40+ years, really seriously on armor and large scale helos (1/32, 1/35) for the last 35 or so.
Thanks Steve. The underside and suspension are pretty dirty, just not caked in mud. I guess it doesn't show up well in the pics due to the angle or something. The brown on the upper surfaces is supposed to be left over dirt/mud residue from boots as the crew climbed onto the tank. I was going for the looks of a tank that has been in the field a while, but not seen recent rain, just a lot of dry mud residue. It looks right to me when I look at it.
Great build!
Is it me or did they use the armored tail lights from the M48a3? Between that and the drivers hatch short cut looks like they had to beat a deadline and just said, good 'nuff.
You know I have seen tanks looking like that where there is clay like Georgia and Kentucky. These days I am always looking for new effects since I like to do a full range of weathering from mud buggies to motor pool queens.
It's easy to do the real heavy stuff, hard to hold back and just put some clumps on the suspension and some dirty boots up top.
Possibly. Both styles of lights were on the sprues. I have seen both style of lights on actual M60s as well. That or I used the wrong ones.
It was not that bad. Most of the improvements were pretty easy and basic modeling techniques. No, it isn't a Tamiya shake-and-build kit (thankfully), but with a little actual modeling skill (as opposed to just assembling what is in the box), it can come out really nicely.
This kit is only about 20 years too late. My Uncle was 3rd Armor in Germany in '64. I built him an A1 from Tamiya about 1981. It was good enough for him, but always wanted to try and kit bash a slick. Kudos to Dragon. Will be my next build. SPEARHEAD...Victory or Death.
Hi, I'm just new member on Armorama and I need the help of the experts for a model.
As I know that there is momently no full accurate M60 (known by modellers as "slick M60"), what should be the best option :
- the Dragon M60 (ref 3553) + conversion set DEF Model 35082 (metal gun, canvas cover,...)
- the Dragon M60 (ref 3553) + conversion set Legend LF1130 (turret, resin gun, cover...).
Or should I better take an old Esci hull M60A1 (ref 5039) I have in stock + one of those 2 conversion set ?
I didn't want to be 100% accurate.
Thanks a lot.


Comments