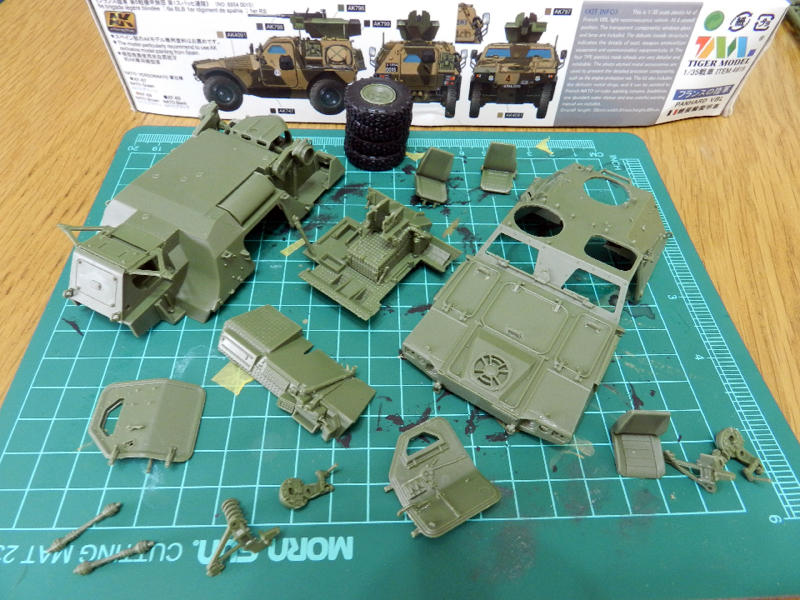
This is an initial (what you get in the box), pre-assembly look at the TIGER MODEL's Panhard VBL - Light armoured vehicle - with 12.7mm M2 machine gun.
Contents
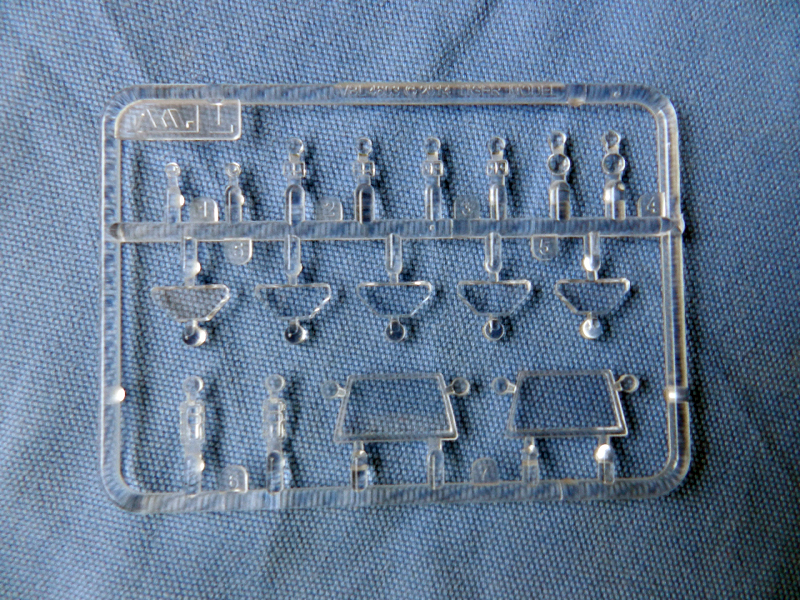
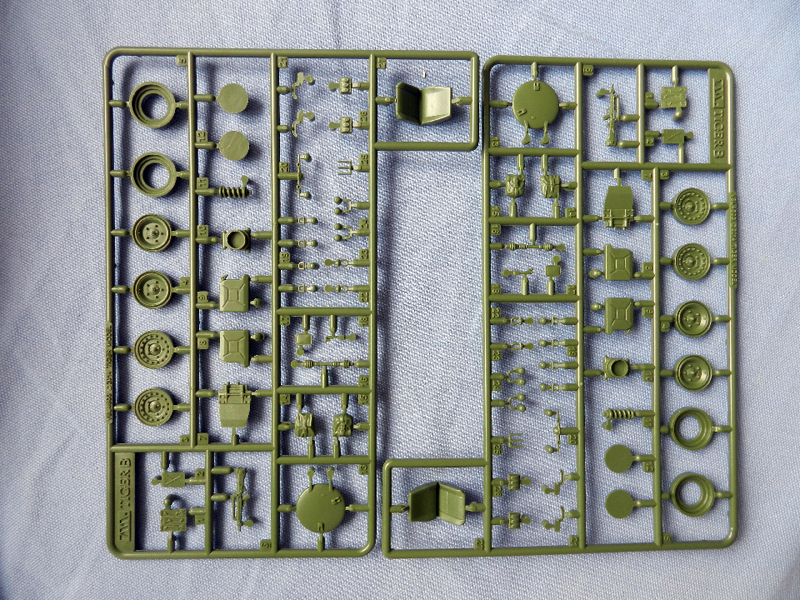
What's included: 6 frets of parts - including Clear; 2 different sets of tyres (depending on the variant? More on this later); a set of PE - plus a separate PE item; decals; 'string' actually twisted wire; upper and lower body halves.
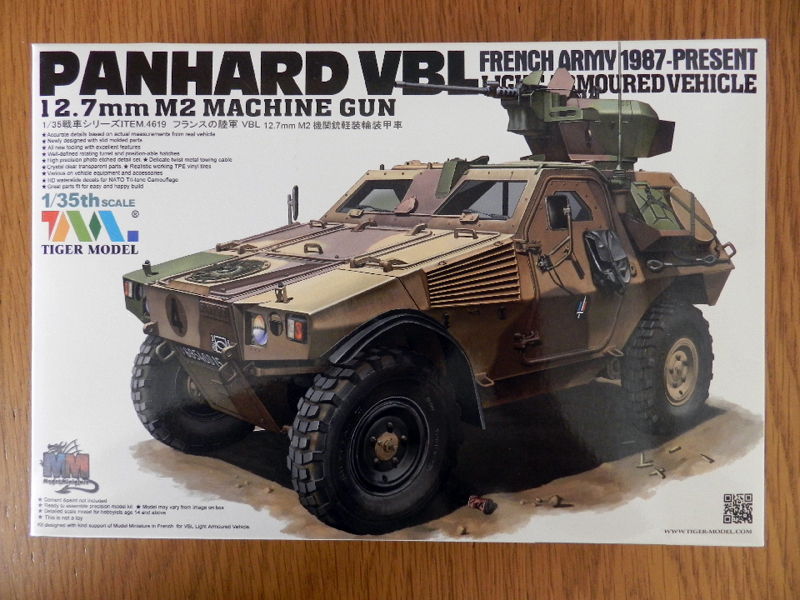
The box art is where it becomes obvious that Tiger Model has 'borrowed' a lot from Tamiya. If it wasn't for the TM logo - this would be easily confused for the Japanese giant; the light card, gloss finish, font choice, layout etc...even extensive use of Japanese, right down to the use of a small star graphic for the bullet points.
Looking at the side panels the comparison becomes even more evident with Tamiya-style profile artwork, and Tamiya paint references for a NATO scheme (more about that later) even though AK has been used for the model's variant scheme.
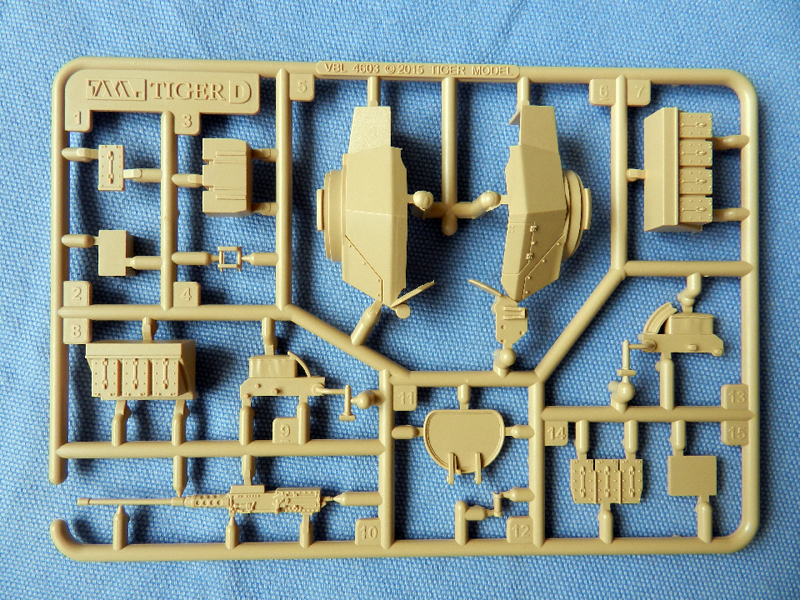
The Parts
There are quite good number of frets and supporting parts which in itself bodes well for most hobbyists. The comparison with Tamiya continues with quality of the plastic (which is therefore understandably very good) and the fret form details. For a physically small kit - there are a lot of details on both the exterior surfaces and the interior parts - which is pleasing for the cost. A nice touch of difference is the 'string' (the tow cable), which is actually twisted wire instead of actual string. There are also two sets of tyres included confusing but nice. There is no indication of who printed the decals but a visual inspection makes it seem as though they are decent enough. How they apply - at present only time will tell.
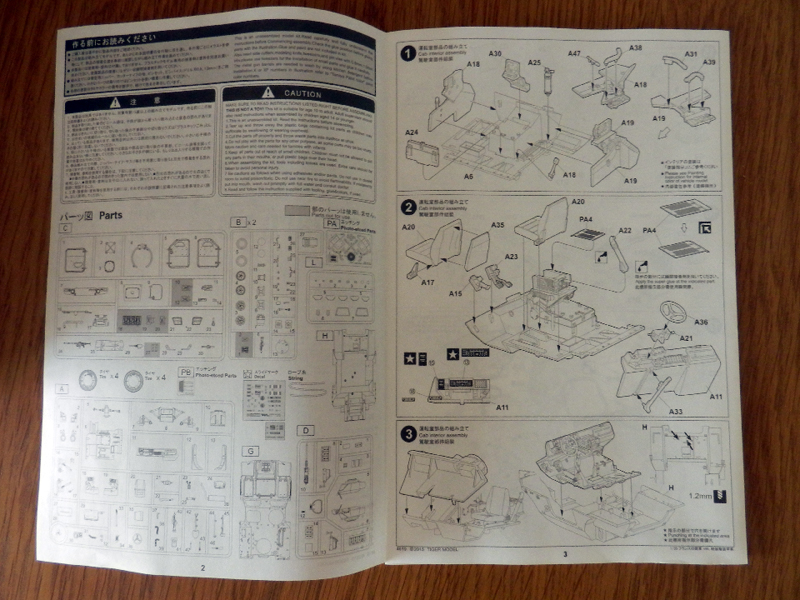
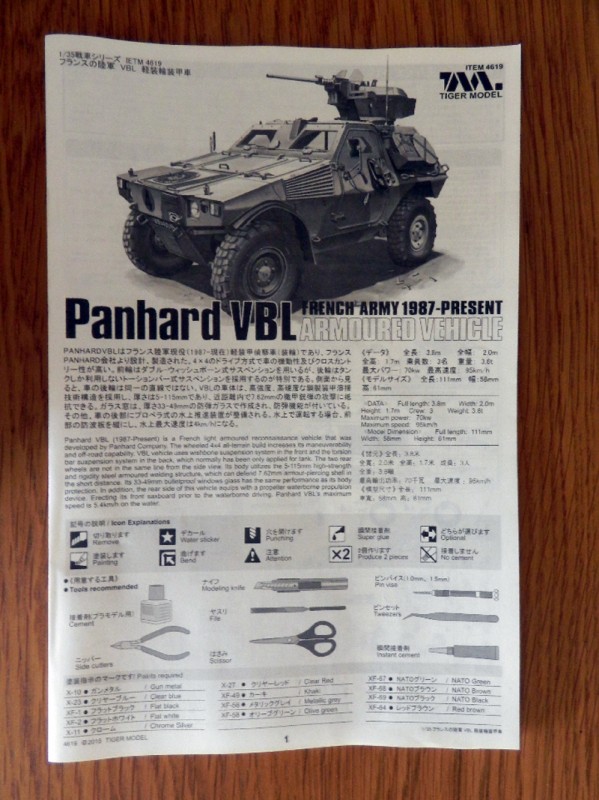
Instructions
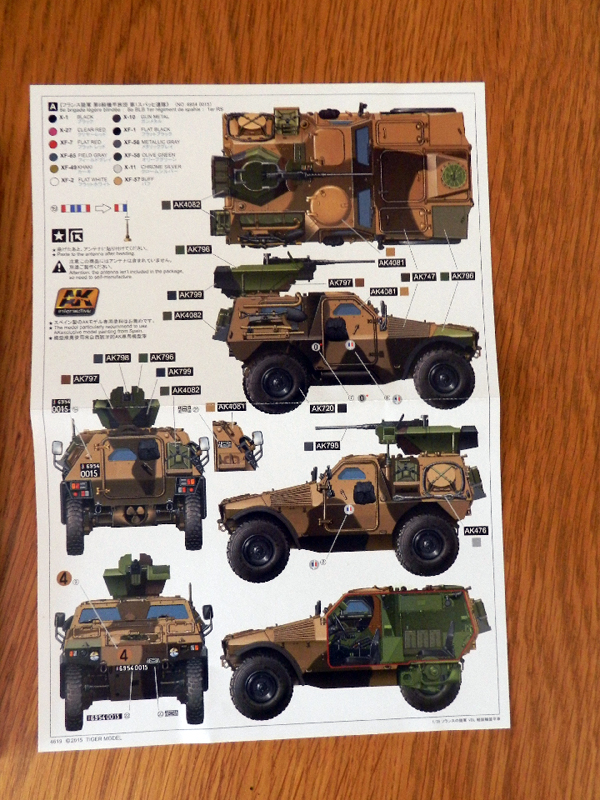
These have been broken down into two parts - a matt art paper B/W booklet of the construction process, and a separate gloss sheet detailing the camouflage; full colour one side and b/w the other. The biggest issue is the lack of colour call-outs except, oddly, in stages 5; Vehicle body assembly (the windscreen framing), Stage 9; Tail-light assembly & Stage 10; 'Head' and right door assembly where those 'X/XF' paints are used.
Equally strangely, Tiger Model left in the parts for a NATO vehicle but have left out the construction options AND the camouflage scheme. The instructions reference the choice of the two tyre sets; though without any details as to why there are two sets, or which set belongs to what type or variant (personal research tends to suggest it really makes no difference, as both schemes appear to use the same tyre tread pattern).
The build instructions appear as an adapted version of Tamiya:
1) Japanese for: the vehicle introduction; Stage titles, notes and part references.
2) The paint references (when they appear in the b/w booklet) are "X"/ "XF"
3) The instruction symbols are mostly the same
4) The 'tools recommended section artwork is very similar;
5) The drawing style with a thicker outline of the model sections/ parts.
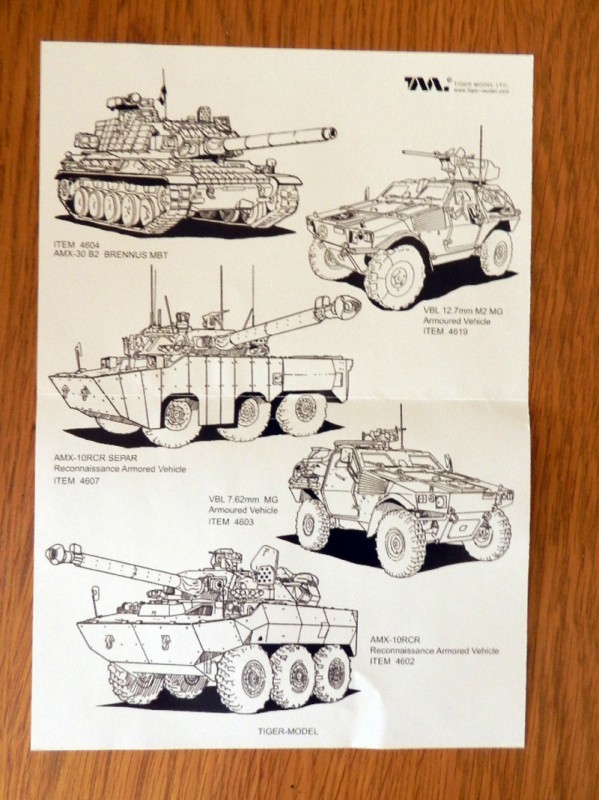
The front of the A4 painting guide sheet is glossy, full colour and reserved for the variant box art scheme. These include Tamiya paints for the equipment and other small parts, with AK for everything else. The back of the painting sheet is b/w and used to promote other Tiger Model kits (including the same model) with quite basic b/w drawings (These should have been at least full colour). Since one of the box side panels provides a NATO colour scheme, this would have been an even better use of this side.
Summary
It would seem that Tiger Model have simply separated the variants into two kits based on the box lid and instructions. A smart modeller will realize they will only need to buy this version and research the other if they prefer the NATO option instead. Homage to a distinguished maestro is fair enough, but with the whole appearance of the box and instructions etc. (and as it is the first offering from this manufacturer I have attempted), it also makes me question what I am really paying for.
The one aspect that is definitely not Tamiya though (and is now so common with many recent HK-based model kit companies), is the lack of colour references throughout the build process. This is a major fault and given the cost of purchase, is difficult to justify in this day and age. At this point, the inclusion of PE and the wire 'cable', by themselves hardly merits the inflated cost of such a tiny model, all the more so when it is left open to question. The product itself does at least appear impressive enough - it should be interesting to see how it builds; time will tell.
The Build
Given the size of the vehicle and the number of frets, it is very easy to get a lot done in a relatively short time.
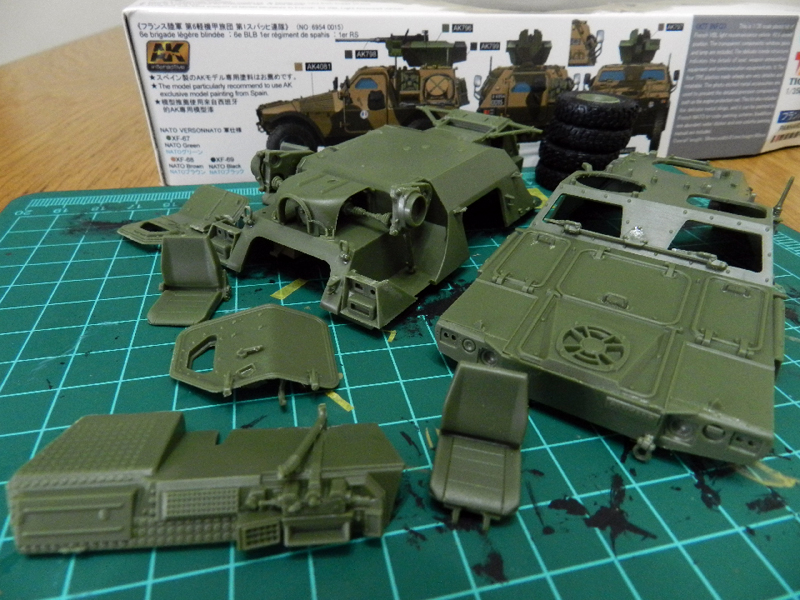
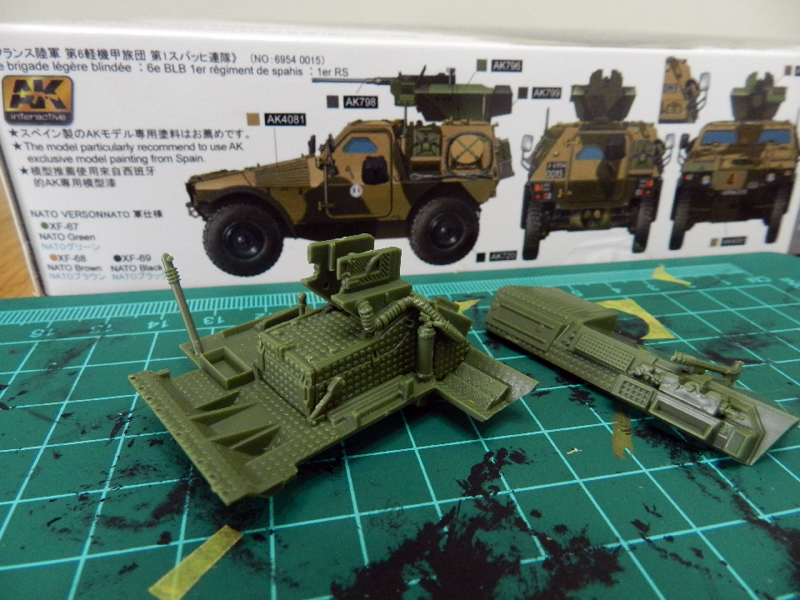
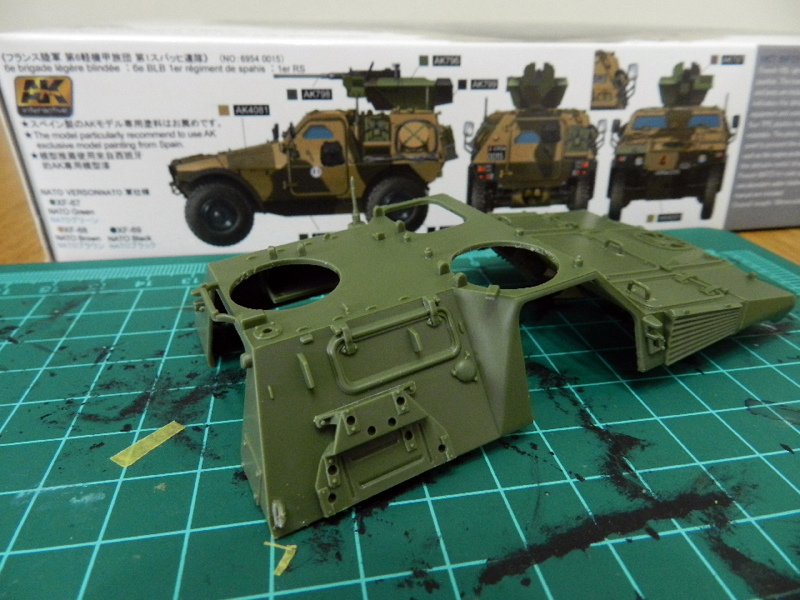
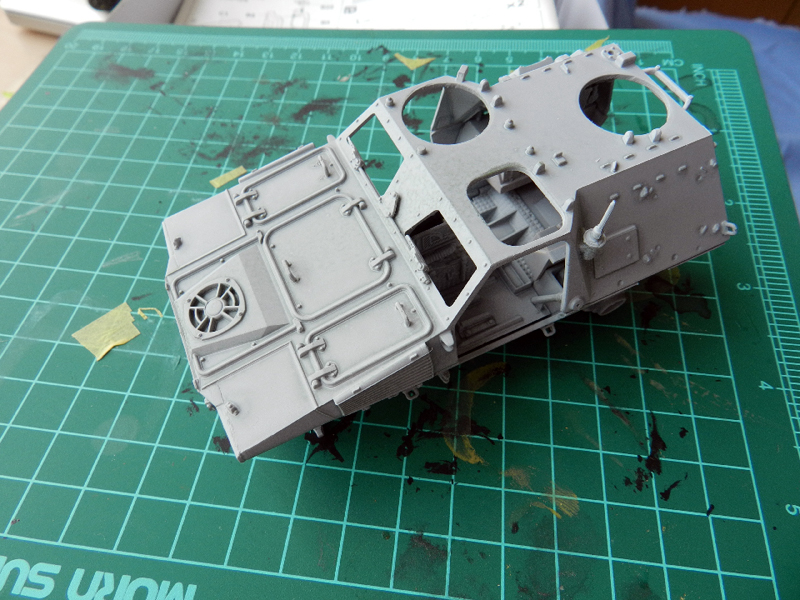
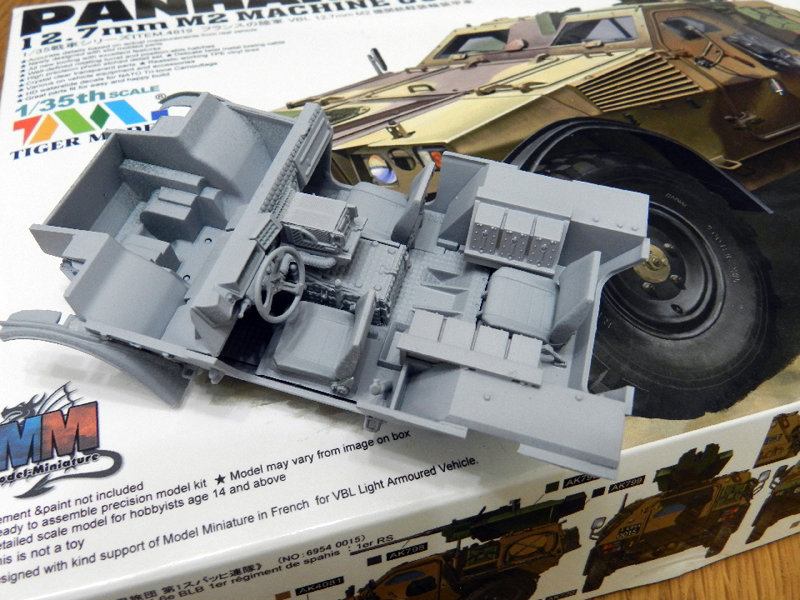
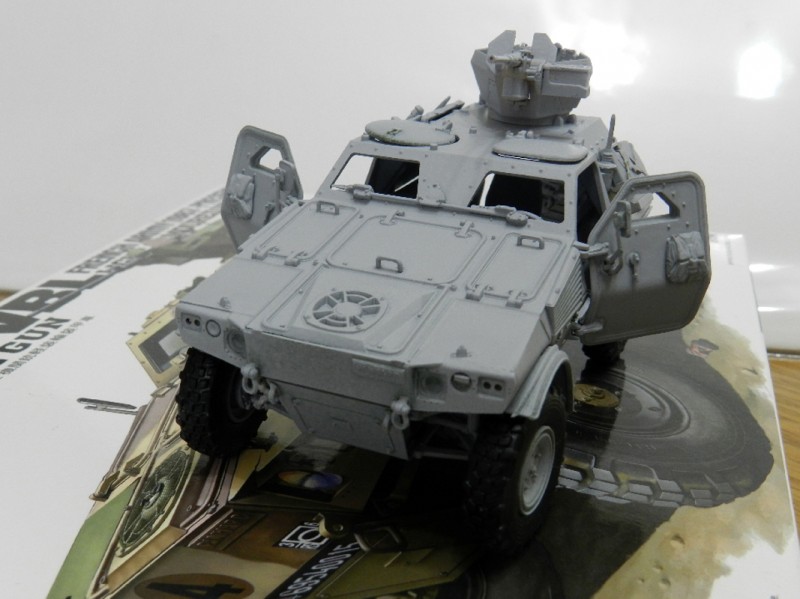
Stages 1-5 of the kit's instructions start with the interior with some large moulded pieces that quickly provide a lot of visual detail and texture. Stages 1-4 are the lower hull driver and rear compartment; Stage 5 the upper roof section.
With an eye on the need to paint later, it was decided to make various sub-assemblies that could be easily dry-fitted whilst allowing other components to be kept ready. This is important as the interior of the real vehicle, is a jumble of olive green, black and exposed metal (except where external camouflage paint is used inside) and decals. Given the tight spaces, this will also allow the opportunity to get in close to some very fiddly corners.
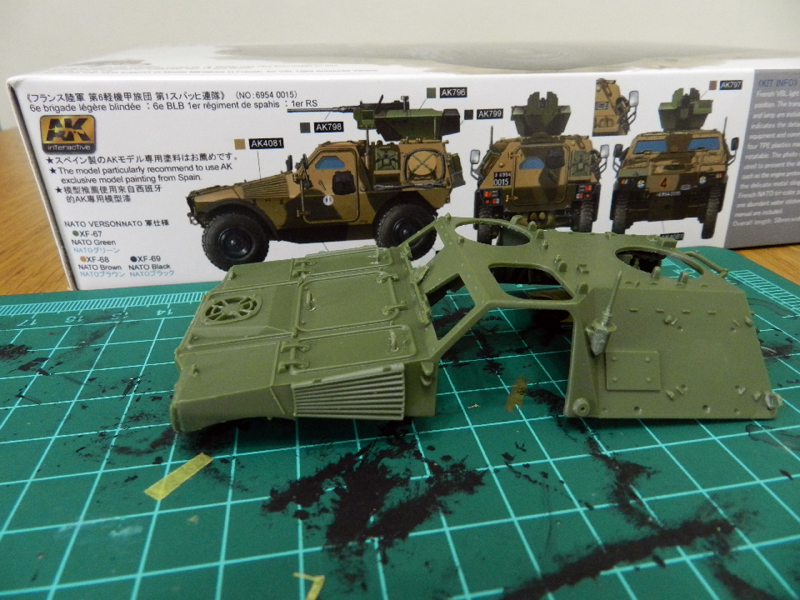
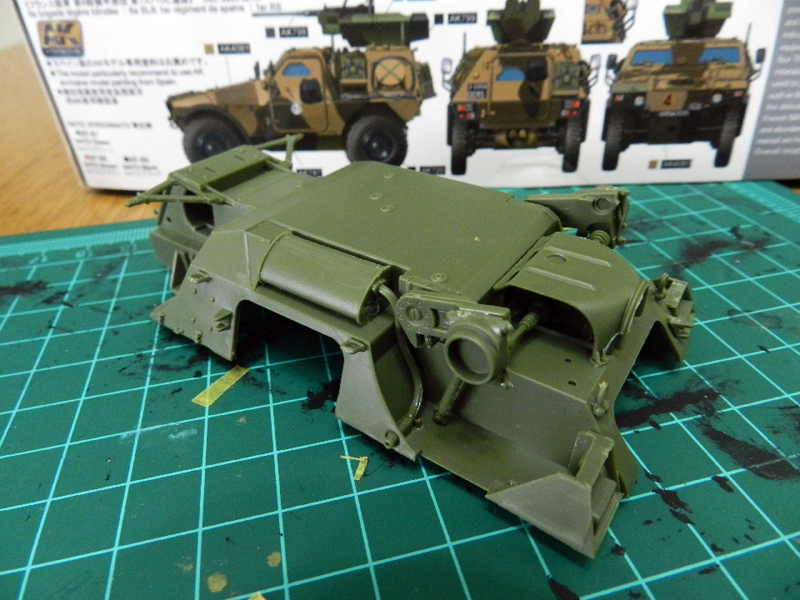
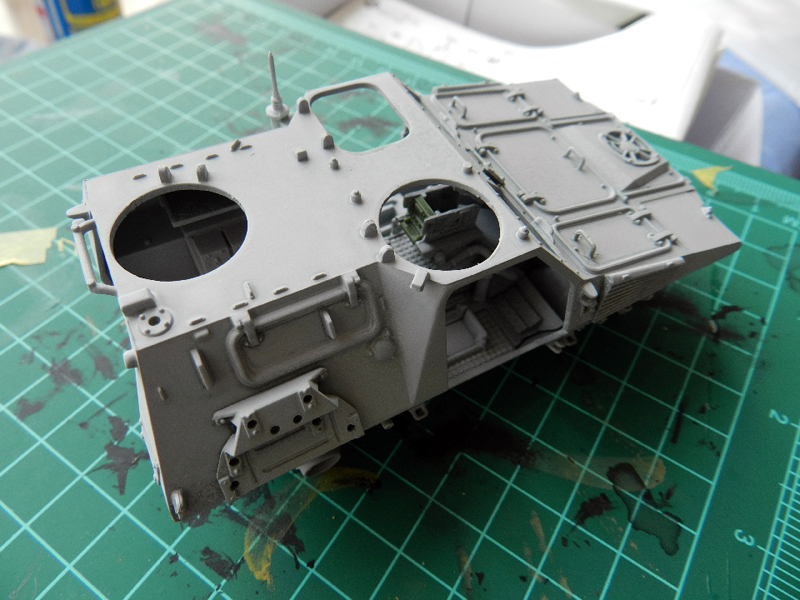
Stages 6-9 are the underside suspension, axles and rear lights, and Stages 10-14 are the doors, front headlight unit, wheels, grab handles, wing mirrors and external stores and equipment. As the top and bottom halves have not been fixed, care is being taken at present not to glue (or dry-fit) anything that requires a full body (like the front wheel arches) - or is likely to be easily broken (those wing mirrors).
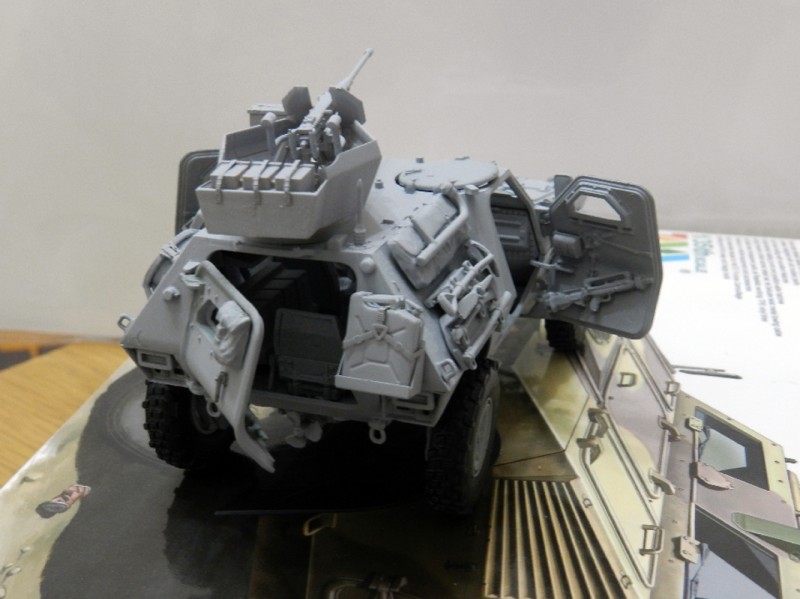
That leaves Stages 15-17 (yes, that's all), to do the finishing details: M2 weapon unit, side equipment, jerry cans, cable and then final placement of the M2 unit onto the rest of the vehicle.
Where things are
Not all of the stages have been completed and I rarely follow the instruction order to the letter. The attached photographs represent only a few of the interior assembly stages with a mix of some of the exterior work. There are very clear reasons why this pick and mix approach was adopted:
1) The interior needs to be painted and it is so much easier without the hassle of glued parts getting in the way of that texture and detail!
2) It hasn't been decided which scheme to go for. As commented earlier, Tiger Model allows for a second, NATO, scheme, and fitting only the typical parts used on both options helps to leave that decision until later.
3) It also buys time to research the real thing. The only consequence though is that it also reveals "further choices". Interestingly enough, it was during a rummage around the internet that the exact featured vehicle was discovered with a more stripped down look - which is rather more appealing but with some tidy-up necessary... Hey, it is still out of the box...isn't it?
Comments - Summary
The Stage I instructions include a mistake on the part numbering - thankfully it is a minor part and quickly solved; "A18" is really "B18". It is irritating as coming right at the very beginning of the build it has the ability to then turn mole hills into mountains.
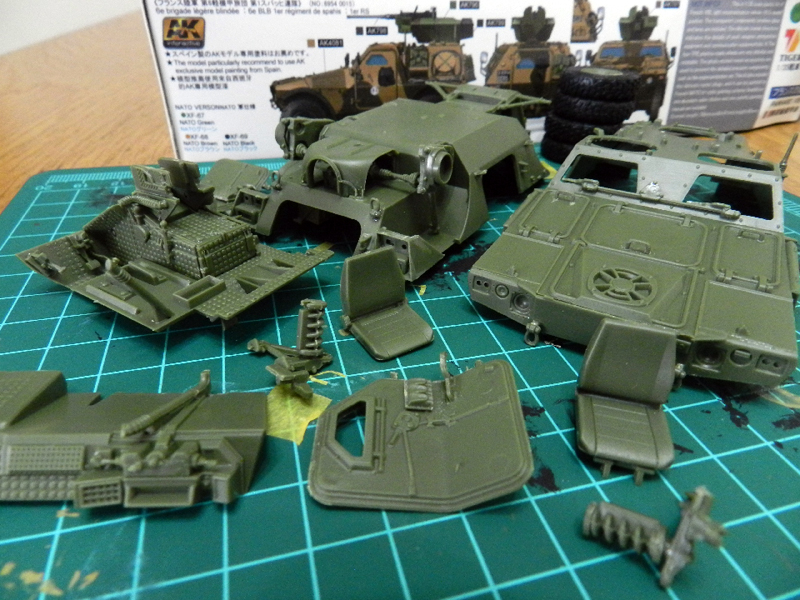
Most of the parts fit very snugly - even when dry-fitting - and the plastic is sharp and strong. Ironically, given the compression of space, the abundance of rich looking texture and detail appears over-done and out of scale.
There are also loads of complementary external surface details. Perhaps though, a fair bit of this should have been left off for the modeller to choose if it gets included. Do you go for an attach everything (accuracy notwithstanding), OR cut-off and smooth (and/or fill-in.) approach? The choice depends on what type of modeller you are, but also how careful you can be (bearing in mind the smallness of the working area). The point here though is Tiger Model does all the thinking for the modeller and nowadays that is not necessarily the best thing.
Certain drawings (Stage 4 comes to mind) need to be a little clearer with the attachment detail. The rear-compartment ammunition boxes only needed simple fixing holes, instead of the wide gaps that were provided - this leaves the final positioning of the boxes on both sides quite vague.
The PE in Stage 5 turns out to be irrelevant - shelf arm supports though would have been better and more accurate (plus the shelf fixing detail is 'strange' not to mention basic).
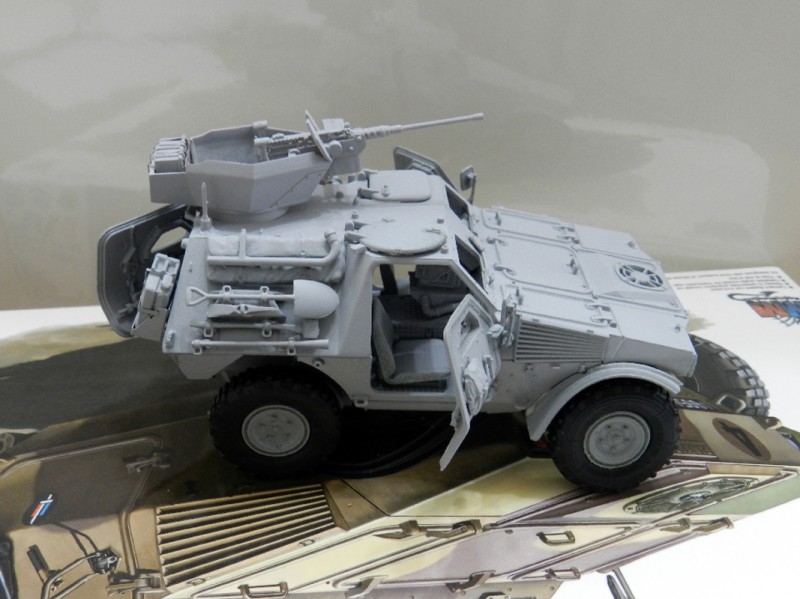
It is also surprising the exhaust unit in Stage 6 was not supplied as a single piece with an opening in the side of the vehicle. Instead the main exhaust tube stops just short (and not cleanly) of a small stud on the inner side wall; the end of the exhaust is moulded on as part of the lower body.
The side doors' inside locking mechanism is quite thinly treated. These could have been done as separate parts - and would have been very cool indeed.
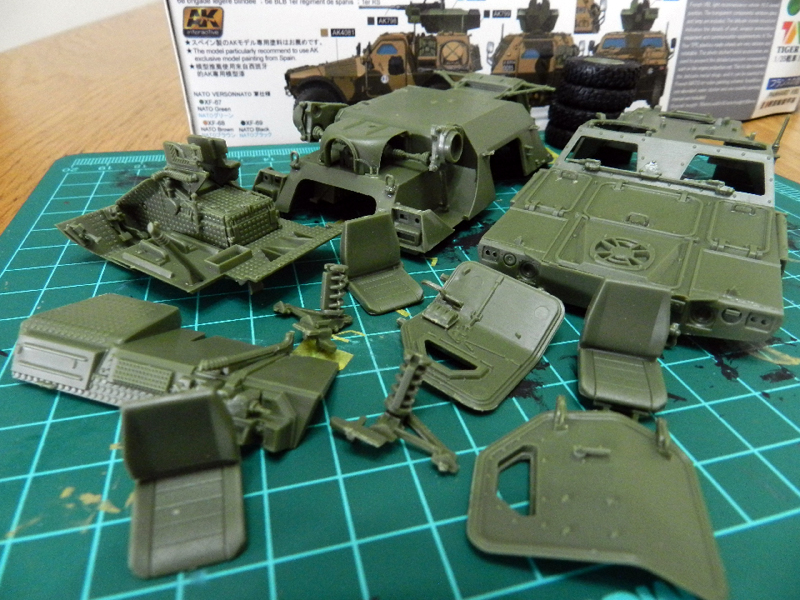
Overall though, good progress has been made and it has been a pleasing experience. Still more to come and some decisions to make!
With the main parts of the assembly ready, time to get onto the accessories and those details that really define the start of the closing stages of any build; first though - a detour.
In the previous update, it became clear that there were some differences between the boxed model and photos of the real thing (with the same vehicle registration number). Minor for most of us, yes, but for some, these variations can be crucial.
Hold on a minute you cry, a/some photograph/s doesn't prove a thing - different configurations at different times; normal enough, so what's the big deal?
Well, any record of a difference (especially of the exact same vehicle being represented), gives the enthusiast a license to deviate from the provided instructions.
The question then became, How to resolve the dilemma of doing an O-o-t-b review AND satisfy the urge to go a slightly different route in the finishing (without buying a second kit, after all this is already UNSPONSORED...!). Along the way additional discrepancies became apparent (it seems research also helps to sharpen-up the eyes).
The solution was simple enough; glue anything that wasnt interfering with anything else and would survive a good deal of handling; dry-fit anything that could be, and then blu-tac (or in this case "white"-tac) everything else.
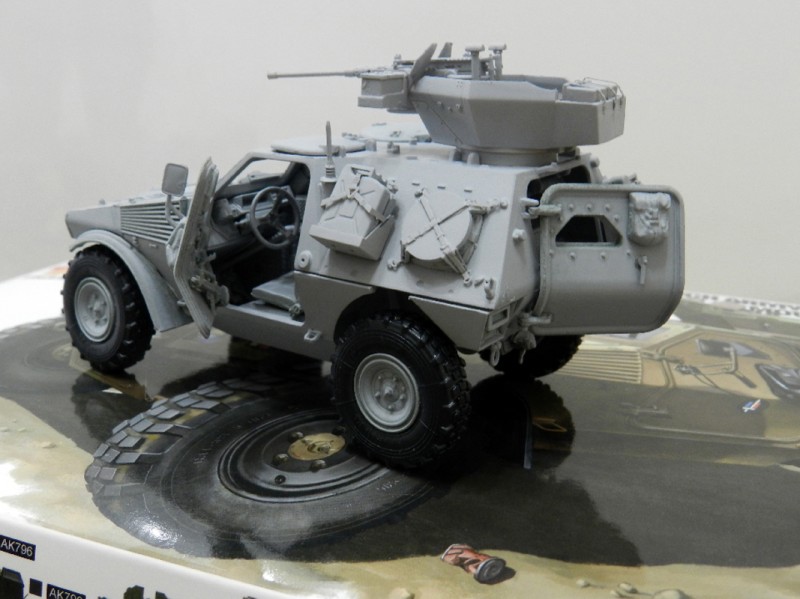
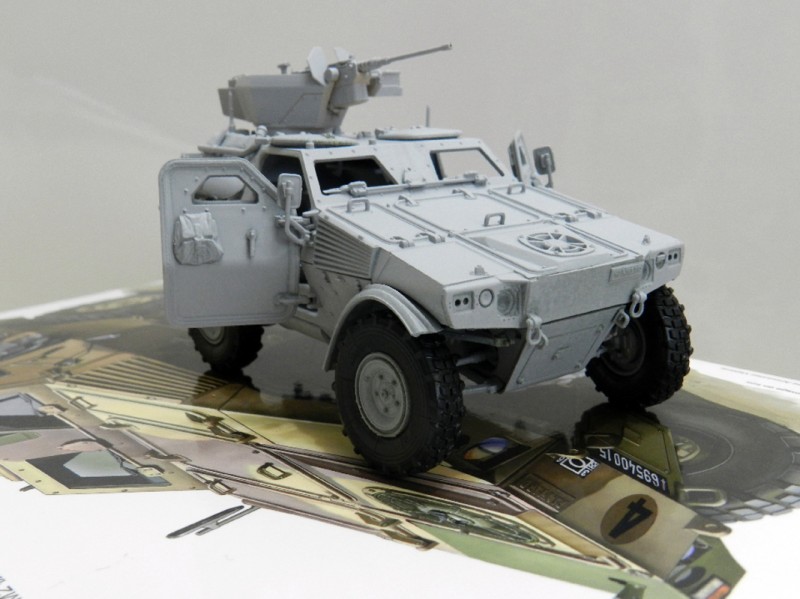
Since most of the larger parts were known to fit, there was no further issue to worry about. Even the smaller untested parts fitted smoothly enough, save for the fact that quite a few were blu-tac'd in place! Priming using Mr.Color's 1200 surfacer from a spray can, was no real issue either - nothing became dislodged.
It is safe to say the all but completed product really looks the part. There is plenty for the eyes to behold, and for the hands to tamper with later.
However, back to those issues referred to earlier:
Completeness of Kit
Tiger Model seems to have done a fair bit of research with the VBL. Despite this there are still some oversights.
One omission is 'hidden in plain sight'. On the box cover - and in real-life photos of the very same, featured vehicle (and included on even NATO scheme vehicles), there is a conduit running from the left-hand side antenna to the middle of the windscreen frame, where it ends in a type of junction box. This is attached both to the windscreen frame and the roof. Neither the conduit nor the junction box appears in the colour sheet, in the instructions - or in the box...
On the opposite side (the back right hand side), there is a length of tubing on top of a storage bag (these are included in the box and instructions). However, both are only referenced in the top view of the respective painting guide. Research shows no such accessories and the attachment points are very different to the clunky stubs on the kit (these really should have been PE)... Curiously the side view, on the same paint guide, only shows the tubing attachment, and instead of the hinged steel plate, the artist has rendered glass...errr???
On the opposite side panel there are also a few accessories. In the available photography, only the Jerry-Can carry bin is visible but in the camouflages darker brown, rather than the 'light sand'.
The two front headlight panels are in fact separate units. Whilst presented integral to the whole wing/ body (which is understandable for the model mass market), it does allow the skilled modeller a further opportunity to add that extra personal touch by removing and re-attaching - ensuring the necessary gaps and sag of weakened and aged thin metal sheet.
The wing mirror supports are illustrated in black. For this variant they should be in the 'light sand' colour. Where are the mirror finish stickers for the mirrors?
The tools weren't on the tool storage plate on the real vehicle in the sourced photographs. This also becomes a matter of preference, with the necessary filling in if it is decided not to attach them. Though missing the opportunity for a cool wooden treatment of the respective handles is highly likely to influence the choice!
The PE is adequate - with only one interior part that is really not necessary or even understandable. That should have been replaced with more accurate shelving arms.
It is possible, though, that Tiger Model has made an error of judgement. Included in the kit, but not visible on any reference image, is a rear, right-hand side, roof-top mounted antenna and fixing point. Surely, with the 12.7mm Machine gun in its protective housing, this antenna would only get in the way...? The painting guide sheet is also quite inconsistent when it comes to the illustration of this part (one of them even has an antenna on the wrong side); a little sloppy...
Overall
VFM - For the size of model, there is no doubt this begins to get a little pricey - especially when compared to what else can be bought for the money - or for just a little bit extra. By the time the model gets to this stage however, it has become less of an issue. It is a delightful [little] kit to make.
Yes, it took a little longer than otherwise it might, but then, there are other things in life that also need to be done; like research for one, and deciding on the approach for another!
The plastic, interior and overall surface details all combine to take centre-stage. The models overall compactness makes it seem a lot more robust than you would expect from such a tiny vehicle. Photos of the real vehicle make it look like a boneshaker; far more so than the kit itself would lead you to believe.
There are quite a few irritations, generally forgive-able (some only just), but they are still there nonetheless. These are about the level of Tiger Model lack of attention - the [missing] paint call-outs, painting instructions; silly omissions and inclusions; language skills and branding; some other decal options would have been good too.
As the decals have not been utilized at this point, there is nothing more to comment about those. Maybe later on there will be an addendum to this review, as and when this gets a lick or two of paint, and quite possibly configured a little differently.
Despite the challenges, it is a very worthy addition to anyone's collection; easily an 8 out of 10; Tiger Model really does need to consider how to present their products.
SUMMARY
Highs: The all but completed kit really looks the part, with plenty for the eyes to behold, and for the hands to tamper with later. The plastic, interior and overall surface details all combine to take centre-stage. Lows: There are quite a few omissions and inconsistencies.Verdict: A very nice model of the VBL, but it is on the expensive side.
My guess is that those newer wheels started to be fitted to the VBL when the PVP entered service. The wheels are the same and both vehicles are built by the same Panhard company.
Keith, your point is relevant. Why showing a detail on the box art that is not in the box? Unfortunately this is quite regularly done by many manufacturers.
Olivier
Keith
Check your "local" luckymodel.com. TM is cheaper than takom and HB. Price is about $30 and for T-55 and HB VBL you have to pay $36 and $34. Si it's not expensive. Especially when HB costs more than TM and simply is a piece of sh.t.
Hi Stephane thanks for the links - the Mali vehicles do look cool and have their own configuration - especially the tow cable wrapped around the front..and different equipment options. TM does provide a great platform to modify from and plenty of personalization possible - though it would mean sourcing new decals from somewhere... Hi Olivier - sadly you are correct and reviews need to address these issues - and this is an O-o-t-b review... Hi Onkos1 - Actually I was not referring to Luckymodel.com (I have a better source). Where I go, I can get the TM VBL, HB VBL for the same (IF I should ever want the HB that is...) and the T-55 for pretty much the same cost. It's interesting the Tamiya model of the Japanese "VBL" - the 1/35 No.275 JGSDF Lt Armored Iraq Model, I can get for way less than Luckymodel. As such equating a real Tamiya equivalent - or being able to get the T-55 for very much almost the same, the TM is expensive...especially with the attendant issues - from an O-o-t-b perspective...
Well. Talking about prices Again. We all have our sources...generally speaking if you check the reccomended retail prices of mentioned kits, then TM is cheaper than Takom and HB, and based on that you shouldn't say it isn't.
I managed to buy Tamiya T-72, and two Dragons BRDM's for £10 each last weekend, and based on that I should say that TM is expensive. But I can't because I have my source...
In my opinion when you write the review you should compare the prices of similar models.
So generally TM is cheaper than HB. Takom's T-55 is more expensive than Tamiya's T-55 etc.etc.
Last thing I hope...you don't want the HB VBL...
I'm actually thinking about writing a letter to HB and ask to get my money back...
Onkos1 - Thanks for the tip about HB - figured as much... Btw: If I am able to obtain kits from my retailer at a certain price - then surely that becomes my reference and price point - I would hardly go to an even more expensive source would I? The definition of 'expensive' is not just an absolute term (i.e. a LOT of money) it is also relative to what I am getting for that money - both in terms of overall value and opportunity cost (i.e. what else can be bought for the same amount). All I am saying is comparing kits (Tamiya JGSDF, and TAKOM's T-55) I consider TM's VBL over-priced... Wish you all the best with HB... I wrote to Aires Models over their Hasegawa 1/48 Spitfire IXc Resin upgrade set - they weren't even remotely interested or even bothered...
Yes Keith. But you are writing a review not for yourself but for modelers around the world. Not all of us have our own sources, and some are buying models from shops and pay a R.R.P. So the price point should be based on that. Not on the fact that you can get it cheaper...Please remember that.
Hello
For french modern marking i suggest to do your own by using the excellents FFSMC decals sheet!
LINK
Notice that you can find photos of different configurations (turrets, front armored little turret), and equipments (add on armour, anti IED antenas...) for VBL in Mali and Afstan!
In Balkans/Afstan/Mali there were sand/Brown and Nato style camo VBL even if the last one is the most common.
Onkos1 - Thank you for clarifying your point - I shall bear that in mind, though it really is very difficult to consider the entire globe's RRP, when I am only making a very general point myself i.e. as far as I am concerned (since it is my review), the TM VBL is still overpriced - by whatever measure you care to consider, much like your view of the HB offering...Which, since you have bought, you might want to build and review - just to let everyone else know that too...(if only to save people finding out the hard way perhaps???) Stephane - Great info and appreciate the added link! As the OOTB review part is now complete - I am able to consider giving a more individual finish - perhaps...!
I think expensive is relative. This kit can be had for about $25-26 from Hong Kong Ebay dealers with another $12 or so for shipping. I personally don't find that expensive at all.


Comments