Sometimes a kit crosses your modeling desk that screams to be built, the reason why varies from person to person, but usually comes from a combination of subject, style, components and presentation but the feeling is the same. I have got to build this. When Kit MC16001, a 1/16th scale Sd Kfz 123 Luchs from the new company Classy Hobby arrived that is exactly how I felt. The scale, subject and presentation all combined to make me excited at the prospect of building this kit. Since then I have built (and reviewed) MC16002 jerry can set so know that there is the potential for pit falls in a Classy Hobby kit, but nonetheless so far this model is proving an enjoyable experience.
Contents
It was therefore the intention to post a review and build all in one go, but two things have contributed to this becoming part one of a two part build and review. Firstly the size of the kit means it is taking a bit longer than expected. Nowhere have I found the number of parts contained in the kit listed so I started counting:- 12 clear parts, 215 metal track pins, 217 brown plastic track links, 71 photo etched parts and once Id reached 309 parts in grey styrene with still a number of sprues to go I called it a day, it is a full box of parts, and while some parts are certainly complex, it doesnt appear over engineered. 8 parts for example make up the jack but the breakdown makes sense and gives detail. But before any in box review some detail on the vehicle would make sense.
Review
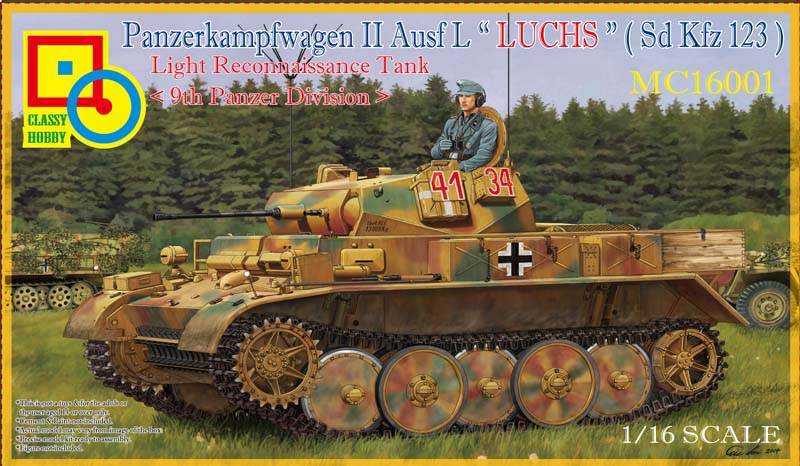
The final evolutionary development of the useful but out dated Panzer II was Panzerspahwagen II Ausf L Luchs Sd.Kfz.123 (VK 1303), roughly translated to Armoured Reconnaissance Vehicle II Model L Lynx . This light reconnaissance tank (it weighed 13 tons equipped, but also refers to its light role armament, having only a 20mm cannon with 7. 92mm additional MG), was produced by MAN and Henschel from September 1943 to January 1944. Just over 100 were made, some sources stating up to 133 in total. The Sd Kfz 123 Luchs was a development of VK 901 Ausf G and used a modified suspension and larger hull, the most significant difference was the use of inter-leaved road wheels. It had a four man crew for the vehicle consisting of commander, gunner, driver and radio-operator. Luchs was a reliable vehicle that relied on speed and manouverability to compensate for weak armour and firepower. Communication using its FuG 12 radio was a more important weapon in the recce role. The Luchs saw service until the end of the war on both fronts with Panzer-Aufklarungs-Abteilungen (armoured reconnaissance detachments) of the Wehrmacht Heer and Waffen-SS. Vehicles sent to the Eastern front often mounted additional frontal armour for increased protection. Small numbers were fitted with extra radio equipment and antennas and served as reconnaissance communication vehicles. The Luchs seemed to be an able vehicle with a high proportion of well preserved tanks surviving WWII and now in museums across the world, a surprise given the relative low production number. One of these, 4121 is preserved in Bovington, UK and is given as a finishing option in the Classy Hobby kit.
And therein is the second reason for delaying the completion of this build, as will be mentioned in the review, the kit does have some areas of exquisite internal detail, so it seems only right to get down to Bovington sometime soon to take some pictures and try to get those details right.
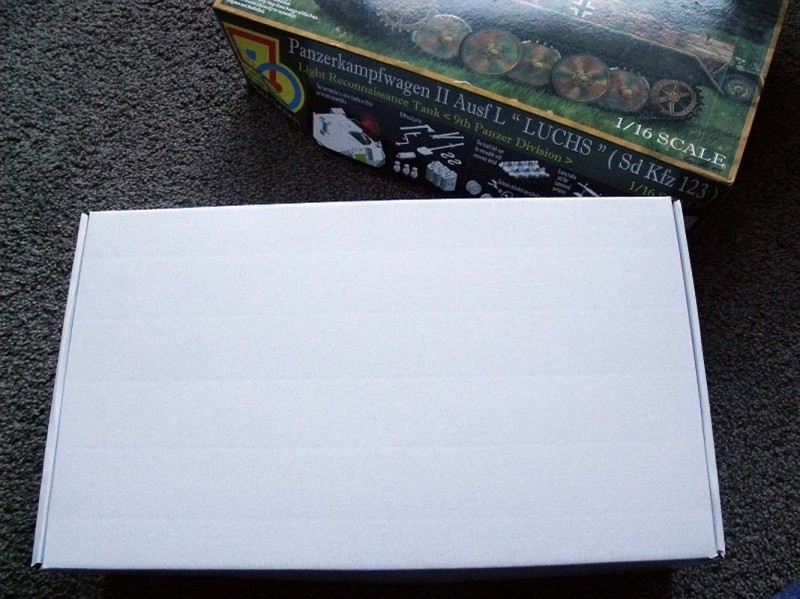
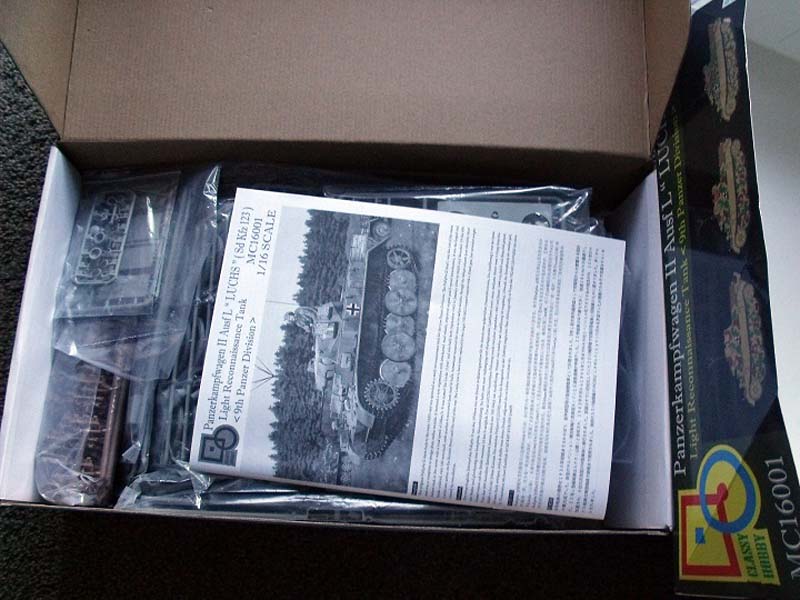
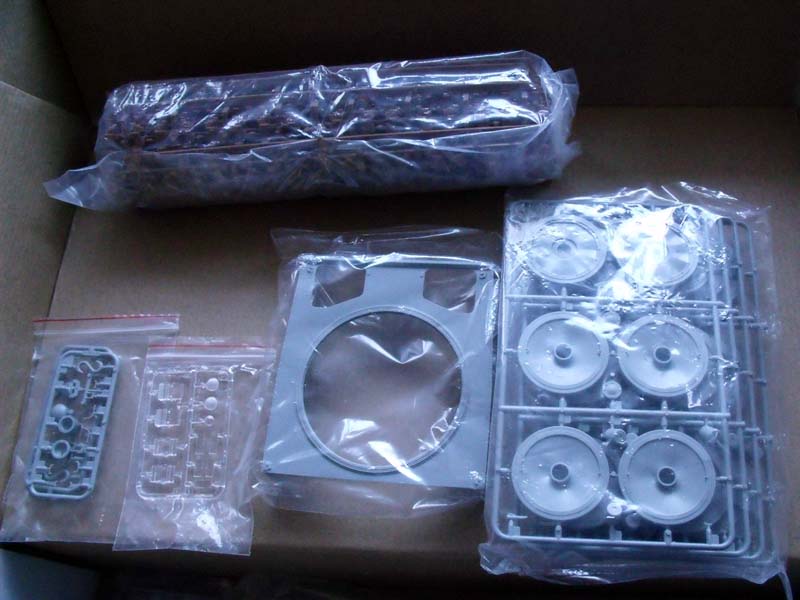
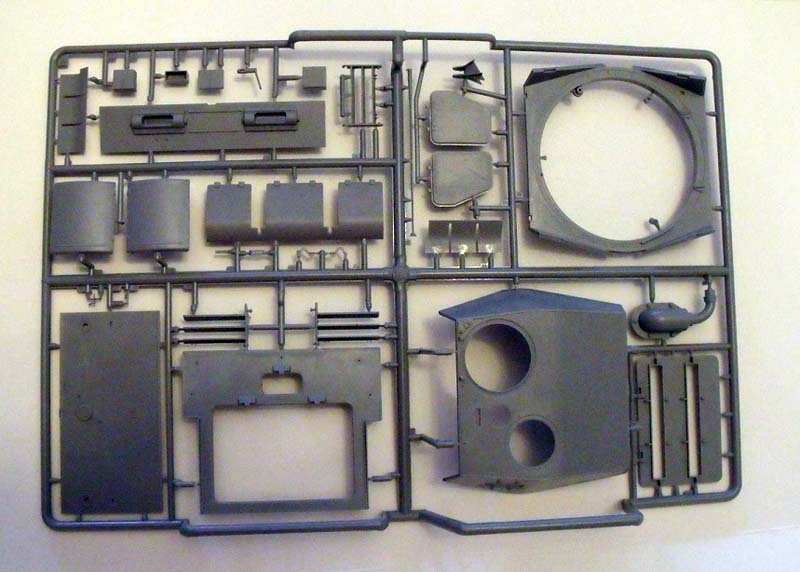
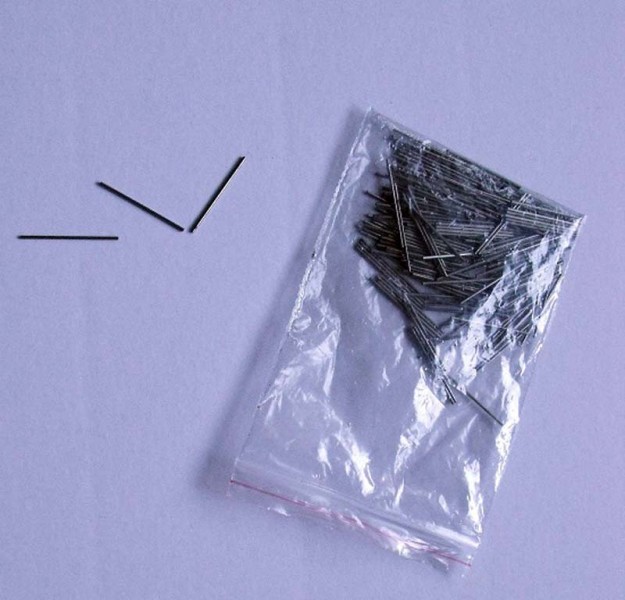
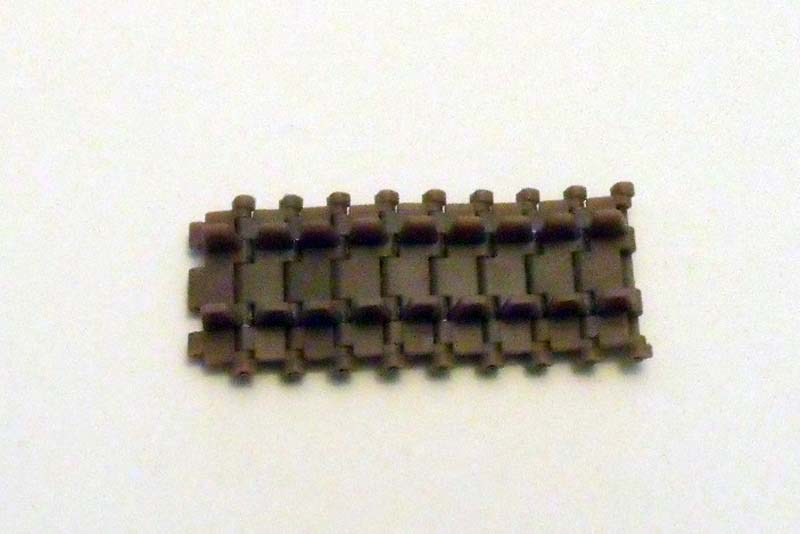
The kit arrives in a stout box that will travel well, only one part in the whole kit had any damage that will easily be repaired. The box outer looks distinctly Bronco but this is down to the artist rather than any link between Classy Hobby that Im aware of. The top lifts off to reveal a complete box that opens via a top flap. The contents of this box are completely full of individually bagged sprues, 25 Grey sprues cover the main tank plus a clear sprue of periscopes, lenses and vision plates, 12 parts in total. There is a sheet of photo etch that has grills, small clasp details, chain links and parts for the jerry cans as seen on kit MC16002, approx 71 parts. 13 sprues each of 16 track links as well as a short extra sprue for spare links all moulded in brown plastic. A zip lock bag contains the pre cut metal pins. A few had pierced the bag and were loose in the box. These pins are a real highlight. Simple enough, but the fact they are already the correct length and all exactly the same is a real boon. The links are simple one piece parts each with minutely cast text on the centre of each link. I cant actually make out what it says and hope some remain on the real one at Bovington. The twin row of guide horns are correctly depicted as filled in, thus over all these are the nicest individual track linked tracks Ive ever had the joy of making. The metal pins hold firm by friction. Each link has 3 attachment points but these cut away cleanly and all that is needed is a quick rub over with an emery board for the part to be ready for assembly. When assembled they are fully moveable. The instructions suggest 95 to 98 for each side, once again a counting task for my Bovington visit.
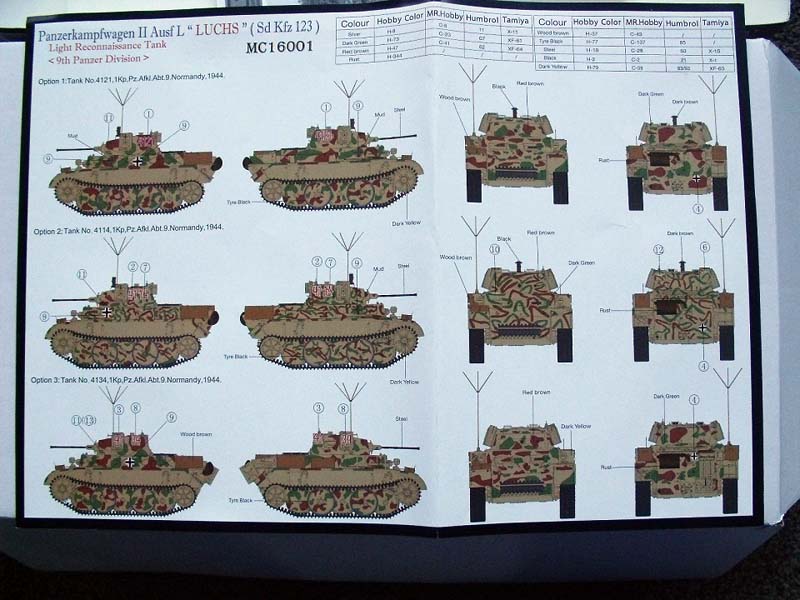
Ive started the review looking at the tracks but the construction of these doesnt get called out until step 20, yet a made up run is fitted as spares on the hull at step 4. It is the instructions that are the weakest part of this wonderful kit, though I should stress that any competent modeller will not fall foul of the errors. Many parts appear and disappear throughout the guide, part A1 for instance is fitted in step 2, gone in step 5, back in 6 and 8, gone again in 10 and 11, back in 12... you get my drift. And that happens with other parts so some flicking back and forth might happen. Also regarding the instructions the process of assembly is at times a little unclear as to which version you are building. The colour painting guide shows three vehicles options, Option 1:- Tank 4121, Option 2:- Tank 4114 and Option 3:- Tank 4134. Yet in the instructions Option1 isnt for Option 1, it is for tank 4134. Thankfully this option stays consistent throughout the build guide and option 1 always refers to 4134 with option 2 for either 4121 or 4114. Once again with a little observation between stages you shouldnt fall foul of this once youve picked up on the difference. Other optional call outs allow you to decide between plastic and photo etch parts and optional locations for fender boxes, these again arent completely clear as to which tank they apply.
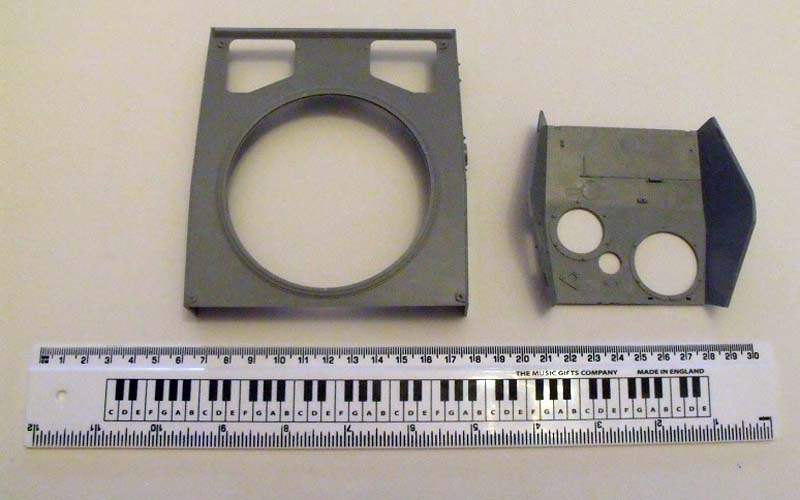
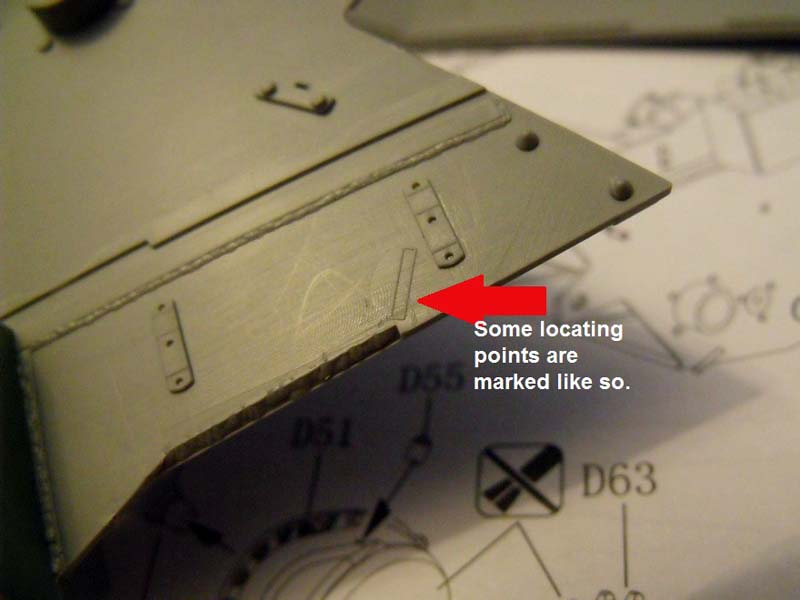
Step 61 relates to building a sight that I have never seen before and is shown as an optional fitting. I have not found it in any period picture I have viewed of the Luchs and wish that Classy Hobby had named what the part is, but that seems to be a modern failing in most kits; not to label parts which is frustrating to those who want to know what they are actually building. The tank fenders are arranged with differing stores but the majority of differences are on the turret so the old warning of- check your references applies here. Parts all seem to fit well so far, but locations are sometimes little more than a faint mark on the surface rather than a positive locating hole so take time in alignment.
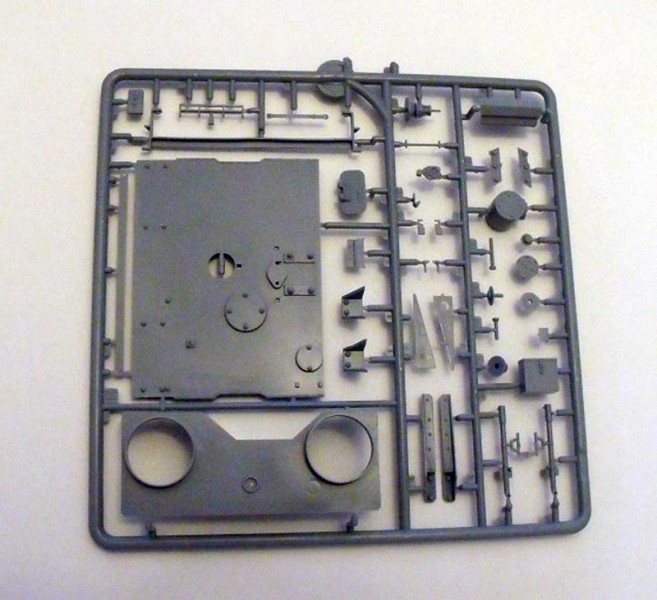
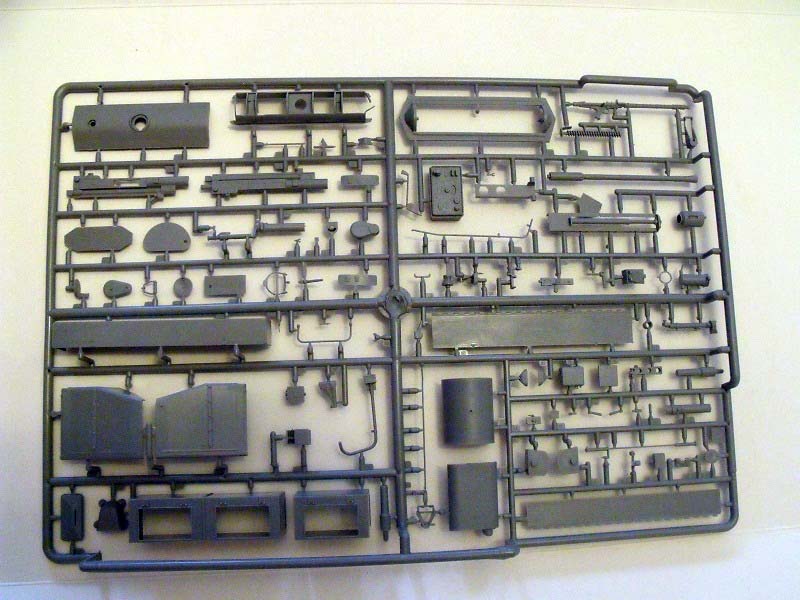
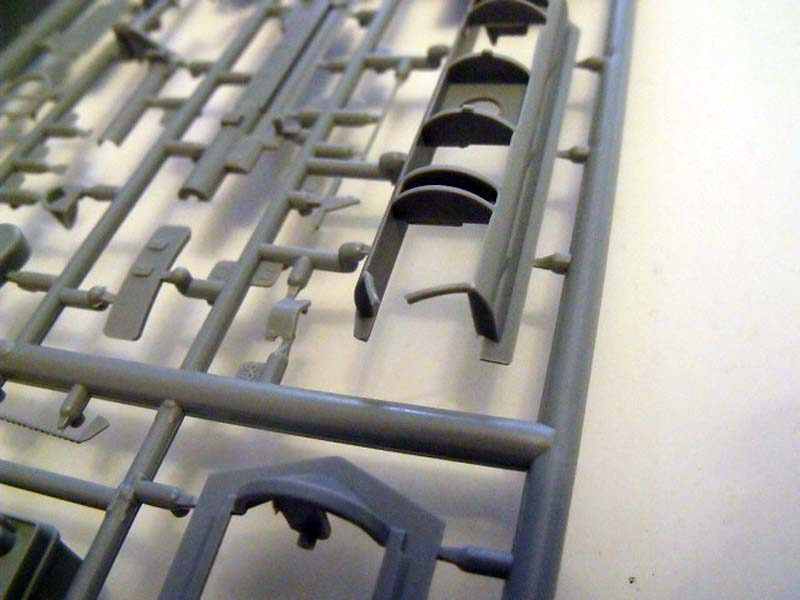
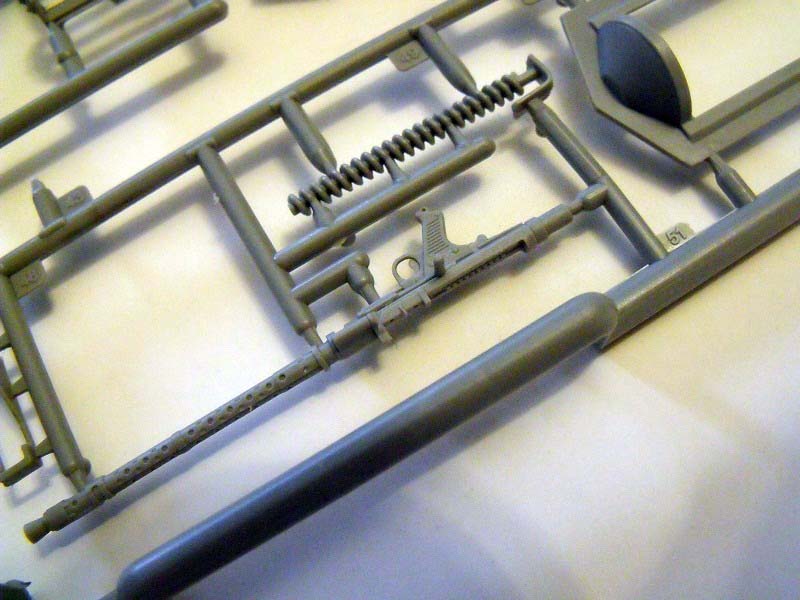
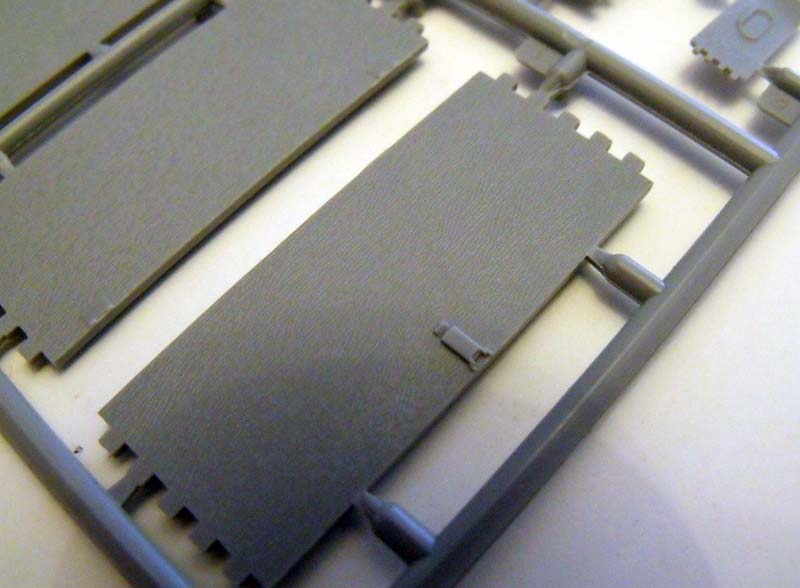
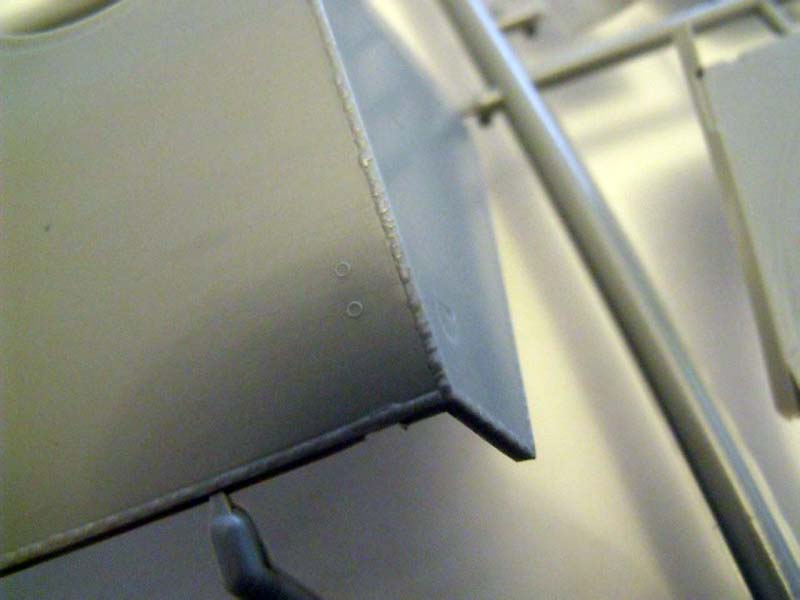
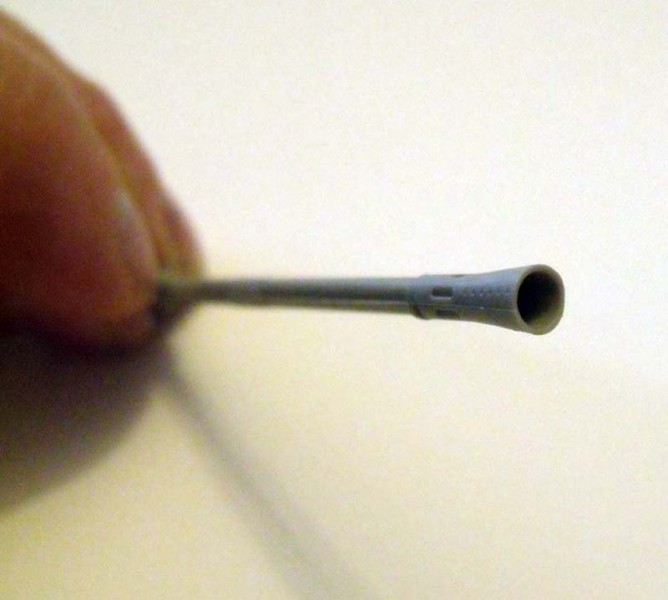
So what of the kits strengths? There is a lot to praise. The wealth of parts are all well moulded and crisp, no flash at all. The detail is great, the 7.92 MG has a separate top cover, separate 20mm rounds to fit into the main magazines, the photo etch tool clasps can be opened and closed if you are precise with the glue. The fasteners for tow ropes have the Axis style half butterfly nut. Weld beads on the hull are beautifully done and appear realistic in definition as well as to the correct scale. The 20mm gun barrel is a single part, which means a hollow end to the muzzle which has detail, but the holes are only depressions so you might want to drill them out. There is a mould line along two sides of the barrel so your happiness at no join line will be short lived as some clean up is still required. The wooden boxes have a subtle texture more akin to ply and finished in the same camouflage paint as the main hull, the box art shows planks of hard wood used for the boxes in an unpainted state. It wont take much effort to convert the supplied parts to match the box art if you prefer.
The turret interior is well appointed with a lot of details that can be viewed if you assemble the rear and top hatches open, or infact you can have the rear hatches functioning if you apply glue carefully. Also functioning is the elevation of the gun barrel and rotation of the turret, the tracks and wheels will rotate if made as instructed and if some thought is applied to the torsion bar construction youll even get some resemblance of suspension movement, but Id not go so far as to suggest this is a suitable model for R/C, it is far too delicate for that.
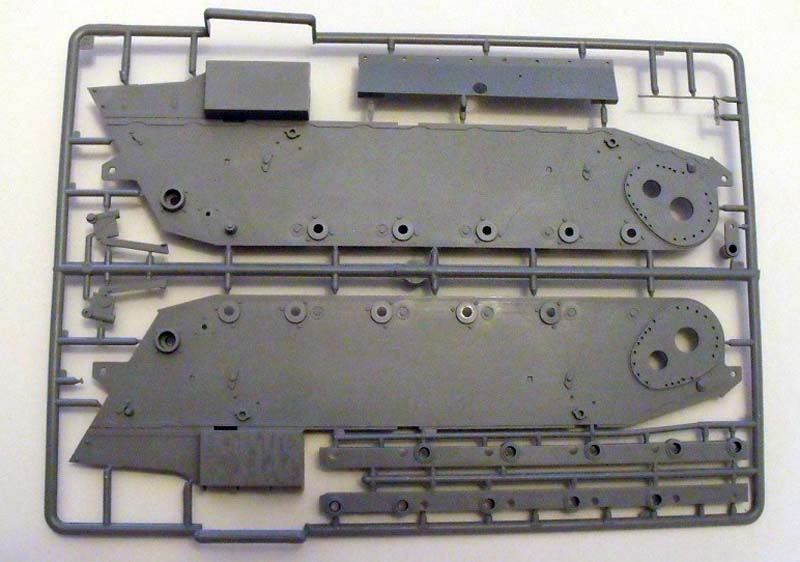
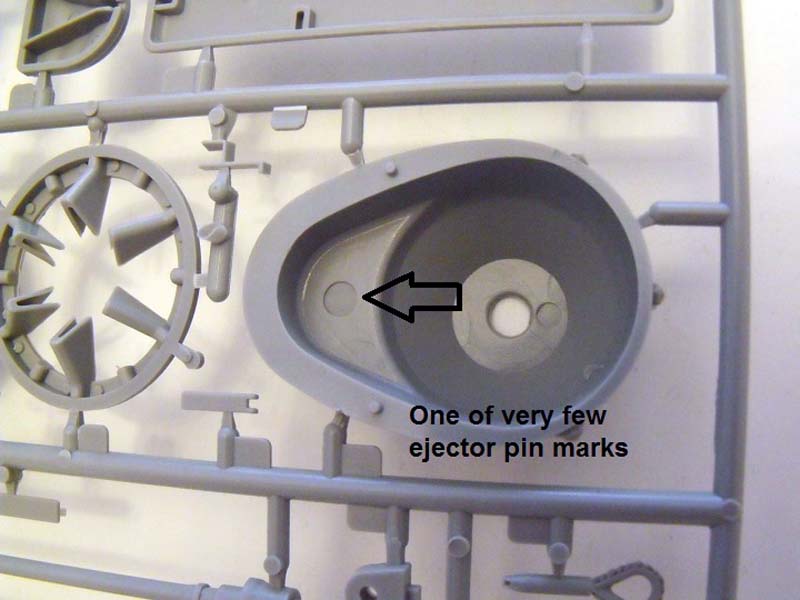
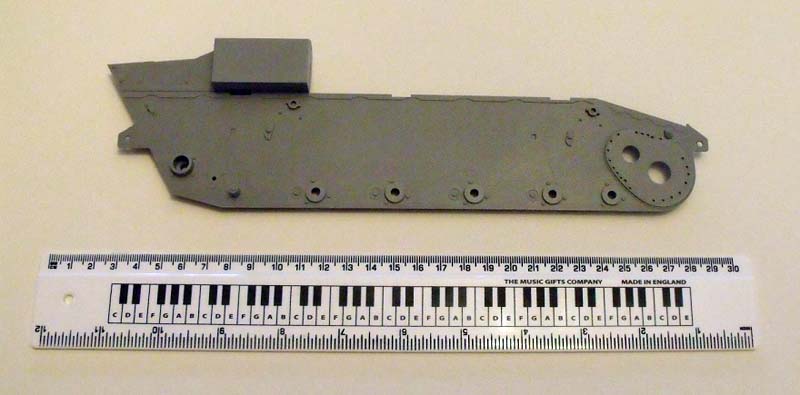
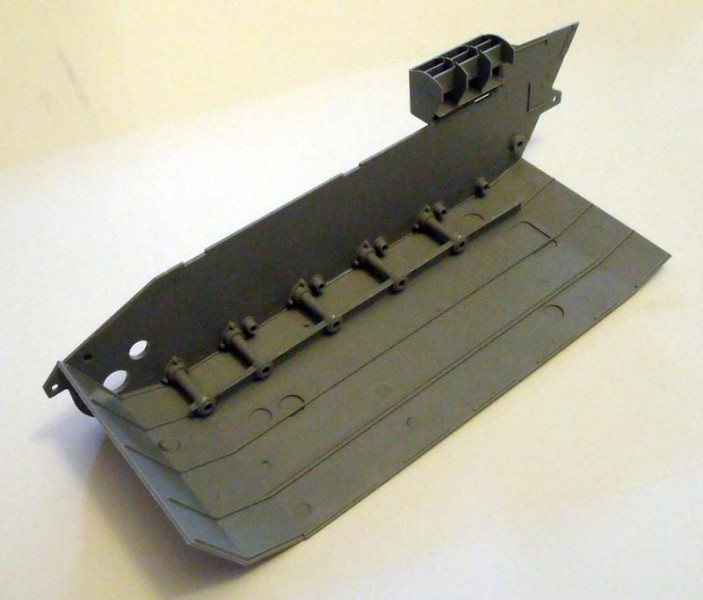
The hull is less detailed, with only the area below the very rear top grills having detail for fans and drive belts. As part A28 is hinged and A19 is separate there is a lot of scope for detailers (or after market manufacturers) to scratch build an engine and drivers/radio operators compartment. The torsion bars are present as is the rear of some very detailed vision flaps. It seems as if the decision not to continue the excellent detail in the hull was made after some excellent designing of the included parts had been done. Perhaps Classy Hobby will issue this vehicle as a more expensive but more complete kit with interior as well? The interior of the hull is the only area that had obvious ejector pin marks, some did appear in other areas such as backs of part D51 but all seem to be in places that wont be seen after assembly.
String (missing from my sample but included) is used for the tow rope with plastic loops for the ends. Classy Hobby have issued a note that it is unclear if the Luchs had a tow rope fitted in the style shown in their model, I have seen one picture of a disabled Luchs with a rear tow cable fitted but cannot tell if that was on the Eastern or Western front, it is linked here to a Flikr photo account that contains heaps of good pictures.
Classy Hobby have also issued a number of small corrections to mis-labelled parts in the instructions so hopefully these will not appear in future imports.
The kit contains a small decal sheet and the colour plan calls out 4 paint brands as well as a conventional name such as tyre black etc. Markings are for Tank 4121, Tank 4114, and Tank 4134 all from 9th Panzer reconnaissance battalion, 9th Panzer Division serving in Normandy 1944
Strengths
Fantastic tracks that are simple to construct and operate perfectly. Detailed turret interior. Detailed parts breakdown without over engineering. Well defined weld lines. Ideal choice of scale for compact vehicle. Sensible amount of PE. Nice parts box (yes I think it is). Highly detailed with lots of room for additional work if wished for.
Weakness
Instructions can be a little confusing, take your time and cross check. No figures included. No engine detail, not a weakness, as not everyone wants all the internals to build, but space is there for one if desired.
SUMMARY
Highs: The tracks are the stars of the model as they are a joy to build.Lows: The instructions are a little haphazard and will require care from the modeller.Verdict: A great kit that has the ability to be stunning depending on your abilities.
Our Thanks to Classy Hobby! This item was provided by them for the purpose of having it reviewed on this KitMaker Network site. If you would like your kit, book, or product reviewed, please contact us.
About Darren Baker (CMOT) FROM: ENGLAND - SOUTH WEST, UNITED KINGDOM
I have been building model kits since the early 70s starting with Airfix kits of mostly aircraft, then progressing to the point I am at now building predominantly armour kits from all countries and time periods. Living in the middle of Salisbury plain since the 70s, I have had lots of opportunitie...
Talking of killer shipping (and just price generally) this is the only offer on UK eBay right now:
That's $154 + $64pp.
I'm sure things will settle down once it is available though... this is surely just to capture the over-excitable.
I build 1/16 armor kits at at $99 it DOES look very good. It's going to be about 5 inches shorter than a 1/16 Panther tank so a good idea of it's size.
Jeff


Comments