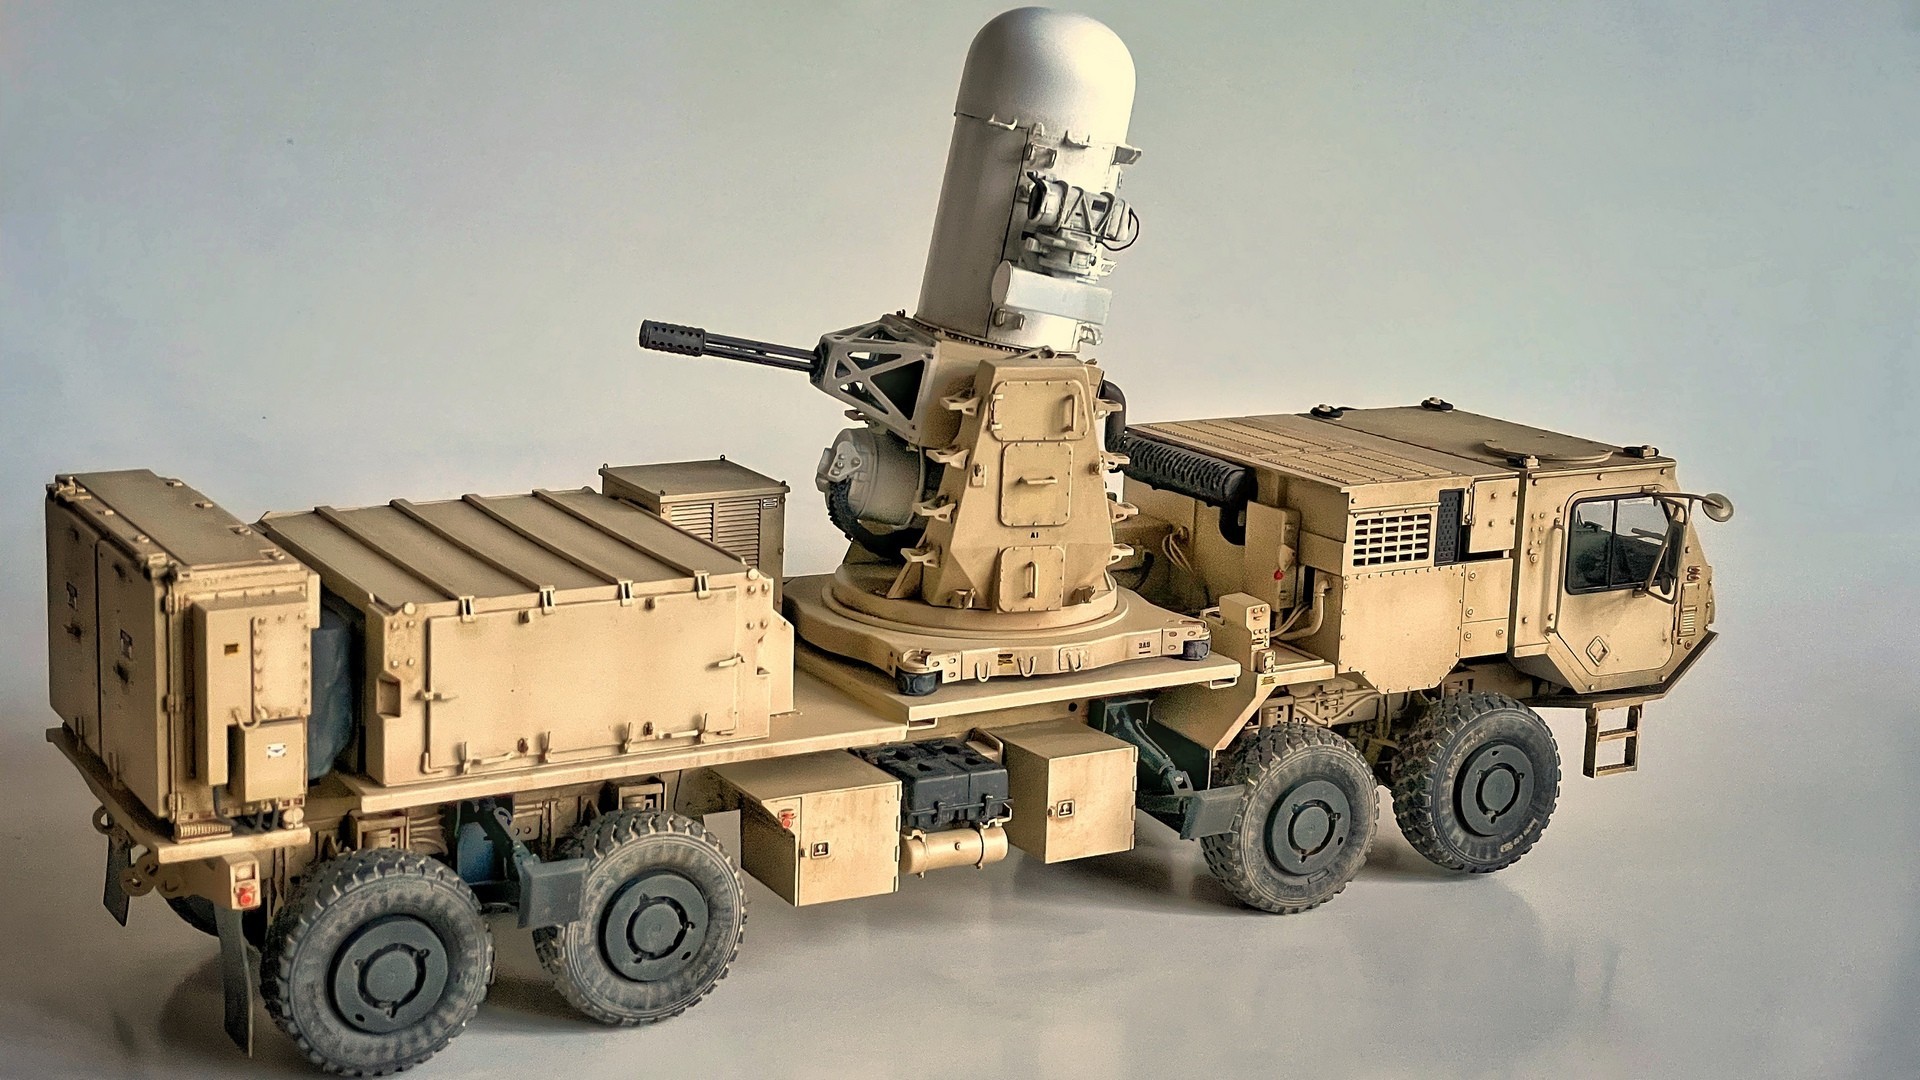
The C-RAM (Counter Rocket, Artillery, and Mortar) "Centurion" system is a weapon developed by Raytheon in 2004, similar in concept to the Israeli Iron Dome. It is based on the Mk 15 Phalanx Close In Weapon System (CIWS) mounted on many NATO vessels. The system was first deployed to Iraq in 2006, protecting the Green Zone and effectively intercepting 70-80 percent of incoming rockets and mortars. The Centurion can be mounted on trailers or Oshkosh trucks, with a Mobile Centurion variant introduced in 2008 as a prototype, featuring the hybrid-electric HEMTT A3 heavy truck. That's the subject of this kit, even though it never moved past the prototype stage and was never actually fielded.
I was always fascinated with the Phalanx CIWS, and when RPG Model issued an excellent 1/35 scale model of it (https://www.scalemates.com/kits/rpg-model-35005-mk-15-phalanx-close-in-weapon-system--1213859), I had to get one. In summer 2023, I Love Kit released the Mobile Centurion, combining the Phalanx with an all-terrain HEMTT A3 truck (https://www.scalemates.com/kits/i-love-kit-63526-us-c-ram-with-hemtt-a3--1428208). Even though there isn't much information online being a prototype only version, it is nevertheless an unusual and awesome weapon that I wanted to build as well.
Unfortunately, despite being an interesting subject, the kit is a mixed bag, especially considering the hefty price (approx. $150 CAD). While part fit is very good all around, there are a number of shortcomings that marred it:
1) Poor instructions: several errors on part number call-outs, vague locating arrows that kept me guessing, and no background info whatsoever on the weapon system. One kit part was on the sprues, but it was left out completely from the instructions - I noticed this based on photo references, and used it accordingly;
2) Inconsistent detail levels: the truck undercarriage and drive train is beautifully detailed, but the superstructure, weapon components, and driver cab lack finesse and detail, as if the two sets came from separate designs and moldings, with the superstructure being a rushed addition;
3) The decals also lacked finesse and detail, a real shame.
The Phalanx gun and accompanying electrical boxes are not up to par, and I ended up repurposing my built-up RPG Model Phalanx, which is a far more accurate and detailed representation of the weapon. I carefully disassembled it, removed all decals, and repainted it, which made for a far better representation of the real thing. However, for the price I would have hoped to use what's in the box, rather than having to use another expensive kit.
I also spent a fair bit of time adding detail to the driver cab, which was quite bare out of the box.
Another challenge with the kit was that two wheels, one front and one rear, didn’t touch the ground once cemented in place. This might have been either sloppy assembly on my part, or the long plastic frame being slightly warped. Rather than hide the defect by creating uneven groundwork, I decided to straighten the frame to make all wheels contact the ground. I drilled a small hole on the display base on the inside of the two wheels, ran thin metal wire around the axle, and pulled down the wire to make the wheel contact the base. I then secured the wire with a small screw. Happily the surgery worked and all was good with the world again.
All things considered, the kit makes for a rare and impressive weapon system, and in 1/35 scale, it is a large and imposing model. This was a highly anticipated offering but not the kit I had hoped for, especially given the $150 (Canadian dollars) price.
The I Love Kit box
A comparison between the kit's gun base Vs the disassembled RPG Model gun base. The RPG model shows superior detail, which led me to re-purpose it and ignore the I Love Kit gun assemblies altogether.
The RPG Model Phalanx model disassembled and ready for repaint.
I spent considerable time adding some details and wiring to the otherwise bare driver cab.
I added wiring and tubing based on reference photos. None were present in the kit except the one pipe visible on the lower right of the photo.
Primer and base coat applied. Mr. Color H313 lacquer based acrylic paint is the only one I could find as a perfect match, even though the instructions called for a darker shade.
I had to tie down two of the wheels to ensure they would contact the ground correctly.
Reference photo and my model side by side.

