

1⁄35Opel Kapitan
9
Comments
Introduction
Following the review I did earlier on the Opel Kapitän 2 door saloon; a link to which can be found at the end of this feature. It was time to build it and make a build feature out of it. Mostly to answer the questions I had no answers to at the time of the review. I wont go deeper into whats in the box as the review answers those questions perfectly. However on the subject of accuracy and build there were still a few open holes which I hoped to fill. I have by now built the kit I can go deeper into those issues. And my findings are below Just as with ICMs Opel Kadett K38 which I built earlier; a link to which is also at the end of this feature. I was really looking forward to this kit. Probably even more so because as I mentioned in the review it came with separate doors to have it modelled open together with the bonnet so you could show off both the nice interior as well as the engine bay with all its details. How that turned out you will find out later.The build
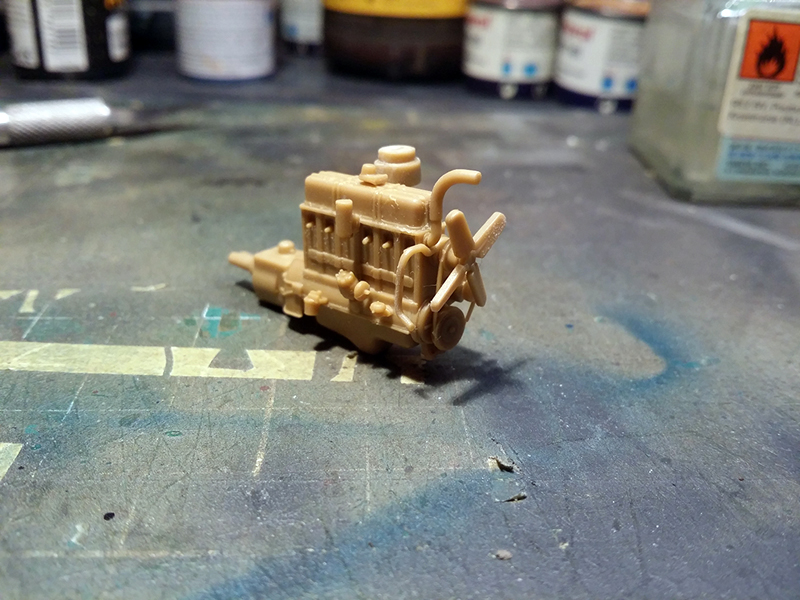
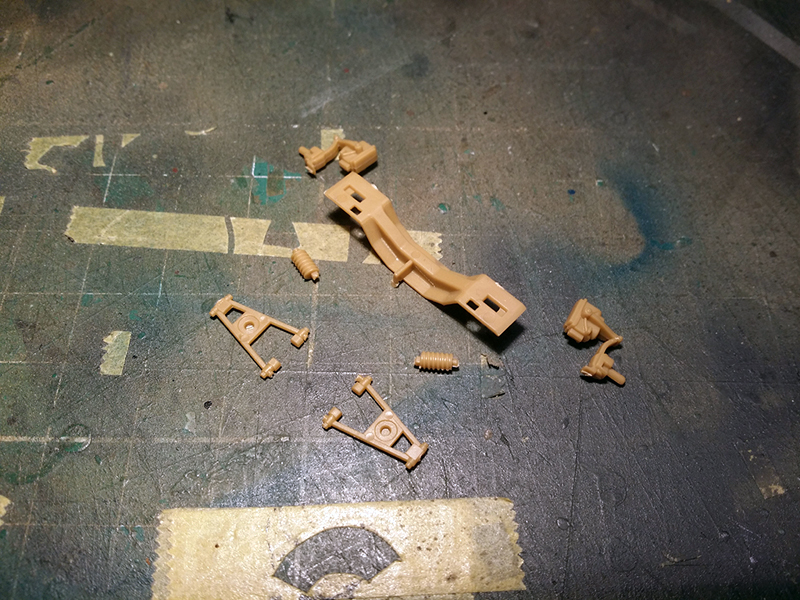
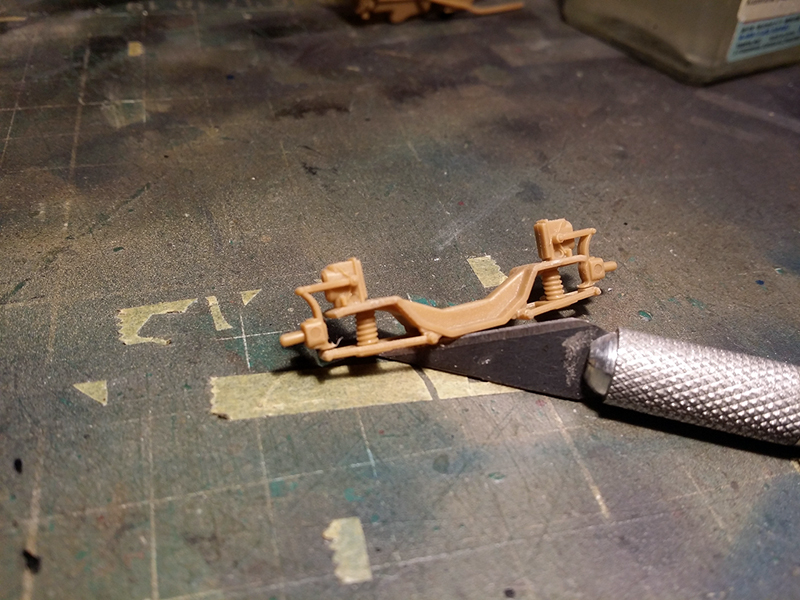
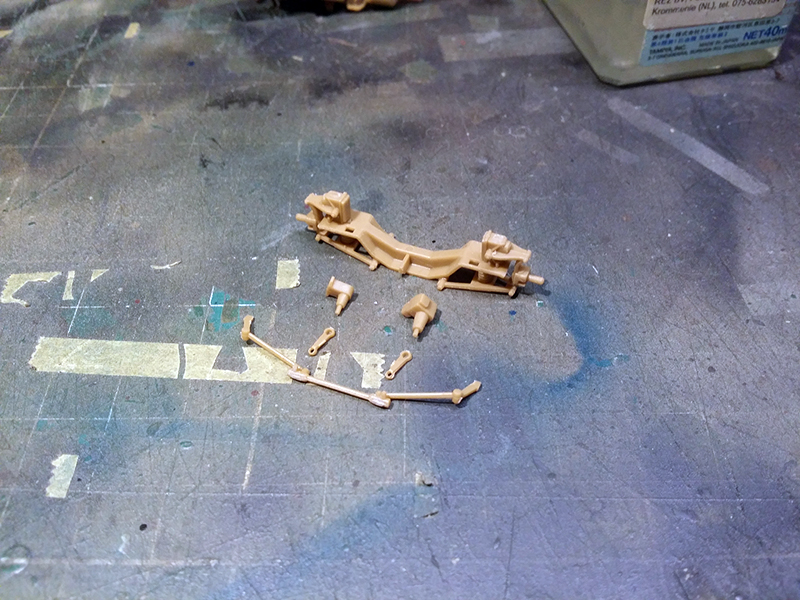
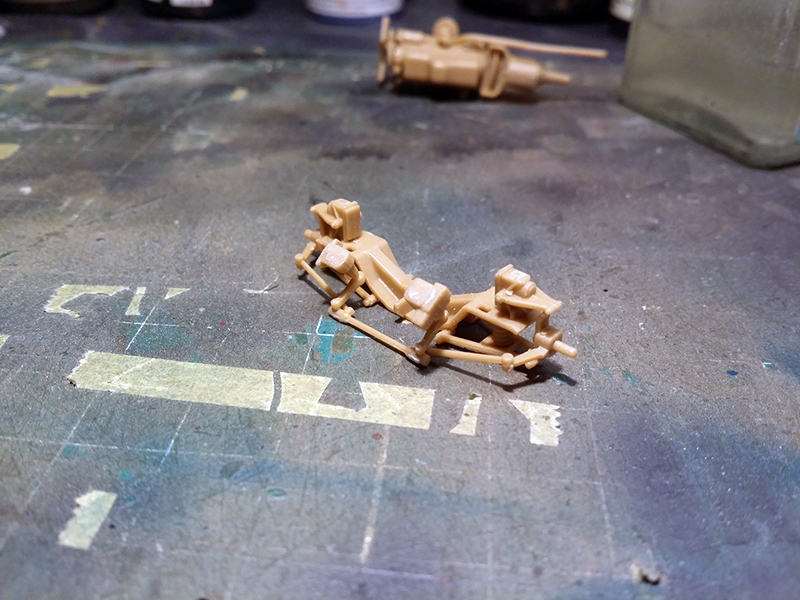
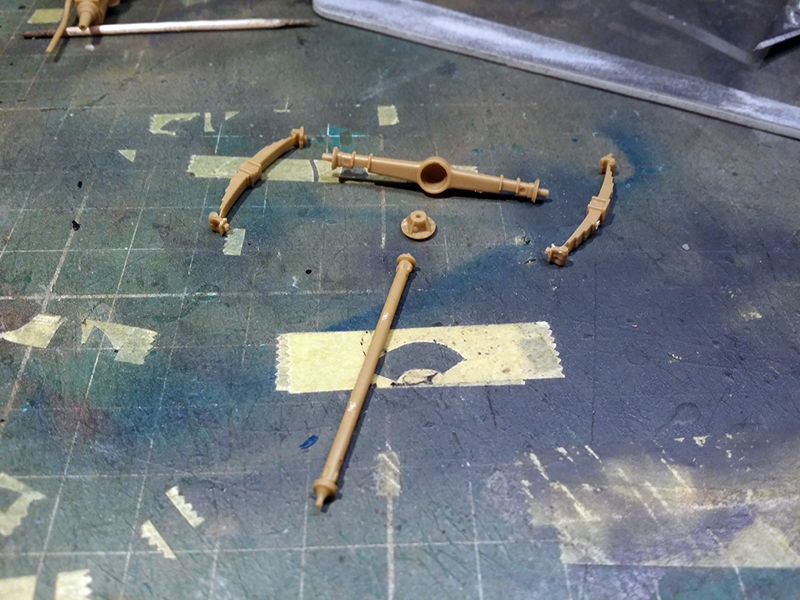
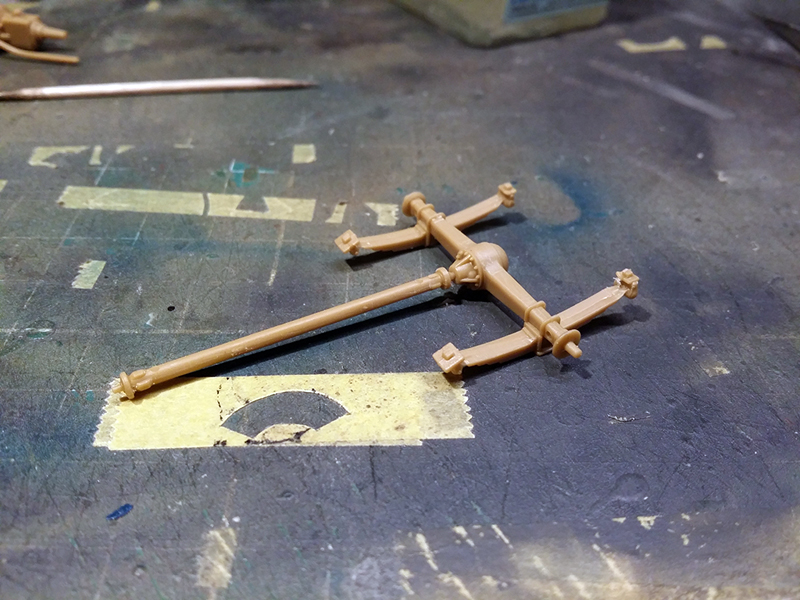
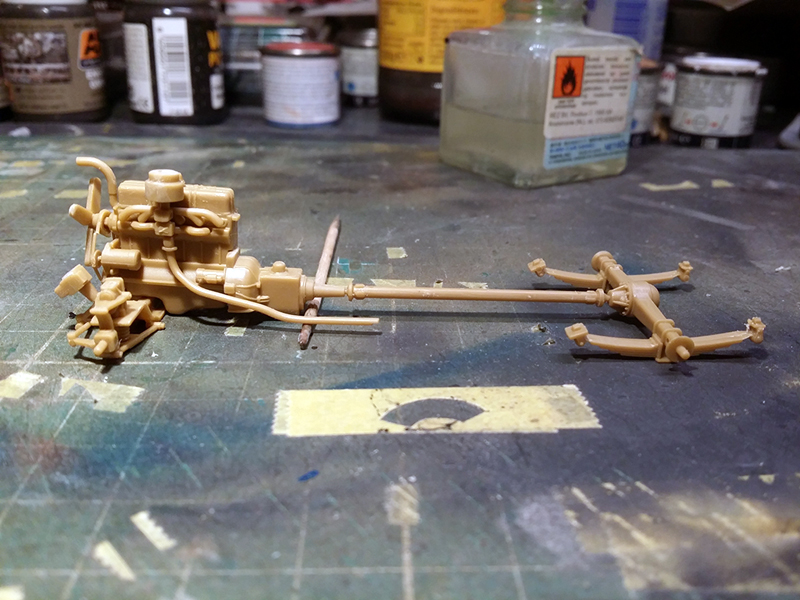
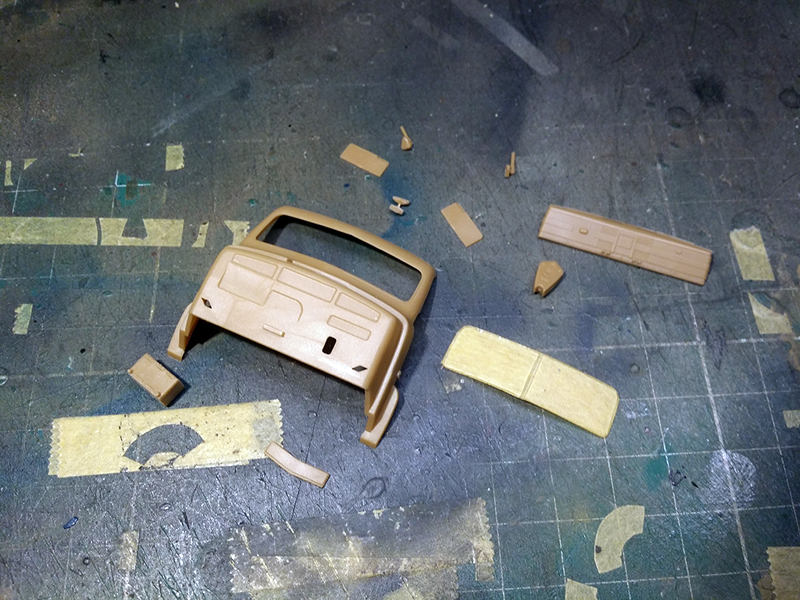
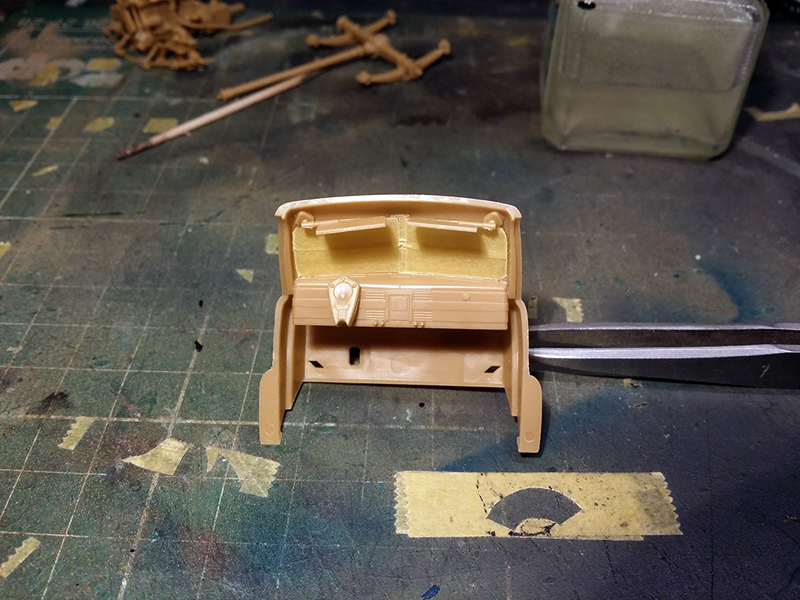
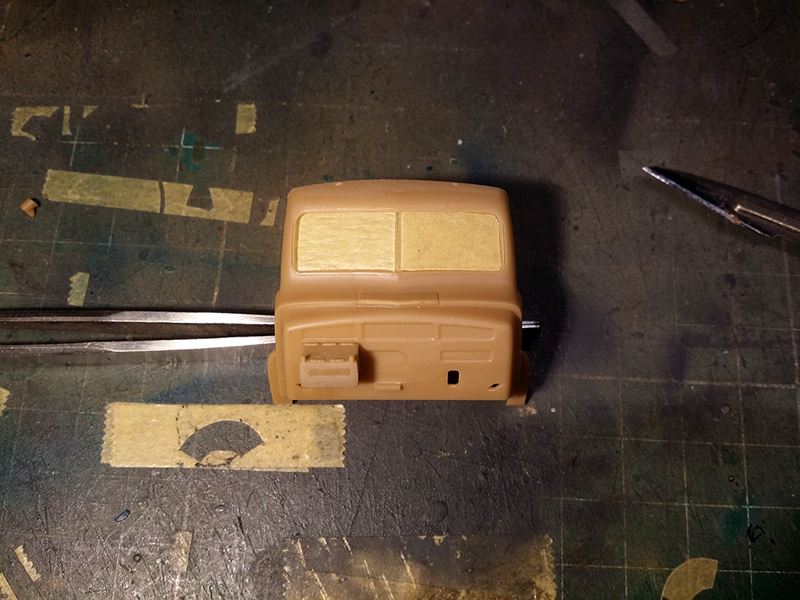
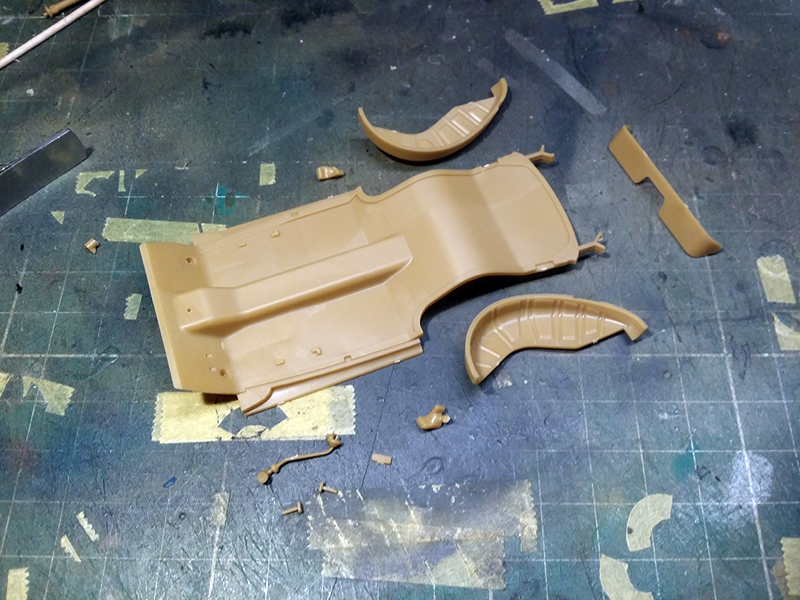
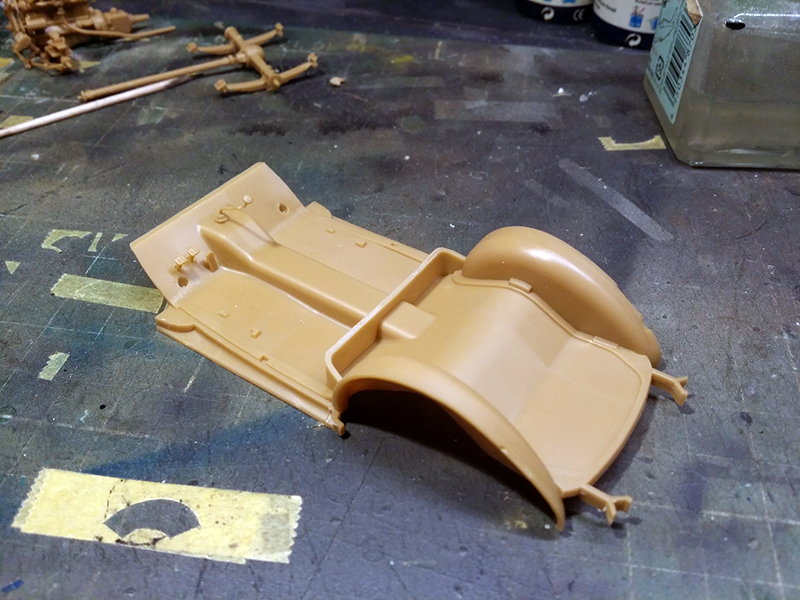
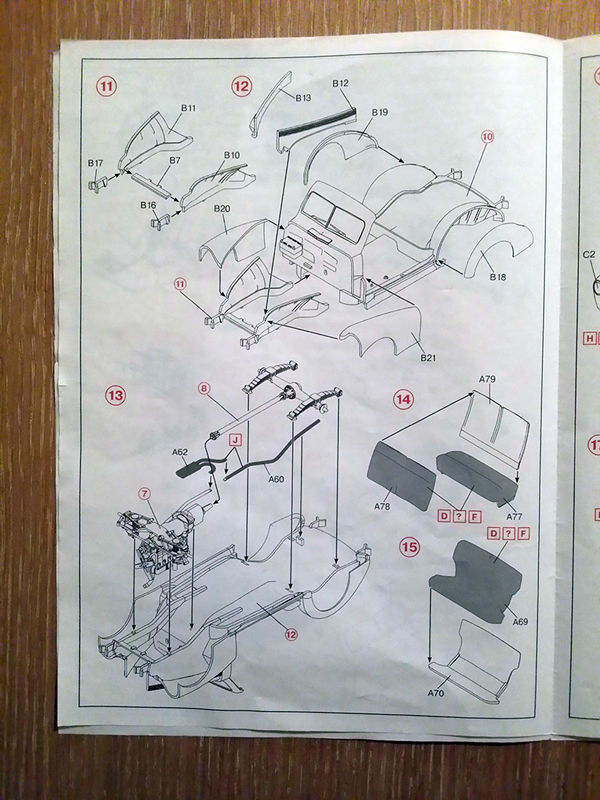
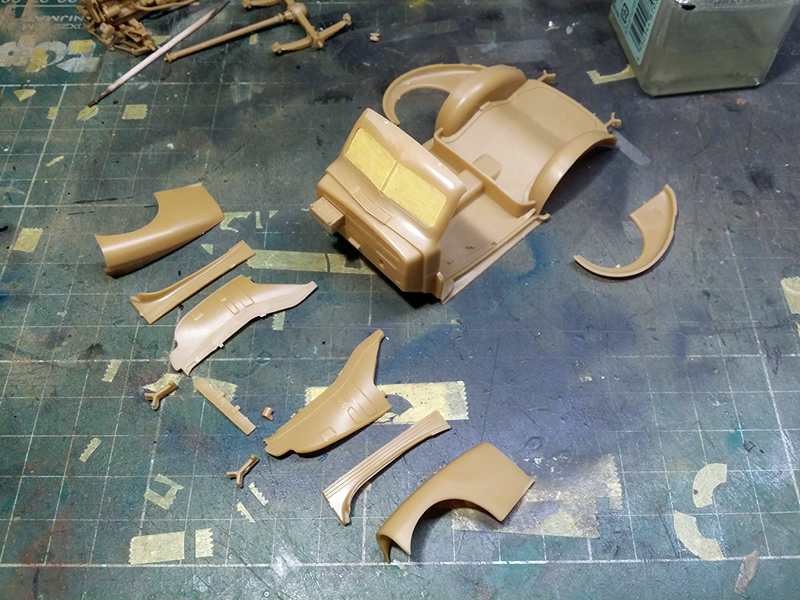
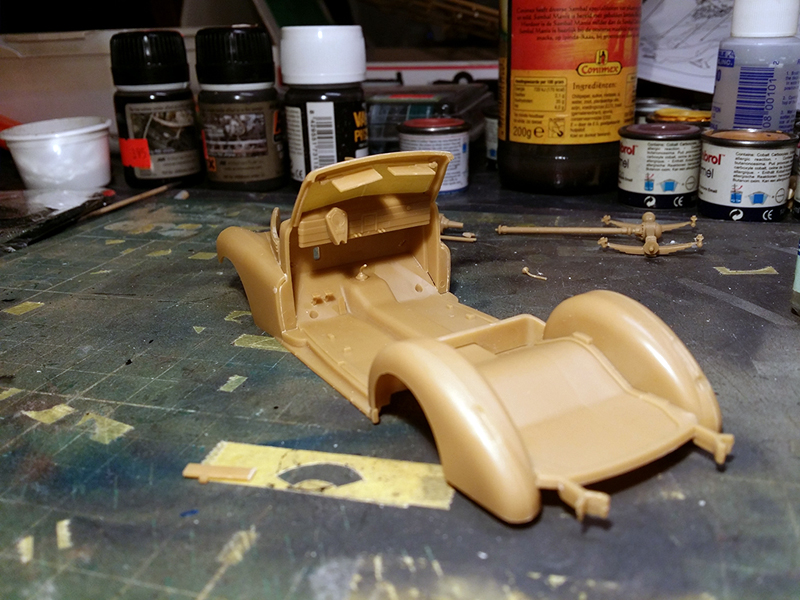
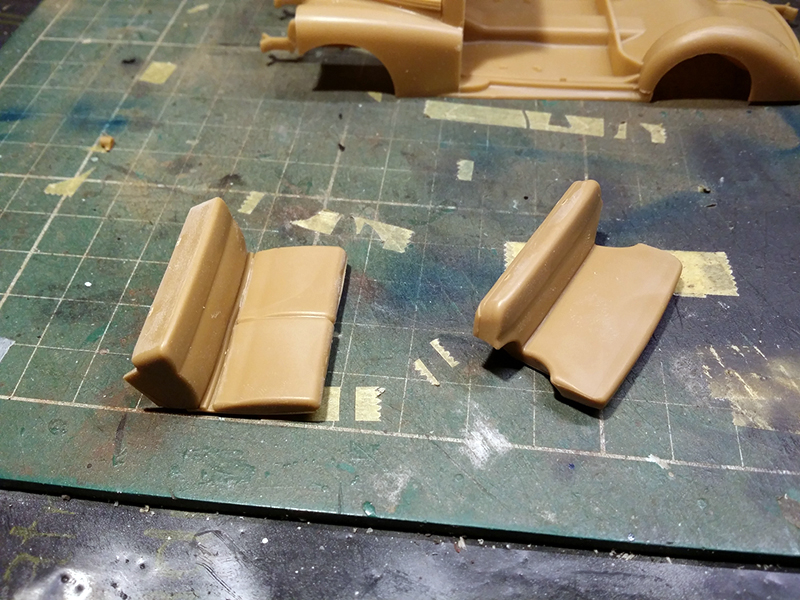
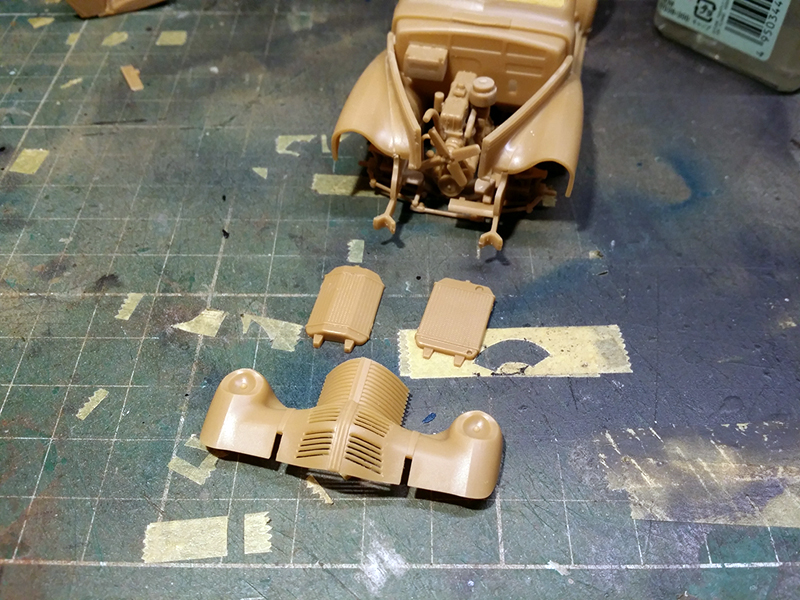
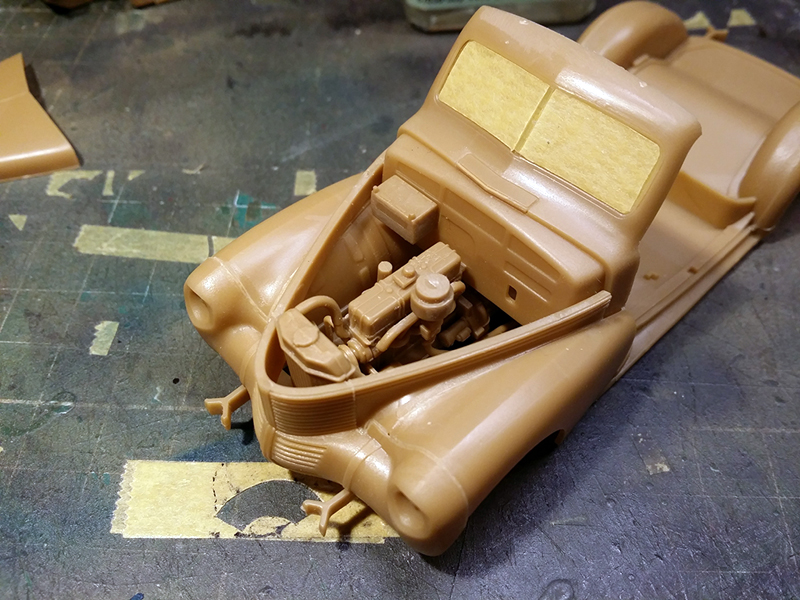
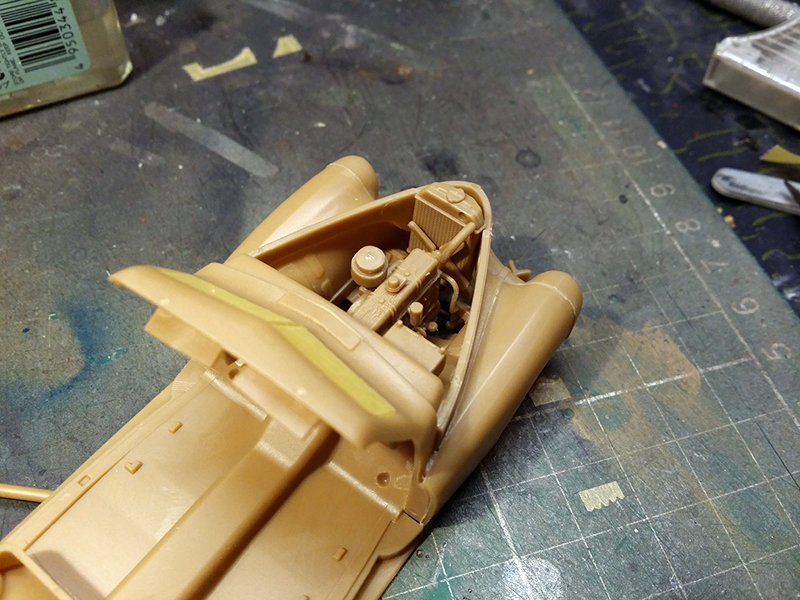
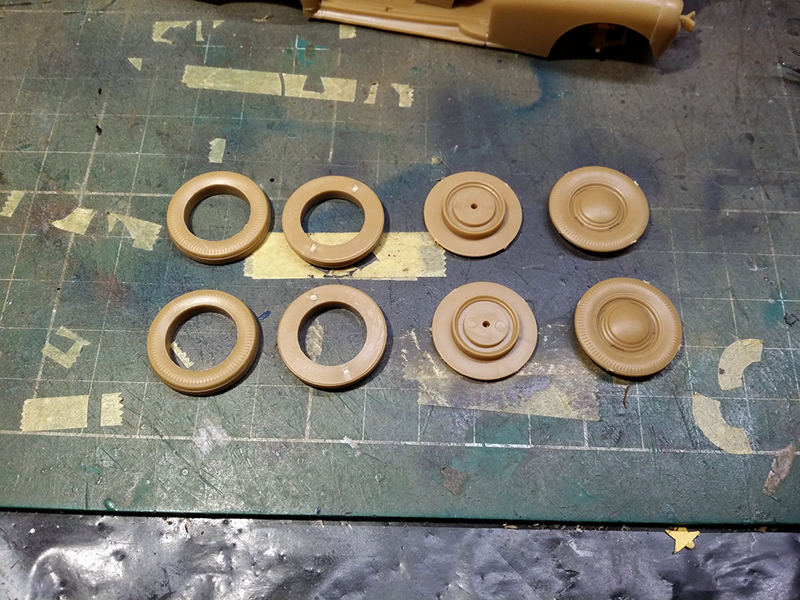
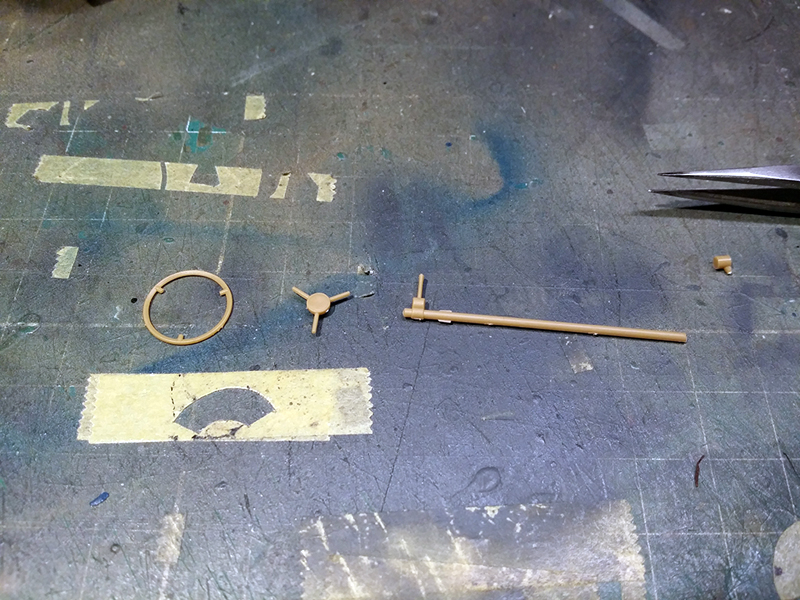
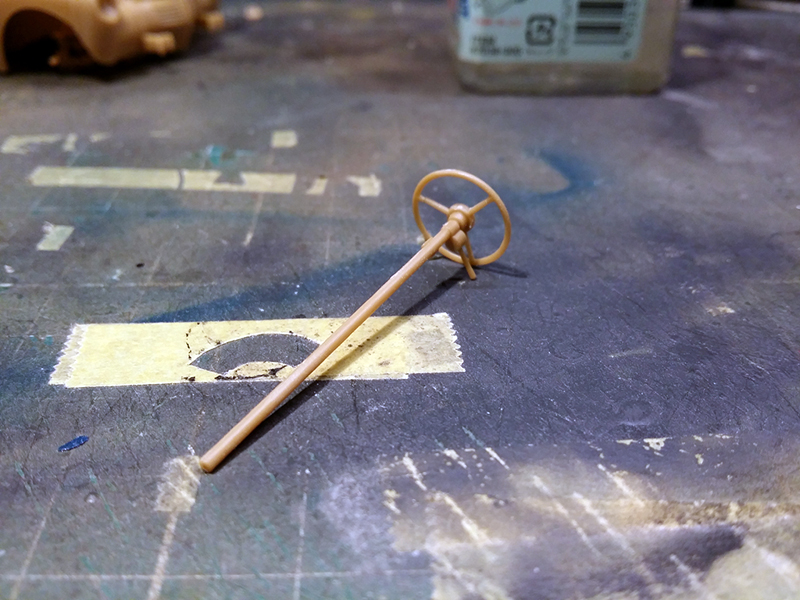
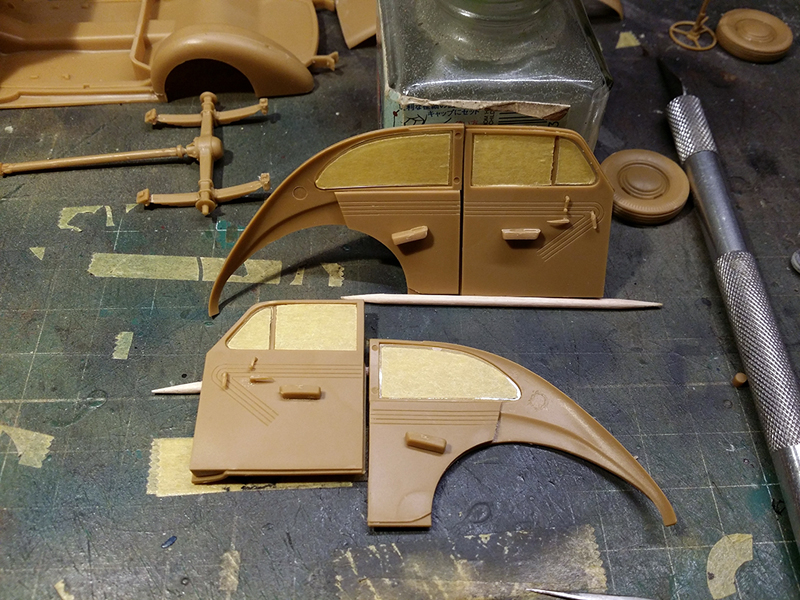
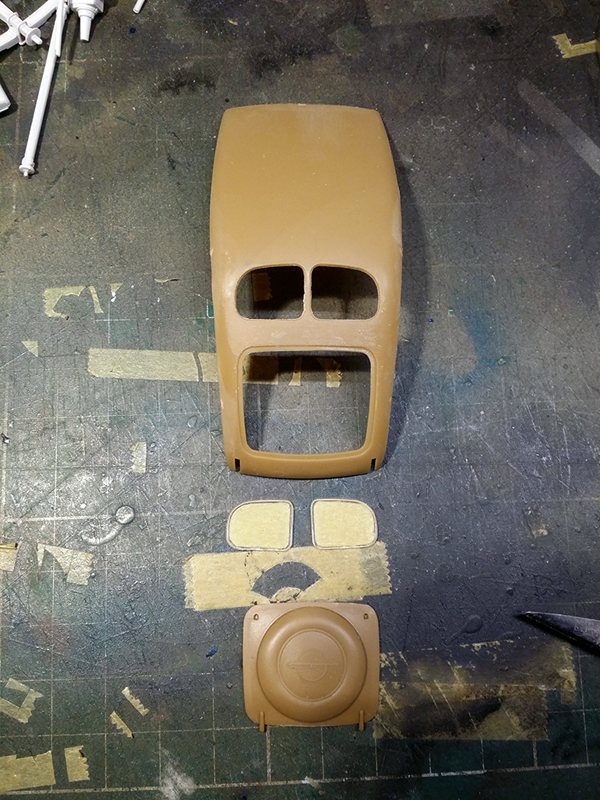
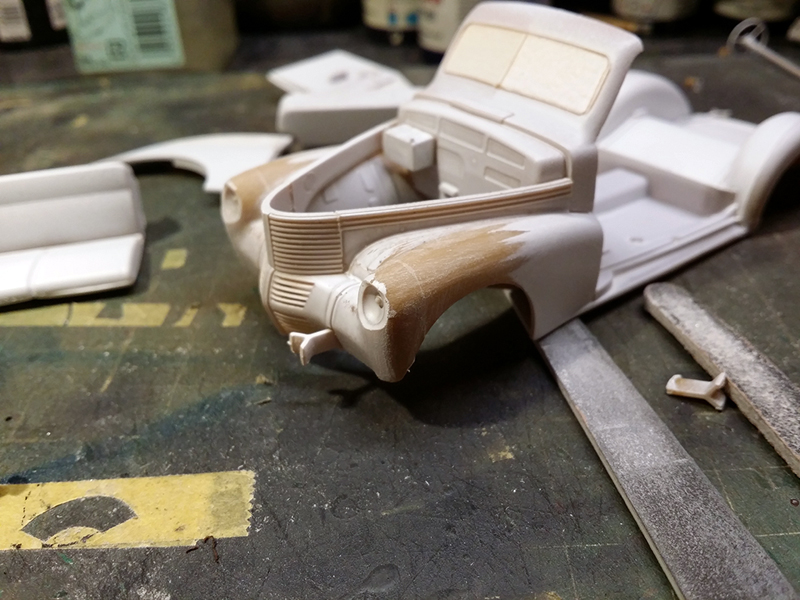
Starting with page 1. Which has 10 steps of the build process. The first 8 deal with the construction of the cars engine. The front and back suspension and drivetrain. 23 parts, some of them very small make up the Kapitäns Powerhouse. No problems were encountered. The instructions are very clear and the part locations are as well; you should end up with a good representation of the engine. Only thing you could add is some wires. I decided not to for reasons that will become clear later on. Step 5 to 8 handle the suspensions and drivetrain. Again no problems found. Step 9 and 10 have you start on the interior bits of the car. The body floor is supplied as one big part to which you mount the firewall/windshield combo which has nice detail on the engine bay side and on the interior side you add a really nice and correct dashboard. It also has you add the windshield in this step. Make your life easier and mask it before mounting it as you have to glue it in the frame from the inside. You also add the inside of the fender wells in the back and a lot of smaller doodads like the sunblinds, rear-view mirror, gas clutch and brake pedals. No real problems here except that I added the rear view mirror after the whole interior was painted because I suspected I would break it when I peeled off the masking tape on the inside of the windscreen. Turning the page and on to step 11 to 15 which deals with the engine bay and the fender wings front and back. Adding the engine with the front and back suspension and the drivetrain to the bottom of the chassis. And assembling the front and rear seats. There are no real problems here although the sheet metal stuff on the front of the car can be a bit of a puzzle. I solved this by first gluing parts B12 and B13 to the engine bay parts and then glue the fender wings (parts B20 and B21) to that. A bit of putty is needed to fill the seams here and the excess was wiped off with a Q-tip moistened with nail polish remover without acetone. The next page has 2 steps. Number 16 and 17. In step 16 you add the wheels which are made of 2 parts each. The tire itself and a part that has the outside of the tire with the wheel rim. Very nice detail. 2 of the wheels in my sample had a dimple in the wheel hub which were filled with putty and sanded smooth. Also you add the radiator and the really nice nose of the car with its distinct grille. In this step it also shows you adding the lenses which in this case I have left off till most of the airbrush work was done so I could paint the insides silver. I didnt like to mask them. Step 17 has you add the bumpers and the seats. The steering wheel which again consists of 2 parts. The ring and the spokes which could easily have been done in 1 part, the steering rod and the big one- piece bonnet. I decided to leave all the interior bits separate till all were finished so I could paint them, then assemble it and closing the vehicle up before I could paint the exterior. In the review I already voiced the lack of interior detail on the bonnet but upon building it I found out it goes even further than that. The Kapitän comes with a nice bonnet but in the design process of the kit nobody at ICM appears to have given hinges and the working of doors concept a thought. The way they designed the bonnet there is no way you can assemble it so that it sits like the real deal. It is there for a bit of a shame of that really nice engine that is hidden underneath it. I solved this by spraying the engine bay and engine black and focus my time on other things of the kit. Turning to page 4 which has you assemble the sheet metal stuff of the body and the roof. The doors, which are assembled in step 18 are 9 part affairs, one outside panel with window frame, 2 windows, one inside panel with window frame, one armrest and 4 little handles and levers. Detail is sharp and fairly correct. And no problems in assembly should arise. Where you will encounter problems is in modelling them open. In the review I was quite enthusiastic because the doors were delivered as separate parts but again the engineer responsible for the master must have cut a corner or two here. As again the way they are provided in the kit they simply wont work. I decided to have them closed. If you want to have them open it will mean you have to cut the inside panel in the area where the bulge is that runs from the fender into the door. And even then you have to figure out the hinge part on the inside of that because it will hang in mid-air. Also the fit is not the best and it is most noticeable on the aforementioned bulge where the fender goes over into the door. It is either there or on the top were the roof goes over the door. It is more obvious there so I decided to go with the lesser of 2 evils and decided to leave the gap at the bottom. The sides of the body (step 19) are made of 4 parts. Outside panel, inside panel with armrest and a window that gets sandwiched between them. No problems there. The last steps, number 20 and 21 have you bring everything together. First you glue in the doors and the side panels and on top of that you glue the 4 part roof (roof, 2 rear windows and the rear hatch with the (missing) spare wheel.) No real problems here except I had to use some putty to fill some small seams between the roof and the side panels and a seam that runs the width of the roof where it meets the windshield frame. In those steps you also add some smaller bits and bobs like the direction indicators, the lights and the license plates. At first I was really enthusiastic about the kit when I reviewed it. Open doors, a nice separate bonnet so you could show off all the nice stuff inside. But it turned into a bit of a deception. Even more so because I had quite a nice diorama idea that leaned completely on having everything opened up. Oh well nill desperandum I have another car with which I can make that so I decided to get on with the ätän and make something nice out of it.Accuracy
A 1:1 Opel Kapitän measures 462 centimetres which in scale translates to 13,2 cm and from bumper to bumper it is exactly that. 1:1 width is 166 cm which in 1:35 is 4,7 cm and again ICM has it spot on. Height of the car is 157,5 cm scale height is 4,5 cm. And I cant fault ICMs work on this point either. All the other details match pictures I have seen. The dash is correct, Interior details spot on all-in all this kit does extremely well done when it comes to accuracy.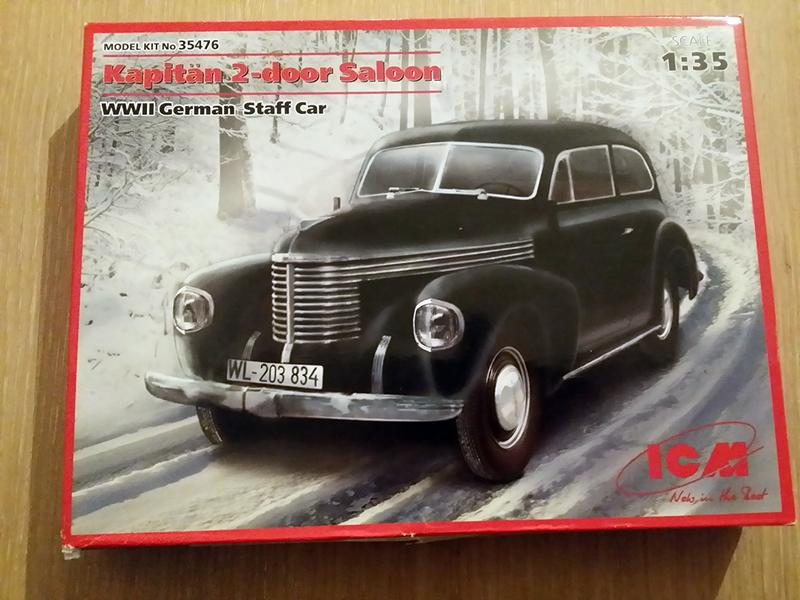


About the Author


FROM: NOORD-HOLLAND, NETHERLANDS
Started modelling when I was about 7 or 8 years old had a little break in between (school, girls partying) and eventually returned when finding this site in 2002. Main interest WW2 German army, wheeled vehicles and radio and communication troops or every other thing that manages to catch my interest...
Comments

Thanks Mister Baker for putting this feature online. You did another great job.
@ Kurt
Thanks for the compliments. Really appreciated.
APR 10, 2014 - 11:39 PM


Awesome, what a gorgeous finish!
Thank you so much for the article, very useful, I love the vehicle and have one kit waiting in the stash.
Cheers,
Christophe
APR 11, 2014 - 11:12 PM
Ola Christophe.
Thanks for your reply and the kind words. I'm glad you found it useful and I'm looking forward to your efforts once you start this nice kit. Even with its shortcomings you can make something really nice out of it.
APR 12, 2014 - 02:08 AM

Hi Robert,
Another great article and build. Pity about the bonnet. Do the doors open (missed that)!
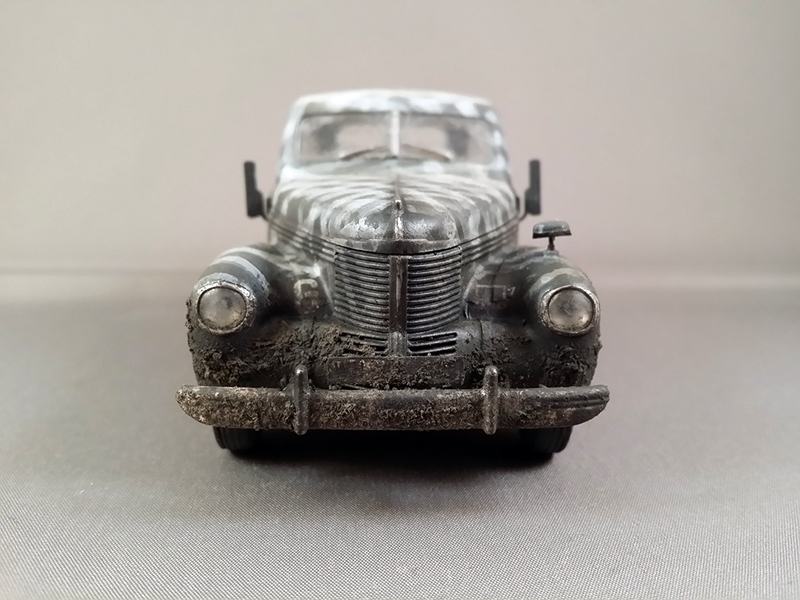
Funky and interesting camo scheme, nice work on the painting and finish..
Excellent addition to your vehicle collection..
Cheers
Al
APR 12, 2014 - 04:31 AM
Thanks Alan for the kind words.
The doors can be opened but it requires quite a bit of surgery on the inside of the doors where the bulge at the bottom is. And you have to scratchbuilt the hingesystems.
But otherwise it is a decent kit that can be made into something cool. It's currently standing among it's other 1:35 Automotive Brethren.
APR 12, 2014 - 04:41 AM
Copyright ©2021 by Robert Blokker. Images and/or videos also by copyright holder unless otherwise noted. The views and opinions expressed herein are solely the views and opinions of the authors and/or contributors to this Web site and do not necessarily represent the views and/or opinions of Armorama, KitMaker Network, or Silver Star Enterrpises. All rights reserved. Originally published on: 2014-04-10 21:37:28. Unique Reads: 12248

WEB HOSTING BY


Copyright ©2021 Armorama and Kitmaker Network, a subsidiary of Silver Star Enterprises
All Rights Reserved. Please read our Conditions of Use and Privacy Policy.
All Rights Reserved. Please read our Conditions of Use and Privacy Policy.