Alabama, United States
Joined: October 21, 2005
KitMaker: 310 posts
Armorama: 302 posts
Posted: Tuesday, January 07, 2020 - 04:12 PM UTC
Quoted Text
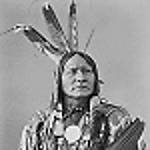
This will be my inspiration picture purported to show an M60A1 of the 3rd Infantry Division in Germany sometime in the 1970's.
(Image source was apparently Pinterest but I failed miserably in posting a link.)
Now the color scheme seems a bit odd to me as it appears to be a very sloppily applied MERDC desert camouflage! Am I close do you think? Anyone have any other ideas?
That is the pre-MERDC "MASSTER" camo scheme used by the 7th Army.
https://sites.google.com/site/merdccamo/home/7tharmy"Lead me, Follow me, Or get out of my way!" --GEN George S. Patton
California, United States
Joined: February 01, 2010
KitMaker: 551 posts
Armorama: 543 posts
Posted: Wednesday, January 08, 2020 - 06:48 AM UTC
Quoted Text
I think that white bit on the M60A1 glacis isn't paint, but some cloth-based object. There is another white object between the third and fourth road wheels too. And those bolts on the lower glacis are interesting - not sure why they are there.
That object above the mantlet looks like an upturned field-made BBQ! And it was very considerate of the designers to make the front fenders just right for snoozing... 
BBQ! Yes that makes much more sense than a 50 gallon oil drum on top of the mantlet! I concur that there seems to be some cloth - covering the black star I wonder? Or is the placement just coincidence? No idea about the *thing* on the wheels - or the bolts for that matter.
California, United States
Joined: February 01, 2010
KitMaker: 551 posts
Armorama: 543 posts
Posted: Wednesday, January 08, 2020 - 06:52 AM UTC
Great link there with many pictures - especially that 'Army years' link from that site. Thanks for posting that.
(Now I know the paint scheme I want for my ESCI M106 - but that's for another time!)

#012
Wyoming, United States
Joined: November 07, 2003
KitMaker: 3,098 posts
Armorama: 1,236 posts
Posted: Friday, January 10, 2020 - 10:17 AM UTC
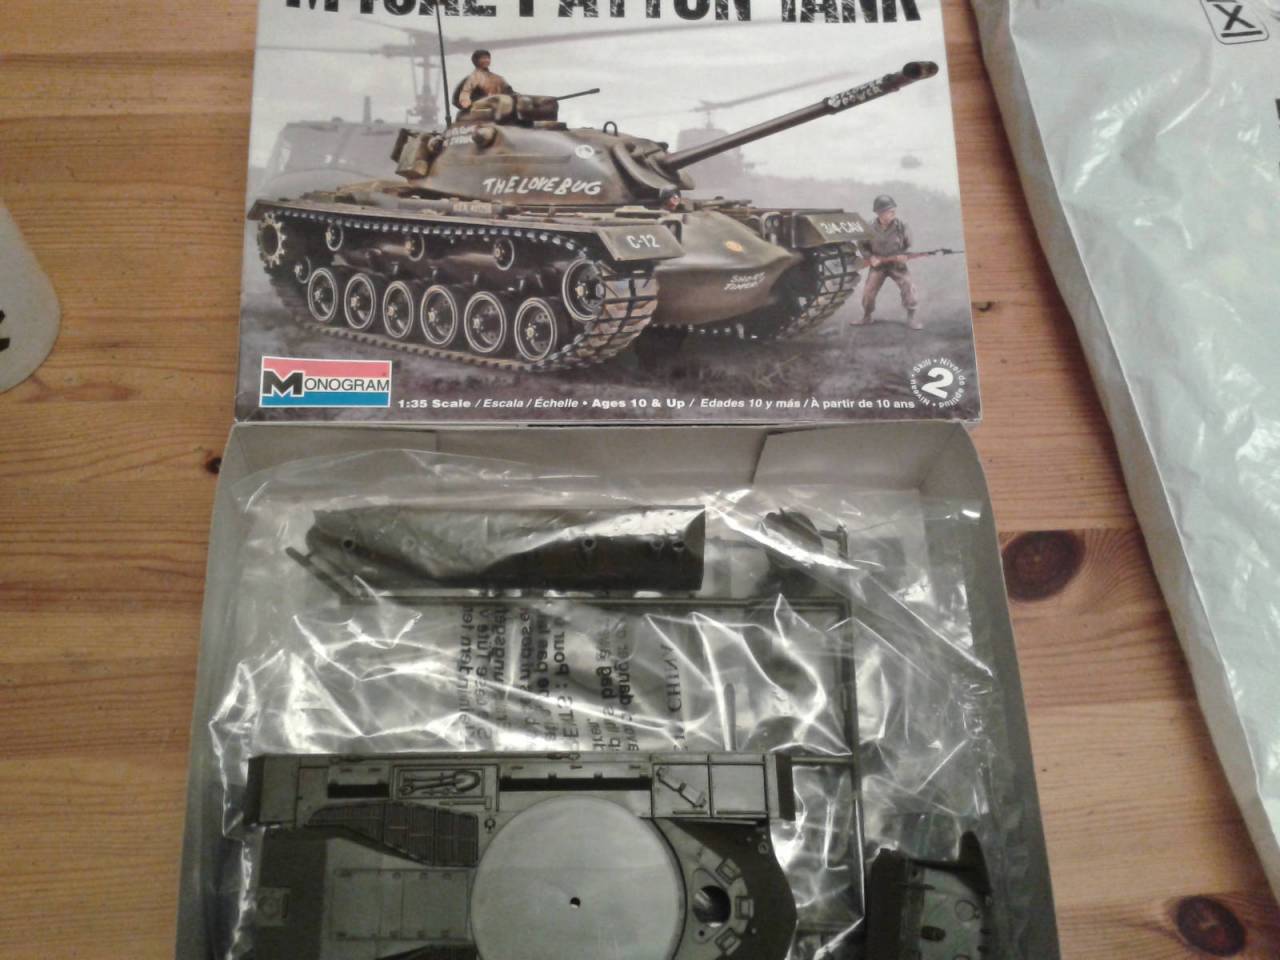
Well I actually sat down and got started on my Monogram "Screamin' Mimi" last night. Feels good to be working on a campaign entry again.


I need to go back and do some clean-up, fill in some gaps and whatnot before I move on. Kind of forgot what these old Monogram kits were like in regards to seamlines, pushout marks, excess flash, gaps, etc. bringing back some good old memories of my earlier days of modeling.
Thanks,
Randy
If any white man tries to destroy what is mine, or take what is mine, or take my lands, I will take my gun, get on my horse, and go punish him. Chief Low Dog - Oglala Sioux Chief
Queensland, Australia
Joined: August 06, 2005
KitMaker: 3,353 posts
Armorama: 3,121 posts
Posted: Friday, January 10, 2020 - 02:23 PM UTC
Certainly looks like a "Golden Oldie" in the photos, Randy.
On the Bench:
Dust, styrene scraps, paint splotches and tears.
#012
Wyoming, United States
Joined: November 07, 2003
KitMaker: 3,098 posts
Armorama: 1,236 posts
Posted: Saturday, January 11, 2020 - 04:45 AM UTC
Quoted Text
Certainly looks like a "Golden Oldie" in the photos, Randy.
Yeah, good old Monogram. Always had a soft spot in my heart for these old kits.
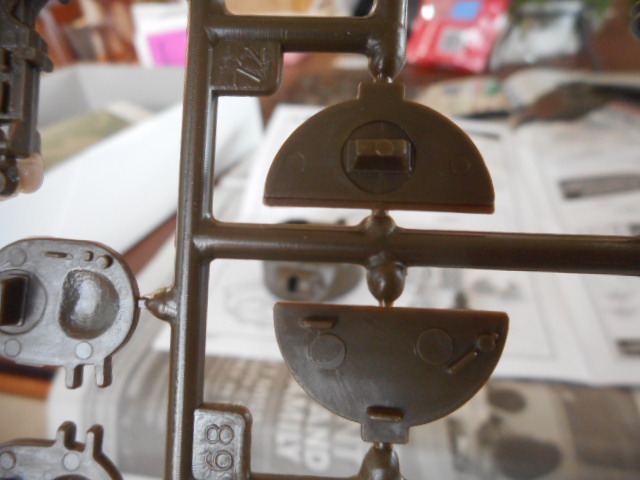
Removed these from the sprue and can't get over the amount of warping that has happened to them. Not sure why. I don't remember seeing that in one of the Monogram kits before.
Turret base.

Main gun barrel.

Oh well, gives me something to work on and fix.
Thanks,
Randy
If any white man tries to destroy what is mine, or take what is mine, or take my lands, I will take my gun, get on my horse, and go punish him. Chief Low Dog - Oglala Sioux Chief
#494
New Brunswick, Canada
Joined: August 08, 2018
KitMaker: 213 posts
Armorama: 198 posts
Posted: Saturday, January 11, 2020 - 05:11 AM UTC

Here we go!
#041
Kobenhavn, Denmark
Joined: July 20, 2006
KitMaker: 10,069 posts
Armorama: 4,677 posts
Posted: Friday, January 17, 2020 - 02:10 AM UTC
I will be building this Sherman Calliope for this campaign. The version I have is from 1995, but I suspect the moulds are much older. It seems like it is very old school layout and moulding of parts.
More to follow


Campaign'oholic - 252+ campaigns completed
#123
New Mexico, United States
Joined: November 17, 2008
KitMaker: 1,202 posts
Armorama: 635 posts
Posted: Saturday, January 18, 2020 - 07:09 PM UTC
Howdy Y'all

I had a problem similar to the one Randy found.
Yippee. Something to work on... The injection marks on the insides of the hatches are going to be another booger to take care of. I thought of gluing the hatches closed and skipping the crew figures.
Take care,
Don "Lakota"
Working on Campaigns:
1/72 Hasegawa Ki-84 Frank
1/144 Dragon Armor
Dalarnas, Sweden
Joined: March 24, 2006
KitMaker: 2,093 posts
Armorama: 1,359 posts
Posted: Saturday, January 18, 2020 - 11:25 PM UTC
Well, I finally got myself to start the build.
The initial build actually is very straight forward. I encountered little to no flash and very few ejection marks.
I did run into a few alignment issues though. The body appears to be slightly too large for the sides. I also ended up gluing the rear upside down! Carelessness on my part, but it does nothing for the fit-issues, really. I only noticed that when I tried dry fitting the chassis to the body. It was easily remedied, since the glue had not fully set yet.


Working on:
Reworking Italeri/Zvezda T 34/76
http://scalemodelling-by-ron.blogspot.se/
#012
Wyoming, United States
Joined: November 07, 2003
KitMaker: 3,098 posts
Armorama: 1,236 posts
Posted: Monday, January 20, 2020 - 08:36 AM UTC
A couple more in-progress photos of my Monogram "Screamin' Mimi". I still have plenty of filling and sanding to do on some of the pieces, especially the rocket tubes. That is going to take a while to complete. But here is what I have completed since my last post.

r
Another photo showing the repair work I had to do to the main gun barrel. It was badly warped and when I go it straightened out and glued together I ended up with some spots I had to fill and sand. it doesn't look too bad now. I made a new coaxial .30 caliber machinegun barrel and drilled out the end of it. I removed the kit supplied antenna from it's base and made a stretched sprue one. I also took the .50 caliber machinegun and cut off and replaced the charging handle and put it in the correct spot. I drilled out the end of the barrel. I also cut away a bunch of the one piece plastic that made up the grips and made the correct looking dual grips and also added a buffer to the rear of the receiver. I still need to make the butterfly trigger for it.

That is about all for now until I get the rocket tube gaps filled and sanded and a few other things before I move forward with the construction.
Quoted Text
I had a problem similar to the one Randy found.
So obviously it just wasn't with my kit. Must have been an issue they ran into when they used the old molds for the re-release of these kits or something.
Thank you,
Randy
If any white man tries to destroy what is mine, or take what is mine, or take my lands, I will take my gun, get on my horse, and go punish him. Chief Low Dog - Oglala Sioux Chief
barkingdigger
 Associate Editor
#013
England - East Anglia, United Kingdom
Joined: June 20, 2008
KitMaker: 3,981 posts
Armorama: 3,403 posts
Posted: Monday, January 20, 2020 - 11:31 AM UTC
Hey Randy, that Sherman brings back memories! I have one on the shelf that took a staggering 20 years to finish, and even back then it had all the fit and moulding problems you pointed out. I added some lead weights hanging from the breech by wire to counterbalance the rocket tubes so the gun can be posed at any angle. I'll grab some pics and post them here for inspiration.
As for my build, I'm going right back to the 1950s with the M48A2, complete with terrible figures. I'll add stowage and a mantlet cover, pose the wheels over uneven ground, and generally model some fictional assault scene just like Shep did back in the day!
"Glue, or Glue Not - there is no Dry-Fit" - Yoda (original script from Return of the Jedi...)
Dalarnas, Sweden
Joined: March 24, 2006
KitMaker: 2,093 posts
Armorama: 1,359 posts
Posted: Monday, January 20, 2020 - 07:55 PM UTC
Nice work guys!
Slowly the entries and participants are trickling in, but there were more!
Where are you?!?
Working on:
Reworking Italeri/Zvezda T 34/76
http://scalemodelling-by-ron.blogspot.se/
North Carolina, United States
Joined: April 29, 2014
KitMaker: 1,112 posts
Armorama: 886 posts
Posted: Tuesday, January 21, 2020 - 12:15 AM UTC
Building and not posting....yet.
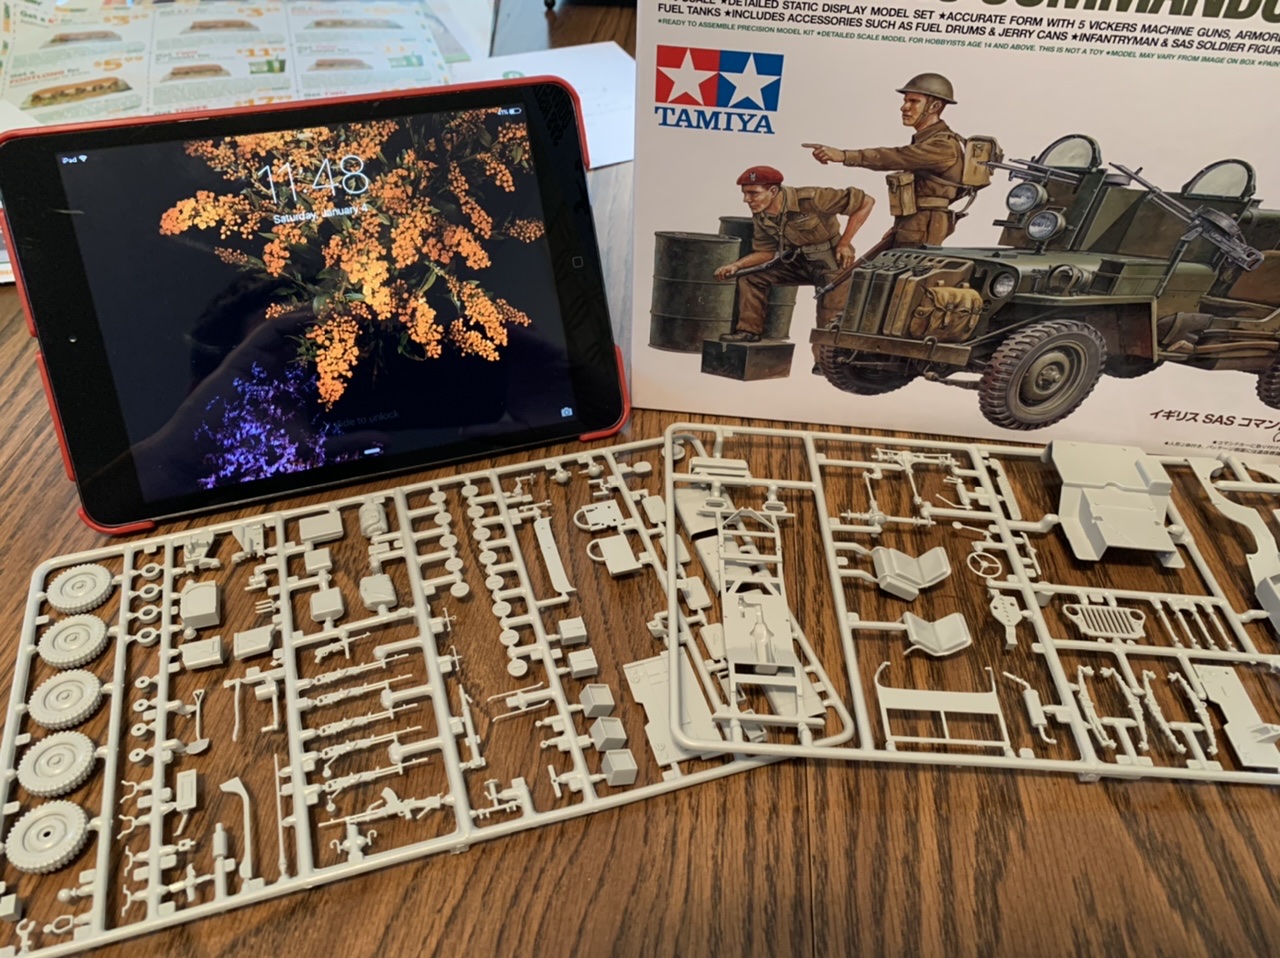
A club build is using the Tamiya kit, British SAS Commando Vehicle, which is the old Italeri Commando Car.
https://www.scalemates.com/kits/tamiya-25152-british-sas-commando-vehicle--186415For this campaign, I will not be using the new Tamiya parts as they fall outside the timeframe and sticking with the spirit of the campaign using only the old Italeri plastic molds.
Dalarnas, Sweden
Joined: March 24, 2006
KitMaker: 2,093 posts
Armorama: 1,359 posts
Posted: Tuesday, January 21, 2020 - 12:37 AM UTC
Is there any difference?
Different molds or an Italeri rebox-thing?
Working on:
Reworking Italeri/Zvezda T 34/76
http://scalemodelling-by-ron.blogspot.se/
North Carolina, United States
Joined: April 29, 2014
KitMaker: 1,112 posts
Armorama: 886 posts
Posted: Tuesday, January 21, 2020 - 12:49 AM UTC
Quoted Text
Is there any difference?
Different molds or an Italeri rebox-thing?
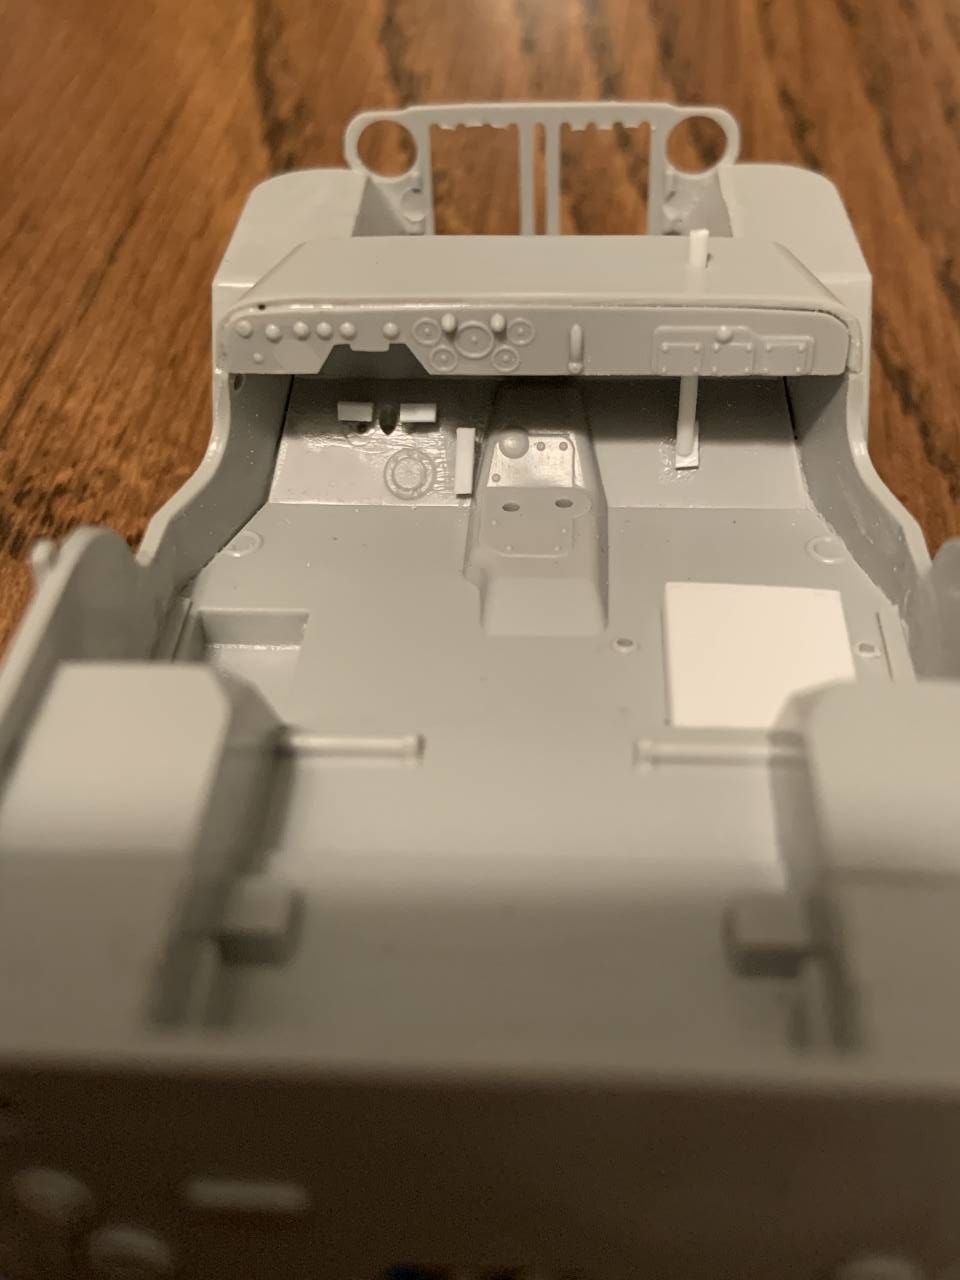
Tamiya adds a extra sprue of cans and figures. I am told that those are a generic set from a previous release. The plastic seems softer then then older Italeri plastic.
I am attempting to build the one on the left.
.jpg)
From
www.warwheels.net I like what you did with yours. Mine is very similar. I have removed many parts, front and rear bumpers, spare tire hanger. Because of a club joke, I am adding new petals. Still have the clutch to add. I hope they all survive airbrushing as it is a pain to attach.
California, United States
Joined: February 01, 2010
KitMaker: 551 posts
Armorama: 543 posts
Posted: Tuesday, January 21, 2020 - 02:44 AM UTC
Oh not forgotten! Just trying to clear the 'workbench'. Cromwell ready for some paint now and I'm really trying to get my 1/72 convoy 'shelf queen' done but I have to trim rifles and combat gear from Italeri US troops to complete the scene which is more tedious even than dealing with track links! (Such close-quarter work I had to wrap my knife with tape to leave only about 1/4 inch showing. Not fun when you cut your thumb on a fresh blade just holding the knife...)
North Carolina, United States
Joined: April 29, 2014
KitMaker: 1,112 posts
Armorama: 886 posts
Posted: Wednesday, January 22, 2020 - 12:45 AM UTC
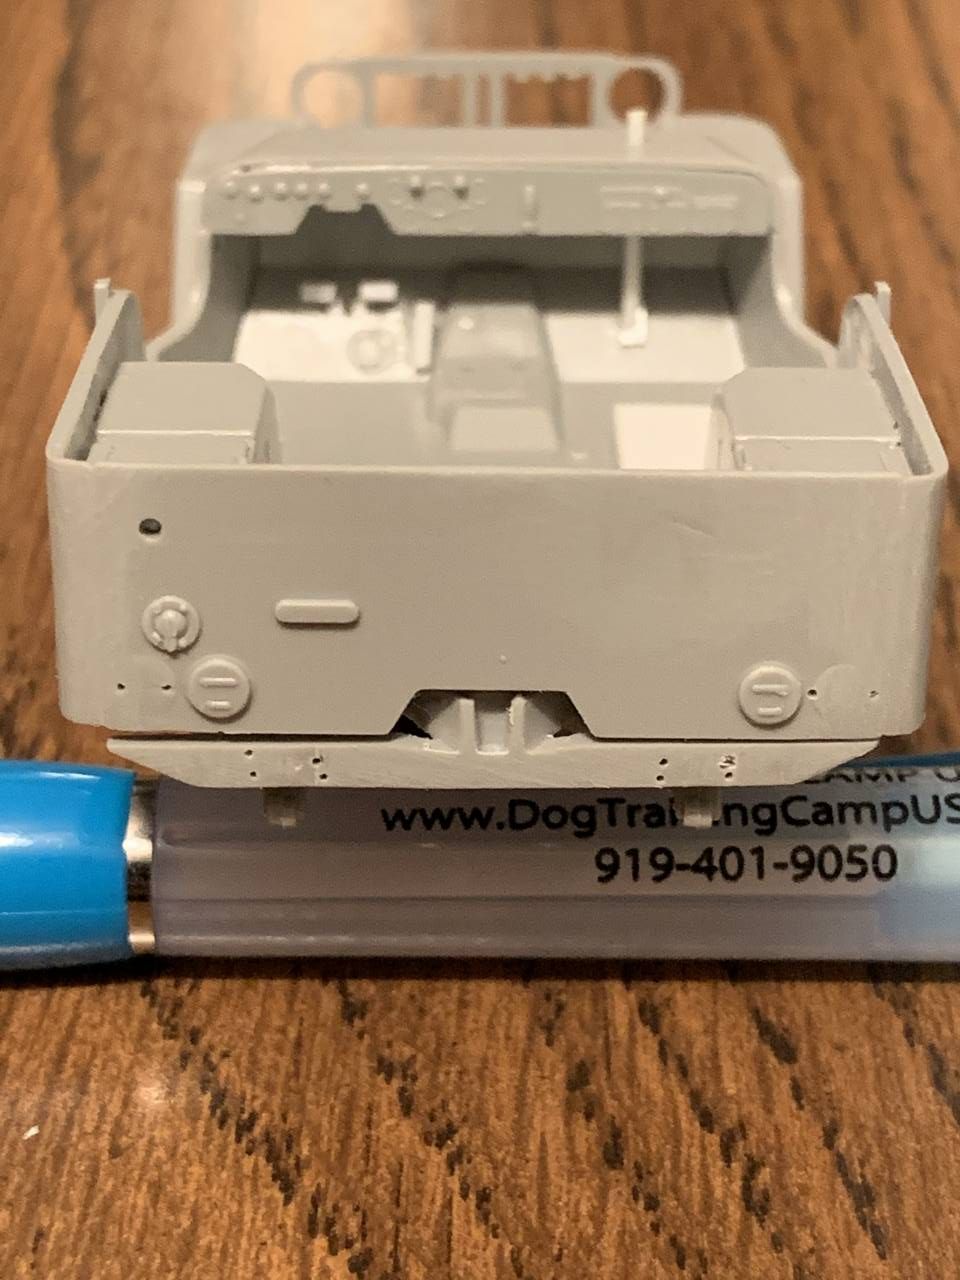
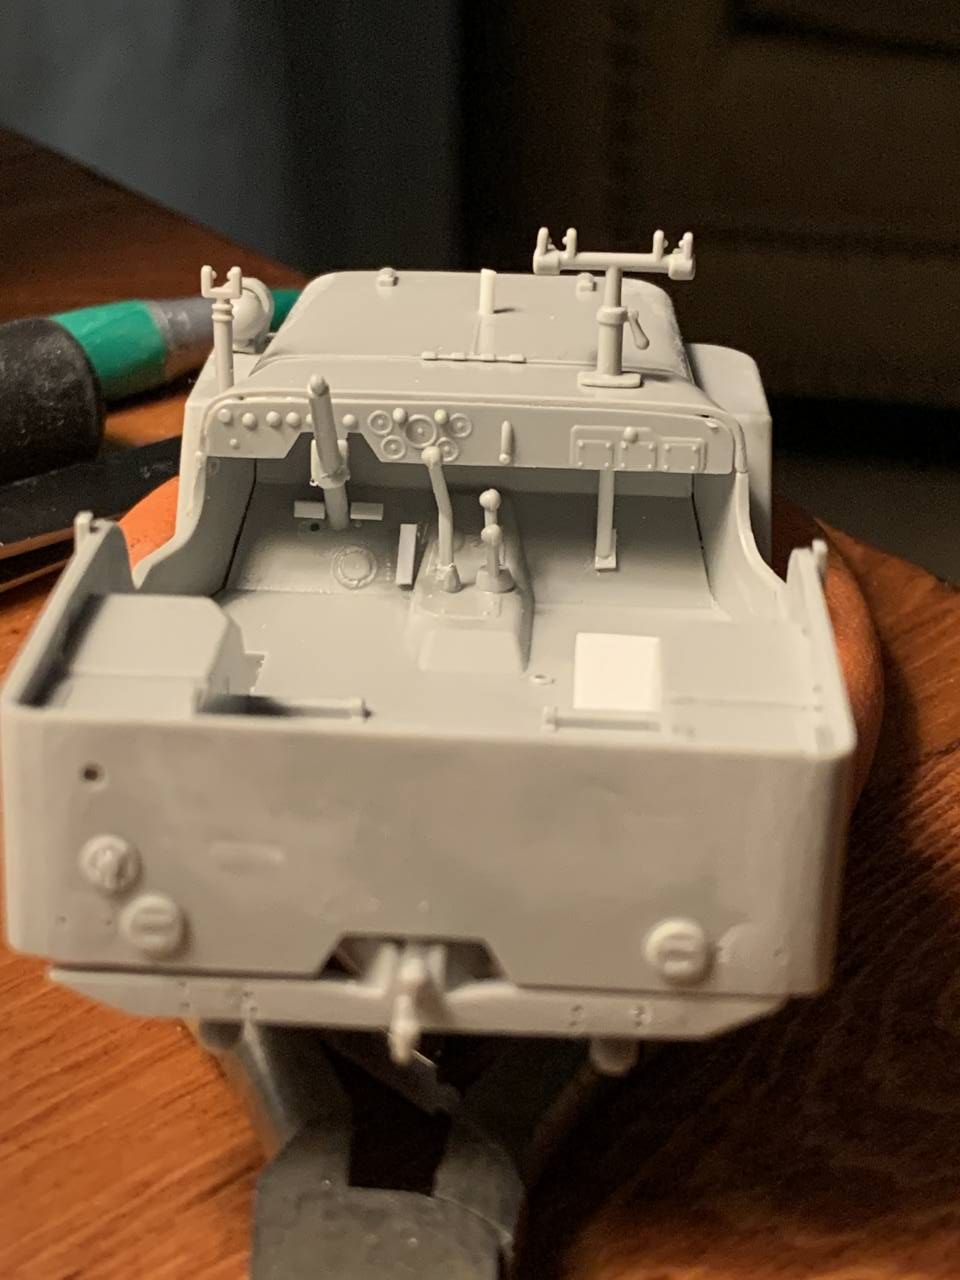
My build
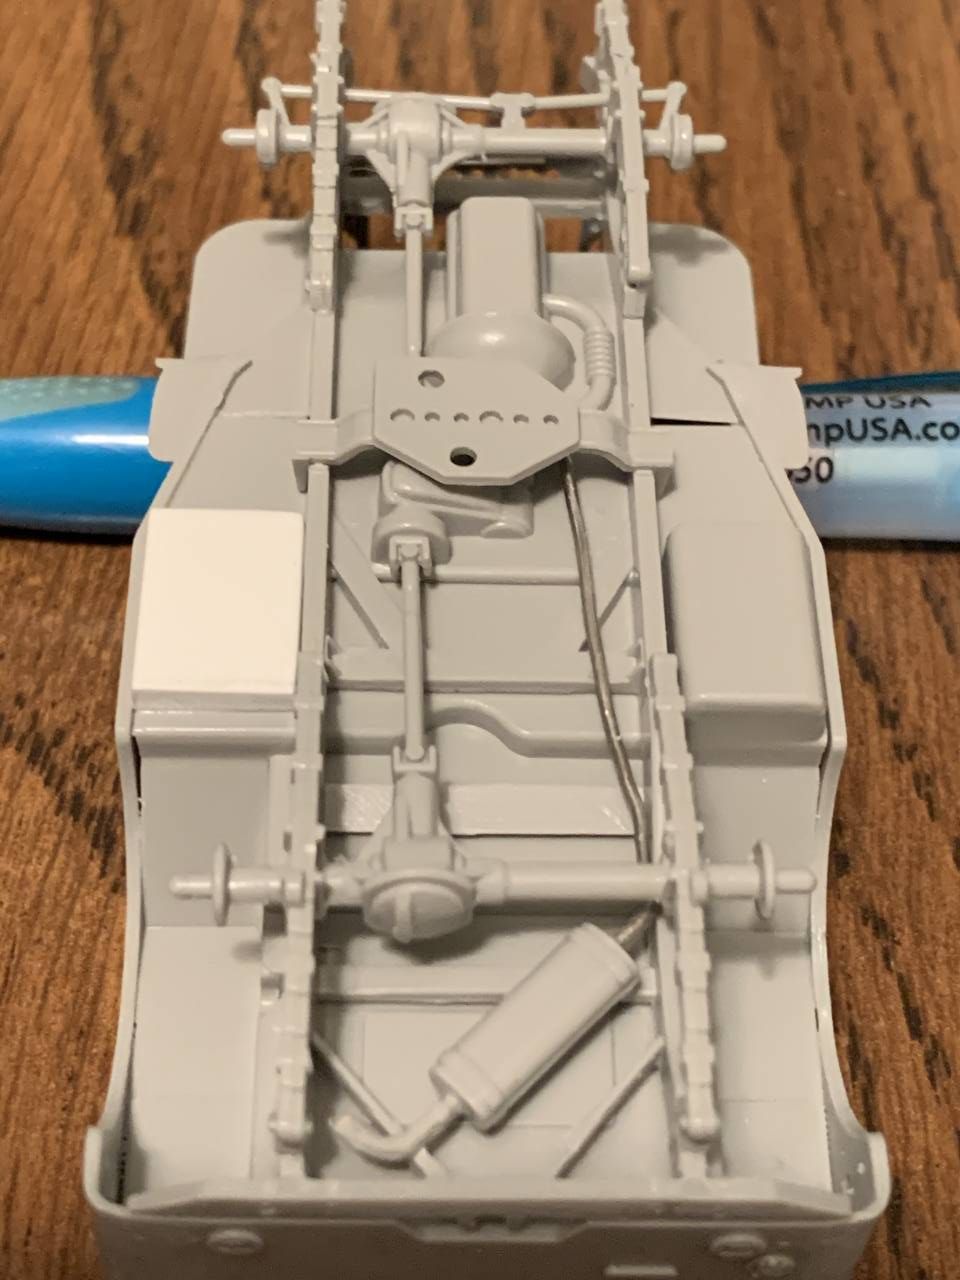
This is what I am going for.
From
www.warwheels.netHere is where I am at. From my research some SAS jeeps removed a number of items. I have taken a lot of items off and attempted to leave rivet holes. I need to work on my micro drill placement game. As this is a quick build for our club I just keep moving on otherwise it would be in the trash can or shelf of doom.
Dalarnas, Sweden
Joined: March 24, 2006
KitMaker: 2,093 posts
Armorama: 1,359 posts
Posted: Wednesday, January 22, 2020 - 03:18 AM UTC
hmpf... the molds used and resulting fit most certainly do look like Italeri's.
I wonder a little about the exhaust and its placement?
Working on:
Reworking Italeri/Zvezda T 34/76
http://scalemodelling-by-ron.blogspot.se/
North Carolina, United States
Joined: April 29, 2014
KitMaker: 1,112 posts
Armorama: 886 posts
Posted: Wednesday, January 22, 2020 - 05:21 AM UTC
Quoted Text
hmpf... the molds used and resulting fit most certainly do look like Italeri's.
I wonder a little about the exhaust and its placement?
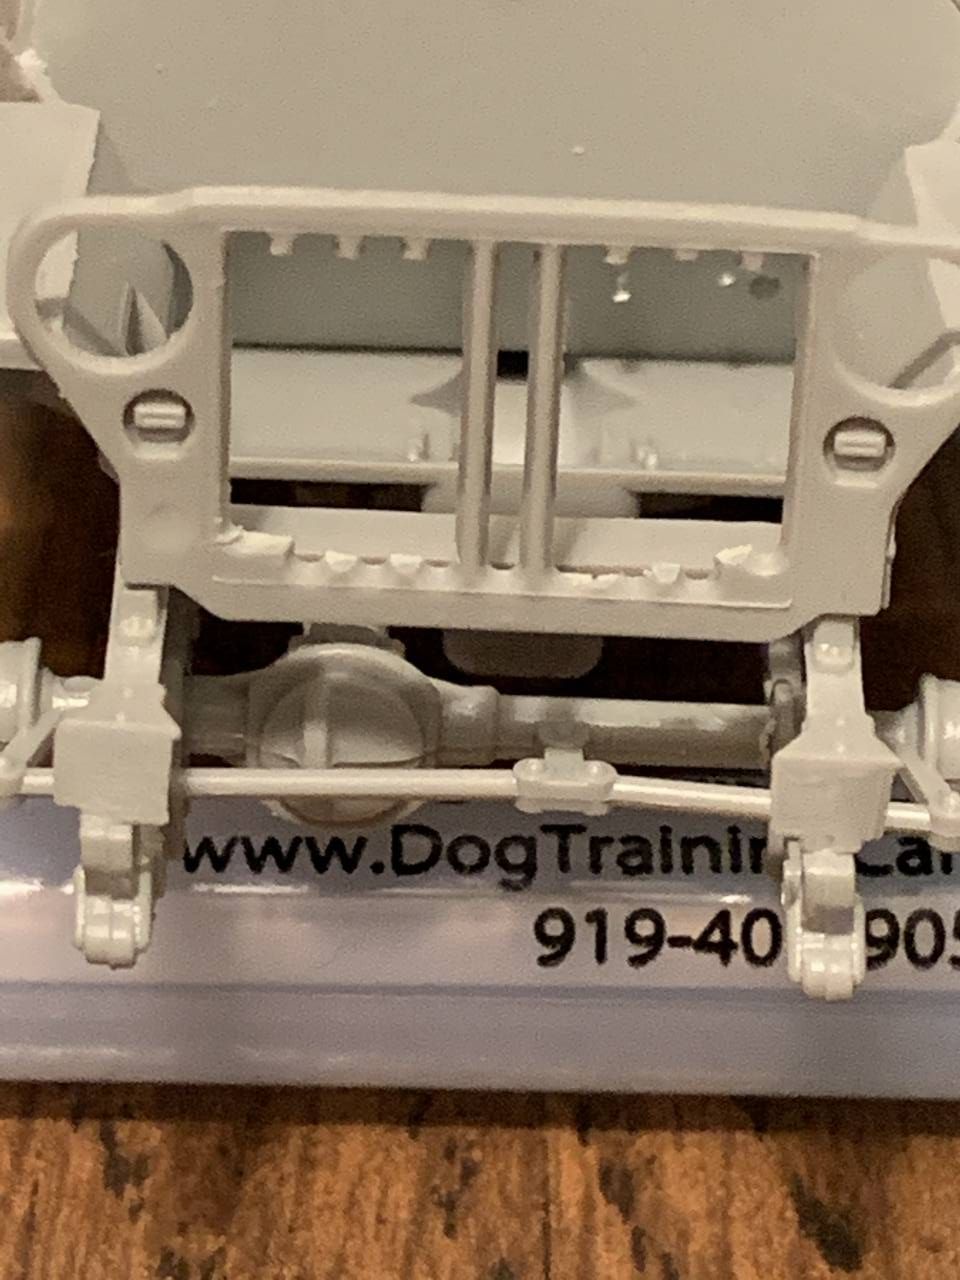
Not sure what Italeri was trying to do but some SAS jeeps added a second fuel tank under the passenger seat, that is the white boxes I have on top and below the body. That means the exhaust has to be redone. A later mod was called deep mud exhaust and that is what I was trying to replicate with the different location.
fuel tank
https://www.gastankdepot.com/1772002-steel-fuel-tank-late-willys-mb-ford-gpw.htmlDeep Mud exhaust
https://forums.g503.com/viewtopic.php?t=139549
North Carolina, United States
Joined: April 29, 2014
KitMaker: 1,112 posts
Armorama: 886 posts
Posted: Thursday, January 23, 2020 - 12:54 AM UTC
Need to add some T handles to the hood, a few small touch ups in a spot or two then the paint shop.
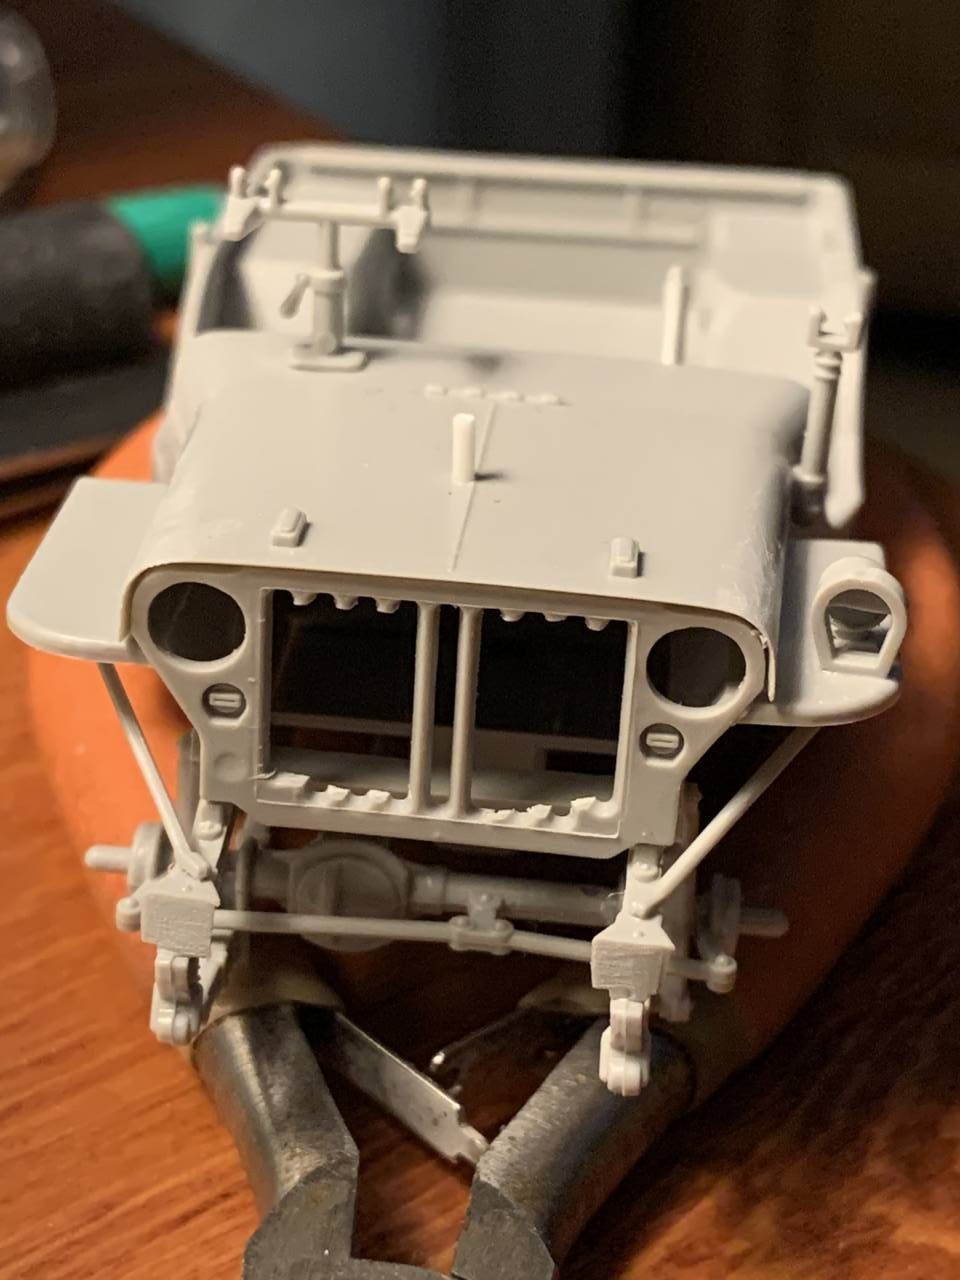
I plan to use Tamiya XF-62 OD for the Jeep and Vallejo 889 US OD Green or similar green on hand for the extra bits as generic SCC15. Thoughts on the colors?
#494
New Brunswick, Canada
Joined: August 08, 2018
KitMaker: 213 posts
Armorama: 198 posts
Posted: Thursday, January 23, 2020 - 10:39 AM UTC
finally got some bench time this week. Lower hull is done. Im not planning on doing much if any extra detail other than maybe some mesh in the turret baskets and some cam netting. I don't remember the last time I built anything out of the box without tweaking something. It's kinda refreshing.Although the open sponsons are making my rivet counting nerve twitch.

Queensland, Australia
Joined: August 06, 2005
KitMaker: 3,353 posts
Armorama: 3,121 posts
Posted: Friday, January 24, 2020 - 08:11 AM UTC
Nice work so far guys.
My choice for the build, the Italerei Schwimmwagen:

..and no that is not a misspelling, it is the original name of the company as evidenced by the moulding under the fender, which in itself, proves how old this mould is


Comes complete with the usual sink marks, knock out marks and flash we came to know and 'love':


and some not so subtle detail, such as the "grill work":

so off we go.... let the filling begin...sink marks to upper hull and knock outs on floor pan puttied..

I'll be adding a fair bit of detail to this one, all scratch built of course..... now where did I put that fine mesh from the old nylon kitchen strainer
.
On the Bench:
Dust, styrene scraps, paint splotches and tears.
barkingdigger
Associate Editor #013
England - East Anglia, United Kingdom
Joined: June 20, 2008
KitMaker: 3,981 posts
Armorama: 3,403 posts
Posted: Friday, January 24, 2020 - 11:16 AM UTC
Ahhh the joys of old kits! I hear ya Pete, and raise you a big gap.
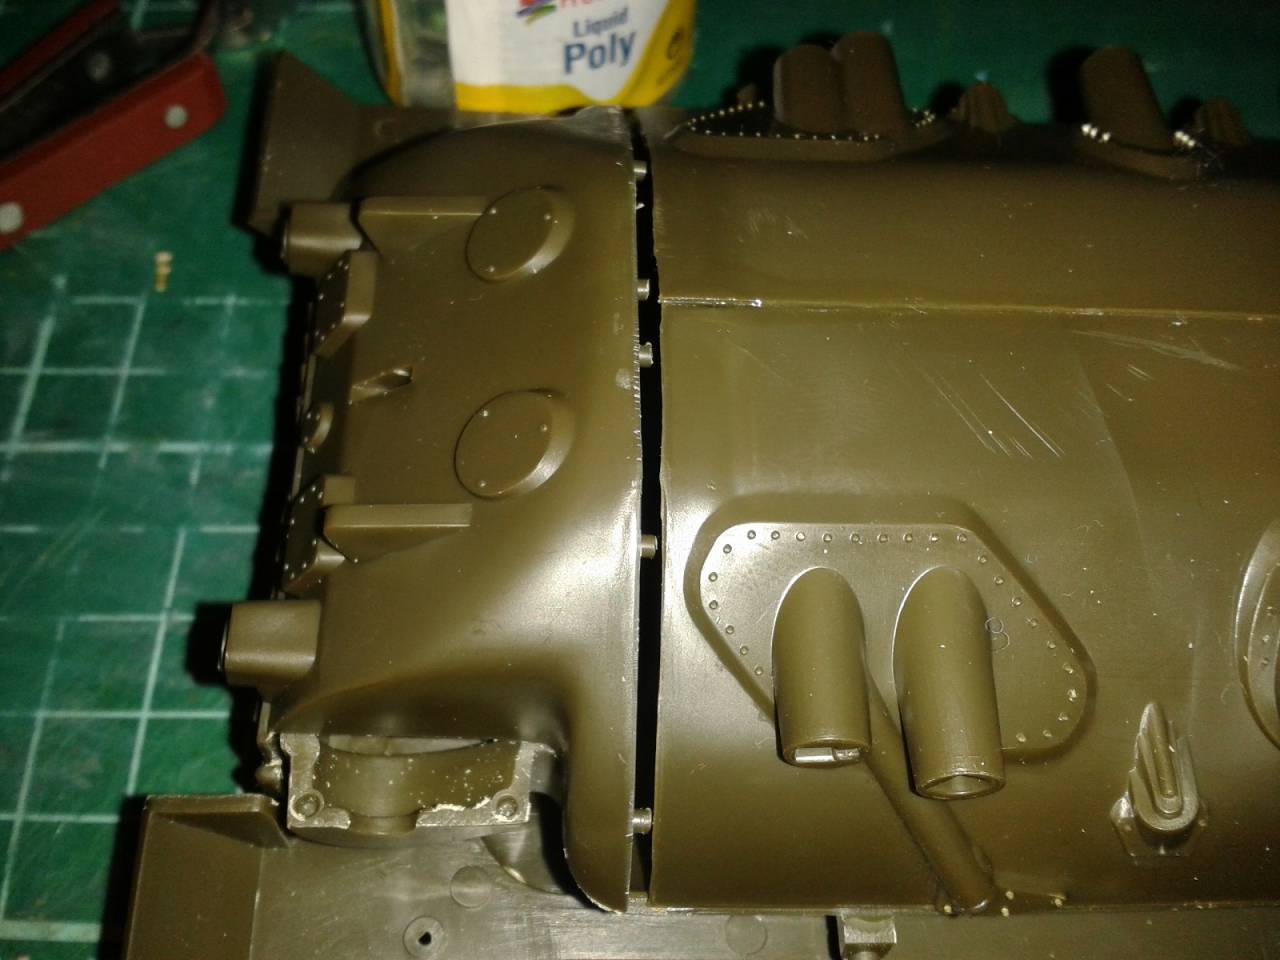
I could have added a slice of Evergreen sheet, but went old school and bridged the gaps on the inside with chunks of sprue, and will add good old filler putty to fill the gap!
"Glue, or Glue Not - there is no Dry-Fit" - Yoda (original script from Return of the Jedi...)
Ohio, United States
Joined: February 28, 2007
KitMaker: 392 posts
Armorama: 198 posts
Posted: Friday, January 24, 2020 - 03:39 PM UTC