_GOTOBOTTOM
Armor/AFV: Axis - WWII
Armor and ground forces of the Axis forces during World War II.
Hosted by Darren Baker
Bronco 1/35 Turan II Review Blog
errains
#045
Visit this Community
South Carolina, United States
Joined: September 23, 2005
KitMaker: 362 posts
Armorama: 350 posts
Posted: Sunday, March 24, 2019 - 10:58 PM UTC
OUTSTANDING Build Article!!!

I'm sorry I missed this thread until now. The craftsmanship is excellent and the information provided is useful and relevant.

Awesome Job Matthew and Thanks for posting this!
firstcircle
Visit this Community
England - South East, United Kingdom
Joined: November 19, 2008
KitMaker: 2,249 posts
Armorama: 2,007 posts
Posted: Sunday, March 31, 2019 - 09:49 AM UTC
Thanks very much Eric, nice of you to comment.

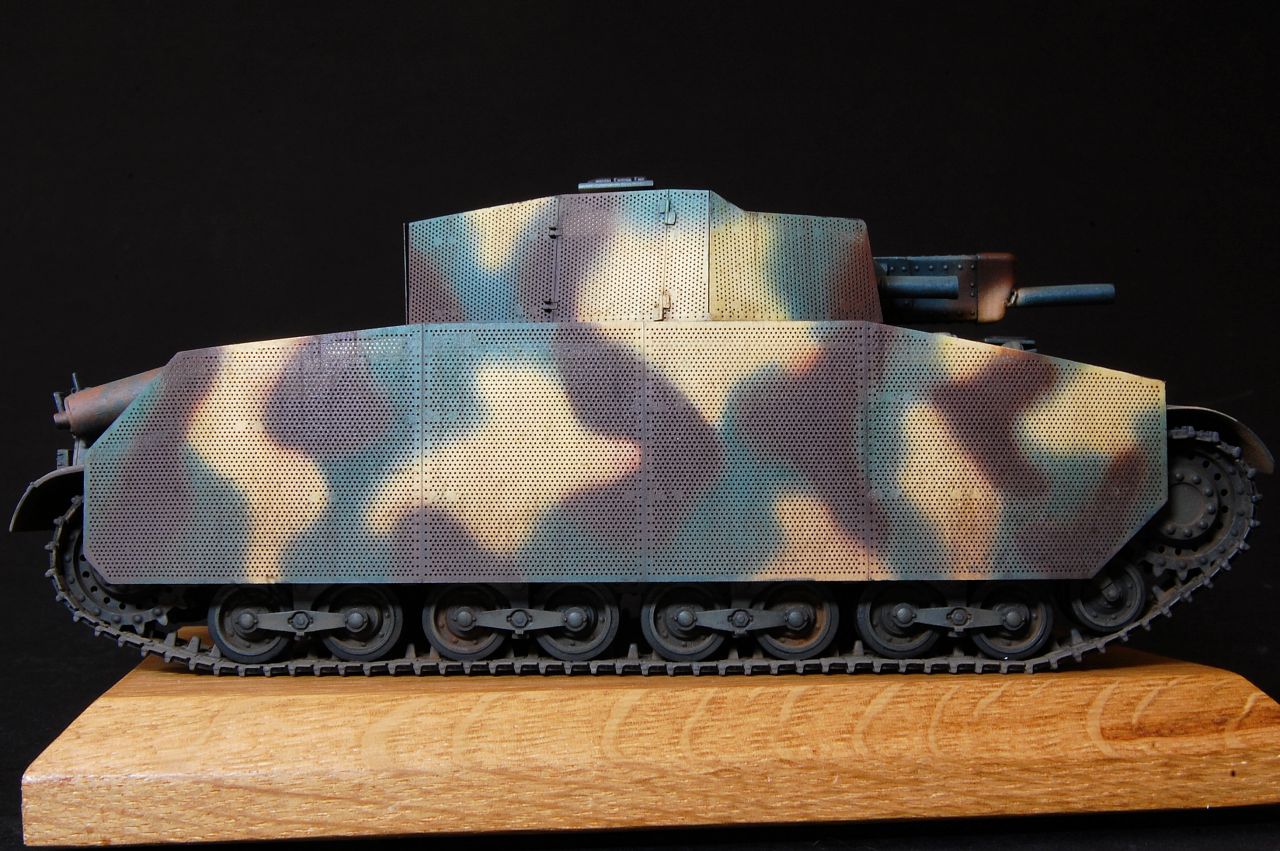
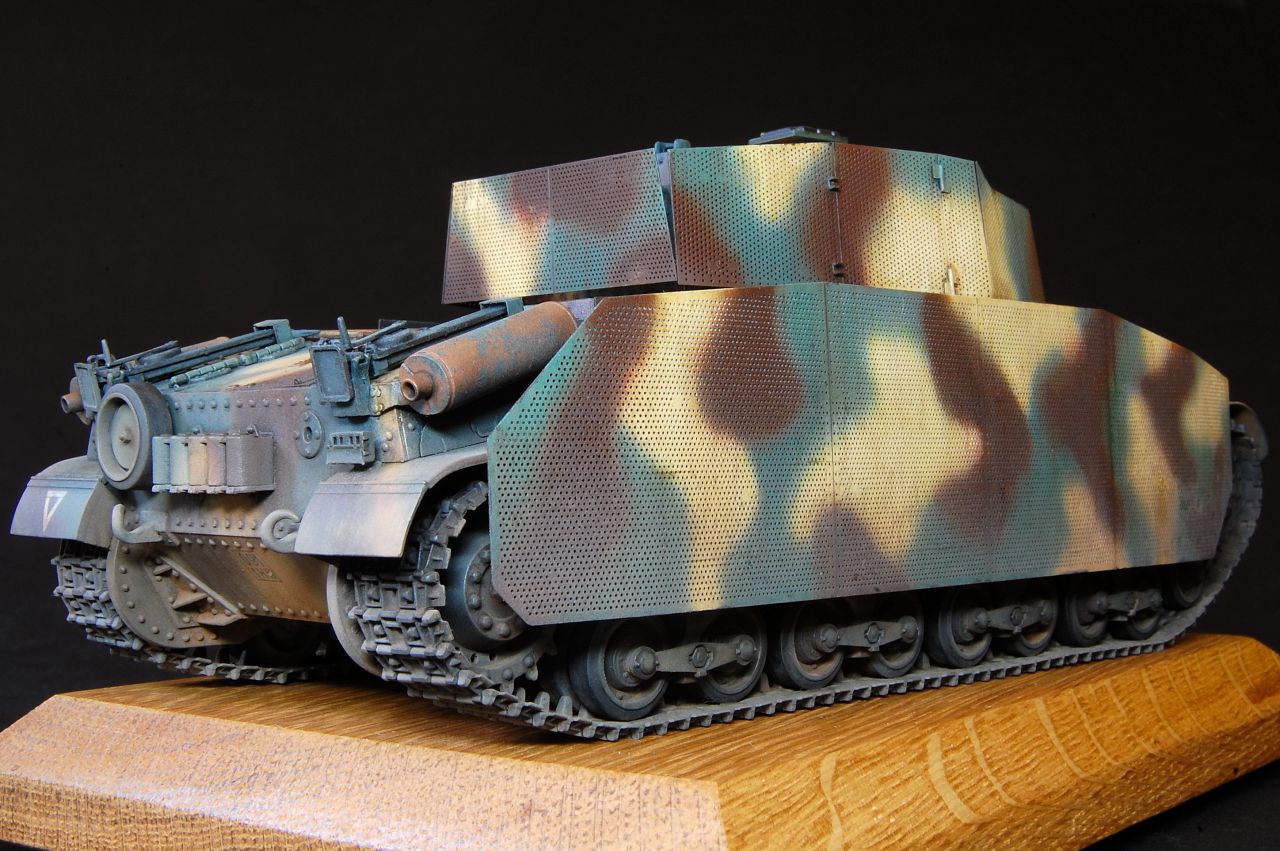
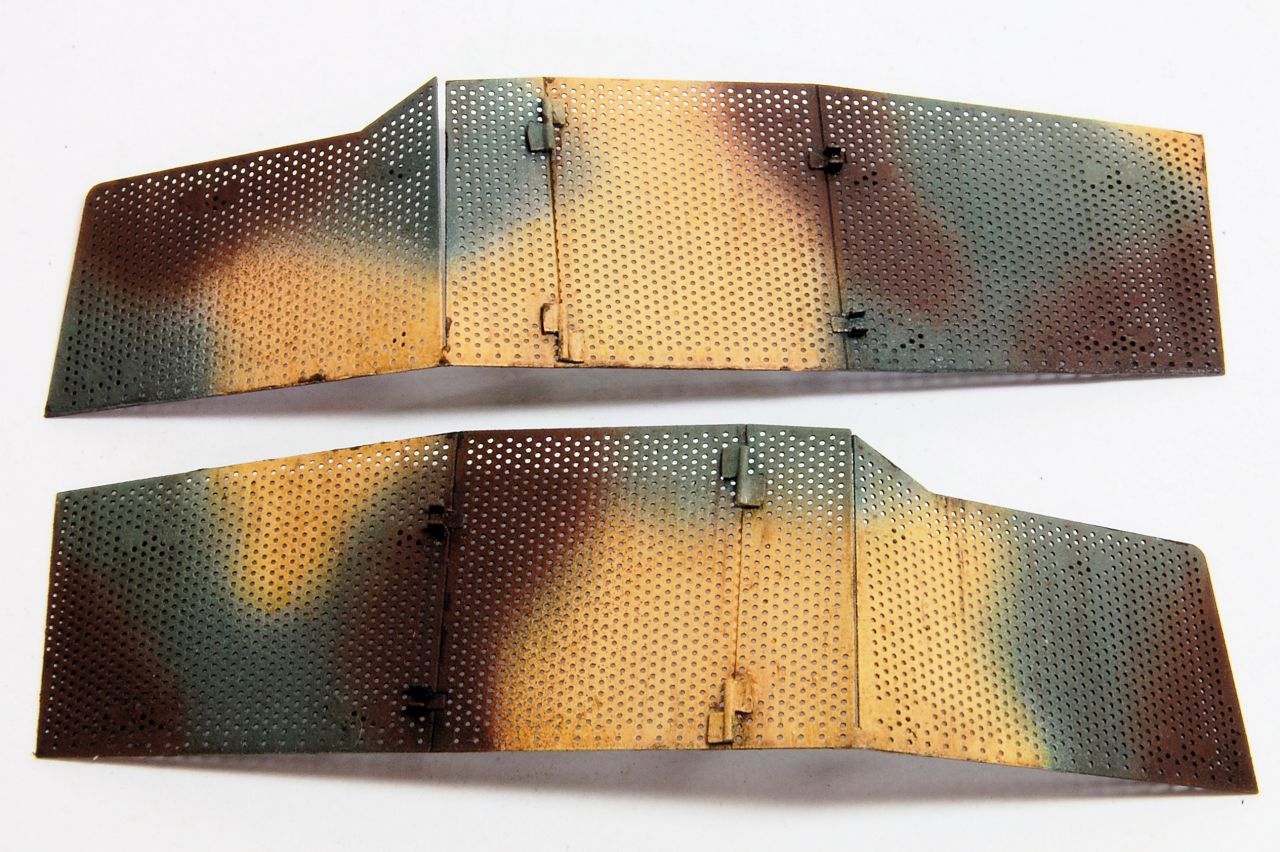
Weathering of the skirt armour has been continuing, this is the turret side plates more or less done:


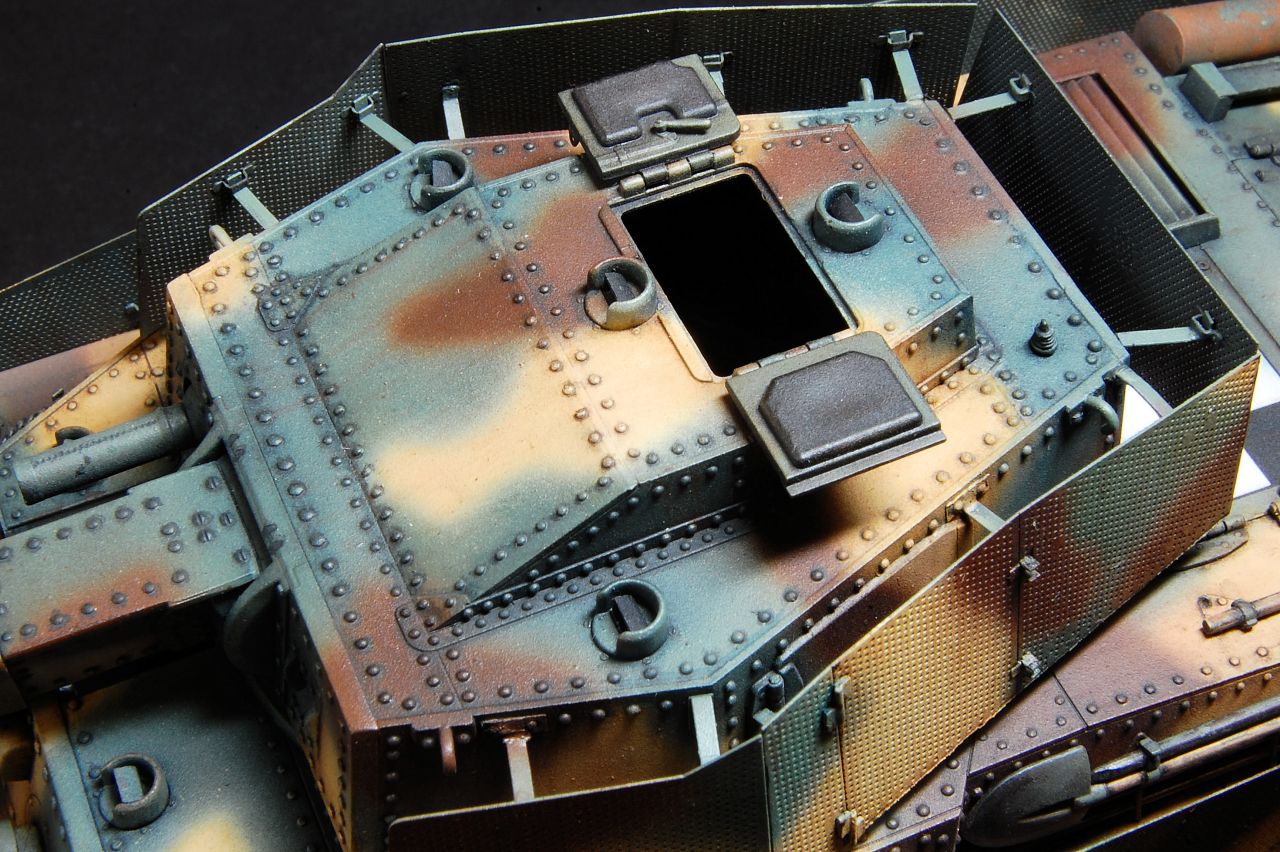
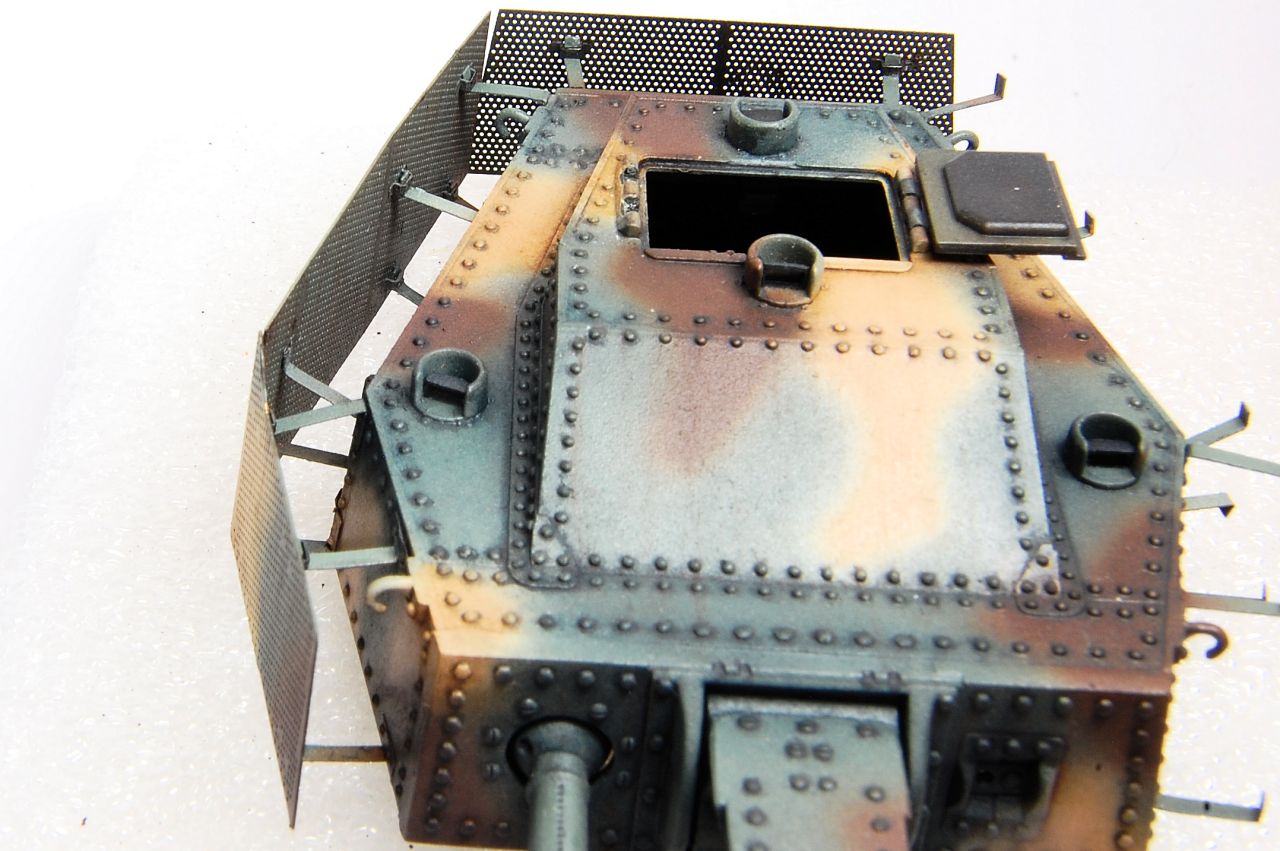
One of the things that is missing on the big hull plates is any engraved line between the separate plates. It would make sense to engrave it yourself prior to painting, but having not done so I decided to paint it on. This is the masking:


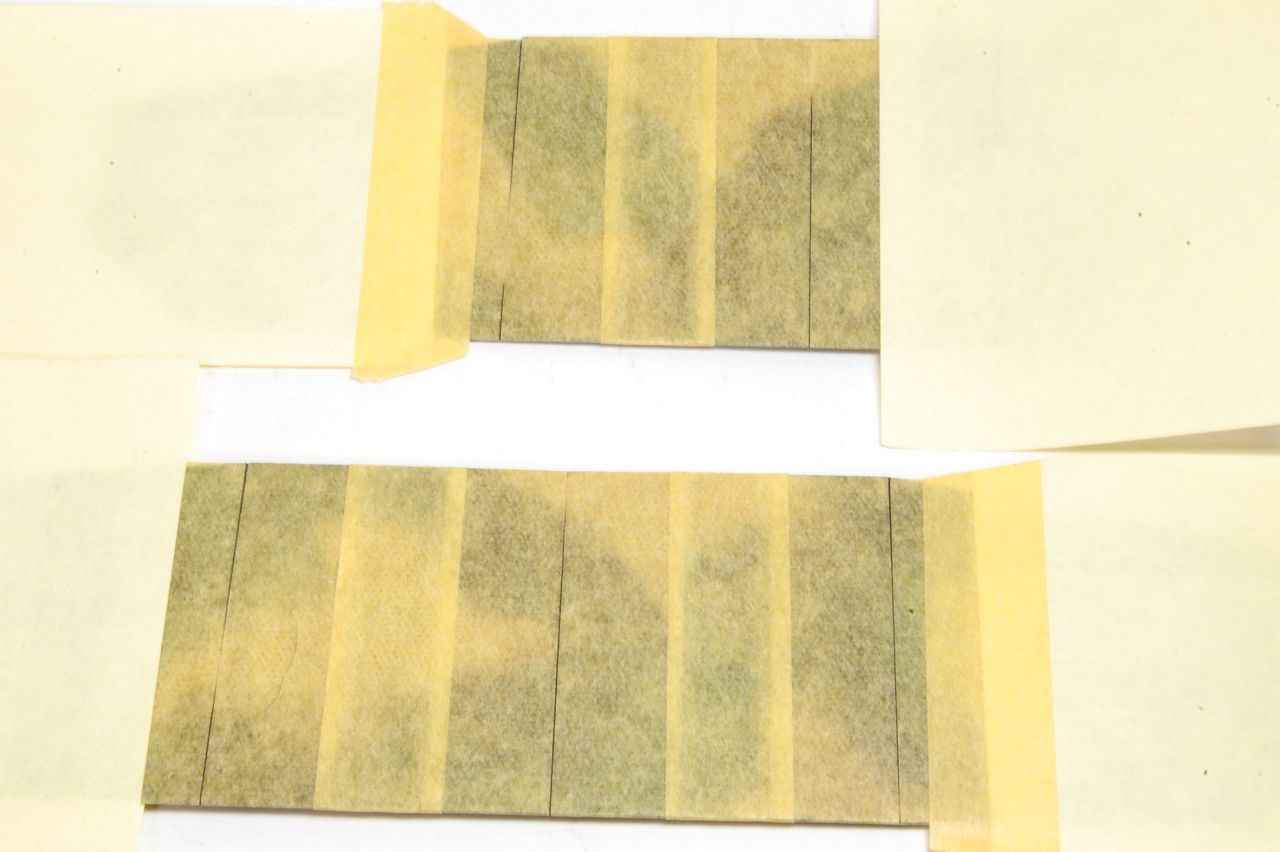
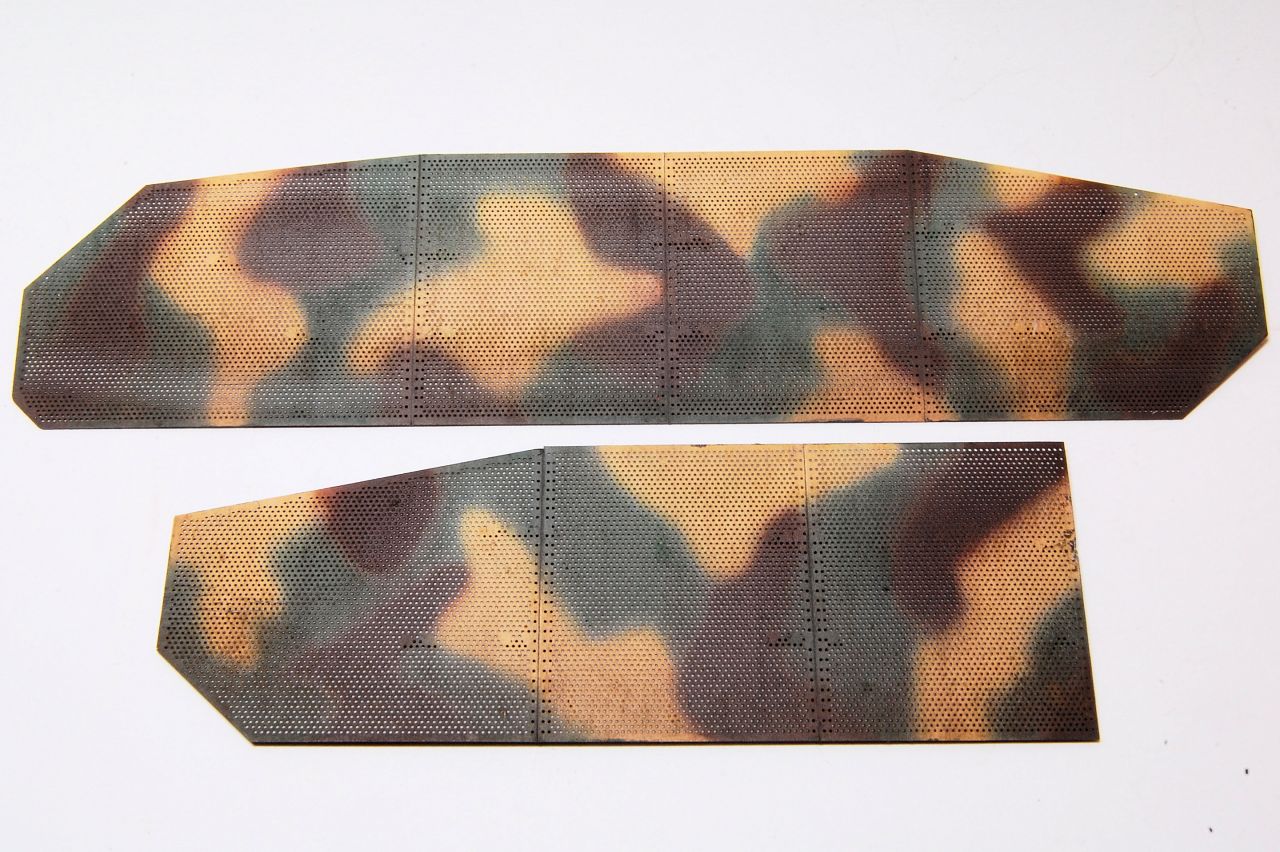
Vallejo German Camo Black Brown (often used as a chipping colour) was sprayed on, resulting in fine lines that I think are about the right degree of subtlety.


In preparation for the final big challenge of this kit, attaching the turret spaced armour, I thought I'd better test fit the turret to make sure it's not too difficult to fit in place, once the armour plates are on. The brackets make the turret painfully delicate, so all handling has to be done using the gun, the hatch, and the raised section on top.
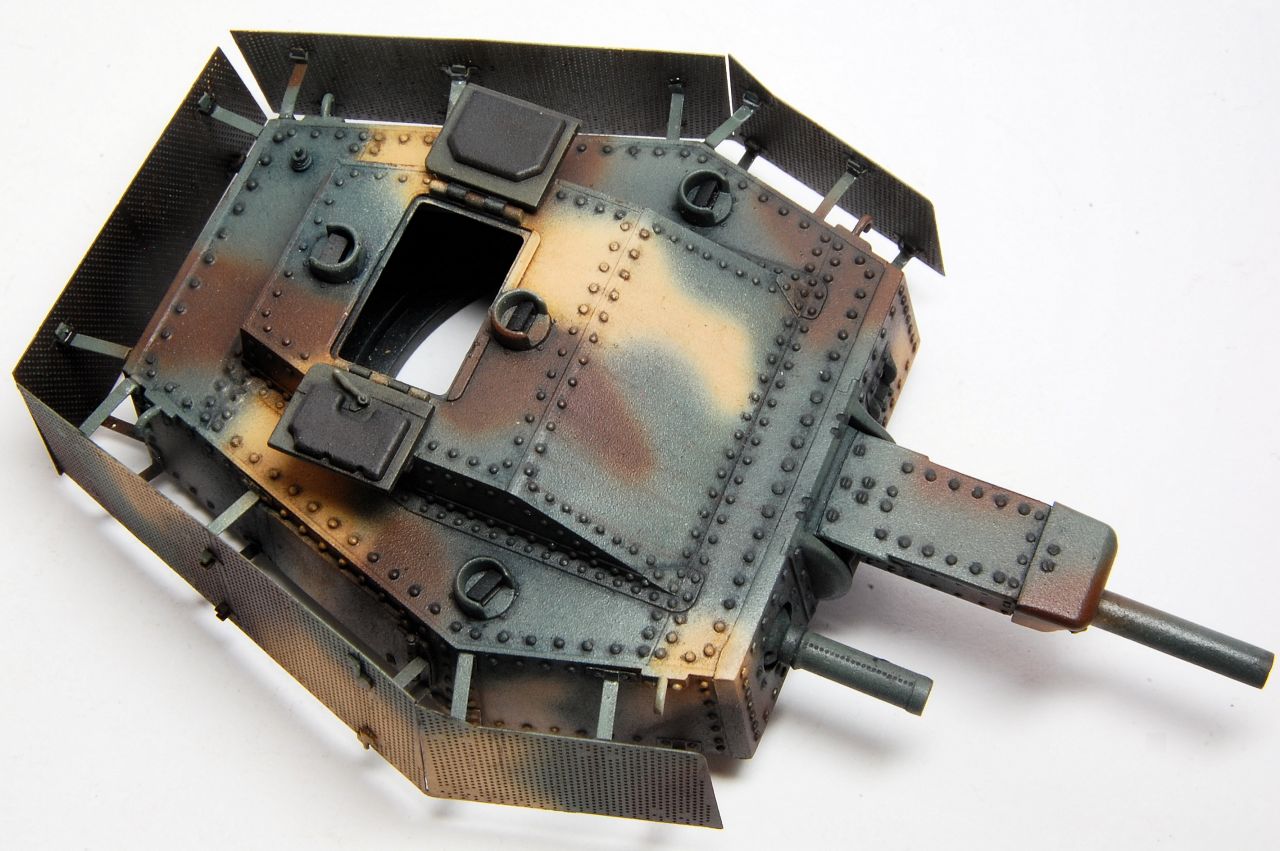
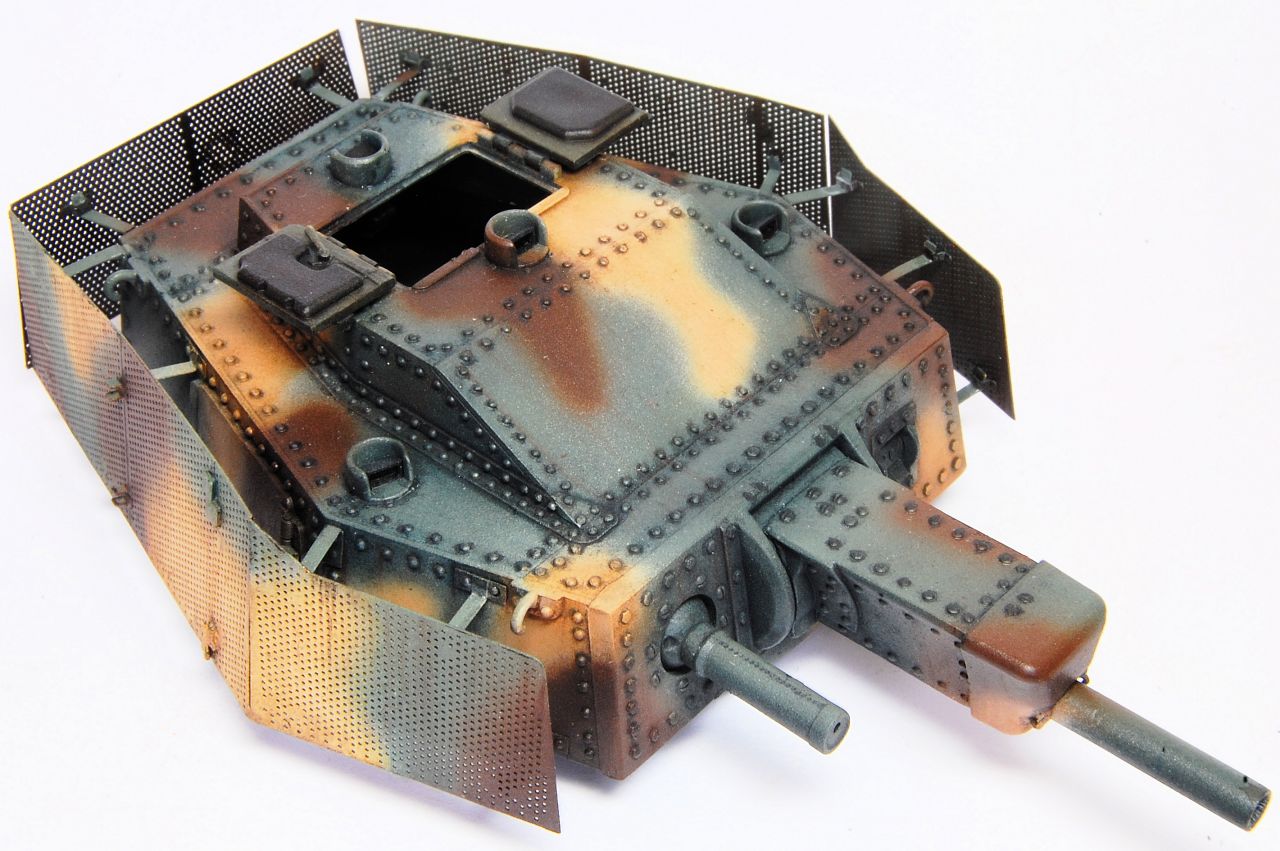
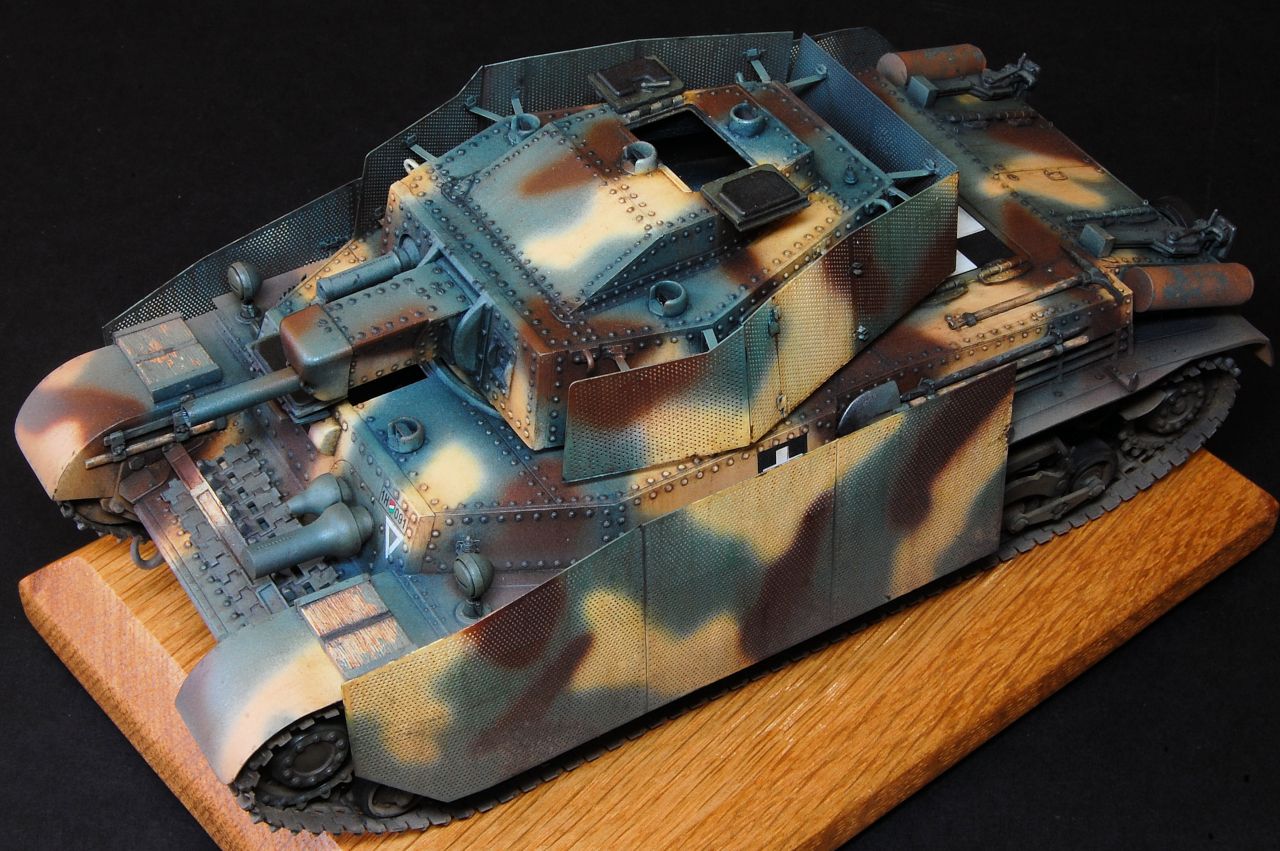
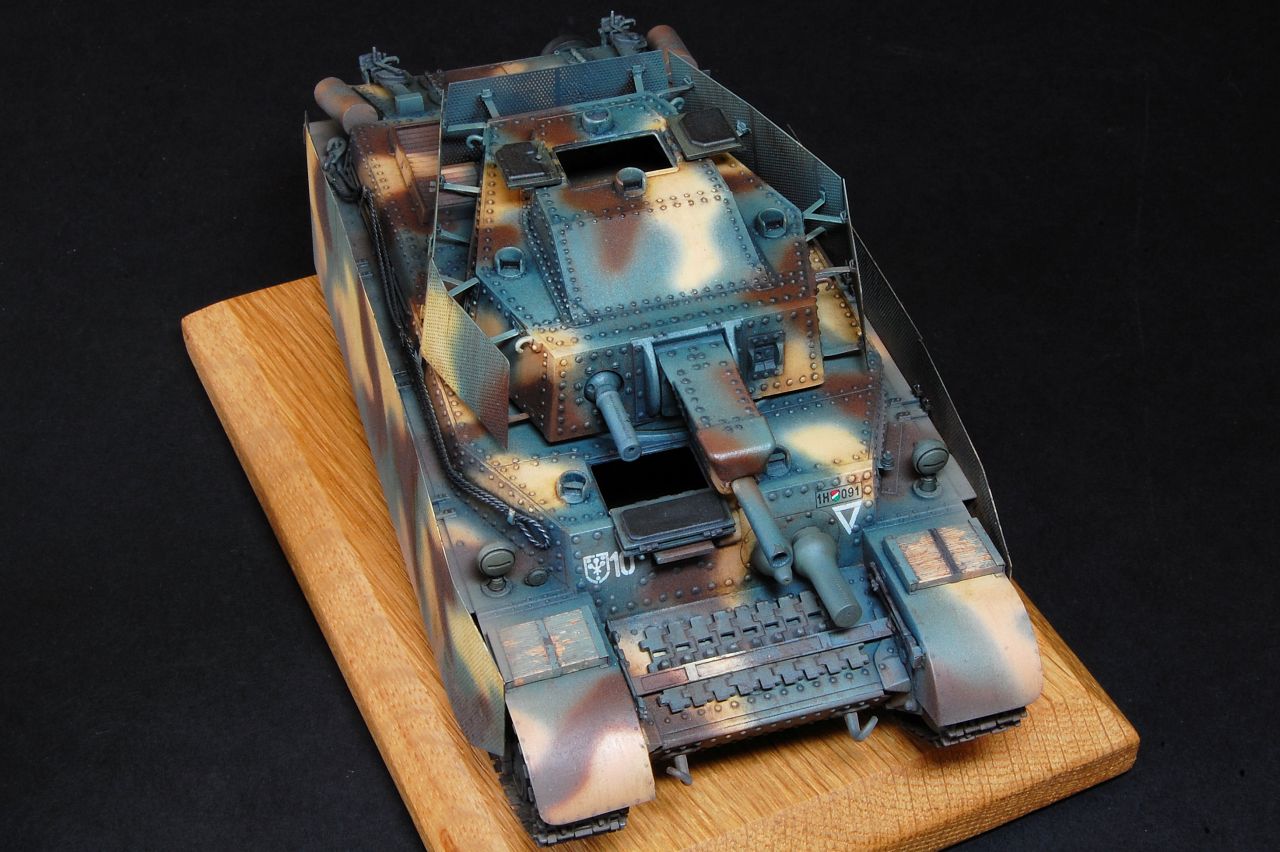
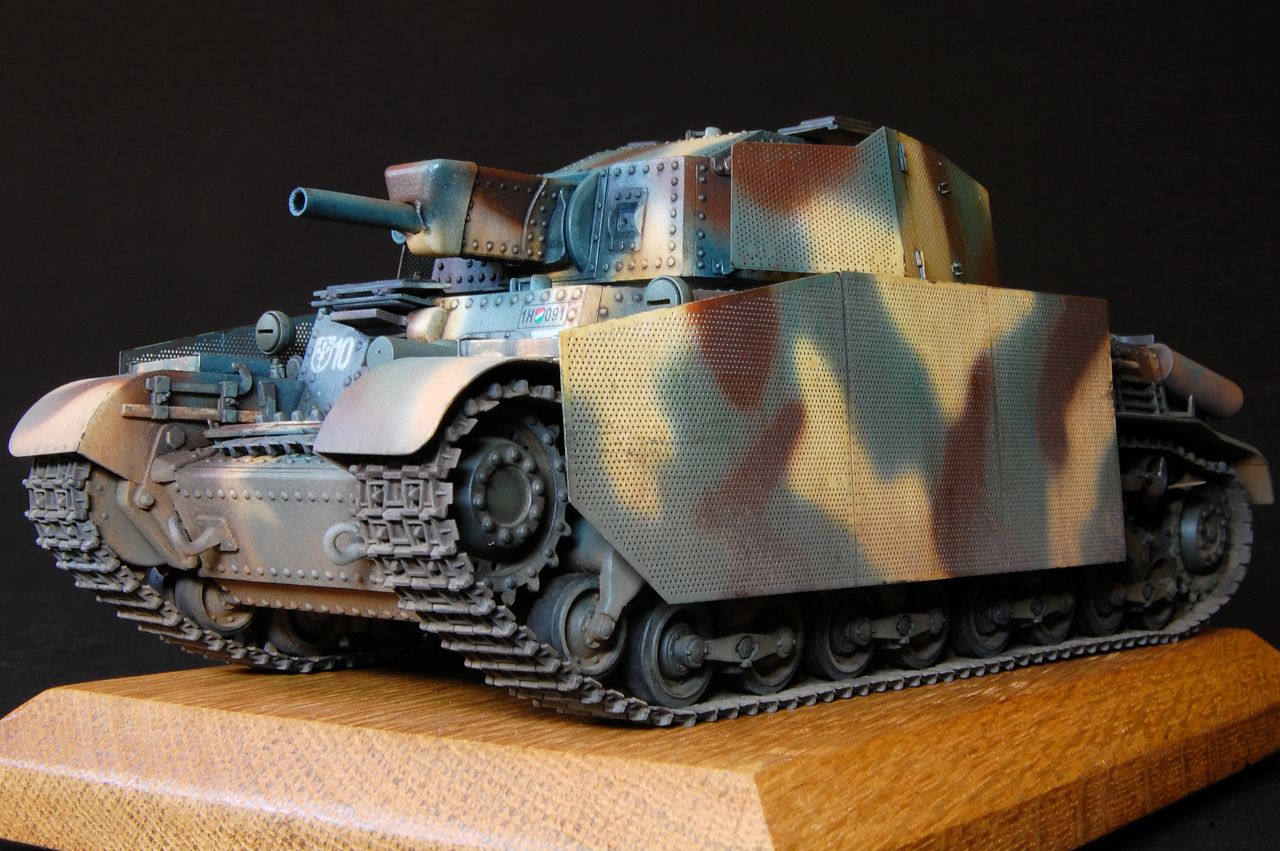
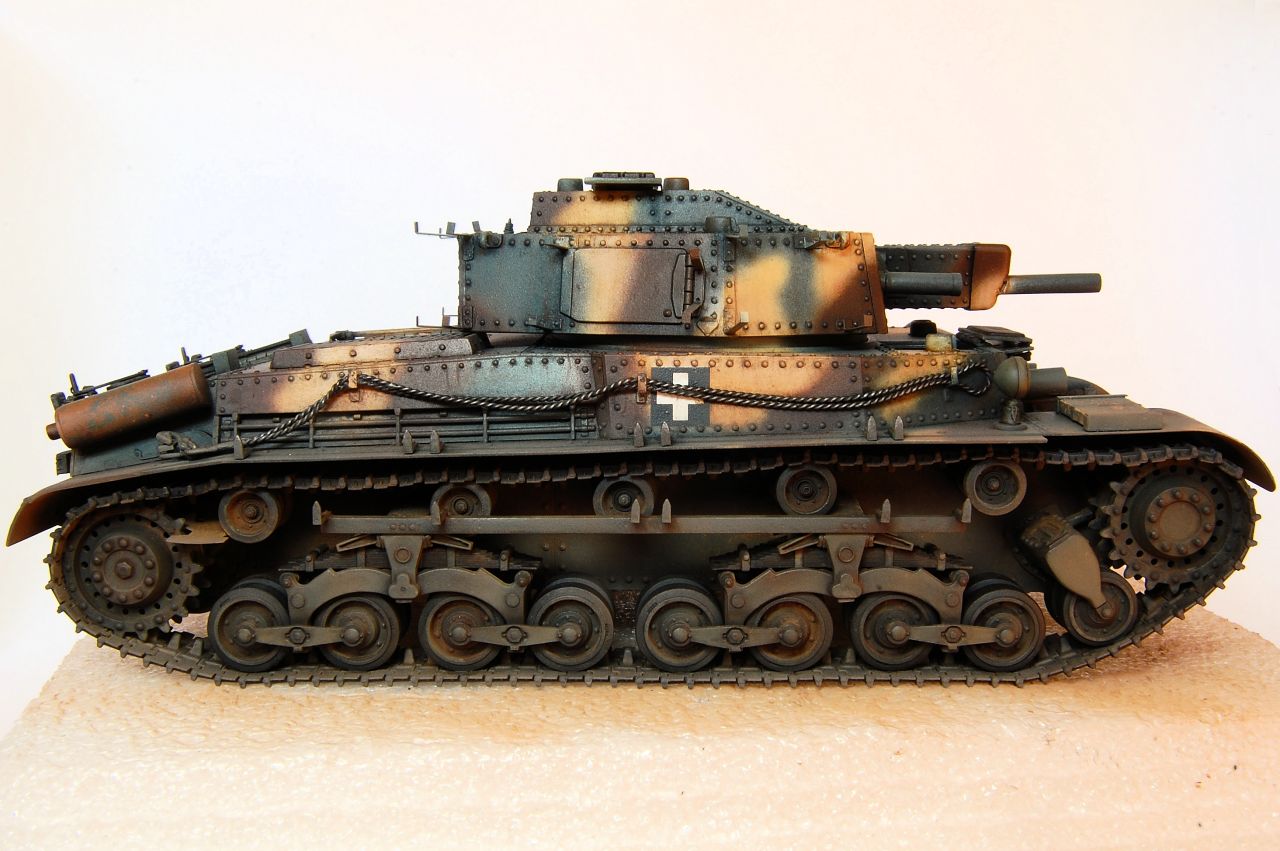
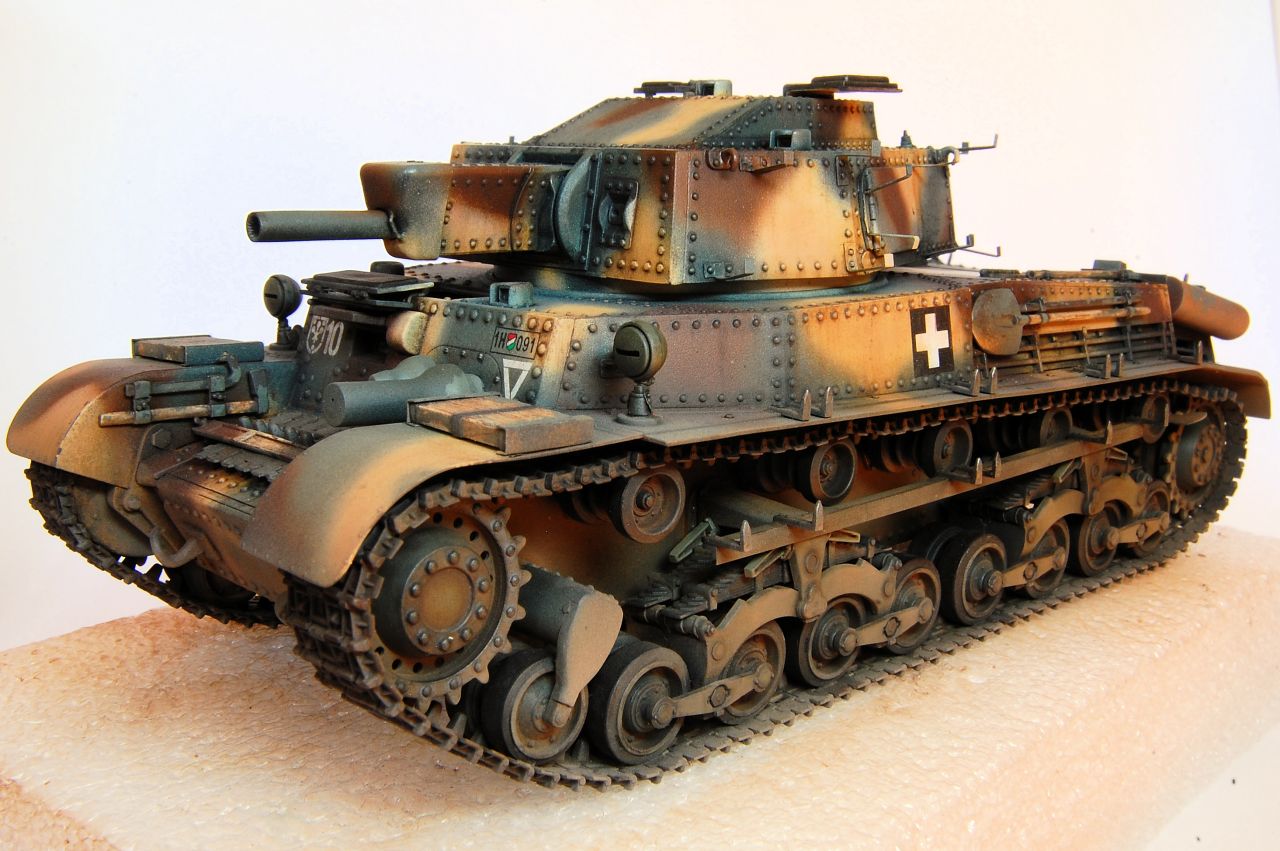
Fortunately it goes on quite easily, so time for a few shots of the almost finished model without any of the stand off armour:


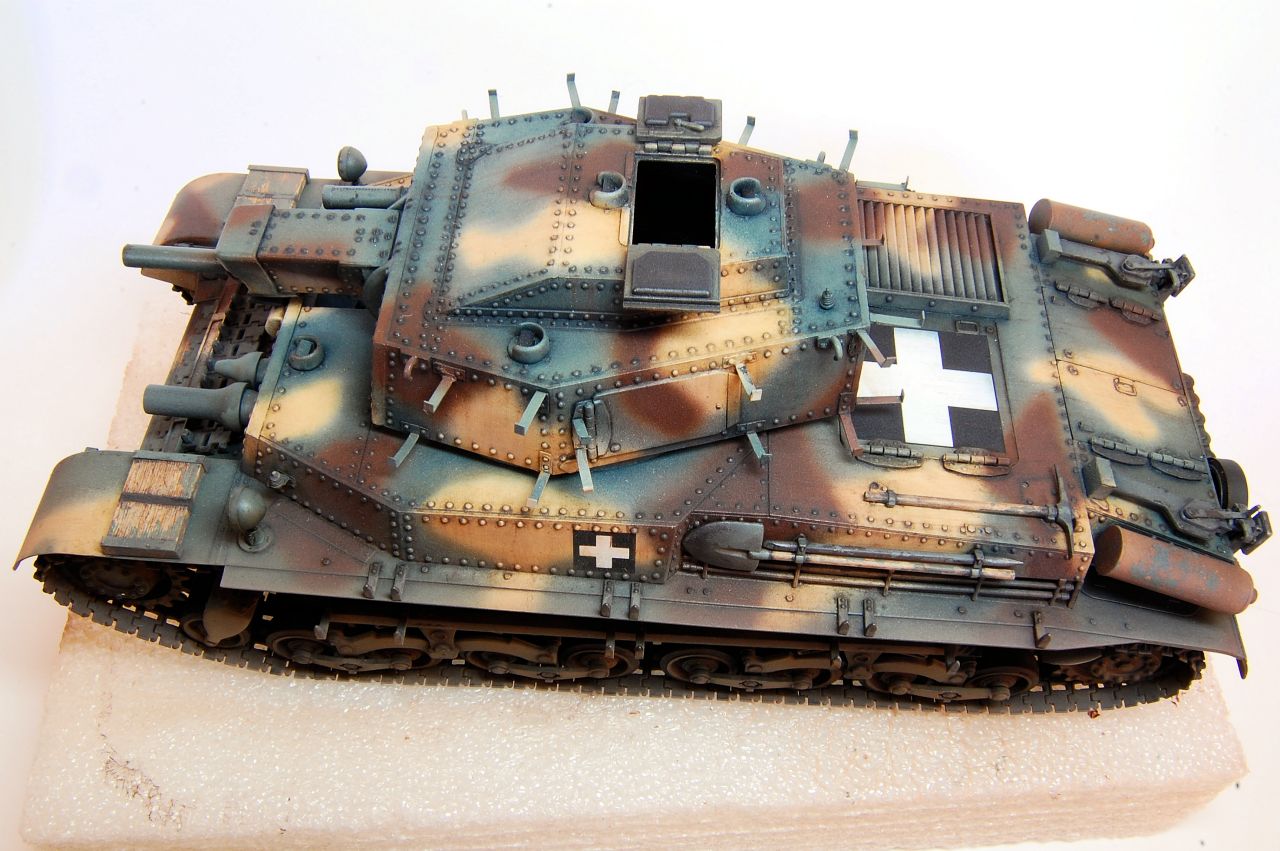
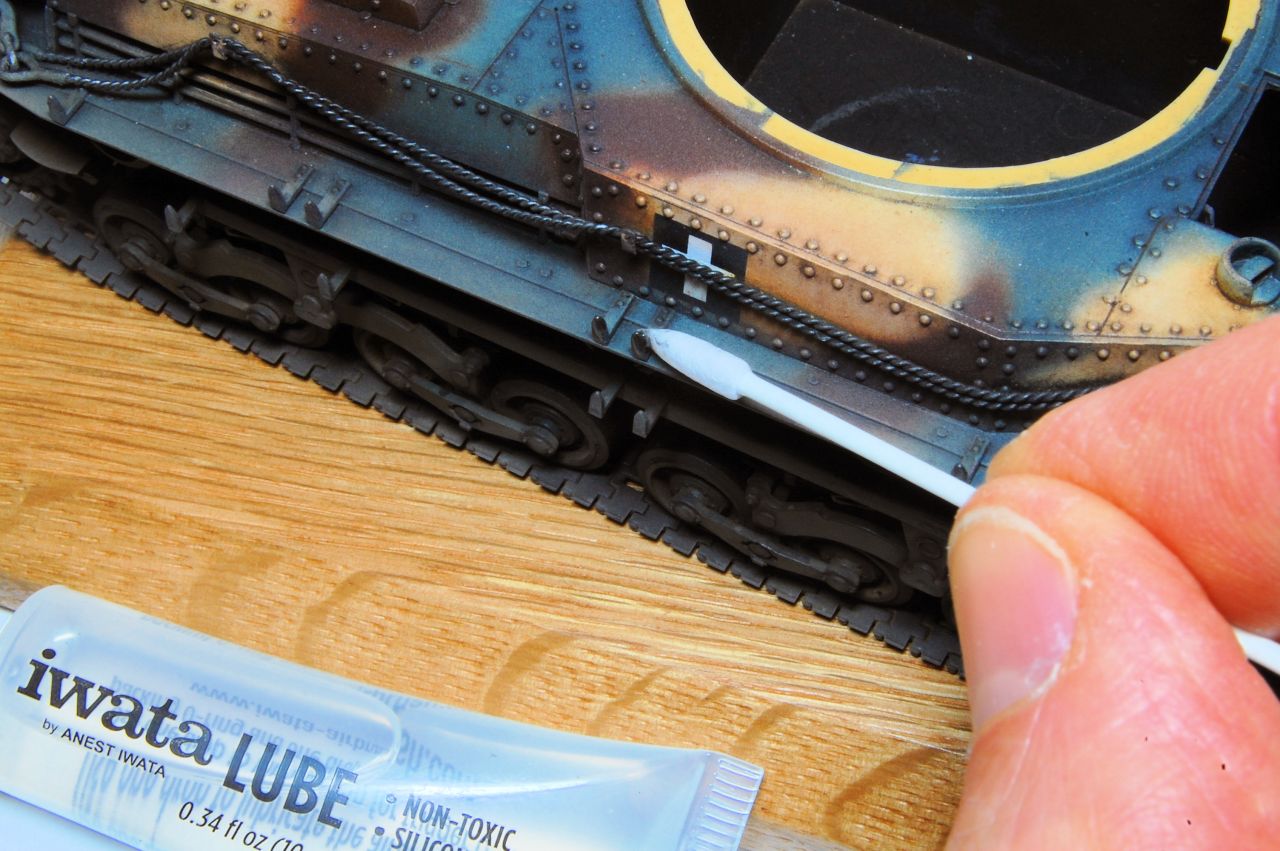
Here can be seen the result of quite a lot of painting work done to the bogies, wheels, tracks, with repeated oil and enamel washes, pigments, Tamiya Flat Earth etc.


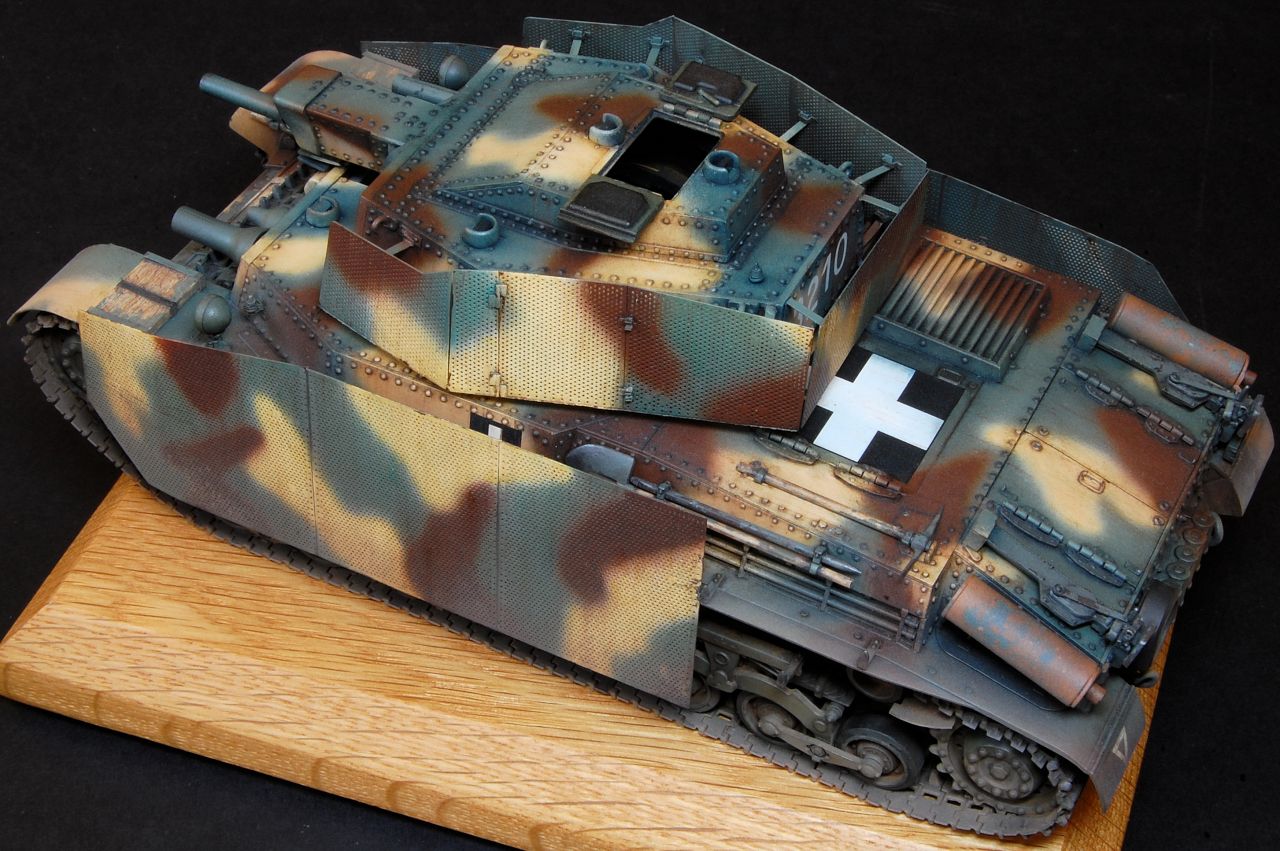
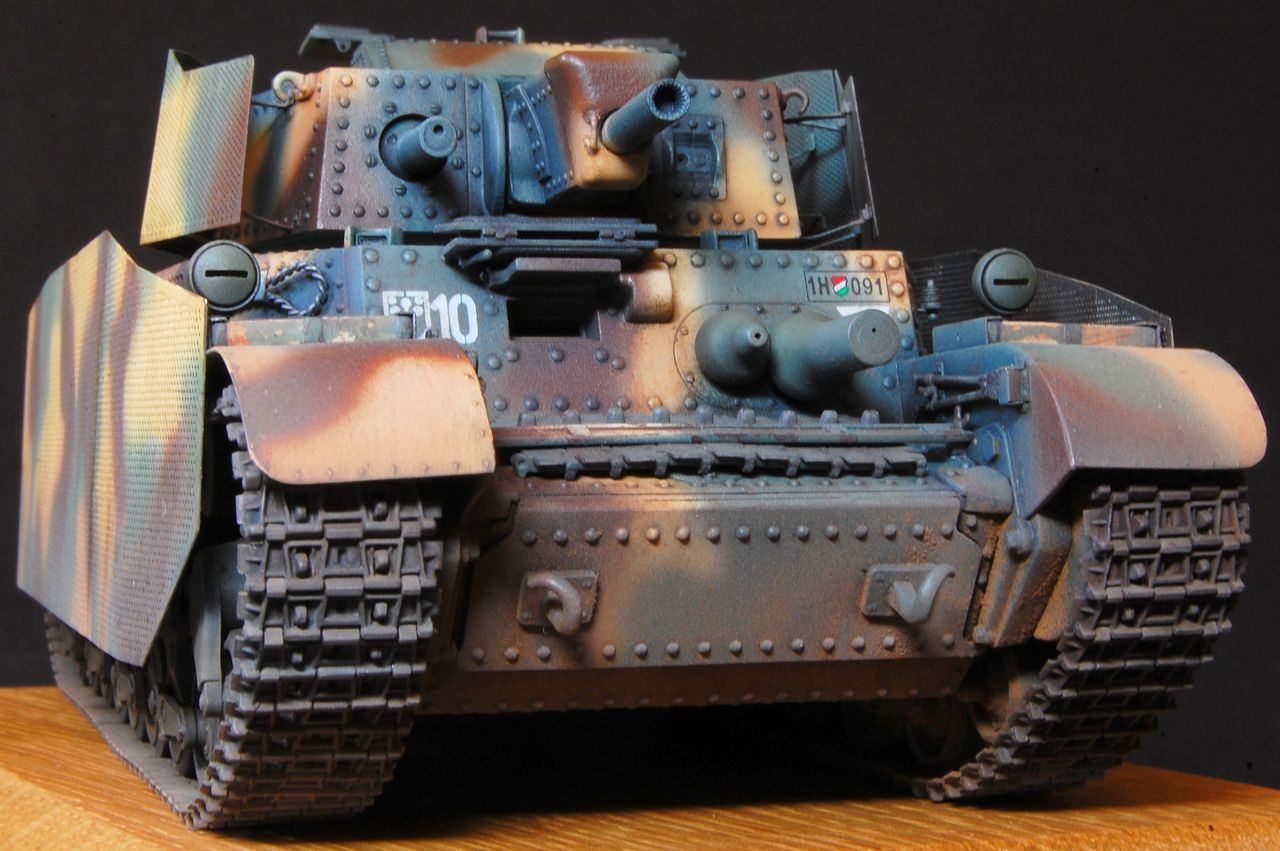
A very few small chips visible, and some metallic pigment on the hull armour hangers:


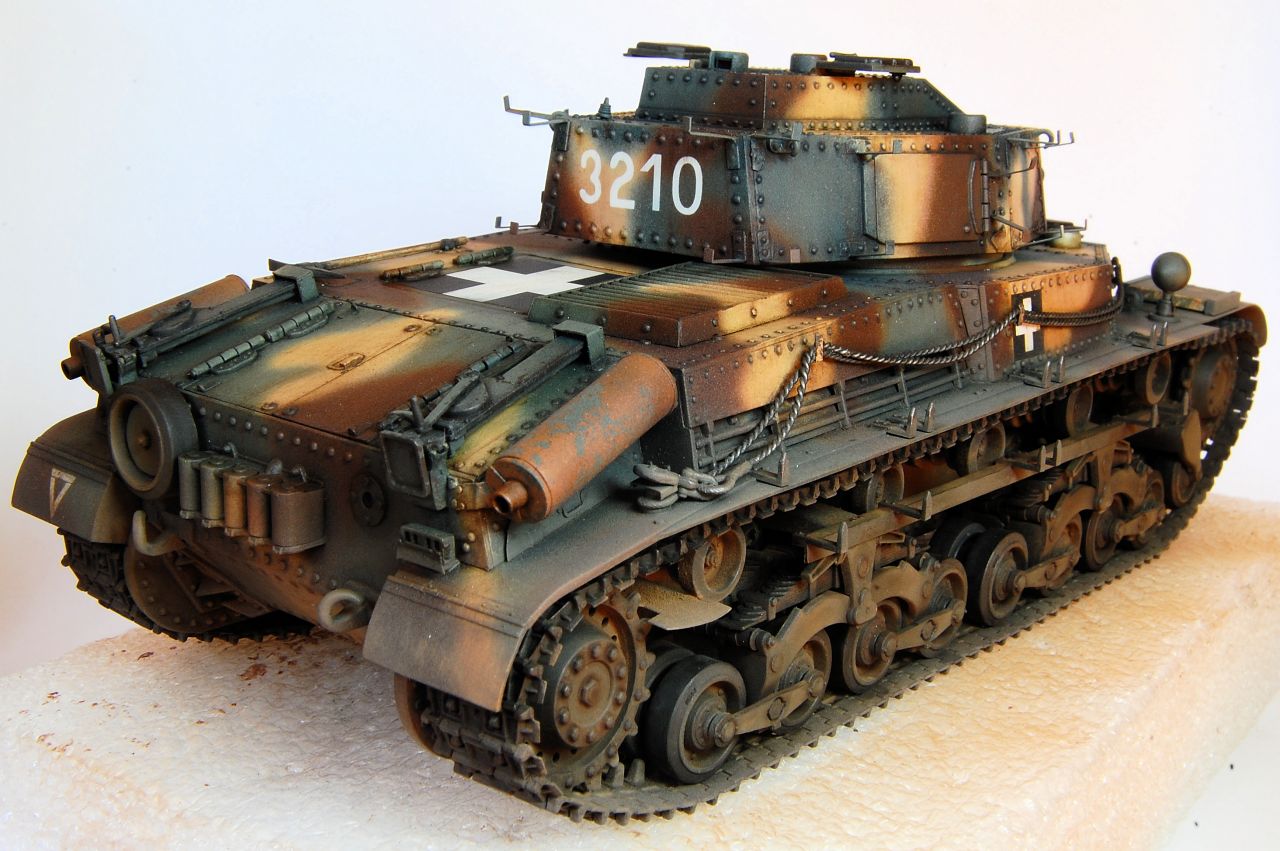
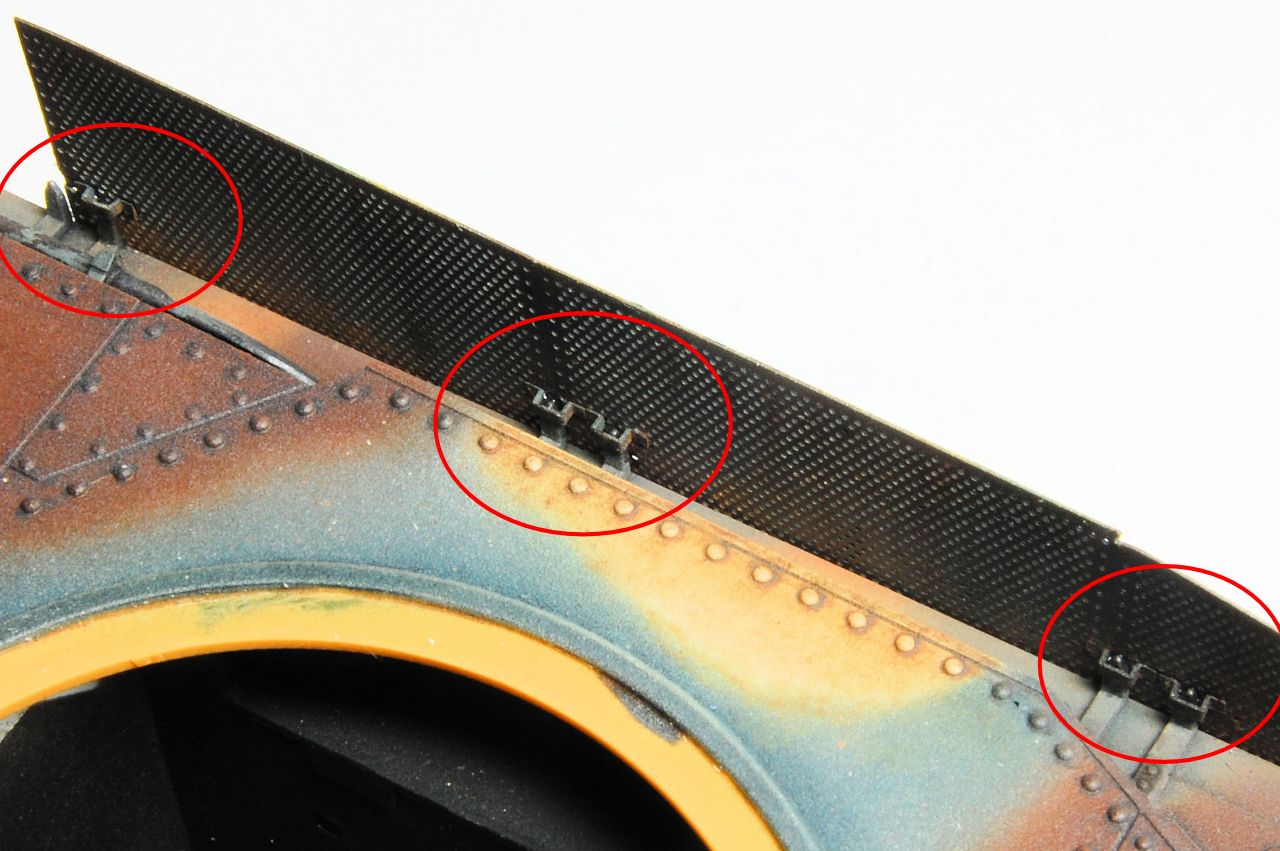
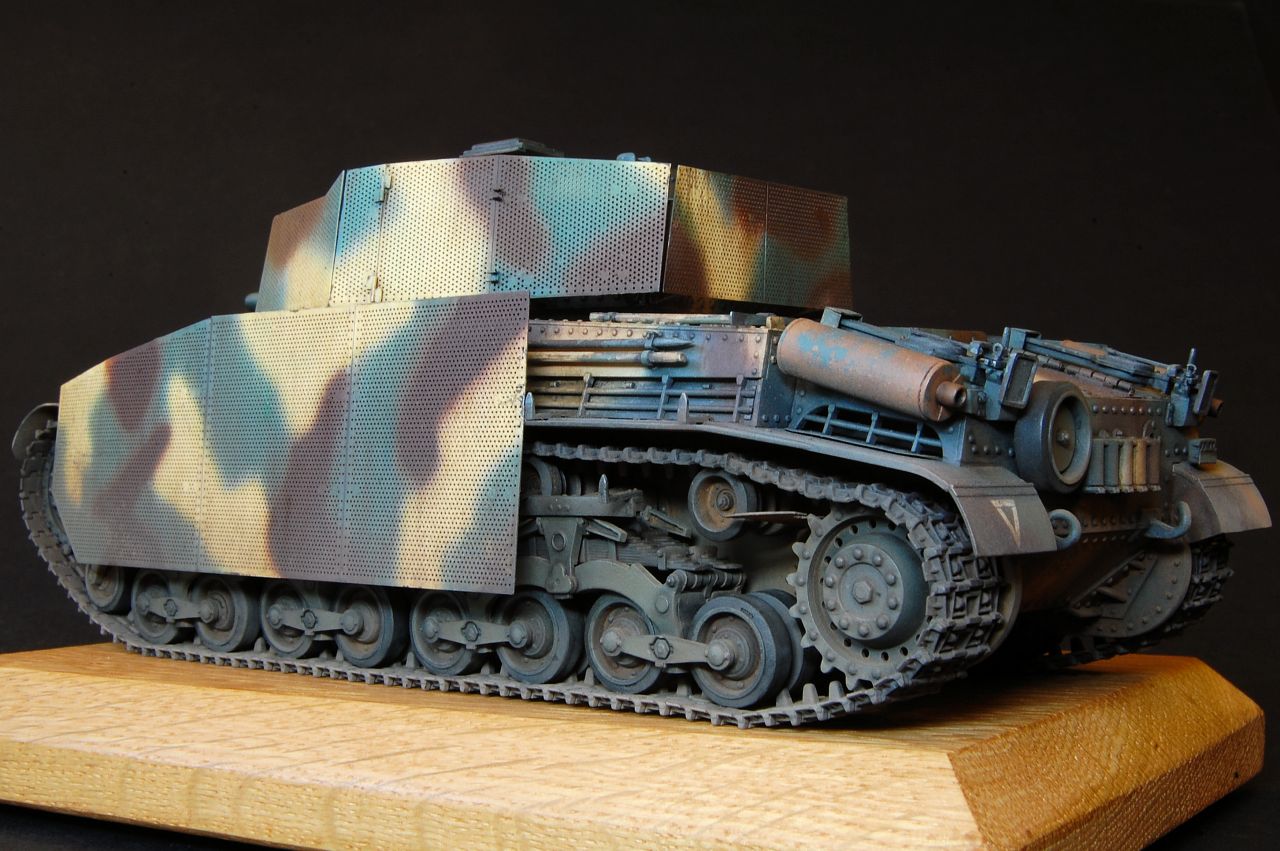
Fitting the turret armour was quite stressful. The brackets are delicate, and some needed bending a little to get into the right position for the eyelets on the plates, and needless to say that has to be done very carefully.

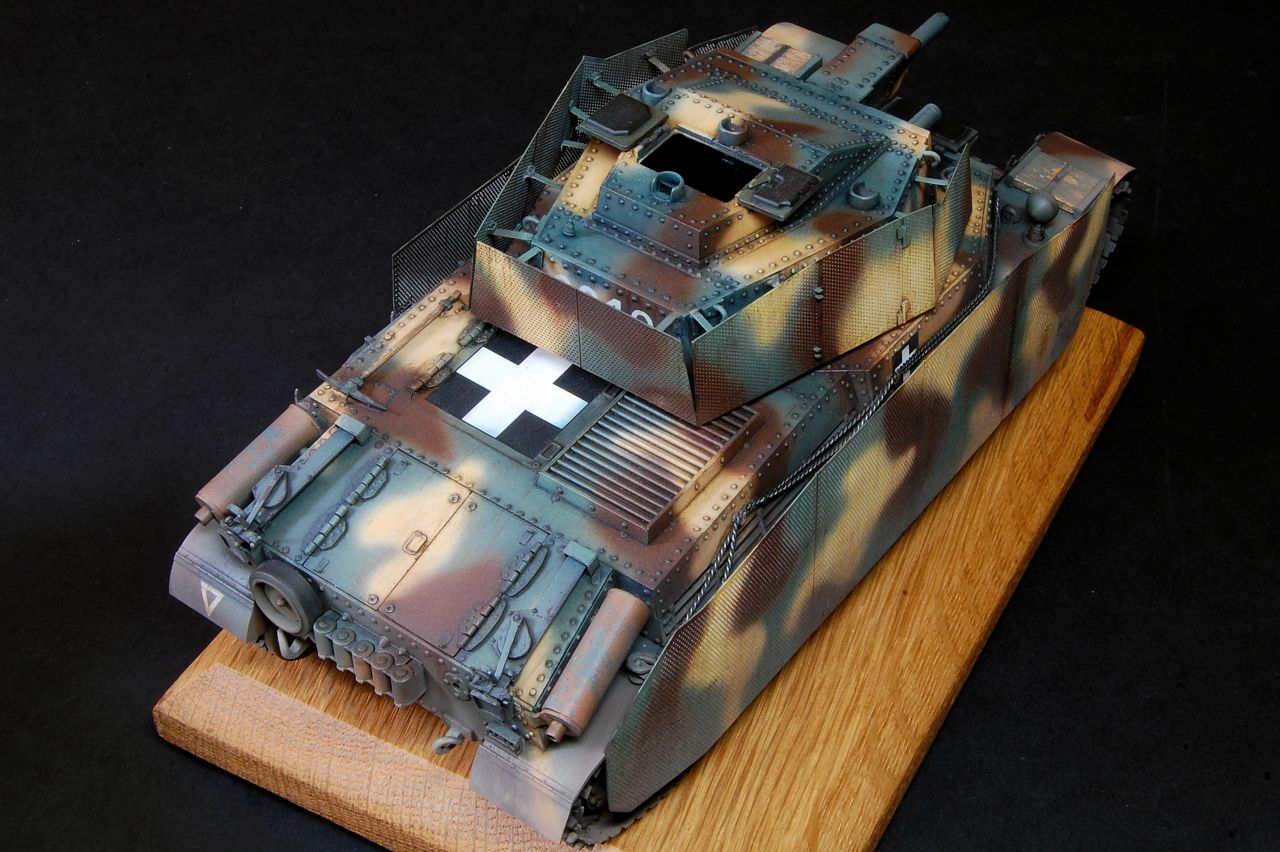
The lower left bracket on the rear plate (visible in the photo below) just wouldn't slot into the eyelet, and it also repeatedly hooked underneath the plate itself every time I tried to get all the brackets correctly engaged.

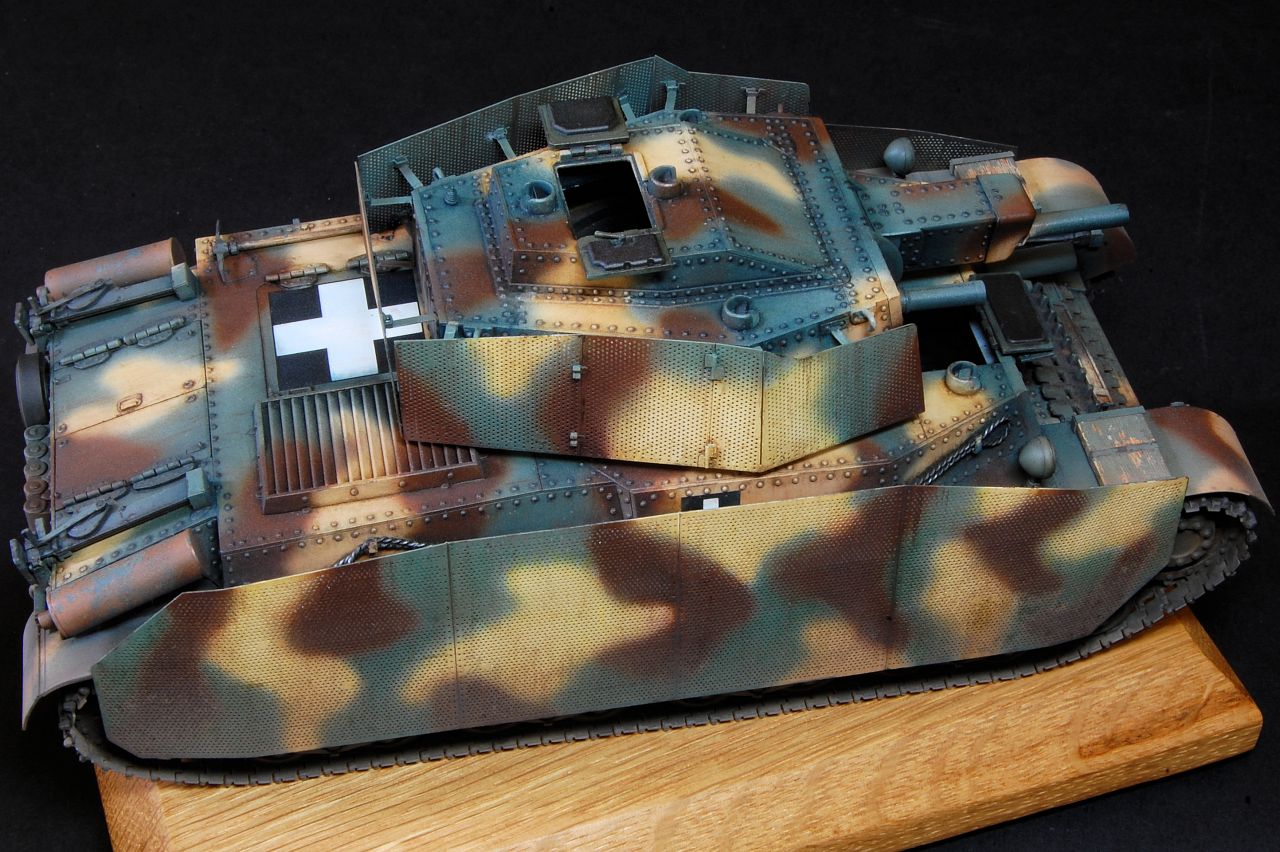
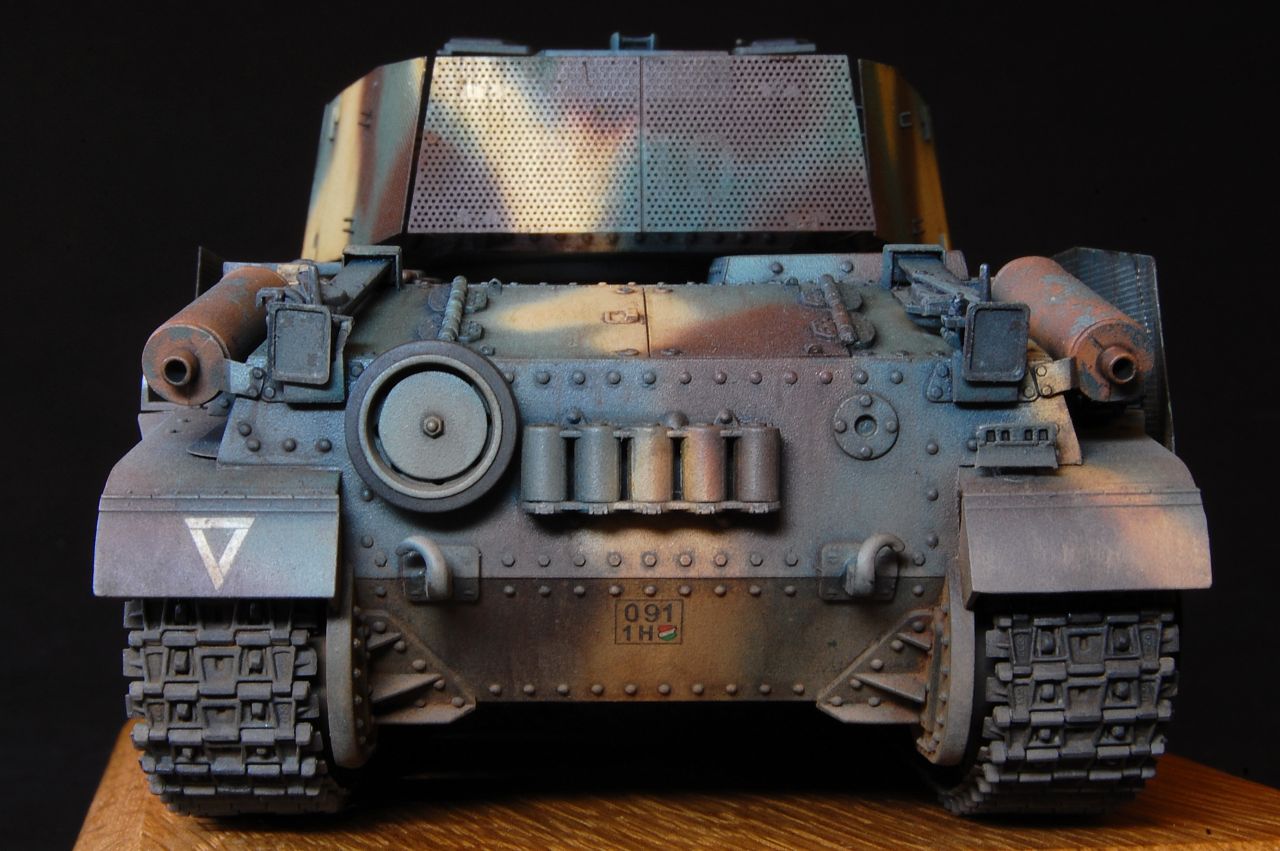
Trying to dry fit all the hooks and eyes in one go proved really hard, so on the side plate I made sure that the top of the rear section was engaged and applied CA glue. The front part is effectively slightly hinged where it angles round, so that section could be done separately. Once the top was done, I could turn the turret over and work on the lower section of hooks and eyes.


All of them attached, waiting for the glue to fully cure before doing any further adjustment, and also, probably, some touching up of paint:


errains
#045
Visit this Community
South Carolina, United States
Joined: September 23, 2005
KitMaker: 362 posts
Armorama: 350 posts
Posted: Sunday, March 31, 2019 - 12:37 PM UTC
Hello Matthew,
Good job with the skirt armour, as you stated quite stressful at this stage of the build for sure. I would like to commend you on the finish that you achieved thus far. The harmony of the colors is just beautiful. Your style reminds me of other great English modeler, Tony Greenland.

Looking forward to see this one come to a great finish!
firstcircle
Visit this Community
England - South East, United Kingdom
Joined: November 19, 2008
KitMaker: 2,249 posts
Armorama: 2,007 posts
Posted: Saturday, April 27, 2019 - 07:25 AM UTC
Eric, Tony Greenland, wow thanks, though I think my models are considerably rougher around the edges than his. I admit I do have his Panzer Modelling book, the finish on the wheels is a bit like his technique, and he did used to like a pretty camo scheme; no dry brushed edges here though.

Earlier I trial fitted, then removed, the side skirts, now with the turret armour on I could test fit both together. This revealed that the bottom edge of the turret armour would just snag the side skirts if the turret was rotated. The side skirts hang by lowering the eyelets onto the two rows of hooked brackets. The amount the skirts needed to be lowered by was only about 1mm so I used a hairdryer to slightly warm the brackets that are mounted on the rail attached to the bogies, and then bend them down a little, and that proved enough.

It also helps lower the skirts to insert the hooks as far as possible into the eyelets, but the two painted surfaces don't move against each other easily. As can be seen below, some of the hooks went in further than others:


I tried some airbrush lube to see if that would ease things up:


The lubricant definitely helped and allowed the skirts to be attached straight, and low enough. I should add that before mounting the skirts, the end portion of the front and rear plates needs to be bent in slightly so as to meet the track guard.

You can see by this stage that the hull had been mounted on a wooden base (from jaya10612 on ebay.co.uk) as once the turret with its armour and the side skirts are in place, the model is very difficult to handle.

So that is it more or less complete. The missing sledgehammer needs to be replaced, or at least the clasps, but I'll have to make it.

An interesting tank kit then, that produces an attractive looking model, although it is quite complex and in places fairly awkward to make and paint. I'm not sure that there is any ideal way to cope with making and painting the tracks and suspension assemblies, and some will prefer other methods to the one I used. The tracks on these tanks are quite distinctively chunky and their appearance is well captured by the kit parts, including cast in numbers on each link, so no need for aftermarket items (save your $40 for something else).


firstcircle
Visit this Community
England - South East, United Kingdom
Joined: November 19, 2008
KitMaker: 2,249 posts
Armorama: 2,007 posts
Posted: Saturday, April 27, 2019 - 07:30 AM UTC
Some low angle person height views for the record:


Thanks to Bronco for sending this sample to Armorama, and thanks to Darren for sending it on to me.
CMOT
Staff MemberEditor-in-Chief
ARMORAMA
Visit this Community
England - South West, United Kingdom
Joined: May 14, 2006
KitMaker: 10,954 posts
Armorama: 8,571 posts
Posted: Saturday, April 27, 2019 - 08:17 AM UTC
Really nice work Matthew and the journey has been pleasing to follow.
ninjrk
Visit this Community
Alabama, United States
Joined: January 26, 2006
KitMaker: 1,381 posts
Armorama: 1,347 posts
Posted: Saturday, April 27, 2019 - 08:19 AM UTC
That came out quite nicely.
errains
#045
Visit this Community
South Carolina, United States
Joined: September 23, 2005
KitMaker: 362 posts
Armorama: 350 posts
Posted: Saturday, April 27, 2019 - 09:33 AM UTC
all I can say is...PHENOMENAL!!!

Though I feel drybrushing still has its place in todays finishing and weathering trends this example certainly does not need any as you achieved excellent definition between the many panels and other details.

Kind of a shame to hide all that beautiful suspension work behind the side skirts.

Oh did I say I think this build is just...PHENOMENAL!!!

 _GOTOTOP