Under New Management 2018
Uusimaa, Finland
Joined: October 01, 2016
KitMaker: 514 posts
Armorama: 171 posts
Posted: Thursday, October 18, 2018 - 07:14 AM UTC
Mudguards almost done, have add few bolts:

Finns replaced the mudguards of captured KV-1s and T-34s with these more angular ones. I'd guess motivation could be to make the tank more recognizable as captured vehicle to avoid friendly fire.
Queensland, Australia
Joined: August 06, 2005
KitMaker: 3,353 posts
Armorama: 3,121 posts
Posted: Thursday, October 18, 2018 - 08:47 PM UTC
That would be a big motivation I think! Looking good Pasi.
On the Bench:
Dust, styrene scraps, paint splotches and tears.

#453
Texas, United States
Joined: August 28, 2016
KitMaker: 1,925 posts
Armorama: 601 posts
Posted: Thursday, October 18, 2018 - 11:23 PM UTC
Pasi,
Nice work installing those mudguards, very clean.
Mark

Uusimaa, Finland
Joined: October 01, 2016
KitMaker: 514 posts
Armorama: 171 posts
Posted: Friday, October 19, 2018 - 05:10 PM UTC
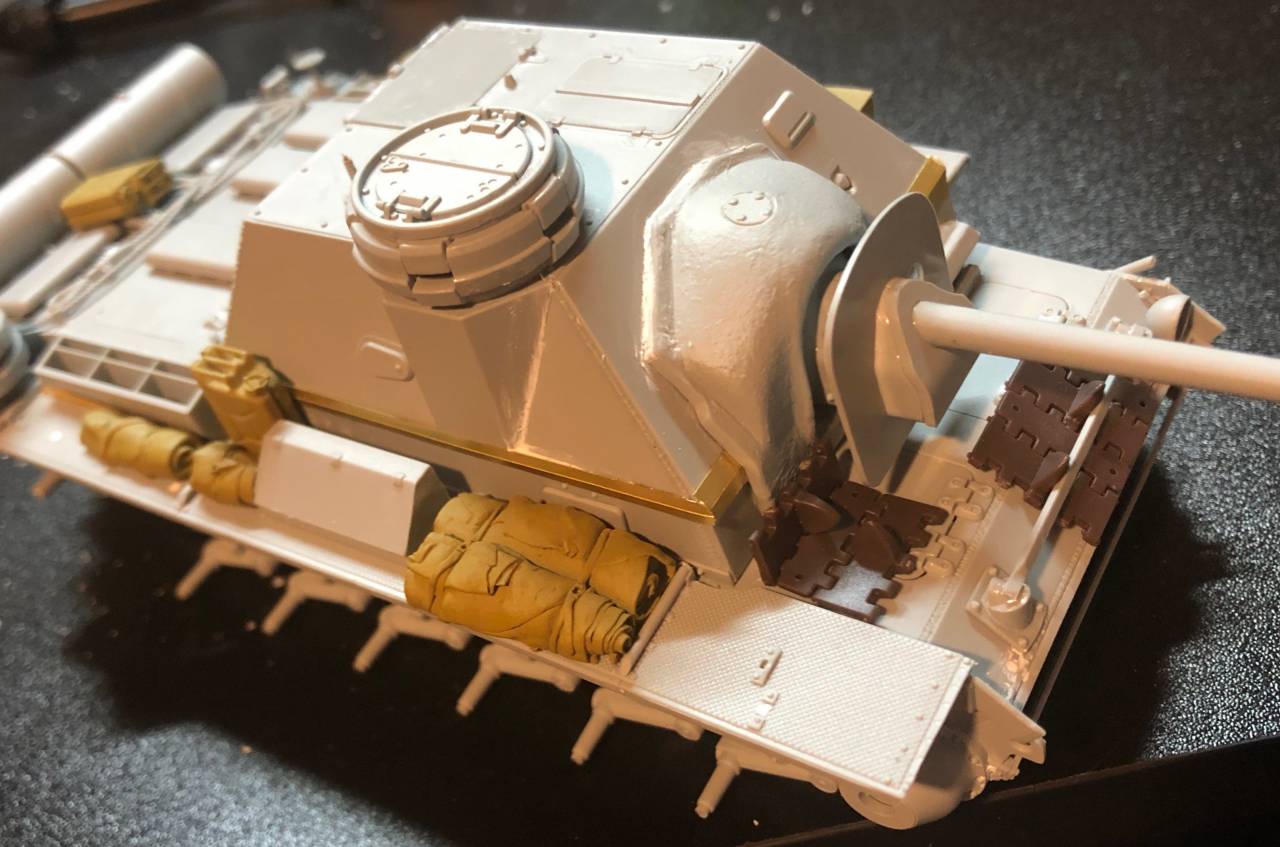
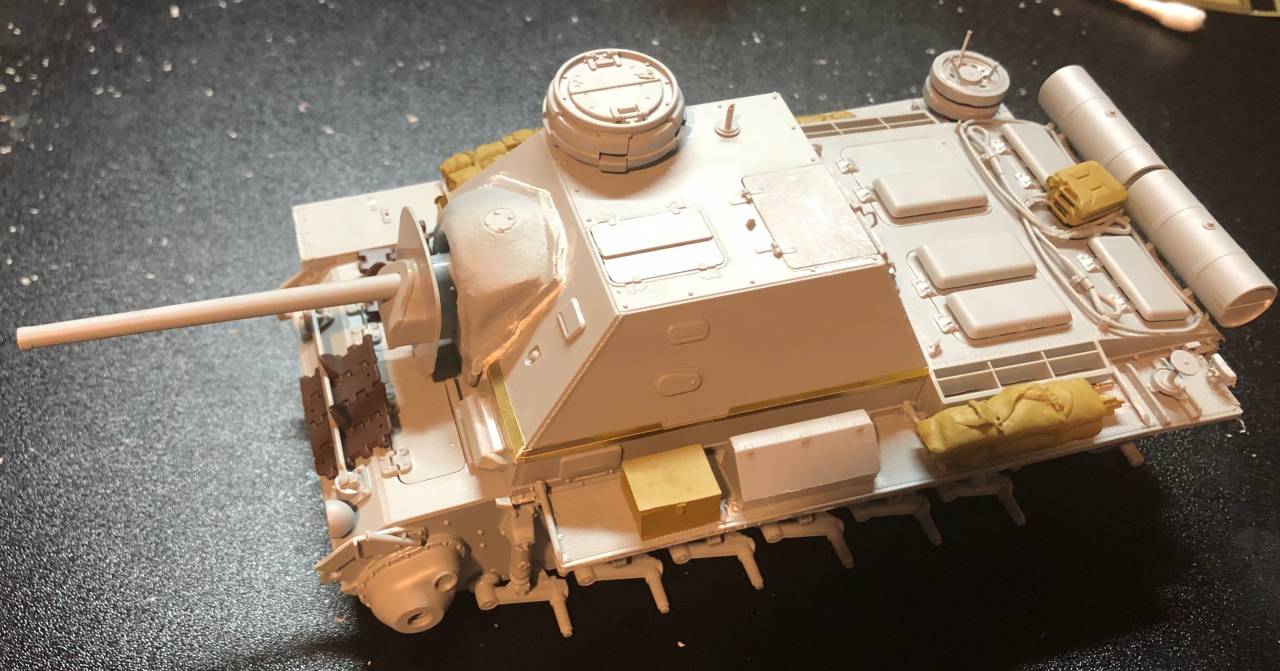
Thanks. Did some PE work, and unfortunately ET Model's toolboxes are too deep for Finnish KV-1 (they are for German captured KVs):

Mudguard size should be right: there's Trumpeter's mudguard for Russian KV on bottom, and based on photos the Finnish mudguard doesn't cover tracks completely and neither do mine.
I'll have to buy acetone to dissolve CA glue, and at least reuse smallest parts and possibly the curved cover. More sheet plastic work ahead...
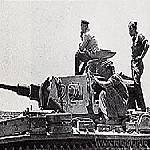
And here's probably the most difficult part, which is engine cooling air intake. The aftermarket parts I've seen have mesh attached, but for some reason Finnish KVs didn't have them so support structure was left visible as can be seen in this photo from Parola Tank Museum:

Queensland, Australia
Joined: August 06, 2005
KitMaker: 3,353 posts
Armorama: 3,121 posts
Posted: Friday, October 19, 2018 - 09:13 PM UTC
Pasi, based on what you have done so far, the intakes should be no problem for you
On the Bench:
Dust, styrene scraps, paint splotches and tears.
Sofiya, Bulgaria
Joined: November 26, 2017
KitMaker: 393 posts
Armorama: 369 posts
Posted: Saturday, October 20, 2018 - 04:43 AM UTC
#453
Texas, United States
Joined: August 28, 2016
KitMaker: 1,925 posts
Armorama: 601 posts
Posted: Saturday, October 20, 2018 - 10:19 AM UTC
Kalin,
Great looking interior. Really loving the colors you used for the camo.
Mark
Queensland, Australia
Joined: August 06, 2005
KitMaker: 3,353 posts
Armorama: 3,121 posts
Posted: Saturday, October 20, 2018 - 12:35 PM UTC
Yes, Kalin, great looking interior indeed.
On the Bench:
Dust, styrene scraps, paint splotches and tears.
Sofiya, Bulgaria
Joined: November 26, 2017
KitMaker: 393 posts
Armorama: 369 posts
Posted: Saturday, October 20, 2018 - 11:47 PM UTC
Mark, Peter, thank you for the comments!
This is the second model I do with cut camouflage. I have encountered a problem with the order to make the colors. Mainly, I have overflowing colors.
Kalin

Queensland, Australia
Joined: August 06, 2005
KitMaker: 3,353 posts
Armorama: 3,121 posts
Posted: Sunday, October 21, 2018 - 07:35 AM UTC
Hi Kalin
If you use a gloss colour in very light coats, you will get less bleed under the mask.
I haven't tried this yet, but Robin Nilsson who is a regular here suggested first spraying the edge of the mask with the colour under the decal. Then spray the new colour over that. The bleed should then be the original colour. It sounds like it would work.
On the Bench:
Dust, styrene scraps, paint splotches and tears.
#490
Sofiya, Bulgaria
Joined: September 22, 2016
KitMaker: 1,432 posts
Armorama: 1,390 posts
Posted: Sunday, October 21, 2018 - 08:12 AM UTC
Nico job on the Gaunter camo, Kalin!
The interior also looks the part.
Only Erwin Rommel is missing

Peter and Robin- this anti-bleed approach sounds quite promissing.
It's noted and will be tested someday, thanks!
Västra Götaland, Sweden
Joined: May 29, 2018
KitMaker: 397 posts
Armorama: 388 posts
Posted: Sunday, October 21, 2018 - 04:57 PM UTC
Nice work Kalin. Don't worry to much about paint bleed, just take some fine brush and paint bleeds by hand. All caunter schemes were free hand painted using brush. They did not use masking tape...

And, if you need line without bleed, just use Peter's metod, it works with any paint - few fine dry coats.
Sofiya, Bulgaria
Joined: November 26, 2017
KitMaker: 393 posts
Armorama: 369 posts
Posted: Monday, October 22, 2018 - 05:26 AM UTC
Peter, Bogi, thanks for the advice. I will try them on the next model.
Kalin
California, United States
Joined: March 03, 2016
KitMaker: 142 posts
Armorama: 137 posts
Posted: Monday, October 29, 2018 - 02:51 PM UTC
CO, Thanks for the extra time!!
At Pasi,
Nice job on the scratch parts!! Question about your PE adhesive, Did you use CA or Solder?
At Kalin,
Interior looks amazing!
JohnA
Uusimaa, Finland
Joined: October 01, 2016
KitMaker: 514 posts
Armorama: 171 posts
Posted: Tuesday, October 30, 2018 - 02:47 AM UTC
#401
Washington, United States
Joined: December 08, 2013
KitMaker: 323 posts
Armorama: 221 posts
Posted: Monday, November 05, 2018 - 03:27 AM UTC
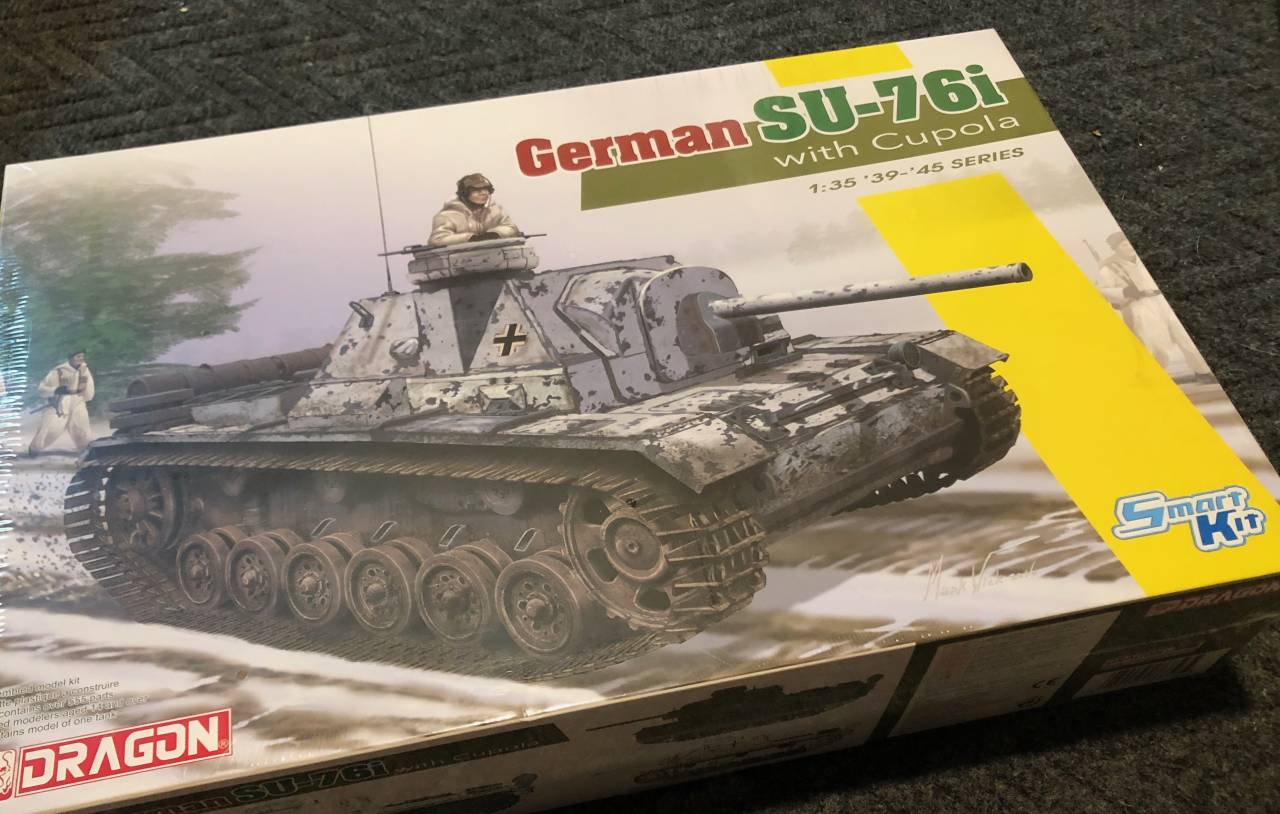
Some really awesome builds going in this campaign so far. I know Im joining the show a little late, I think I have enough time to complete Dragon's Su-76i. The Su-76's had a really interesting story and this particular build will represent the third time the AFV changed hands.
#521
Kentucky, United States
Joined: April 13, 2011
KitMaker: 9,465 posts
Armorama: 8,695 posts
Posted: Monday, November 05, 2018 - 03:49 AM UTC
Very entertaining campaign from the armchair viewpoint here at my house.
Thanks guys!
Klaus-Adler
 Campaigns Administrator
Scotland, United Kingdom
Joined: June 08, 2015
KitMaker: 1,505 posts
Armorama: 840 posts
Posted: Friday, November 09, 2018 - 10:21 PM UTC
ok well i plan to do a captured iraqi M113 and here is the kit still in the box with a date and time stamp care of google

Klaus-Adler
Campaigns Administrator Scotland, United Kingdom
Joined: June 08, 2015
KitMaker: 1,505 posts
Armorama: 840 posts
Posted: Sunday, November 11, 2018 - 01:43 AM UTC
ok well here is a quick update, i have completed making the road wheels and i have skipped step two for now which is the assembly of the rear ramp, i hope to do that this evening. I'm a bit annoyed that they have sacrificed the interior for the accessories but hay-ho.
this picture also contains a armistice day poppy as we are commemorating the end of the first world war today here in the United Kingdom.

Klaus-Adler
Campaigns Administrator Scotland, United Kingdom
Joined: June 08, 2015
KitMaker: 1,505 posts
Armorama: 840 posts
Posted: Monday, November 12, 2018 - 03:21 AM UTC
ok so i have now managed to get the upper hull plate added as well as the rear ramp and all the small items that go there as well.

California, United States
Joined: March 03, 2016
KitMaker: 142 posts
Armorama: 137 posts
Posted: Tuesday, November 13, 2018 - 05:08 PM UTC
At Pasi.. Your Welcome!
Welcome to the Campaign David!
Your captured M113A2 is coming along nicely.
JohnA
Klaus-Adler
Campaigns Administrator Scotland, United Kingdom
Joined: June 08, 2015
KitMaker: 1,505 posts
Armorama: 840 posts
Posted: Wednesday, November 14, 2018 - 10:51 PM UTC
Quoted Text
At Pasi.. Your Welcome!
Welcome to the Campaign David!
Your captured M113A2 is coming along nicely.
JohnA
yep it's an easy kit to put together, especially as they have done away with the interior of the kit :-(
here is a brief update, i have now secured the engine access panel and have filled in the gaps with putty which i am now waiting for it to harden before sanding it smooth.

Queensland, Australia
Joined: August 06, 2005
KitMaker: 3,353 posts
Armorama: 3,121 posts
Posted: Thursday, November 15, 2018 - 08:46 AM UTC
On the Bench:
Dust, styrene scraps, paint splotches and tears.
Klaus-Adler
Campaigns Administrator Scotland, United Kingdom
Joined: June 08, 2015
KitMaker: 1,505 posts
Armorama: 840 posts
Posted: Sunday, November 18, 2018 - 03:04 AM UTC
cheers mate,
i have now started the painting process by giving the kit several coats of matt white car primer paint.
The commanders cuppola hatch cover which isn't the picture has been a royal pain, due to the injector pin park in the centre which has taken several attempts to fill and sand and only now have i managed to give it a coat of paint

#401
Washington, United States
Joined: December 08, 2013
KitMaker: 323 posts
Armorama: 221 posts
Posted: Saturday, November 24, 2018 - 05:22 AM UTC
Ive made some significant progress on the SU76i thanks to the holiday weekend. I completed the tracks after taking these pictures and should be moving to the painting process today.
I will say that Dragon really did a poor job with the 'SU76i' specific parts for this kit. I glad I bought this kit when it was on a deep discount.