_GOTOBOTTOM
Armor/AFV
For discussions on tanks, artillery, jeeps, etc.
Tasca Jumbo with the new Real Colors
clovis899
#155
Visit this Community
California, United States
Joined: May 05, 2002
KitMaker: 774 posts
Armorama: 605 posts
Posted: Wednesday, December 06, 2017 - 11:36 AM UTC
A little more work tonight. I tried a bit of brush painting; painted the wooden handles of the pioneer tools with the RC030 Earth Yellow as a base coat. Didn't have any problems at all, it felt kind of like thinned Tamiya paint. I thinned it even more before I actually put it on the model. Went on well with no issues at all. Here is the photo of step one.

After letting that dry for about twenty minutes (it dries quickly, not much waiting around time at all) I used some Burnt Umber and Burnt Sienna to give it the look of wood. Here is the photo of that stage.

Finally, I added some leather retaining straps for the tools with paper and some old Aber buckles. The paper straps were painted Vallejo Flat Brown #984 with a little Vallejo Air Golden Brown #032 added in. Here is the photo for where we are now.

That's it for tonight. Tomorrow I should get the .50 M2 taken care of and maybe a light wash.

Cheers,
Rick
Vicious
Visit this Community
Queensland, Australia
Joined: September 04, 2015
KitMaker: 1,517 posts
Armorama: 1,109 posts
Posted: Wednesday, December 06, 2017 - 11:54 AM UTC
With the brush they're like the tamiya if you don't leave the first coat dry perfectly the second lifts te first coat or don't put 2 stroke in same spot or get messy,basically a pain in the .... (I hate brush tamiya they are orribile) or they go down like vallejo and others water based acrylics?...if you understand what I mean


Ps: thanks for your review!
clovis899
#155
Visit this Community
California, United States
Joined: May 05, 2002
KitMaker: 774 posts
Armorama: 605 posts
Posted: Wednesday, December 06, 2017 - 12:09 PM UTC

Quoted Text

With the brush they're like the tamiya if you don't leave the first coat dry perfectly the second lifts te first coat or don't put 2 stroke in same spot or get messy,basically a pain in the .... (I hate brush tamiya they are orribile) or they go down like vallejo and others water based acrylics?...if you understand what I mean


Ps: thanks for your review!


It was not quite like Vallejo but very close. I thinned it down quite a bit. What you see is about three or four coats. I didn't try to overwork the paint but let it dry a minute or two between coats. On a 1-10 scale for brush painting with 1 being Tamiya like and susceptible to lifting and a 10 being Vallejo like with the brush I would rate this paint about a 7 after thinning. It does seem much more durable than Vallejo so that is a bonus if you are going to have to handle the model at all.

Hope that helps.

Cheers,
Rick
guni-kid
Visit this Community
Nordrhein-Westfalen, Germany
Joined: July 21, 2007
KitMaker: 521 posts
Armorama: 514 posts
Posted: Wednesday, December 06, 2017 - 01:41 PM UTC
The results look fine and convincing to me. Thanks for describing your steps and for the evaluation of the paints. It's much appreciated!
165thspc
#521
Visit this Community
Kentucky, United States
Joined: April 13, 2011
KitMaker: 9,465 posts
Armorama: 8,695 posts
Posted: Thursday, December 07, 2017 - 12:27 AM UTC
Your woodwork looks beautiful - very jealous.

Thanks for sharing your process.
clovis899
#155
Visit this Community
California, United States
Joined: May 05, 2002
KitMaker: 774 posts
Armorama: 605 posts
Posted: Friday, December 08, 2017 - 10:54 AM UTC
Marian and Michael,
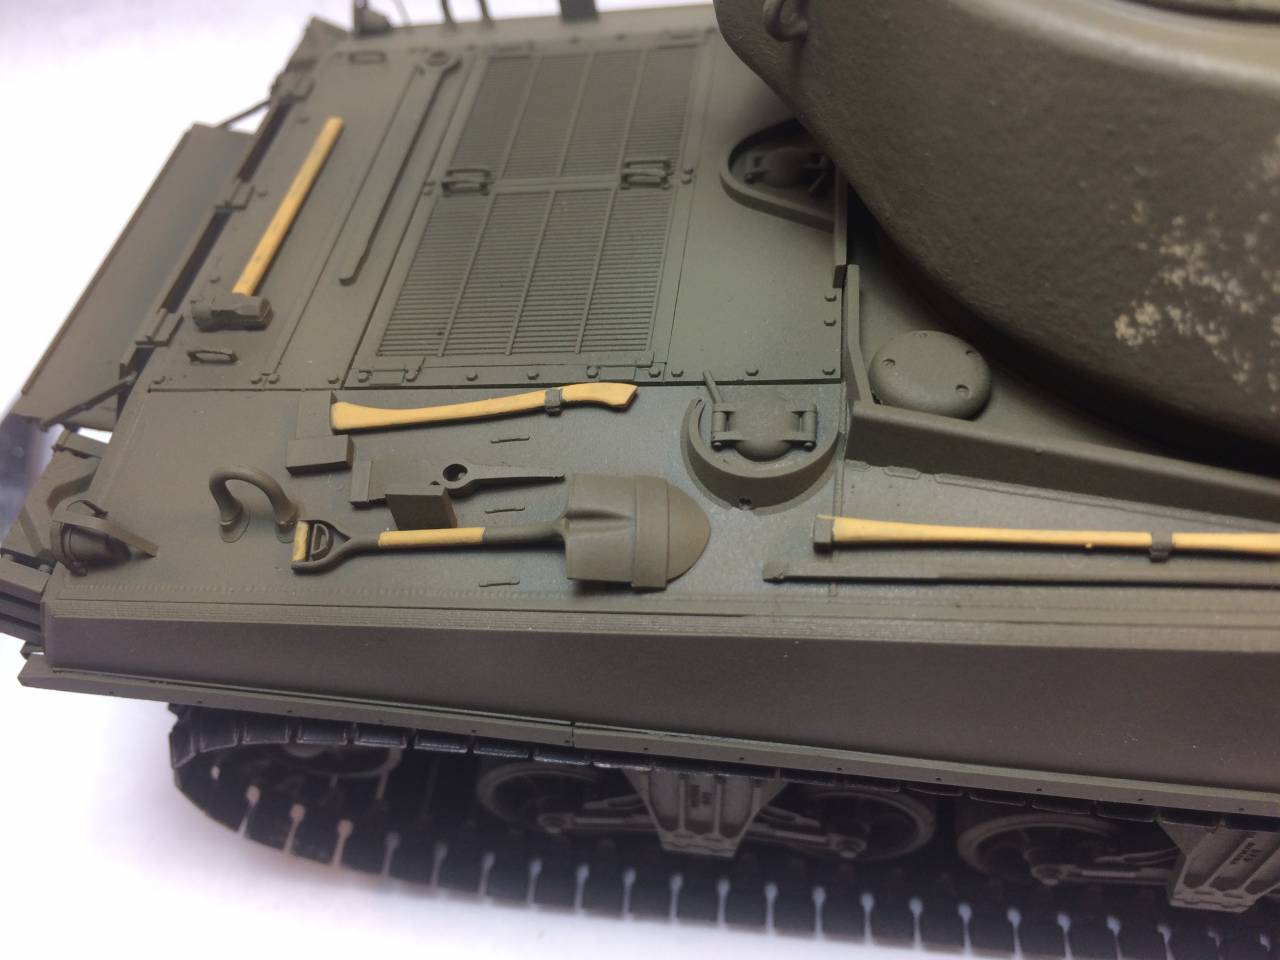
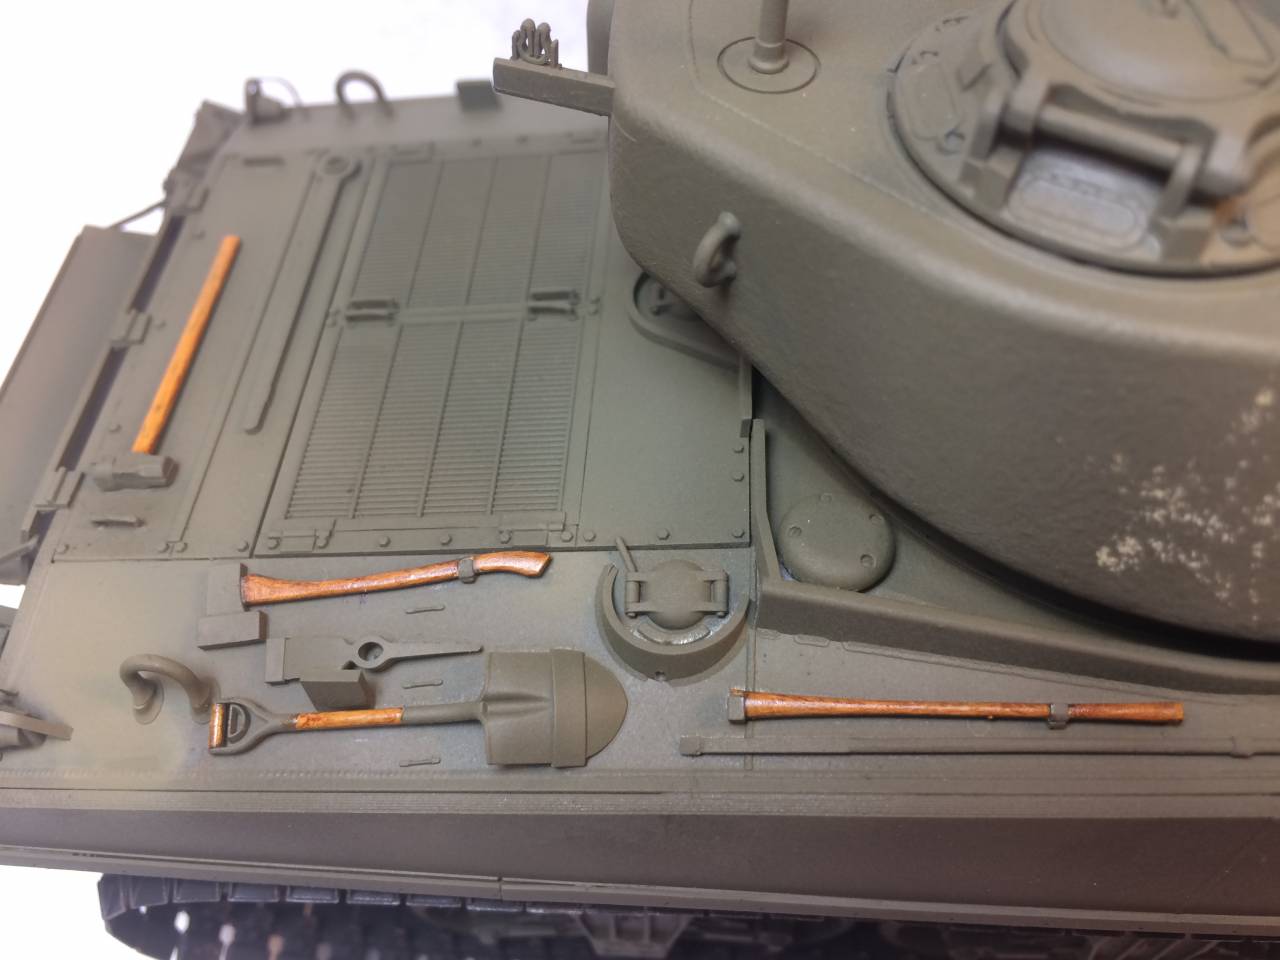
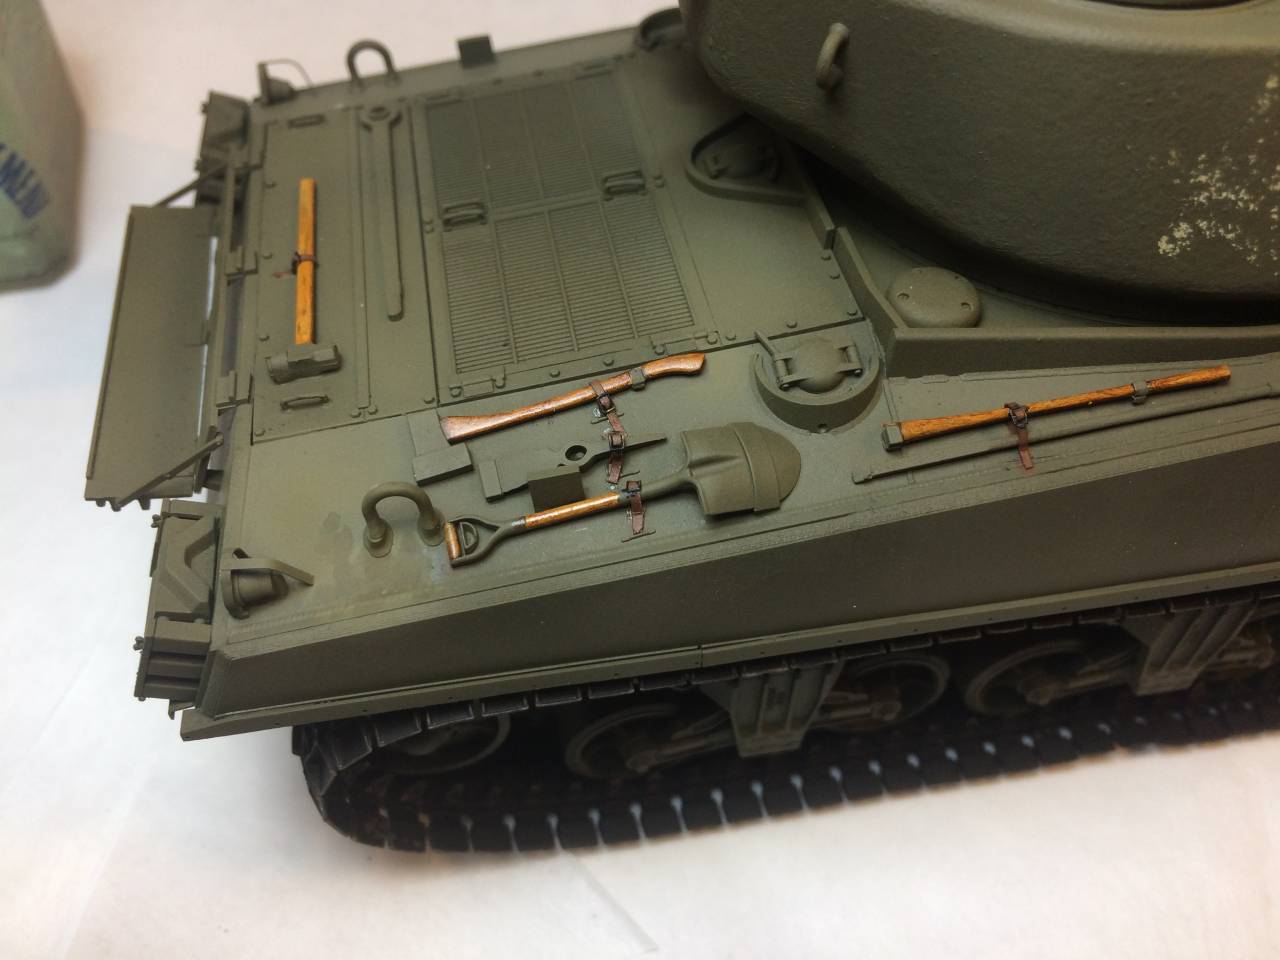
Thank you for your comment, you are far to kind. Michael, the wood effect is very easy, light yellow/tan color with acrylic/enamel (really, anything other than oils), let dry, apply a light coat of any umber or sienna, let it sit for five minutes then remove it with a brush or Q-tip. Wax on, wax off, very easy and effective.

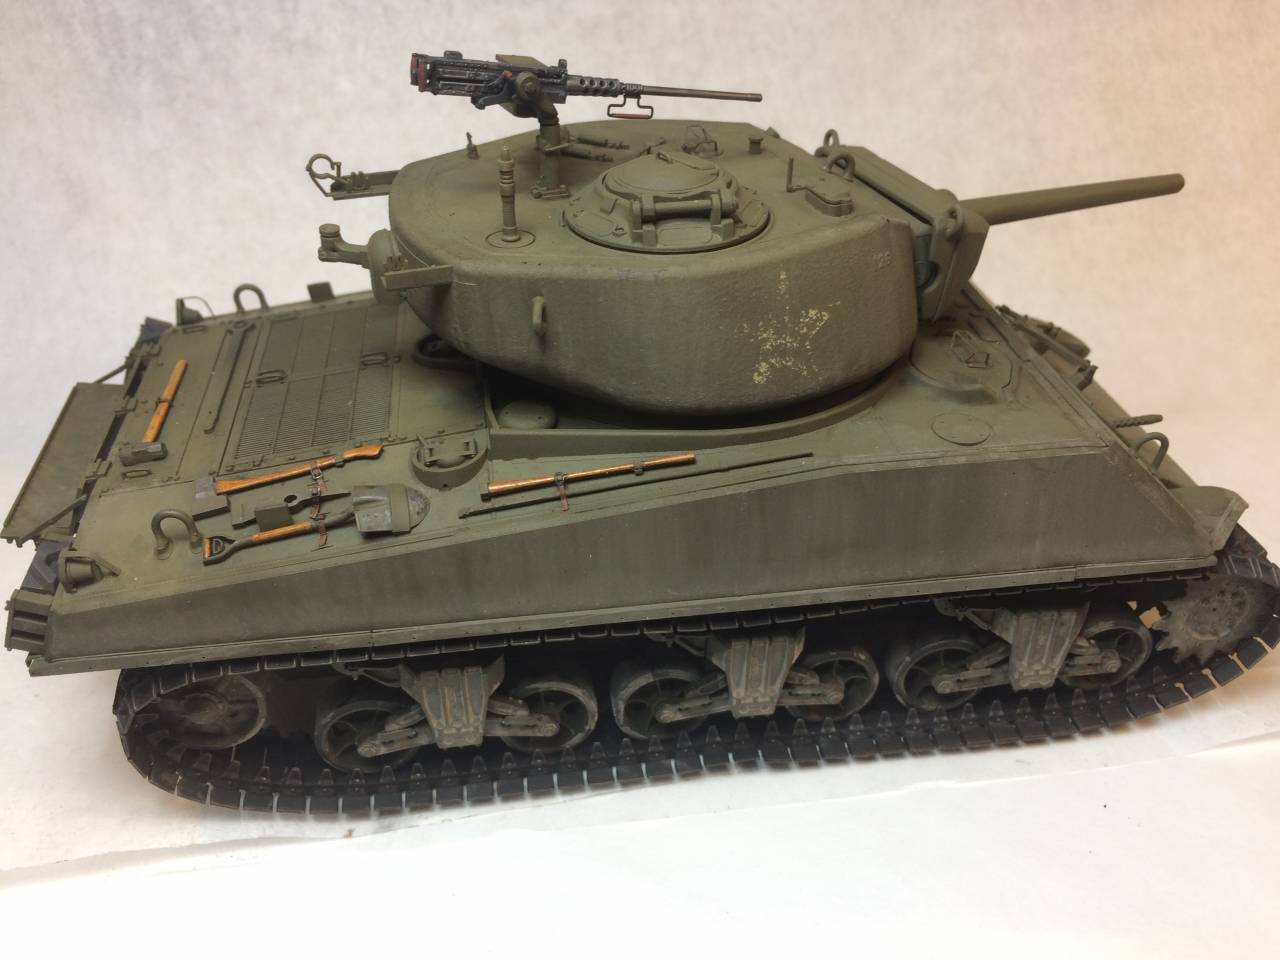
Well, I think I am at the finish line with the painting and weathering. Would love to get a couple of decals if someone has the Tasca Jumbo and is planning on one of the 76mm armed tanks I could really us your registration codes for painting and marking option 2!

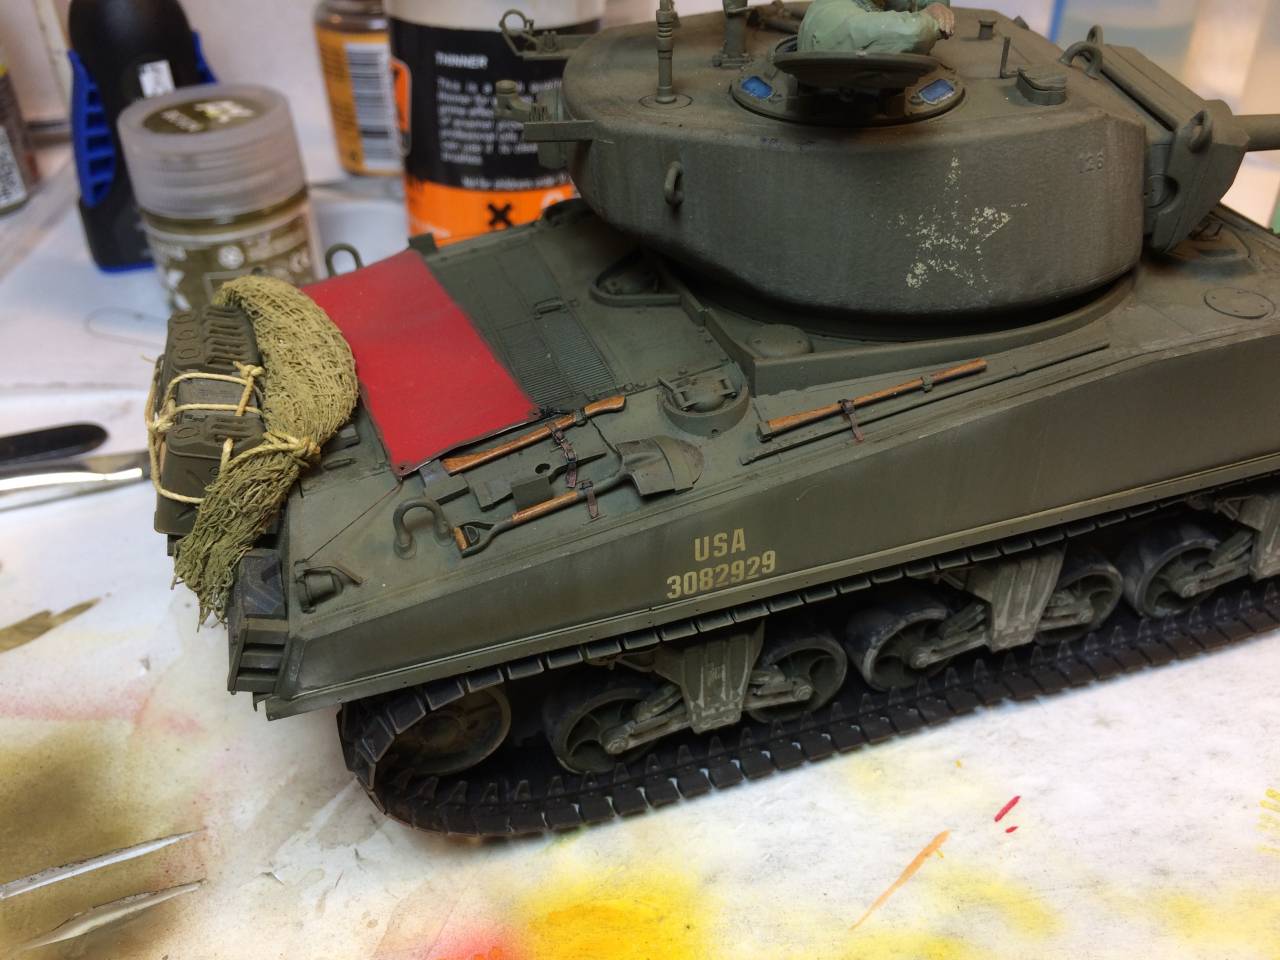
Here is the finished result.
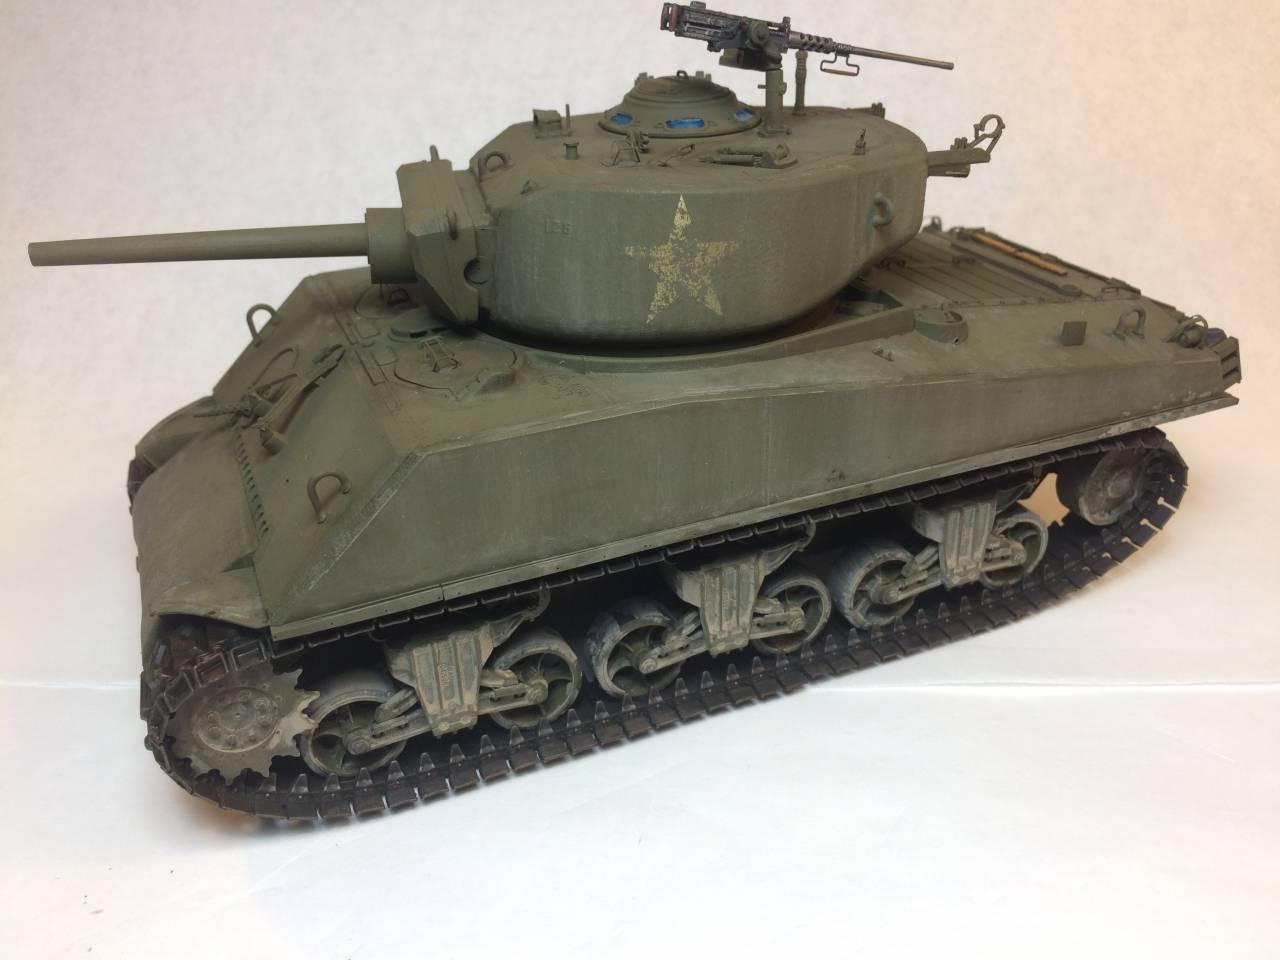
The other side...

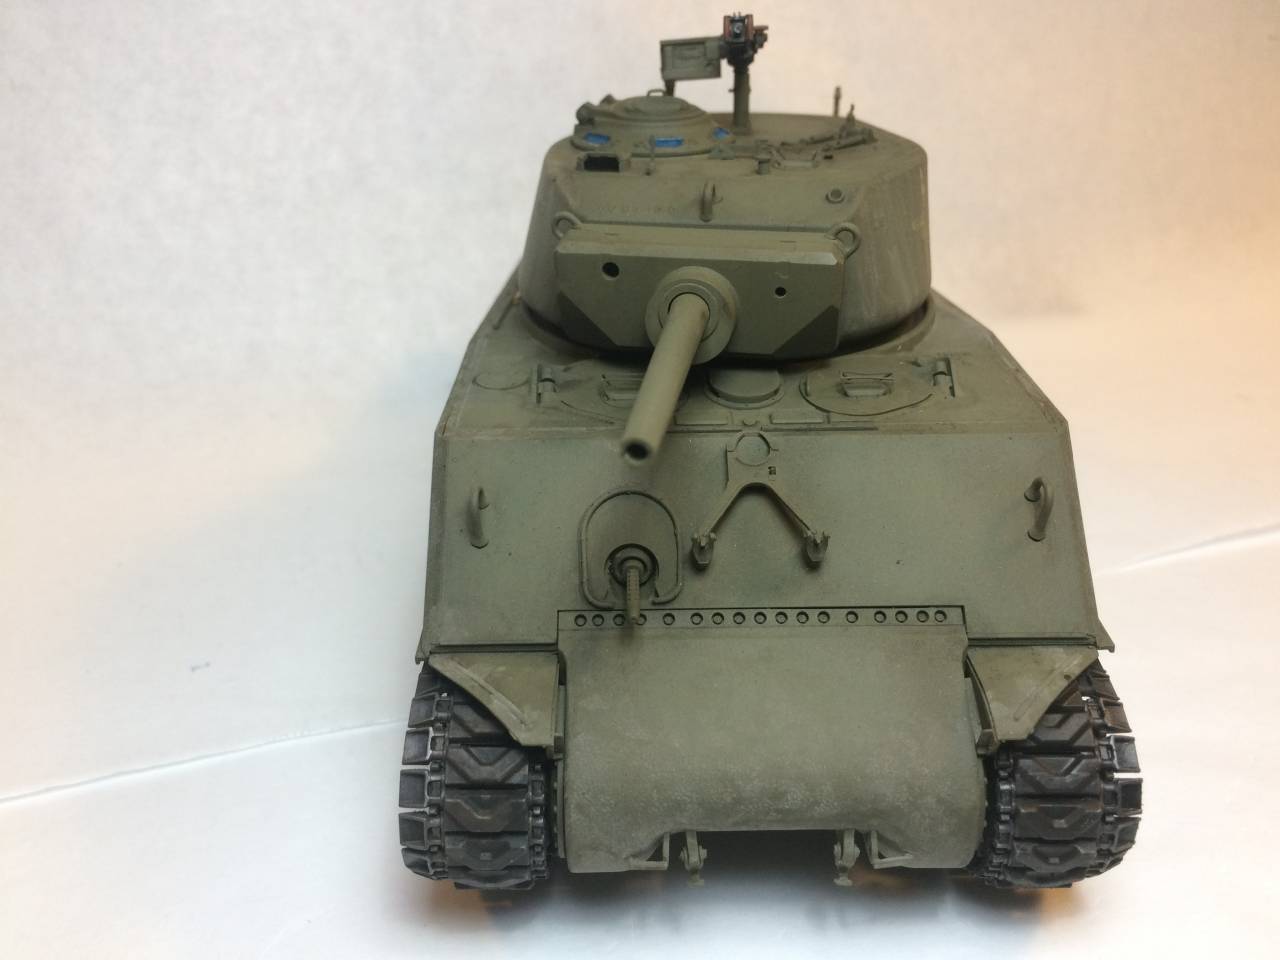
The front and the rear view...


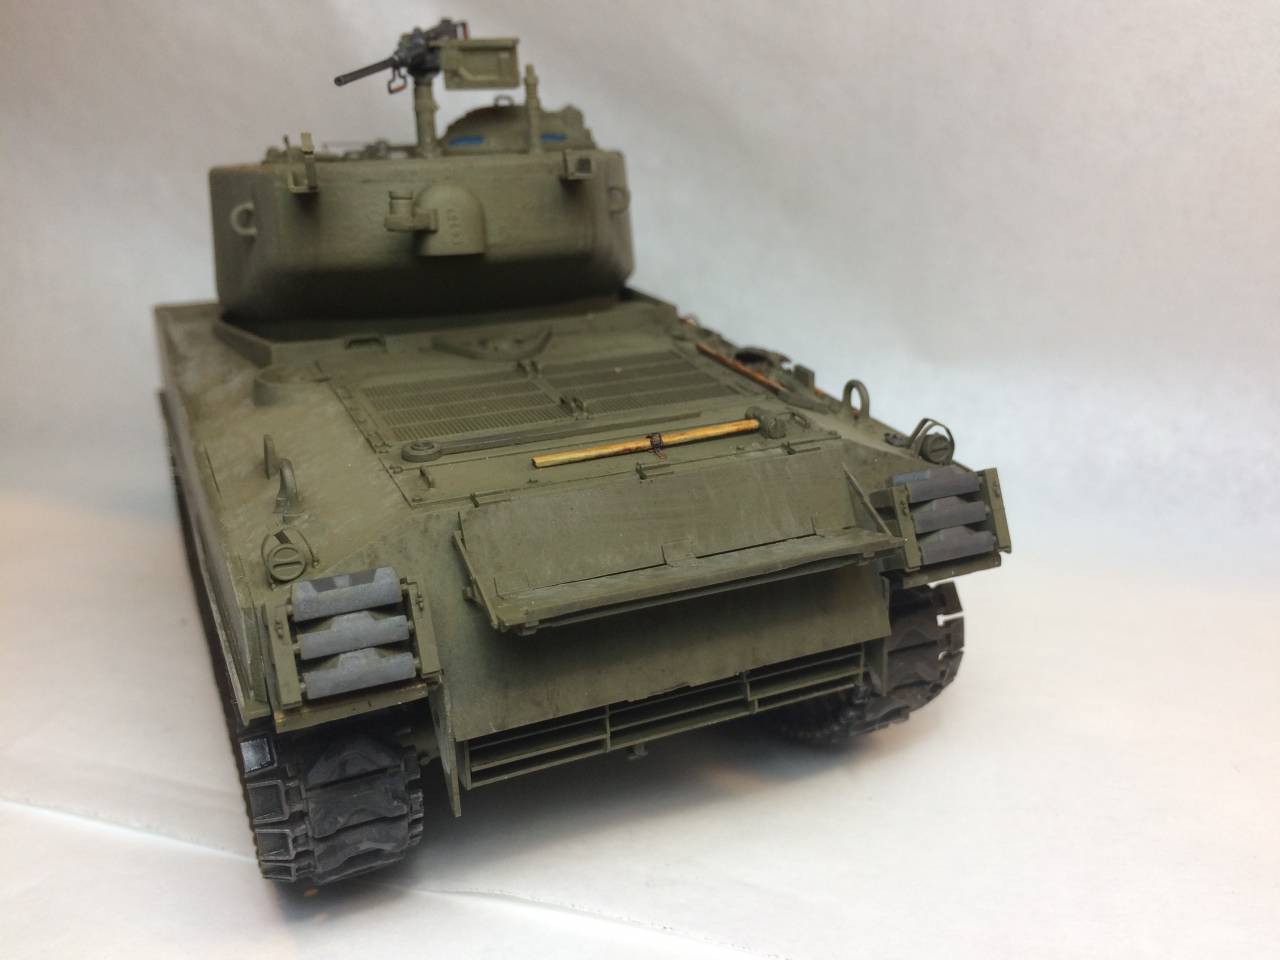
Love photos, they reveal what you gloss right over, like I forgot to paint the taillights! Also, I am not sure about the commander's cupola armored glass; ideas or options anyone?
As far as the AK Real Colors go, the set I have really impressed me. Smooth, easy to work with and clean up. I know my buddy Jon is having an issue with chipping, but I didn't do any, so I can't really weigh in on that, but for straight airbrushing they are top notch. For regular brushing I only used them for small areas, I had no issues but hard to say what the verdict will be on large surfaces. Maybe I'll do a piece of French armor with one of those wild camo schemes next. Always liked the look of the Somua S35!

Cheers,
Rick
canismalus
#465
Visit this Community
Nordrhein-Westfalen, Germany
Joined: September 12, 2014
KitMaker: 398 posts
Armorama: 394 posts
Posted: Friday, December 08, 2017 - 01:12 PM UTC
Hi Rick,

That’s a nice build and tasteful finish + weathering - thanks for taking the plunge and trying out the new AK colors, I might have to try some out myself.

I have the Tasca Sherman Jumbo kit, and am probably going to build one of the 76mm options (or use aftermarket decals) so you can have my registration numbers for option #2. I‘ll shoot you a PM in a sec so we can sort out the details.

Jerry
kunjuro
Visit this Community
Philippines
Joined: October 27, 2013
KitMaker: 520 posts
Armorama: 488 posts
Posted: Tuesday, December 12, 2017 - 09:15 AM UTC
Looks great! Love the faded US Decals. Also like the restrained finish and weathering.
Kenaicop
#384
Visit this Community
Nevada, United States
Joined: August 23, 2005
KitMaker: 1,426 posts
Armorama: 1,316 posts
Posted: Tuesday, December 12, 2017 - 08:48 PM UTC
What can I say that hasn’t already been said?! Great job
clovis899
#155
Visit this Community
California, United States
Joined: May 05, 2002
KitMaker: 774 posts
Armorama: 605 posts
Posted: Thursday, December 21, 2017 - 06:51 AM UTC
Thanks Jerome!!
Decals came in the mail yesterday and on the Jumbo today. Worked in a little stowage and an air recognition panel as well to add a little color.


I will try to take enough quality photos to create a photo feature tomorrow of the finished product.

To reiterate, the purpose of this blog was to test out the new Real Colors. I used the new thinner and the Allied set which comes with Flat Black, Olive Drab no. 9, Faded Olive Drab, and Earth Yellow no. 6. The paints all handled well and provided a nice smooth luster-less and durable surface. I'm looking forward to adding a few more sets to my arsenal.

Cheers,
Rick
canismalus
#465
Visit this Community
Nordrhein-Westfalen, Germany
Joined: September 12, 2014
KitMaker: 398 posts
Armorama: 394 posts
Posted: Monday, December 25, 2017 - 04:35 PM UTC
Hi Rick,

You're very welcome and your Jumbo looks fantastic! Can't wait to see your photo feature.

Thanks again for trying these paints out and doing the blog.

Happy Holidays,

Jerry
JSSVIII
Visit this Community
Massachusetts, United States
Joined: March 28, 2007
KitMaker: 1,169 posts
Armorama: 1,067 posts
Posted: Monday, December 25, 2017 - 04:51 PM UTC
Beautiful build Rick!
Ramanathan
#477
Visit this Community
Pest, Hungary
Joined: March 21, 2007
KitMaker: 133 posts
Armorama: 131 posts
Posted: Sunday, January 07, 2018 - 08:16 PM UTC
Really nice finish, Rick! I love the weathering (not overdone, just perfect for my taste) - the only thing I would do other way is the track: it seems too clean compared to the vehicle. So some dirt there would make your build even better But You made me wish to start my Jumbo from the stash...
cheers,
Zsolt
 _GOTOTOP