

Hosted by Darren Baker
Char 2C
JSSVIII

Joined: March 28, 2007
KitMaker: 1,169 posts
Armorama: 1,067 posts
Posted: Monday, August 21, 2017 - 03:12 PM UTC
Nice progress Gary, Which color scheme are you going to use?

TAFFY3
Joined: January 21, 2008
KitMaker: 2,531 posts
Armorama: 859 posts
Posted: Monday, August 21, 2017 - 08:09 PM UTC
It was called a 'stroboscopic cupola'. Here's a drawing of the workings inside of the cupola.

The US Army experimented with them in the early twenties. Al
Al
The US Army experimented with them in the early twenties.
Al
srmalloy
Joined: April 15, 2012
KitMaker: 336 posts
Armorama: 298 posts
Posted: Monday, August 21, 2017 - 10:26 PM UTC
It would make for an interesting exercise in painting the illusion of a moving object to fill in all the vision slits on the cupola and then paint it to look properly blurred as if it were spinning in use. I'm not sure, though, that the stated 250-300 rpm speed wouldn't just blur everything into an amalgam of all the colors at that height on the cupola, leaving the addition of speed lines as the only way to indicate movement.
Removed by original poster on 08/22/17 - 20:59:58 (GMT).

VelluS

Joined: November 04, 2014
KitMaker: 52 posts
Armorama: 50 posts
Posted: Tuesday, August 22, 2017 - 02:01 AM UTC
Quoted Text
You have glued part E6 to different angle than shown in instructions. I made the same mistake with my first Char 2C too.
Now, I always thought that the tabs and slots on a kits turret ring were so the turret would stay in place in case the model was turned over etc. I think that Meng didn't really give this much thought as the tabs and slots line up with the turret pointing straight forward! D'oh ??????


RobinNilsson

Joined: November 29, 2006
KitMaker: 6,693 posts
Armorama: 5,562 posts
Posted: Tuesday, August 22, 2017 - 02:46 AM UTC
Quoted Text
....
I'm not sure, though, that the stated 250-300 rpm speed wouldn't just blur everything into an amalgam of all the colors at that height on the cupola, leaving the addition of speed lines as the only way to indicate movement.
Assume 300 rpm, this means 5 rotations per second.
With 5 slots in the "bin" this would give 25 images per second which is the same rate as normal movies. With more than 5 slots the image rate gets even better. What you will experience is a reduction in perceived brightness even if the eye adapts.
If half the surface is slots and the other half is armour there would be a 50% loss of light but since the eye adapts the perceived loss will be less.
Compare with a movie projector:
https://en.wikipedia.org/wiki/Movie_projector
;)
/ Robin
gastec

Joined: February 03, 2014
KitMaker: 1,042 posts
Armorama: 871 posts
Posted: Tuesday, August 22, 2017 - 01:59 PM UTC
Quoted Text
You have glued part E6 to different angle than shown in instructions. I made the same mistake with my first Char 2C too.
I thought that part was keyed so it could only go one way. Obviously not

 Apologies to Meng.
The exhausts are a pretty dominant feature on this tank so a little extra work is necessary IMHO to improve the detail.
The silencers/mufflers (depending on what part of the world you are in) are simple affairs but look like they are constructed from 2" thick steel!

I started by shaving off the two supports on the bottom and also the securing strap in the middle. The two supports were then remade from evergreen styrene and cemented directly to the engine deck...

The ends of each muffler were sanded flat and I then used thin lead wire to recreate the overlapping ends to give a more realistic scale effect. With the exhaust pipe cemented in place, the assemble sits nicely in its new supports...


The heat shields on each side are way too thick to be realistic....

Thinning just the edges won't work due to how they are fitted, so the PE parts supplied by Voyager are certainly the better option...

I applied some green paint underneath the shield to aid painting later on.
The exhausts then simply slot into place, with their new PE rataining straps...


This means the exhausts can remain seperate to aid painting and weathering.
Gary
JSSVIII
Joined: March 28, 2007
KitMaker: 1,169 posts
Armorama: 1,067 posts
Posted: Tuesday, August 22, 2017 - 03:05 PM UTC
Very nice job on those mufflers Gary!
TAFFY3
Joined: January 21, 2008
KitMaker: 2,531 posts
Armorama: 859 posts
Posted: Tuesday, August 22, 2017 - 06:52 PM UTC
Very nice! Al
Algastec
Joined: February 03, 2014
KitMaker: 1,042 posts
Armorama: 871 posts
Posted: Friday, August 25, 2017 - 12:48 AM UTC
Thanks guys.
Kit build is just about complete....


I will be using teh side skirts but the wheels will be painted first. Have also left off the front stowage bins. The kit ones are pretty poor and the Voyager ones have an issue where one of the bin sides is too short So will be portraying vehicle 91 'Provence' which didn't have the bins fitted. This was also the vehicle captured intact by the Germans in 1940.
Will make a start on the tail skid soon - details later on....
Gary
Kit build is just about complete....
I will be using teh side skirts but the wheels will be painted first. Have also left off the front stowage bins. The kit ones are pretty poor and the Voyager ones have an issue where one of the bin sides is too short
So will be portraying vehicle 91 'Provence' which didn't have the bins fitted. This was also the vehicle captured intact by the Germans in 1940.Will make a start on the tail skid soon - details later on....
Gary
JSSVIII
Joined: March 28, 2007
KitMaker: 1,169 posts
Armorama: 1,067 posts
Posted: Friday, August 25, 2017 - 04:43 AM UTC
Can't wait to see some color Gary, will you have time to spray this weekend?

Nahuel19431

Joined: August 15, 2010
KitMaker: 593 posts
Armorama: 548 posts
Posted: Friday, August 25, 2017 - 04:48 AM UTC
Excelent Job, Gary. Good Datails, I hope to see it painted quikly.
Regards
Regards
gastec
Joined: February 03, 2014
KitMaker: 1,042 posts
Armorama: 871 posts
Posted: Friday, August 25, 2017 - 06:16 AM UTC
Thanks guys. No paint yet - need to replace a needle on my AB and research which green to use too. Also need to sort some lettering out to make up the Provence name for the tank.
In the meantime, as promised, the tailskid...

IMHO, Meng dropped the ball by not including one in the kit. Fortunately, Niko, a producer fiom Poland, has stepped up to the mark...


Clean up and assembly is fairly straightforward, but careful alignment is an absolute must for obvious reasons. Doesn't take too long to assmble and get to this stage....

The tail light is repositioned to the rear of the skid along with its wiring cable...

Niko provide some mounting bolts/nuts, but I've opted for styrene ones from one of the Meng sets....

And the build stage, I think, is now complete...


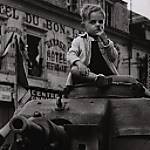
And in case there was any lingering doubt as to how big this thing is....

Now, does anyone know the Tamiya equivalent of Vallejo 71.015?
Gary
In the meantime, as promised, the tailskid...
IMHO, Meng dropped the ball by not including one in the kit. Fortunately, Niko, a producer fiom Poland, has stepped up to the mark...
Clean up and assembly is fairly straightforward, but careful alignment is an absolute must for obvious reasons. Doesn't take too long to assmble and get to this stage....
The tail light is repositioned to the rear of the skid along with its wiring cable...
Niko provide some mounting bolts/nuts, but I've opted for styrene ones from one of the Meng sets....
And the build stage, I think, is now complete...
And in case there was any lingering doubt as to how big this thing is....
Now, does anyone know the Tamiya equivalent of Vallejo 71.015?
Gary

ColinEdm


Joined: October 15, 2013
KitMaker: 1,355 posts
Armorama: 1,229 posts
Posted: Friday, August 25, 2017 - 08:49 AM UTC
Looks great Gary!

Frenchy

Joined: December 02, 2002
KitMaker: 12,719 posts
Armorama: 12,507 posts
Posted: Friday, August 25, 2017 - 12:32 PM UTC
Quoted Text
Now, does anyone know the Tamiya equivalent of Vallejo 71.015?
According to this chart :
http://www.finescale.com/~/media/files/pdf/how-to/rlmv2.pdf
XF-58 or XF-61 should be OK for RLM71...
H.P.
gastec
Joined: February 03, 2014
KitMaker: 1,042 posts
Armorama: 871 posts
Posted: Friday, August 25, 2017 - 01:12 PM UTC
Thanks H.P.
Conflicting evidence here - http://www.creativemodels.co.uk/paint_conversion.php/manufacturers_id/12/page/2 Have to say that the Black Green looks more likely though? Thoughts????
Gary
Conflicting evidence here - http://www.creativemodels.co.uk/paint_conversion.php/manufacturers_id/12/page/2 Have to say that the Black Green looks more likely though? Thoughts????
Gary
gastec
Joined: February 03, 2014
KitMaker: 1,042 posts
Armorama: 871 posts
Posted: Saturday, August 26, 2017 - 05:07 AM UTC
Tamiya Surface Primer via a rattle can....

After some further searching, have decided to go with H.P's suggestion of XF 58. That's coming next...
Gary
After some further searching, have decided to go with H.P's suggestion of XF 58. That's coming next...
Gary
gastec
Joined: February 03, 2014
KitMaker: 1,042 posts
Armorama: 871 posts
Posted: Saturday, August 26, 2017 - 08:26 AM UTC
And here it is...

Gary
Gary
gastec
Joined: February 03, 2014
KitMaker: 1,042 posts
Armorama: 871 posts
Posted: Saturday, August 26, 2017 - 10:30 AM UTC
Some rudimentry shading....


Will set aside to allow the paint to fully harden before moving onto to detail painting.
Gary
Will set aside to allow the paint to fully harden before moving onto to detail painting.
Gary
ironhull

Joined: November 23, 2013
KitMaker: 134 posts
Armorama: 134 posts
Posted: Saturday, August 26, 2017 - 11:50 AM UTC
Note the French flag has its color order wrong. Blue is on the left and not on the right as Meng printed. I don't know if they correct it on newest kit but the oldest were wrong
gastec
Joined: February 03, 2014
KitMaker: 1,042 posts
Armorama: 871 posts
Posted: Saturday, August 26, 2017 - 12:10 PM UTC
Yep, read that in other reviews but not using any kit suggested markings on this model.
gastec
Joined: February 03, 2014
KitMaker: 1,042 posts
Armorama: 871 posts
Posted: Sunday, August 27, 2017 - 01:58 PM UTC
After painting some details, the decals are next up. As the vehicle I wanted to depict isn't covered by the kit, I had to get creative with what I had. #97 (on the Meng sheet) was modified to create vehicle #91. The number does look at an angle but it is simply an illusion from the photography.
As for the name, Provence, I ended up making this from several other tank names from a Tamiya Matilda decal sheet I had in my spares box. The V is actually an A cut to suit and placed upside down. Does the trick nicely!

Gary
As for the name, Provence, I ended up making this from several other tank names from a Tamiya Matilda decal sheet I had in my spares box. The V is actually an A cut to suit and placed upside down. Does the trick nicely!
Gary
bprice1974

#436
Joined: August 10, 2014
KitMaker: 196 posts
Armorama: 182 posts
Posted: Sunday, August 27, 2017 - 05:29 PM UTC
Really loving your build on this one. The attention to extra detail and a very clean build make this one of my recent favorites. Have you thought on how it will be displayed when finished as this looks like on to display. Thanks for taking the time to share your work.
JSSVIII
Joined: March 28, 2007
KitMaker: 1,169 posts
Armorama: 1,067 posts
Posted: Monday, August 28, 2017 - 04:22 AM UTC
Looking great Gary!
gastec
Joined: February 03, 2014
KitMaker: 1,042 posts
Armorama: 871 posts
Posted: Monday, August 28, 2017 - 01:06 PM UTC
Thanks guys. Haven't decided on a base yet - probably something plain and simple so it doesn't detract from the vehicle itself. Will probably add a figure to show its immense size though.
No progress photos to show at this time but am in the process of putting on a clear coat using Long Life floor polish in preperation for the start of the weathering process.
Gary
No progress photos to show at this time but am in the process of putting on a clear coat using Long Life floor polish in preperation for the start of the weathering process.
Gary
 |

WEB HOSTING BY


Copyright ©2021 Armorama and Kitmaker Network, a subsidiary of Silver Star Enterprises
All Rights Reserved. Please read our Conditions of Use and Privacy Policy.
All Rights Reserved. Please read our Conditions of Use and Privacy Policy.