Texas, United States
Joined: June 07, 2006
KitMaker: 726 posts
Armorama: 687 posts
Posted: Friday, April 20, 2018 - 08:17 PM UTC
It looks like I am just about ready to put the roof on. I still need to highlight the grab handles (after looking at these photos I realized that one broke off so I just put a new one on so I have to paint that one prior to highlighting) and then I can glue it to the hull. The grab handles are from the Academy kit since I was unable to find my several PE sets for the Academy kit that has them in brass. They look OK and will work for this track and the diorama that the track will be in.


That's all for now. Thanks for looking.
Cheers,
James
Texas, United States
Joined: June 07, 2006
KitMaker: 726 posts
Armorama: 687 posts
Posted: Friday, April 20, 2018 - 10:32 PM UTC
Zuid-Holland, Netherlands
Joined: April 19, 2013
KitMaker: 179 posts
Armorama: 117 posts
Posted: Saturday, April 21, 2018 - 01:06 AM UTC
Very impressive builds going on here

Especially impressed with James' interior!
Queensland, Australia
Joined: August 06, 2005
KitMaker: 3,353 posts
Armorama: 3,121 posts
Posted: Saturday, April 21, 2018 - 02:59 AM UTC
All that effort is really paying off James. Looks fantastic
On the Bench:
Dust, styrene scraps, paint splotches and tears.

#041
Kobenhavn, Denmark
Joined: July 20, 2006
KitMaker: 10,069 posts
Armorama: 4,677 posts
Posted: Saturday, April 21, 2018 - 11:39 AM UTC
Looks fantastic, James! Really nice details and that lived in effect.
Campaign'oholic - 252+ campaigns completed
Correze, France
Joined: June 10, 2004
KitMaker: 5,329 posts
Armorama: 5,204 posts
Posted: Saturday, April 21, 2018 - 03:08 PM UTC
I have assembled and painted all the sub assemblies for my interior of the Bushmaster.
All the pictures I have found show exhibition vehicles with their interior in pristine condition. As I would like to weather my vehicle a bit, would anyone share some pictures of a vehicle in the field.
Thanks in advance.
I'll try to post pictures of my WIP later today.
Olivier
Visit my site Click the banner
"La reine des batailles, j'ai nommé l'infanterie"
Napoléon
Philippines
Joined: November 20, 2013
KitMaker: 26 posts
Armorama: 26 posts
Posted: Saturday, April 21, 2018 - 03:34 PM UTC
I want to join guys.
Here's my entry...
Correze, France
Joined: June 10, 2004
KitMaker: 5,329 posts
Armorama: 5,204 posts
Posted: Saturday, April 21, 2018 - 07:48 PM UTC
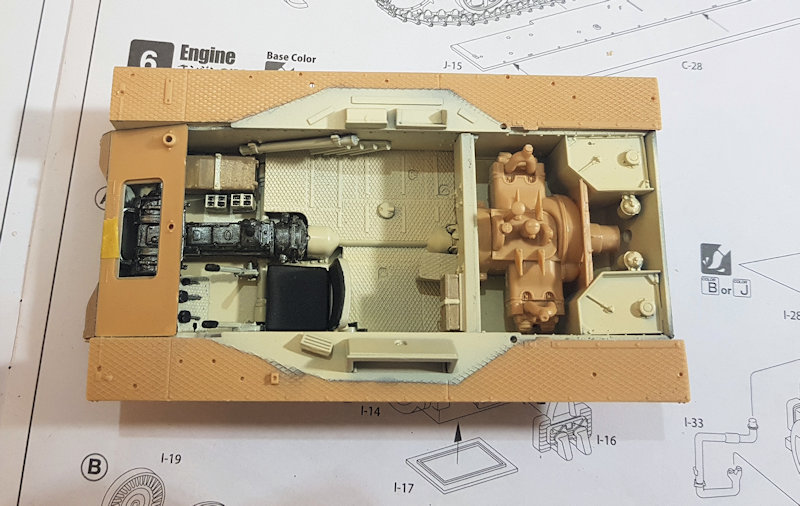
Bushmaster interior base is ready. Still have a lot of details to add and weather as well.
The kit needs a lot of test fitting before gluing the parts. The PE parts (large white sides) were too large and needed to be trimmed before they could fit.


Olivier
Visit my site Click the banner
"La reine des batailles, j'ai nommé l'infanterie"
Napoléon
France
Joined: February 20, 2012
KitMaker: 1,932 posts
Armorama: 1,907 posts
Posted: Saturday, April 21, 2018 - 10:15 PM UTC
This Bushmaster is not very cool to build, I did it two years ago and it was very boring. Details are never fine and parts don't fit well.
Texas, United States
Joined: June 07, 2006
KitMaker: 726 posts
Armorama: 687 posts
Posted: Sunday, April 22, 2018 - 07:04 PM UTC
Thanks, Goof, Peter, and Jesper.
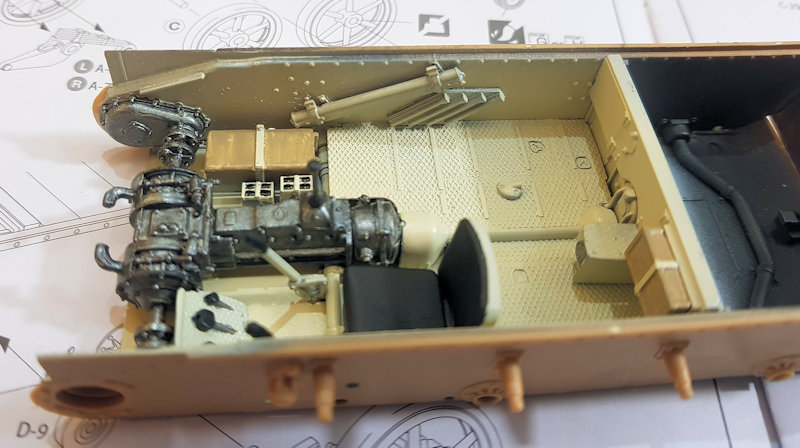
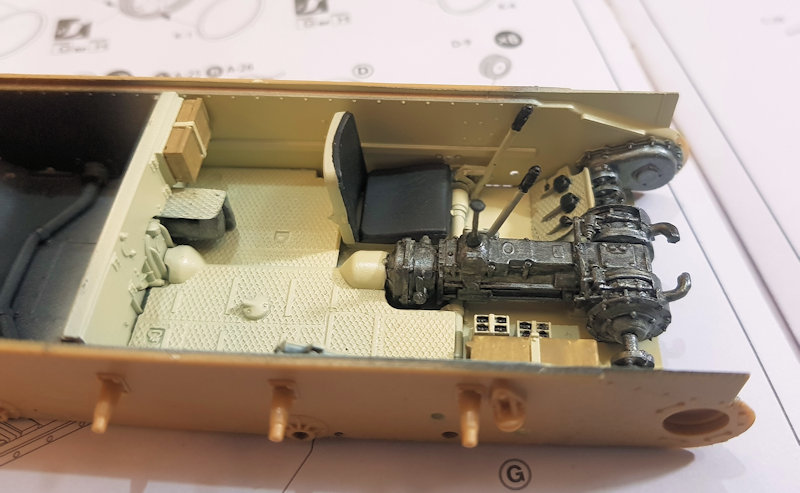
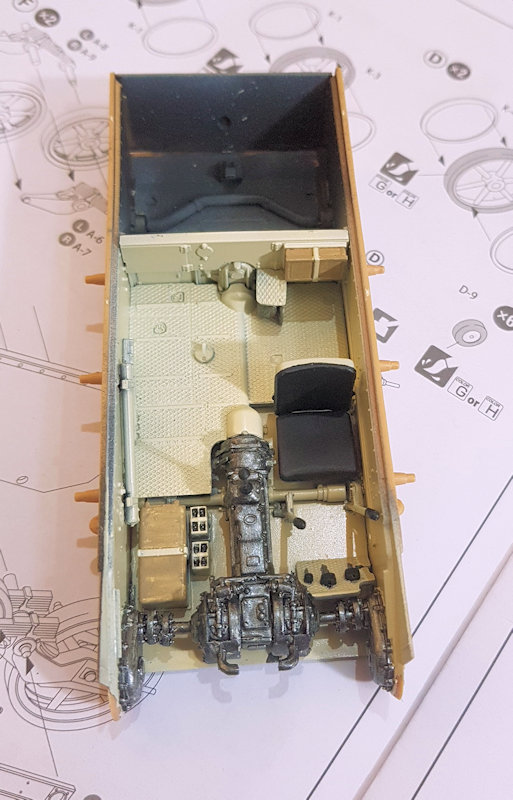
Here is my progress from Sunday. I didn't really follow the instructions in any order. I just added parts as I pleased. Most of the models I had built up to this point have not had as many small parts as this one does, so it is something new for me.


Not sure what I will get done today as I have a bunch of chores on the to do list today.
Thanks for looking.
Cheers,
James
Alberta, Canada
Joined: December 11, 2009
KitMaker: 546 posts
Armorama: 316 posts
Posted: Sunday, April 22, 2018 - 09:03 PM UTC
I've had a few too many Carling Black Labels in my day ...
nice work!
Zuid-Holland, Netherlands
Joined: April 19, 2013
KitMaker: 179 posts
Armorama: 117 posts
Posted: Sunday, April 22, 2018 - 10:56 PM UTC
And to show i have made at least some progress:
The (excellent) Black Ops Models engine bay, one engine more or less done, the other still needs the details added. The compartment itself is taped together for the time being

What you will eventually see, with at least 1 GI bent over it:

And the total of the boat

Texas, United States
Joined: June 07, 2006
KitMaker: 726 posts
Armorama: 687 posts
Posted: Monday, April 23, 2018 - 04:29 AM UTC
Quoted Text
I've had a few too many Carling Black Labels in my day ...
nice work!
Thanks.
Glad that the Black Label boxes caused some memories to surface. Hopefully they were some of the better ones.
Cheers,
James
Texas, United States
Joined: June 07, 2006
KitMaker: 726 posts
Armorama: 687 posts
Posted: Monday, April 23, 2018 - 04:30 AM UTC
I look forward to seeing how this turns out. I also look forward to seeing you put some GIs in there fixing the engines.
Cheers,
James
#456
Oklahoma, United States
Joined: September 22, 2016
KitMaker: 654 posts
Armorama: 638 posts
Posted: Monday, April 23, 2018 - 09:15 PM UTC
Queensland, Australia
Joined: August 06, 2005
KitMaker: 3,353 posts
Armorama: 3,121 posts
Posted: Tuesday, April 24, 2018 - 01:31 AM UTC
Some really fine work being done here guys.
Olivier. I'm watching with interest as I have this kit in the stash. Be interested to know of any other issues you have. Re the interior, yes pics of non-parade turned out Bushmasters are rare. You can get some glimpses here though:
https://www.youtube.com/watch?v=F7GCnPEz7Fshttps://www.youtube.com/watch?v=862uIEp3qR4Goof, that looks like a nicely detailed resin set. It is not often you see the battery terminal lead clamps moulded on. Usually just a bump on the top.
Mark, the little panzer will look great when finished.
On the Bench:
Dust, styrene scraps, paint splotches and tears.
Florida, United States
Joined: May 14, 2012
KitMaker: 730 posts
Armorama: 624 posts
Posted: Wednesday, April 25, 2018 - 08:34 AM UTC
I've just joined up as well, man this Campaign is buzzing along.
Nice work everyone so far.
Cheers

Dave
"No beast so fierce but knows some touch of pity.
But I know none, and therefore am no beast."
Correze, France
Joined: June 10, 2004
KitMaker: 5,329 posts
Armorama: 5,204 posts
Posted: Wednesday, April 25, 2018 - 10:58 AM UTC
Peter,
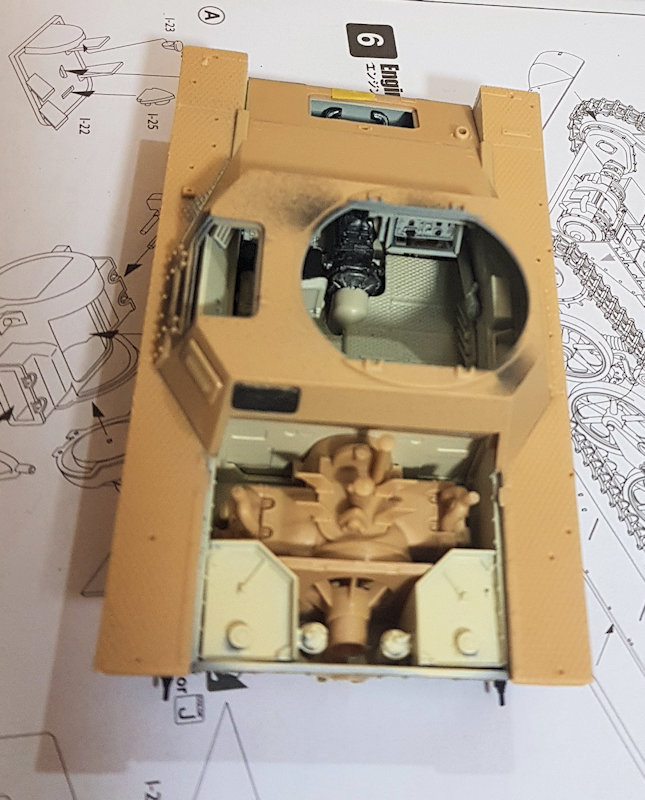
I came across some difficulties with the large flat PE parts on the sides of the driver compartment. They prevent a perfect fit of the dashboard but this is an easy fix. The biggest issue is the fit of the hull over the chassis. Unless I did something wrong, the PE part on the driver side needs to be cut by 1 mm. Otherwise the hull won't sit at the front.
I found the PE seatblets are a pain to put in place even after having been annealed. And don't forget to add the decals for the cushions before gluing the seatbelts!
Showcase gives you a lot of placards and stencils for the interior. Unfortunately, there is no indication in the instructions for the location. The various walkarounds over the web are helpful. They also show more mistakes or omission by Showcase. In front of the vehicle commander, there should be a kind of "open" bin fixed to the dashboard. It should be higher than the dashboard itself. It is obvious when you apply the decal there.
At the back of the vehicle, you have a large shelf on the rear right. The bottom of it misses a kind of lip of the lower drawer. There again, it is obvious when you want to apply the decal.
As I don't intend to detail the interior that much I can live with those flaws.
I will look at your videos to see how I could weather the interior a bit. Thanks for posting the links.
Olivier
Visit my site Click the banner
"La reine des batailles, j'ai nommé l'infanterie"
Napoléon
Queensland, Australia
Joined: August 06, 2005
KitMaker: 3,353 posts
Armorama: 3,121 posts
Posted: Wednesday, April 25, 2018 - 12:17 PM UTC
Thanks Olivier,
BTW, I got an email from Don B over on PP. Apparently he has a couple of server issues. He is looking for the original Pics I sent him - they were on a DVD as they were full size photo's not adulterated for fast upload. Hopefully I can get them back.
On the Bench:
Dust, styrene scraps, paint splotches and tears.
#456
Oklahoma, United States
Joined: September 22, 2016
KitMaker: 654 posts
Armorama: 638 posts
Posted: Wednesday, April 25, 2018 - 08:06 PM UTC
Work is continuing at a faster pace now that my Workhorses Campaign build is complete.
Dry fitting the engine and upper hull parts.

Correze, France
Joined: June 10, 2004
KitMaker: 5,329 posts
Armorama: 5,204 posts
Posted: Wednesday, April 25, 2018 - 10:42 PM UTC
Visit my site Click the banner
"La reine des batailles, j'ai nommé l'infanterie"
Napoléon
France
Joined: February 20, 2012
KitMaker: 1,932 posts
Armorama: 1,907 posts
Posted: Wednesday, April 25, 2018 - 11:56 PM UTC
Good job on interior, there is nothing in the kit to fill the various racks.
Arms Corps Models had a project of update set for this kit but for unknown reasons it has never been released.
Correze, France
Joined: June 10, 2004
KitMaker: 5,329 posts
Armorama: 5,204 posts
Posted: Thursday, April 26, 2018 - 11:00 AM UTC
Arms Corps Models are out of business. Unfortunately as they had some interesting upgrade sets for both the Bushmaster and the ASLAV.
You're right that in the kit you get nothing t ofill the racks but I'm not sure you can see a lot when the hull is glued. I still don't know whether or not I will represent the rear door open.
Olivier
Visit my site Click the banner
"La reine des batailles, j'ai nommé l'infanterie"
Napoléon
Queensland, Australia
Joined: August 06, 2005
KitMaker: 3,353 posts
Armorama: 3,121 posts
Posted: Thursday, April 26, 2018 - 12:10 PM UTC
Quoted Text
Good job on interior, there is nothing in the kit to fill the various racks.
Arms Corps Models had a project of update set for this kit but for unknown reasons it has never been released.
I know Jason the guy behind ARMS Corp Models. He chose to stop resin casting over 2 years ago and move on to other pursuits. A pity because his work had to be seen to be believed.
On the Bench:
Dust, styrene scraps, paint splotches and tears.
France
Joined: February 20, 2012
KitMaker: 1,932 posts
Armorama: 1,907 posts
Posted: Thursday, April 26, 2018 - 03:38 PM UTC
Quoted Text
Quoted Text
Good job on interior, there is nothing in the kit to fill the various racks.
Arms Corps Models had a project of update set for this kit but for unknown reasons it has never been released.
I know Jason the guy behind ARMS Corp Models. He chose to stop resin casting over 2 years ago and move on to other pursuits. A pity because his work had to be seen to be believed.
Bad news.