

Hosted by Richard S.
TAKOM - Campaign
petbat

Joined: August 06, 2005
KitMaker: 3,353 posts
Armorama: 3,121 posts
Posted: Tuesday, November 21, 2017 - 02:50 PM UTC
Looking good Tom.

canismalus

#465

Joined: September 12, 2014
KitMaker: 398 posts
Armorama: 394 posts
Posted: Tuesday, November 21, 2017 - 03:50 PM UTC
Quoted Text
There's some pretty exciting stuff going on here! Jerry that Gepard is impressive! And Imran that Russkie tank is looking great. And Michael I'm looking forward to the top-side of your Merkava...
Thanks a lot, Tom! Some great work there on yours - Can't wait to see the turret bits!
Jerry
Removed by original poster on 11/22/17 - 11:07:23 (GMT).
barkingdigger

#013

Joined: June 20, 2008
KitMaker: 3,981 posts
Armorama: 3,403 posts
Posted: Wednesday, November 22, 2017 - 01:44 AM UTC
Quoted Text
Will the details be available on Shapeways like the drivers compartment set? (Pretty please?)
Way ahead of you, John! The interior is available here.
JSSVIII

Joined: March 28, 2007
KitMaker: 1,169 posts
Armorama: 1,067 posts
Posted: Wednesday, November 22, 2017 - 04:58 AM UTC
Quoted Text
Quoted TextWill the details be available on Shapeways like the drivers compartment set? (Pretty please?)
Way ahead of you, John! The interior is available here.
Sorry Tom, I knew the drivers compartment details were available. What I meant was, will the TURRET interior details be made available as a set.
barkingdigger
#013
Joined: June 20, 2008
KitMaker: 3,981 posts
Armorama: 3,403 posts
Posted: Wednesday, November 22, 2017 - 03:32 PM UTC
Oh - I see. Given the size I was planning on doing them in plastic (3D printing would cost a bomb!), but I might think about a printed set for those with very deep pockets. (It needs a full gun tube/breech in addition to other details...)
I'd be happy to share my construction techniques, measurements etc for you if you plan to scratch-build one! Given how hard it is to see in through the hatches there isn't a need for too much hyper-detail of the bits you can't see.
I'd be happy to share my construction techniques, measurements etc for you if you plan to scratch-build one! Given how hard it is to see in through the hatches there isn't a need for too much hyper-detail of the bits you can't see.

imransz

Joined: July 10, 2007
KitMaker: 38 posts
Armorama: 37 posts
Posted: Thursday, November 23, 2017 - 05:33 PM UTC
Guess im done with the tiran 4....


All comments are welcome...


All comments are welcome...
petbat
Joined: August 06, 2005
KitMaker: 3,353 posts
Armorama: 3,121 posts
Posted: Friday, November 24, 2017 - 02:34 AM UTC
Very nice Imran. I love the final weathered finish. A great addition to your collection.
Thanks for joining in.
Thanks for joining in.
canismalus
#465
Joined: September 12, 2014
KitMaker: 398 posts
Armorama: 394 posts
Posted: Friday, November 24, 2017 - 07:00 PM UTC
Wow, Imran, that looks superb. There's a lot I could praise, but my girlfriend (who's not interested in models or tanks or anything like that) thought that it looked like a photo of a real vehicle photoshopped onto a white background. That says it all.
Jerry
Jerry

ClaytonFromEllijay
#454
Joined: July 10, 2016
KitMaker: 1,273 posts
Armorama: 1,138 posts
Posted: Friday, November 24, 2017 - 07:45 PM UTC
I agree with the others, Imran, great weathering job!!
imransz
Joined: July 10, 2007
KitMaker: 38 posts
Armorama: 37 posts
Posted: Friday, November 24, 2017 - 08:00 PM UTC
Thanks peter,jbranca and clayton.... 

Thirian24
Joined: September 30, 2015
KitMaker: 2,493 posts
Armorama: 2,344 posts
Posted: Saturday, November 25, 2017 - 01:18 AM UTC
Very nicely done, Imran.
petbat
Joined: August 06, 2005
KitMaker: 3,353 posts
Armorama: 3,121 posts
Posted: Saturday, November 25, 2017 - 04:02 AM UTC
Okay, bit the bullet. The replacement tracks are long overdue. I'm going to do the box art camo and that means some creative track work can happen:


all hidden by the skirts:

So off to paint the primer now.
all hidden by the skirts:
So off to paint the primer now.
MichaelSatin
Joined: January 19, 2008
KitMaker: 3,909 posts
Armorama: 510 posts
Posted: Saturday, November 25, 2017 - 08:28 PM UTC
Great work going on here! Very nice job, Imran! And it's looking good so far, Peter!
I've had some excitement with the Merkava I. I was starting to put the road wheel pairs together for one side when I realized I'd put the outside wheels together backwards. I put part A15 on the outside of part A18, rather than the inside as the instructions fairly clearly show. I've started to pry things aprart and correct them. The wheels on the left show how I did it at first and those on the right show the corrections (not repainted yet):
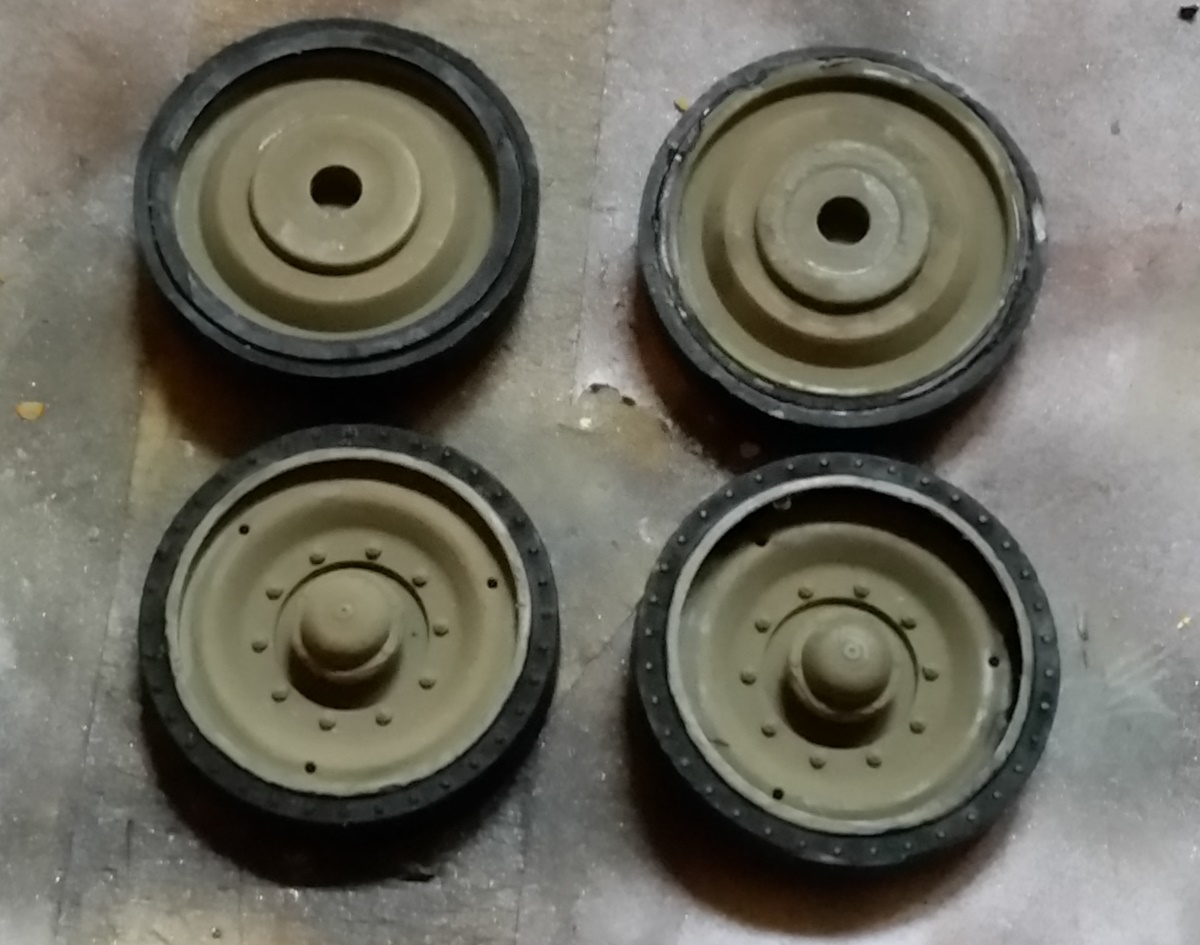
I expect to lose at least one knife blade in this process, but it's gotta be done. Happily I only had done one side (six wheels). Caught the problem before I built the other side. So, two fixed, four to go!
Michael
I've had some excitement with the Merkava I. I was starting to put the road wheel pairs together for one side when I realized I'd put the outside wheels together backwards. I put part A15 on the outside of part A18, rather than the inside as the instructions fairly clearly show. I've started to pry things aprart and correct them. The wheels on the left show how I did it at first and those on the right show the corrections (not repainted yet):
I expect to lose at least one knife blade in this process, but it's gotta be done. Happily I only had done one side (six wheels). Caught the problem before I built the other side. So, two fixed, four to go!
Michael

Kanguroo

Joined: May 07, 2006
KitMaker: 416 posts
Armorama: 312 posts
Posted: Saturday, November 25, 2017 - 08:40 PM UTC
Quoted Text
Okay, bit the bullet. The replacement tracks are long overdue. I'm going to do the box art camo and that means some creative track work can happen:
What a good solution! Thanks, Peter.

petbat
Joined: August 06, 2005
KitMaker: 3,353 posts
Armorama: 3,121 posts
Posted: Sunday, November 26, 2017 - 01:15 AM UTC
Good catch Michael. You obviously need to build more armour and less bombers 
At least your boo boo was recoverable, unlike my accidental bathing the tracks in Tamiya extra thin.
How are you enjoying the kit so far?
Thanks Mr K.
At least your boo boo was recoverable, unlike my accidental bathing the tracks in Tamiya extra thin.
How are you enjoying the kit so far?
Thanks Mr K.
MichaelSatin
Joined: January 19, 2008
KitMaker: 3,909 posts
Armorama: 510 posts
Posted: Sunday, November 26, 2017 - 03:57 AM UTC
Quoted Text
Good catch Michael. You obviously need to build more armour and less bombers
At least your boo boo was recoverable, unlike my accidental bathing the tracks in Tamiya extra thin.
How are you enjoying the kit so far?
Thanks Mr K.
Liking it so far, minus the boo-boo. I've fixed all the bad ones and am now repainting them. They don't look too awful, I suppose. Damn Syrian anti-tank fire!
Michael
petbat
Joined: August 06, 2005
KitMaker: 3,353 posts
Armorama: 3,121 posts
Posted: Sunday, November 26, 2017 - 02:50 PM UTC

barkingdigger
#013
Joined: June 20, 2008
KitMaker: 3,981 posts
Armorama: 3,403 posts
Posted: Wednesday, November 29, 2017 - 10:52 PM UTC
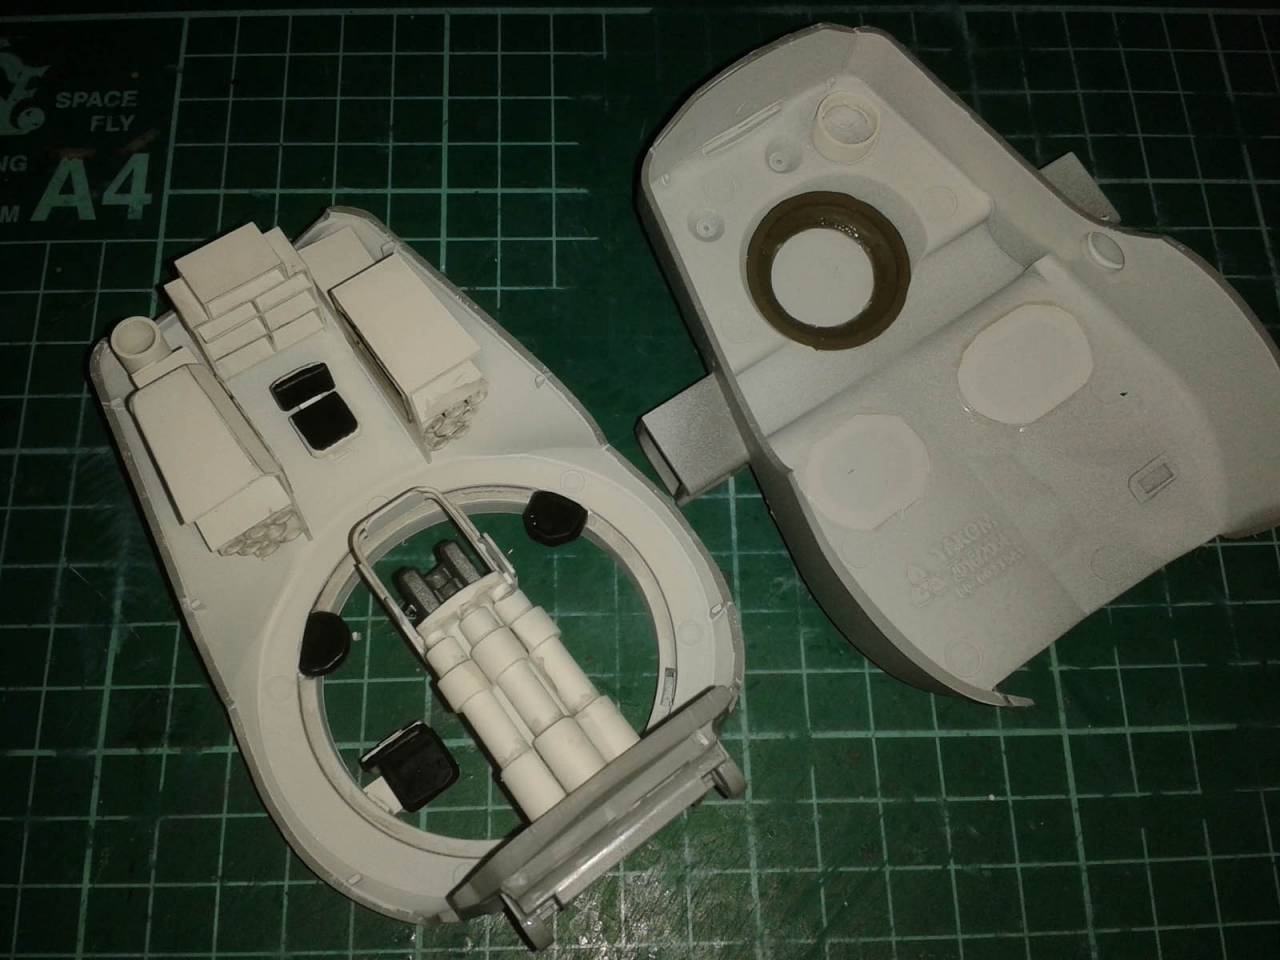
Small progress update on the T29E3 - I tackled the turret interior. First I built up the innards of the gun and recoil stuff, based on the few photos I could find. It will hang off the turret front, and since the underside cannot be seen I didn't bother detailing it.

Next came the ammo bins either side of the TC - he musta had tremendous faith in the strength of the turret walls! These are simple boxes from plastic sheet, with shell storage space above and propellant tubes below. Detailing is crude because they are hard enough to see through the hatches. The vent blower is a tube, and the shelves at the back are modelled "empty" - I assume they held MG ammo and other stuff? I need to build a suitable radio for the rear left corner, then paint it all before gluing the turret together.
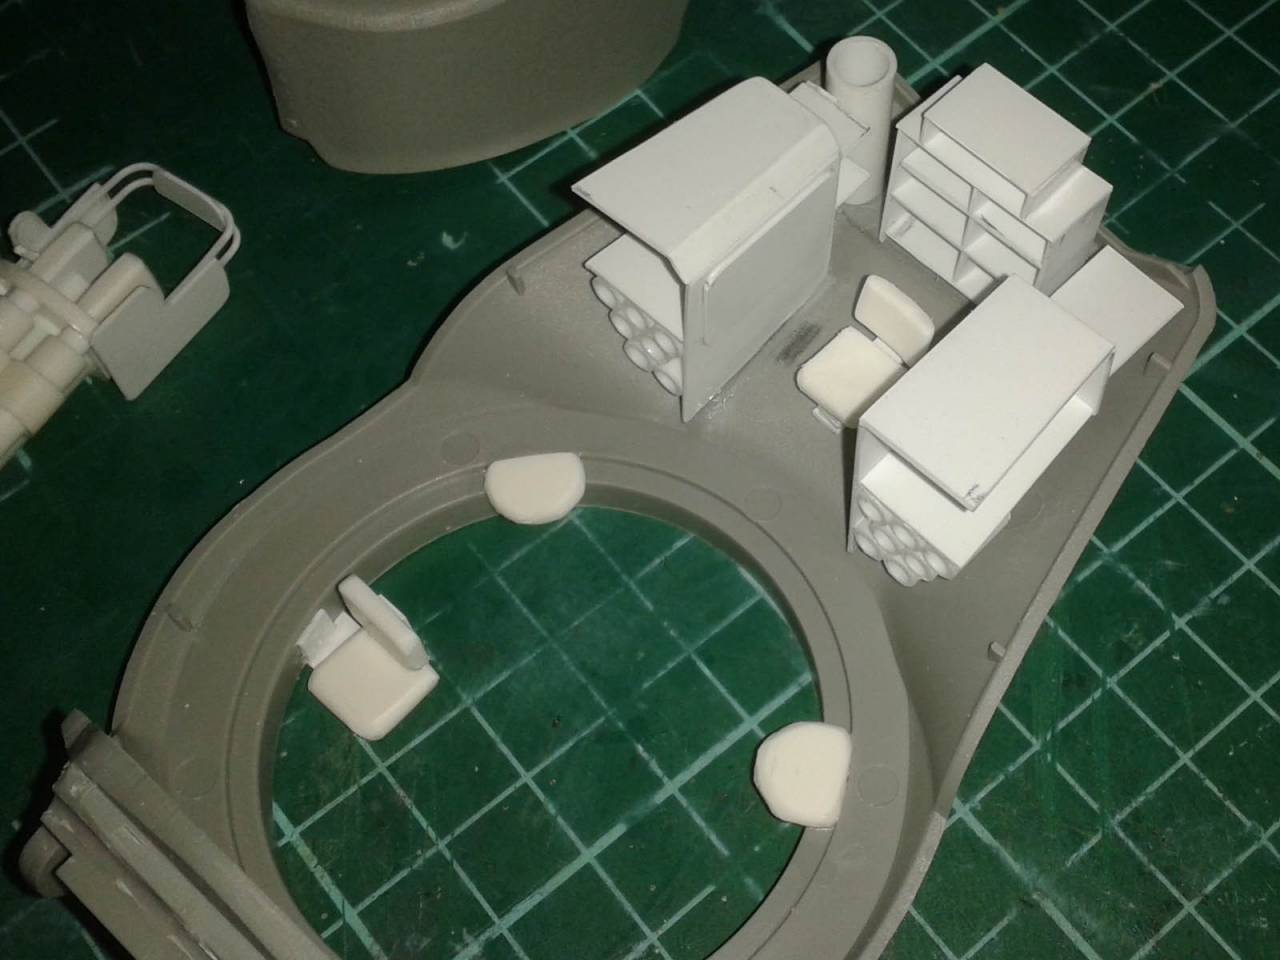
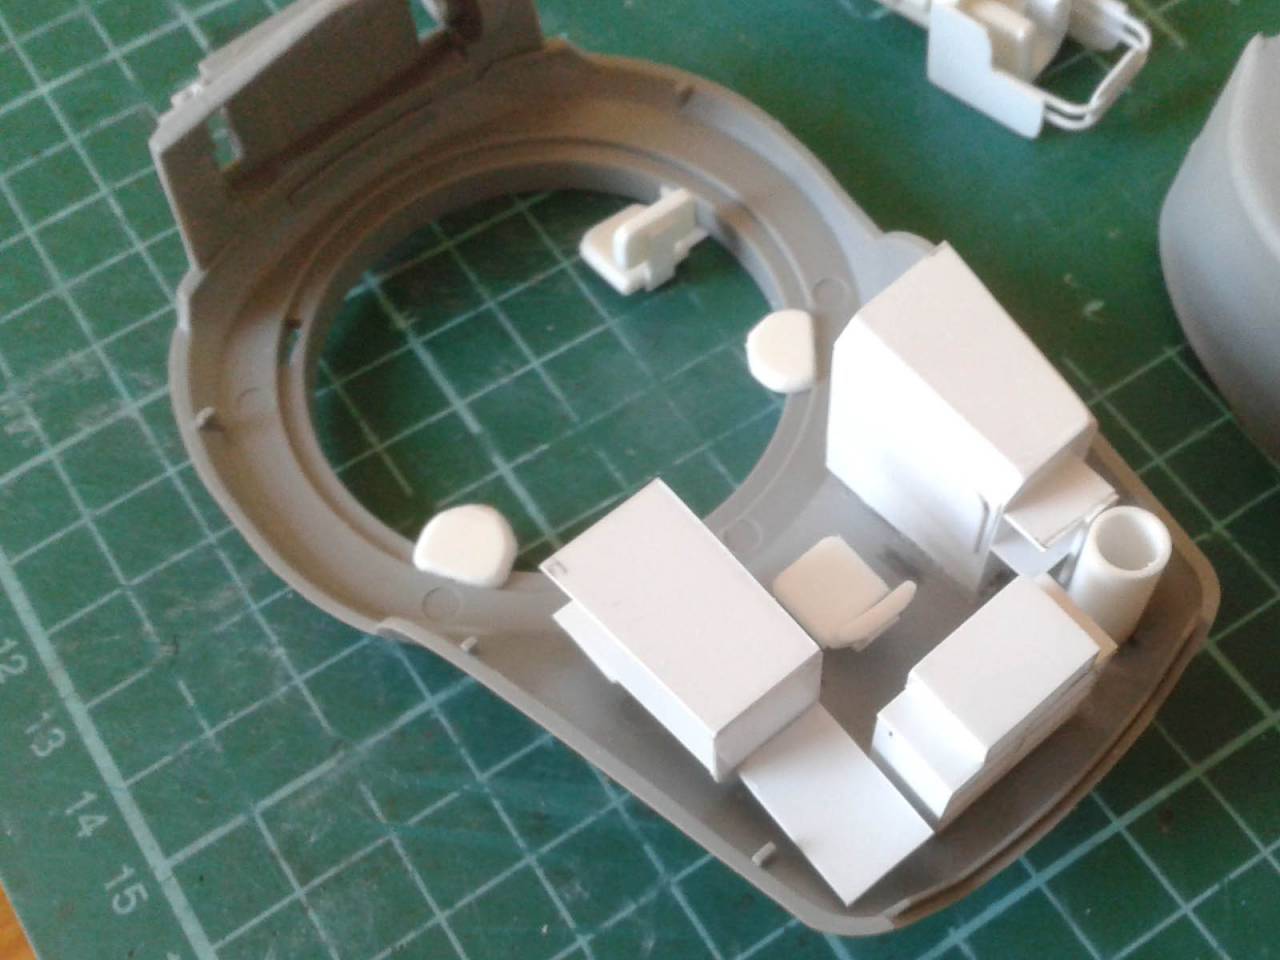
The walls are a bit bare because I have no info on what should be there. Likewise the gunner just gets a seat - I couldn't find anything about the clutter of controls and instruments that US tanks had here, but you wouldn't really see it from the hatches anyway.

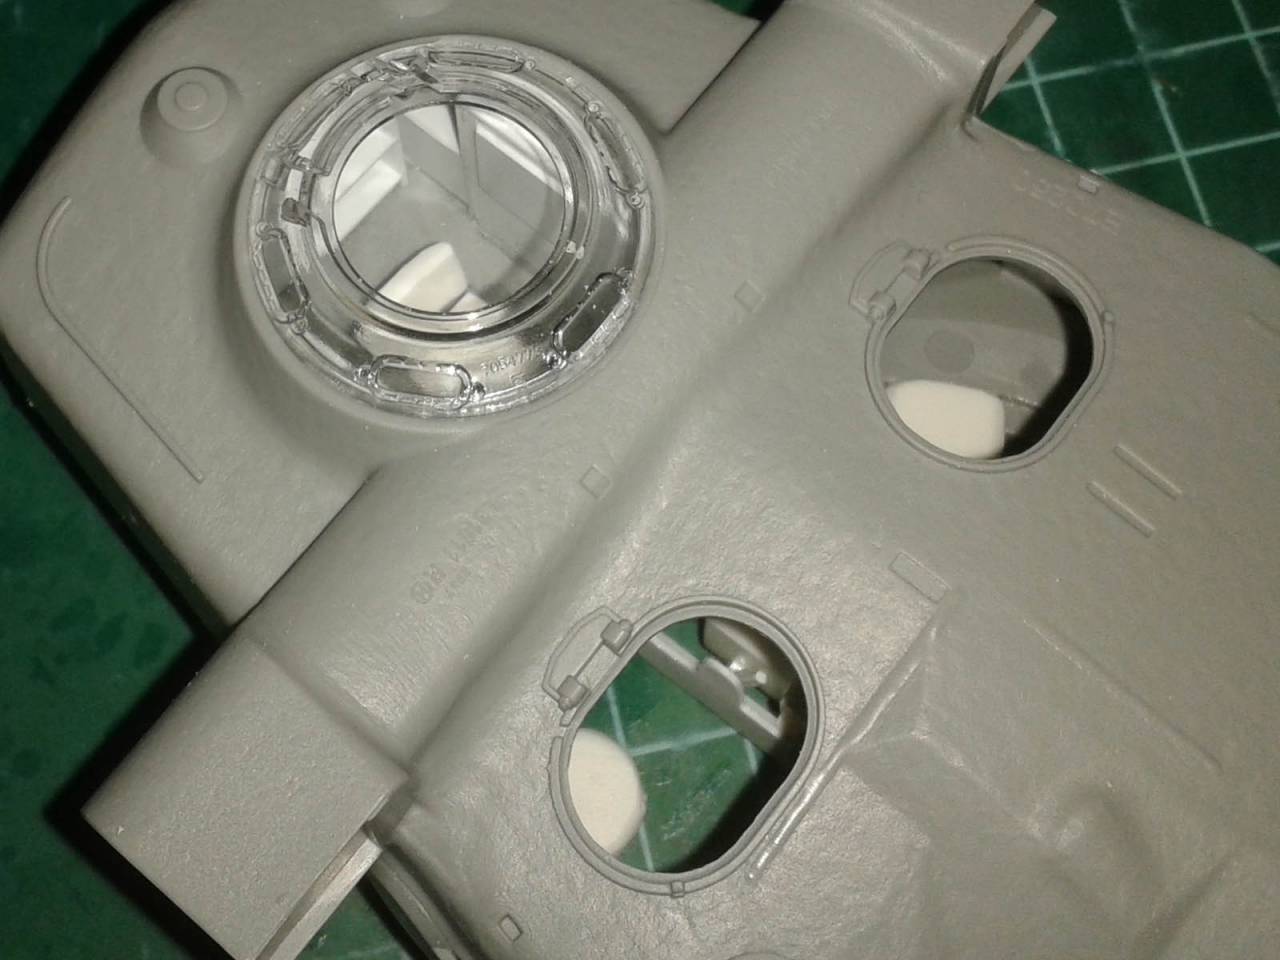
The hull is primed, so hopefully I'll get it all painted and done by the deadline!
Next came the ammo bins either side of the TC - he musta had tremendous faith in the strength of the turret walls! These are simple boxes from plastic sheet, with shell storage space above and propellant tubes below. Detailing is crude because they are hard enough to see through the hatches. The vent blower is a tube, and the shelves at the back are modelled "empty" - I assume they held MG ammo and other stuff? I need to build a suitable radio for the rear left corner, then paint it all before gluing the turret together.
The walls are a bit bare because I have no info on what should be there. Likewise the gunner just gets a seat - I couldn't find anything about the clutter of controls and instruments that US tanks had here, but you wouldn't really see it from the hatches anyway.
The hull is primed, so hopefully I'll get it all painted and done by the deadline!
petbat
Joined: August 06, 2005
KitMaker: 3,353 posts
Armorama: 3,121 posts
Posted: Thursday, November 30, 2017 - 02:44 AM UTC
Nice Tom. Best part about finding no references for the interior is you can do whatever you want.. 
JSSVIII
Joined: March 28, 2007
KitMaker: 1,169 posts
Armorama: 1,067 posts
Posted: Thursday, November 30, 2017 - 05:55 AM UTC
Nice work Tom, just enough to look busy.
canismalus
#465
Joined: September 12, 2014
KitMaker: 398 posts
Armorama: 394 posts
Posted: Friday, December 01, 2017 - 02:35 AM UTC
Quoted Text
Liking it so far, minus the boo-boo. I've fixed all the bad ones and am now repainting them. They don't look too awful, I suppose. Damn Syrian anti-tank fire!
Nice save, Michael...I suppose the next low-intensity conflict version of the Merkava will have some new kind of spaced armor to defeat those roadside radio-detonated glue bombs.....
And great work on the T29 turret, Tom.
Jerry
barkingdigger
#013
Joined: June 20, 2008
KitMaker: 3,981 posts
Armorama: 3,403 posts
Posted: Friday, December 08, 2017 - 12:39 AM UTC
Turret complete! After a lick of paint:
...I closed it all up and added all the details in a very productive evening session.
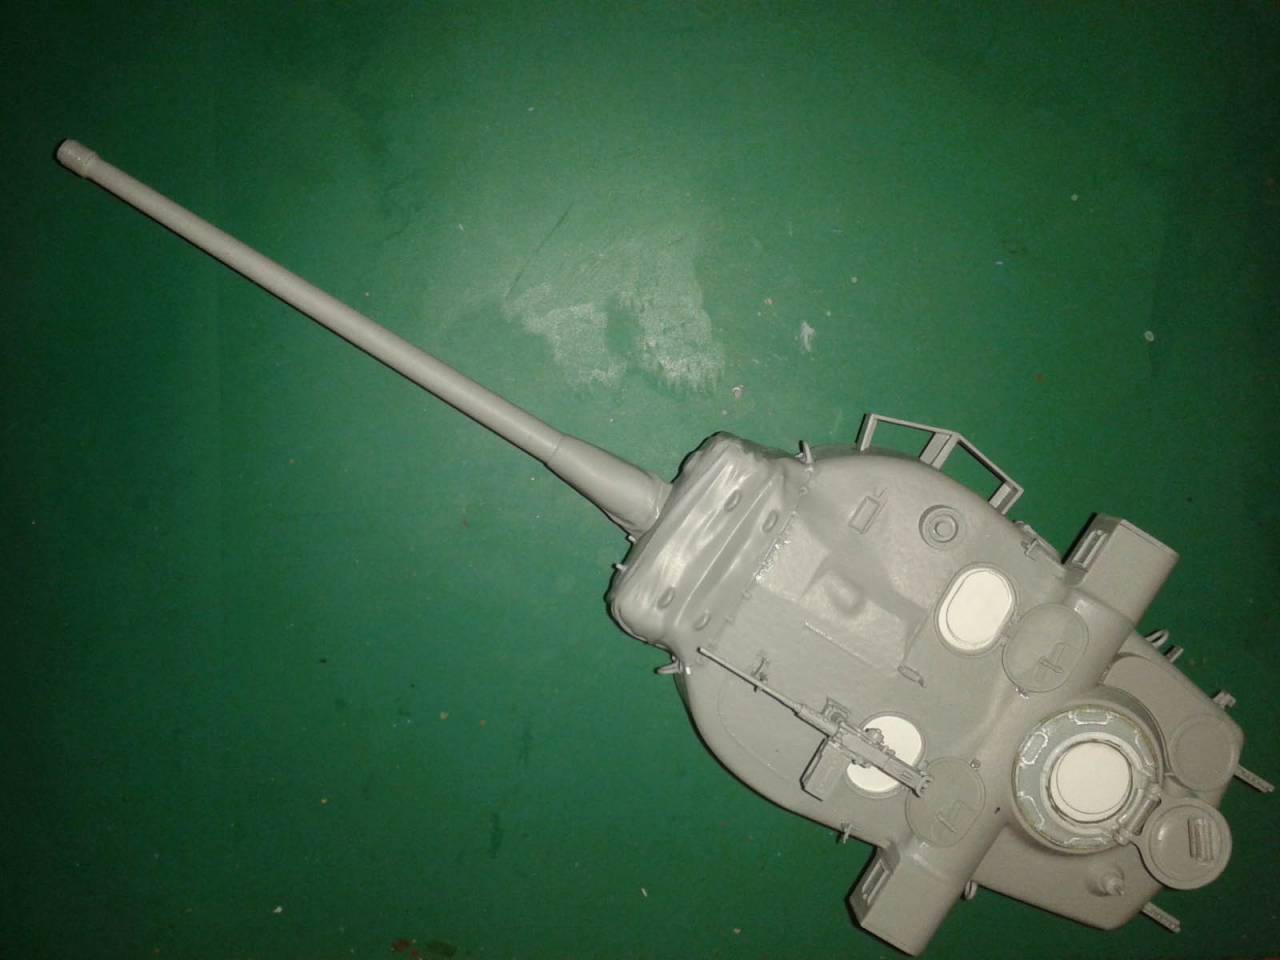
(The hatches are blanked off with 0.005" sheet, glued on with Gator's Grip. When the final painting is done I'll soften it with warm water and then simply press them out. At least that's the theory!)
The .50cal MG is a new one on me - the receiver is moulded as two halves! It goes together well enough, but I'm not happy with the charging handle being a tiny stump - it might need replaced.
But it's all now covered in primer, so let the airbrushing commence!
...I closed it all up and added all the details in a very productive evening session.
(The hatches are blanked off with 0.005" sheet, glued on with Gator's Grip. When the final painting is done I'll soften it with warm water and then simply press them out. At least that's the theory!)
The .50cal MG is a new one on me - the receiver is moulded as two halves! It goes together well enough, but I'm not happy with the charging handle being a tiny stump - it might need replaced.
But it's all now covered in primer, so let the airbrushing commence!
petbat
Joined: August 06, 2005
KitMaker: 3,353 posts
Armorama: 3,121 posts
Posted: Friday, December 08, 2017 - 12:50 AM UTC
Interesting bit about the receiver Tom. Halves are new to me too.
Have to admit the blanking off with card is new to me too. Usually I just make a tube of paper and insert it in the hatch opening, then stuff some wadded tissue in the tube to push it out to form right up to the lip of the opening. Hope the theory re Gator grip doesn't end up Chaos Theory
Have to admit the blanking off with card is new to me too. Usually I just make a tube of paper and insert it in the hatch opening, then stuff some wadded tissue in the tube to push it out to form right up to the lip of the opening. Hope the theory re Gator grip doesn't end up Chaos Theory
barkingdigger
#013
Joined: June 20, 2008
KitMaker: 3,981 posts
Armorama: 3,403 posts
Posted: Sunday, December 17, 2017 - 12:06 AM UTC
@Pete - I hope so too! (Gonna find out soon enough...)
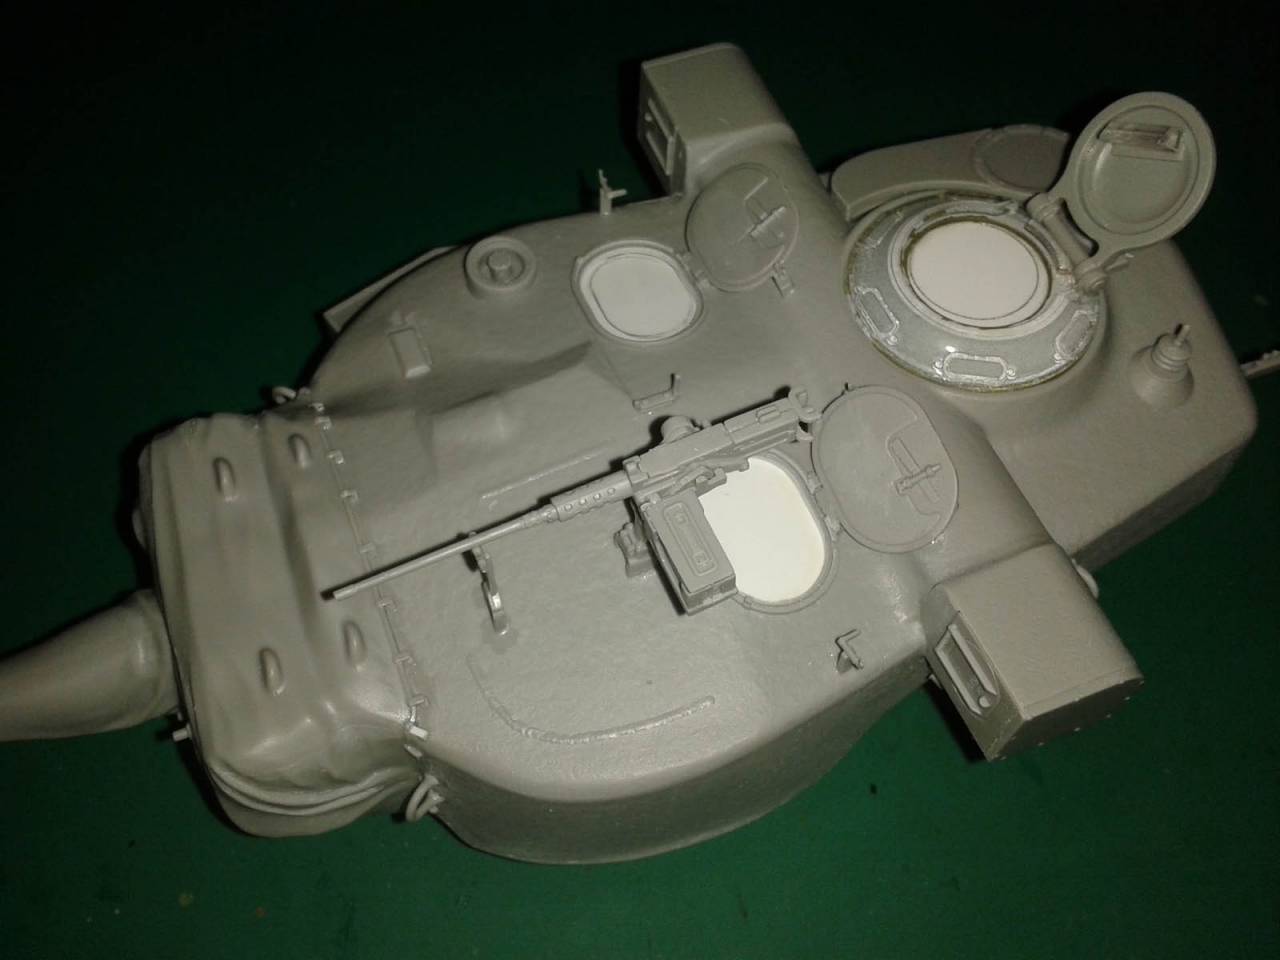
Some "proof of life", or "proof of colour":
I won't be adding any decals - the kit only has big spurious markings for a WoT What the heck! scheme, and the only real pics I've seen just had small registration numbers on the fender stowage boxes, and I don't have anything suitable handy. So it's straight on to pin washes and weathering!
 |

WEB HOSTING BY


Copyright ©2021 Armorama and Kitmaker Network, a subsidiary of Silver Star Enterprises
All Rights Reserved. Please read our Conditions of Use and Privacy Policy.
All Rights Reserved. Please read our Conditions of Use and Privacy Policy.