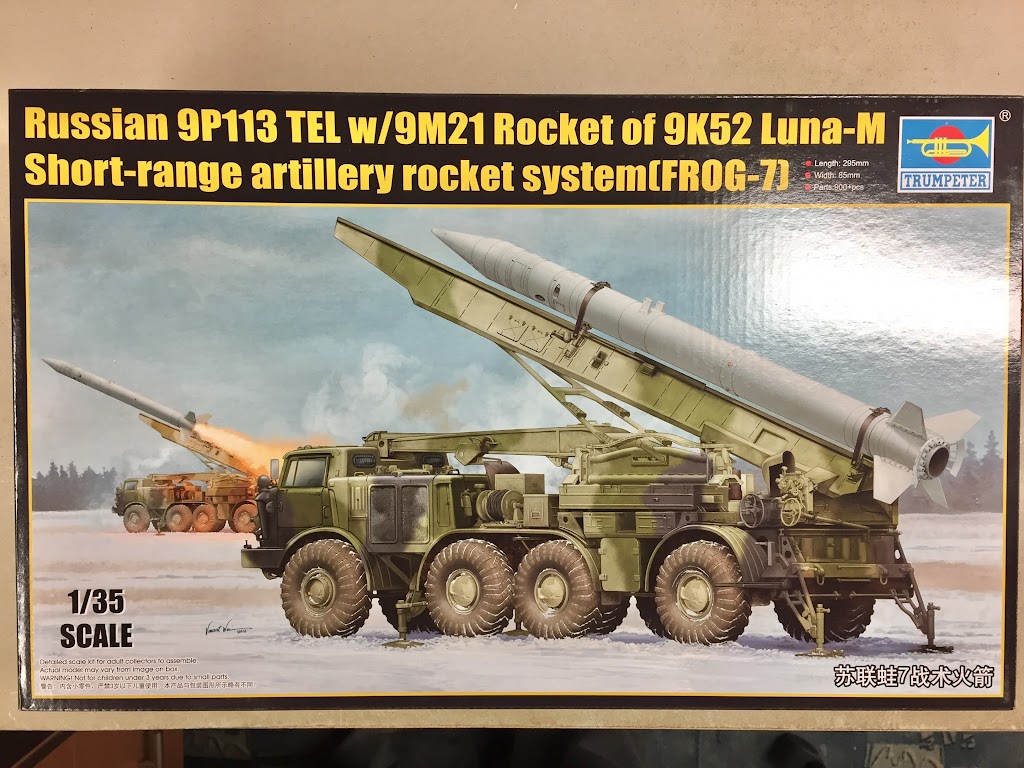
[W] 9K52 Luna-M (FROG-7) - Trumpeter 1:35
Wojewodztwo Mazowieckie, Poland
Joined: October 29, 2010
KitMaker: 169 posts
Armorama: 136 posts
Posted: Tuesday, January 10, 2017 - 06:53 PM UTC
As I'm still waiting for PE parts for Scimitar and for track links I decided to start Luna model. I've waited a long time for it and I would prefer BM-27 Uragan first but anyway I wasn't so happy with new model for a long time:
We get a quite big box filled with sprues. I was suprised with packaging quality. Some sprues are wrapped in foam couple of times and then sealen in plastic bag. Most of the sprues are in the main section of the box, in remaining two smaller one we have a cab, engine hood, 8 rubber tires, PE fret and sprue with something what looks like grill flooring:
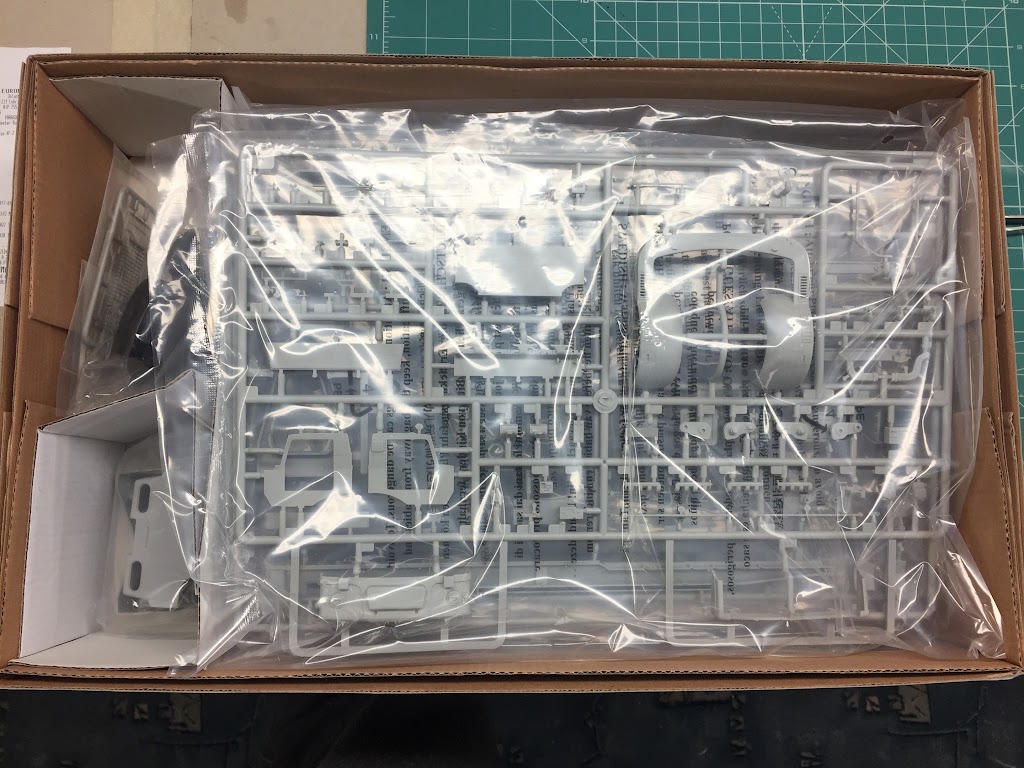
There is a lot of sprues filled with parts, Trumpy is claiming that there is more then 1000 parts (and we do not have track links to increase the counter).

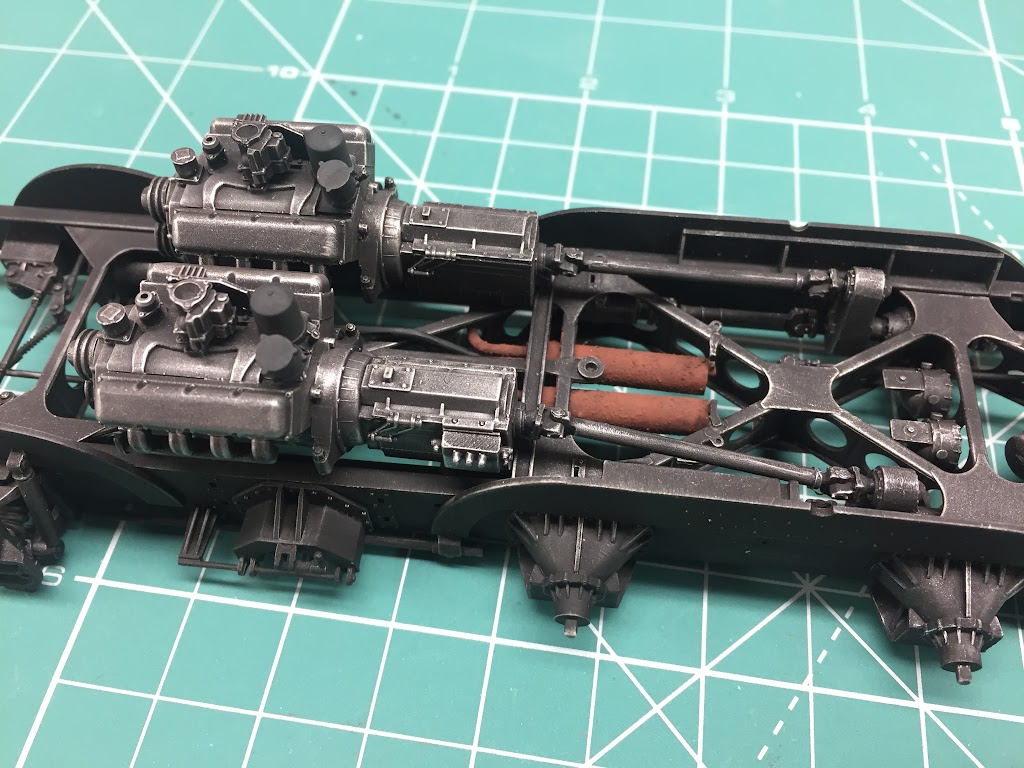
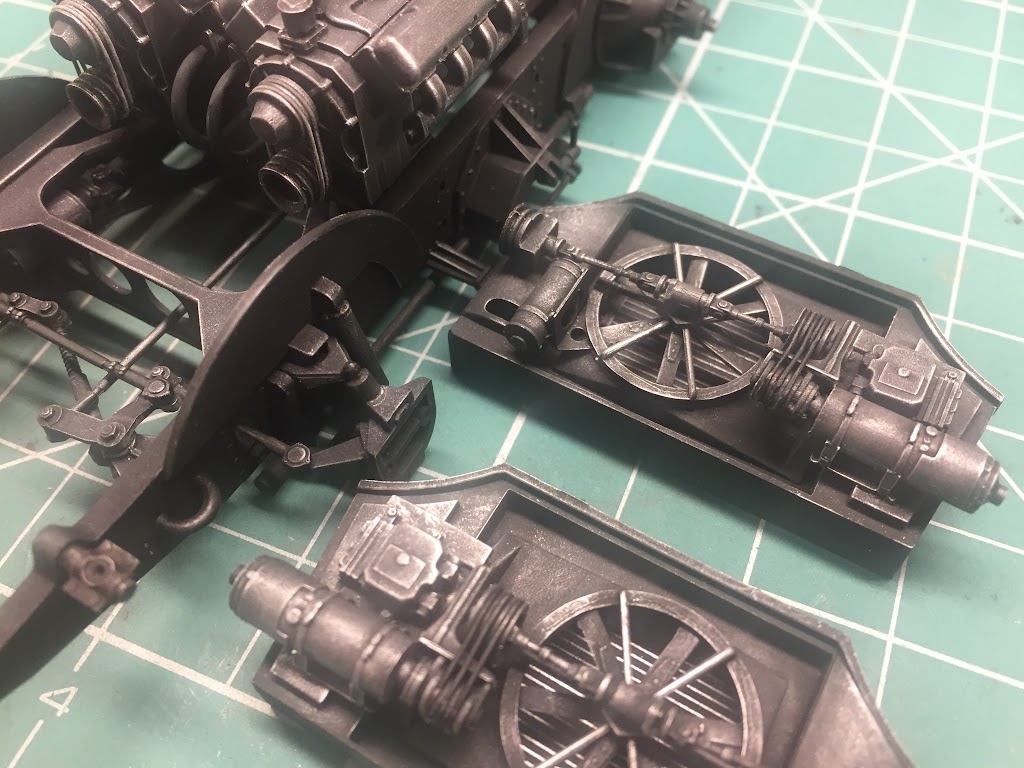
We start with a specific frame with a lot of gentle parts. No pin marks or seam lines but parts are very gentle and a lot of attention is needed to cleanthem up and glue properly. Please pay attension to proper parts alignment as instruction is not showing all parts in very understandable way. For the first time I used Quick Setting Thin Cement to make sure parts will stick properly in no time:

Before final mount of frame was done I sprayed with flat black just to make sure that every part of it will be covered with paint.On top of the photo you can see an external part of frame with a lot of ugly pin marks. Some of them will be covered with transpmission parts, so I hope not much of those marks wil lbe visible:

Workbench:
Luna-M - 1:35 (Trumpeter) - 99%
Bereg/Rubezh - 1:35 (Trumpeter) - 10%
Scorpion/Scimitar - 1:35 (AFV Club) - 30%
A-7D Corsair II - 1:32 (Trumpeter) - 20%
Bayern, Germany
Joined: September 30, 2013
KitMaker: 1,615 posts
Armorama: 1,500 posts
Posted: Tuesday, January 10, 2017 - 08:06 PM UTC
Woohoo!!! I'll sure be following your build!

That frame has a very special structure...
Building logs: http://armored76.wordpress.com/
Finished projects: http://armored76.wordpress.com/portfolio/
England - South West, United Kingdom
Joined: January 03, 2015
KitMaker: 282 posts
Armorama: 255 posts
Posted: Tuesday, January 10, 2017 - 08:09 PM UTC
Is this available now? I've been told late Jan in the UK..?
Wojewodztwo Mazowieckie, Poland
Joined: October 29, 2010
KitMaker: 169 posts
Armorama: 136 posts
Posted: Tuesday, January 10, 2017 - 08:54 PM UTC
Quoted Text
Woohoo!!! I'll sure be following your build!
That frame has a very special structure...
Welcome aboard.
Honestly I was not aware that frame looks like this. I thought it will have more traditional structure. But I assume it was needed to build it this was as one engine runs one side and two sets of transmissions, gears etc have to be included on the side comparing to only one in most of the vehicles.
Quoted Text
Is this available now? I've been told late Jan in the UK..?
Yes it is. At least in Poland but only in one shop.
Workbench:
Luna-M - 1:35 (Trumpeter) - 99%
Bereg/Rubezh - 1:35 (Trumpeter) - 10%
Scorpion/Scimitar - 1:35 (AFV Club) - 30%
A-7D Corsair II - 1:32 (Trumpeter) - 20%
Wojewodztwo Mazowieckie, Poland
Joined: October 29, 2010
KitMaker: 169 posts
Armorama: 136 posts
Posted: Friday, January 13, 2017 - 03:10 AM UTC
Finally, frame more less completed. In total 202 parts

-

Workbench:
Luna-M - 1:35 (Trumpeter) - 99%
Bereg/Rubezh - 1:35 (Trumpeter) - 10%
Scorpion/Scimitar - 1:35 (AFV Club) - 30%
A-7D Corsair II - 1:32 (Trumpeter) - 20%
Bayern, Germany
Joined: September 30, 2013
KitMaker: 1,615 posts
Armorama: 1,500 posts
Posted: Friday, January 13, 2017 - 12:05 PM UTC
This looks superb! The dry brushing really brings out the details.
Are you brushing the larger, flat areas as well or is there a different technique for this?
Building logs: http://armored76.wordpress.com/
Finished projects: http://armored76.wordpress.com/portfolio/
Wojewodztwo Mazowieckie, Poland
Joined: October 29, 2010
KitMaker: 169 posts
Armorama: 136 posts
Posted: Friday, January 13, 2017 - 01:04 PM UTC
Thank you.
I'm using wide and quite stiff brush to drybrush all areas including flat surfaces.
Workbench:
Luna-M - 1:35 (Trumpeter) - 99%
Bereg/Rubezh - 1:35 (Trumpeter) - 10%
Scorpion/Scimitar - 1:35 (AFV Club) - 30%
A-7D Corsair II - 1:32 (Trumpeter) - 20%
Wojewodztwo Mazowieckie, Poland
Joined: October 29, 2010
KitMaker: 169 posts
Armorama: 136 posts
Posted: Saturday, January 14, 2017 - 01:57 AM UTC
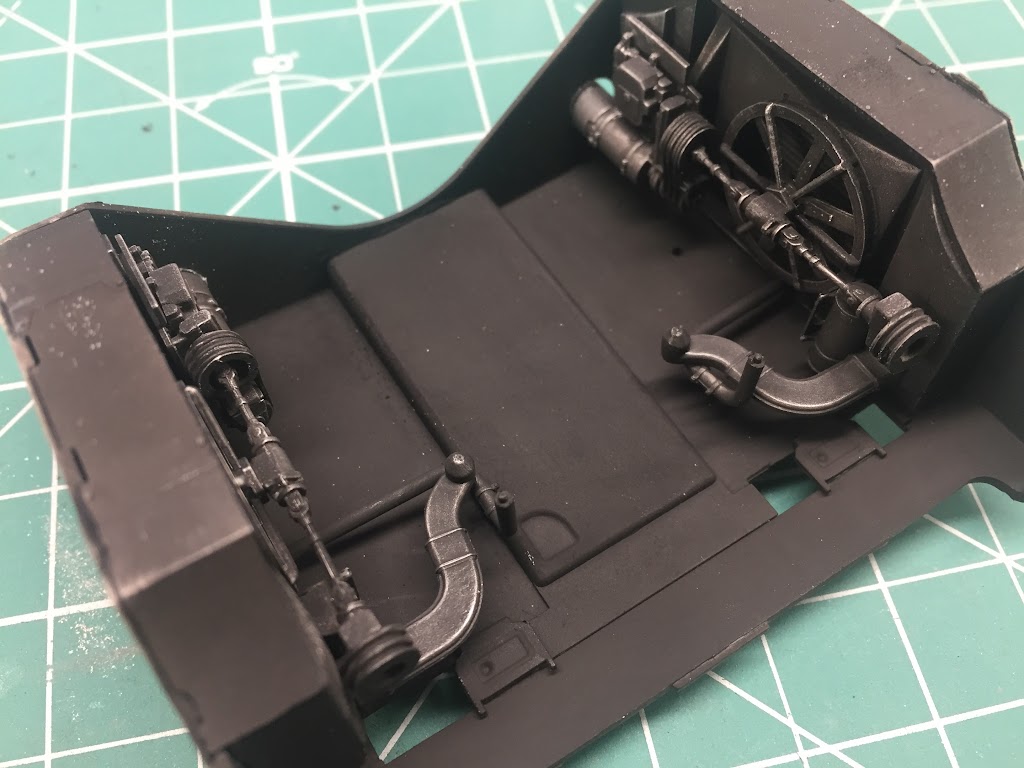
Uff, engines done and some rust added to exhaust
I glued both radiators with equipment (later Ive added some belt to the engine and radiator fans)
Workbench:
Luna-M - 1:35 (Trumpeter) - 99%
Bereg/Rubezh - 1:35 (Trumpeter) - 10%
Scorpion/Scimitar - 1:35 (AFV Club) - 30%
A-7D Corsair II - 1:32 (Trumpeter) - 20%
GulfWarrior
 Campaigns Administrator
Texas, United States
Joined: January 05, 2010
KitMaker: 1,051 posts
Armorama: 1,029 posts
Posted: Saturday, January 14, 2017 - 02:40 AM UTC
I'll definitely be watching this build!
I soooooo want one of these kits!
Current campaigns:
I Like Big GUNS...And I Cannot Lie (2S1 Gvozdika)
Operation Snow White (Maultier w/ 37mm Flak Gun)
Stryker Campaign (AFV Club Stryker Dragoon)
1st Gulf War, 30th Anniversary (Dragon MLRS)
Wojewodztwo Mazowieckie, Poland
Joined: October 29, 2010
KitMaker: 169 posts
Armorama: 136 posts
Posted: Sunday, January 15, 2017 - 04:49 PM UTC
Jumping thought instruction I'm doing some of the equipments, like this one. Part of rear bumper with support legs and some landings:

And dry fit of front bumber wirh cab part:

And overall look with bumpers, cab etc:

Workbench:
Luna-M - 1:35 (Trumpeter) - 99%
Bereg/Rubezh - 1:35 (Trumpeter) - 10%
Scorpion/Scimitar - 1:35 (AFV Club) - 30%
A-7D Corsair II - 1:32 (Trumpeter) - 20%
Texas, United States
Joined: March 11, 2007
KitMaker: 977 posts
Armorama: 976 posts
Posted: Sunday, January 15, 2017 - 07:26 PM UTC
That is looking really nice. Will you be using the kit supplied rubber wheels or any available resin after market wheels.
Gregovich "I paint all my Models in 4BO Green" Beckman
Holder of the Knight's Cross, Hero of the Soviet Union, Dragon Slayer and Slinger of Massive BS.
Wojewodztwo Mazowieckie, Poland
Joined: October 29, 2010
KitMaker: 169 posts
Armorama: 136 posts
Posted: Sunday, January 15, 2017 - 07:45 PM UTC
Quoted Text
That is looking really nice. Will you be using the kit supplied rubber wheels or any available resin after market wheels.
Most likely I will stick to the rubber ones for a two main reasons. First they look quite good, second I'm not aware of any other AM wheels available for this kit. ;-)
Wheels would have to be designed for this model as 1st and 4th exle are similar in shape and mounting (apart from metal ring in 1st pair) and 2nd and 3rd axles are different (mounting point is different). Also tire thread on both side have to face the same way so it wouldn't be simple 8 copies of the same wheel, rather 8 different forms thus very expensive set.
Workbench:
Luna-M - 1:35 (Trumpeter) - 99%
Bereg/Rubezh - 1:35 (Trumpeter) - 10%
Scorpion/Scimitar - 1:35 (AFV Club) - 30%
A-7D Corsair II - 1:32 (Trumpeter) - 20%
Bayern, Germany
Joined: September 30, 2013
KitMaker: 1,615 posts
Armorama: 1,500 posts
Posted: Sunday, January 15, 2017 - 09:41 PM UTC
Now that you mention it... are the tires reproduced correctly in the kit?
Building logs: http://armored76.wordpress.com/
Finished projects: http://armored76.wordpress.com/portfolio/
Wojewodztwo Mazowieckie, Poland
Joined: October 29, 2010
KitMaker: 169 posts
Armorama: 136 posts
Posted: Sunday, January 15, 2017 - 10:45 PM UTC
Quoted Text
Now that you mention it... are the tires reproduced correctly in the kit?
let me take some photos of them. I will post it in a few hours.
Workbench:
Luna-M - 1:35 (Trumpeter) - 99%
Bereg/Rubezh - 1:35 (Trumpeter) - 10%
Scorpion/Scimitar - 1:35 (AFV Club) - 30%
A-7D Corsair II - 1:32 (Trumpeter) - 20%
Wojewodztwo Mazowieckie, Poland
Joined: October 29, 2010
KitMaker: 169 posts
Armorama: 136 posts
Posted: Tuesday, January 17, 2017 - 03:38 PM UTC
I'm still trying to finish this build as there is a lot of small parts. Model so far is very good, some cleaning of parts is needed but fitting is very, very good. The main disadvantage is total lack of wires or piping. Not a single smallest piece of it. Just a bad quility string as a rope for a crane.
Photos of wheels that were promised. I glued rims and try ti fit wheels, they fit but are quite loose, too loose IMO. But rubber is a strange type, I have a feeling that it is too soft and will fall apart into pieces:

-

Dashboard with additional launcher control panel, not a single wire:

And dry fit with cab:

My cab has a strange looking structure on rear wall. I'm not sure is this on purpose?
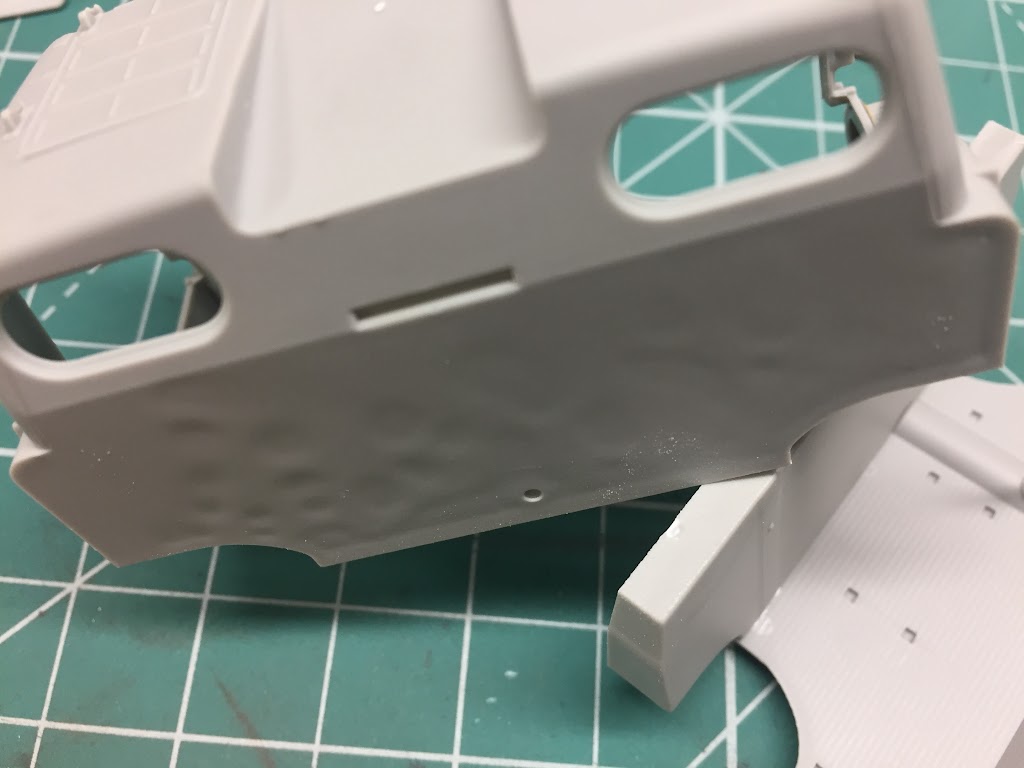
And there is a lot of such small components which are quite time consuming:

Workbench:
Luna-M - 1:35 (Trumpeter) - 99%
Bereg/Rubezh - 1:35 (Trumpeter) - 10%
Scorpion/Scimitar - 1:35 (AFV Club) - 30%
A-7D Corsair II - 1:32 (Trumpeter) - 20%

#465
Nordrhein-Westfalen, Germany
Joined: September 12, 2014
KitMaker: 398 posts
Armorama: 394 posts
Posted: Tuesday, January 17, 2017 - 04:06 PM UTC
Hi Przemek,
Thanks a lot for going to the trouble of doing this build log. I got this kit myself for Christmas and am following your build with great interest - if it's anything like your other builds, it'll turn out fantastic.
Pity about the total lack of wiring, but the Trumpeter SCUD kit is no different.
Jerry
Australia
Joined: June 16, 2007
KitMaker: 193 posts
Armorama: 184 posts
Posted: Wednesday, January 18, 2017 - 02:03 AM UTC
Beautiful build, nice to see as a build log showing how you get such great results. Thanks for taking time to do this way.
Scotland, United Kingdom
Joined: September 01, 2005
KitMaker: 409 posts
Armorama: 402 posts
Posted: Wednesday, January 18, 2017 - 09:43 PM UTC
Quoted Text
My cab has a strange looking structure on rear wall. I'm not sure is this on purpose?
Be hidden behind bodywork anyway.
Regards,
Andy
I always keep a picture of my wife and kids in my wallet. It reminds me why there's no money in it.
Wojewodztwo Mazowieckie, Poland
Joined: October 29, 2010
KitMaker: 169 posts
Armorama: 136 posts
Posted: Friday, January 20, 2017 - 07:18 PM UTC
Thank you guys for all the posts.
Im trying to continue my build.
I glued the crane but it is quite awful and for me unacceptable

I had to sand down all from top and bottom, seal the joints with CA glue and add some HIPS stips, same for the launcher

Most of the parts fit well but to glue the rear bumper with jack I had to cut 0.5-0.7mm from the each side of frame. Then it fit

Radiators with fans and rest of equipment glued to cover
And this is how my TEL looks like now


Workbench:
Luna-M - 1:35 (Trumpeter) - 99%
Bereg/Rubezh - 1:35 (Trumpeter) - 10%
Scorpion/Scimitar - 1:35 (AFV Club) - 30%
A-7D Corsair II - 1:32 (Trumpeter) - 20%
Wojewodztwo Mazowieckie, Poland
Joined: October 29, 2010
KitMaker: 169 posts
Armorama: 136 posts
Posted: Sunday, January 22, 2017 - 04:01 PM UTC
I started to paint cab:

-
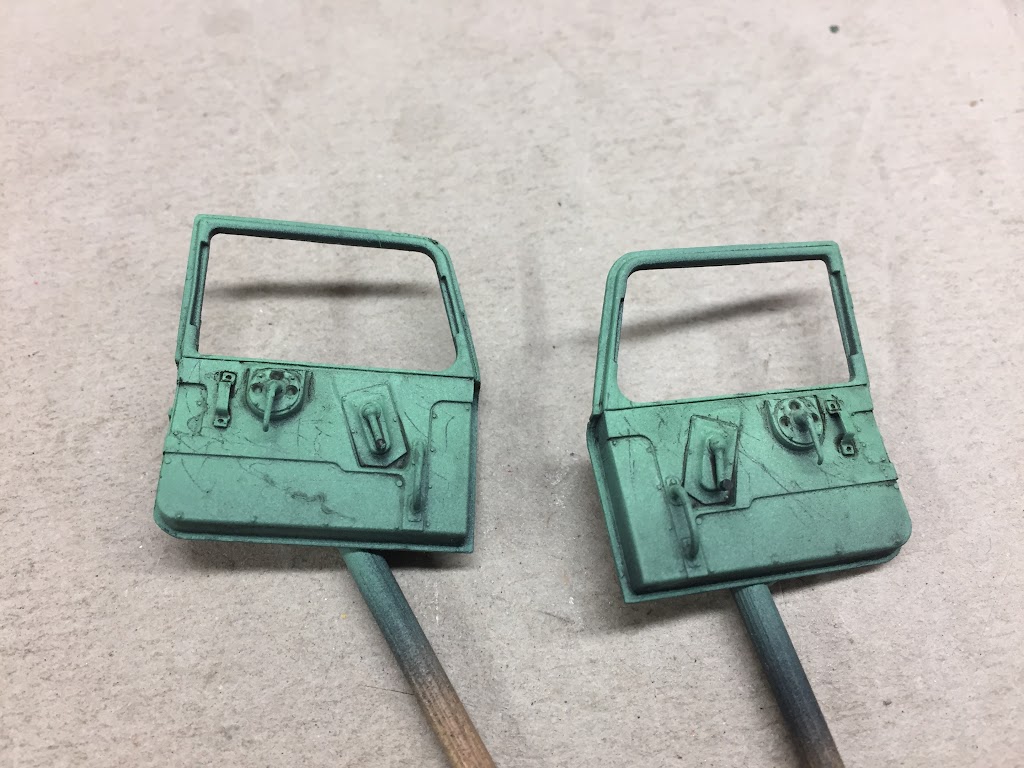
But decals are slighty moved:

So I decided to paint it myself:

Workbench:
Luna-M - 1:35 (Trumpeter) - 99%
Bereg/Rubezh - 1:35 (Trumpeter) - 10%
Scorpion/Scimitar - 1:35 (AFV Club) - 30%
A-7D Corsair II - 1:32 (Trumpeter) - 20%
Bayern, Germany
Joined: September 30, 2013
KitMaker: 1,615 posts
Armorama: 1,500 posts
Posted: Sunday, January 22, 2017 - 10:01 PM UTC
Great progress! You're such a FAST builder!

Building logs: http://armored76.wordpress.com/
Finished projects: http://armored76.wordpress.com/portfolio/
Wojewodztwo Mazowieckie, Poland
Joined: October 29, 2010
KitMaker: 169 posts
Armorama: 136 posts
Posted: Friday, January 27, 2017 - 11:02 PM UTC
Quoted Text
Great progress! You're such a FAST builder!
Thank you.
I started shading from black and grey

with white at the end

I am planning to do a Polish version of Luna and colors used in late 60 in LWP (Ludowe Wojska Polskie - Polish Peoples Army) were in so many options so anything that looks like green would fit, but I decided to use OliveDrab from Tamiya as a base. Then by adding few drops of white, yellow and light green I get the shade of vehicle standing a lot of time in sun - faded color

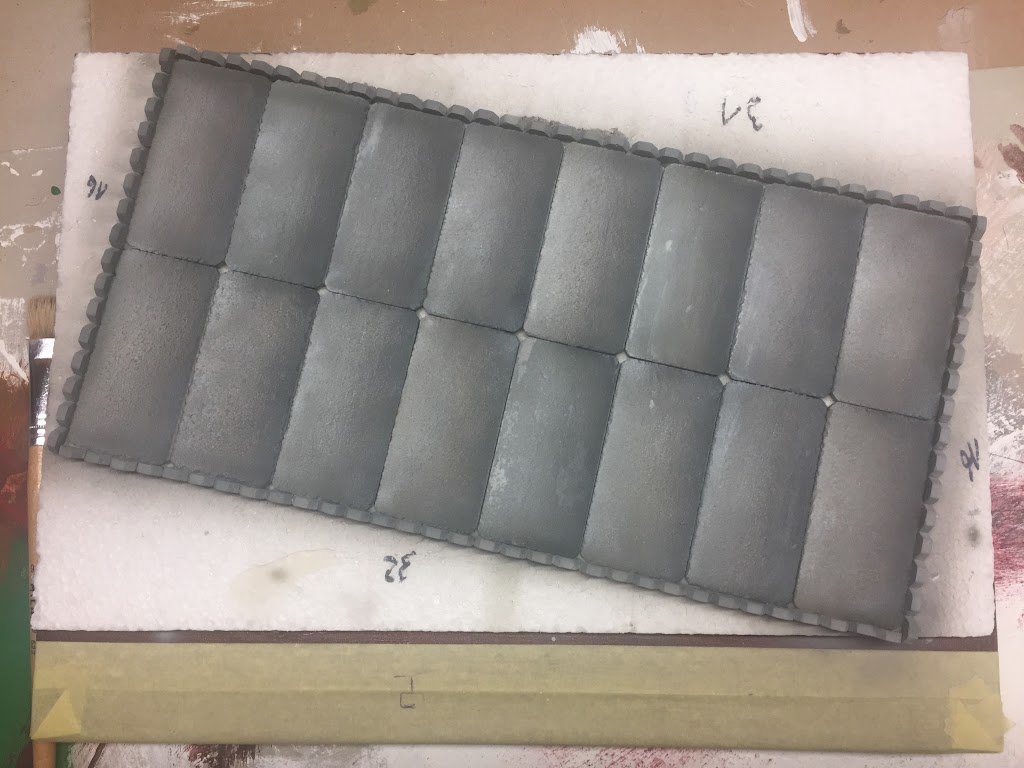
And in the meantime working on base - made new road panel model and a mold for it - and I end up with few plaster copies

On sides I will put some hex blocks

Workbench:
Luna-M - 1:35 (Trumpeter) - 99%
Bereg/Rubezh - 1:35 (Trumpeter) - 10%
Scorpion/Scimitar - 1:35 (AFV Club) - 30%
A-7D Corsair II - 1:32 (Trumpeter) - 20%
Wojewodztwo Mazowieckie, Poland
Joined: October 29, 2010
KitMaker: 169 posts
Armorama: 136 posts
Posted: Sunday, February 05, 2017 - 08:34 PM UTC
I'm posting again photo from last post as it disappeared

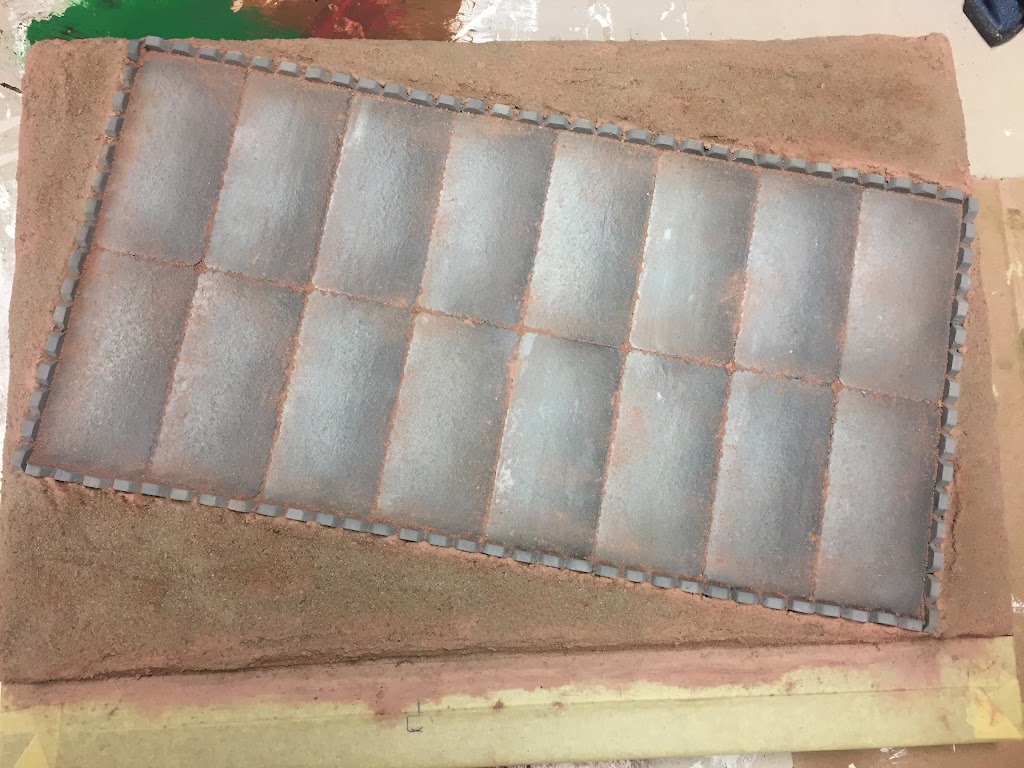
Base painted with different shades of grey:

And shaded with dark grey and white:
With some earth:
Some more shading, pigments to balance it some more:

As it will be a museum vehicle I've added some steaks:

---

---

Dusting wheels in the meantime

I've added some rust, moss amd more streaks:

---

Workbench:
Luna-M - 1:35 (Trumpeter) - 99%
Bereg/Rubezh - 1:35 (Trumpeter) - 10%
Scorpion/Scimitar - 1:35 (AFV Club) - 30%
A-7D Corsair II - 1:32 (Trumpeter) - 20%
Bayern, Germany
Joined: September 30, 2013
KitMaker: 1,615 posts
Armorama: 1,500 posts
Posted: Monday, February 06, 2017 - 01:55 PM UTC
Just wow!!! Beautiful finish!!! We want more !

Building logs: http://armored76.wordpress.com/
Finished projects: http://armored76.wordpress.com/portfolio/
#465
Nordrhein-Westfalen, Germany
Joined: September 12, 2014
KitMaker: 398 posts
Armorama: 394 posts
Posted: Monday, February 06, 2017 - 04:29 PM UTC
Hi Przemek,
Agreed. This looks fantastic and I can't wait to see your Luna when it's finished.
Jerry


