Campaigns: Completed Campaigns
Campaigns that are completed should be grouped here.
Hosted by Richard S.
Improvised Ingenuity
barkingdigger
Staff MemberAssociate Editor
ARMORAMA
#013
Visit this Community
England - East Anglia, United Kingdom
Joined: June 20, 2008
KitMaker: 3,981 posts
Armorama: 3,403 posts
Posted: Monday, February 20, 2017 - 09:32 PM UTC
After seeing all the nifty work going on, I figured it was finally time I posted my own meagre progress! My Leopard "tractor" started as an Italeri Leo 1A2 kit, and to "tractorize" it I needed to remove the gun and add a few doo-dads. So starting with the turret I blanked off the holes for the gun and the commander's TRP periscope with some tread plate, borrowing an idea seen in photos of a sored artillery obs conversion. (The only pic of the tractor does not show these areas clearly so I'm having to guess!) Then I replaced the TC's periscopes and AA gun ring with 3D-printed ones I made at Shapeways.com, replaced the Loader's hatch spring too, and built the rest more or less OOB. Just behind the left rangefinder hood Italeri forgot to add the cap for the searchlight socket, and the brackets above & below to hold the caps when the cable is inserted, so I scratched these. The white clamp-like things on the turret side defy explanation, but were also easy enough to scratch.


Before I start the hull I need to address the engine-deck screen. I bought the Perfect Scale Modelbau PE set, painted the plastic kit fan, and will assemble the inner screen/fan to the underside of the deck before assembling the hull. I will slip some .005 sheet between the screen and hull to protect the area during painting, and pull it out through the turret ring after. (Pics of this to follow...)

petbat
Visit this Community
Queensland, Australia
Joined: August 06, 2005
KitMaker: 3,353 posts
Armorama: 3,121 posts
Posted: Friday, February 24, 2017 - 02:48 AM UTC
Very nice Tom.

Detail Modelling always comes with some guess work. Well no-one will argue what you done if they can't prove it!

The 3d ring looks fantastic. Did you do the CAD work?
barkingdigger
Staff MemberAssociate Editor
ARMORAMA
#013
Visit this Community
England - East Anglia, United Kingdom
Joined: June 20, 2008
KitMaker: 3,981 posts
Armorama: 3,403 posts
Posted: Friday, February 24, 2017 - 03:26 AM UTC
Hi Peter, yes I modelled it in AutoCAD. I did several different types for Leo 1A1-3s, 1A4s, and 1A5s - including the ring of periscope heads seen inside an open hatch.
ClaytonFromEllijay
#454
Visit this Community
Georgia, United States
Joined: July 10, 2016
KitMaker: 1,273 posts
Armorama: 1,138 posts
Posted: Friday, February 24, 2017 - 04:57 AM UTC
Very impressive, Tom.
d111298pw
#456
Visit this Community
Oklahoma, United States
Joined: September 22, 2016
KitMaker: 654 posts
Armorama: 638 posts
Posted: Saturday, February 25, 2017 - 09:28 AM UTC
I finally had some time to work on this project. All the major sub-assemblies are completed and painted. I still need to finish painting the decking. (never have been good at doing wood) Will then start putting it all together.

Chassis (will detail paint the final drive gearing before assembly)


Fenders:


Bridge support sections:


Support rails:


Gantry:


Support leg(?):


Deck Sections:
petbat
Visit this Community
Queensland, Australia
Joined: August 06, 2005
KitMaker: 3,353 posts
Armorama: 3,121 posts
Posted: Saturday, February 25, 2017 - 01:29 PM UTC
Even more impressive with you doing the Auto Cad work too Tom

A lot done there Mark. I suggest you use a strong epoxy glue on the Bridge beams as the joins are top an bottom and get a bit of stress on them.

I know the box art tells you to paint the slats and the turret cover timber, but I am fairly certain they were painted the same grey as everything else. Check the pic I posted earlier.

That would be a great opportunity to do a bit of real world 'chipping' practice on the wood, where paint would be worked off the edges etc. The track would not move against the slats and scrub them down (which some people think) but rather over them, but the cleat parts would likely clip the edges in places.

Then you can always put a load of branches on top
d111298pw
#456
Visit this Community
Oklahoma, United States
Joined: September 22, 2016
KitMaker: 654 posts
Armorama: 638 posts
Posted: Saturday, February 25, 2017 - 05:03 PM UTC
Peter,
Great idea about using epoxy. Hadn't thought of that. Will use for the support rails as well. I was of two minds on what to do about the wood slats. Eventually, I decided to just flip a coin. Since everything is gray, having the wood color will add something to contrast it.
d111298pw
#456
Visit this Community
Oklahoma, United States
Joined: September 22, 2016
KitMaker: 654 posts
Armorama: 638 posts
Posted: Saturday, February 25, 2017 - 05:47 PM UTC
Bridge sections are completed.


ClaytonFromEllijay
#454
Visit this Community
Georgia, United States
Joined: July 10, 2016
KitMaker: 1,273 posts
Armorama: 1,138 posts
Posted: Saturday, February 25, 2017 - 09:38 PM UTC
Very nice, Mark, your wood looks good!
bwiber
Visit this Community
Washington, United States
Joined: August 03, 2008
KitMaker: 436 posts
Armorama: 320 posts
Posted: Tuesday, February 28, 2017 - 03:55 AM UTC
Mark..... I second the comment on the wood. Definitely coming together nicely. Enjoying your build.

Tom..... Coming together nicely. Like your new parts.... They definitely are an improvement. Going to be another stunner.

As for my little Hippo.... well, it is coming together. I had a bit of an issue with the first crew cabin... Yep, on to No2...


The first one was to wide, which screwed up the way the front went together. The error wasn't in the drawings, rather it was in the reading of them. However, as you can see, the second one looks to be good... which is something of an improvement on my earlier efforts.


For some reason I like the way that the rear of the vehicle looks more than the sides... Oh well, it will come together all the way around eventually.


A bit of cleanup and on to detailing the hull...
Bob
petbat
Visit this Community
Queensland, Australia
Joined: August 06, 2005
KitMaker: 3,353 posts
Armorama: 3,121 posts
Posted: Wednesday, March 01, 2017 - 12:50 AM UTC
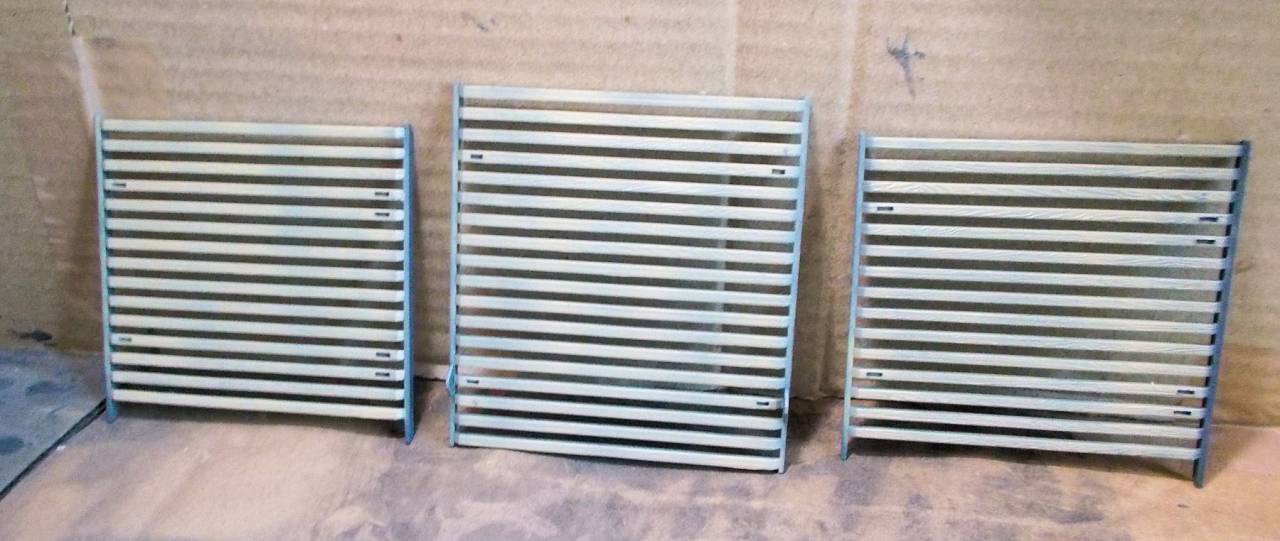
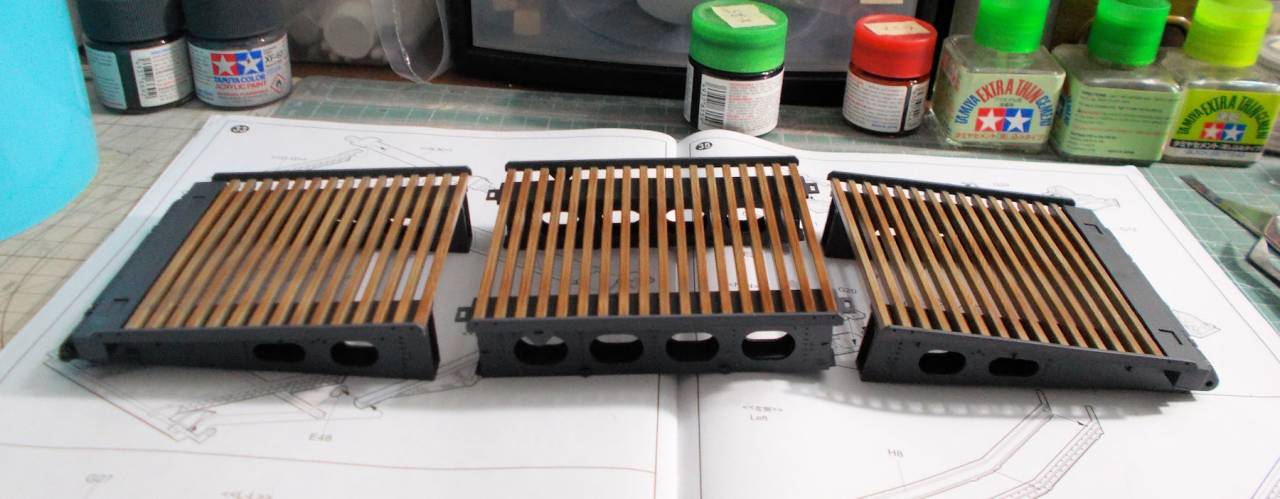
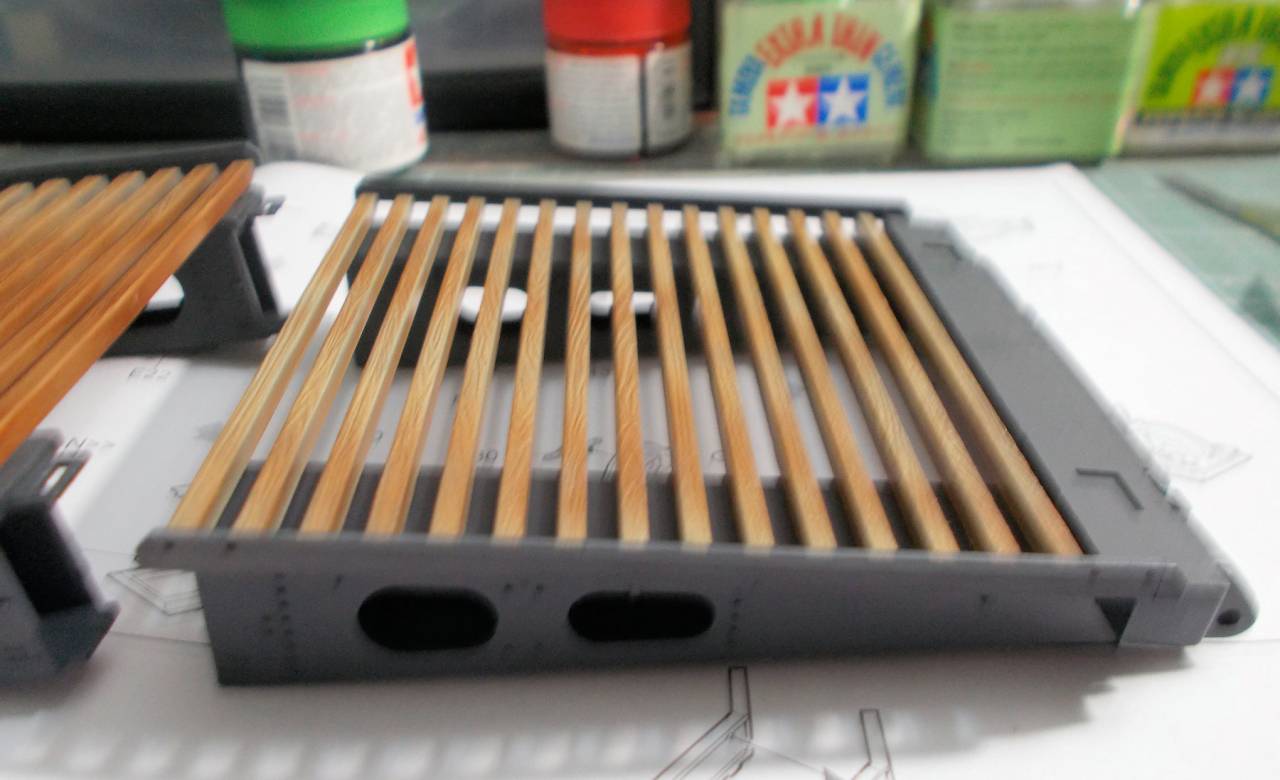
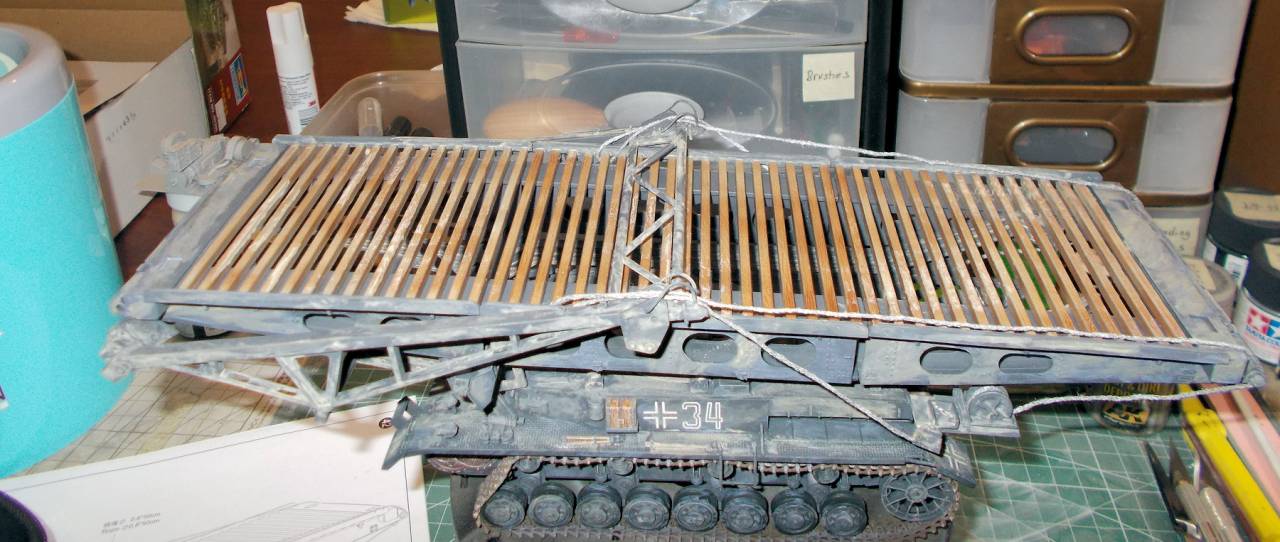
Mark. Yes the wood looks fantastic. It will pop some life into the finished build... mine will be grey all over except the ammo rounds... so a 'leetle beet' of color in it.

Bob. Do you have shares in Evergreen??

Sorry to see you had to redo, but the result is looking really impressive.

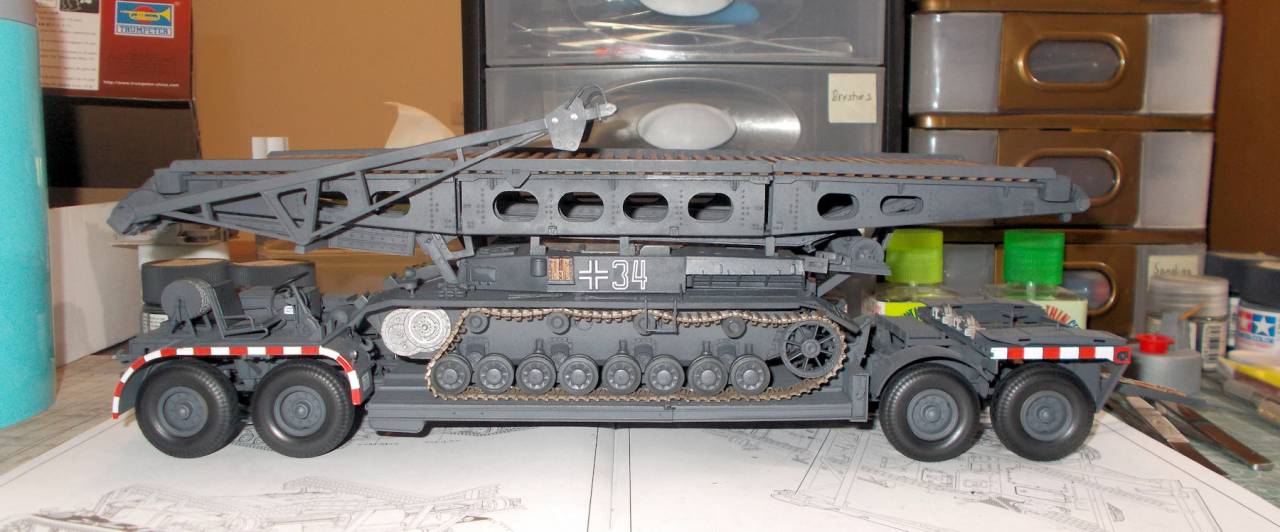
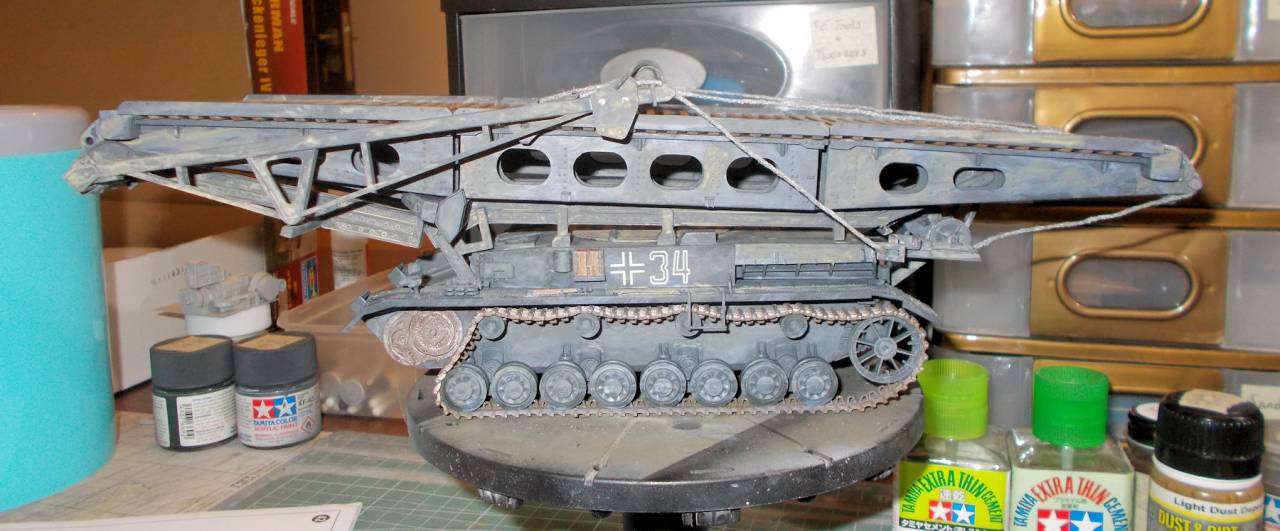
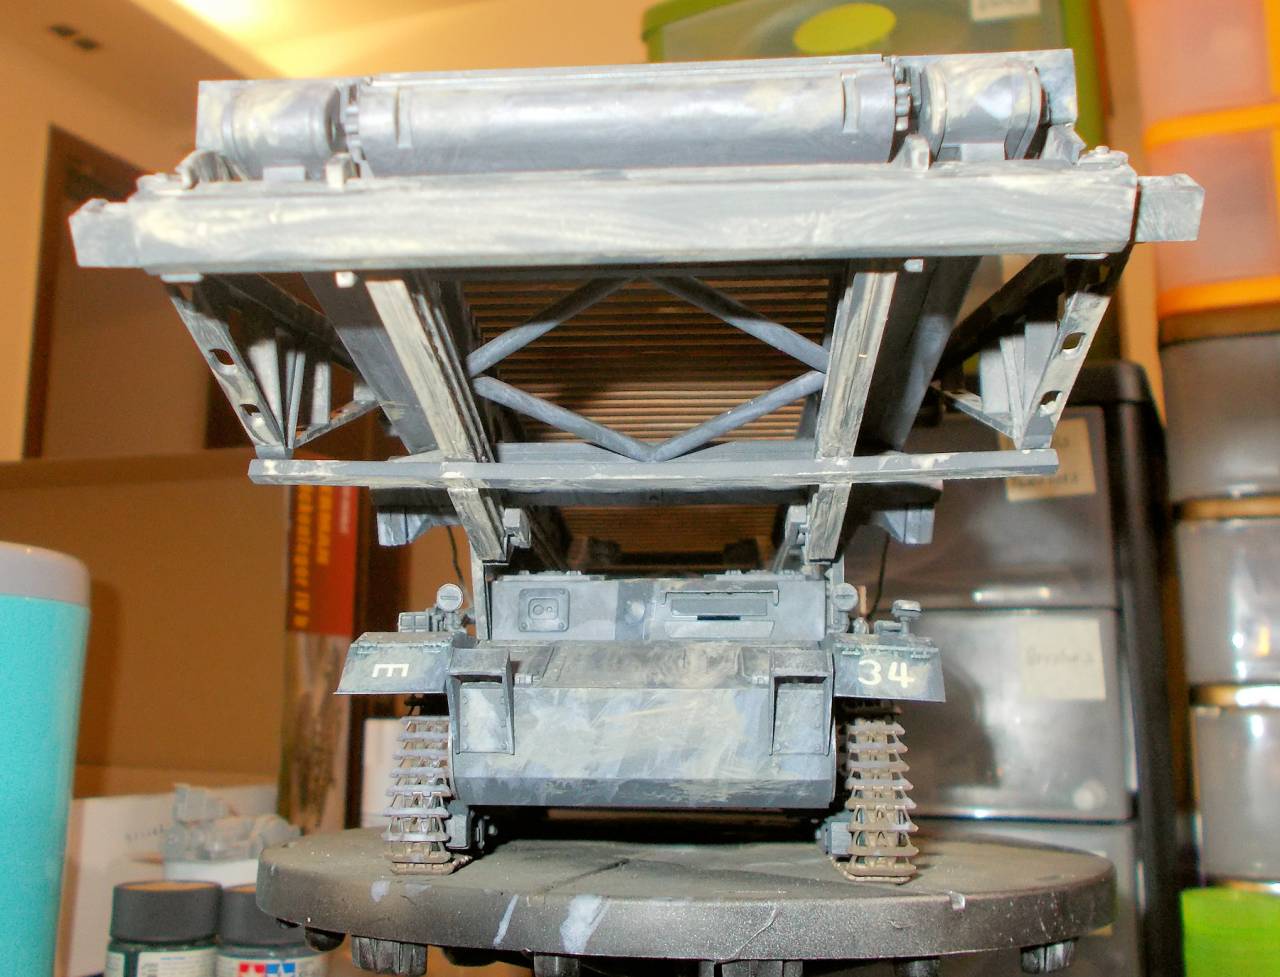
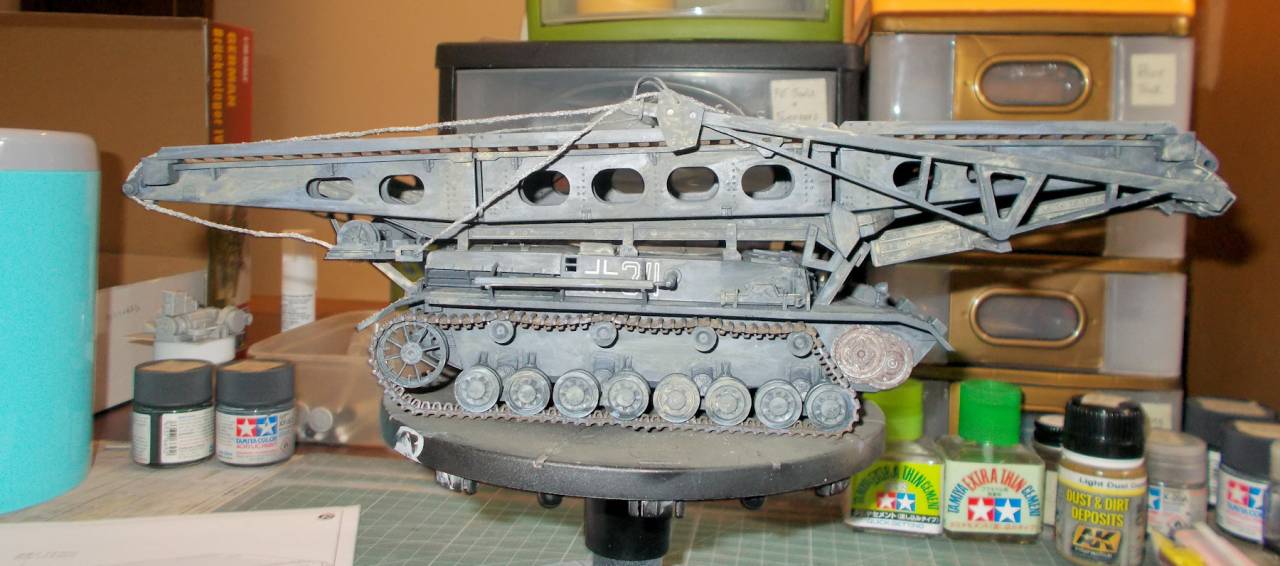
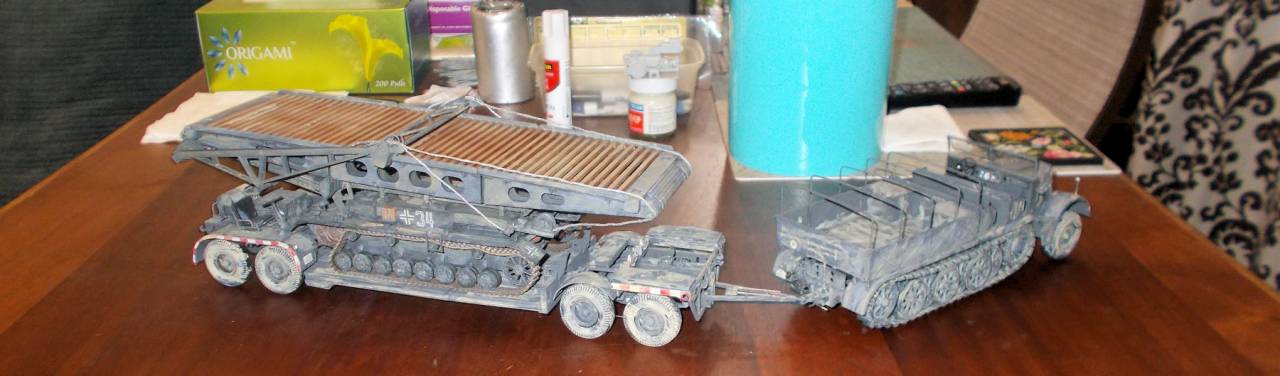
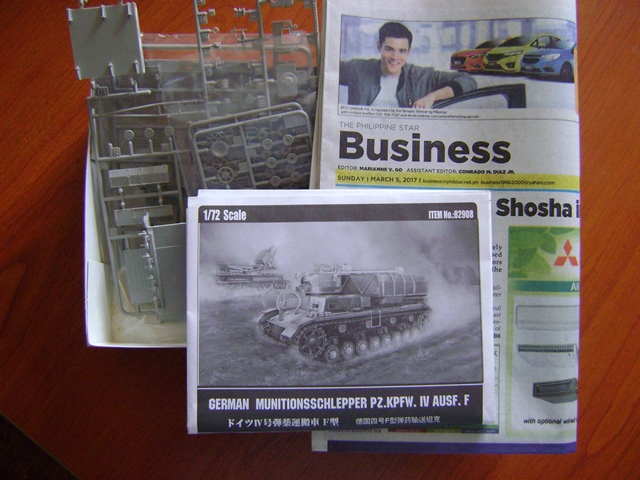
Well time to put some pics where the mouth is... so to speak. These were taken on the weekend but haven't had much time to upload.

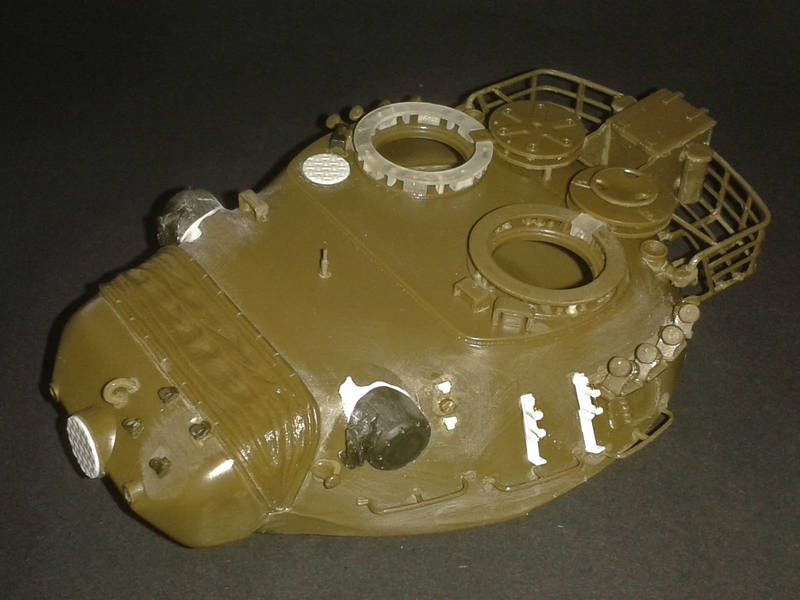
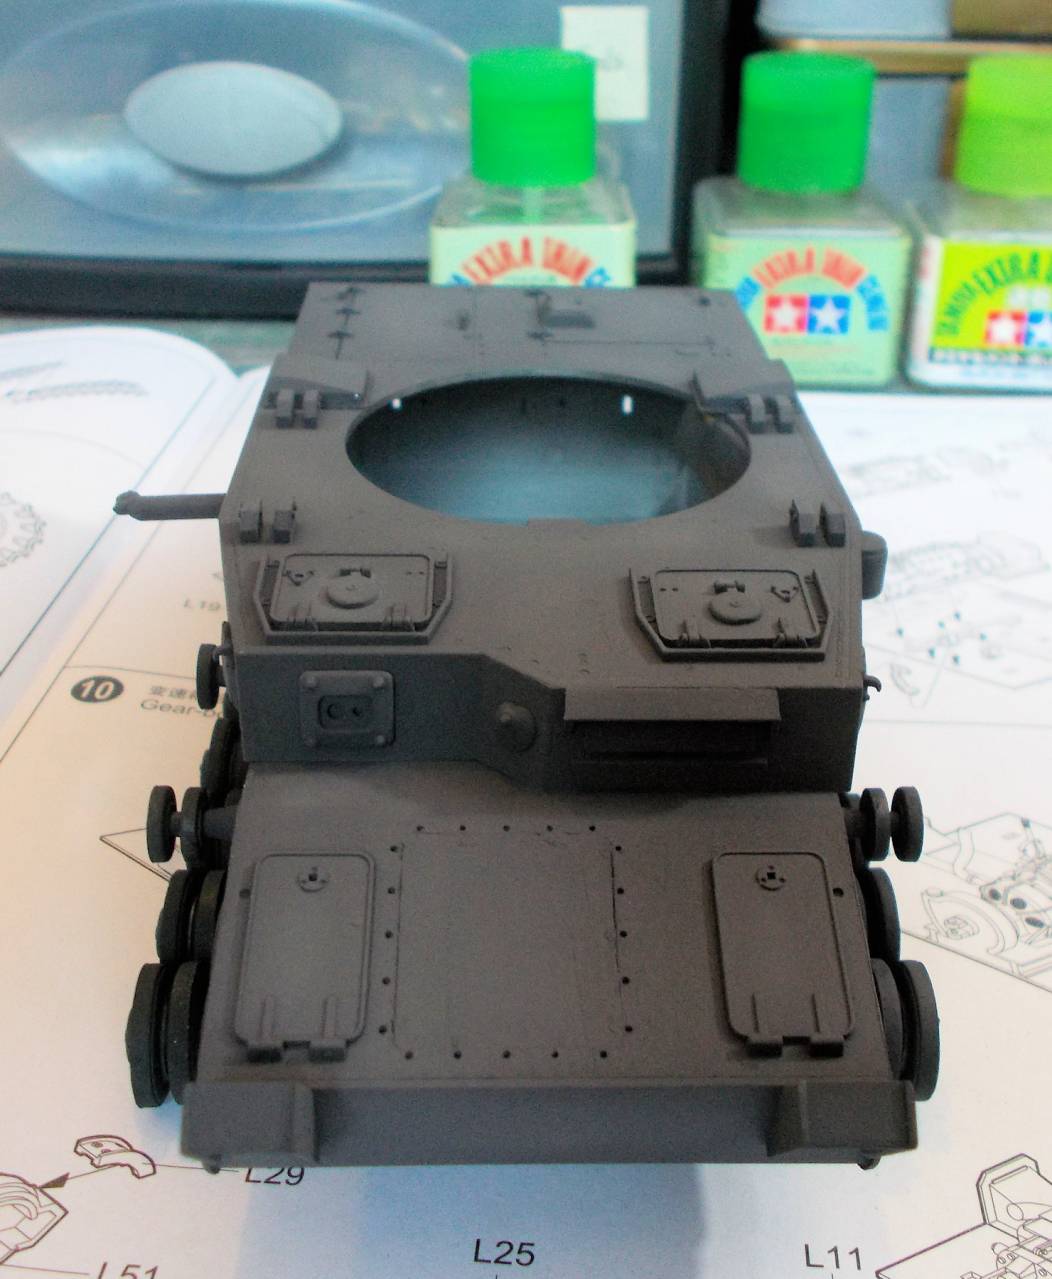
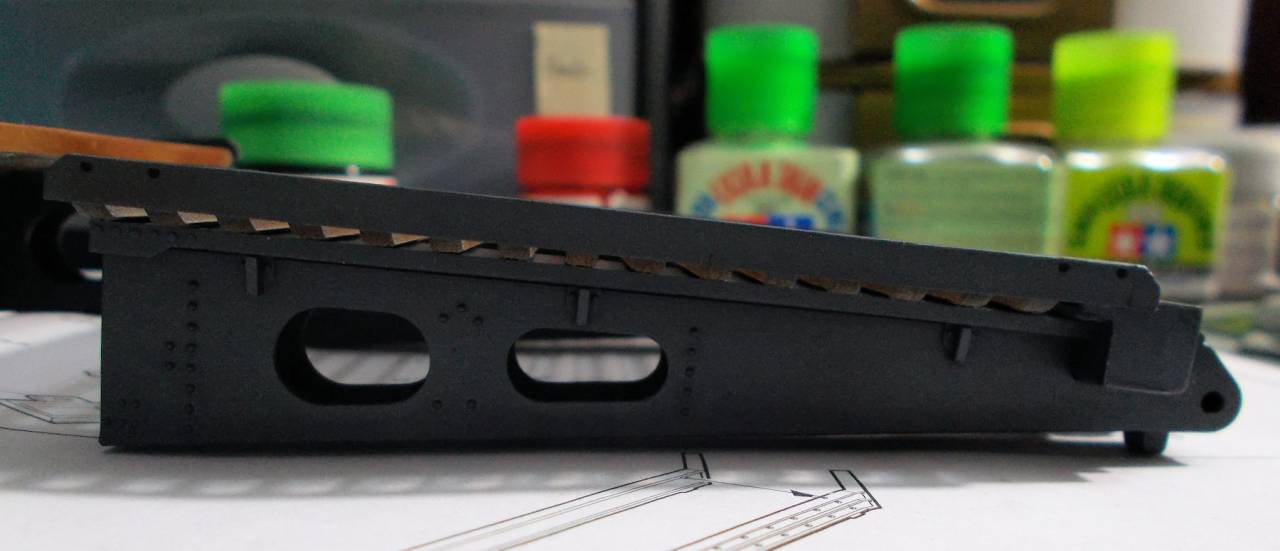
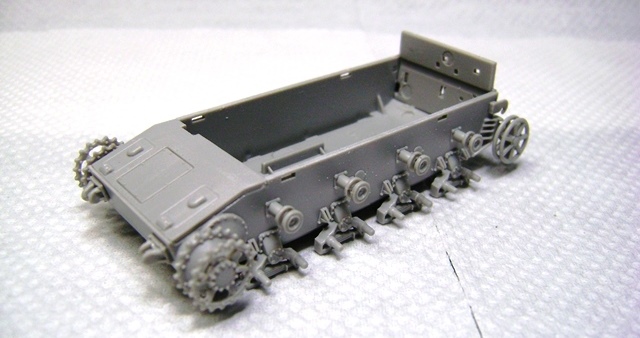
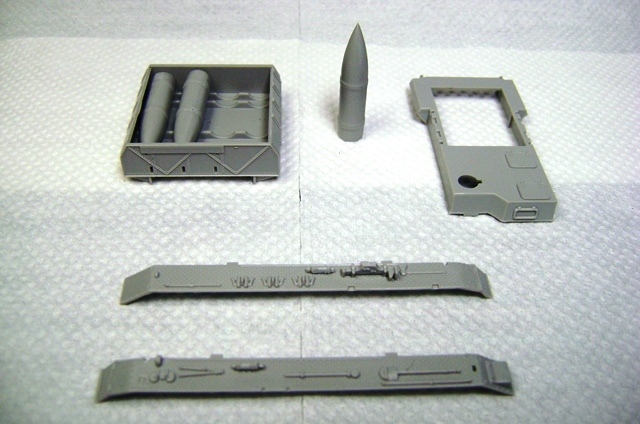
First up spent a while filling knock out marks on the inside of the ammo transport module.....then spent a day sanding them all down with a few touch ups. Had to be careful not to loose detail:

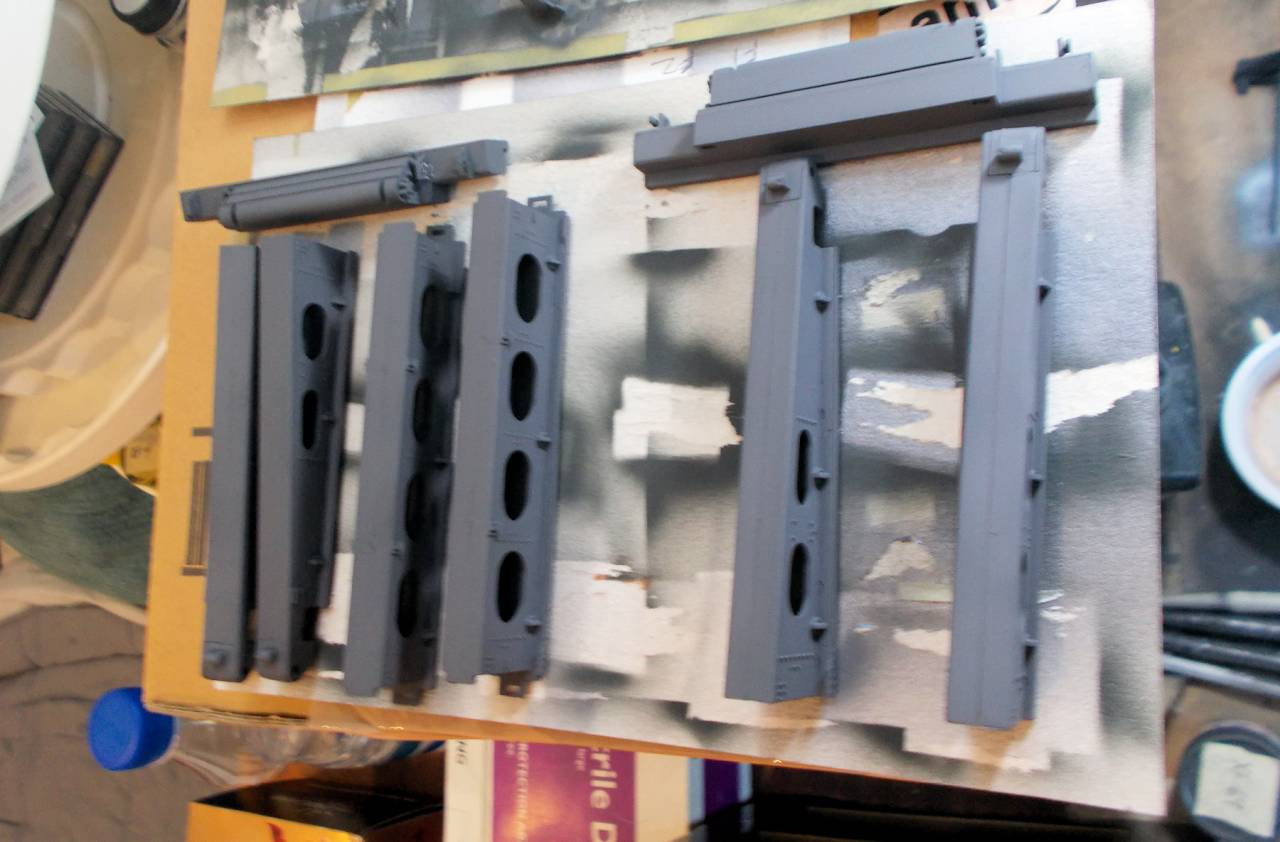
Ran out of putty and the LHS only had Tamiya Brand. It dries rock hard and takes a lot to remove.

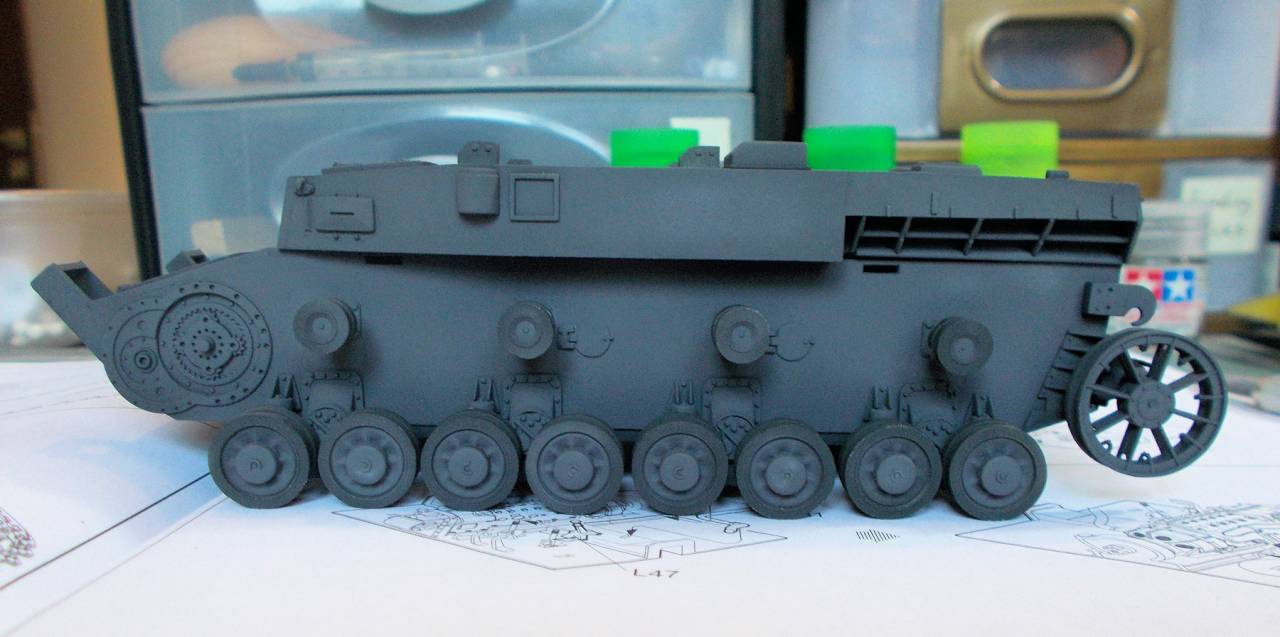
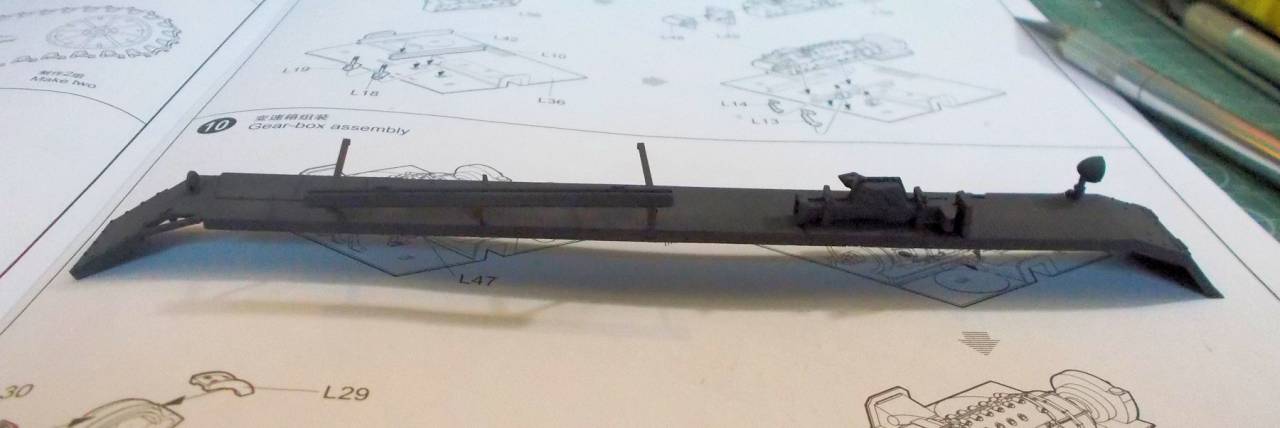
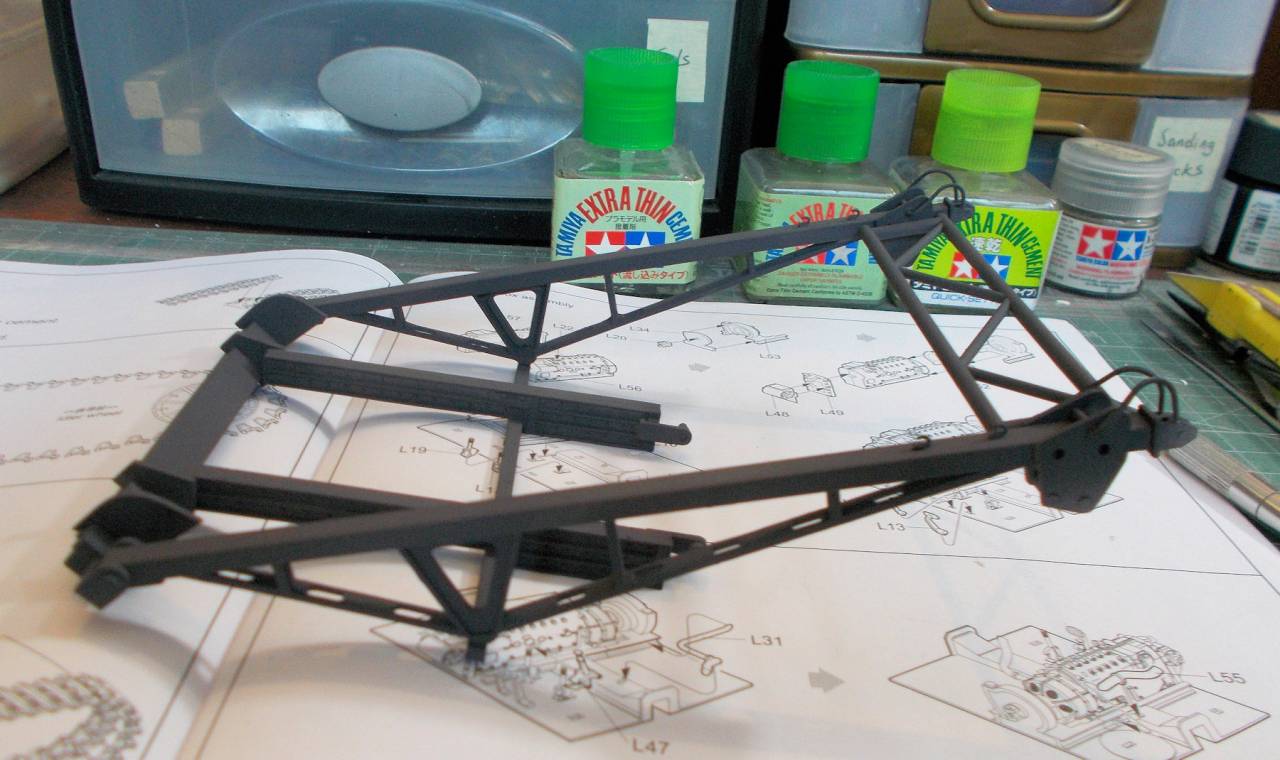
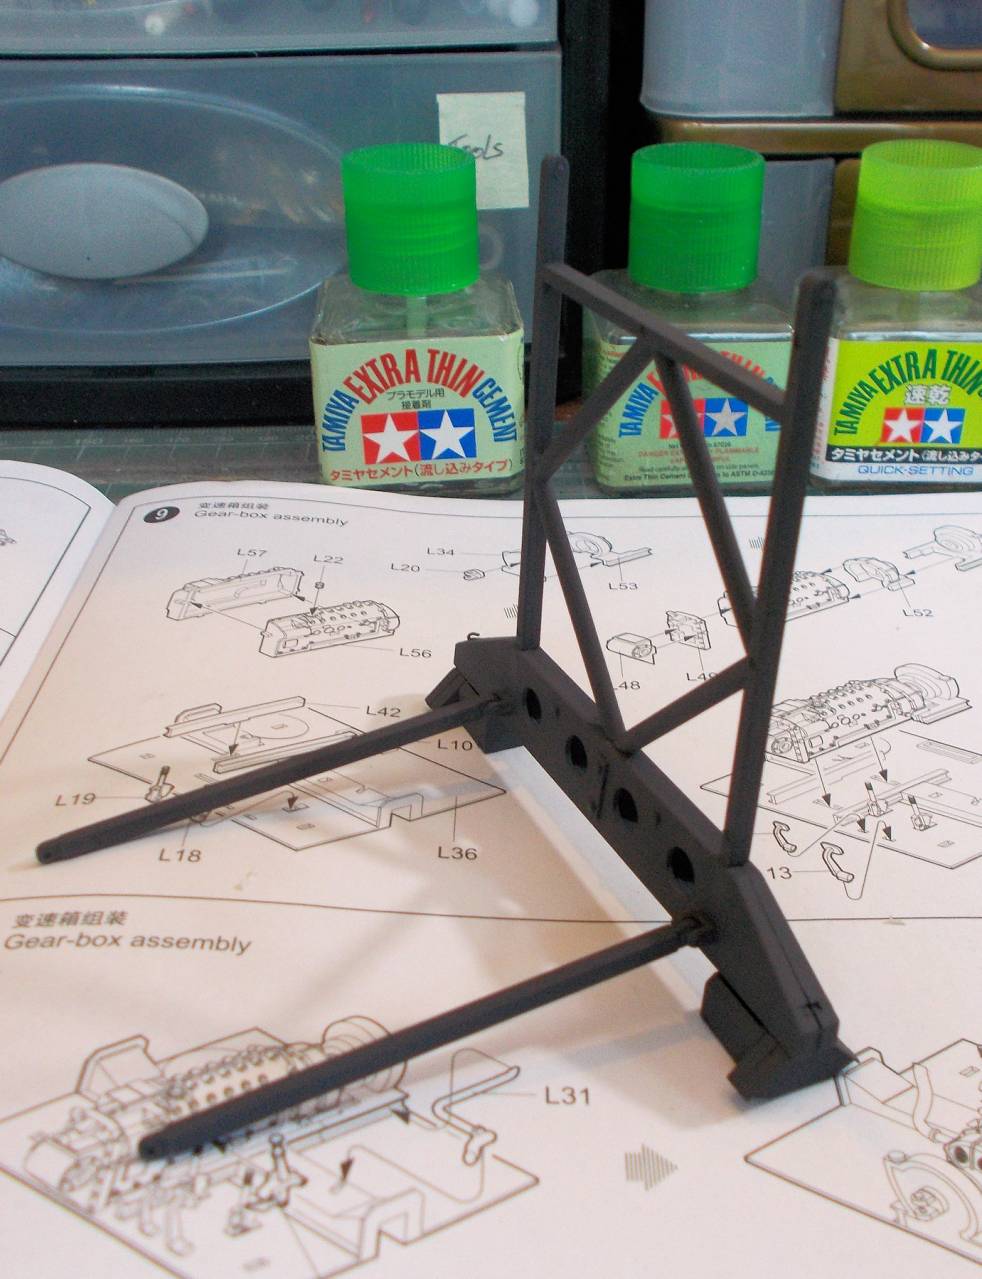
Also made some progress on the winch assembly. This needed a lot of trimming of flash and for parts to fit. Also some filler needed in places.


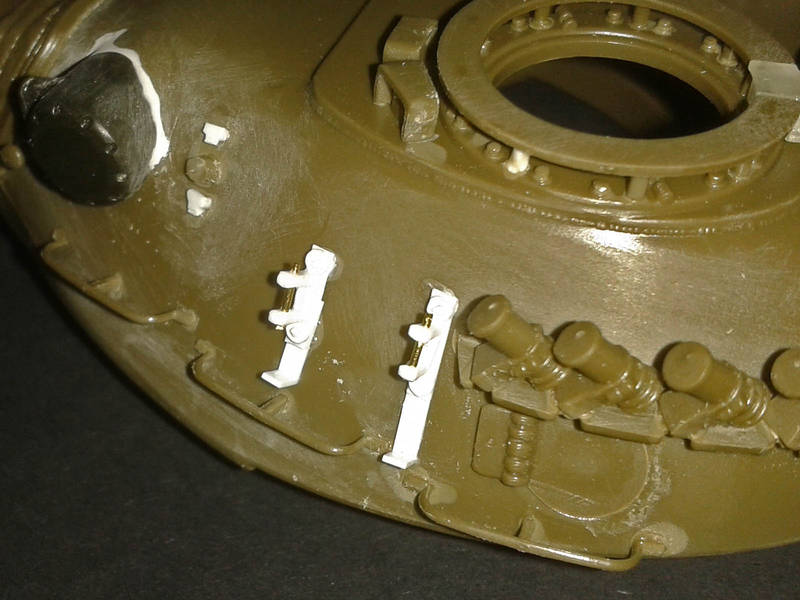
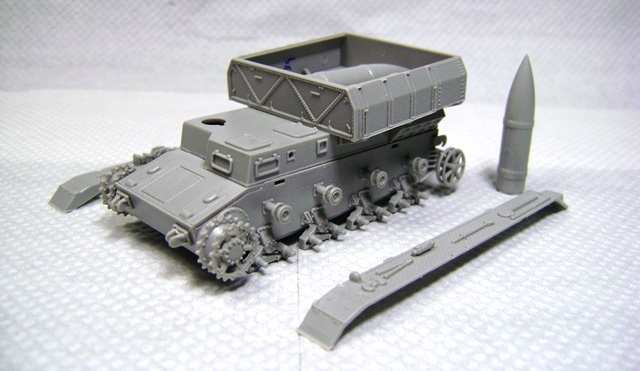
Also fitted the front tow mounts. These are from Dragon as the Trumpeter ones left a lot to be desired. The etch ones they provide are over sized and the styrene ones are in two halves split where the locking pin runs through the holes on the mounts. I was over looking at puttying gaps and sanding the components again by this stage.


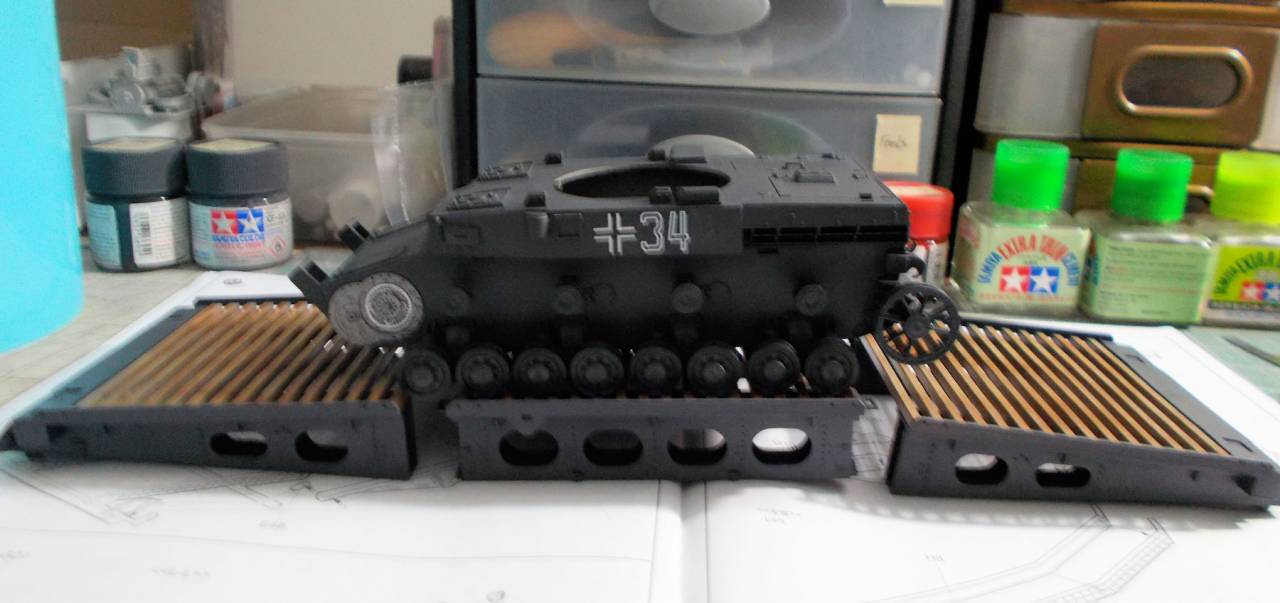
The image shows where the hull top has had some panels fitted too

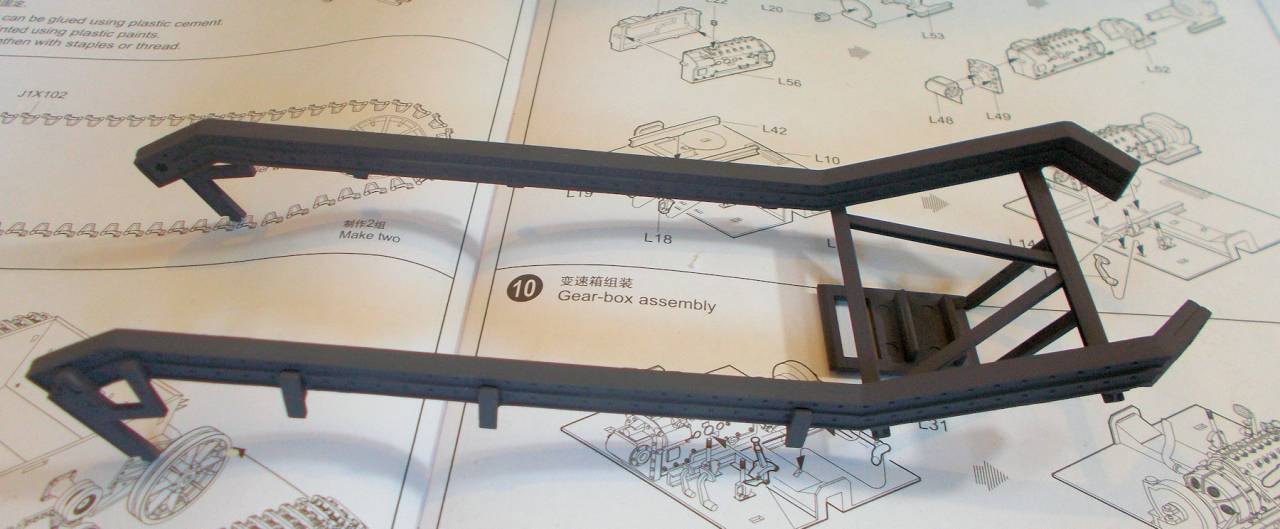
Brain went into neutral when I was fitting the bolts to the drive sprocket mounting. I fit them as per the instructions, forgetting all the bolts are for the Ausf E... the Ausf D did not have so many. Have to trim them off and relocate them.

Off on holiday for a few weeks on Saturday, so not much to show for a while. Happy building to everyone in the meantime and see you soon.
d111298pw
#456
Visit this Community
Oklahoma, United States
Joined: September 22, 2016
KitMaker: 654 posts
Armorama: 638 posts
Posted: Wednesday, March 01, 2017 - 07:06 PM UTC
I appreciate all the positive comments.

The bridge sections are now assembled. It's actually a very heavy piece. Using epoxy to join the sections is definitely the way to go.


I've been waiting for this to clear Indian customs for the last 10 days. Never used these before. So, I'll take my time putting them together.


petbat
Visit this Community
Queensland, Australia
Joined: August 06, 2005
KitMaker: 3,353 posts
Armorama: 3,121 posts
Posted: Thursday, March 02, 2017 - 02:08 AM UTC
Yes, Mark. Having built it I found out the hard way that epoxy is the only thing that holds the sections together.

Have fun with the Fruil. They are great tracks. Just make sure the holes for the wire go all the way through into the last section; sometimes they are blocked. I use a drill bit to test the depth and turn out any dags inside. Measure out the drill bit against the outside of the track piece, stopping just short of going all the way through. Wrap some tape around the end of the drill bit flush with the open track end, then when you push the drill bit in the tracks, you can see if you need to drill out or not and you know when it is deep enough.

I usually push the wire in the tracks then draw it back a smidgen (technical term) and snip off with cutters. Then you can push the wire all the way in without any wire hanging out the end. A drop of Cyano will hold the wire in place and seal the hole.

Looking forward to seeing progress when I get back home to Australia
KoSprueOne
Visit this Community
Myanmar
Joined: March 05, 2004
KitMaker: 4,011 posts
Armorama: 1,498 posts
Posted: Thursday, March 02, 2017 - 05:41 AM UTC
Yes! Very inspiring progress going on in here.

Good to know the requirement for epoxy for that model.


d111298pw
#456
Visit this Community
Oklahoma, United States
Joined: September 22, 2016
KitMaker: 654 posts
Armorama: 638 posts
Posted: Thursday, March 02, 2017 - 11:41 AM UTC
Peter, thanks for the recommendations regarding the tracks. Hope to have some time this weekend to begin work on them.
d111298pw
#456
Visit this Community
Oklahoma, United States
Joined: September 22, 2016
KitMaker: 654 posts
Armorama: 638 posts
Posted: Friday, March 03, 2017 - 10:13 PM UTC
Completed the left track. Putting them together just takes patience. I didn't have any real issues. Now to complete the right side track.

Test fit. Pretty similar to the picture

d111298pw
#456
Visit this Community
Oklahoma, United States
Joined: September 22, 2016
KitMaker: 654 posts
Armorama: 638 posts
Posted: Sunday, March 05, 2017 - 07:08 PM UTC
Finished the tracks over the weekend. They came out nicer than I expected.

Test fitting the structure. A few minor adjustments to make.


And, just to see what the final product will look like!

ClaytonFromEllijay
#454
Visit this Community
Georgia, United States
Joined: July 10, 2016
KitMaker: 1,273 posts
Armorama: 1,138 posts
Posted: Sunday, March 05, 2017 - 08:41 PM UTC
Wow, that is shaping out to be one very impressive display,Mark!
d111298pw
#456
Visit this Community
Oklahoma, United States
Joined: September 22, 2016
KitMaker: 654 posts
Armorama: 638 posts
Posted: Tuesday, March 07, 2017 - 08:15 PM UTC
She's finished. Not the easiest kit in the world. But, happy with the end result. Just need to weather the FAMO and trailer and then the two can be joined.


ClaytonFromEllijay
#454
Visit this Community
Georgia, United States
Joined: July 10, 2016
KitMaker: 1,273 posts
Armorama: 1,138 posts
Posted: Tuesday, March 07, 2017 - 09:04 PM UTC
Very nice work, Mark! Be sure to post a pic of the final display!
d111298pw
#456
Visit this Community
Oklahoma, United States
Joined: September 22, 2016
KitMaker: 654 posts
Armorama: 638 posts
Posted: Wednesday, March 08, 2017 - 07:57 PM UTC
Here is the final version with my "Truck and Trailer" campaign build.

This is what I was loosely following


Close enough for government work


ClaytonFromEllijay
#454
Visit this Community
Georgia, United States
Joined: July 10, 2016
KitMaker: 1,273 posts
Armorama: 1,138 posts
Posted: Wednesday, March 08, 2017 - 08:15 PM UTC
A great way to combine 2 campaigns, Mark!
tatbaqui
Staff MemberNews Writer
ARMORAMA
#040
Visit this Community
Metro Manila, Philippines
Joined: May 06, 2007
KitMaker: 2,713 posts
Armorama: 2,451 posts
Posted: Wednesday, March 15, 2017 - 07:09 PM UTC
Congratulations on your finish Mark.

Here's my entry:


As I have finished a Morser Karl for another campaign I thought of building its ammo carrier.


It's braille scale, so it builds quick. So far my issue has been the very tiny parts that somehow take a life of its own and just roll off my work table. Still lucky I guess as I've been able to recover all.


The road wheels are at the paint shop, so once done with I'd be able to put them on plus the tracks.

Cheers,

Tat
ClaytonFromEllijay
#454
Visit this Community
Georgia, United States
Joined: July 10, 2016
KitMaker: 1,273 posts
Armorama: 1,138 posts
Posted: Wednesday, March 15, 2017 - 07:20 PM UTC
Looking good (and tiny), Tat! I just don't have the eyes or fingers for 1/72, amazed that anyone can work that small!
tatbaqui
Staff MemberNews Writer
ARMORAMA
#040
Visit this Community
Metro Manila, Philippines
Joined: May 06, 2007
KitMaker: 2,713 posts
Armorama: 2,451 posts
Posted: Thursday, March 16, 2017 - 04:38 AM UTC
Thanks! I try to avoid 1/72 myself but there are just some in the stash that need to get the attention