Armor of the American Civil War
MichaelSatin
 Campaigns Administrator
Colorado, United States
Joined: January 19, 2008
KitMaker: 3,909 posts
Armorama: 510 posts
Posted: Friday, March 03, 2017 - 06:50 AM UTC
Excellent Alvaro!!
Michael

On the bench:
Sorta depends on your definition of "on the bench"...
Oklahoma, United States
Joined: September 30, 2015
KitMaker: 2,493 posts
Armorama: 2,344 posts
Posted: Friday, March 03, 2017 - 07:00 AM UTC
"Only the dead have seen the end of war." - Plato
Canelones, Uruguay
Joined: December 27, 2006
KitMaker: 773 posts
Armorama: 765 posts
Posted: Friday, March 03, 2017 - 05:45 PM UTC
Thanks Michael and Dustin.

Regards from the south
Álvaro

#454
Georgia, United States
Joined: July 10, 2016
KitMaker: 1,273 posts
Armorama: 1,138 posts
Posted: Friday, March 03, 2017 - 08:14 PM UTC
"I can make armored cars, safe and unassailable...and behind these our infantry will be able to follow quite unharmed and without any opposition."
-Leonardo da Vinci, 1487
Canelones, Uruguay
Joined: December 27, 2006
KitMaker: 773 posts
Armorama: 765 posts
Posted: Sunday, March 05, 2017 - 08:28 AM UTC
Thanks Clayton
Regards Álvaro
tatbaqui
News Writer #040
Metro Manila, Philippines
Joined: May 06, 2007
KitMaker: 2,713 posts
Armorama: 2,451 posts
Posted: Tuesday, March 07, 2017 - 02:16 PM UTC
Looks awesome Alvaro -- congrats on your finish!
Time to get started on mine:
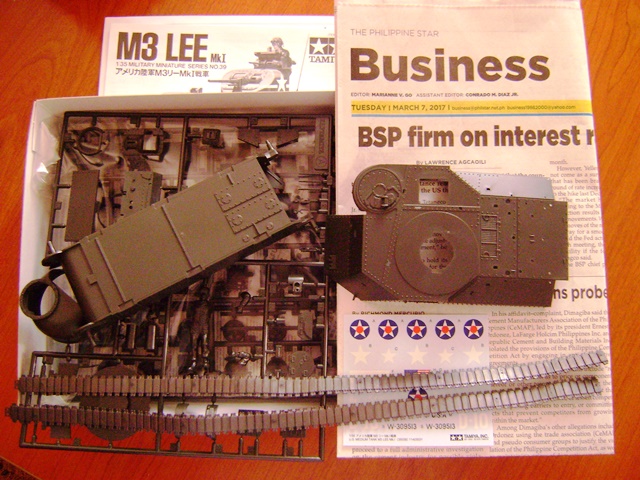
I've started by cutting and cleaning the road wheels. I just painted it and will assemble the suspension once dry. Here's where I am on the other sub-assemblies:
More to come.
Cheers,
Tat
Canelones, Uruguay
Joined: December 27, 2006
KitMaker: 773 posts
Armorama: 765 posts
Posted: Wednesday, March 08, 2017 - 06:33 PM UTC
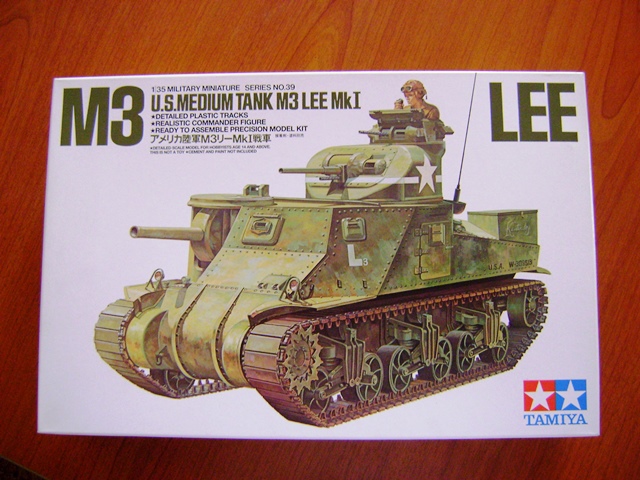
Thanks Tat, I will wait for the Lee!. Its a model kit that I want on my stash.
Regards from the south
Álvaro
tatbaqui
News Writer #040
Metro Manila, Philippines
Joined: May 06, 2007
KitMaker: 2,713 posts
Armorama: 2,451 posts
Posted: Thursday, March 09, 2017 - 03:02 AM UTC
Thanks Alvaro -- I don't have anything fancy planned for this, so hopefully I can do justice to this oldie.
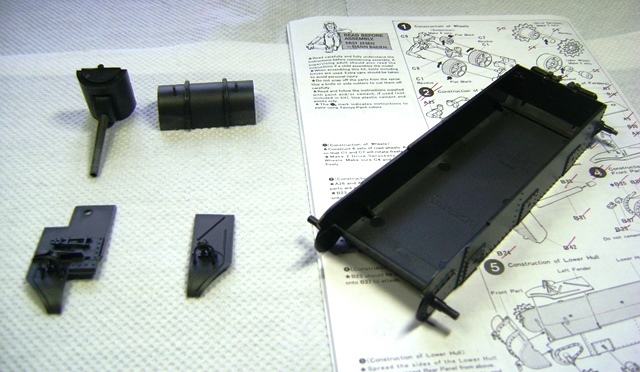
Here's progress from last night -- haven't glued them as one yet. One thing I can say is that Tamiya kits do build quick, stress-free as well

Some areas have gaps, nothing major that a filler can't handle.
Cheers,
Tat
tatbaqui
News Writer #040
Metro Manila, Philippines
Joined: May 06, 2007
KitMaker: 2,713 posts
Armorama: 2,451 posts
Posted: Wednesday, March 15, 2017 - 07:30 PM UTC
Hello,
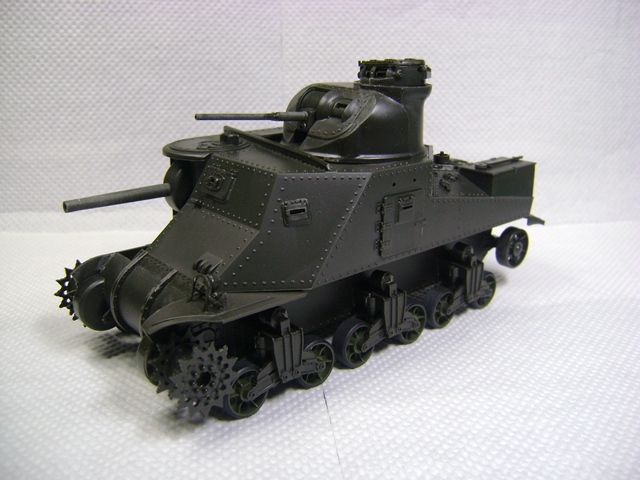
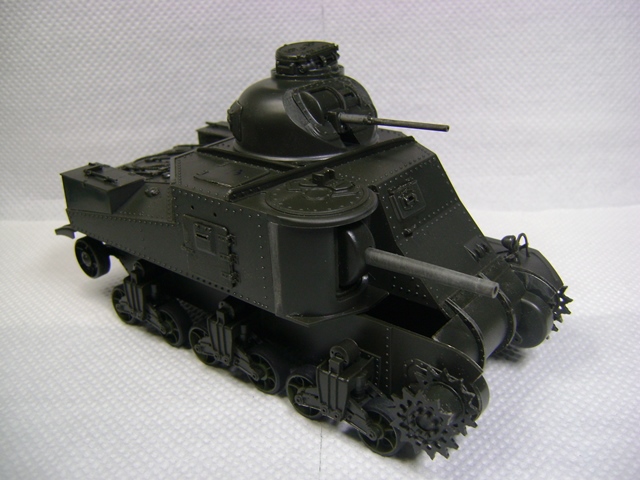
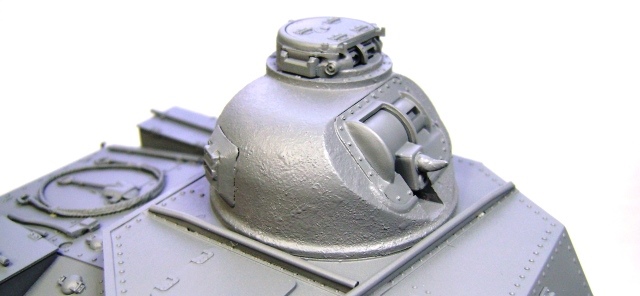
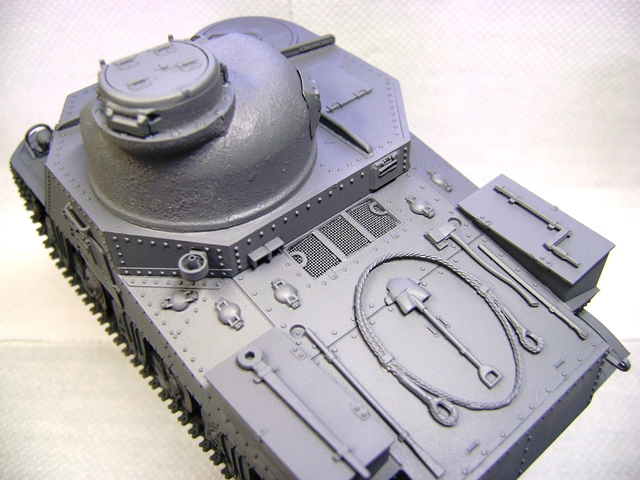
During the build I kept telling myself that I'd leave this as is:

But as I was preparing for painting, I thought why not try and do something about it. Here's the result:
Its not going to win any medals (either accuracy or looks) but I guess it would do
I've practiced on doing some texture using Mr. Surfacer 500:
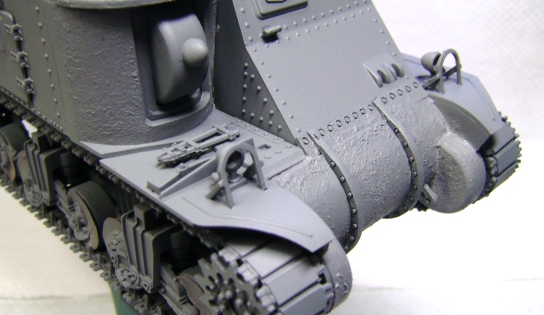
Primer done. Base coat next.
Cheers,
Tat
#454
Georgia, United States
Joined: July 10, 2016
KitMaker: 1,273 posts
Armorama: 1,138 posts
Posted: Wednesday, March 15, 2017 - 07:53 PM UTC
A nice improvement, Tat, it's the little things that add up!
"I can make armored cars, safe and unassailable...and behind these our infantry will be able to follow quite unharmed and without any opposition."
-Leonardo da Vinci, 1487
tatbaqui
News Writer #040
Metro Manila, Philippines
Joined: May 06, 2007
KitMaker: 2,713 posts
Armorama: 2,451 posts
Posted: Thursday, March 16, 2017 - 04:35 AM UTC
Thanks Clayton! The modification I actually wanted was not to have the stowage bins at the rear based on the photo of the tank I wanted to depict. Didn't push thru as I have no rivets to put in place. Just waiting for a warm sunny day then I'll do the base coat. Cheers, Tat
Warszawa, Poland
Joined: October 26, 2012
KitMaker: 65 posts
Armorama: 62 posts
Posted: Thursday, March 16, 2017 - 02:59 PM UTC
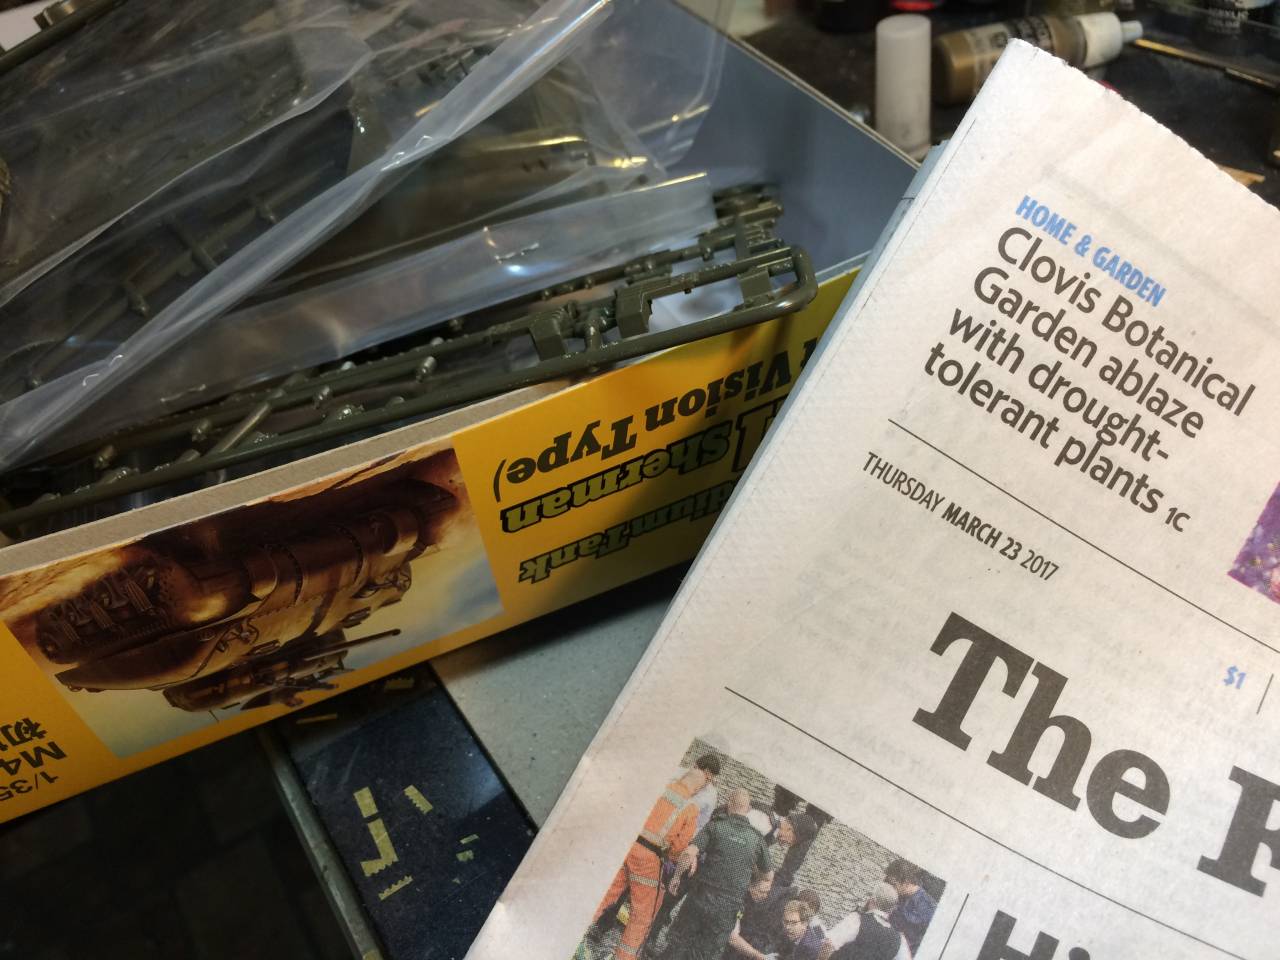
Due to misleading title I have omitted this campaign. But luckily I dropped by. I have so many Shermans in my stock that this is a perfect campaign for me. I would love to utilize one here. I'm going to start with these sets.


This will be the most annoying and boring part of the project. I hope I will finish the tracks till the end of the month. After that - the easiest part - the tank itself

tatbaqui
News Writer #040
Metro Manila, Philippines
Joined: May 06, 2007
KitMaker: 2,713 posts
Armorama: 2,451 posts
Posted: Saturday, March 18, 2017 - 07:05 AM UTC
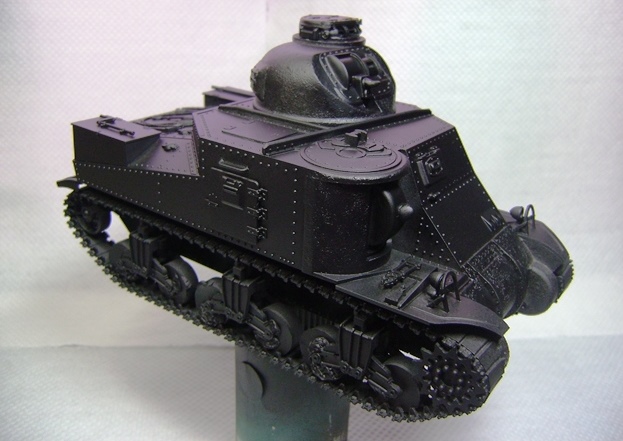
Hello,
I've worked on the base coat during the last couple of days. As I am not too excited cleaning the AB, I'd use a rattle can at every opportunity possible.
After the primer I've sprayed on some plain yellow I got from the DIY store. After that followed the rattle can Tamiya Olive Drab II. The lighting is not that good, but it somehow approximates the shade on the box art.

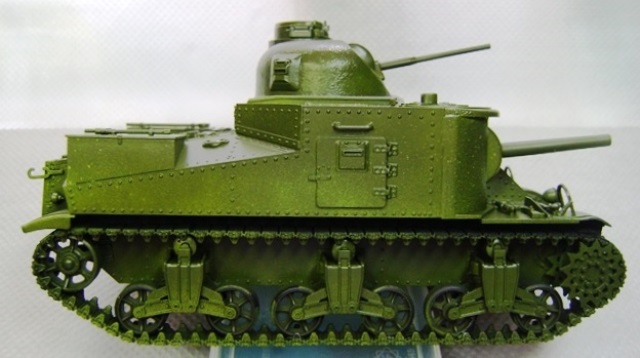
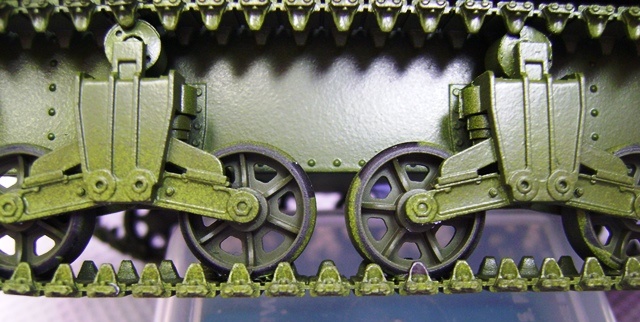
Looks like my wheel paper masks didn't do its magic this time.
Will do the re-touches and work on the tracks next.
Cheers,
Tat
Canelones, Uruguay
Joined: December 27, 2006
KitMaker: 773 posts
Armorama: 765 posts
Posted: Saturday, March 18, 2017 - 08:04 AM UTC
Hi Tat, nice progress on this one. Congrats.
Álvaro
tatbaqui
News Writer #040
Metro Manila, Philippines
Joined: May 06, 2007
KitMaker: 2,713 posts
Armorama: 2,451 posts
Posted: Sunday, March 19, 2017 - 03:24 AM UTC
Thanks Alvaro!

MichaelSatin
Campaigns Administrator Colorado, United States
Joined: January 19, 2008
KitMaker: 3,909 posts
Armorama: 510 posts
Posted: Sunday, March 19, 2017 - 06:49 PM UTC
Tat,
Nice job on a rough kit!
I'm finally showing some progress on the Tamiya M51:

Tracks next!
Michael
On the bench:
Sorta depends on your definition of "on the bench"...
Warszawa, Poland
Joined: October 26, 2012
KitMaker: 65 posts
Armorama: 62 posts
Posted: Friday, March 24, 2017 - 08:21 PM UTC
A week later and a small progress with the tracks. Assembling of those tracks is a real nightmare - there is a lot of small parts that fit very tight and the risk of gluing it all together is extremely high. But I'm not giving up.

And here is the tank.

Late M4A1 form Tasca
E9 spacers from shapewaves
PE set from Aber
and AK's decals

This is the particular tank that I'm going to build - a Chilean M4A1E9 from Regimento de Caballeros Blindados Nro 5 "Lanceros"

Am I right, that the tank on the upper photo has a late sharp-nose differential cover?
The only difference is that I will put duckbills on both sides of tracks. Like on this little fellow

New Jersey, United States
Joined: December 08, 2003
KitMaker: 2,864 posts
Armorama: 2,497 posts
Posted: Friday, March 24, 2017 - 08:30 PM UTC
Quoted Text
And here is the tank.
Late M4A1 form Tasca
E9 spacers from shapewaves
PE set from Aber
and AK's decals
This is the particular tank that I'm going to build - a Chilean M4A1E9 from Regimento de Caballeros Blindados Nro 5 "Lanceros"
Am I right, that the tank on the upper photo has a late sharp-nose differential cover?
Yes. It's a late production M4A1. Looks like factory applique armor with the post-war E9, vision cupola and turret mounted spare track.
And damn it's dusty in that last picture. But then that's what tanking is all about.
"The only thing a man should take seriously is the fact that nothing should be taken seriously."
Samuel Butler, Victorian satirist
Steve Willoughby
#155
California, United States
Joined: May 05, 2002
KitMaker: 774 posts
Armorama: 605 posts
Posted: Sunday, March 26, 2017 - 04:03 AM UTC
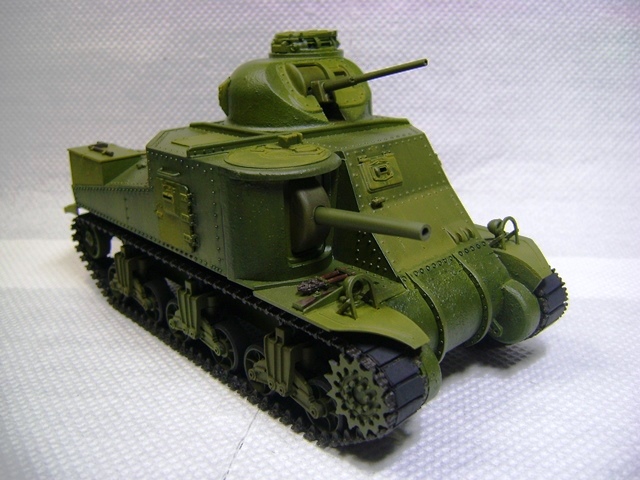
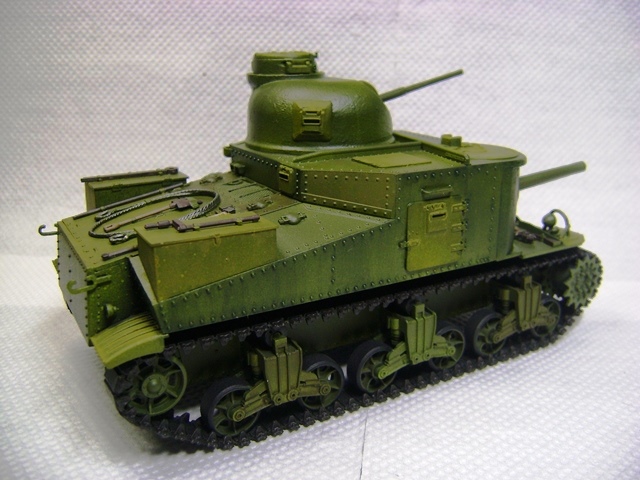
Here is my entry, Tasca kit of the M4A1 direct vision kit. I will be building the tank "Dixie Belle" straight out of the box with Tasca decals. Not planning to add any aftermarket goodies on this one. It will be part of a small Tunisian diorama. Hopefully, I can end up with something half as good as what we have going so far on the campaign.
Cheers,
Rick
Warszawa, Poland
Joined: October 26, 2012
KitMaker: 65 posts
Armorama: 62 posts
Posted: Saturday, April 01, 2017 - 09:37 PM UTC
TimReynaga
Associate Editor California, United States
Joined: May 03, 2006
KitMaker: 2,500 posts
Armorama: 297 posts
Posted: Friday, April 07, 2017 - 02:22 AM UTC
I'm in with a General Stuart light tank...


A tiny tank in tiny 1/100 scale!
#513
Alabama, United States
Joined: March 28, 2006
KitMaker: 554 posts
Armorama: 172 posts
Posted: Friday, April 07, 2017 - 03:21 AM UTC
All,
Lots of great projects going on. I'm really liking what I'm seeing.
Tim,
I'm looking forward to seeing what you can do with that tiny Stuart. I've seen some of your work on microscale ships so I think this will be a treat.
My Bougainville Stuart is still on the beach, (bench that is). 1/1 scale stuff has been imposing on my time of late.
Keep it up folks!
John
TimReynaga
Associate Editor California, United States
Joined: May 03, 2006
KitMaker: 2,500 posts
Armorama: 297 posts
Posted: Friday, April 07, 2017 - 09:33 PM UTC
Quoted Text
Tim,
I'm looking forward to seeing what you can do with that tiny Stuart. I've seen some of your work on microscale ships so I think this will be a treat.
My Bougainville Stuart is still on the beach, (bench that is). 1/1 scale stuff has been imposing on my time of late.
...
John
Hi John,
I know what you mean about those 1/1 scale commitments - I look forward to your Stuart when you get back at it!
My own will be a very basic, out of the box relaxation build. This Flames of War M3A1 Stuart comes as mostly complete resin castings (hull & turret) with a few metal detail parts. Two of these are the turret hatches.

Although simple flat parts, the metal hatches fit poorly on the resin turret. The commanders hatch will be open, so no problem there, but I had to adjust the other one with miniscule plastic shims to achieve a proper fit.
Other than that, cleanup and assembly of the various parts of the Stuart has been straightforward... although I did manage to decapitate the figure as I was installing him in the turrret! After drilling holes in the head and body and adding a brass wire, I reattached the head.

So the tank commander is back in business - and with this new spine the head can now even be turned!

tatbaqui
News Writer #040
Metro Manila, Philippines
Joined: May 06, 2007
KitMaker: 2,713 posts
Armorama: 2,451 posts
Posted: Monday, April 10, 2017 - 04:47 PM UTC
Thanks for your comments Michael. Your Super Sherman is surely coming out nice.
Tim, a Stuart at 1/100? Amazing!
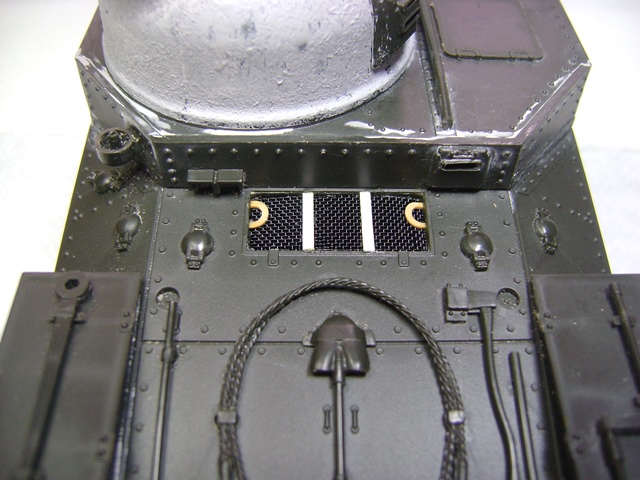
Today I've painted the tools:
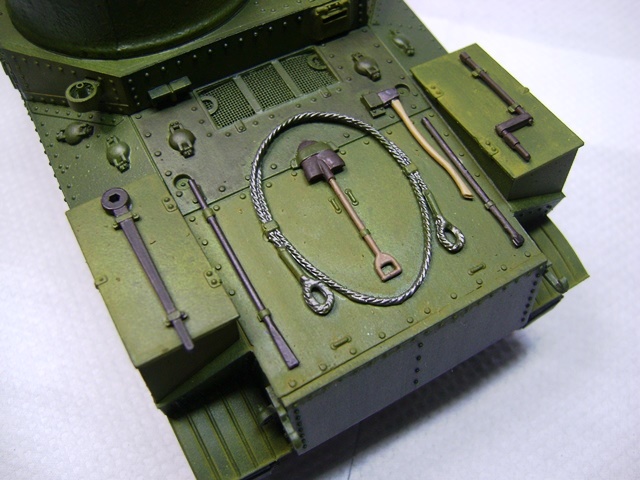
Played with various shades of the base color:
Gloss coat next and decals.
Cheers,
Tat
TimReynaga
Associate Editor California, United States
Joined: May 03, 2006
KitMaker: 2,500 posts
Armorama: 297 posts
Posted: Wednesday, April 12, 2017 - 08:48 AM UTC
Nice looking Lee, Tat. I'll be painting my little Stuart in a similar scheme.
Heres my Flames of War 1/100 scale M3A1 Stuart assembled, primed, and ready for paint.

A sweet little kit, the only changes I made were adding shims to improve the hatch fit and hollowing out the ends of the 37mm and MG barrels.


