

Very nice brake boost module. Do not know how you formed that???
That is a uniquely shaped differential. Cannot begin to imagine the gear layout inside that housing.
Hosted by Darren Baker
Conversions and Scratch Builds

165thspc

#521

Joined: April 13, 2011
KitMaker: 9,465 posts
Armorama: 8,695 posts
Posted: Saturday, February 17, 2018 - 12:21 AM UTC


ayovtshev

#490

Joined: September 22, 2016
KitMaker: 1,432 posts
Armorama: 1,390 posts

Posted: Saturday, February 17, 2018 - 11:54 AM UTC
My "drawing" for the brake booster:

From left to right
0,5 mm sheet circle*5 mm
2 mm long 4.8 mm tube
0.3 mm sheet circle*6 mm
1,5 mm long 3 mm rod, filed to conical shape, grooves were made using triangular diamond file
3,5 mm long 1.5 mm rod
Liberal amount of Mr.Surfacer 500 to form the "dome".

From left to right
0,5 mm sheet circle*5 mm
2 mm long 4.8 mm tube
0.3 mm sheet circle*6 mm
1,5 mm long 3 mm rod, filed to conical shape, grooves were made using triangular diamond file
3,5 mm long 1.5 mm rod
Liberal amount of Mr.Surfacer 500 to form the "dome".
165thspc
#521
Joined: April 13, 2011
KitMaker: 9,465 posts
Armorama: 8,695 posts
Posted: Saturday, February 17, 2018 - 05:21 PM UTC
The cone shaped piece with the grooves was the question mark in my mind.
ayovtshev
#490
Joined: September 22, 2016
KitMaker: 1,432 posts
Armorama: 1,390 posts
Posted: Sunday, February 18, 2018 - 09:53 PM UTC
Seilwinde(winch) ready:


Test fit:

165thspc
#521
Joined: April 13, 2011
KitMaker: 9,465 posts
Armorama: 8,695 posts
Posted: Sunday, February 18, 2018 - 10:46 PM UTC
Angel, Is the electric winch an addition to the Hanomag?
ayovtshev
#490
Joined: September 22, 2016
KitMaker: 1,432 posts
Armorama: 1,390 posts
Posted: Sunday, February 18, 2018 - 11:58 PM UTC
Yes, Mike.
ayovtshev
#490
Joined: September 22, 2016
KitMaker: 1,432 posts
Armorama: 1,390 posts
Posted: Thursday, February 22, 2018 - 12:38 PM UTC
Hanomag SS100 finished

With 2,0 cm Flakvierling 38(Campaign 150+) in tow

With 2,0 cm Flakvierling 38(Campaign 150+) in tow
petbat

Joined: August 06, 2005
KitMaker: 3,353 posts
Armorama: 3,121 posts
Posted: Thursday, February 22, 2018 - 12:58 PM UTC
Sensational work as always Angel. I love this thread.... long time lurker, first time poster.... 

ayovtshev
#490
Joined: September 22, 2016
KitMaker: 1,432 posts
Armorama: 1,390 posts
Posted: Thursday, February 22, 2018 - 02:41 PM UTC
Thanks Peter!
ayovtshev
#490
Joined: September 22, 2016
KitMaker: 1,432 posts
Armorama: 1,390 posts
Posted: Saturday, February 24, 2018 - 09:30 PM UTC
Few more details added:
-Drain plugs,
-Drain cocks
-Supports

A big Thank you goes to Mike for pointing what I omitted!

-Drain plugs,
-Drain cocks
-Supports
A big Thank you goes to Mike for pointing what I omitted!

Stickframe
#362
Joined: December 01, 2013
KitMaker: 1,661 posts
Armorama: 1,202 posts

Posted: Sunday, February 25, 2018 - 02:05 AM UTC
Hi Angel -
Very nice work indeed - really a treat to see!
Cheers
Nick
Very nice work indeed - really a treat to see!
Cheers
Nick
165thspc
#521
Joined: April 13, 2011
KitMaker: 9,465 posts
Armorama: 8,695 posts
Posted: Sunday, February 25, 2018 - 06:30 AM UTC
Ditto
Mike
Mike
ayovtshev
#490
Joined: September 22, 2016
KitMaker: 1,432 posts
Armorama: 1,390 posts
Posted: Wednesday, February 28, 2018 - 06:27 PM UTC
Thanks Nick,Mike!
I'm warming up for the Scratch Builder Campaign
My new subject is Ford V3000 S/SSM Maultier(ICM).
I'm converting it into Bulgarian WWII vehicle:

Detailing the engine:

Engine compartment,

Bonnet/hood:

Suspension:

Mid-production fenders(will need putty there):

I plan to build later this year another Ford Maultier, but with Einheitsfahrerhaus.
Such vehicles were also delivered in 1943-1944 to Bulgarian Royal Army.
I'm warming up for the Scratch Builder Campaign
My new subject is Ford V3000 S/SSM Maultier(ICM).
I'm converting it into Bulgarian WWII vehicle:
Detailing the engine:
Engine compartment,
Bonnet/hood:
Suspension:
Mid-production fenders(will need putty there):
I plan to build later this year another Ford Maultier, but with Einheitsfahrerhaus.
Such vehicles were also delivered in 1943-1944 to Bulgarian Royal Army.
165thspc
#521
Joined: April 13, 2011
KitMaker: 9,465 posts
Armorama: 8,695 posts
Posted: Wednesday, February 28, 2018 - 08:29 PM UTC
All your additions make the engine look nicely snug in there. Very nice.
Your scratch built fenders made me think. Why don't the tool manufactures offer us a small scale English Wheel to help form such things? I wonder if that would be practical at this small size?
Your scratch built fenders made me think. Why don't the tool manufactures offer us a small scale English Wheel to help form such things? I wonder if that would be practical at this small size?
petbat
Joined: August 06, 2005
KitMaker: 3,353 posts
Armorama: 3,121 posts
Posted: Thursday, March 01, 2018 - 01:56 AM UTC
Great work there Angel. The engine bay is excellent. I love the oil can in the bracket. Nice attention to detail.
ayovtshev
#490
Joined: September 22, 2016
KitMaker: 1,432 posts
Armorama: 1,390 posts
Posted: Saturday, March 03, 2018 - 09:46 PM UTC
Thanks Mike,Peter!
I've done a bit more work on the Maultier:

I'm still in test-fitting phase.
I've done a bit more work on the Maultier:
I'm still in test-fitting phase.
Petro
Joined: November 02, 2003
KitMaker: 984 posts
Armorama: 846 posts
Posted: Saturday, March 03, 2018 - 11:09 PM UTC
This thread is just amazing. The amount of talent in this thread alone speaks volumes.

Stickframe
#362
Joined: December 01, 2013
KitMaker: 1,661 posts
Armorama: 1,202 posts
Posted: Tuesday, March 06, 2018 - 01:25 AM UTC
You know...with all these great images of trucks...and lots of great scratch work too....I have a few WIP pics to show.
This was going to be my first Scratch campaign project...not anymore - but, it has inspired the second to be built for the campaign. This version is not military or armor - but, is quite powerful nonetheless - an off road race truck, which is typically in the 700 to 800 hp range and nearly unstoppable.
This model began life as a nice Revell Chevy truck. First step, cut the cab down:
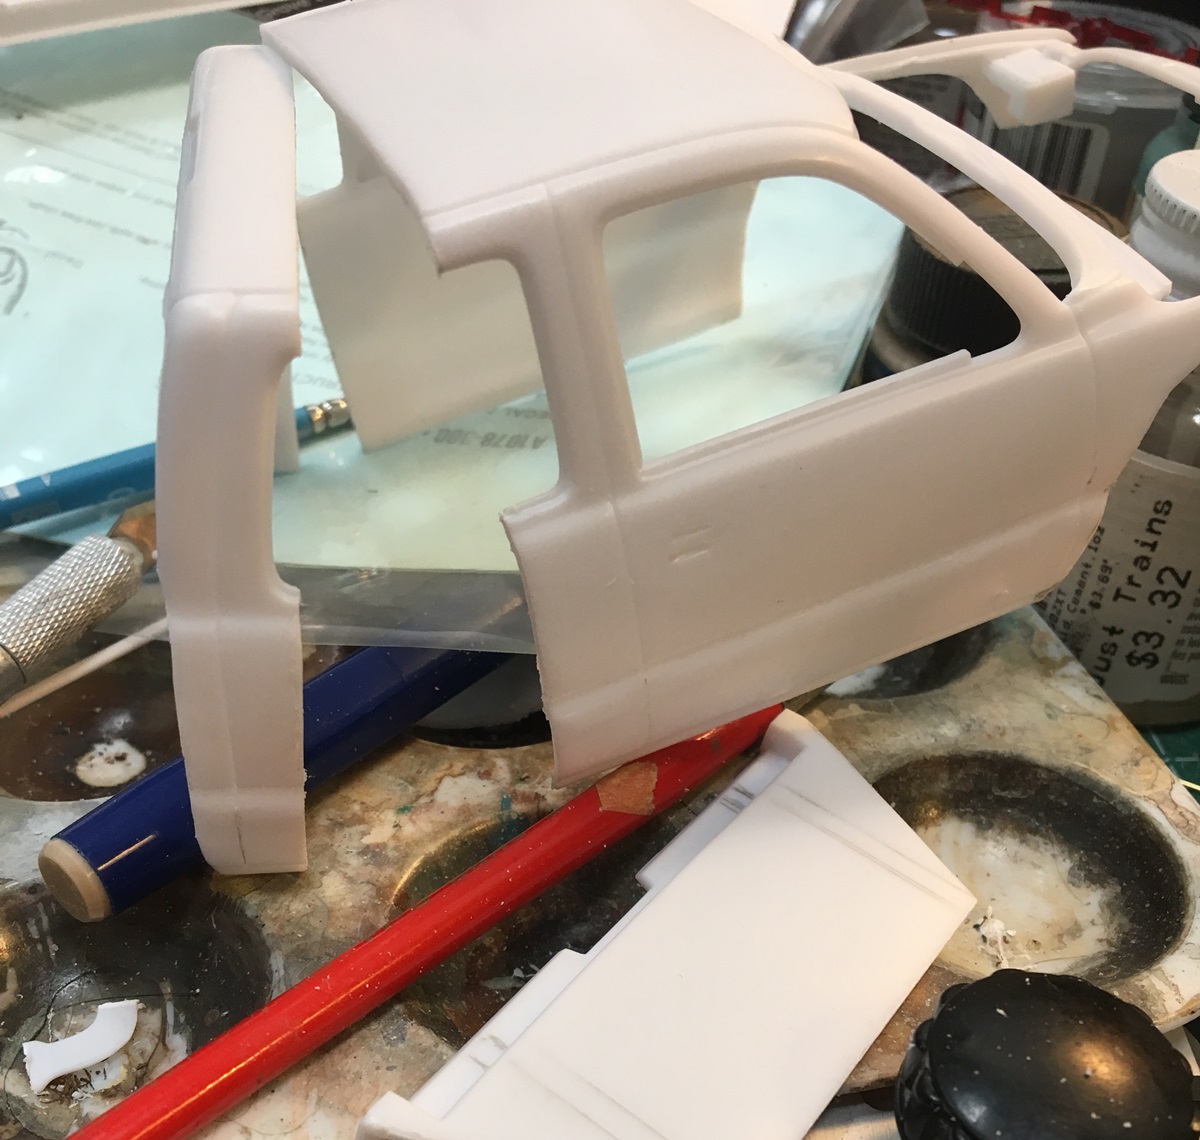
then, enlarge the fender openings:
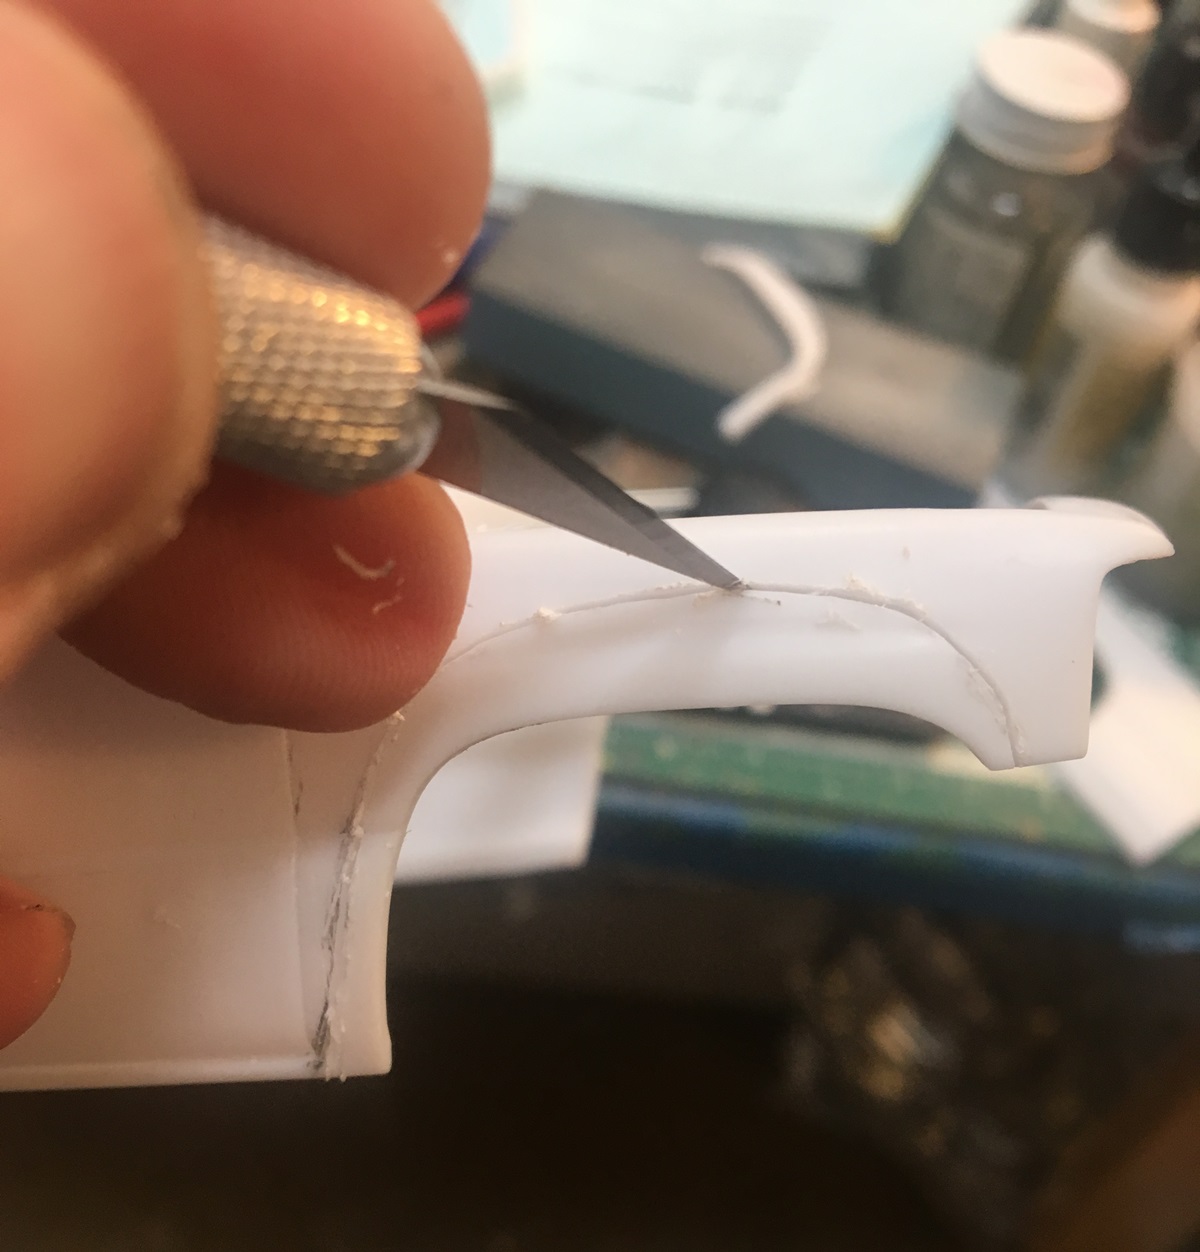
add and subtract more styrene:
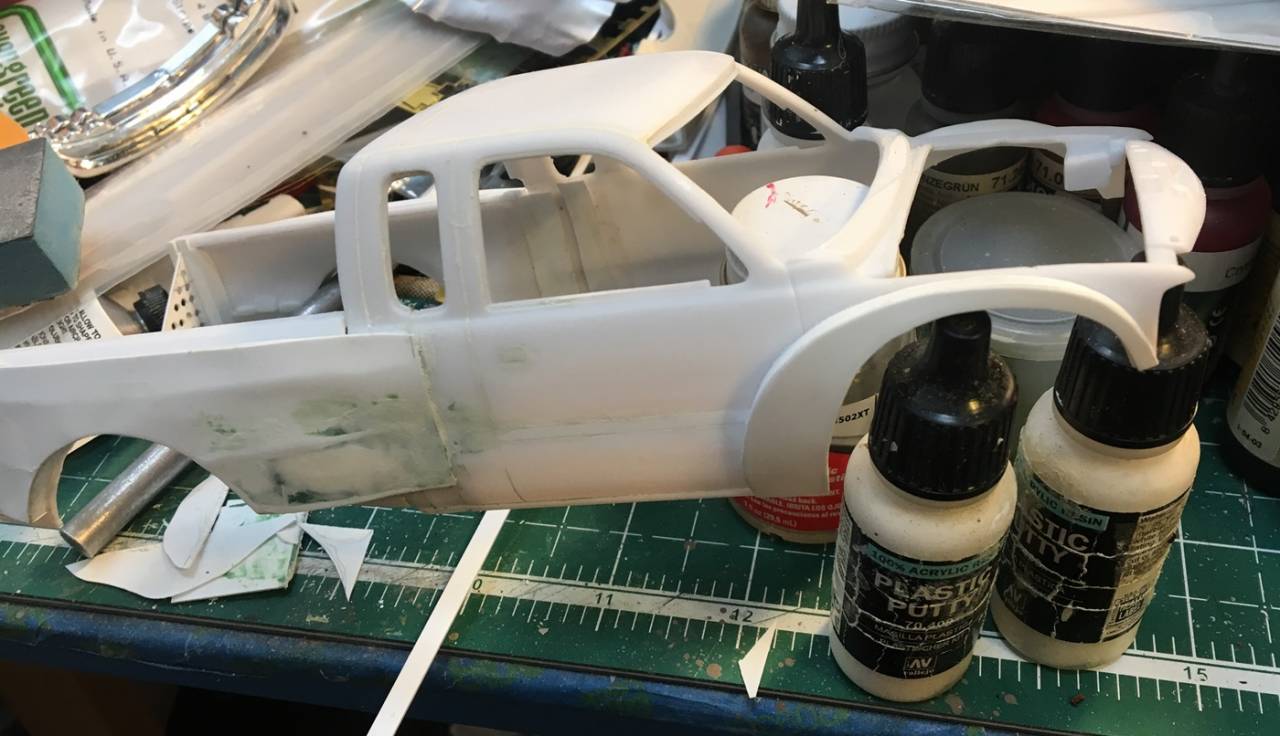
yeah....beautiful WIP eh???.... not my best body work..then, on to the interior for a bit:
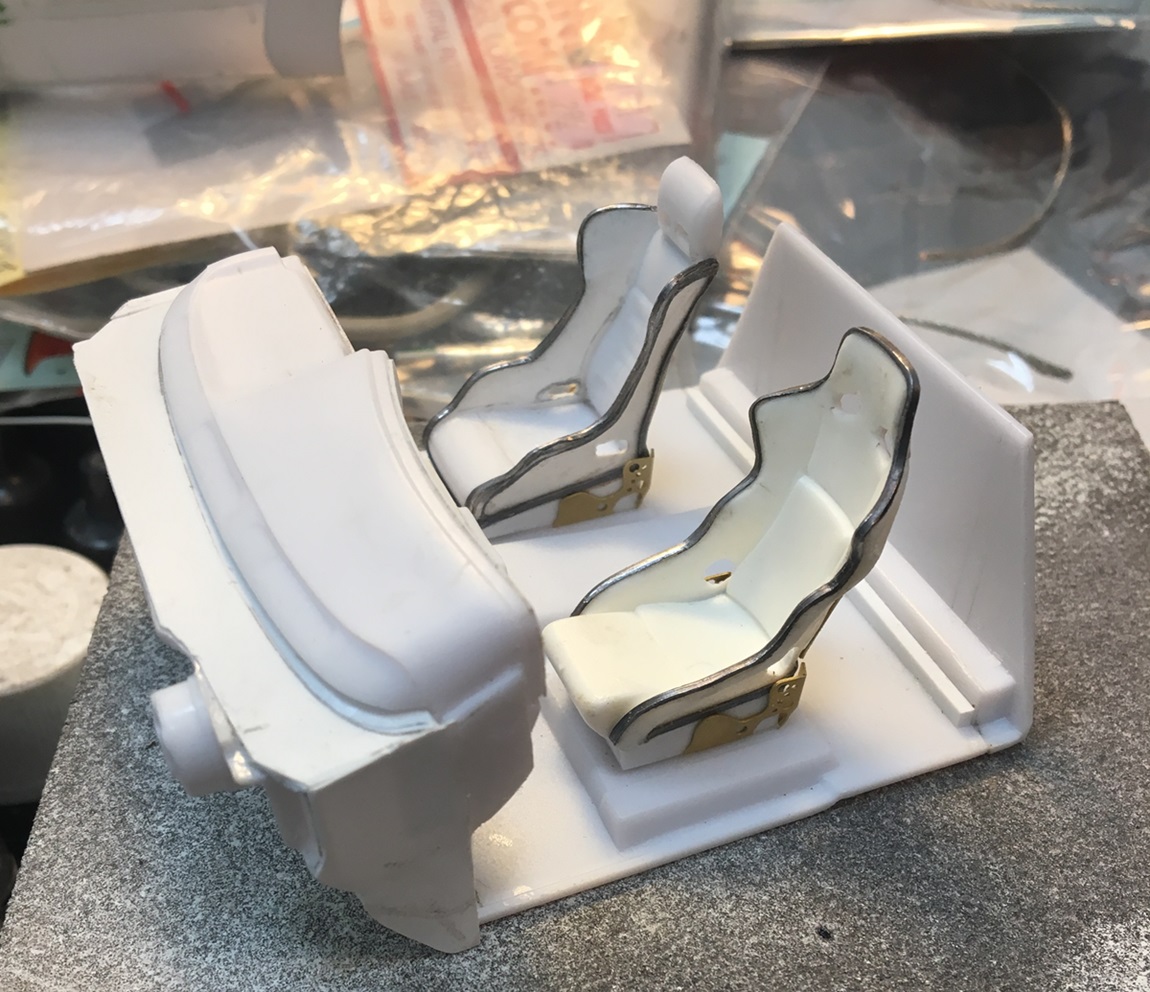
Of course...I had only one seat in the parts box, so, I scratch built the other - I think I prefer mine - haha...
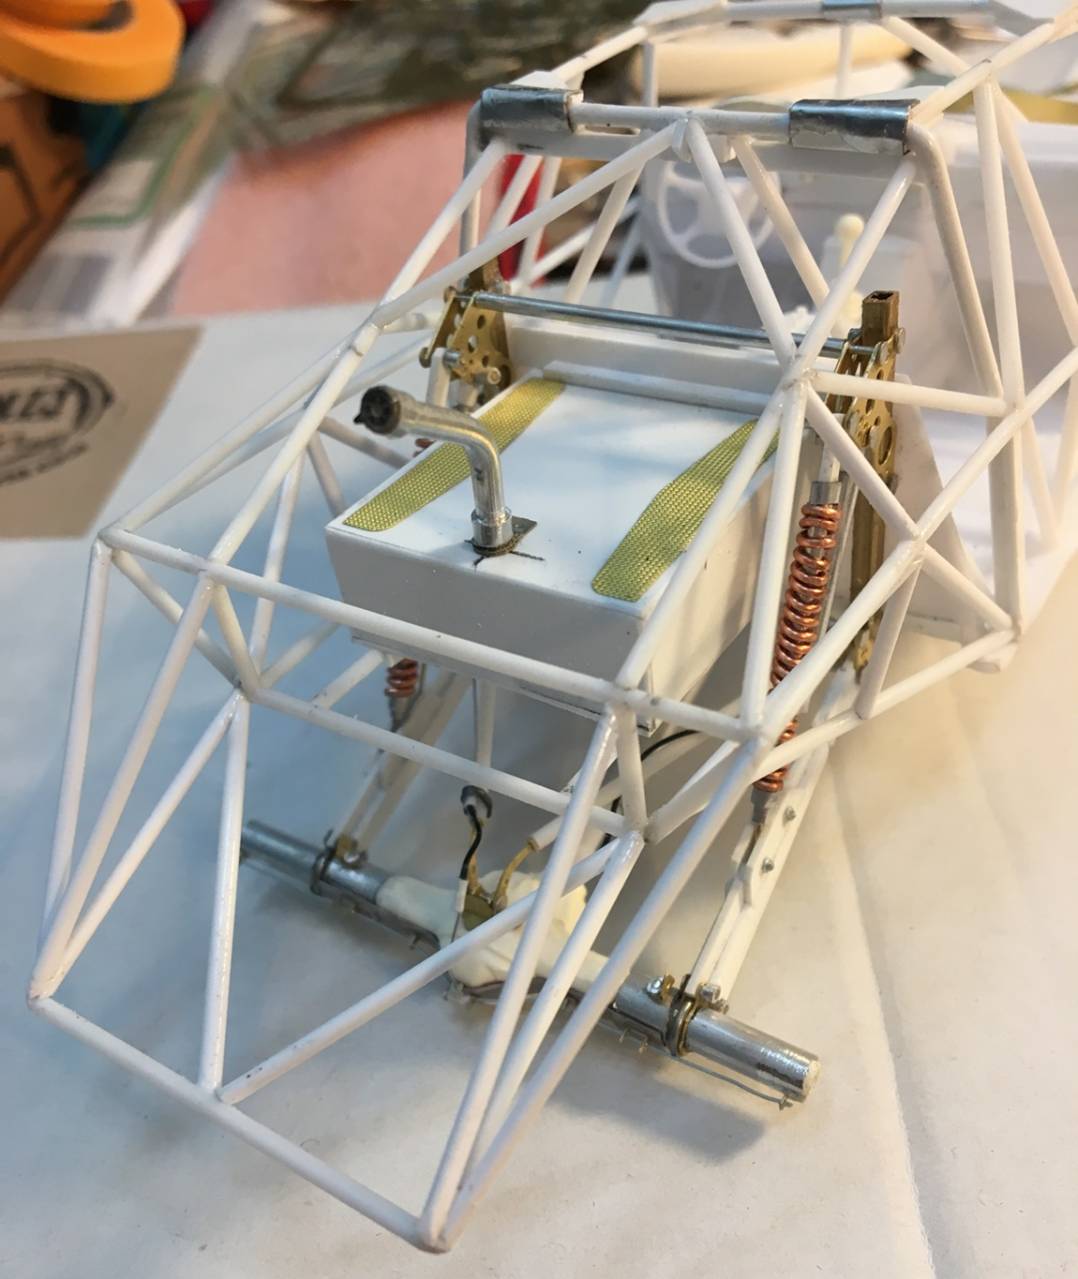
Then, on to the chassis - early:
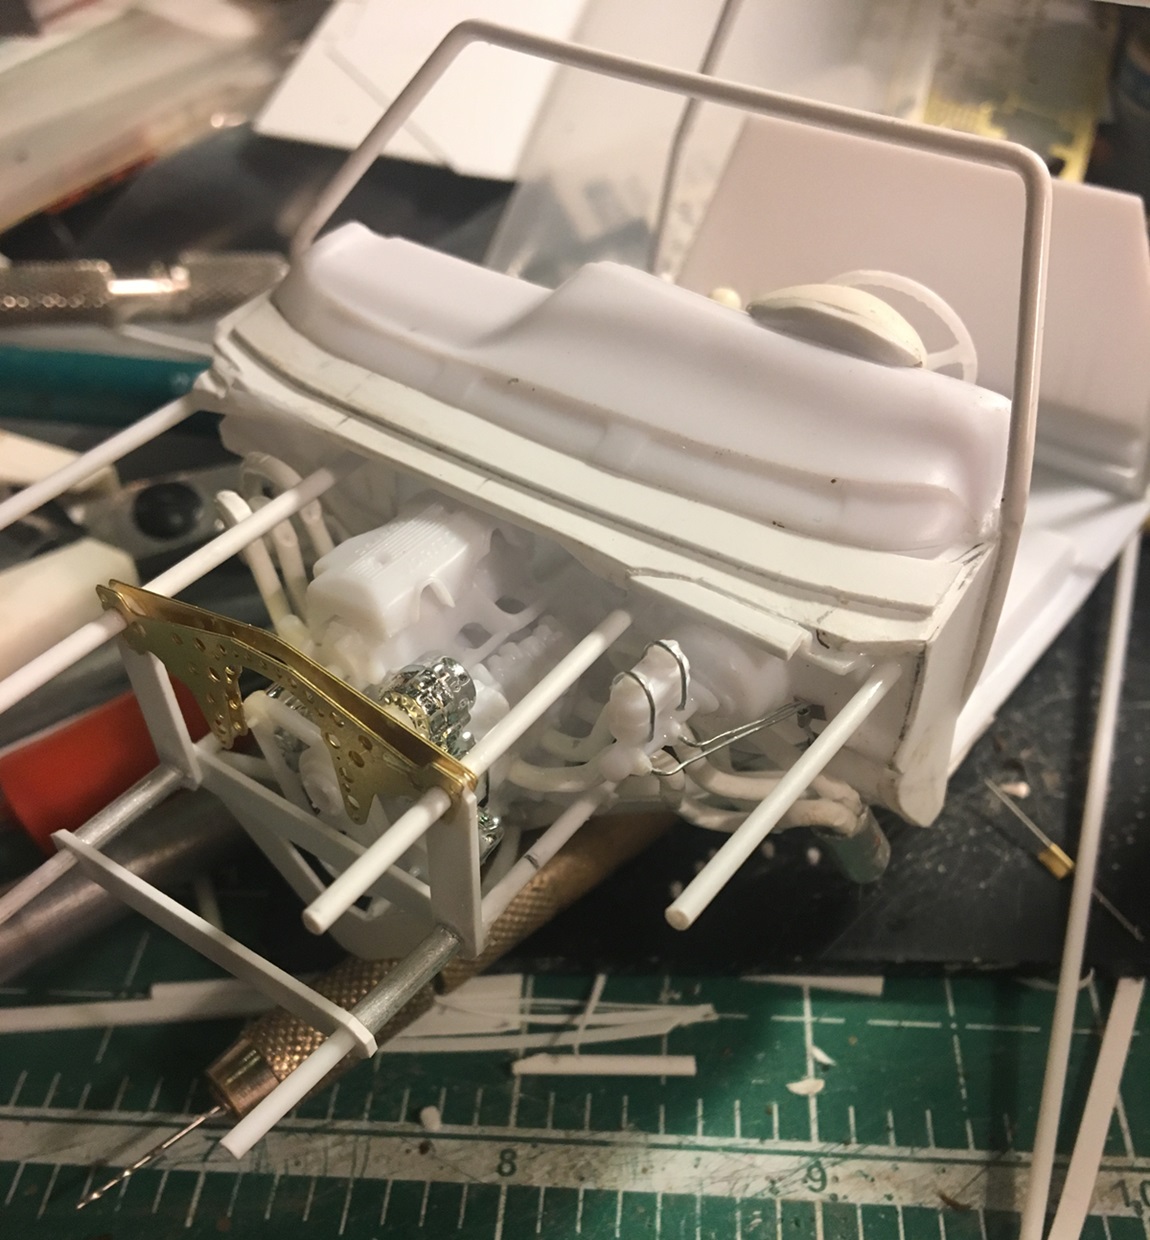
and later on:
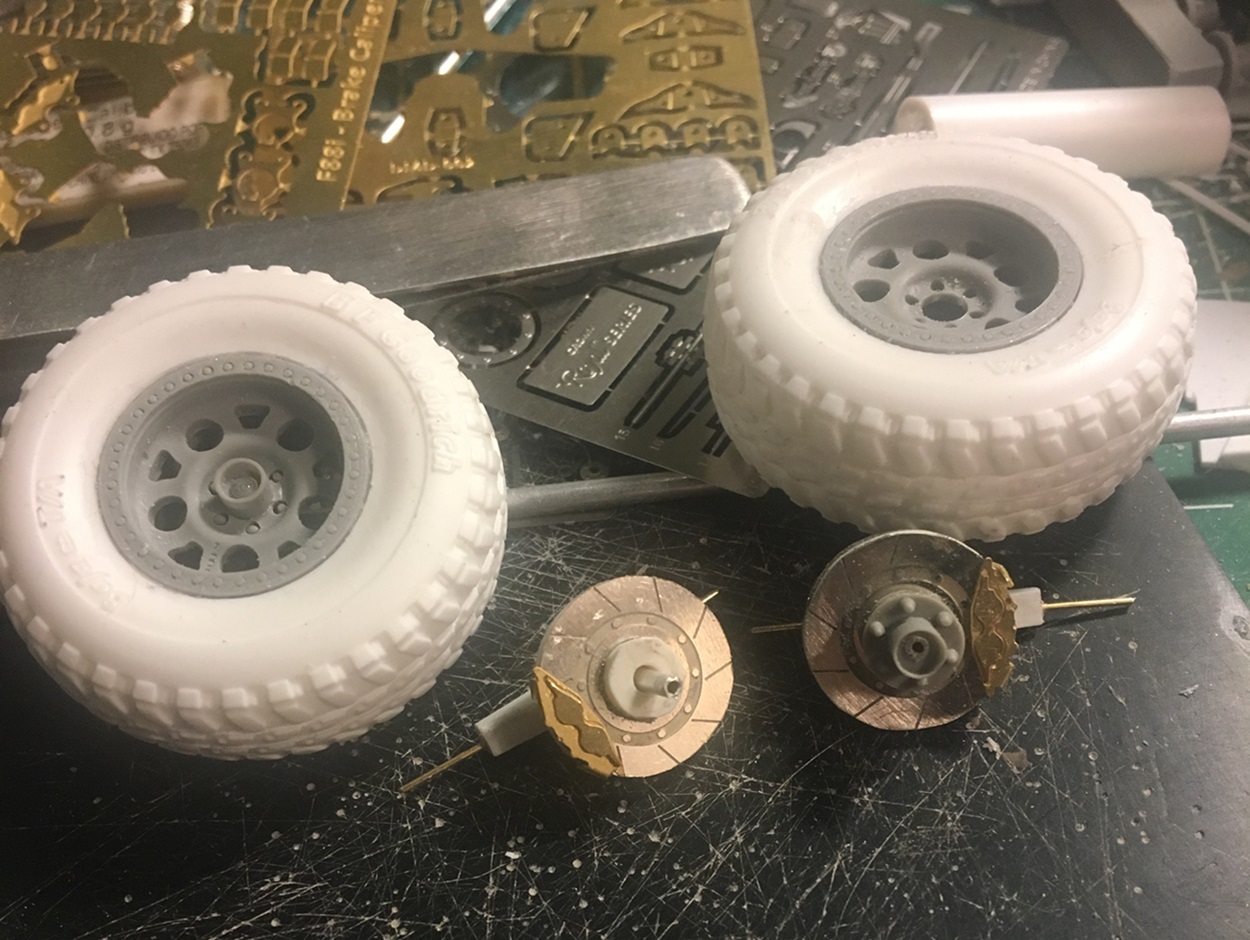
As this is mostly scratch - lots of varied pieces need to come together, like steerable spindles:
and convincing suspension:
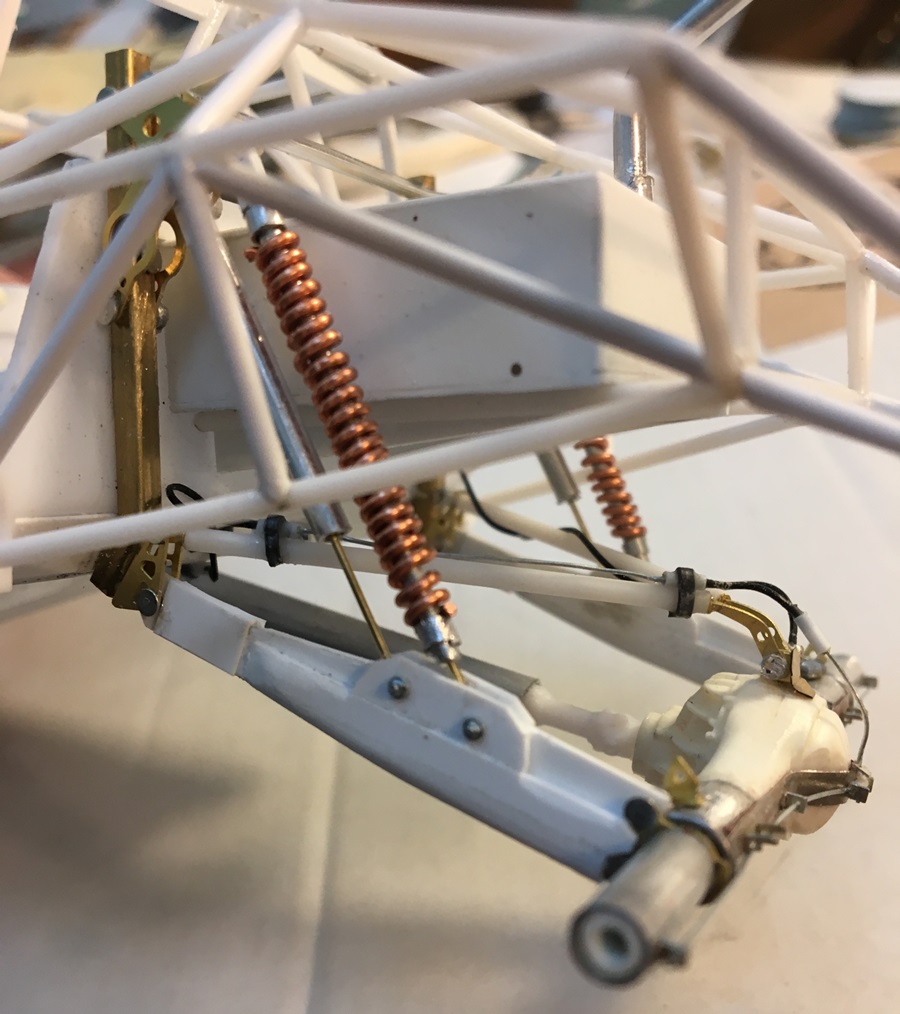
To get all the travel these trucks do, the rear end is a swing arm four link set up w/shocks and coilovers -in real life these can get more than 24" of travel. Sadly, mine is static and was hard enough to build as is....
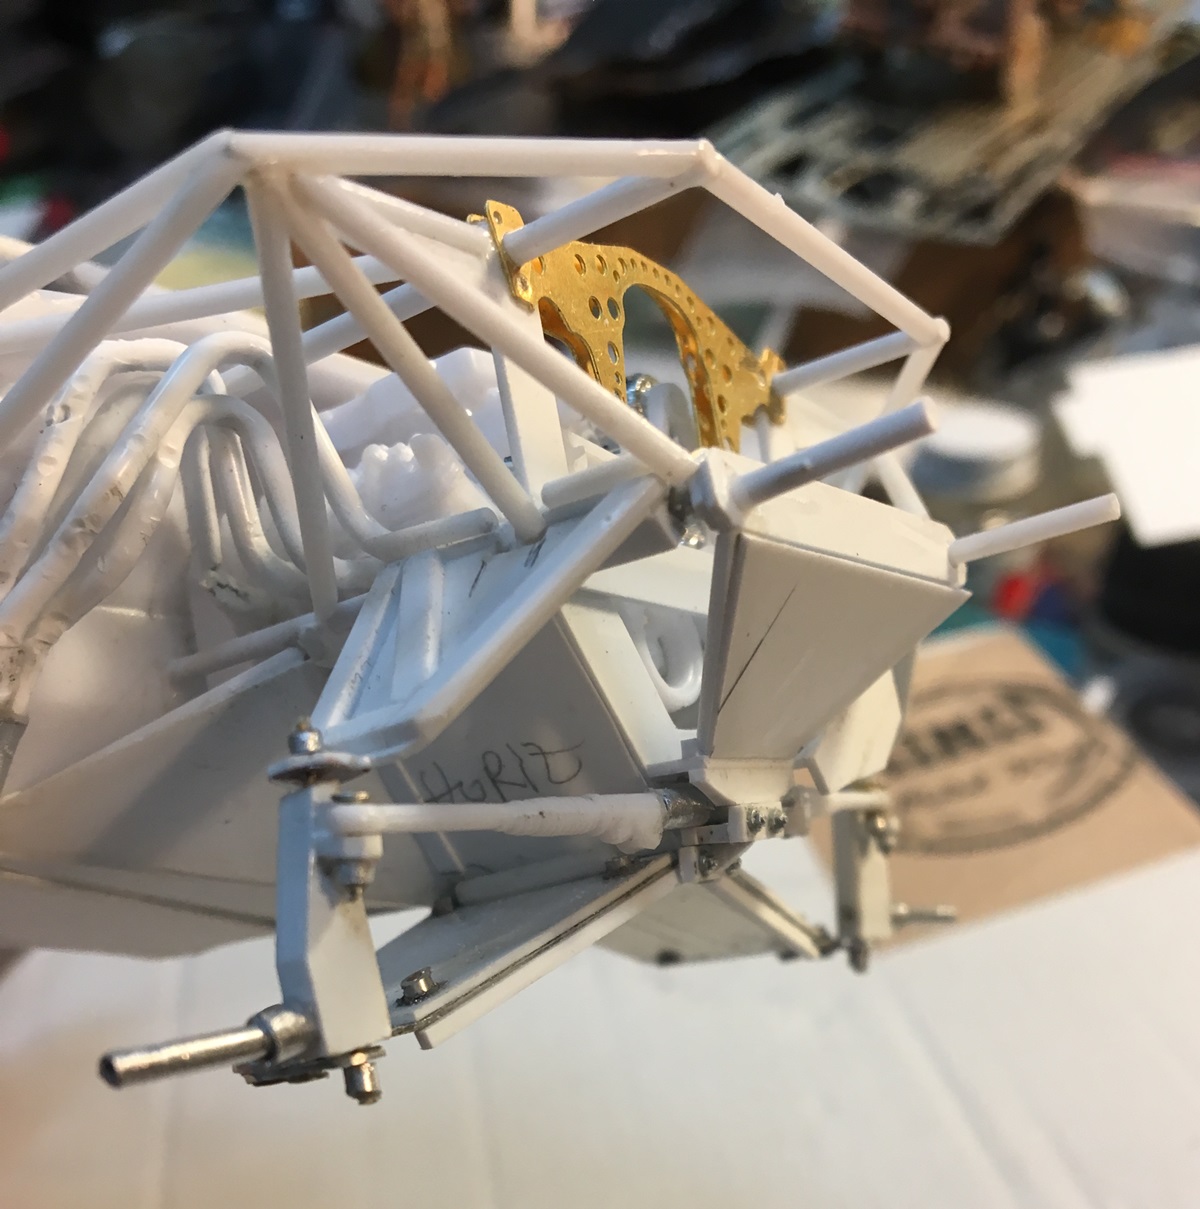
And up front opposing A-symmetrical A arms - you can see the spindle right up front. Getting all the geometry to work is a good mental test....!!!! plus making the variety of materials to work...so - yes, the good fun of scratch work!
I'll post again when it's farther along -thanks for checking it out -
Cheers
Nick
This was going to be my first Scratch campaign project...not anymore - but, it has inspired the second to be built for the campaign. This version is not military or armor - but, is quite powerful nonetheless - an off road race truck, which is typically in the 700 to 800 hp range and nearly unstoppable.
This model began life as a nice Revell Chevy truck. First step, cut the cab down:
then, enlarge the fender openings:
add and subtract more styrene:
yeah....beautiful WIP eh???.... not my best body work..then, on to the interior for a bit:
Of course...I had only one seat in the parts box, so, I scratch built the other - I think I prefer mine - haha...
Then, on to the chassis - early:
and later on:
As this is mostly scratch - lots of varied pieces need to come together, like steerable spindles:
and convincing suspension:
To get all the travel these trucks do, the rear end is a swing arm four link set up w/shocks and coilovers -in real life these can get more than 24" of travel. Sadly, mine is static and was hard enough to build as is....
And up front opposing A-symmetrical A arms - you can see the spindle right up front. Getting all the geometry to work is a good mental test....!!!! plus making the variety of materials to work...so - yes, the good fun of scratch work!
I'll post again when it's farther along -thanks for checking it out -
Cheers
Nick
petbat
Joined: August 06, 2005
KitMaker: 3,353 posts
Armorama: 3,121 posts
Posted: Tuesday, March 06, 2018 - 02:32 AM UTC
Fantastic work there Nick. As you say planning the work is a mental challenge sometimes, but worth it in the end.
We should call this thread "Evergreen Dreams"... and you guys need to buy shares in the company to recoup some of your outlay!
We should call this thread "Evergreen Dreams"... and you guys need to buy shares in the company to recoup some of your outlay!
ayovtshev
#490
Joined: September 22, 2016
KitMaker: 1,432 posts
Armorama: 1,390 posts
Posted: Thursday, March 08, 2018 - 08:51 PM UTC
Simply astonishing,Nick!
Removed by original poster on 05/14/19 - 02:11:49 (GMT).
Stickframe
#362
Joined: December 01, 2013
KitMaker: 1,661 posts
Armorama: 1,202 posts
Posted: Tuesday, March 13, 2018 - 12:52 AM UTC
Hi Peter, Angel, thanks guys for having a look and leaving some good words - They are appreciated. Unlike a kit, a scratch project can certainly leave you guessing - "will it actually work?" or, "how close to what I imagined will this actually be?" and, the answer: keep building and find out!
-----------------------------------------------------------------
And - Matt - you were posting at the same time, so a quick edit - - thanks! I do enjoy the look of mixing the parts -and that includes lots and lots of evergreen!
-----------------------------------------------------------------
For today some updates - as this is not an armor build - I'll stay light on the images. When the scratch campaign rolls around, I'll d a more thorough documentation - this build though, has inspired the idea for my first build in that campaign - hint - I've build several DMVs and modified humvees....what if...?
OK - some pics - please have a look:
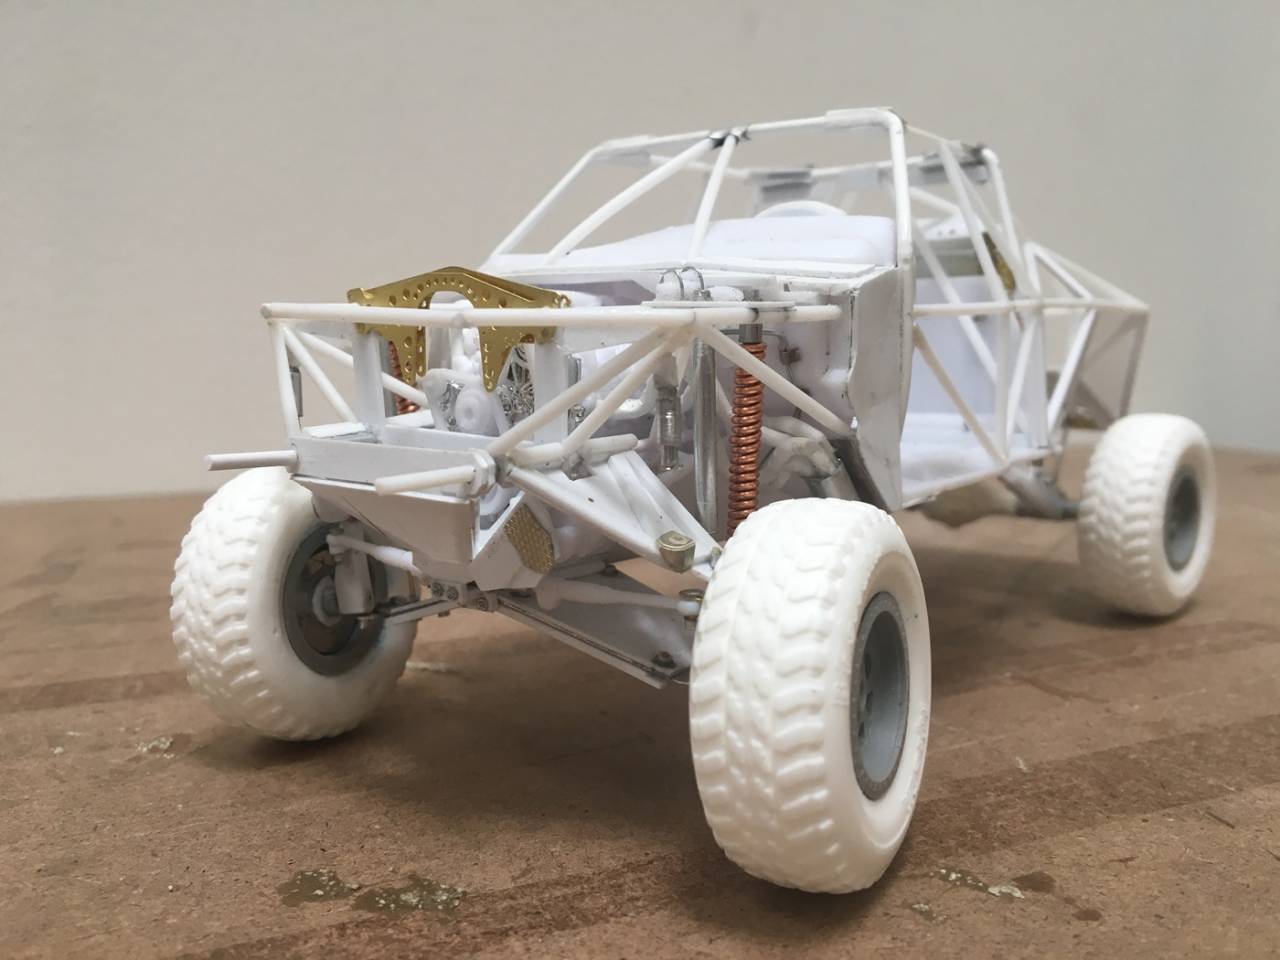
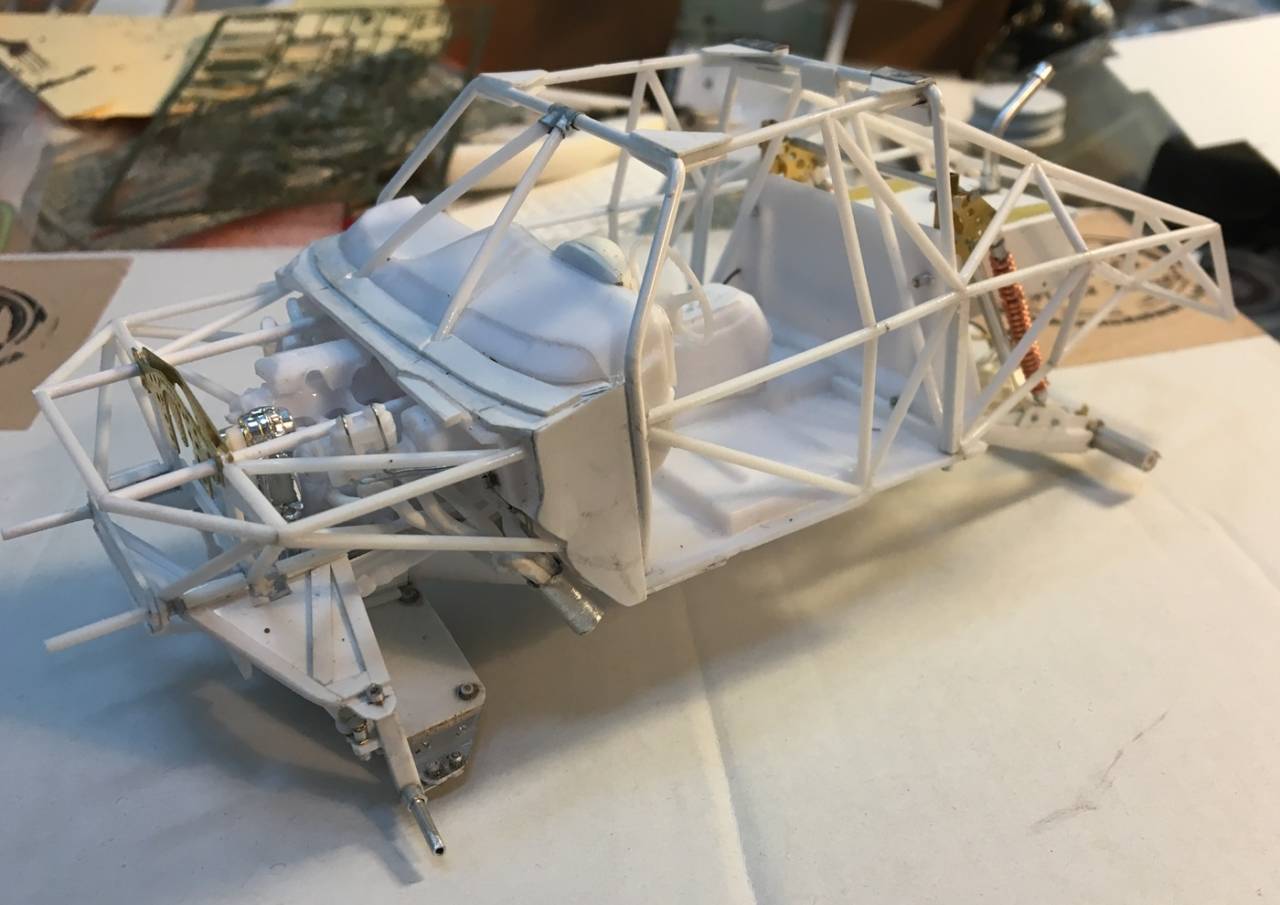
Above, so far so good- a rolling chassis - which shocking as it may sound - all four tires are touching the ground - which seems to be a typical challenge for me to get right. Next:
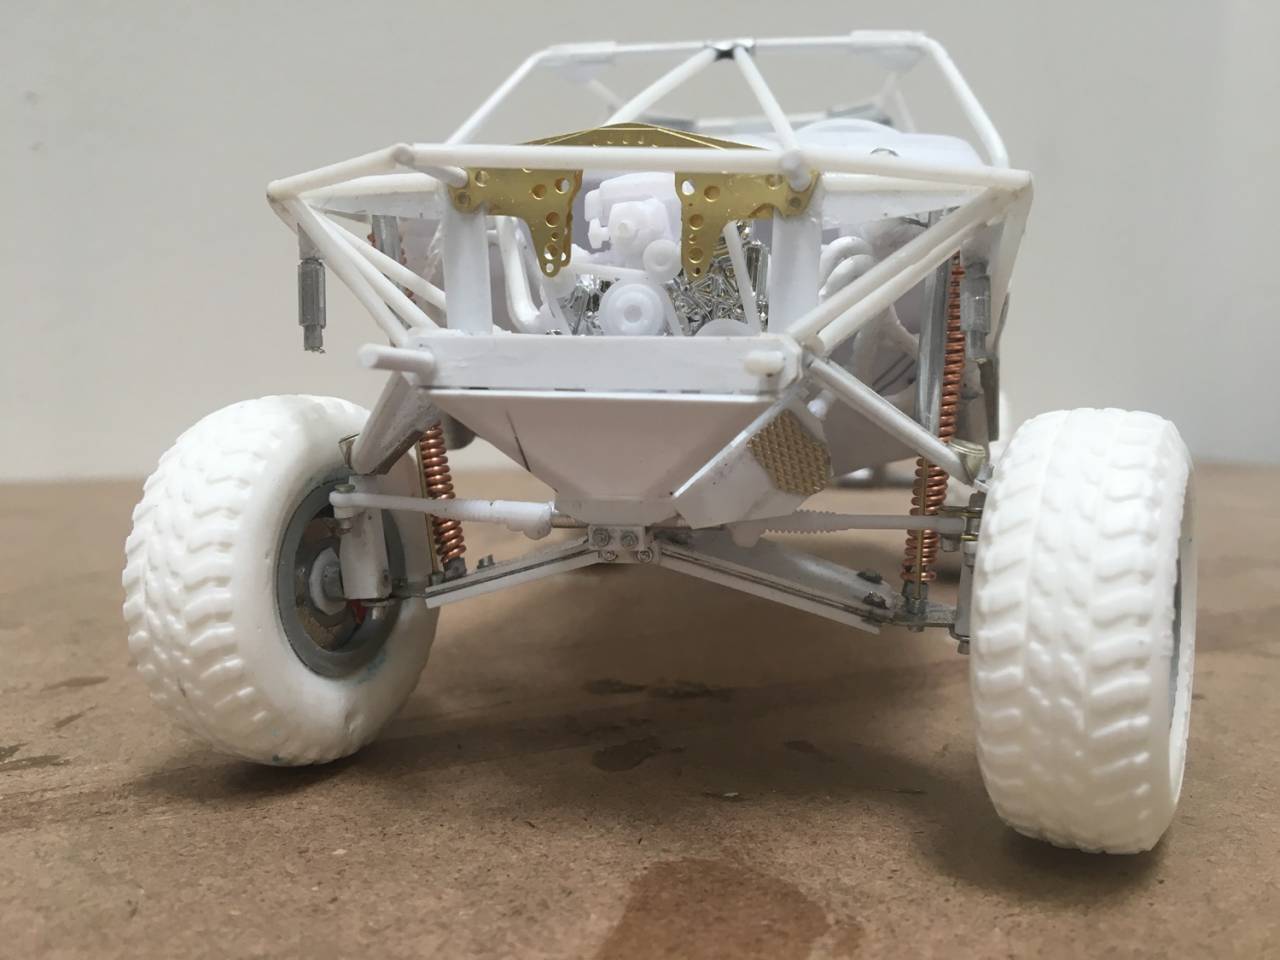
Up front - the steering works - this truck has lots of wheel travel - in retrospect, a bit too much - but, that's what you get - no plans to work with and just eye balling it! the small shocks you see hanging off the tower but not connected, are bump stops- they have a "seat" on the upper "A" arms...which in this case are some remnant Aber T-55 suspension parts!
And in the back:
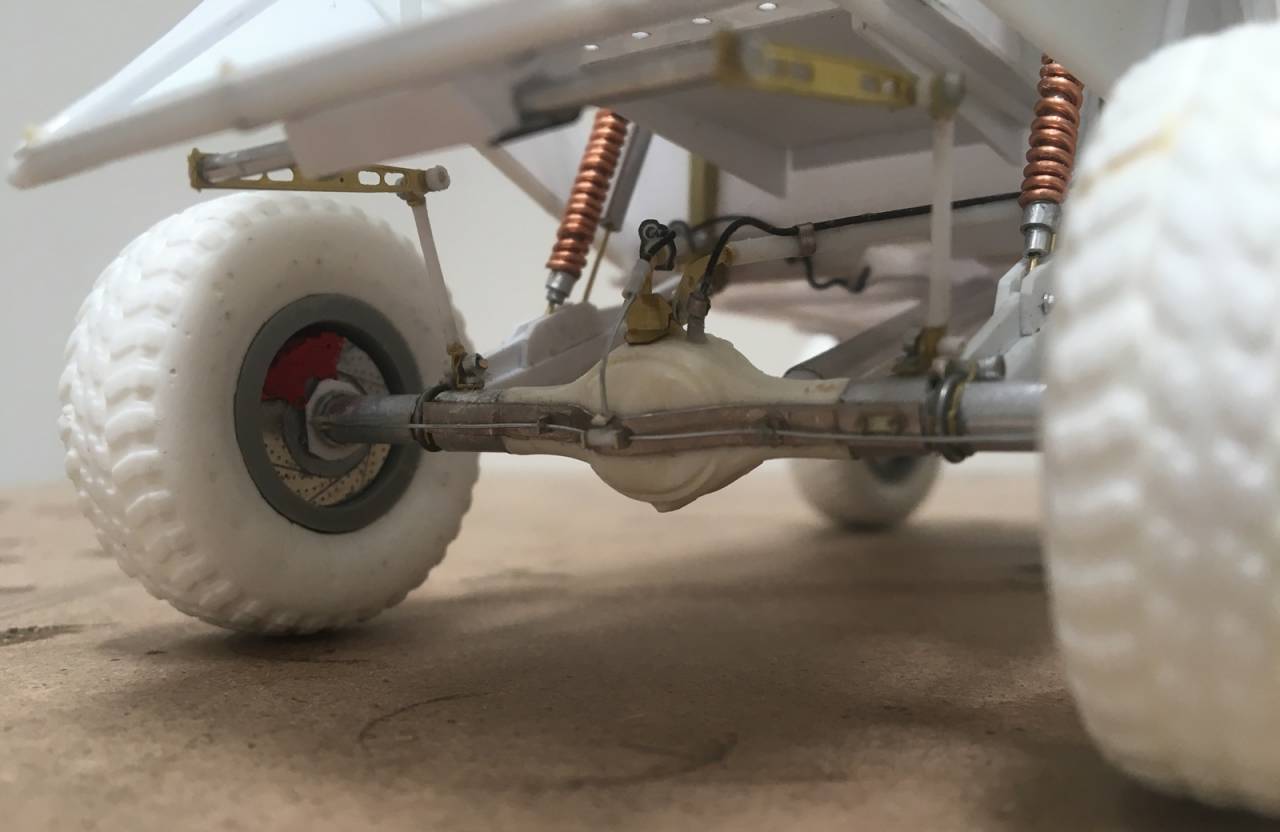
These rear ends are not easy to build, as they remain movable until you add the shocks and coil overs, which means you have plenty of time to break/twist/bend things you'd rather not! You'll see something new here - the panhard bars attached to the axle - in real life these control lateral movement of the rearend - in the model, I like what they look like - but are a headache to install! haha -
Ok - and finally, first results from the paint shop:
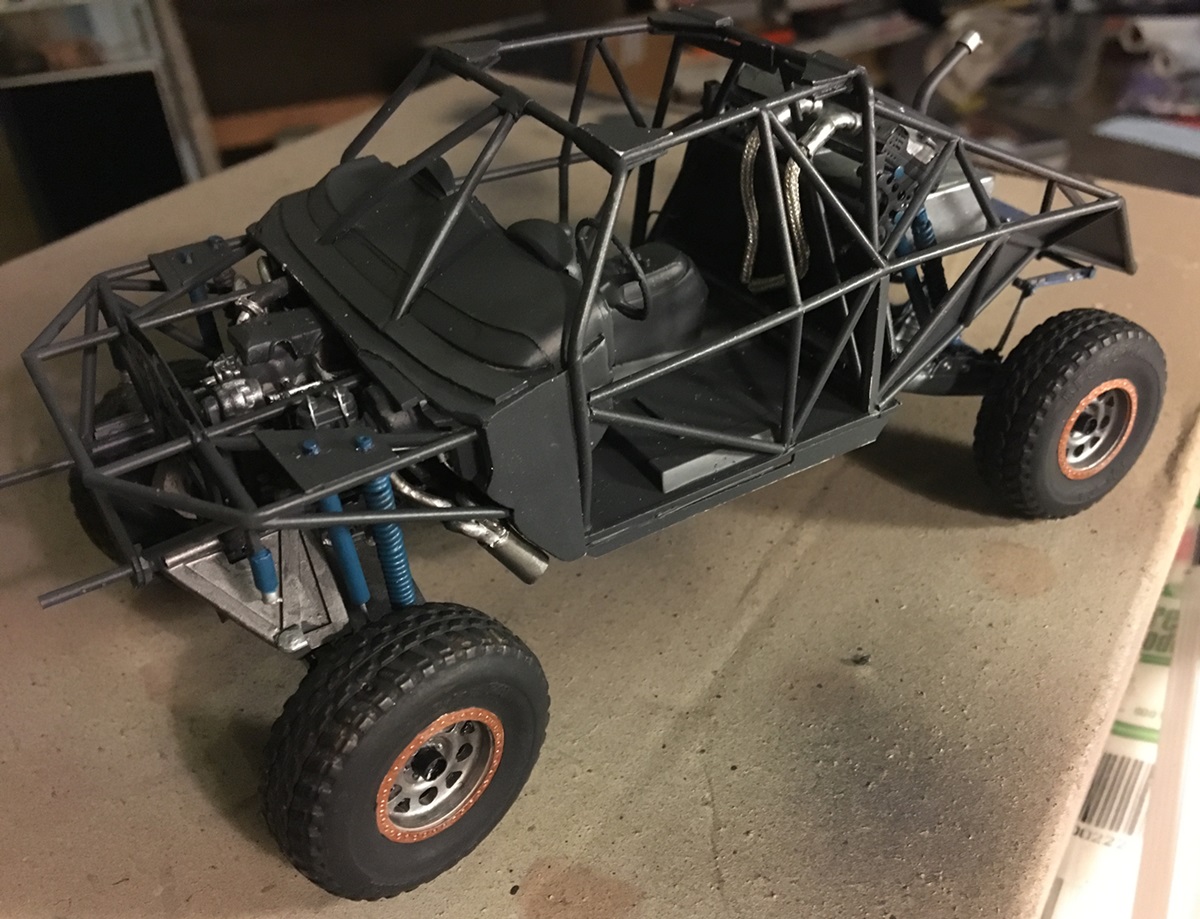
It's getting there. the colors are Vallejo model air - I did mix a few and used sort of a drybrush technique to generally polish the color while painting it on. The overall was airbrushed.
It needs some touch up - before that, I'll add in the seats/harnesses etc -
Then...the body - which has me a bit nervous -I'll try to use a multi color scheme based on a real truck - we'll see how that goes for me...
thanks for having a look -
Nick
-----------------------------------------------------------------
And - Matt - you were posting at the same time, so a quick edit - - thanks! I do enjoy the look of mixing the parts -and that includes lots and lots of evergreen!
-----------------------------------------------------------------
For today some updates - as this is not an armor build - I'll stay light on the images. When the scratch campaign rolls around, I'll d a more thorough documentation - this build though, has inspired the idea for my first build in that campaign - hint - I've build several DMVs and modified humvees....what if...?
OK - some pics - please have a look:
Above, so far so good- a rolling chassis - which shocking as it may sound - all four tires are touching the ground - which seems to be a typical challenge for me to get right. Next:
Up front - the steering works - this truck has lots of wheel travel - in retrospect, a bit too much - but, that's what you get - no plans to work with and just eye balling it! the small shocks you see hanging off the tower but not connected, are bump stops- they have a "seat" on the upper "A" arms...which in this case are some remnant Aber T-55 suspension parts!
And in the back:
These rear ends are not easy to build, as they remain movable until you add the shocks and coil overs, which means you have plenty of time to break/twist/bend things you'd rather not! You'll see something new here - the panhard bars attached to the axle - in real life these control lateral movement of the rearend - in the model, I like what they look like - but are a headache to install! haha -
Ok - and finally, first results from the paint shop:
It's getting there. the colors are Vallejo model air - I did mix a few and used sort of a drybrush technique to generally polish the color while painting it on. The overall was airbrushed.
It needs some touch up - before that, I'll add in the seats/harnesses etc -
Then...the body - which has me a bit nervous -I'll try to use a multi color scheme based on a real truck - we'll see how that goes for me...
thanks for having a look -
Nick
petbat
Joined: August 06, 2005
KitMaker: 3,353 posts
Armorama: 3,121 posts
Posted: Tuesday, March 13, 2018 - 01:03 PM UTC
Gets better and better Nick. A layer of paint makes a world of difference. Can't wait to see what scheme you come up with here.

HeavyArty

Joined: May 16, 2002
KitMaker: 17,694 posts
Armorama: 13,742 posts
Posted: Wednesday, March 14, 2018 - 12:11 AM UTC
Nick, that looks awesome. Is it 1/24, 1/25 scale? Based on this, your next project should be a 1/35 ODS-era USN SEAL FAV.


Stickframe
#362
Joined: December 01, 2013
KitMaker: 1,661 posts
Armorama: 1,202 posts
Posted: Saturday, March 17, 2018 - 10:56 AM UTC
Hi Peter - thanks - In this case, the paint really brings the build to life - I like taking outdoor pics of these - so, I'm hoping the colors really pop. As for the body - just waiting for paint in the mail. Then...one big opportunity to mess this build up! 😄😀
Hi Gino - thanks - I appreciate it. You're on track with what I'm up to - I've got another truck underway (1/25 also) but along the lines of a what if - with a lot of scratchwork. I'll post it one of these days - maybe on its own thread. It has, or will have a few shapeways odds and ends, like weapons and comms - again, supposed to have been in the scratch campaign.
Regarding the Chenowyth, I'm really close to buying a 1/25 VW (so I can get an engine and transaxle) and go for the version you've shown. I've read about those before, and learned they were under powered. I can't help but wonder why they weren't equipped with bigger engines? In their role as off road racers - those cars fly - granted, there are several vehicle classes. So, why didn't the DOD spec - bigger engines?!
Ok gents - keep on scratching -
Cheers
Nick
 |

WEB HOSTING BY


Copyright ©2021 Armorama and Kitmaker Network, a subsidiary of Silver Star Enterprises
All Rights Reserved. Please read our Conditions of Use and Privacy Policy.
All Rights Reserved. Please read our Conditions of Use and Privacy Policy.