Introduction
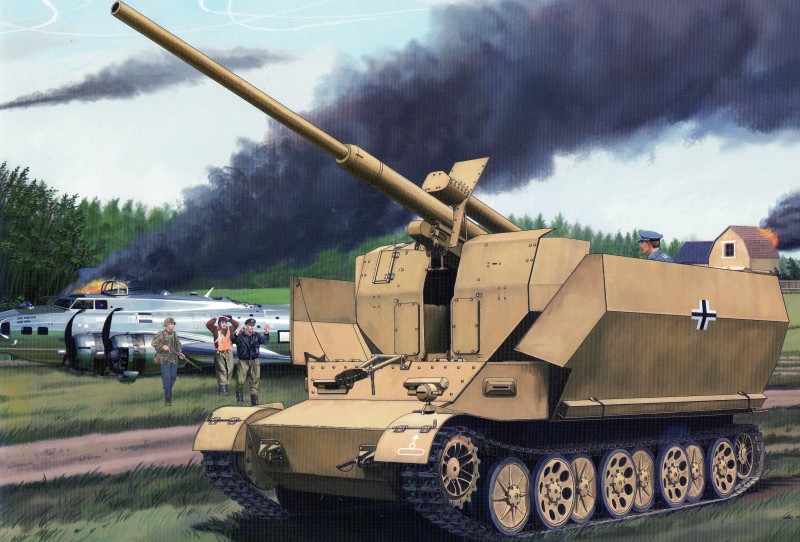
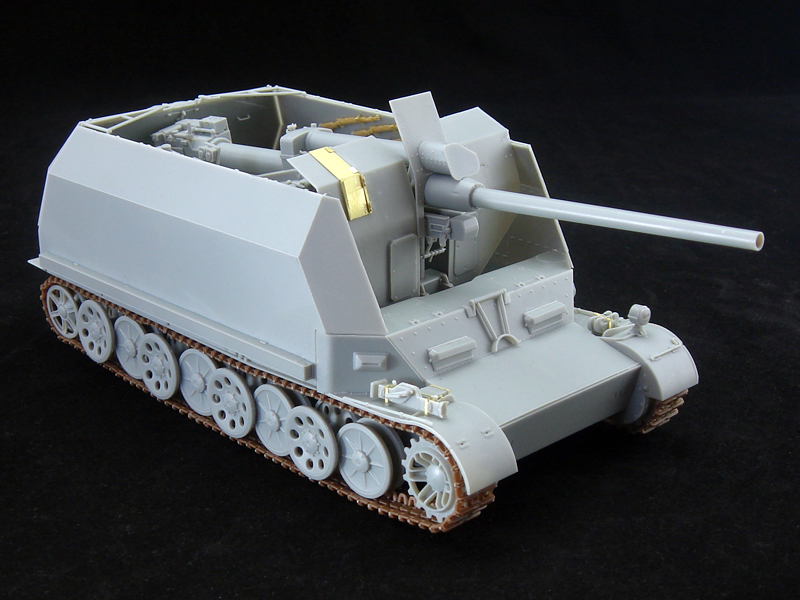
The latest release from Bronco Models the Versuchsflakwagon 8.8cm Flak 41 auf Sonderfahrgestell (Pz.Sfl.IVc) or if you prefer Grille 10 could be said to be a paper panzer. Depending on where your information comes from; there were between 1 and 3 vehicles completed with most agreeing that 1 vehicle went to Italy for trials with Heers Flakartillerie Abteilung 304, 26th Panzer Division. The vehicle is based on the Panzer IV chassis with the road wheel layout being that of the Sd.Kfz.9.
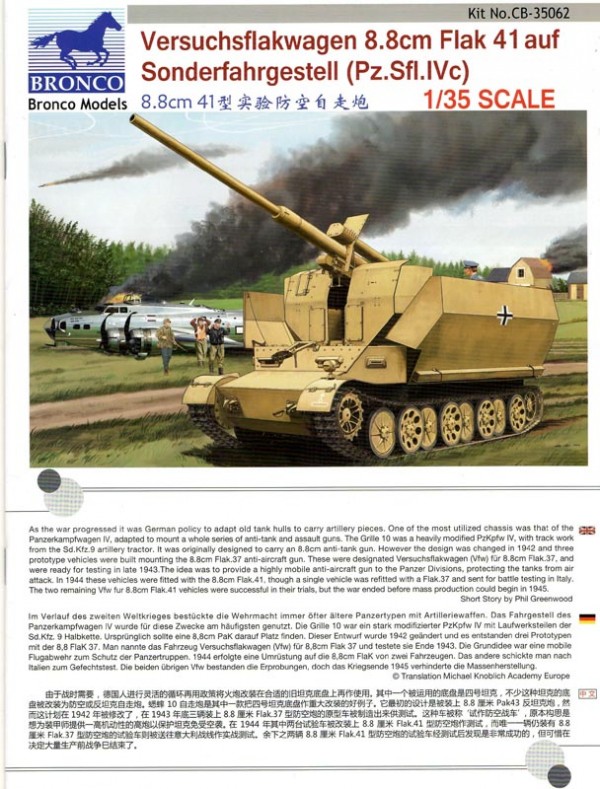
Here is the introduction written by Phil Greenwood and carried on the front of the instructions;
As the war progressed it was German policy to adapt old tank hulls to carry artillery pieces.one of the most utilised chassis was that of the Panzerkampfwagen IV, adapted to mount a whole series of anti-tank and assault guns. The Grille 10 was a heavily modified PzKpfw IV, with track work from the Sd.Kfz.9 artillery tractor. It was originally designed to carry an 8.8cm anti-tank gun. However the design was changed in 1942 and three prototype vehicles were build mounting the 8.8cm Flak 37 anti-aircraft gun. These were designated Versuchsflakwagon (Vfw) fur 8.8cm Flak 37, and were ready for testing in late 1943. The idea was to provide a highly mobile anti-aircraft gun to the Panzer Divisions, protecting the tanks from air attack. In 1944 these vehicles were fitted with the 8.8cm Flak 41, though a single vehicle was refitted with a flak 37 and sent to Italy. The two remaining Vfw fur 8.8cm Flak 41 vehicles were successful in their trials, but the war ended before mass production could begin in 1945.
Contents
Inside the standard cardboard base and card stock upper box from Bronco Models, you will find;
- 24 page instruction booklet
- Glossy artwork of the box top
- Glossy decal and painting guide
- Lower hull
- Track assembly tool
- (31) brown sprues
- (24) light grey sprues
- (8) tan sprues
- (1) clear sprue
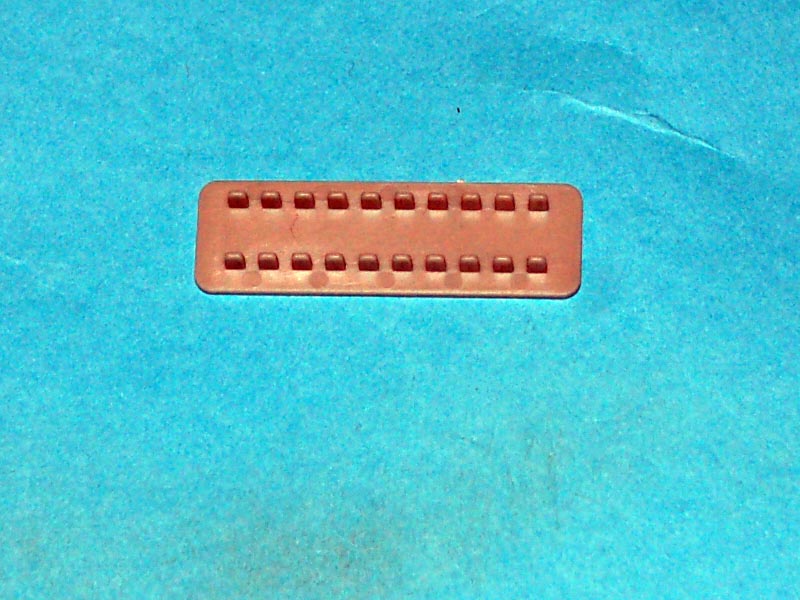
- (2) photo etched frets
- (1) decal sheet
Review
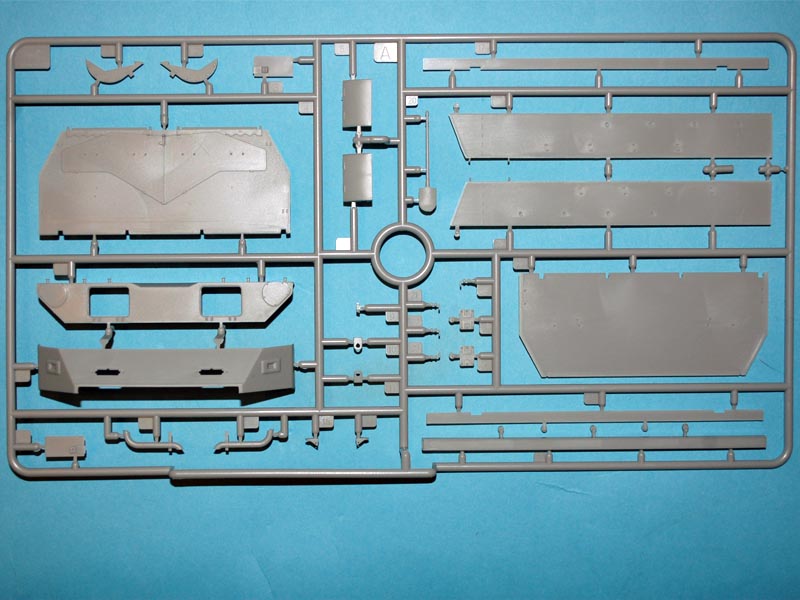
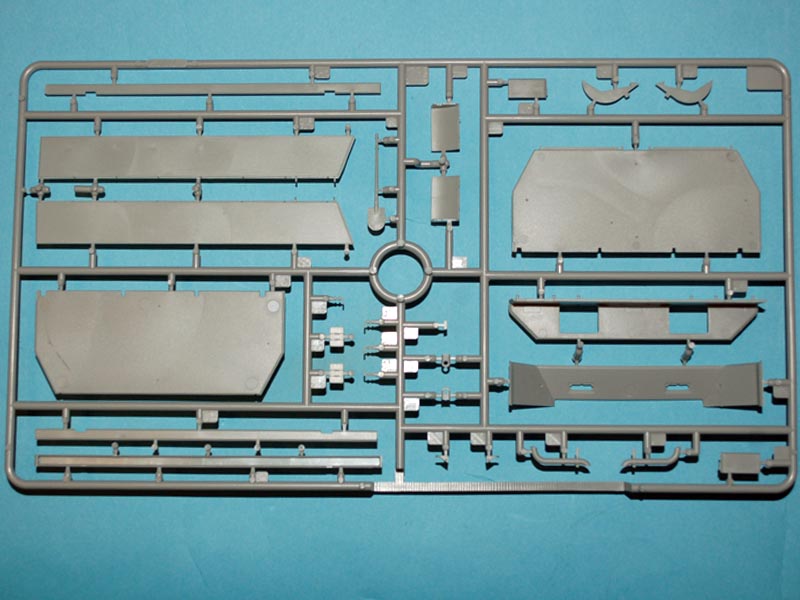
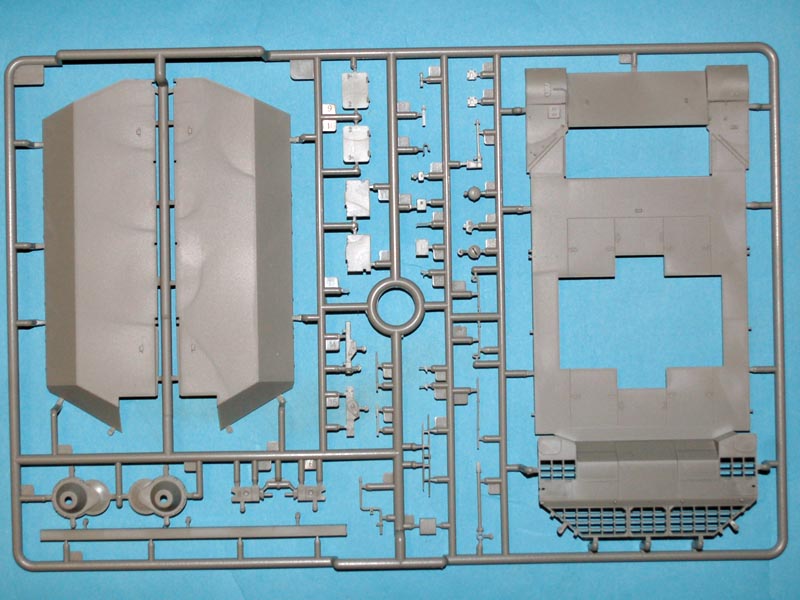
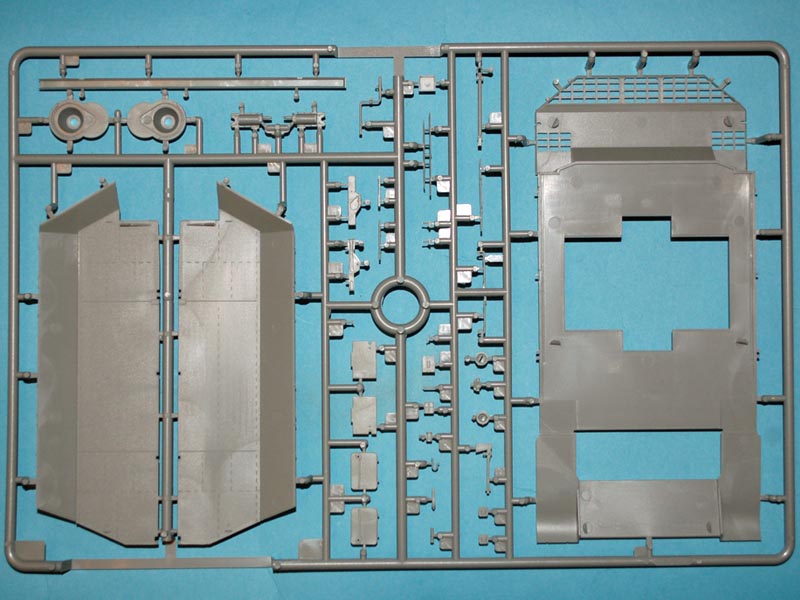
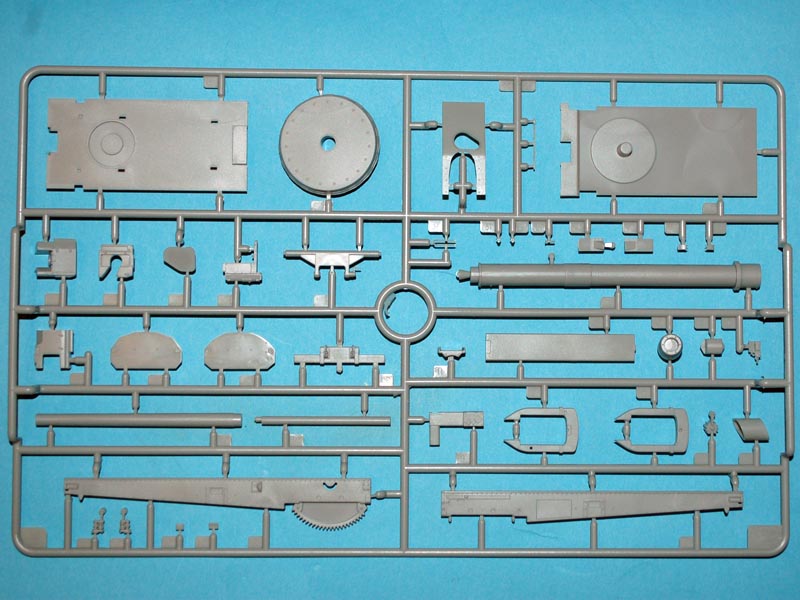
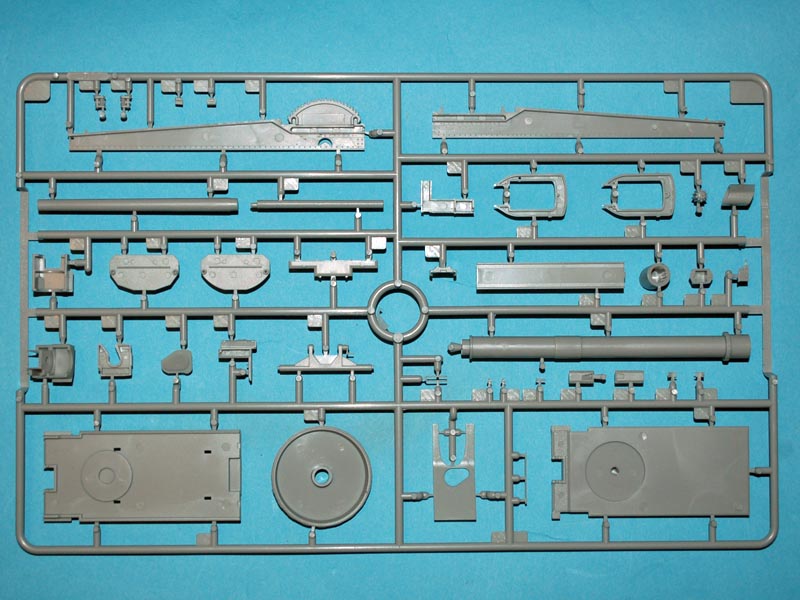
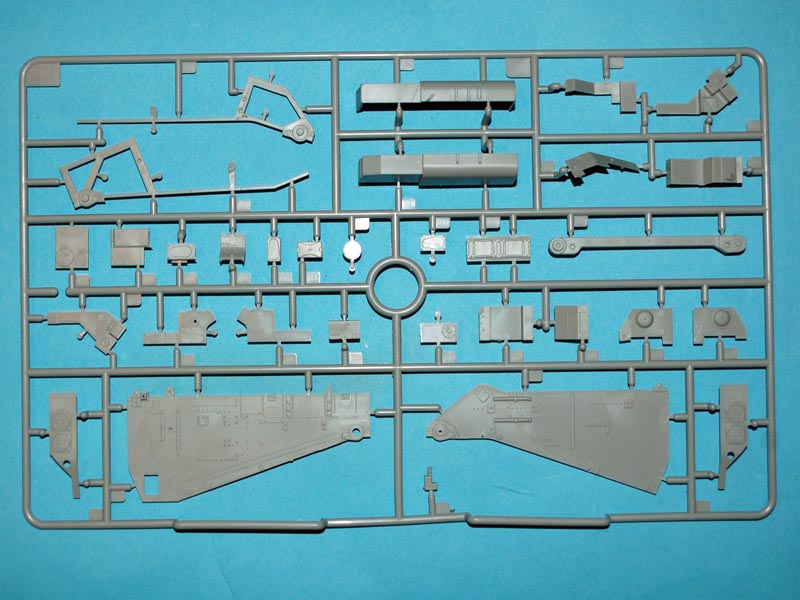
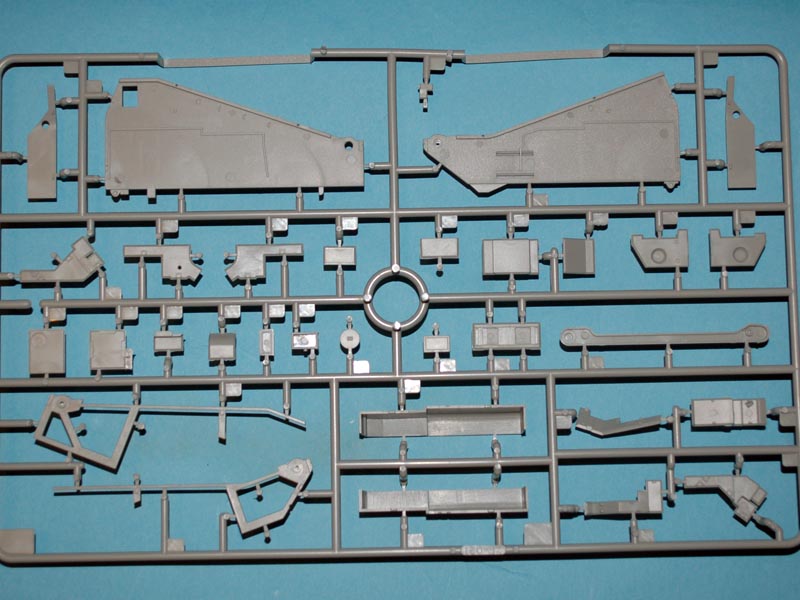
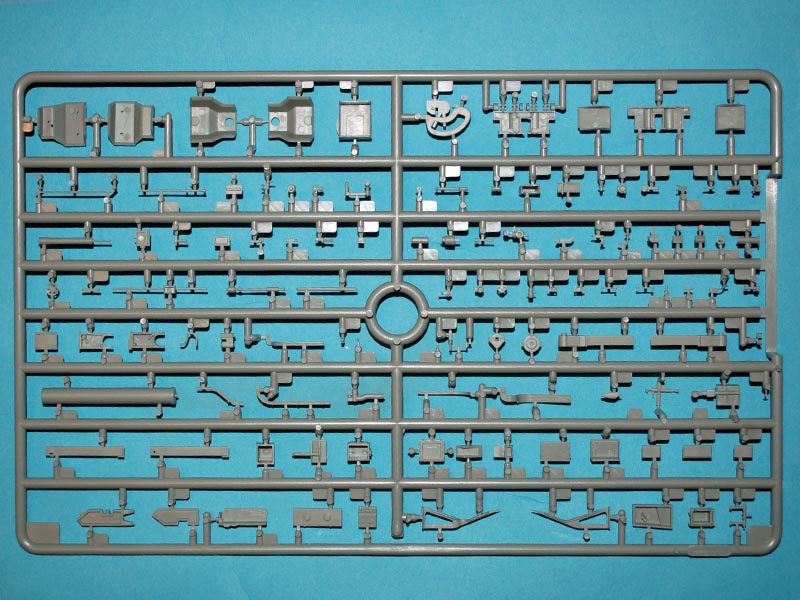
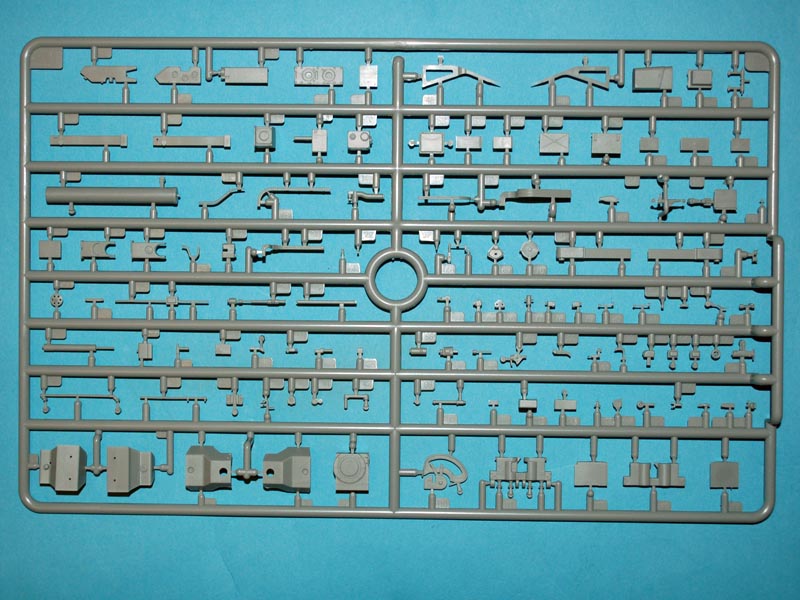
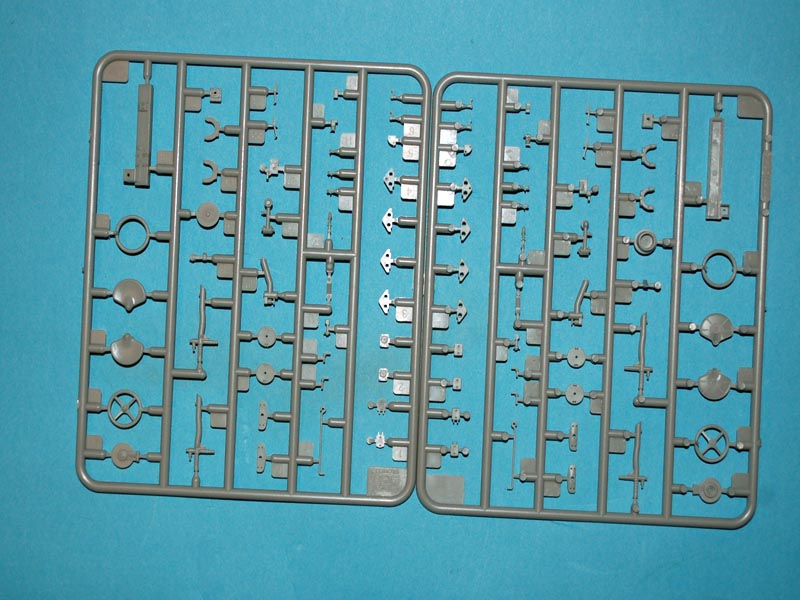
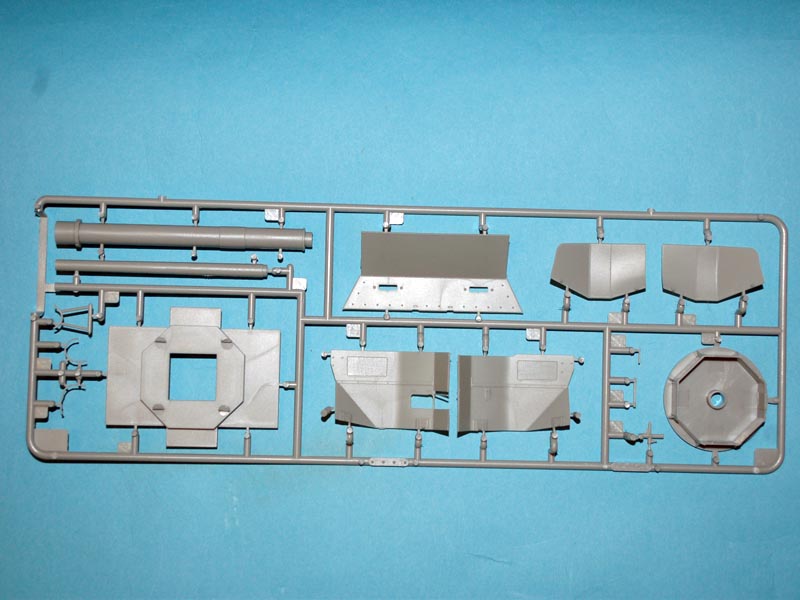
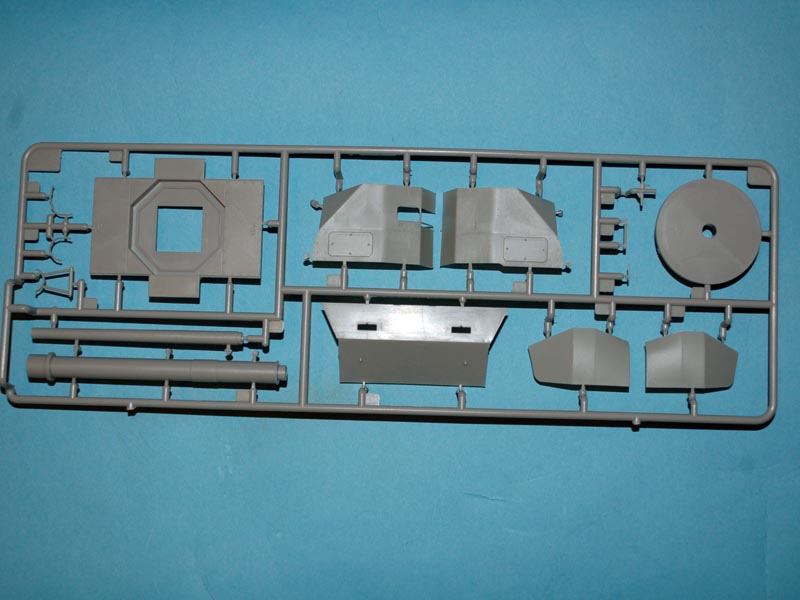
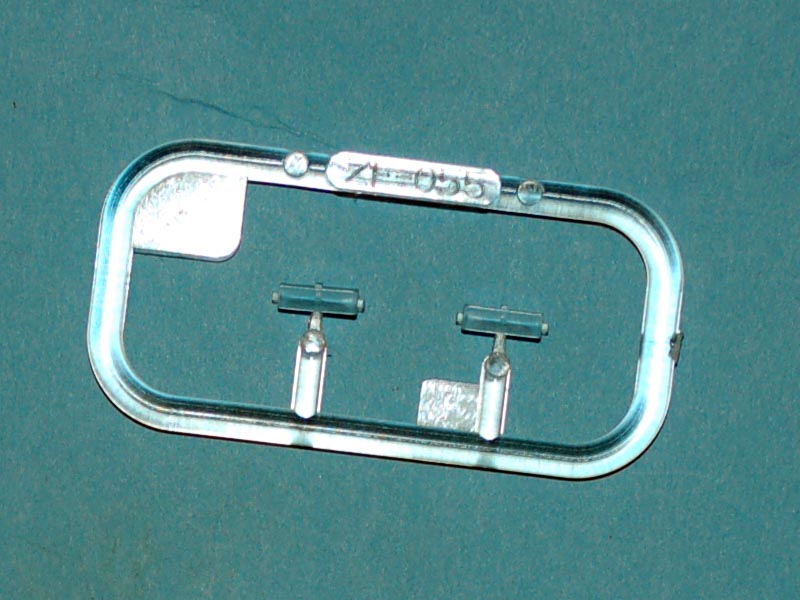
I am going to start this review by looking at the general quality of the mouldings and other parts supplied with the kits. The sprues are all individually packaged in a clear polythene bag, with the exception of sprues that are duplicated which are packaged together. The sprues are typical Bronco Model quality in that there is no flash to contend with, the parts are well cast with the larger panels not being overly thick. There are some large ejector pin marks that may need to be deal with in areas that I believe may be seen, I say maybe as I cannot be sure they will be hidden until its built. The reason I say large is that they are 4mm across, but on the plus side they are very shallow. I have tried to verify that all of these ejector pin marks are covered up or hidden, but I cannot be 100% sure of this. The only issue that I know is present are some flow marks in the plastic; these however to the best of knowledge do not look as if they will not require any remedial action.
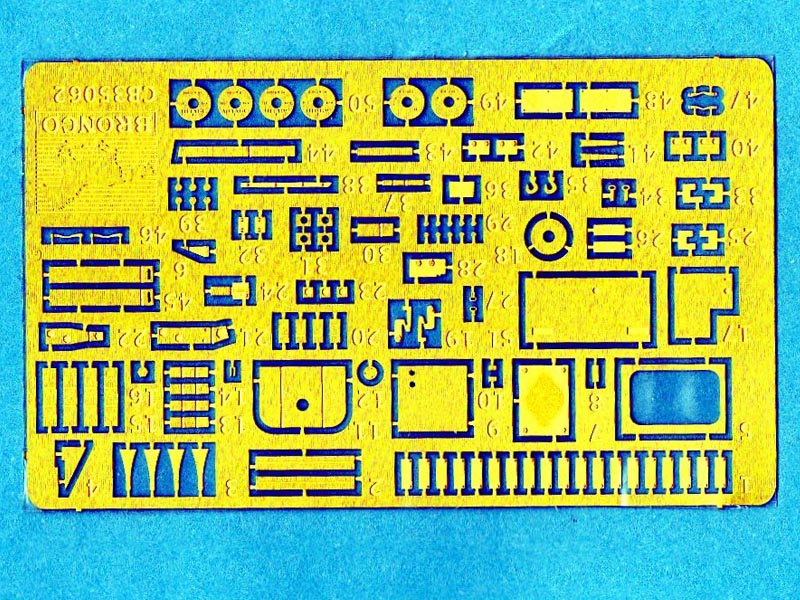
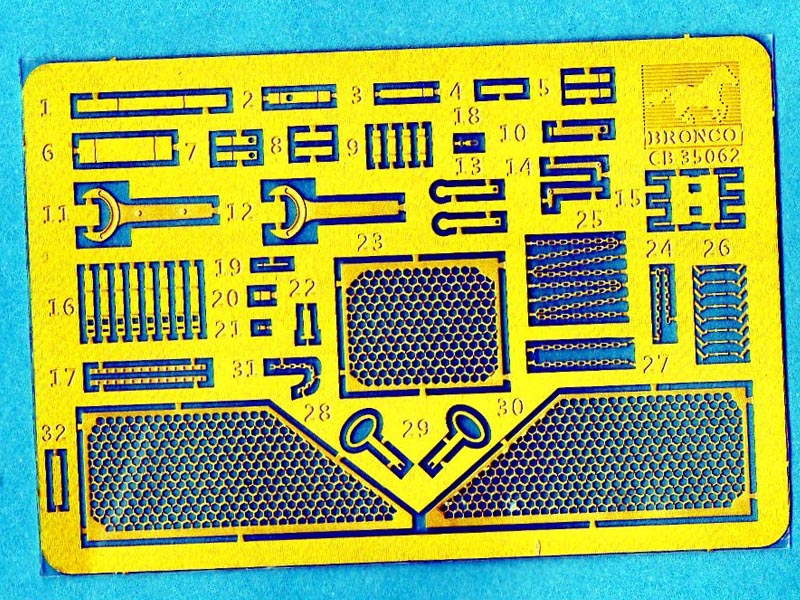
The photo etched frets and the number of parts in them is reasonable. The thickness of the photo etched parts should make them easy to work with as well. The photo etched frets are protected on both sides by a plastic film and this film if left intact on one face should help prevent parts flying off never to be seen again during the removal of the parts.
The painting and decal instructions provided are for the model is an un-camouflaged vehicle as it is believed to have looked while on trial at Oxbol, Denmark. Summer 1944. There is one thing I question on the painting guide which is that you are instructed to show the exhausts as rusted and I am unsure if a vehicle that was on trial would have rusted exhausts, maybe this is one of those occasions when you could show the exhausts as metal rather than rusted metal.
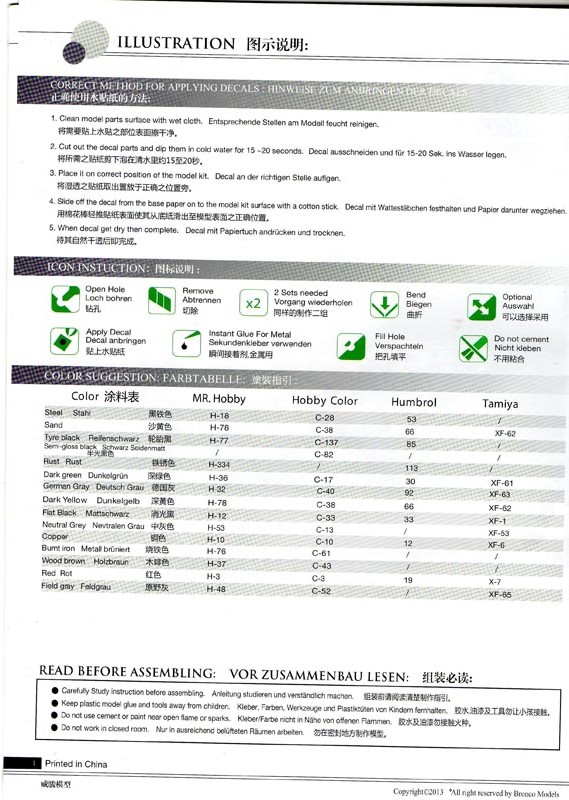
The instruction booklet is A4 in size with the paper being a good quality glossy paper. The front page has the artwork from the box top and an introduction in 3 languages. There are 24 pages that go together to make up the instruction booklet, and use the line drawing method to guide you through construction,, along with some pictures to guide you on some of the more complex areas. The first interior page of the instructions provides a guide for applying the decals, this is followed by an icon guide to the symbols that Bronco Models uses in the instructions.
The last segment on this page is a paint brand guide listing;
- Colour name
- Mr Hobby
- Hobby Color
- Humbrol
- Tamiya
None of the manufacturers listed provides all of the colours recommended for the model, and so the colour name section will be quite helpful.
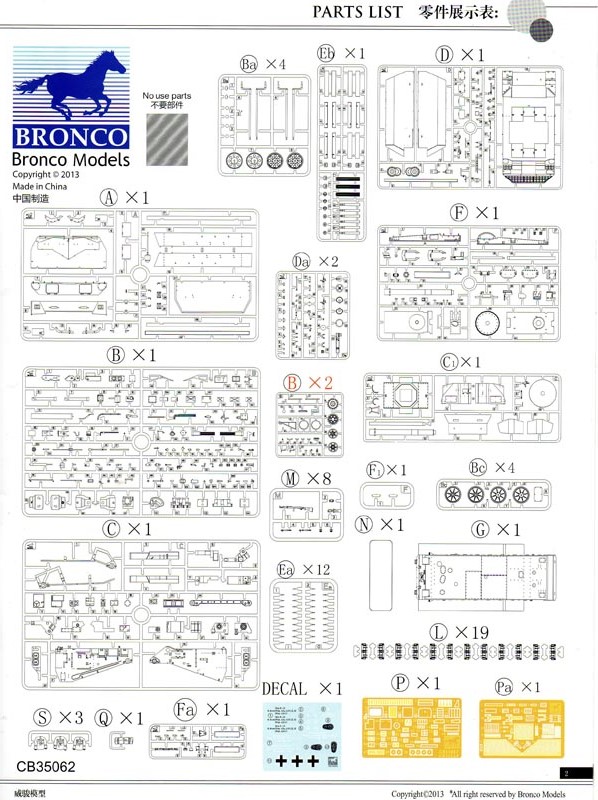
The next page produces a content breakdown and there are a fair number of parts.
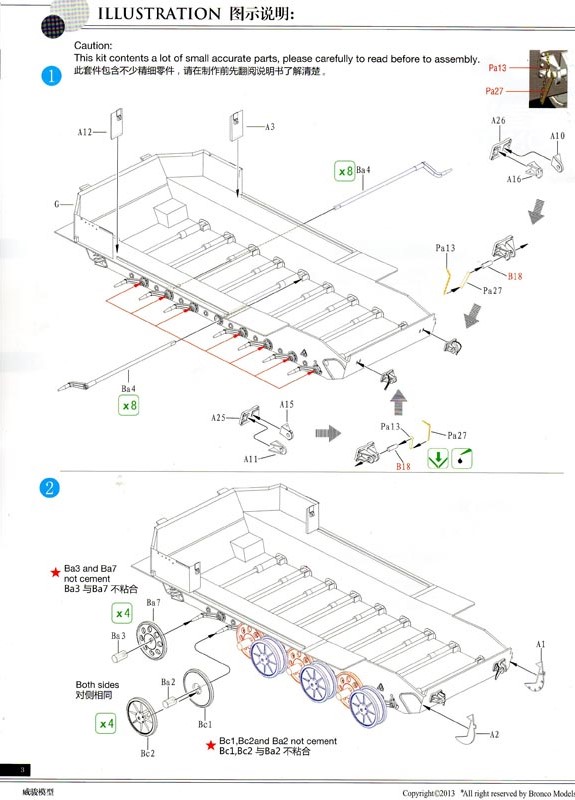
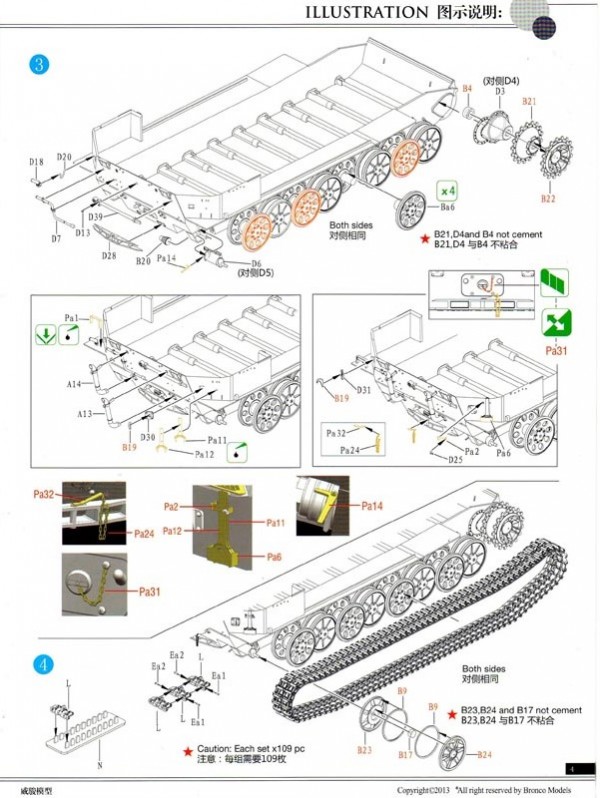
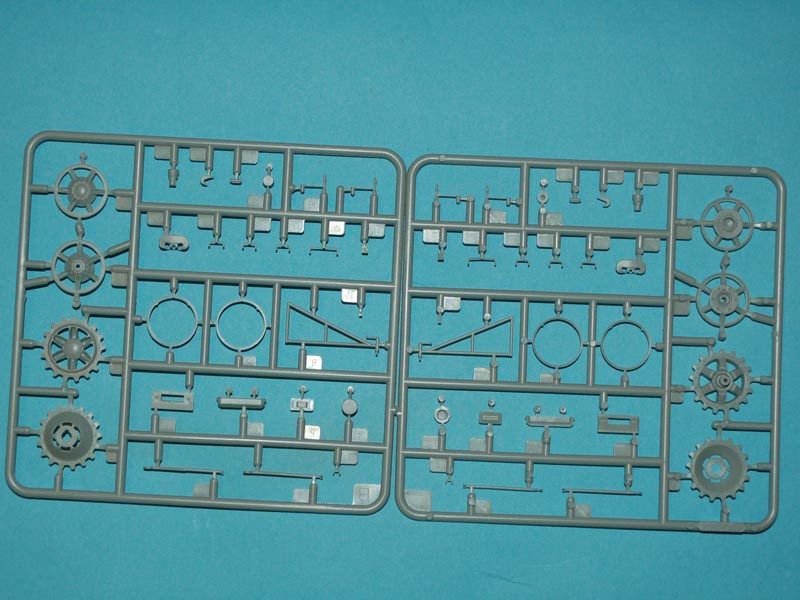
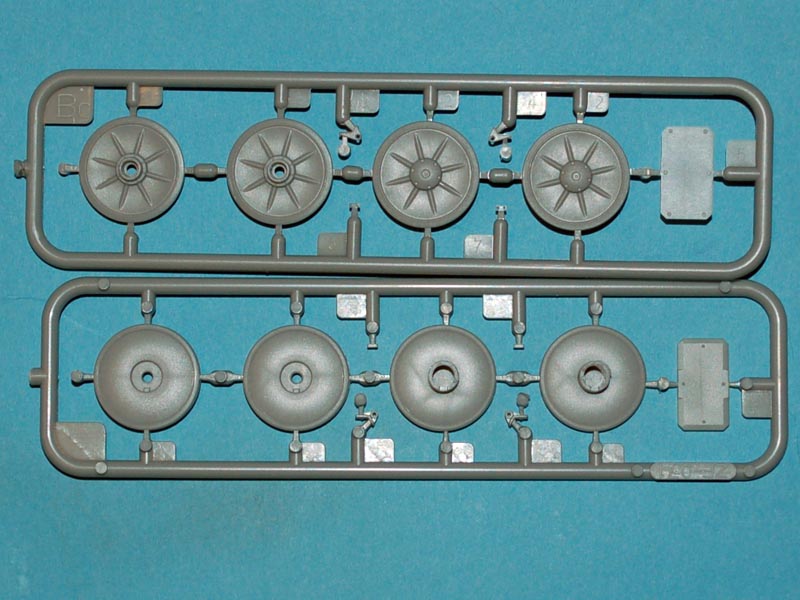
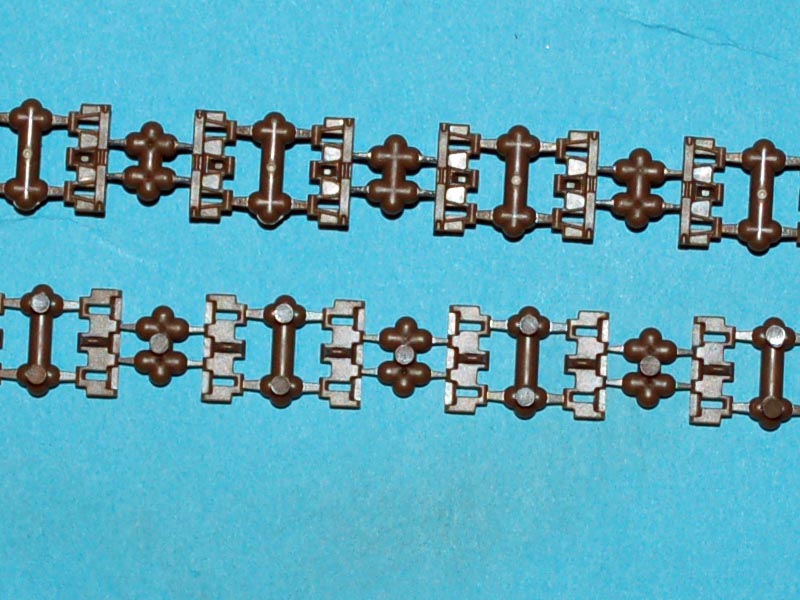
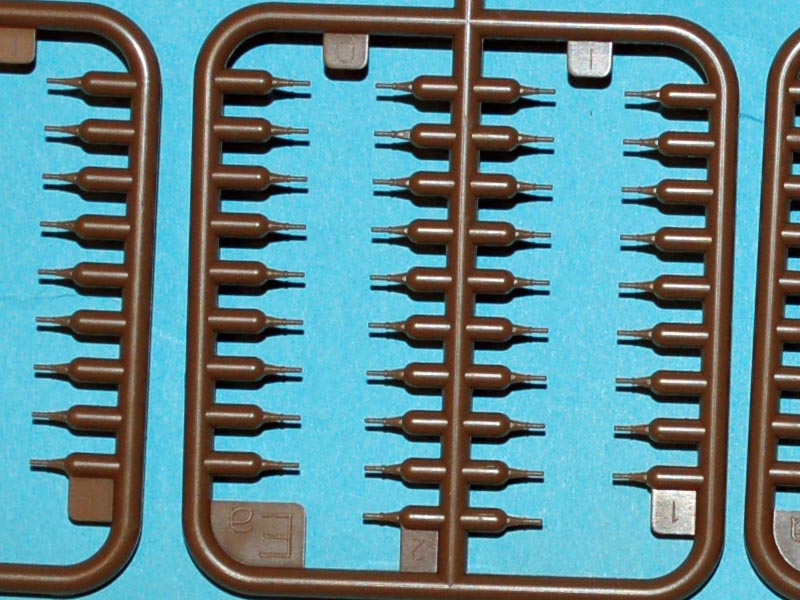
Stages 1 to 4
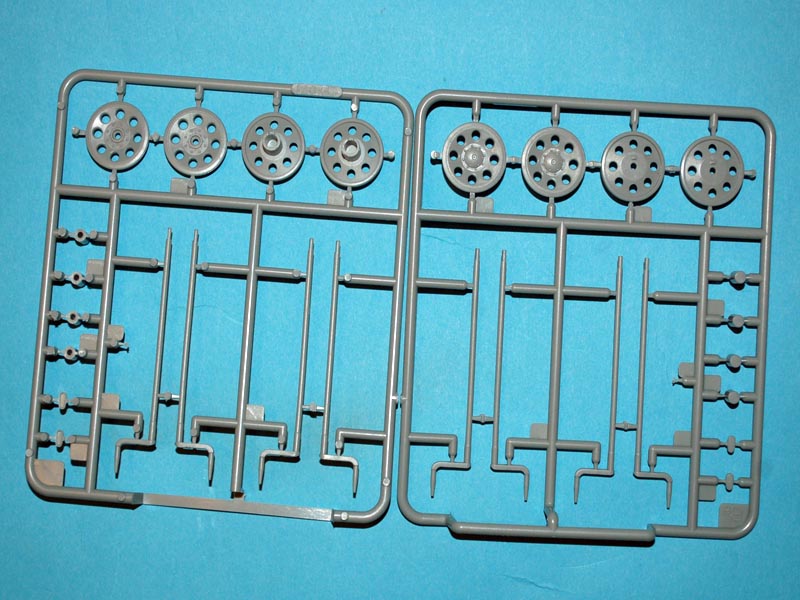
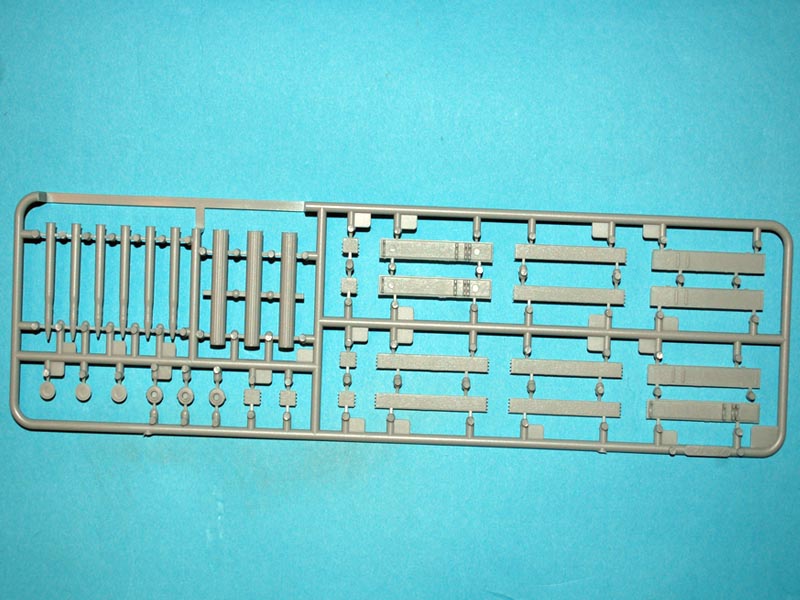
In the usual production sequence the first stages cover the suspension, wheels, and tracks. The suspension arms are workable because Bronco Models has replicated the torsion bar suspension from the vehicle. I do like the option of being able to naturally pose the vehicle on an uneven base if so desired however the torsion bars on this model are very fine, and so I recommend they are cemented in the desired place to remove/reduce the risk of breakage due to movement. The tracks included in this kit are individual track links which are secured to each other via a pin inserted from each side and cemented in place. Included with the tracks is an assembly jig to help you obtain the correct track alignment before the pins are glued in place. The inclusion of the working tracks and suspension arms does open up some interesting display options.
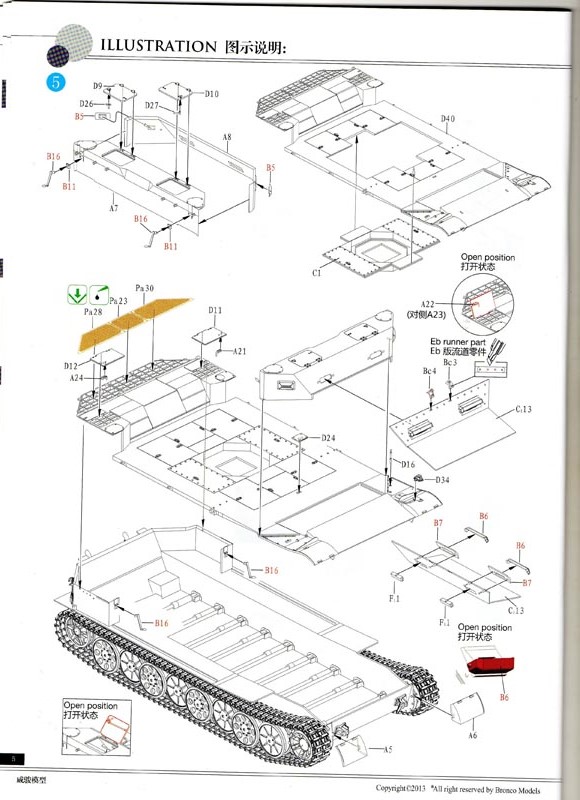
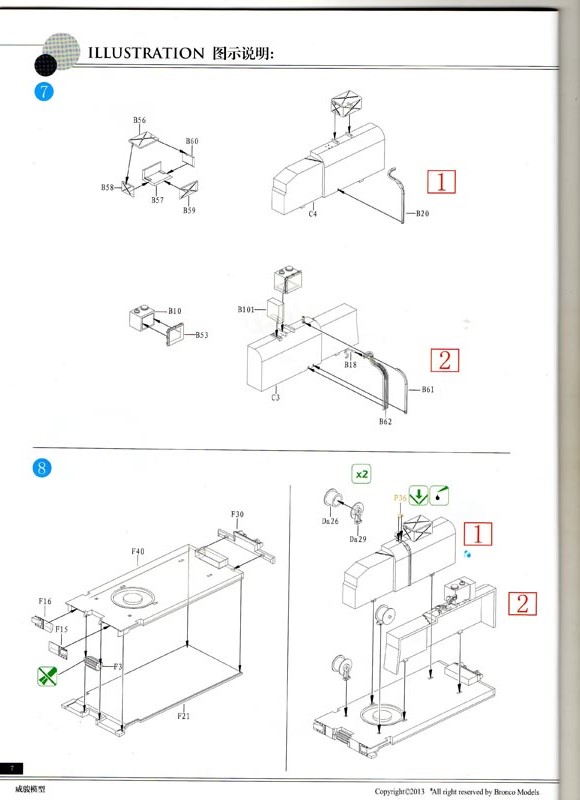
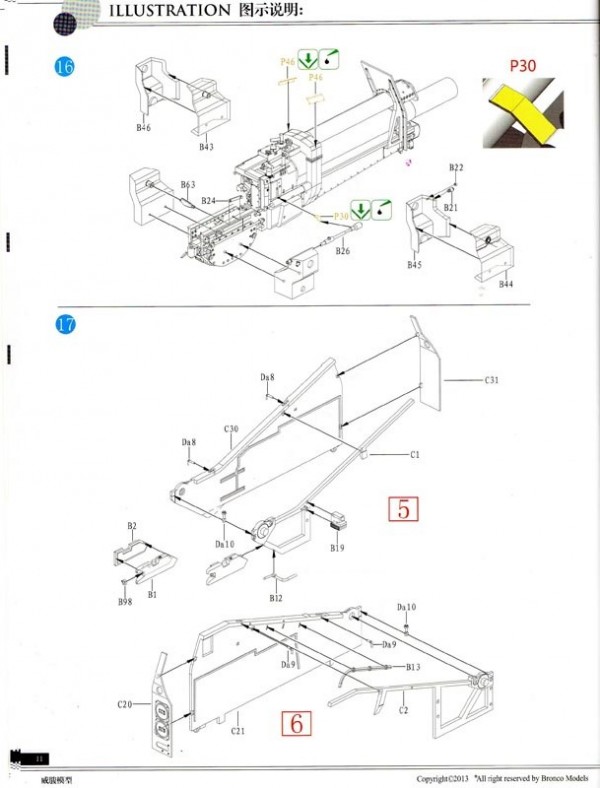
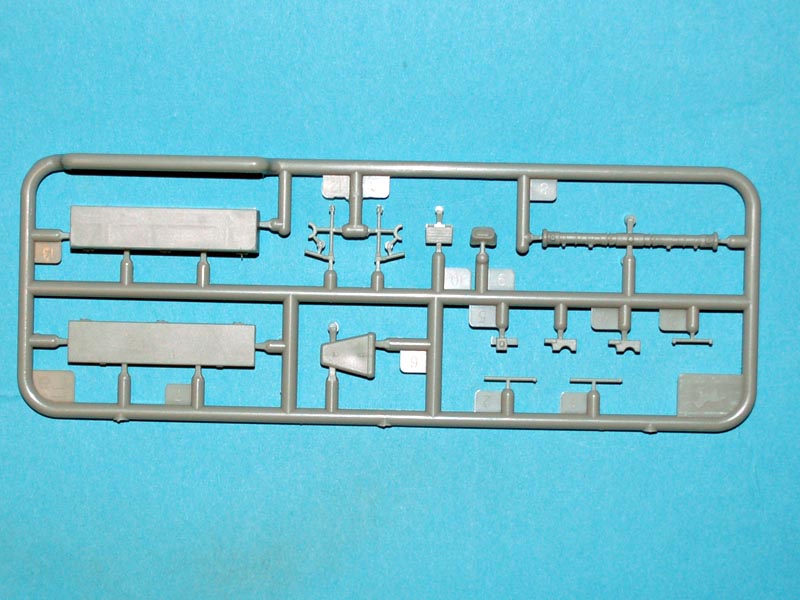
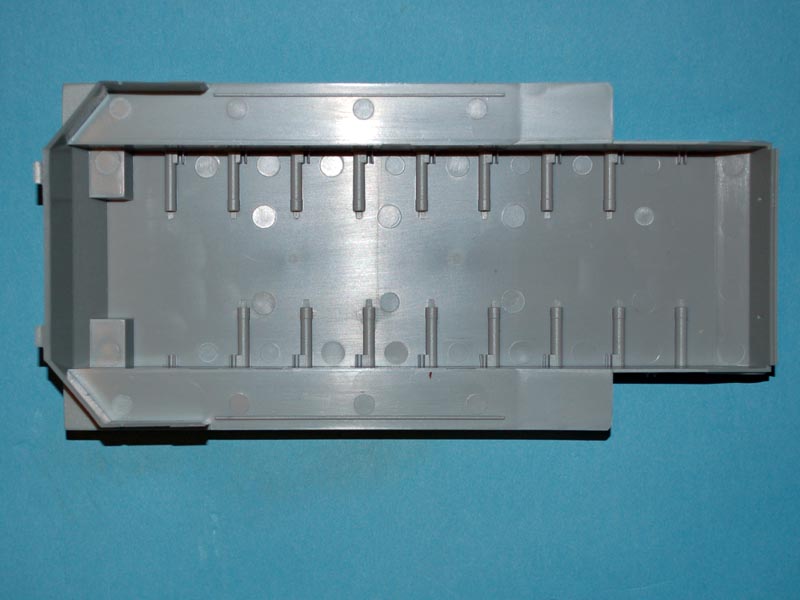
Stages 5 and 6
These two stages works on the floor panels for the vehicle and drivers compartment. Construction of these two stages looks straight forward enough with the construction of the jack looking the most complex part. The inclusion of the photo etched grill covers for the rear of the vehicle is another nice addition here.
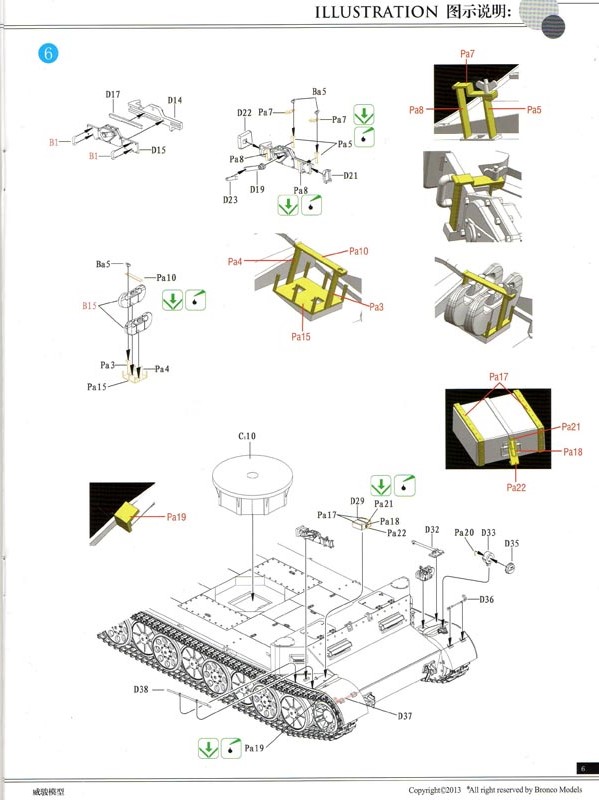
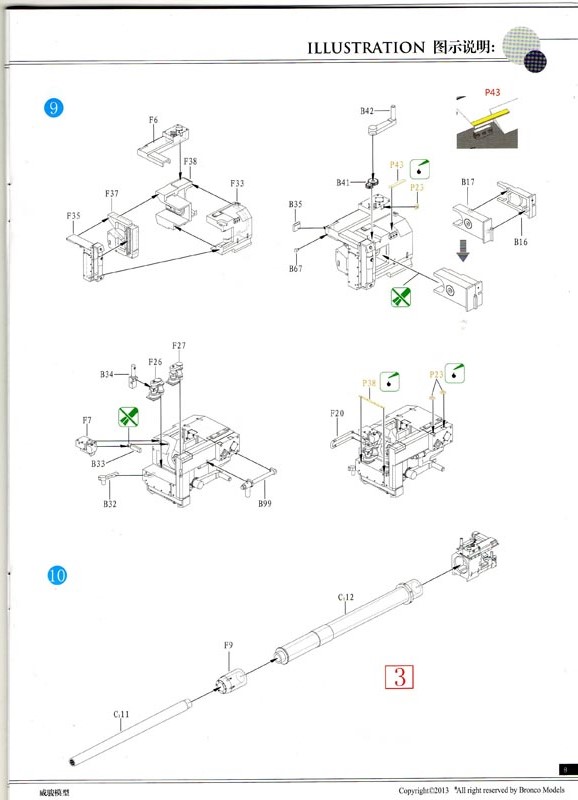
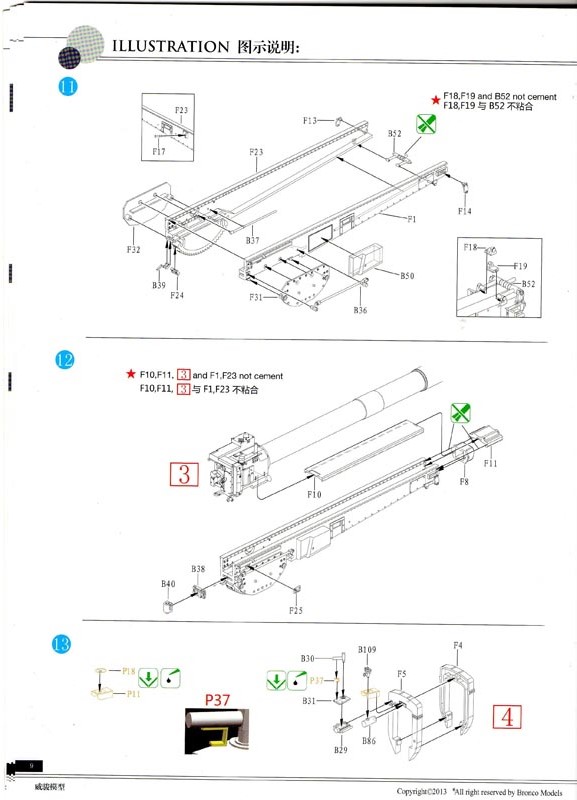
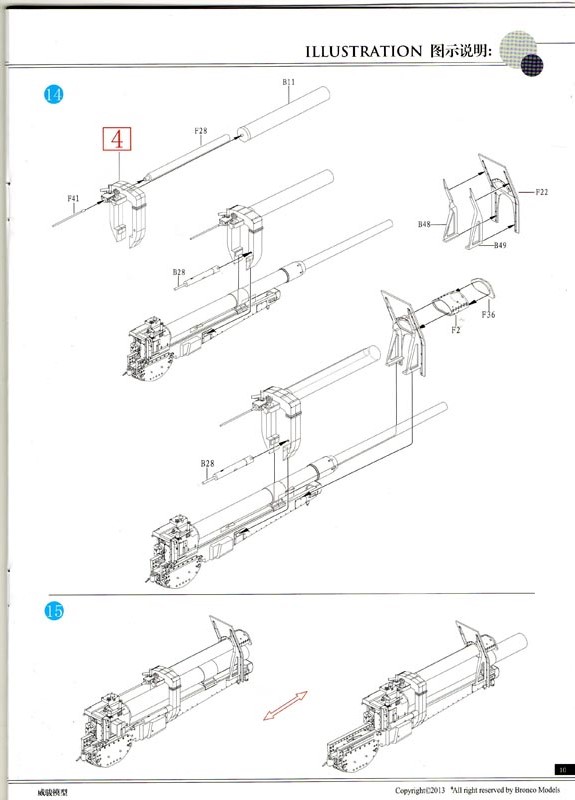
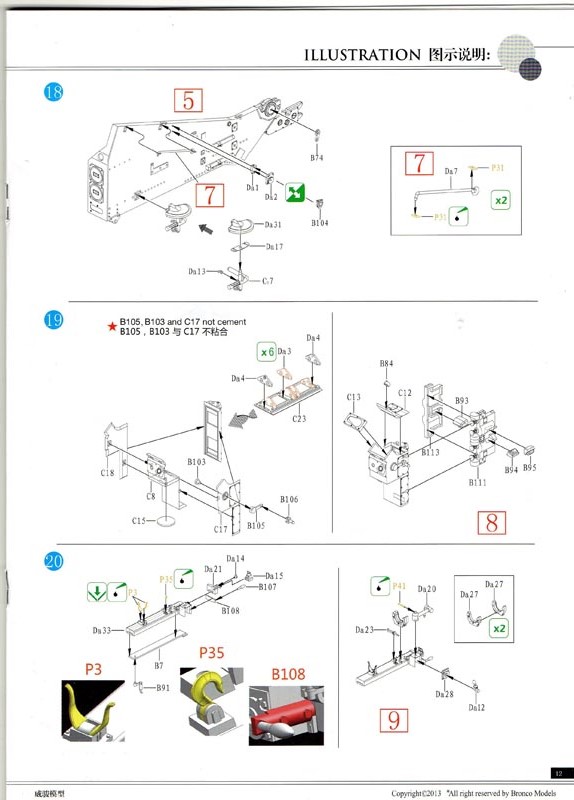
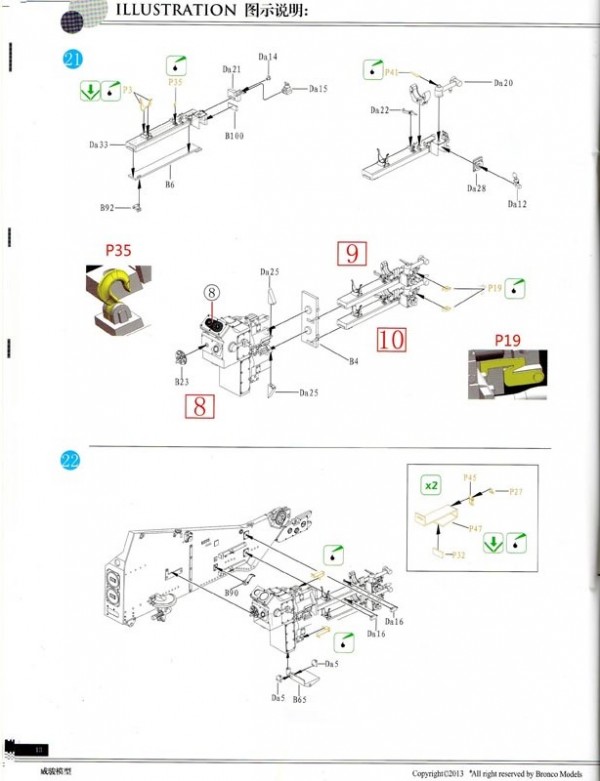
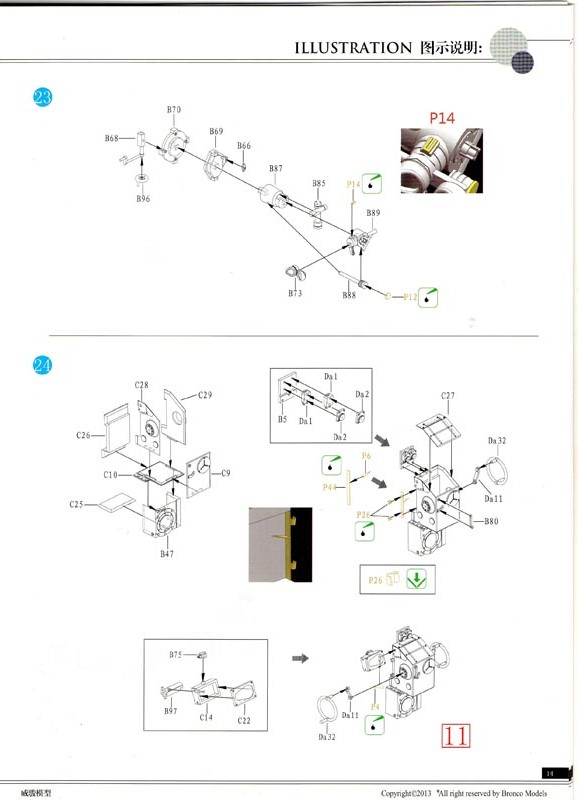
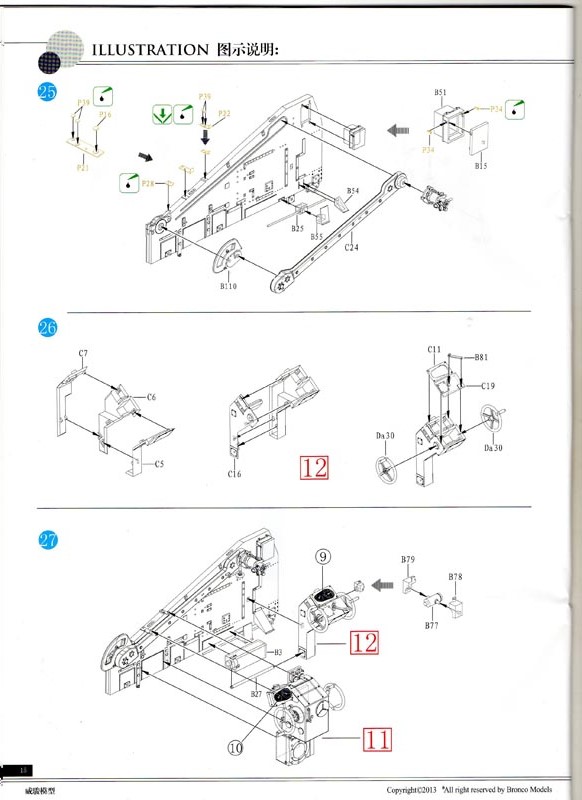
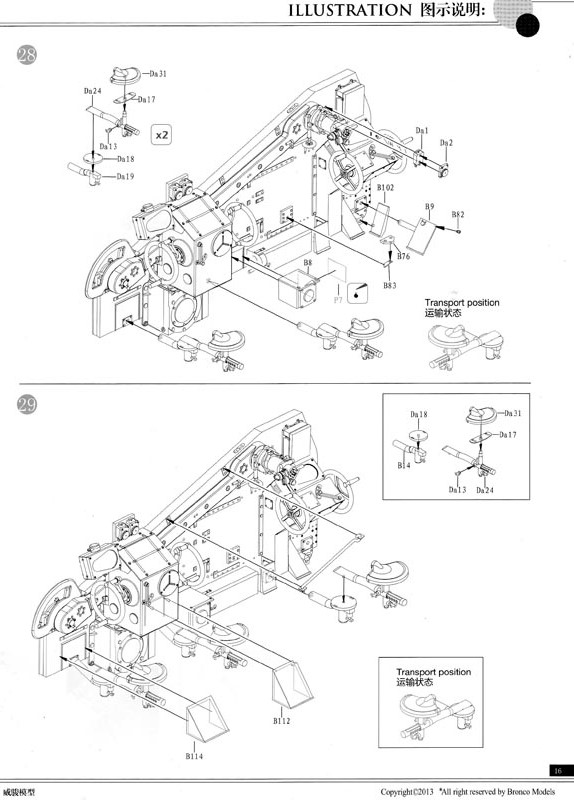
Stages 7 through 33
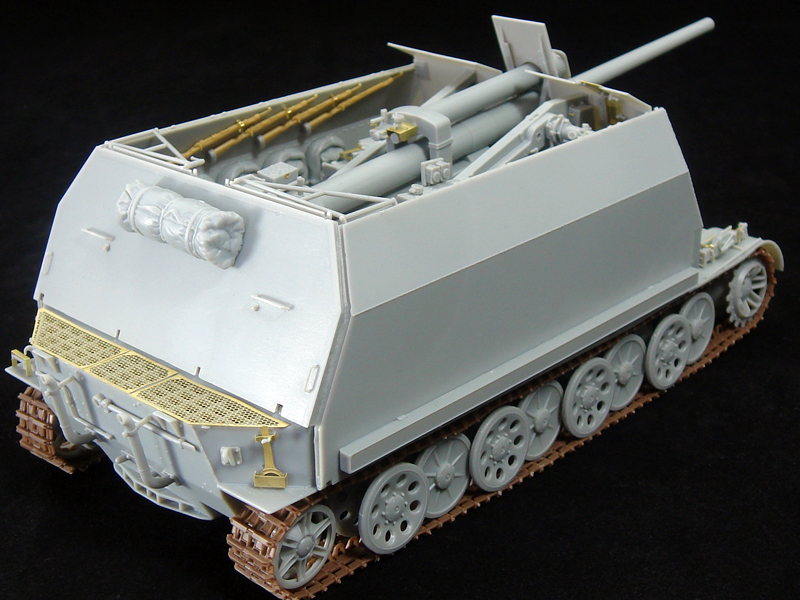
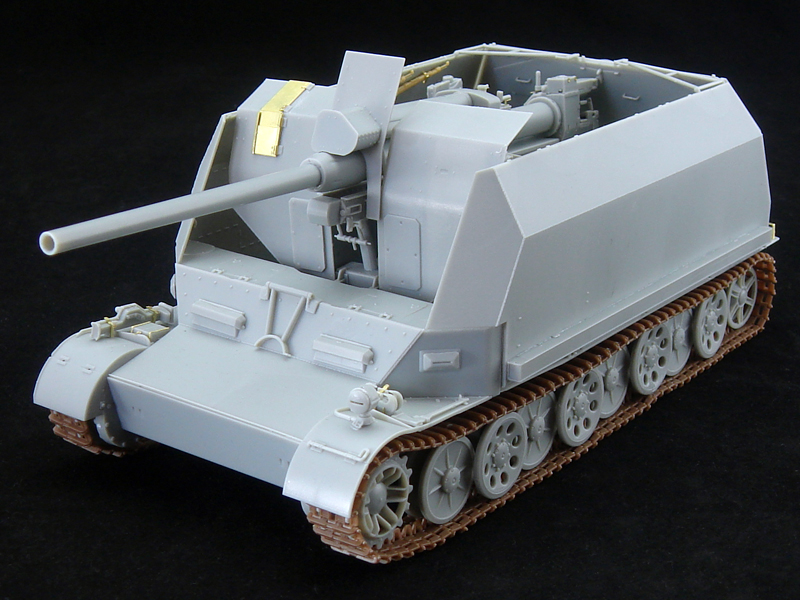
This huge number of stages covers assembly of the 88mm flak 41 gun. Now you may think this is a very large number of steps but judging by the detail included on the gun this number of stages breaks down assembly into bite size chunks. Looking at the amount of space the gun takes up on the floor of the vehicle I would not want to be a loader on this vehicle; as I suspect you would find yourself spending a lot of time on your back having been knocked out of the vehicle.
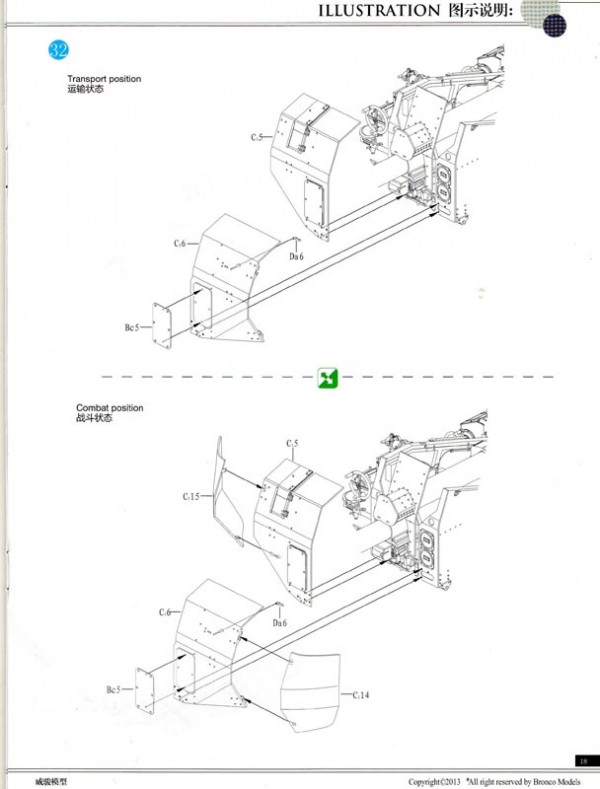
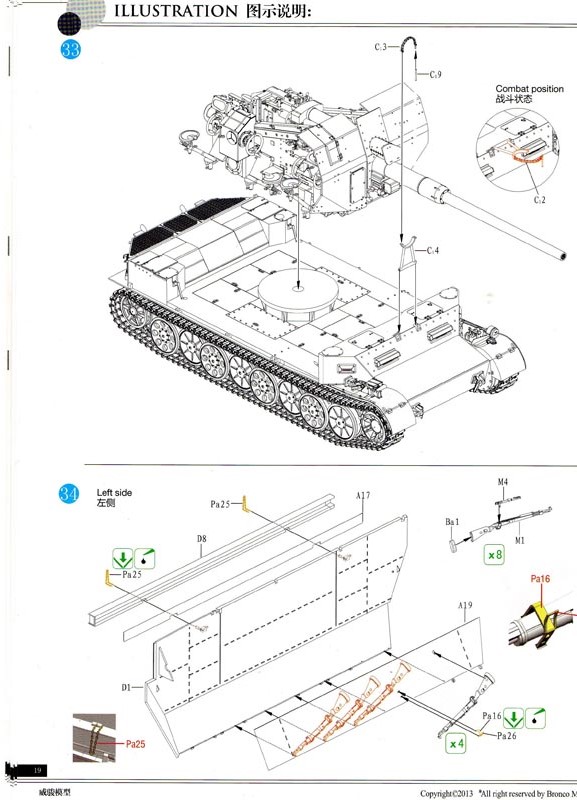
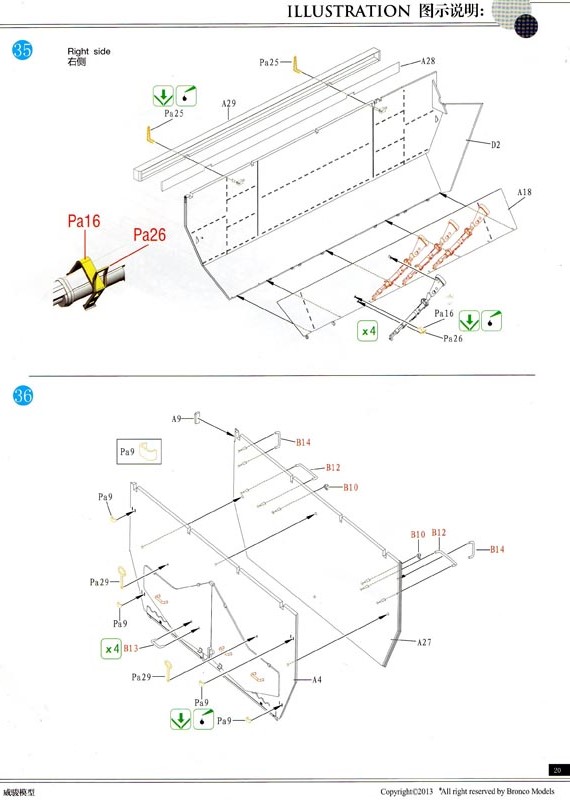
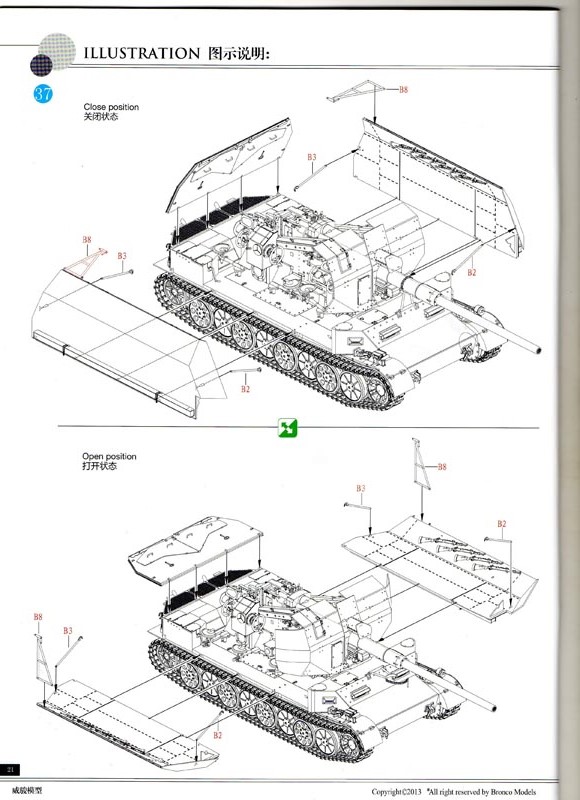
Stages 34 through 37
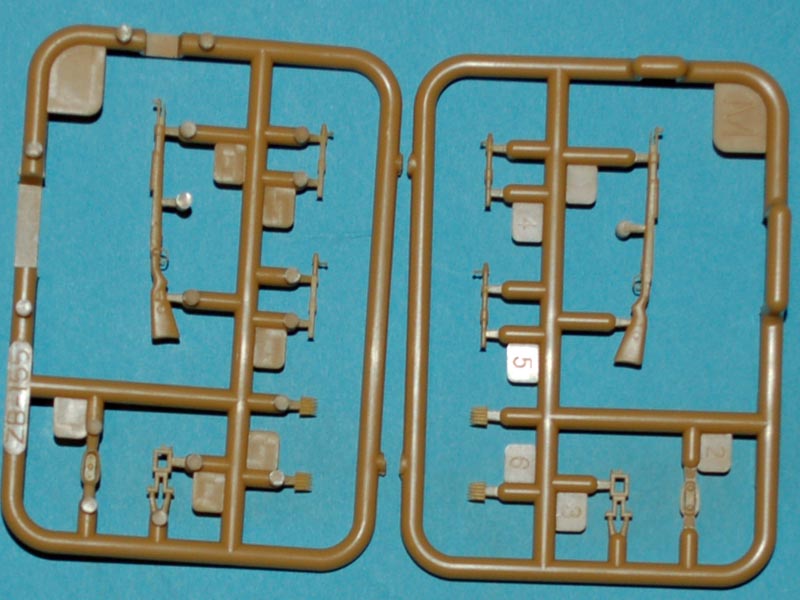
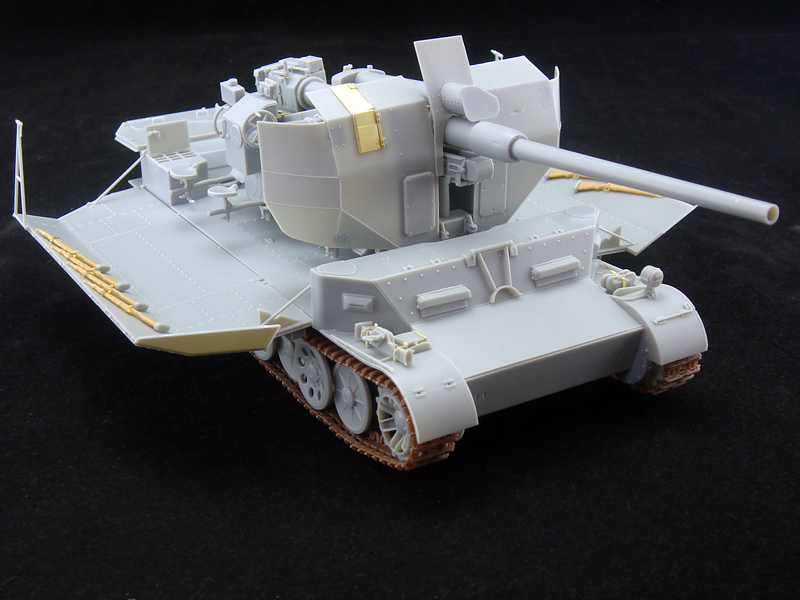
These stages guide you through the assembly and application of the fold down side and rear armour, the fold down panels are not moveable and so you will need to decide if you want them open or closed. Bronco Models has included the 8 rifles for the crew and these are held in place via the use of photo etch parts.
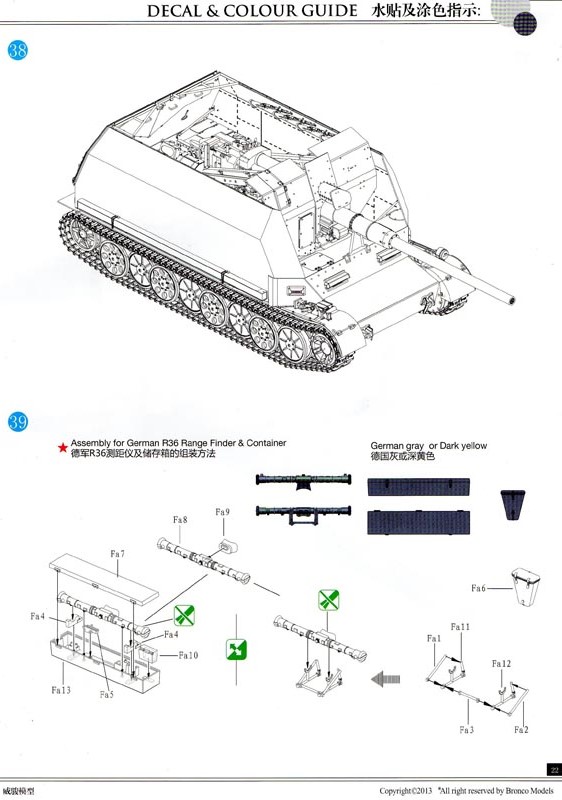
Stage 38
This stage just shows an image of the finished model with the side and rear panels closed/
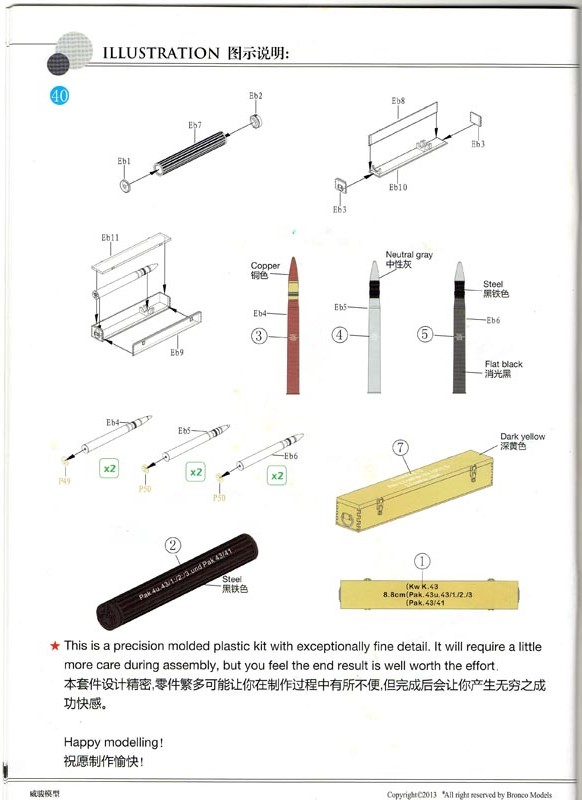
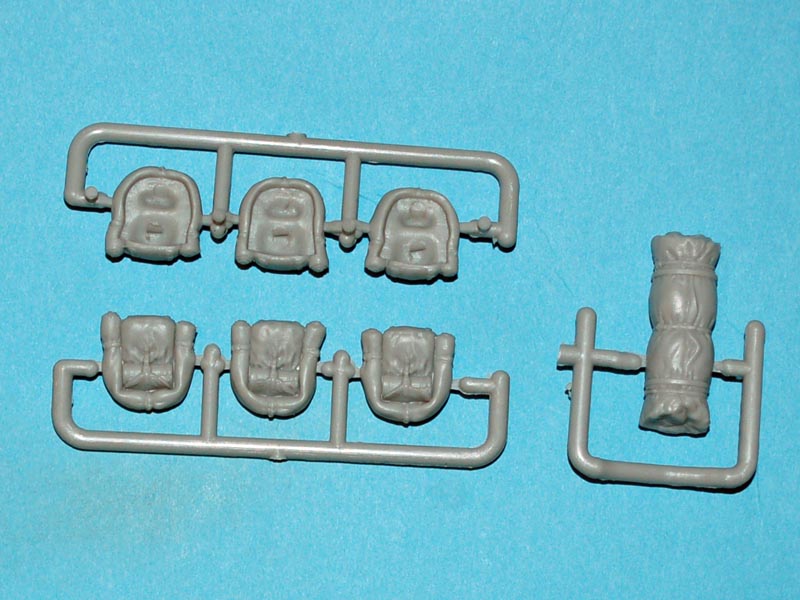
Stage 39 and 40
These two stages cover the assembly of a range finder either in use or placed in a storage box, and how to paint the 88mm ammunition included in the kit along with some storage boxes and baskets.
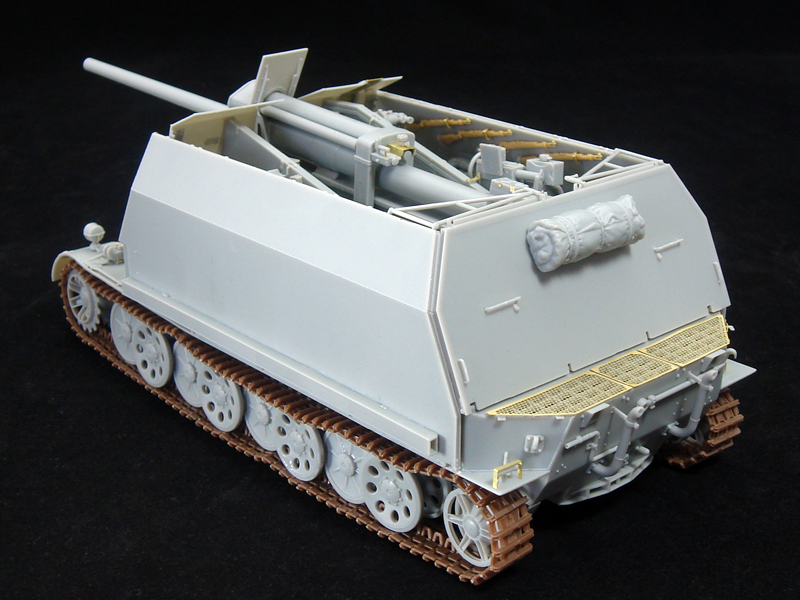
Conclusion
This latest product from Bronco models will make for an impressive looking model I believe, and if the forums are to be believed this model will be a hot item despite its limited participation in World War Two. The detail included in the kit from the box is excellent with just a crew being needed to complete it, and if Bronco Models follows their usual track a crew should not be far behind this release. The parts have been well laid out with the gates being small and perhaps more importantly not excessive. Due to the very small detail parts used in this model it is not for the novice modeller and it will also I suspect take some time to complete due to the high level of detail. The panel lines are in my opinion are well rendered and crisp.


Comments