Introduction
Starting in mid-1930, Mercedes-Benz produced their W136 automobile. Coming to the public market in 1936 and listed as the Mercedes-Benz 170V. The Type 170V replaced the six cylinder predecessor with a more powerful, yet more fuel efficient four cylinder engine. A reliable and technically advanced vehicle for the time, the Type 170V was a perfect choice for the Wehrmacht. Not suitable for off-road travel, this car was nonetheless the best choice at the time for the German command. Used as a scout, radio and mobile repair vehicle, over 19,000 of the type 170Vs made their way into the German Army between the years of 1938 to 1942.
The Kit
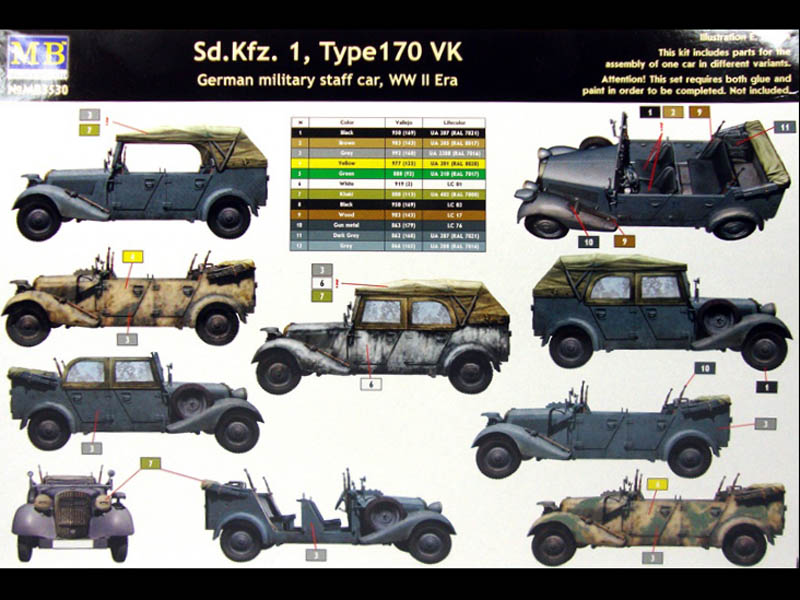
The Master Box LTD. German Military Staff Car, WWII Era Sd.Kfz. Type 170VK is packaged in the standard flip-opening-end-style box with decently attractive box art on the front, depicting the constructed model. The bottom of the box is the paint chart showing nine different color schemes as well as listing which colors to use to obtain these finishes.
Upon opening the box, you will find a single clear plastic bag containing all of the sprue trees and a separate plastic bag containing the clear parts, decals and rubber tires. The total parts count comes to 235, less the decals, of which 28 parts are highlighted on the parts legend in the instruction booklet as not being used.
Contents of the Box:
3no. Sprues molded in dark grey styrene
1no. Sprue molded in tan/grey styrene
1no. Sprue molded in clear styrene
5no. Sprue molded in black rubber (tires, one loose)
1no. Decal sheet
1no. 40-page instruction manual
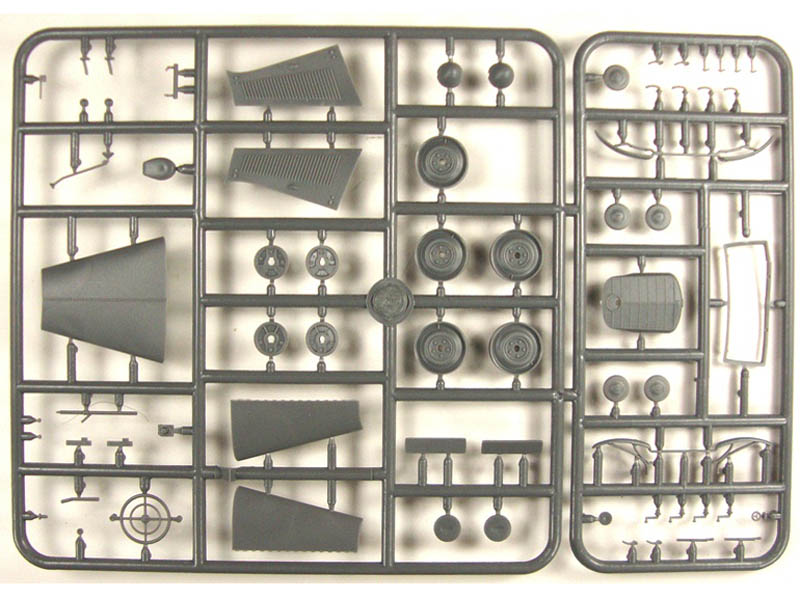
At first glance I find these parts to have excellent detail with crisp molding. There is some noticeable flash and a couple of seam lines, but certainly nothing that cannot be quickly and easily sanded. Here is a look at what is on each sprue and any minor things to look out for in terms of cleanup.
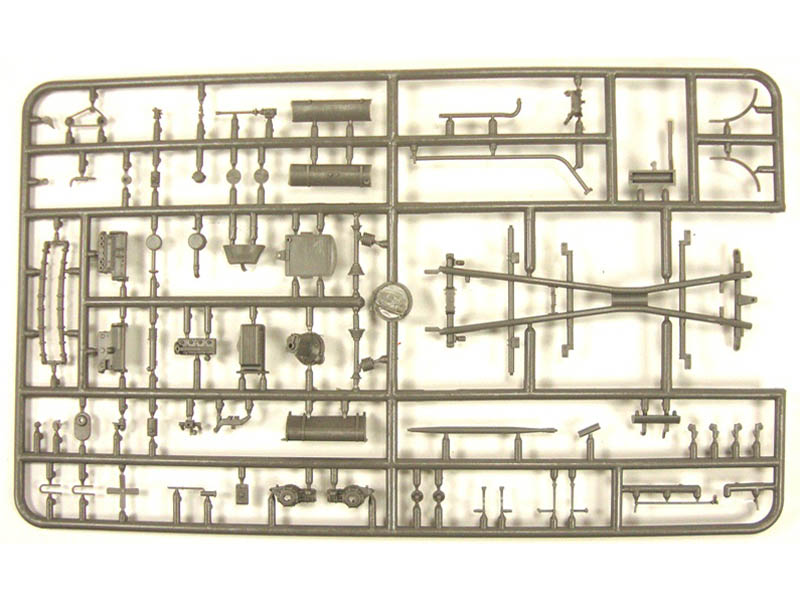
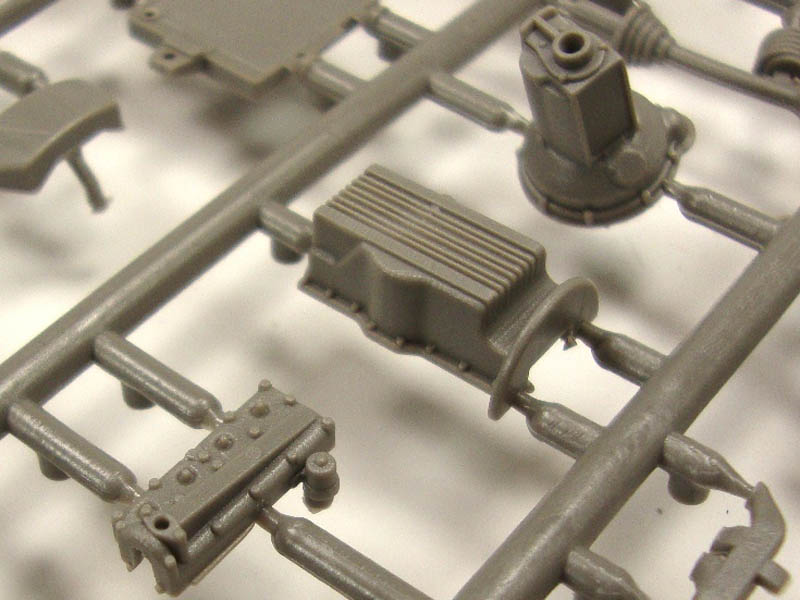
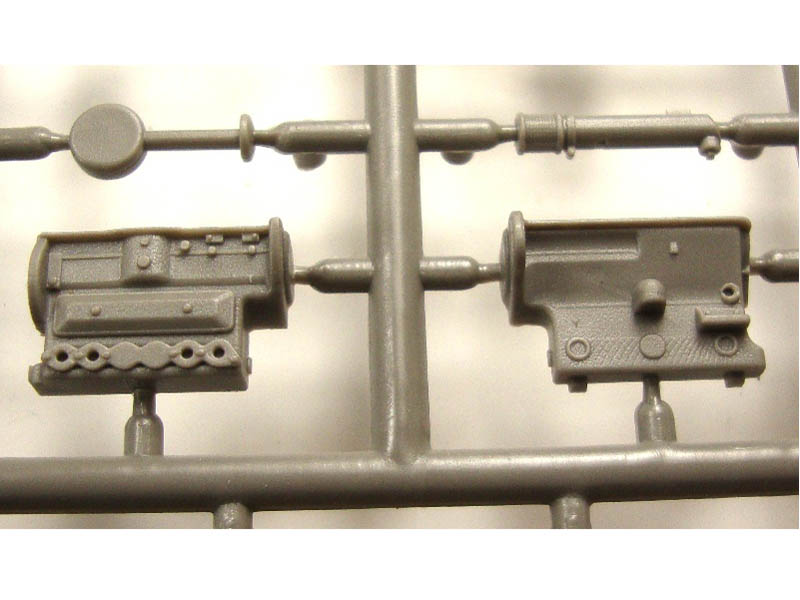
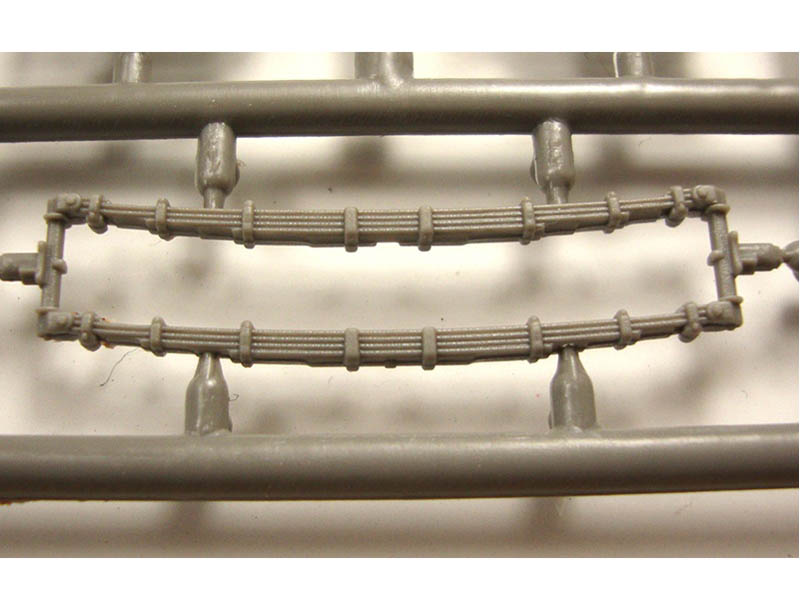
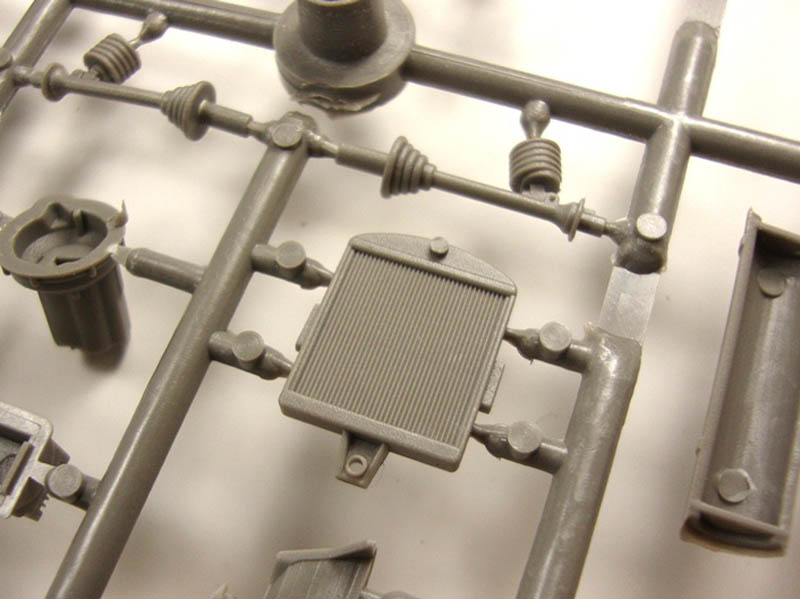
Sprue A: This sprue is the single tannish-grey colored tree. First supplied here are the engine components for which there are 20 parts. The engine is exceptionally molded, detailed very well, and looks like it will be a fun step in the construction of the kit. Also on this sprue are the radiator, fuel tank, frame and suspension parts. The frame is a molded version of Mercedes-Benzs classic X-frame design. Along with the frame there are the crisply molded leaf springs, exhaust system, and driveshaft with separate universal joints.
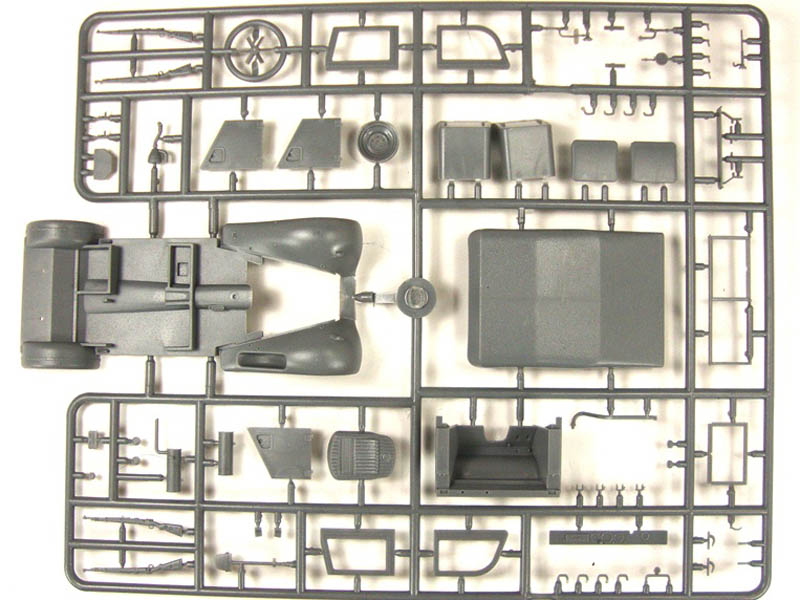
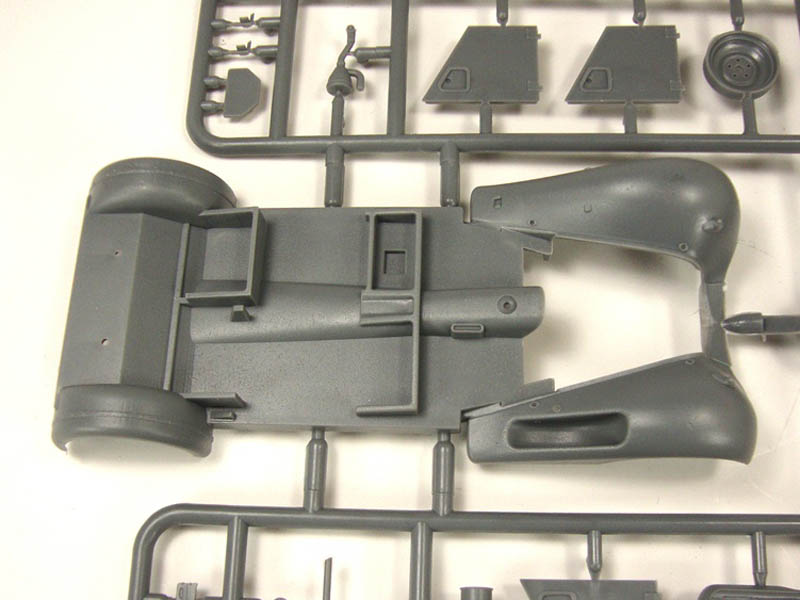
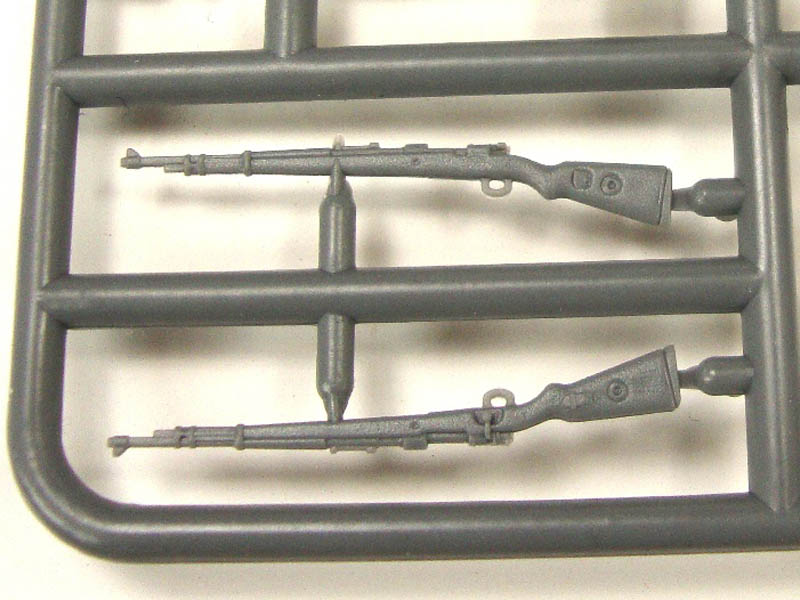
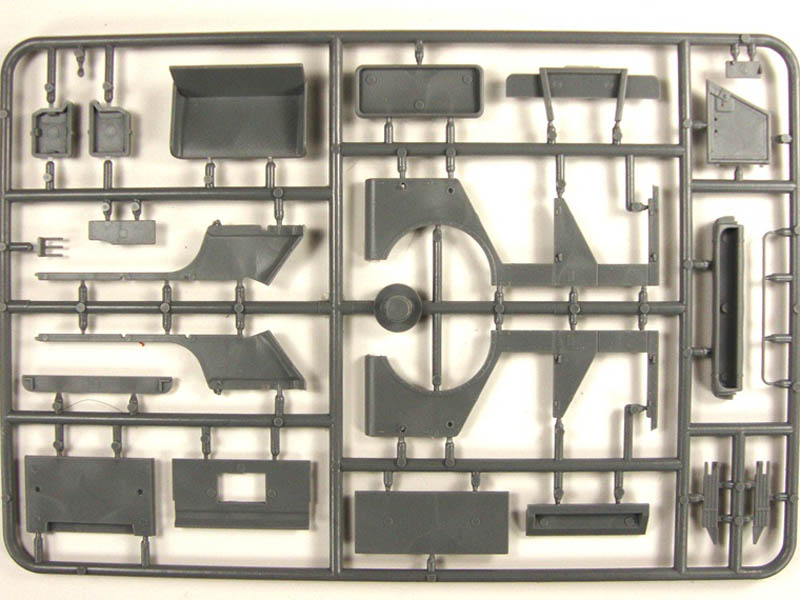
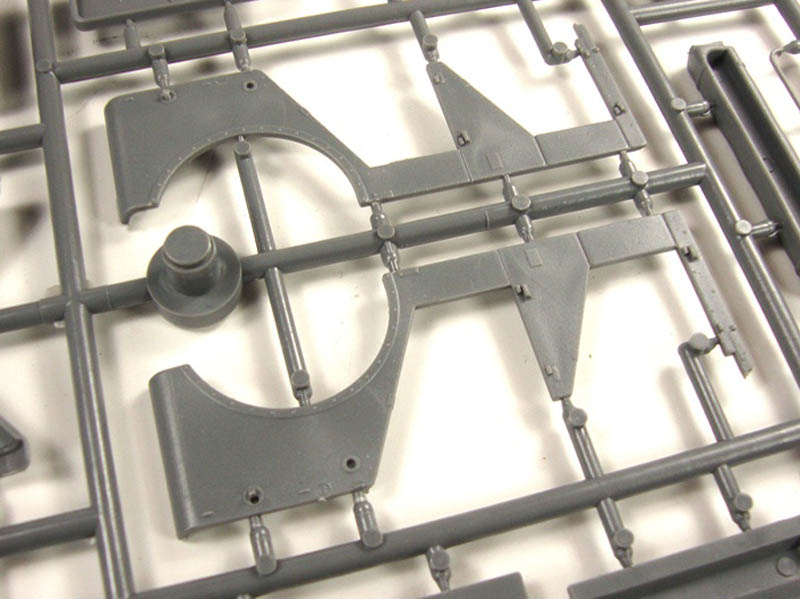
Sprue B: This sprue contains the main body of the car. Both front and rear fenders are molded cleanly to the floorboard section. Here also we find the front seats, dashboard with molded instrument cluster, firewall for the engine compartment, grill, window frames, four rifles, various handles, tie downs, tool clasps, canopy section and three of the doors. Being a car in 1/35 scale you will want to take special care in removing the smaller parts from this sprue as the tiny handles and clasps are, well, tiny and of course very delicate. There are two grill options included in this kit; the builder can choose either to install.
There are a couple of minor items that will need attending to as this kit is built. First is the inside of the canopy or roof section if you plan to build this vehicle in the top up configuration. There are six ejector pin marks that will need to be sanded down. Second would be similar pin marks on the inside of the door panels that require sanding. The last item is one I am a bit surprised was left out of this kit. The backs of the front seats as well as the rear bench style seat do not have a padded section either molded into the piece or supplied as a separate part. This was most likely done to leave more room if seated figures would be added to the build. With a little time and some modeling clay or even a carved piece of thick styrene, suitable seat backs can be constructed.
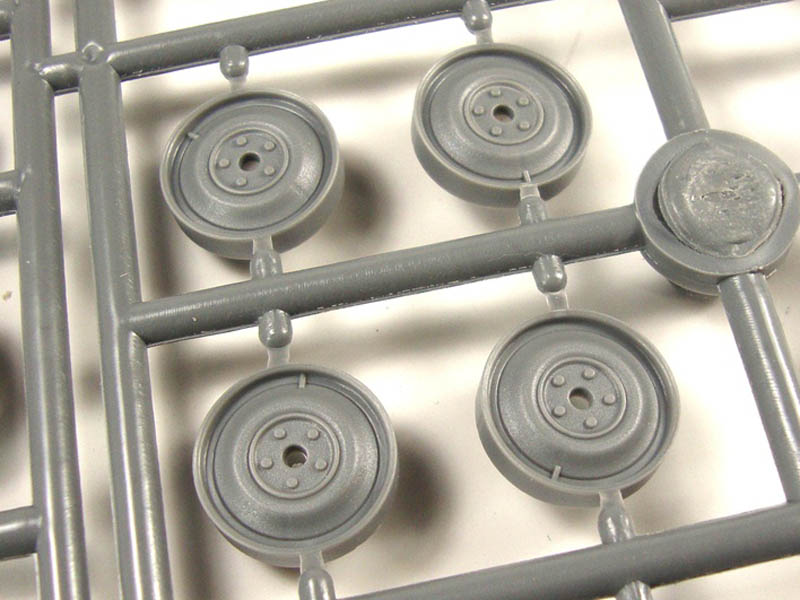
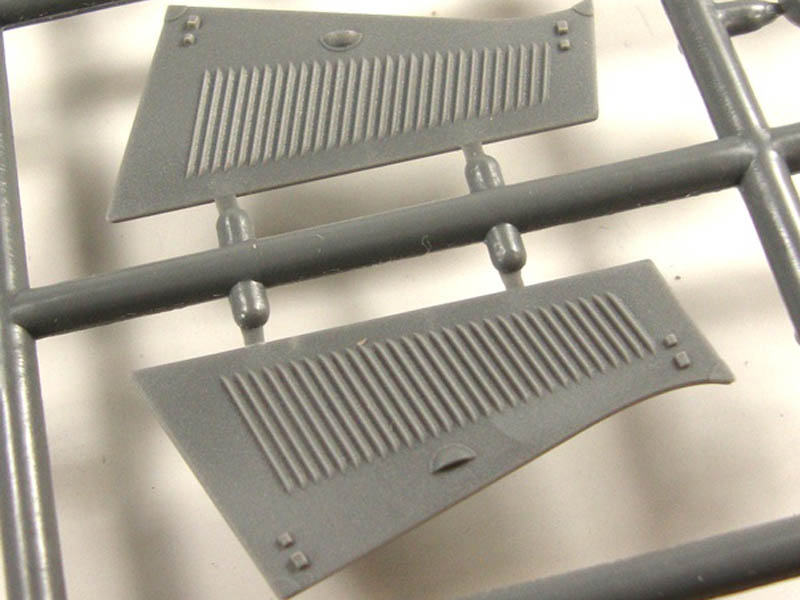
Sprue C: Contained on this sprue are the windshield, wheels and hub caps, hood parts, headlights with separate covers, Notek light and steering wheel. Again, removal of some of these tiny parts will take special care. A nice option with this kit is being able to model the hood in the open or closed position. Please note that if you wish to model the open position that there are some ejector pin marks on the inside of the hood parts that you may want to remove prior to installation. Another nice option with this kit is that the wheels, or rims if you will, can be modeled with or without the hubcaps. The rims have the lug-bolts molded on to them. There is a hole in the center where the center cap would be. This can be replicated easily with a rounded sliver of styrene rod or even a small drop of white glue or super glue.
On this sprue there are the front and rear bumper sections. These are marked as not used by the parts legend. I would think if someone wanted to model this vehicle in an original or civilian configuration they could add these parts
just a thought I had.
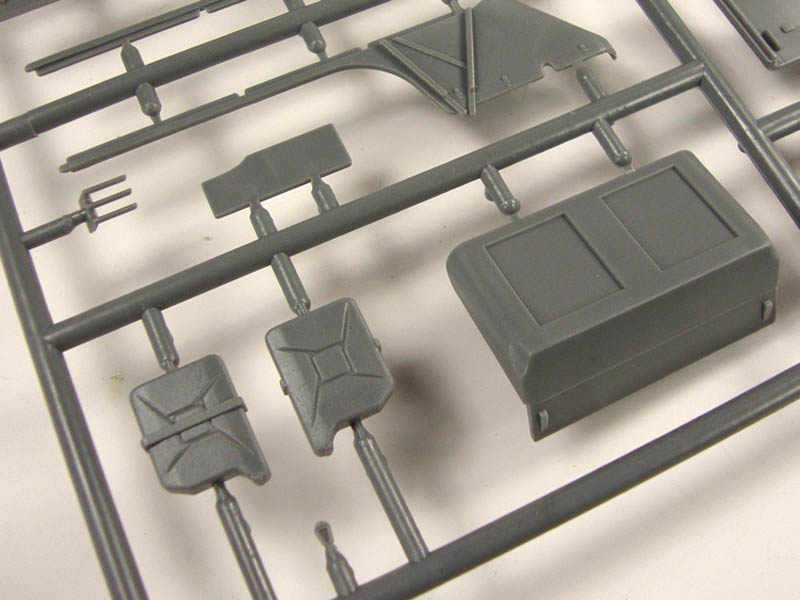
Sprue D: This final sprue of grey molded styrene contains the car bodys sides with the door openings, the fourth door, the canopy and folded support bars, rear bench seat, trunk, and one jerry can. Some light flash on a couple of parts, but again, a quick fix along with removing the pin marks on the inside of the rear door.
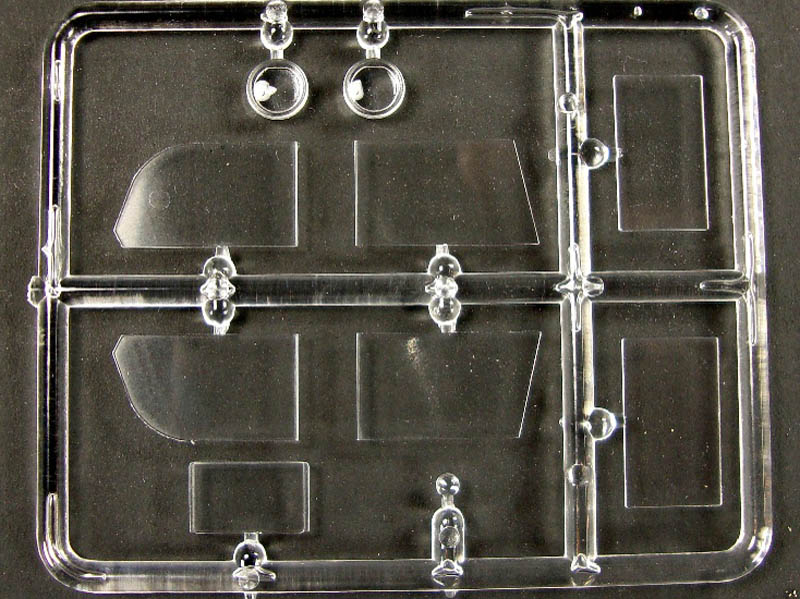
Sprue E: This is the clear styrene sprue. This contains the windshield inserts as well as the side and rear window pieces and two headlight lenses. All of the parts are very clearly molded.
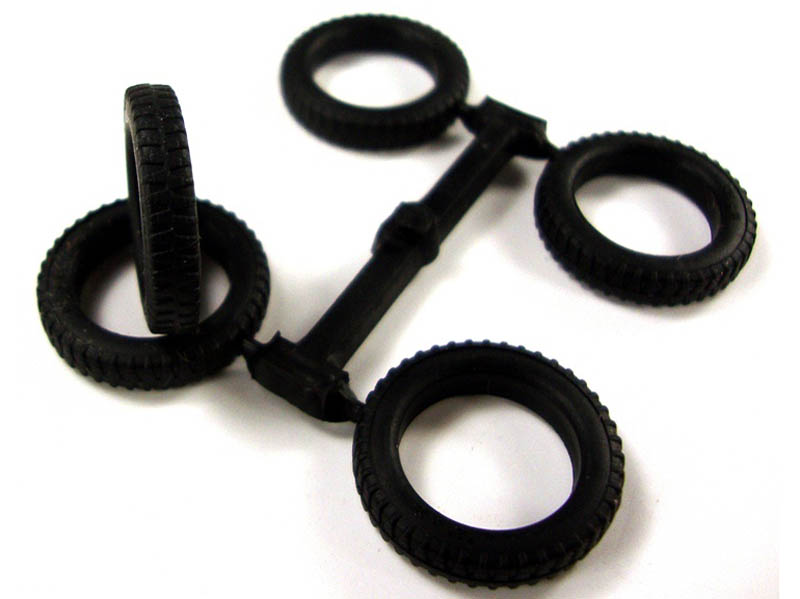
Sprue F: This sprue is molded in black rubber and contains the tires for this vehicle. There are four tires on the sprue and the spare tire are separate. All five tires have small raised lettering on the inside and outside of the tire. There is a typical mold seam running around the tires in the center of the tread. Again, a quick fix to remove the seam.
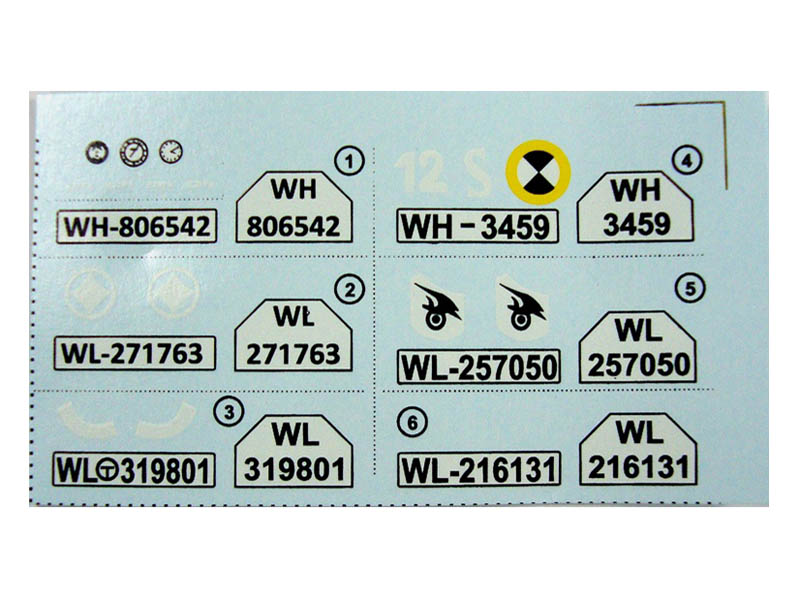
Decal Sheet: Clean and clearly printed sheet containing the instrument cluster for the dashboard and six different 2-piece license plates with matching unit insignia.
The Instructions:
The instructions are clearly printed out in black and white landscape booklet configuration, 41 pages in length. The first page in the booklet is the parts legend showing all parts used in this kit. All highlighted parts are NOT to be used. The instructions are broken up into three major sections of the construction process; Engine, Frame and Auto body. Each section has its own numbering sequence. The construction steps are as follows:
Section 1 Engine; Steps 1 thru 9
This section guides you through the construction of the engine components.
Section 2 Frame; Steps 1 thru 23
Parts 1 thru 13 of this section cover the front and rear suspension including the axles.
Parts 14 thru 21 cover the installation of body mounts, exhaust system, engine to the frame, driveshaft, two final parts for the engine and the radiator and shroud.
Parts 22 and 23 cover the installation of wheels and tires and a top and bottom view of all the parts that have been installed to this point.
Section 3 Auto body; Steps 1 thru 39
Parts 1 thru 10 cover the body construction including firewall/dashboard section, grill and hood assembly with installation in two variants.
Parts 11 thru 13 cover the interior parts installation as well as the sides to the body.
Parts 14 thru 16 cover the construction of the rear door part for the trunk area. There are 4 different configurations to choose from in these parts. With a little research you should be able to find the one that is right for you.
Parts 17 and 18 are the installation of the doors and miscellaneous trim pieces.
Parts 19 and 20 cover the construction of the jerry can and its installation on the model.
Parts 21 thru 25 is the installation all of the exterior parts, such as the lights, mirrors and Notek light. Please note, as I cross-checked the parts with the instructions, I noticed there is a slight sink mark on top of the Notek light. This is easily corrected with a dab of filler and a light sanding.
Parts 26 thru 29 cover the construction and installation of the windshield frame and window in two different variants.
Parts 30 and 31 are the construction and installation of the spare tire.
Parts 32 and 33 cover the installation of the four rifles and clamps for holding them.
Parts 34 thru 38 are the installation of roof in different variants covering the canopy installed in the open or closed positions, along with the side window construction and installation.
Part 39 covers placing the body on the frame.
Finishing:
On the back of the box that the kit came in, it shows the possible variants and colors that can be modeled with this kit. There are nine different options offered up with a list of the paint colors based around Vallejo and Life Color Paints.
Conclusion:
After taking a close look at all the parts and instructions, this is a great little kit. There is a lot of detail packed into this car. 1/35 scale autos can be tricky for some as there are numerous extremely tiny parts included, but with time and patience there is no reason anyone cant construct a beautiful display model. The few minor issues I found are outweighed by the clean molds and detail. The manufactures suggested retail price is certainly high at $51.00 USD. With some searching at local hobby shops and/or on line the cost can be certainly brought down from that.
Sources:
Link to MBs 3D exploded view
kfz. Der Wehrmacht website
Wikipedia
SMC Car Blueprints forum


Comments