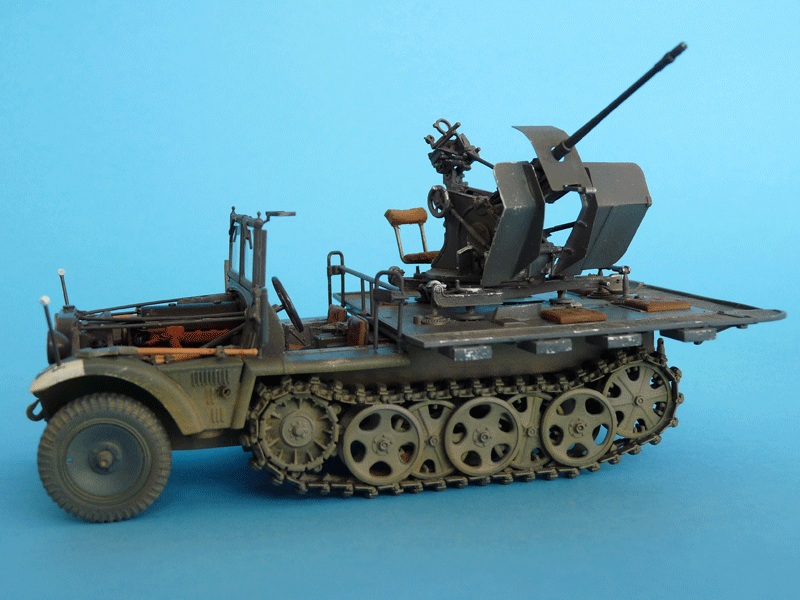
introduction
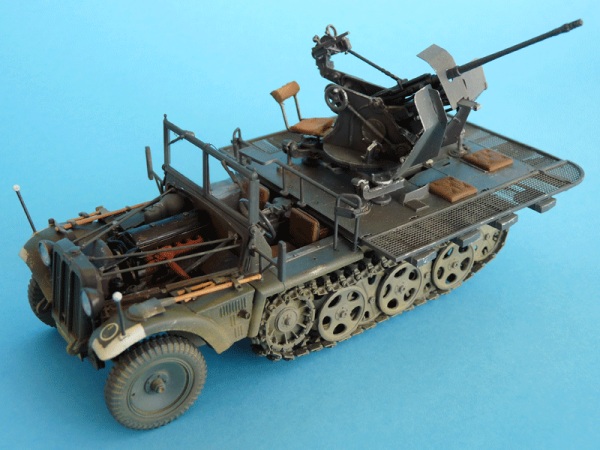
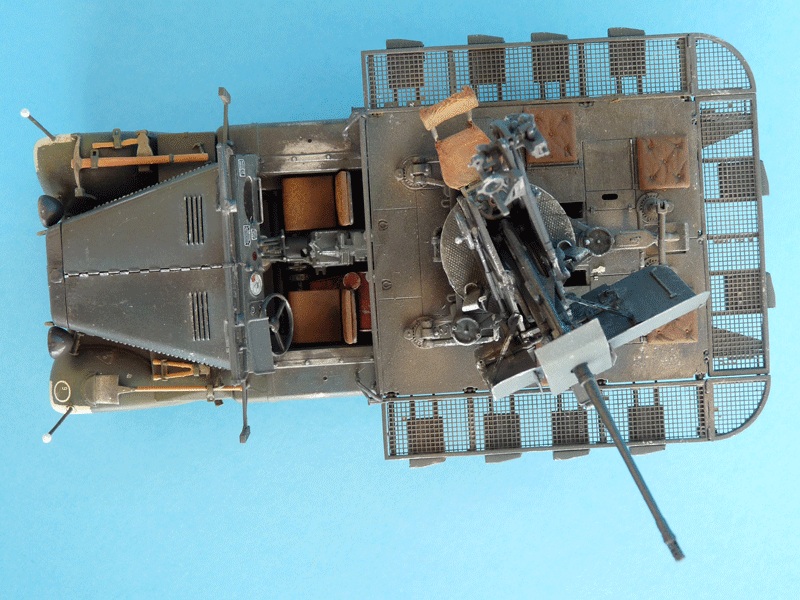
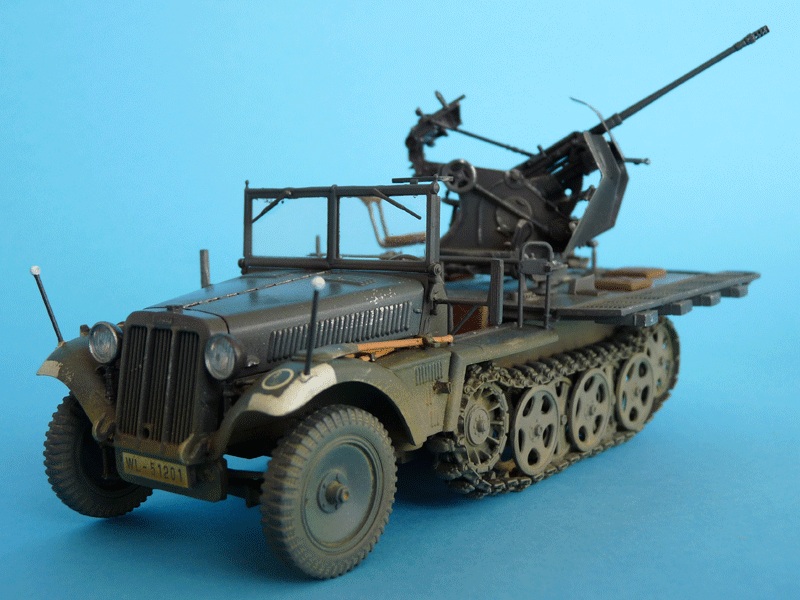
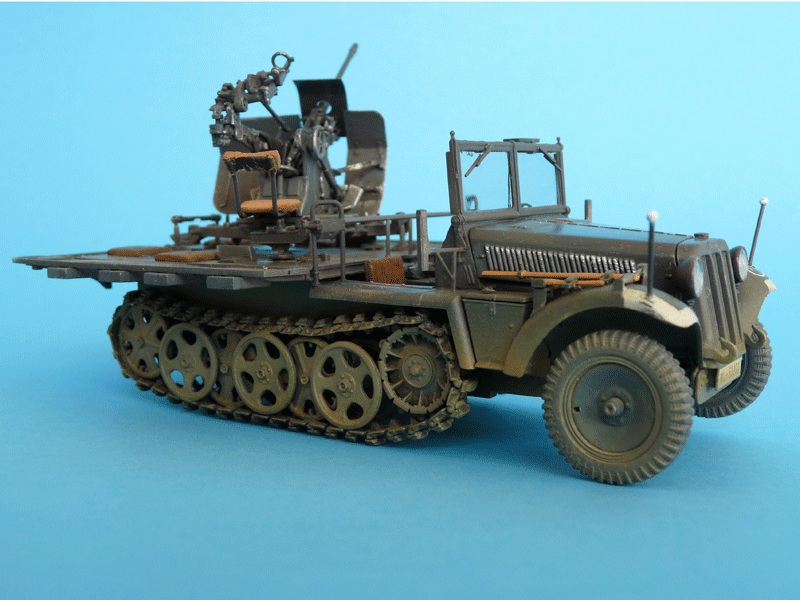
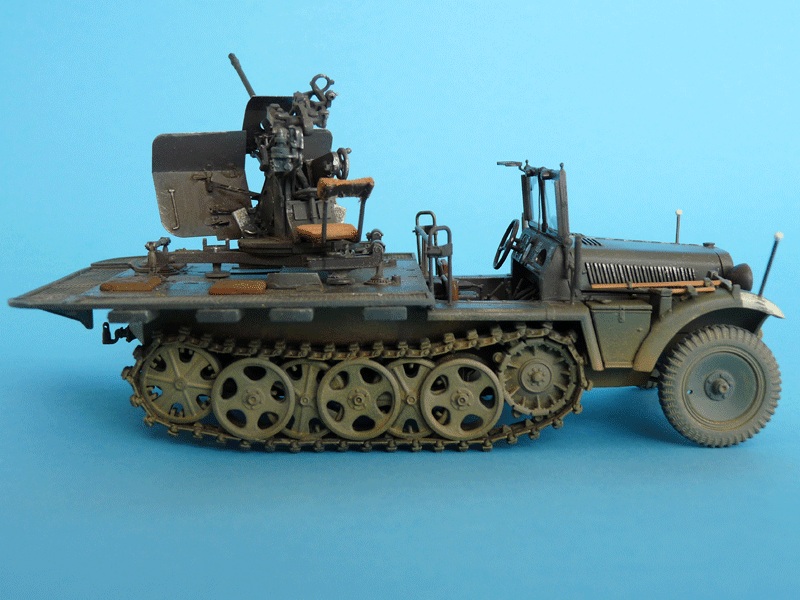
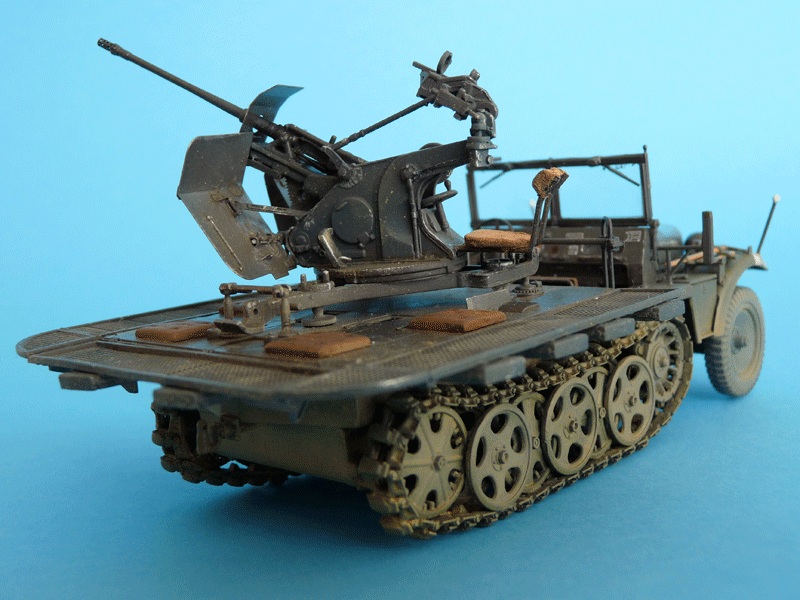
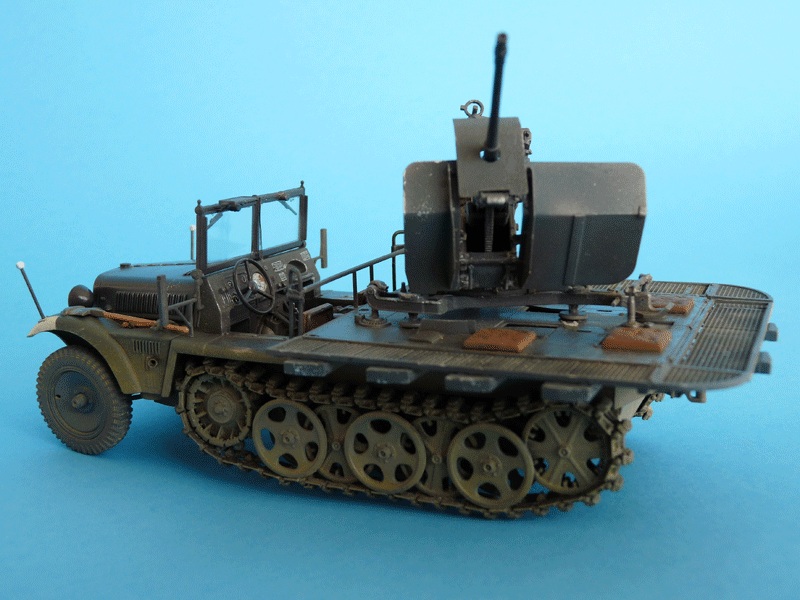
The Sd.Kfz. 10/4 was an early attempt for a mobile anti-aircraft protection for the fast-advancing Wehrmacht units. About 2000 units were produced from 1939 to 1944. As war progressed many changes were introduced, including a new gun with a higher rate of fire; some vehicles had armor plates around the drivers cab and the engine compartment.
The subject of the kit is a 1939-pattern vehicle, with the earlier 20mm FLAK 30 AA gun. In my opinion the kit is a worthy replacement of earlier ESCI and Italeri kits, and complements nicely the Sd Kfz 10/5 that came out in 2011. The In-box review can be found:
DML Sd. Kfz. 10/4
Following are my observations on the construction sequence, and a few recommendations on how to keep the build as simple as possible.
construction
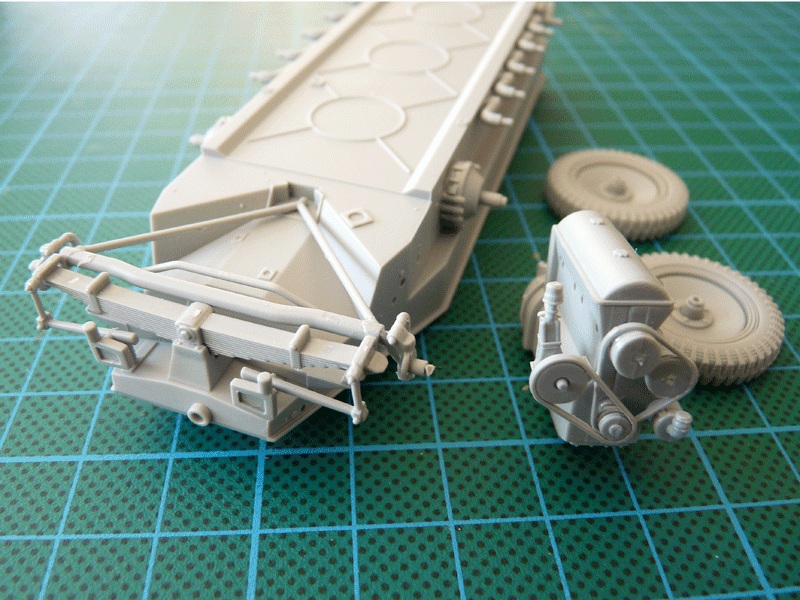
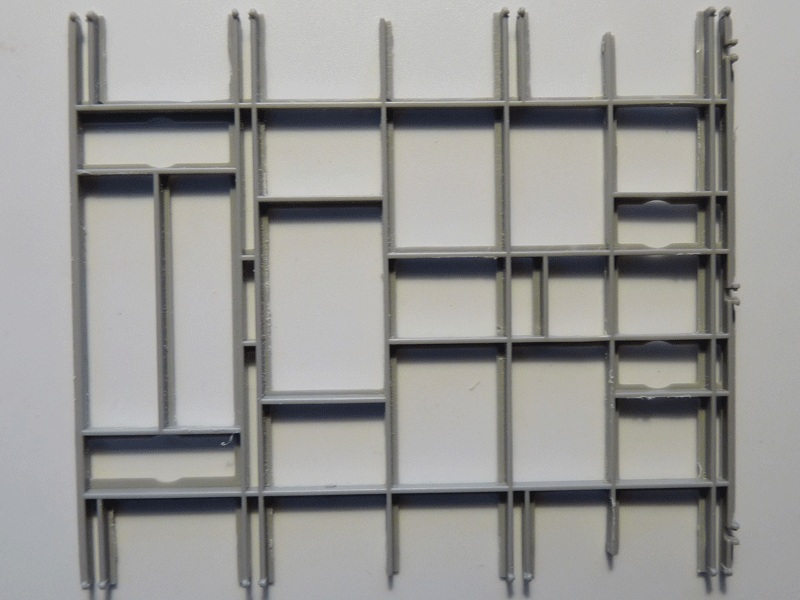
Step 1 is about assembling the wheels for the front axle, the drive sprockets for the tracks, and the inner double roadwheels. On the real thing the drive sprockets are obviously handed, which is not represented in the kit. To match the halves of double roadwheels I had to remove the locating pins on my example.
In
Step 2 you will be dealing with the front suspension, which is nicely detailed, but seems to lack a connection with the steering mechanism.
Attaching the torsion bars and the final drive covers is a rather conventional task.
The real thrill awaits you at the aft end of the hull. The two plates marked
B41 and
B42 are actually
black A41 and black A42 (instructions show the wrong labels). Later on I found out (the hard way) that the idler arms (parts
B22 and
B23) need to be almost in the 12 oclock position in order for the advised number of track links to fit properly.
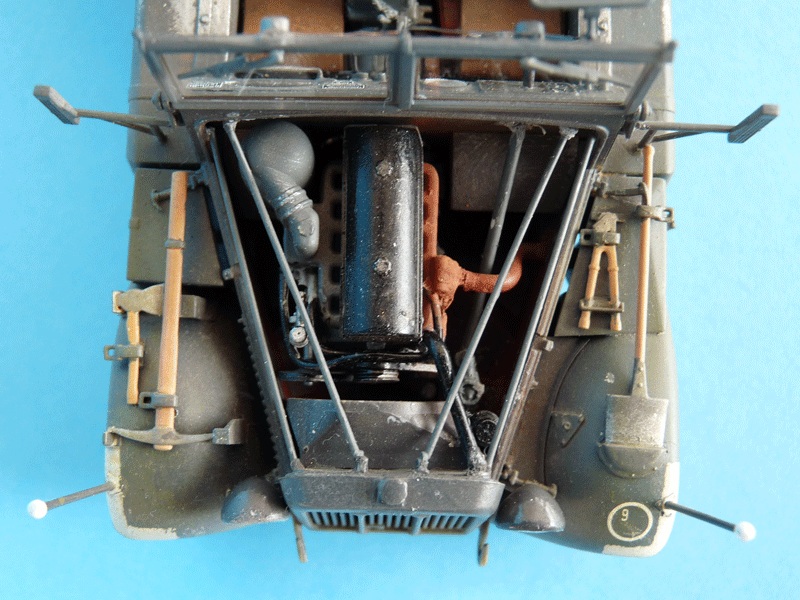
Step 3 assembling the engine. The fit between the two halves of the engine is less than spectacular, and the additional parts cant really hide the seam be prepared to sand. Do dry fit as you add the parts if the engine cant fit (or sit on its own) in the bay you have a problem.
Id recommend that you leave part
B47 off until the final moments its position makes it very easy to break.
Step 4 building the transmission. Careful parts cleanup and test fitting is key here, as there are lot of tiny break-prone parts, meeting at odd angles. You need to test-fit part
B10 against both the gear box and the final drives on the side its position is not marked on the transmission body. Part
B6 is the connection between the engine (protruding between the seats) and the transmission block, so you can use slow-setting glue to allow some last-moment adjustments. Same applies to both parts
B2.
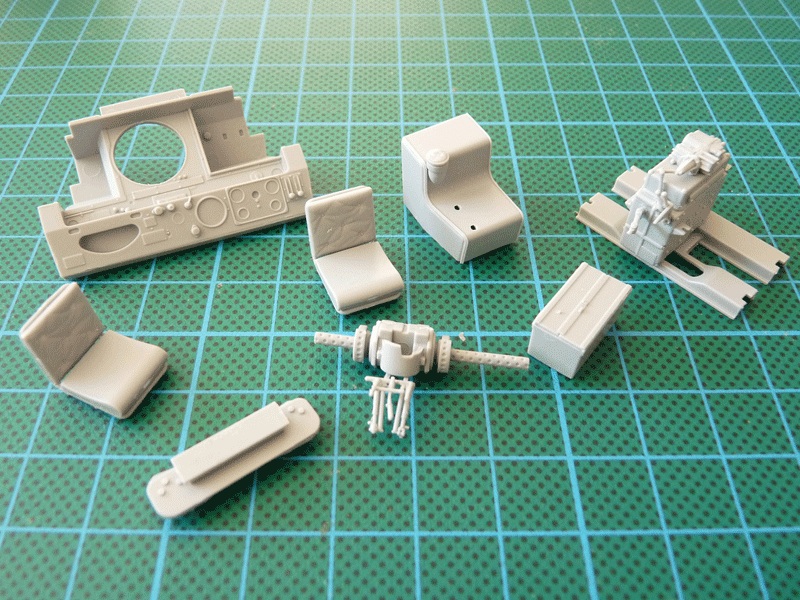
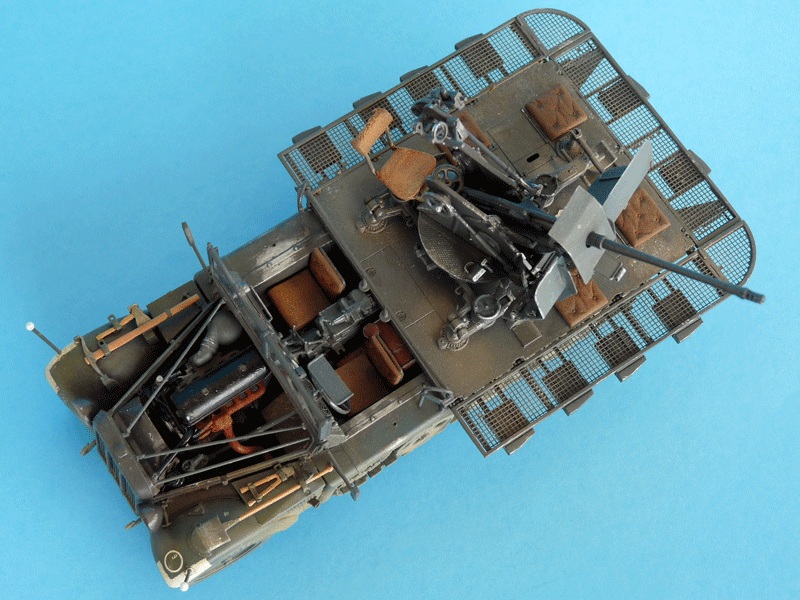
Step 5 easy-peasy driver and commanders seats. Despite the metal frames limited visibility Id paint them and the cushions separately and glue them together after theyre dry and weathered accordingly.
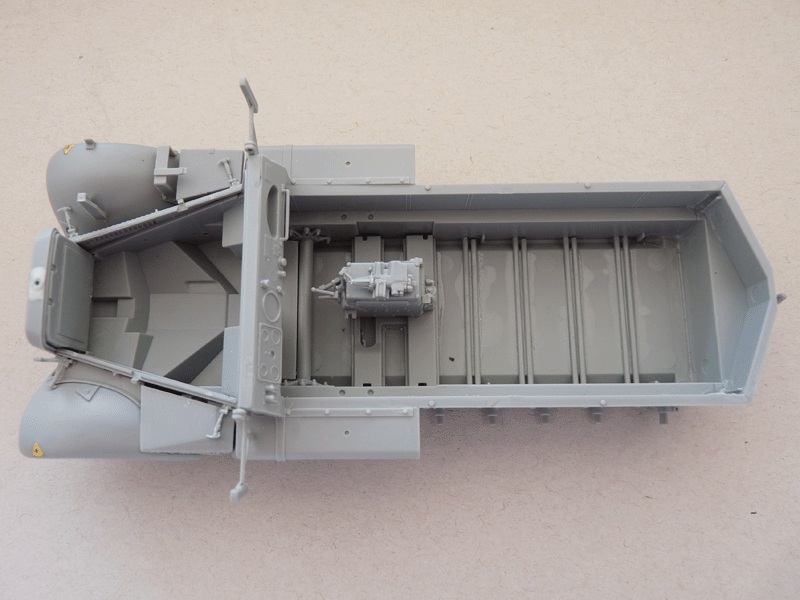
Step 6 the pallet. Mounting the transmission subassembly together with the fuel tank and a toolbox (two options available) to a single frame.
Step 7 engine bulkhead and instrument panel. The instructions suggest that you do this all as a subassembly, but what I did was dry-fit the bulkhead (part A40) with the hull and the dash parts especially for height. Dragon cleverly supplies the decaling pattern at this stage: adding parts in the following construction steps is going to make placing the decals a hard task, especially the placards under the glove compartment. Follow the instructions (just this once) and it will be OK.
I punched a clear disc to place over the tachometer decal, as it is recessed rather deeply. Its glued with a drop of clear acrylic gloss.
Step 8 getting all the pieces so far together. Ive warned you about the parts and subassemblies possibly not fitting as they should, so this step would prove no problem for you except for the missing parts coded
MA6. According to the part plan in my kit the only part
MA6 is the manufacturer nameplate at the top of the radiator housing (clearly reading DEMAG).
I myself left the wheels off for later to ease hull weathering.
Step 9 assembling details in the front. The engine, radiator and supporting bars, fan ducting (no fan in the kit, remember?), front bumper and number plate will give you no hard time.
When mounting part
A31 please note that the rear lock hinge is not molded on it you need to add part
A85. Also, the radiator cover is shown without the filler receptacle (which is molded on the actual part) and is missing any instructions about adding the filler cap (part
A17). In my example there is a molding recess around the opening that needs to be puttied away.
To make alignment of the fenders easier you could also add part
A39 to the left one at this time, fix it into position, and then adjust the left fender accordingly.
Steps 10 and 11 rear fenders, boxes, windshield, tool complement and various other attachments.
An important note about the fenders Dragon includes the full-length fenders for the standard Sd. Kfz. 10 in the kit, so the parts you need are
blue D15 and
blue D16. Check your reference for their exact vertical positioning and fill the holes on the upper surfaces.
Dragon has you detail the windshield and attach it at this stage, but the parts can really easily be broken off in the next steps, so I left mine off until later. The windshield fits in recesses of the two hinges you add in this step parts
A74 and
A75 so if you glue them now you will need to remove one of the locating pins of the windshield.
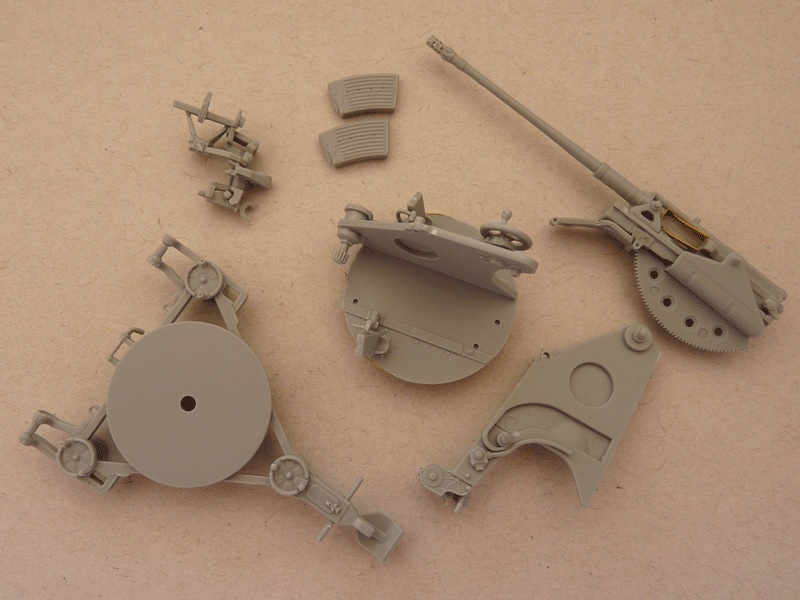
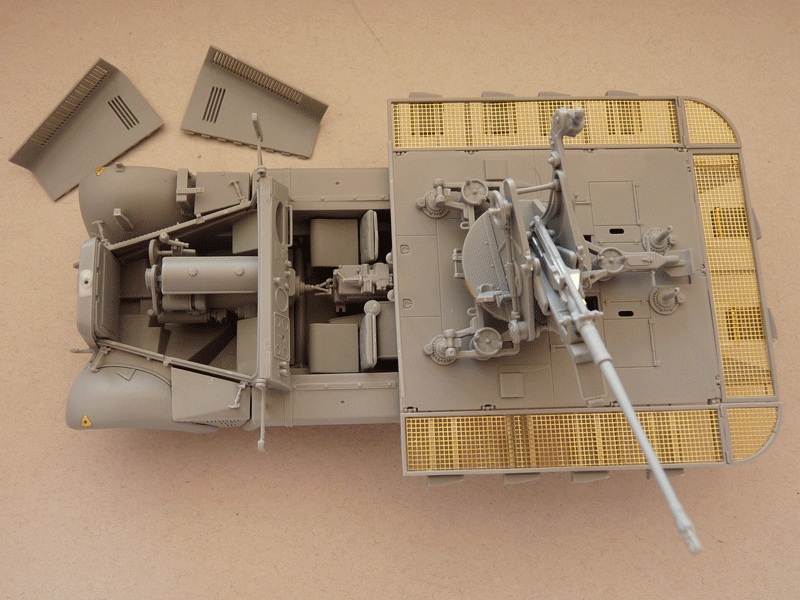
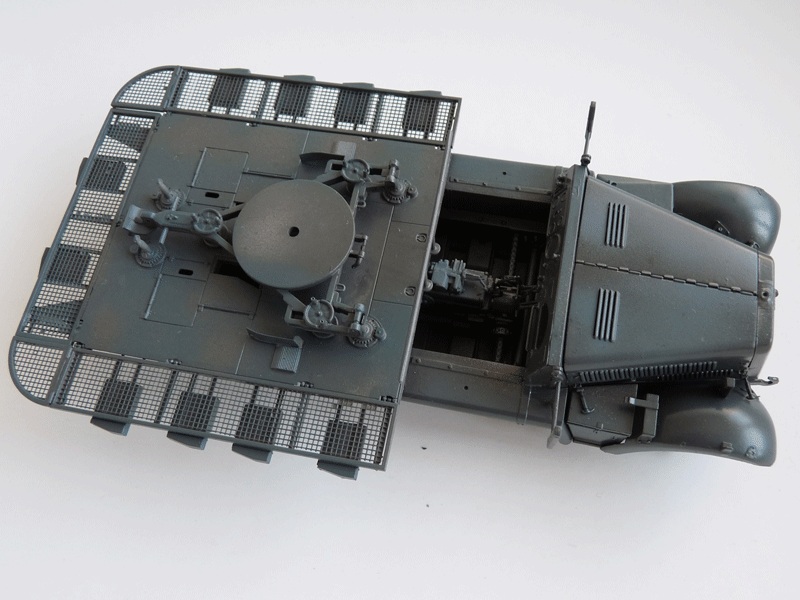
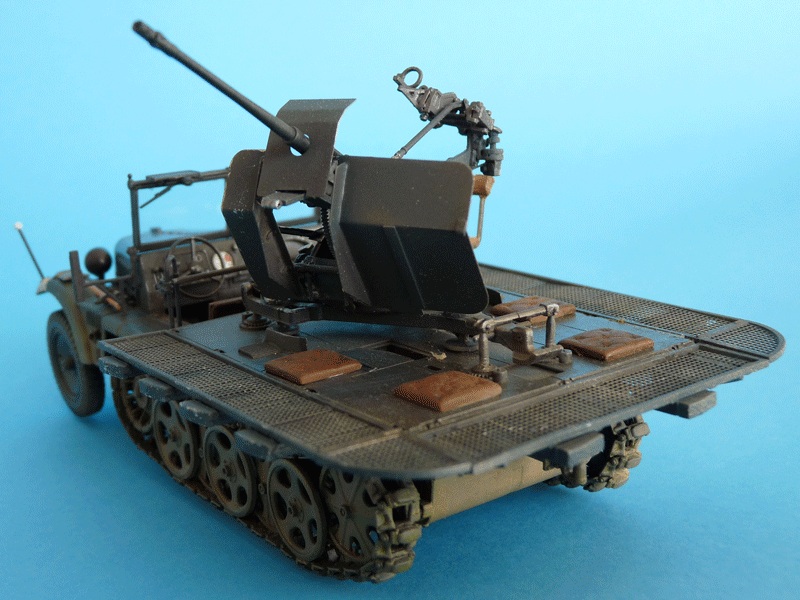
Step 12 the main gun platform. This step deals with the platform support frame and the gun securing posts.
Part
blue D11 is the support frame. Before you clean all the sprue and mold attachments check what portion of the frame will actually be visible you will save yourself a lot of work
Leave parts
blue D12 (on the front supports) until you mount the gun itself these two lock the gun in place.
Dragon tells you there is another pair of parts blue D12 to the drop-board locks. However, these details are actually molded on both parts
blue D4 so no point looking for them.
Step 13 adding the tracks and the gun platform to the hull.
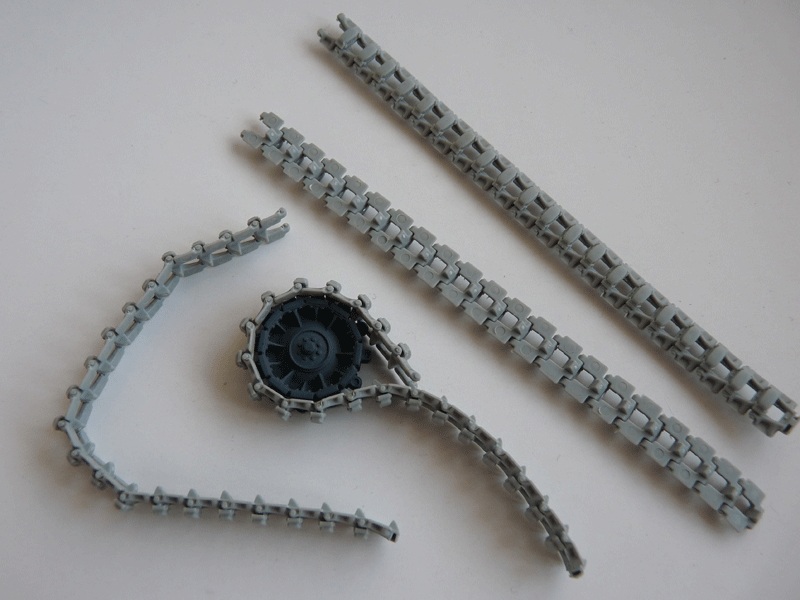
Assembling the tracks is rather easy. If you add just enough modeling glue to fix the rubber pad (part
N1) the tracks will actually remain movable, which will greatly ease the process of adding them to the vehicle.
My advice:
- leave the drive sprockets off, insert the idler arms in their positions, but dont glue them;
- build each of the track runs (42 links in each) without joining their ends;
- glue each sprocket about the middle of the respective track run, then fix it in its position on the hull;
- adjust the track runs over the roadwheels and around the idlers, and then join the two ends of each track run;
- adjust the idler position so you get the right amount of tension on the track as per reference images. Glue the idler arm.
Step 14 gun crew seats and gun platform flaps.
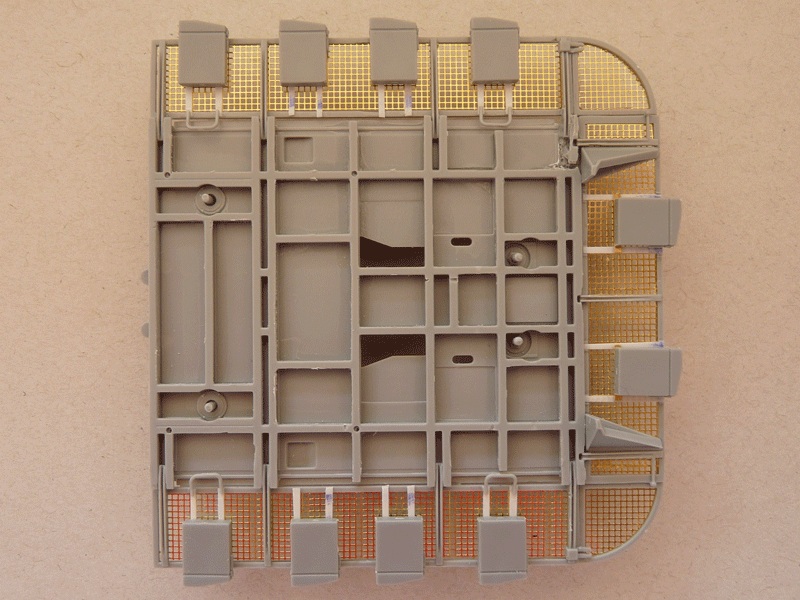
The PE mesh screens for the sideboards of the platform are basically drop fit. The mesh for the rear board (part
MA25), however, is too long you need to cut it to size. Parts
MB2, which serve as bases for the ammo boxes (parts
Z1) were too short in my example and were replaced by thin plastic strips.
Step 15 gun base. No surprises here, except for some wrong part callouts:
- parts
MC3 are actually
MB1;
- parts
MC2 are
MB2 in the kit;
- the callouts for part
A65 and
A70 are swapped in the instructions (the correct part is shown with the number of the mirror part).
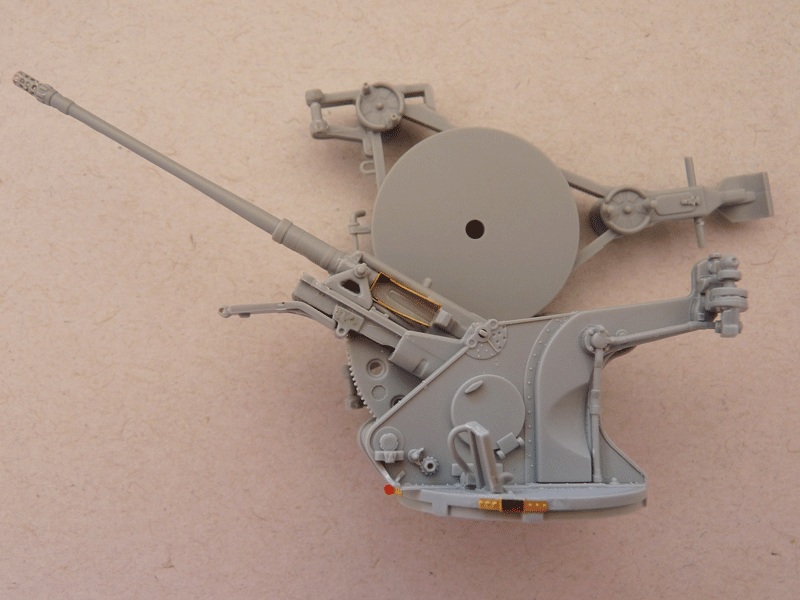
Step 16 gun sight. Two options here, pick the one to your preference (or reference).
Step 17 gun cradle and barrel assembly. Pretty straightforward, only 1 part mislabeled here part
black A10 should be
blue A10. Check the fit between it and part
A31, as well as
blue A14 and
blue A48 some sanding might be in order.
Step 18 assembling the gun. Lots of tricky assembly here due to the many interconnected parts. You will need to select the elevation angle of the gun at this stage, as the barrel/cradle assembly connects to the gun sight via a lever on the left you will notice the axle on that side is longer the gun barrel and line of sight of the gun need to be parallel.
Step 19 gluing the gun to the base turntable. Beyond joining the two subassemblies there are just three details to be added.
Step 20 adding the horizontal traverse wheel and gunners seat. I added some texture on the seat using paper towel, attached using white glue.
Step 21 what you do in this step depends on the elevation angle youve selected for the gun in step 18. Two options locked for transport, or in use. Frankly the parts optional positioning could be suggested earlier, as the images in step 20 already shows part
A58 as fixed in the firing position.
Step 22 main gun shield. Dragon basically has you create a very complicated 3D shape out of completely flat parts. You need to bend, fit and glue well over 30 of them (not considering the etched boltheads and plastic wingnuts) without actual reference of the angles, or how this whole assembly fits to the gun itself. My attempts at forcing any of the wingnuts assume the desired orientation failed miserably, so I simply broke them all off and declared it done.
Step 23 mounting gun shields and the gun itself. There are no markings on the plastic parts to suggest the position of neither gun shield, so its up to you to find the proper reference (or leave the shield off).
Fixing the entire gun on the vehicles cargo platform is a simple task if you read through the instructions and did
not glue parts
blue D12 on the retaining posts (parts
blue D7) as suggested in step 12.
In the accompanying images you will discover Ive added a few simple details in the engine compartment a steering column, a pipe from the exhaust collector to the muffler, another one between the engine block and the radiator, etc. Whether your do the same is entirely up to you.
conclusion
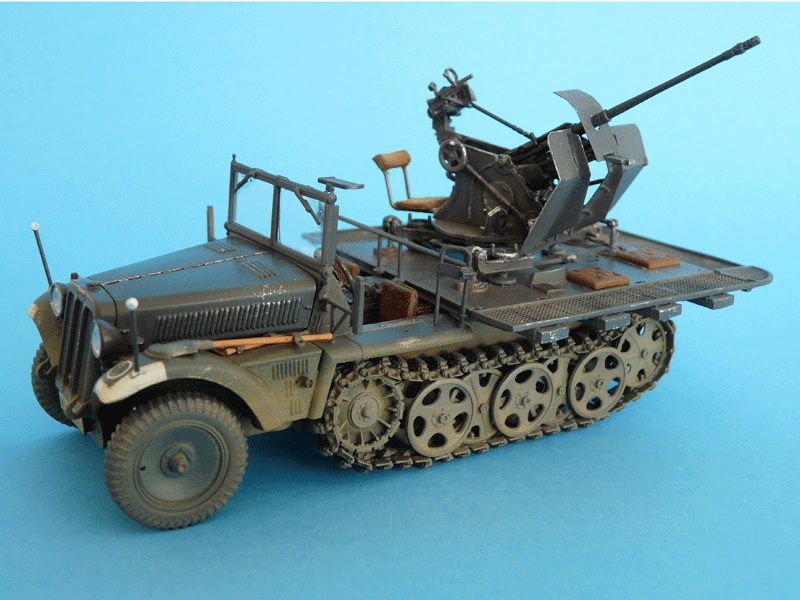
Dragons Sd. Kfz. 10/4 is a very nice kit. Its packed with details, the overall fit is great (no putty on my example), the complete model looks the part and offers a lot of action diorama opportunities. The kit is also an enjoyable build even more so if you go through the instructions and compare everything with the part plan. Few of the parts are not used, which makes it a good investment.
My main problem is the instruction sheet. Rather annoyingly there are mislabeled parts in virtually all the 23 construction steps, and the actual placement of some of the details is entirely left to the modeler. Detailing in the engine compartment is also something that needs additional work.
Overall an enjoyable build despite the issues above these can be easily offset with some careful planning.
Highly recommended.


Comments