What weighs 10362 pounds and purrs? It is of course the MTU-produced MB 838 CaM-500 10 cylinder, 4-stroke powerpack in the Leopard 1. From inception to the present day the 830 hp powerpack has proved that it could make the Leopard 1 series fast, easy to maintain, and trustworthy for all Leopard 1 users around the globe. This powerpack has maintained its performance in the forests, the deserts, the jungle, and the snow.
This very unique powerpack, combining the engine, transmission, and cooling system all into one package, made Leopard crews and technicians very pleased when having to pull the complete powerpack. The powerpack was engineered for a fast paced Cold War battlefield where wasted minutes could have meant life or death. The powerpack and engine compartment utilize quick disconnect hoses and pipes in order to make it easy to prepare for removal. The engine deck uses a simple set of bolts so it could be lifted off in one piece by the ARV. A skilled crew of vehicle technicians could prepare and remove a complete Leopard 1 powerpack in between 15 to 20 minutes.
The engine compartment is of course integral to the powerpack and holds the powerpack secure with mounting points on the floor. The fuel system, brake system, final drives, and air cleaner system were all designed in the engine compartment to make it easy to work on and quick to remove and install a complete powerpack or separate components.
It was a first-of-its-kind powerpack concept when the Leopard 1 was designed and it is still utilized in tank designs to this very day.
POWERING UP
Perfect Scale Modellbau in their ever-growing Leopard kits and conversions has released a fantastic kit to provide Leopard 1 fans with many unique display and diorama opportunities, and the ability to finally build a Leopard 1 with a completely open engine compartment complete with MB 838 powerpack.
Kit # 35025 combines Kit # 35105, the Leopard 1 engine compartment, and Kit # 35104, the Leopard 1 powerpack. The advantage is you get both of these kits together and a small amount of savings over buying them separately.
Lets look at what you can expect with this great kit.
PULLING THE PACK
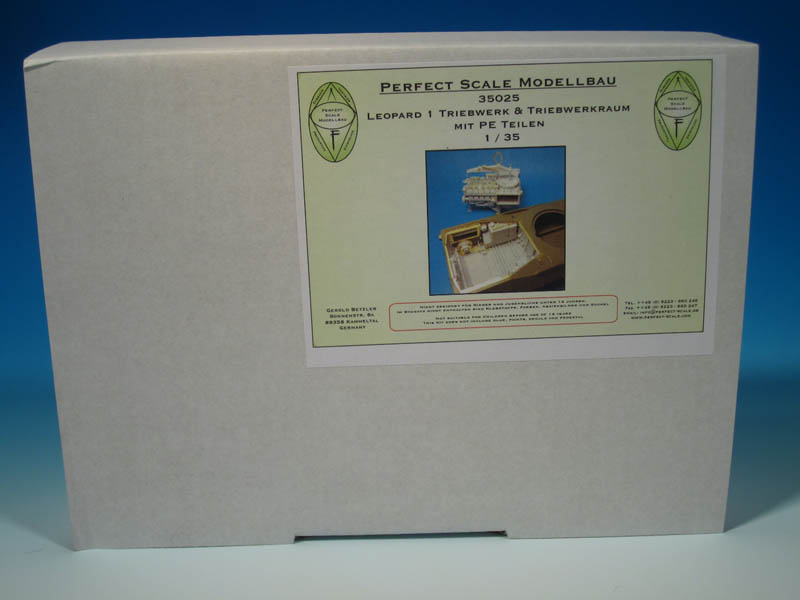
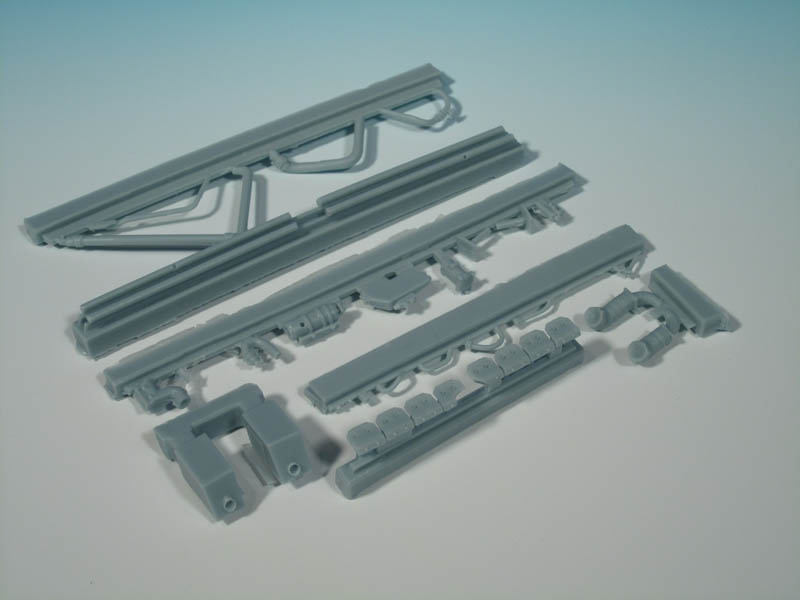
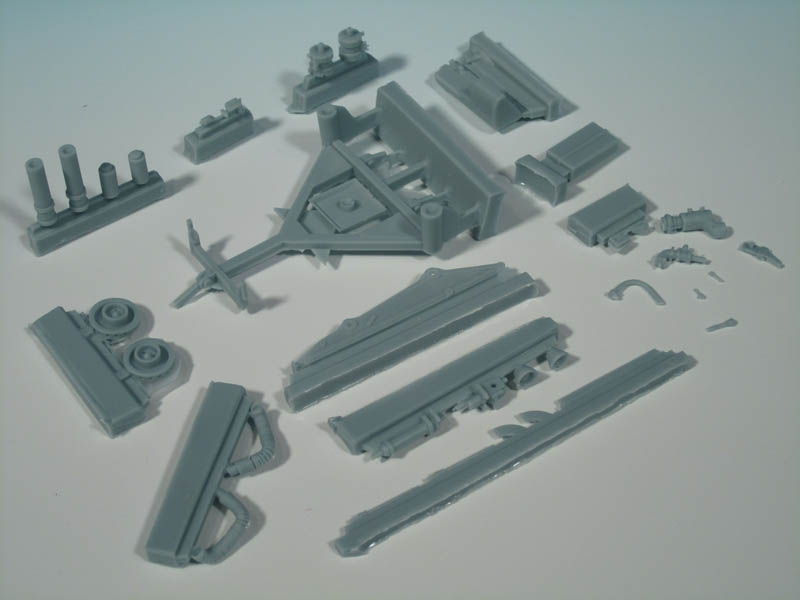
The kit parts are solidly packaged in PSMs sturdy cardboard boxes. The resin and PE parts are ziplock-bagged to avoid displacement during shipping. There are 80 resin parts and two frets loaded with PE detail parts. When I opened the box to initially examine the parts I was amazed by the level of detail and the crispness of the casting. These are for sure some of the very best resin parts I have ever seen. The parts in my kit are cast in a grey resin that really allows you to see the level of detail and workmanship put into mastering and casting this kit.
The kit can essentially be listed as three sub-kits: the engine compartment and powerpack as previously mentioned, but also the powerpack stand and the lifting frame. The lifting frame is attached to the top of the powerpack in order for the ARV crane to lift it out of the engine compartment. The stand is used as a mount for the powerpack while it is placed on the ground. One of the unique features of the Leopard powerpack is the ability for it to be removed and placed on the ground stand and then re-connected to the quick disconnects in the engine compartment for testing and analysis outside the tank. The sound is absolutely deafening but it is very interesting to see.
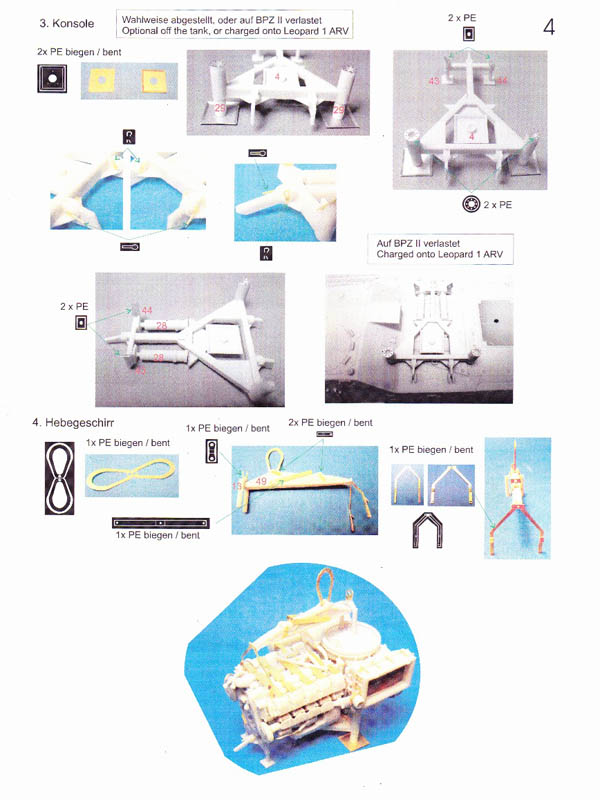
The instructions are provided on six pages and combine colour and B&W images of the parts. All of the resin parts are numbered and the resin parts are described in the instructions by diagrams and completed placement images. The images in the instructions are small but well detailed, but I recommend sourcing additional material on the Leopard powerpack and the engine compartment as there are additional lines and hoses to be added in order to fully detail the kit. These hoses and lines are shown in the instructions but there can be some issues with exact placement and attachment points due to the resolution of the images. The text in the instructions is limited and provided in German and English. The instructions provide multiple views of the same components and this is an advantage as the assembly of the powerpack can be complicated for those not familiar with the various ins and outs of all the components. The Perfect Scale Modellbau site also contains great images of the completed powerpack and engine compartment. These images clarify some of the placements of the additional hoses and lines that can be added with the material of your choice.
POWERFUL PACK
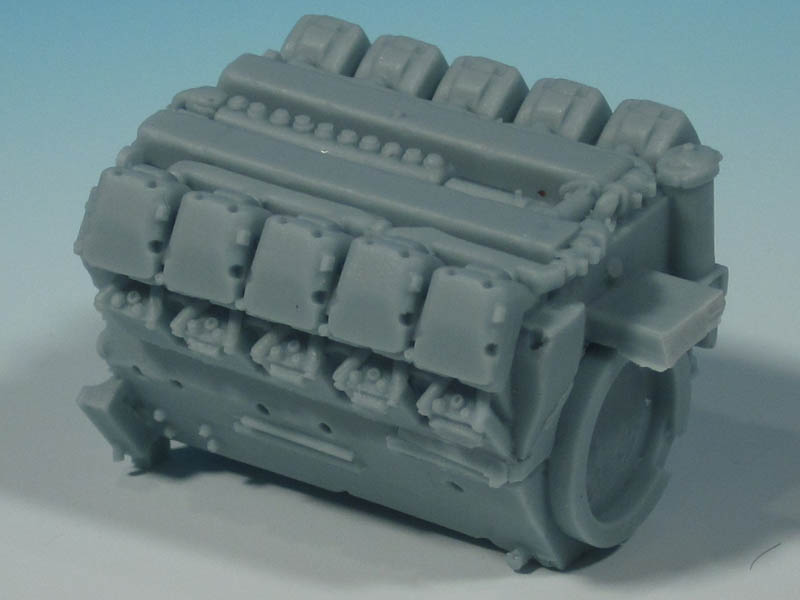
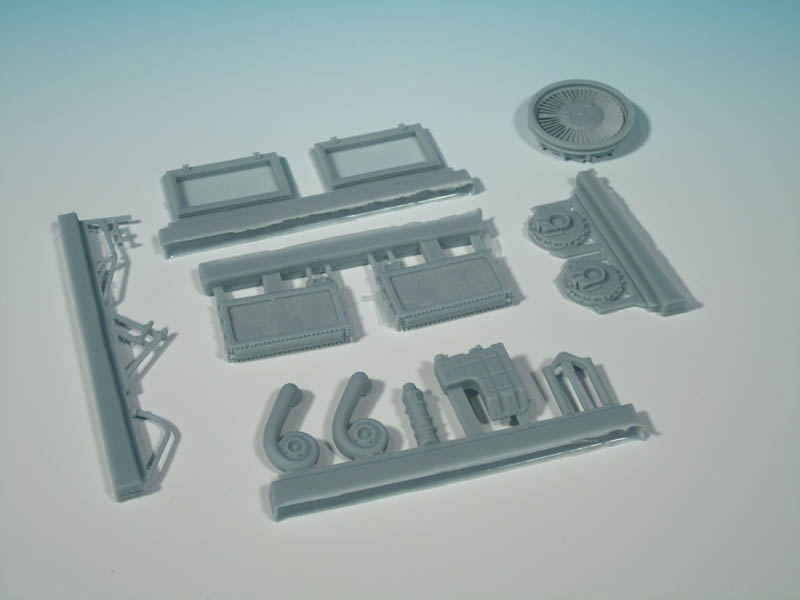
As stated earlier the powerpack combines the engine, transmission, and cooling system. The assembly process takes this into consideration and breaks down the assembly of the powerpack into two main components which include a combination of the transmission and cooling system and then the engine. The assembly starts with the transmission and cooling system. I am very impressed at how the main components are cast as solid pieces of resin and then in multiple layers additional resin and photo etched parts are attached to give a definitive 3D realistic look instead of just making a single all-encompassing resin casting. The details on the cooling fan and the very large radiators are excellent and provide and basis for the first subassembly. PSM was very smart to include PE screens for both radiators instead of simply relying on resin details. The transmission attaches to the bottom of the cooling system and then the powerpack really starts to take shape when photo etch details and resin and wire hoses are attached. Detail parts that are added include the brake oil reservoir, coolant cross-flow pipe, and the powerpack mounts.
The assembly of the engine component of the powerpack begins with a very large resin casting that is remarkably detailed with great detail on the rocker-arms covers and the various heat shields. Attached to the main engine piece are the oil reservoir, alternator, superchargers, oil filter, coolant pump, exhausts, control lines, coolant header tank, the oil filler neck, and the oil dipstick. The powerpack is literally topped off with a series of photo etched step plates on the top of the powerpack. It is a fantastic finale to the look of the powerpack. It should be noted that in the instructions there is no clear stage to attach the engine to the first subassembly but the images show it attached after the first few components. This would make sense in order to ensure a proper fit before adding the finer details as well as hoses and lines. As mentioned previously the instructions show and make mention of adding additional lines and wires. You will have to choose which medium to use for this but I think the appropriate size of solder would be very pliable and look realistic.
The inclusion of both the powerpack mount and the lifting frame was an excellent decision by PSM. The powerpack mount can be built for displaying a pulled powerpack on the ground or on the back deck of a Leopard 1 ARV. The triangular mount, though simple, is well-designed and the resin part receives lots of tiny photo etch details to make it a one-of-a-kind accessory.
The lifting frame is part of the ARV equipment and is unique as it actually attaches to the top of the powerpack when the ARV is lifting it or replacing it into the Leopard hull. The frame consists of two resin parts and six photo etched parts. There should be a data plate and maximum lifting weights (500 kg, 2000 kg, 2500 kg, and 5000 kg) at the four lifting points. These are not included and will have to be created by the modeller and attached to the side of the frame in the appropriate locations. If you choose to attach the frame to the powerpack the attachment points on the top of the cooling fan are self explanatory but modellers may be confused as to where the front mounts attach on the forward area of the top of the powerpack.
The engine compartment is designed for all Italeri and Revell-Germany (R-G) Leopard 1 kits. This would include the following kits:
I suspect due to the layout of the Tamiya Leopard 1A4 lower hull that it may be difficult to fit the engine compartments parts so all efforts should be made to use this set on the recommended Leopard kits.
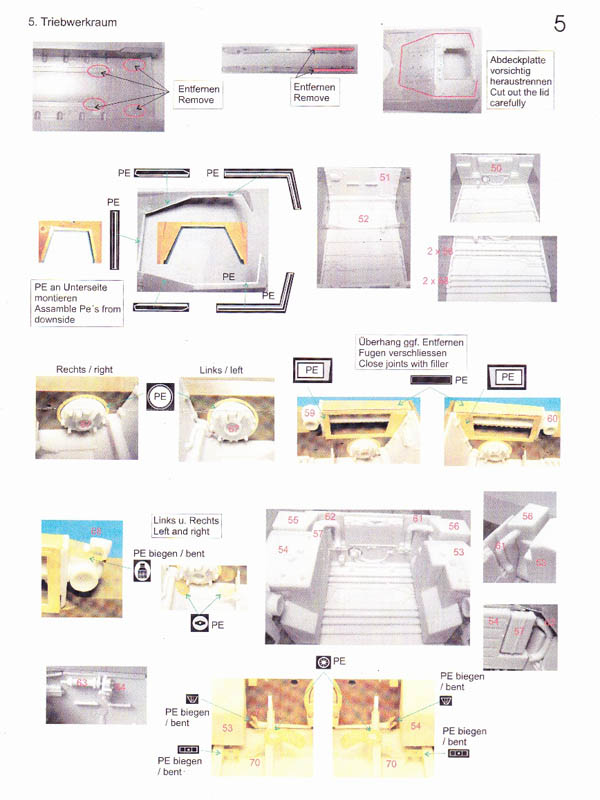
The engine compartment fitting requires some cutting of the Italeri/R-G suspension guide rails and hull mounts in order for it to fit flush in the bottom of the hull. The most major cutting will be the removal of the engine deck from the upper hull piece. Once the base and walls of the engine compartment are installed in the lower hull the resin and photo etch parts will systematically be added to the engine compartment to flesh it out. I am very impressed with the details provided consistently through the entire assembly process of the engine compartment. The photo-etched parts for the engine compartment are impressive and will for sure add a great additional amount of detailing.
Detail-orientated modellers will for sure want to refer to reference material as there will be some additional lines and hoses that can be added to make it even more realistic. Resin parts such as the large exhaust couplings and turbocharger intake hoses should be hollowed out as much as possible to create the proper tubular effect.
There are no painting guides included for any of the parts. This may create confusion for modellers with the engine compartment and the powerpack.
PERFECT SCALING
This kit in its entirety is without a doubt a Leopard modellers dream. The engine compartment, powerpack, lifting frame, and powerpack mount are created with details on top of details. It is apparent that a great deal of research was done to get the parts and the details correct. Out of the box this kit is exceptionally well done. With a small touch of extra details it will be a show stopper. Is this kit for everyone? No, but it easily can be with the right mindset to assemble the parts with care, and by conducting your research before and during the assembly and finishing process. There are no painting instructions and this may create issues for modellers as there are several variations in the painting of components of the powerpack and the engine compartment. Add on to that there a wide variety of weathering combinations from pristine to completely filthy powerpacks and engine compartments. Take your time, research, and ask questions on modelling sites. When I compare the kit parts to my reference material which includes technical data, personal images, and my time on Leopards I think PSM has a grand winner with this kit.
Highs: Fantastic resin casting, excellent photo etched parts, and an incredible amount of detail has been put into this kit.Lows: No painting guide and the additional cables and lines to be added are not included.Verdict: The Wow factor is for sure present in this long awaited multi-component kit for detailing a Leopard 1.
Thanks Guys,
PSM keeps impressing with every release they have. I expect they will have more Leopard 1 and 2 kits and conversions coming down the pipe in the future.
Heh Jason
Very good review except .... it doesn't tell me when to find the time to build it !!!
Actually my second kit from PSM was the Leo2 engine + bay smooth build + great result. This kit looks a little more complex though and even more tempting.
Cheers
Christopher
Thanks Jason,
Mouse House Enterprises has just bought a few of this kit into Australia. Like you I was blown away with the quality (only damage was the right hand side of a cross beam broken on the floor of the engine compartment). I'm going back through my photos of my time in the (Australian) 1st Armoured Regiment 1978-84 to find photos of the colours of the power pack, and the engine deck lifting tool, with its one-way friction spanner. This part is essential in showing the engine covers removed during a powerpack lift. I can not remember it being modelled in any kit, and it was part of the CES (Complete Equipment Schedule) on every Australian Leopard.
Rather than write a full review for Australian modellers, I'll point them to your excellent review, with a few of my own comments.
Tony


Comments