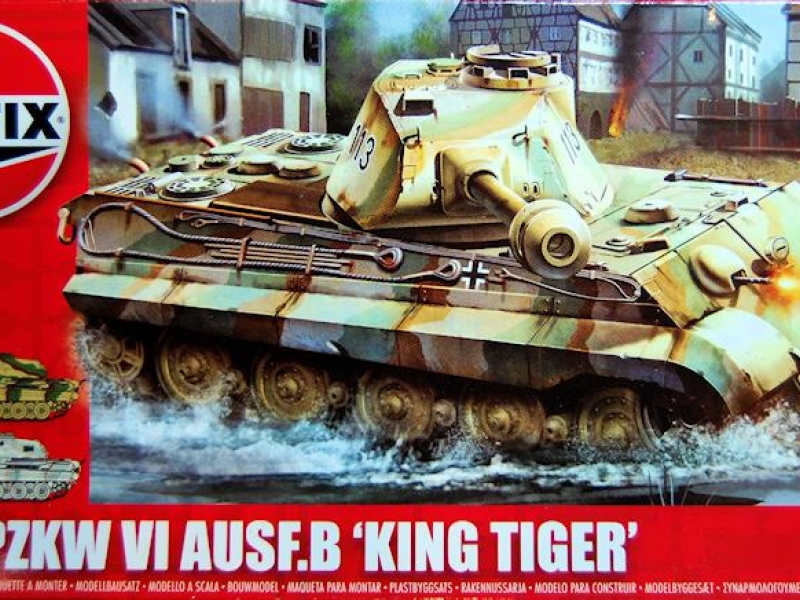
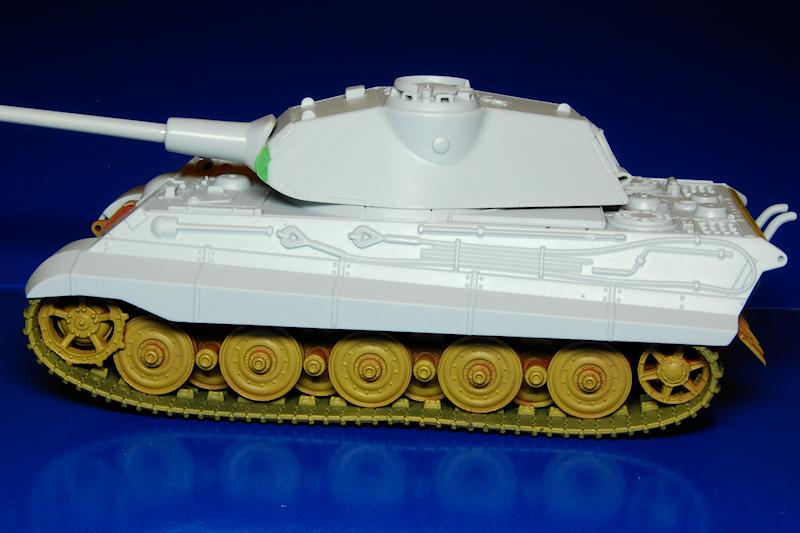
Following up last years all-new tank release of the Cromwell in 1/72, Airfix have now gone for the big one, the King Tiger. They have chosen to represent one of the fifty early vehicles that were fitted with the turret that Krupp had designed and already started building to equip the Porsche-designed VK 45.02(P). They have made a bit of an odd decision in that they have not represented the tank with Zimmerit magnetic mine protection, while it is more or less accepted that all of the operational King Tigers with this turret had Zimmerit applied. The Tiger of this type that is on display at Bovington is one of the non-operational prototypes and doesnt have Zimmerit, and it might be supposed that this vehicle would be one of the references Airfix used. However the kit does not build a replica of this prototype as it differs in other ways: it has the nine toothed sprockets for the double link tracks, full length fenders with the curved fronts, a production mantlet as well as all of the towing and track cables and tools associated with an operational tank. The gun is one of the earlier one piece barrels with the larger muzzle brake (which is like the Bovington example).
What you get
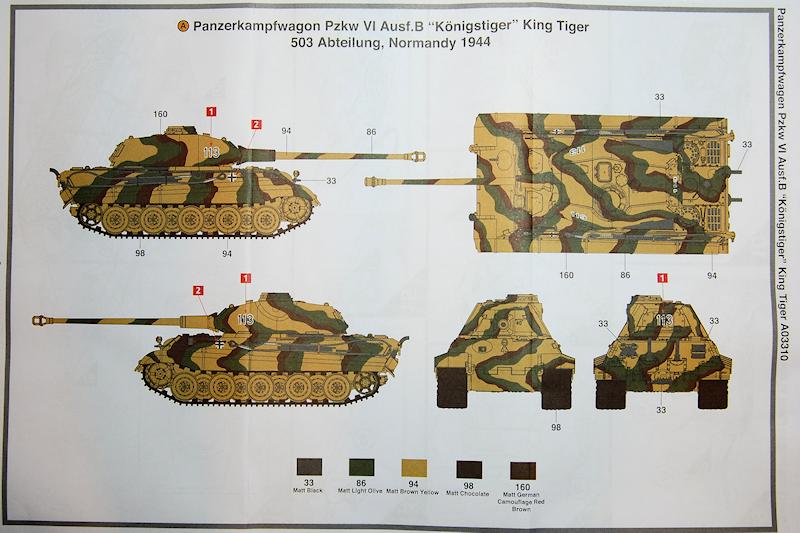
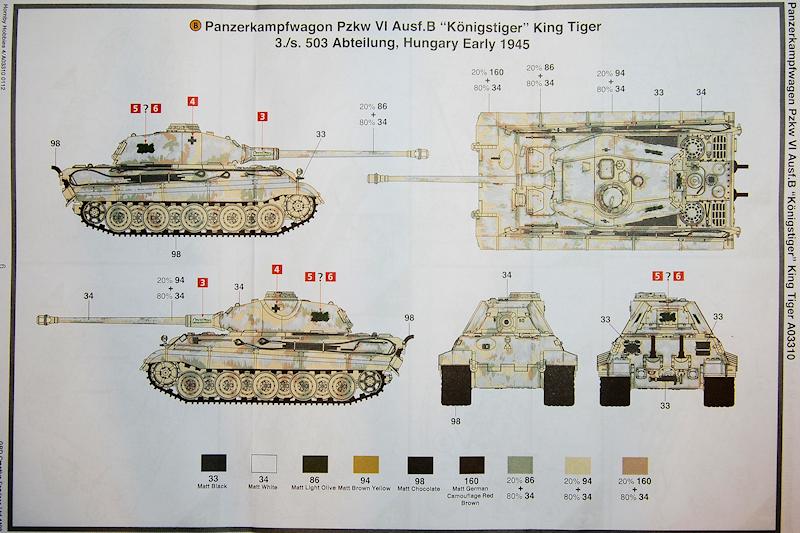
The box is one of Airfixs nice two part cartons, the cover art depicting 113 of 503 Abteilung in Normandy 1944, kicking up some water as the turret turns and it gives a blast with its bow machine gun, in rather characteristic Airfix style. This same vehicle is also shown in profile, along with 314 of 503 (Anneliese) in winter camouflage, Hungary, early 1945, these being the two finishes provided for in the kit.
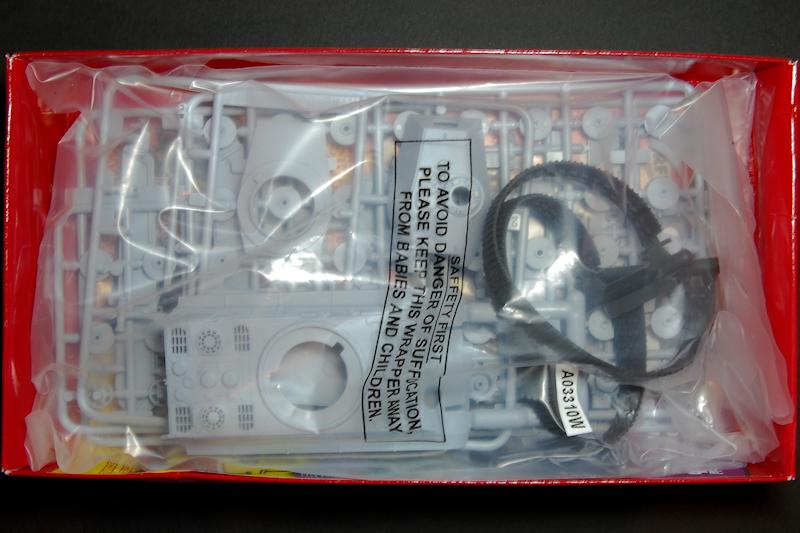
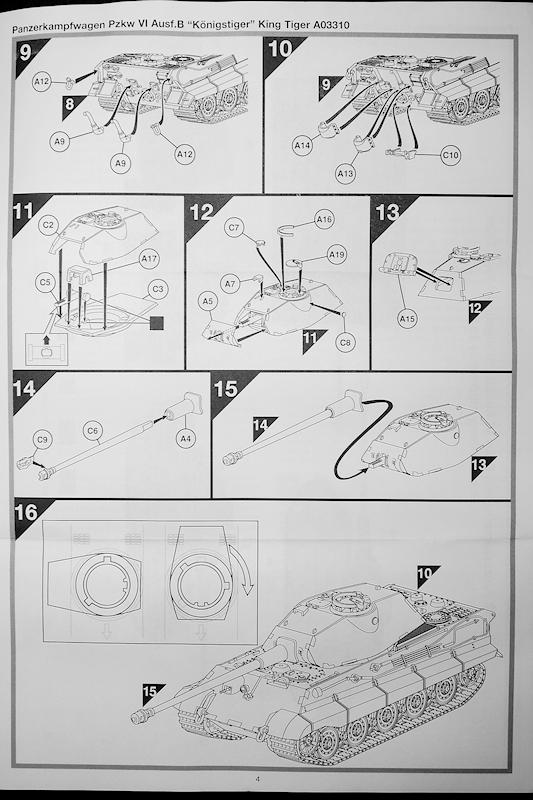
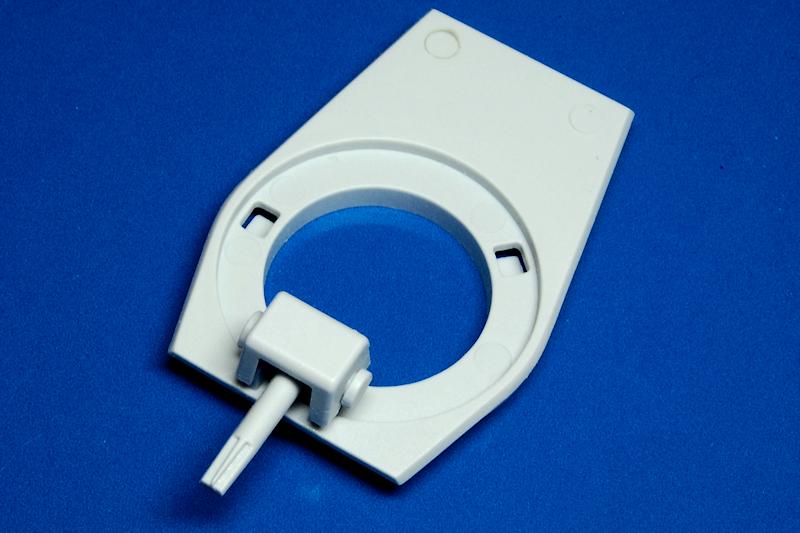
Instructions are nice and big, a six sided A4 sheet, and this gives room for all-round five angle views of each camouflage scheme in full colour. The instructions are also fully comprehensive and dont contain any mistakes ;). Everything is bagged together, and on mine, having come through the post, the bow machine gun mounting had popped off into the bag.
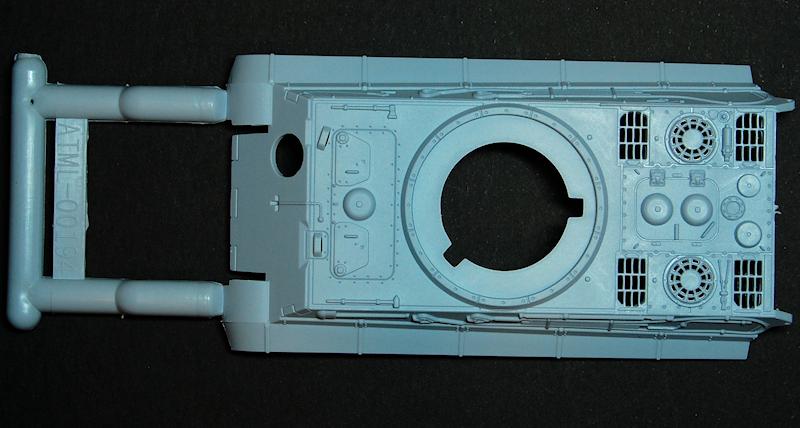
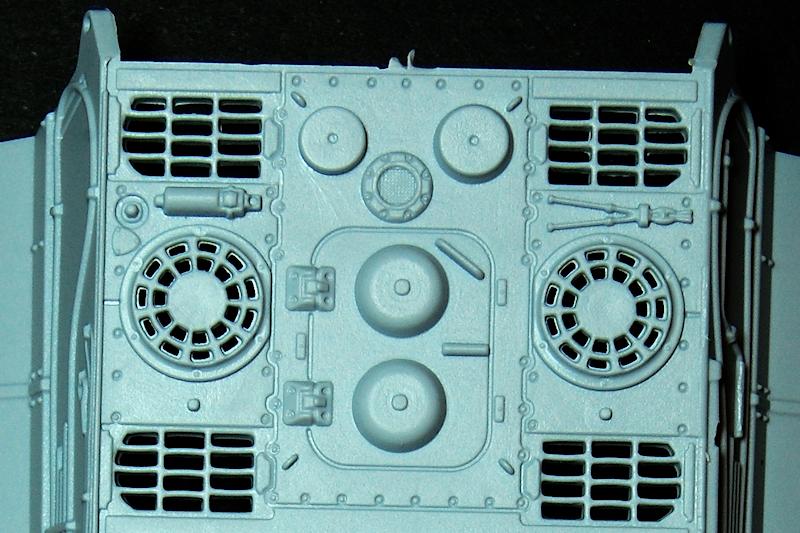
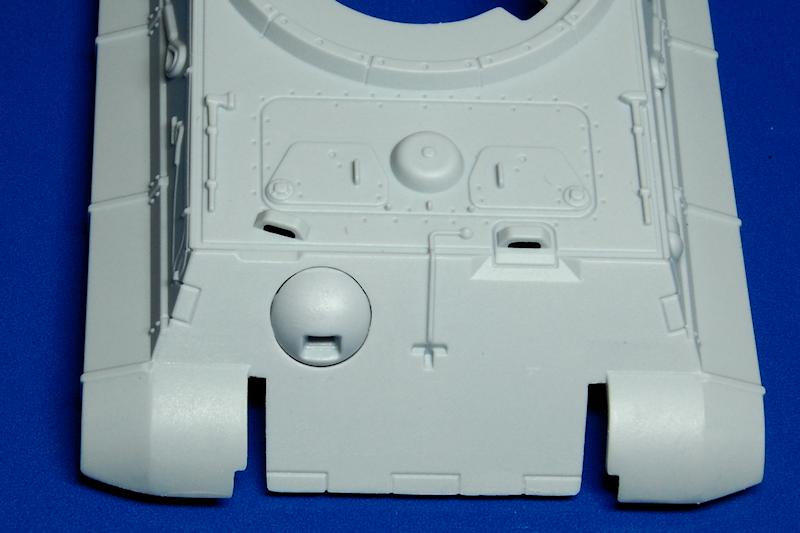
So, the upper hull is one big moulding; the hatches are moulded shut, the rear engine deck grilles are all in place, the side fenders are attached, and the tools and cables are all moulded on the sides. There are only a few separate parts for the hull top: the bow machine gun bulge, engine grilles, headlamp.
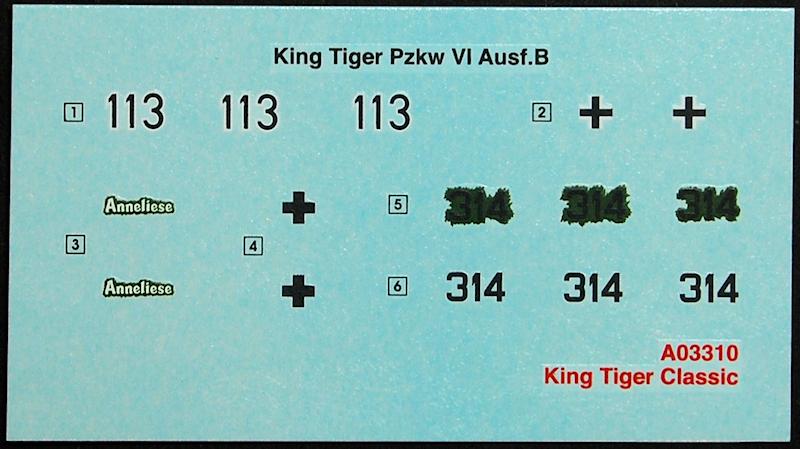
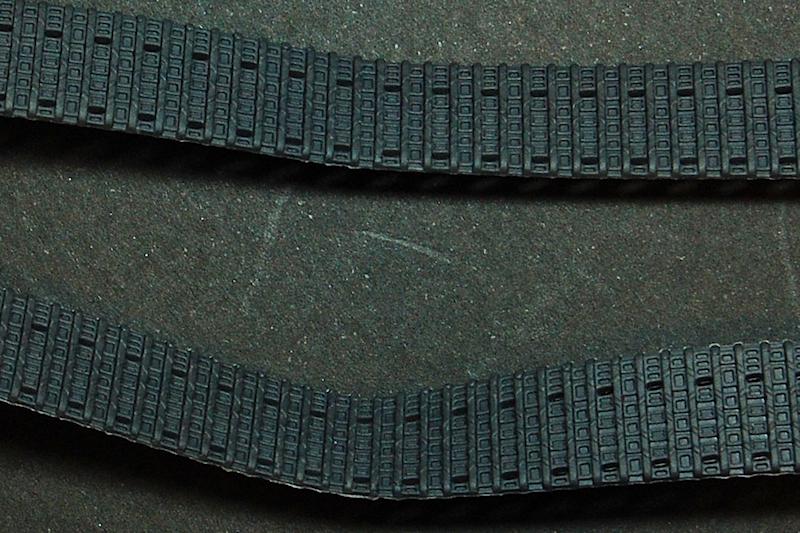
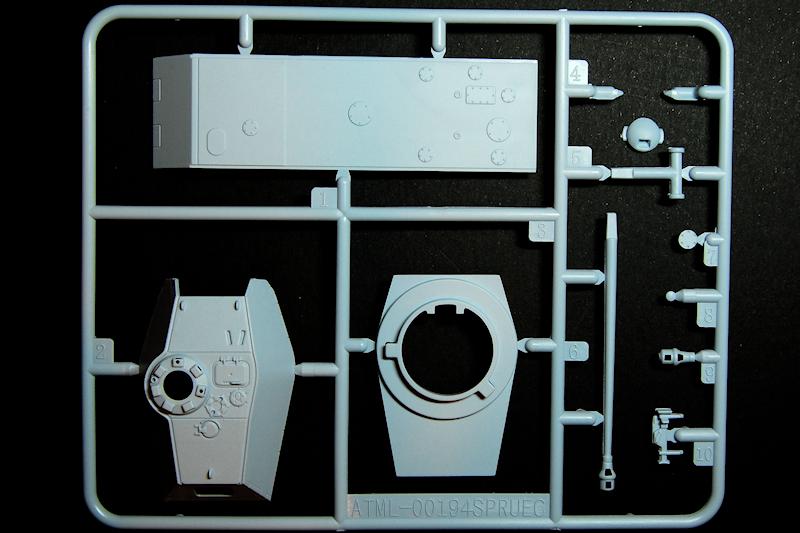
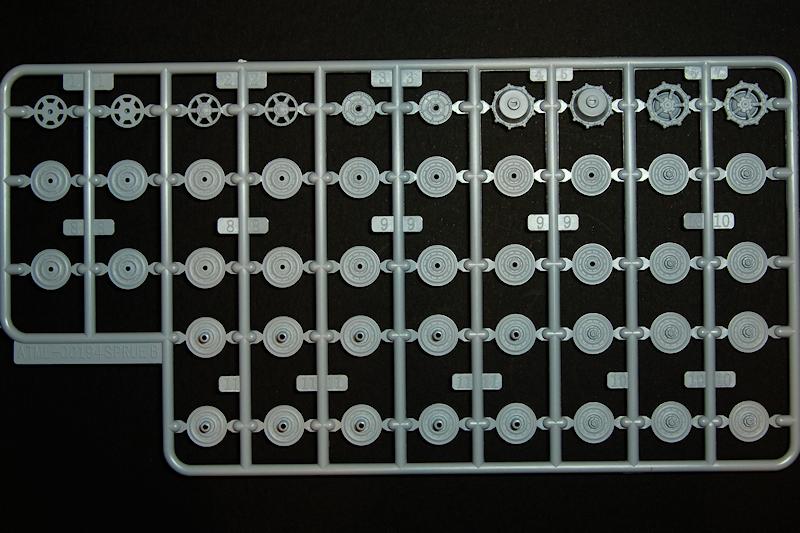
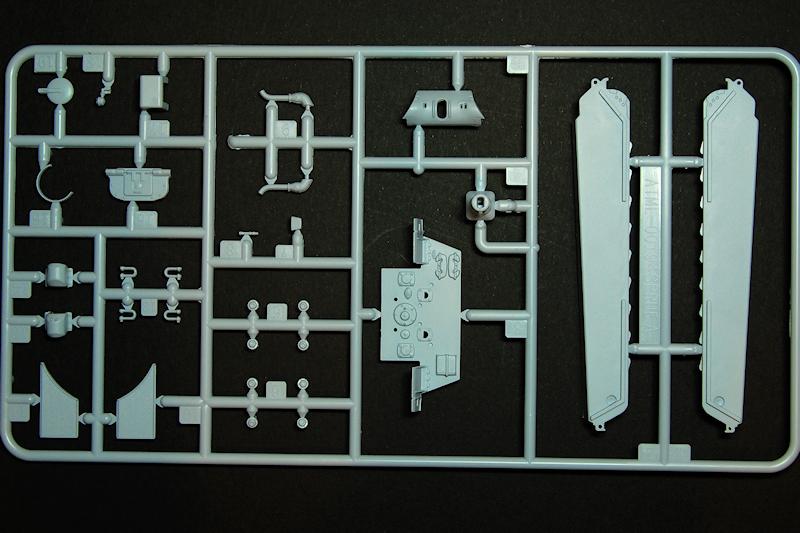
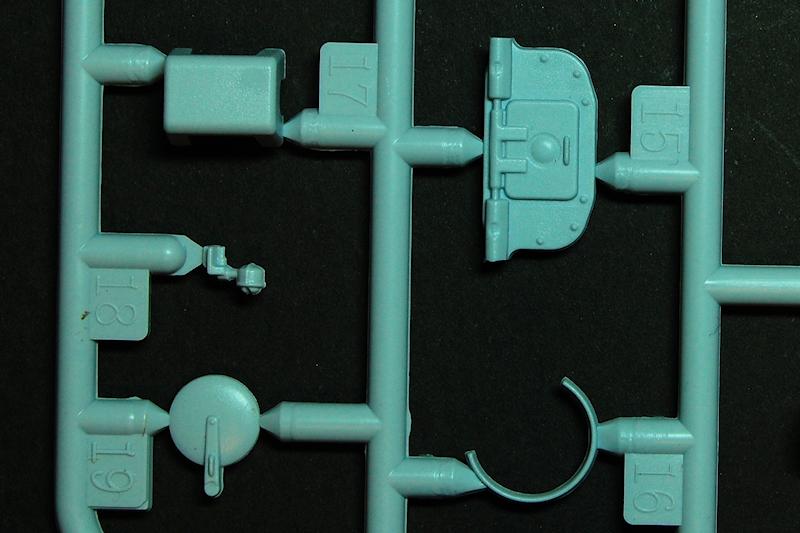
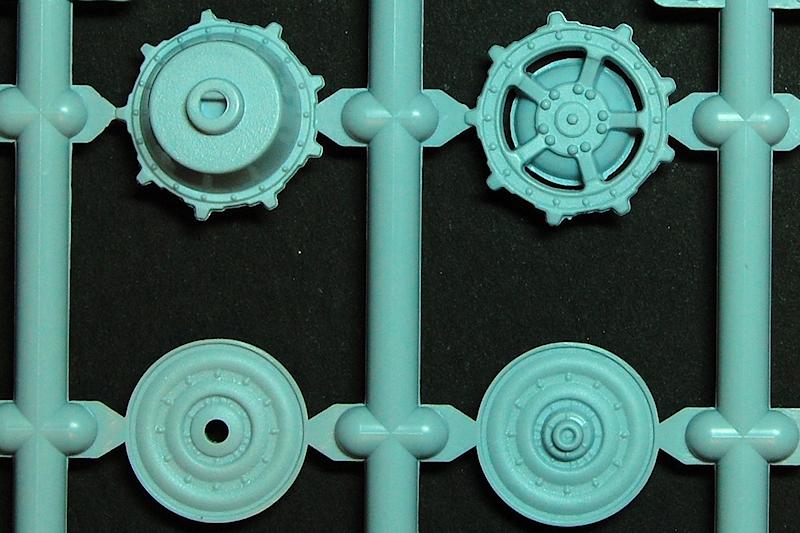
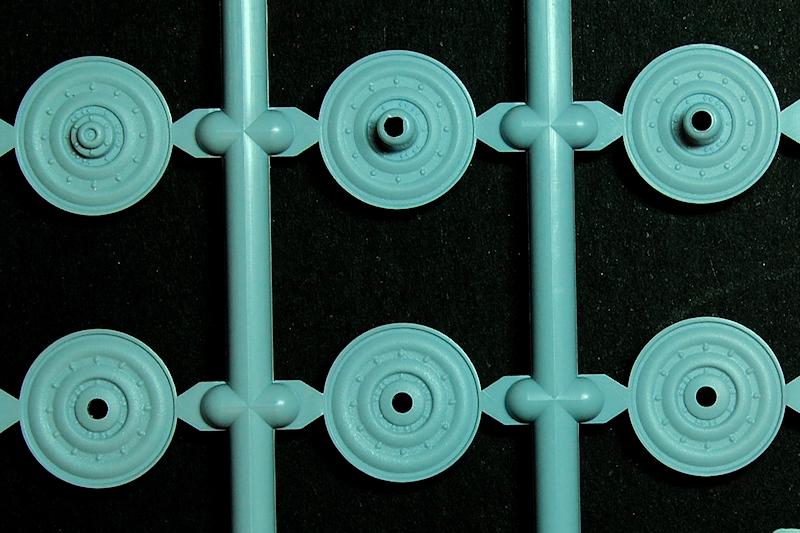
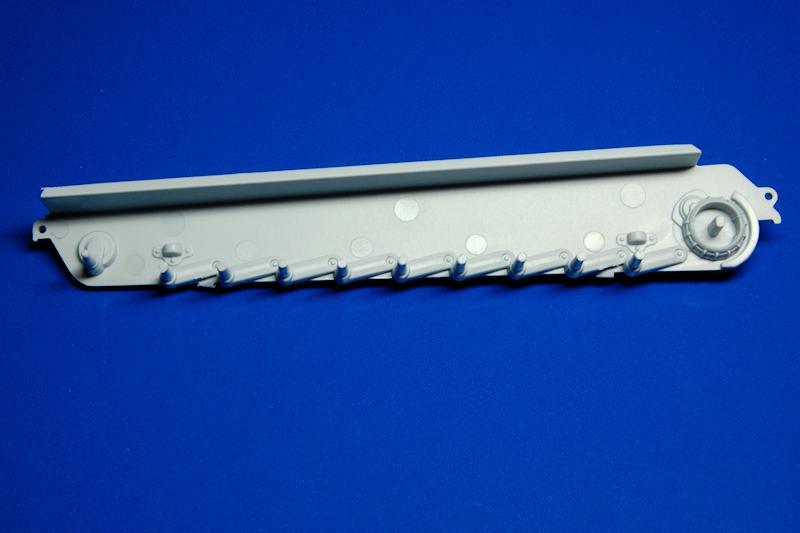
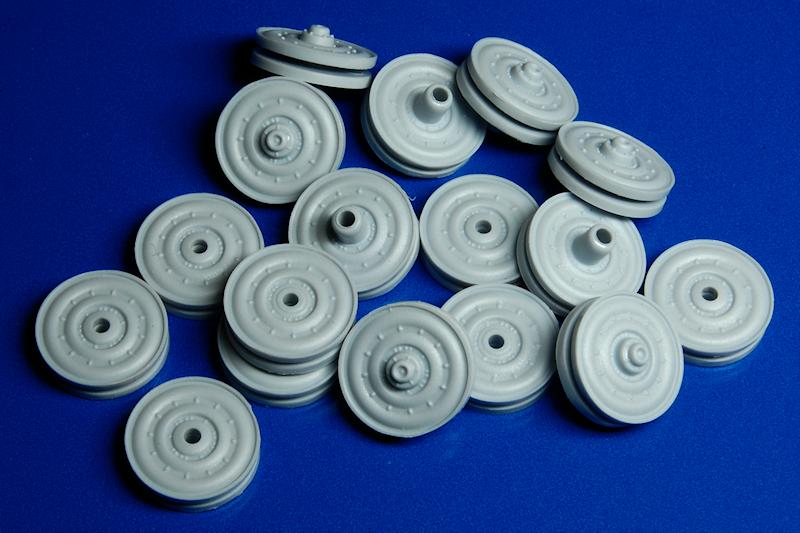
Sprue A has most of the other hull parts: side plates, rear plate, exhausts, towing eyes, and engine deck mesh panels (finely detailed, but not actually mesh.) Sprue B is all of the wheels. Sprue C is the hull bottom plate, the main turret components and the gun. The tracks are rubbery, quite soft, but quite thick and just all round quite big! More on that later, inevitably Decals are for the vehicles already described, including two different crosses, and two different versions of the 314 number, for use with or without white camouflage. Perhaps interesting are the words printed on the decal sheet under the kit number: King Tiger Classic Classic, hmm. Is that significant I wonder?
From the instructions and parts count this is evidently quite a simple kit, but the detail is nicely moulded. Some irony here though; keeping the parts down and providing one piece rubber tracks might appear to make it a simpler kit for beginners, but Im not sure it actually works out that way.
Construction
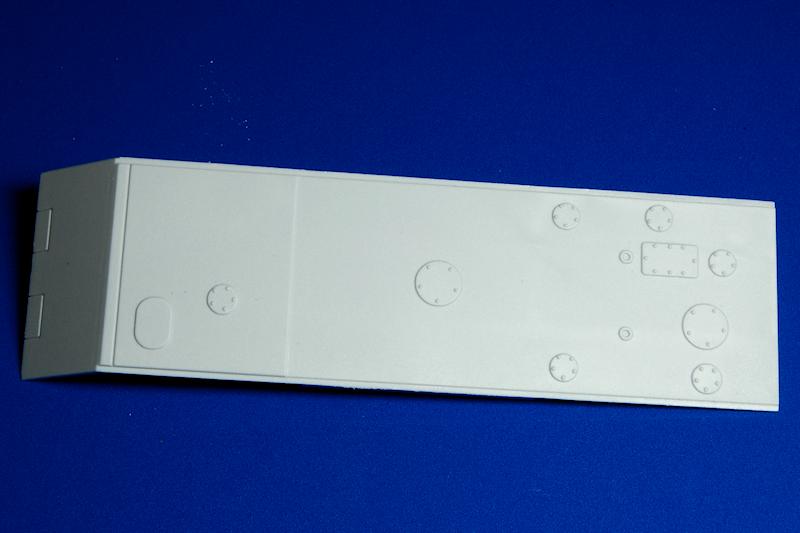
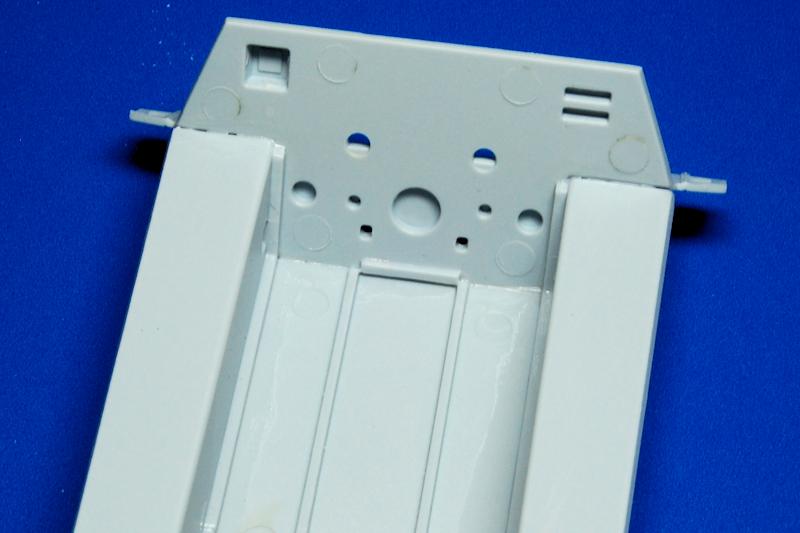
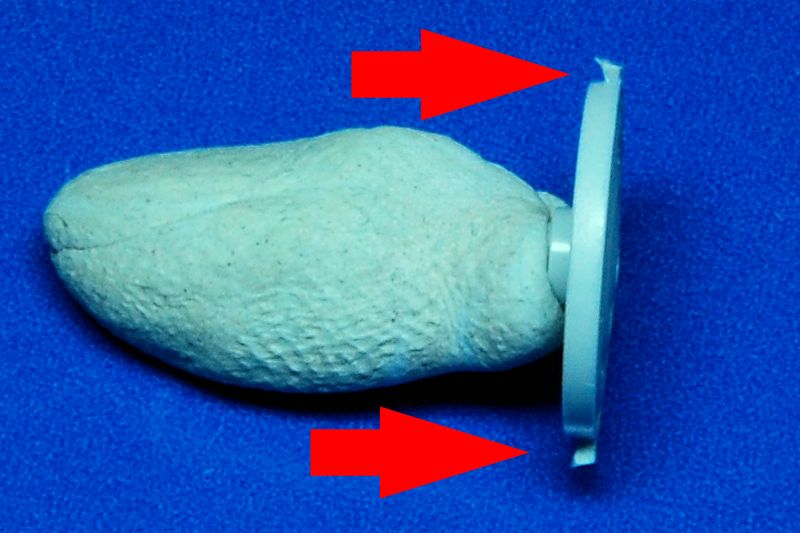
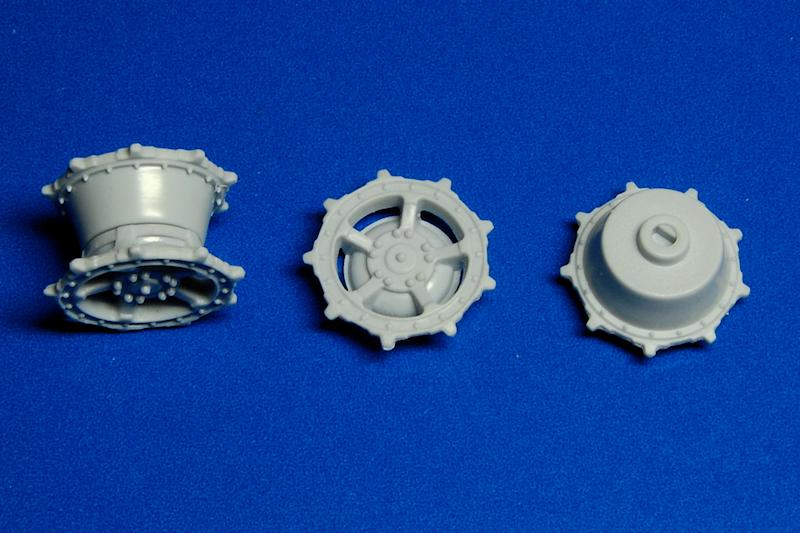
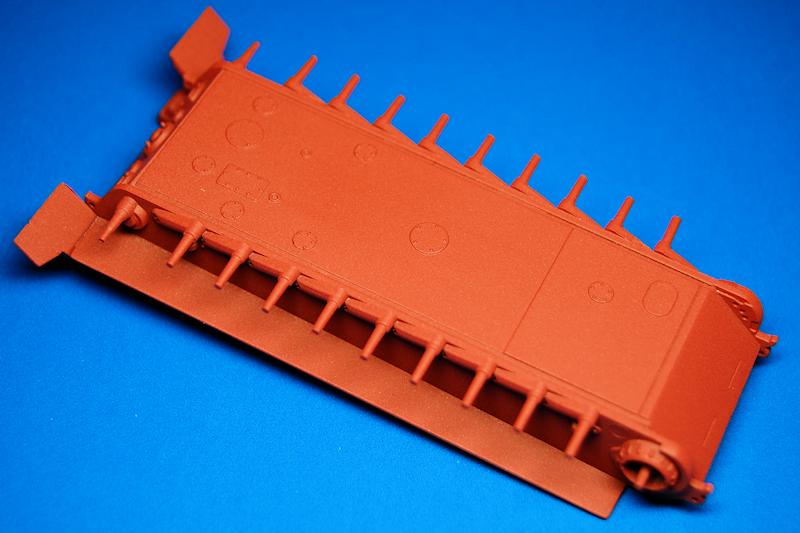
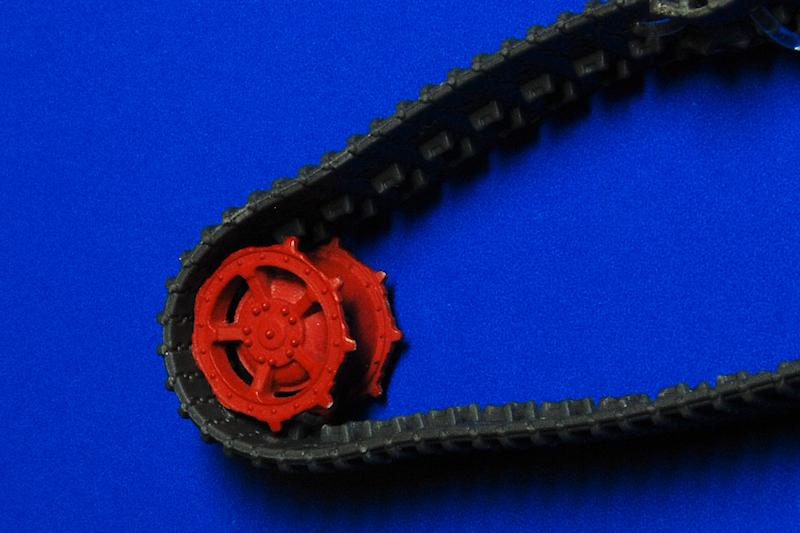
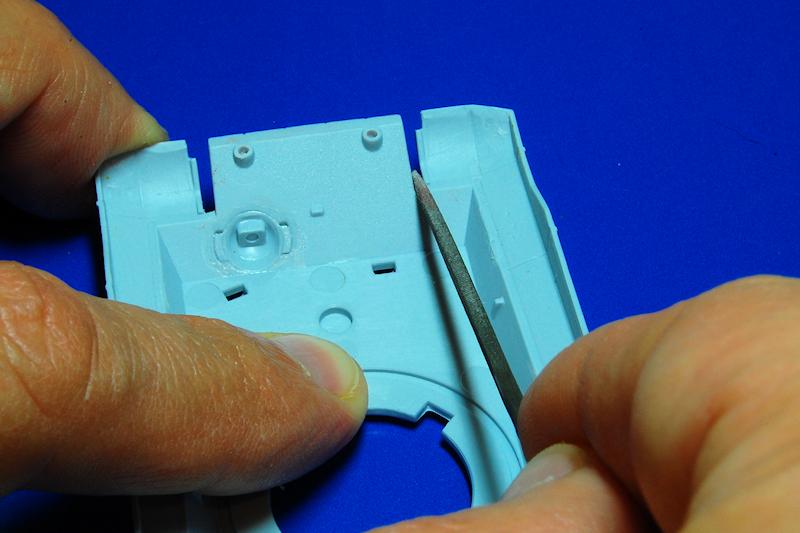
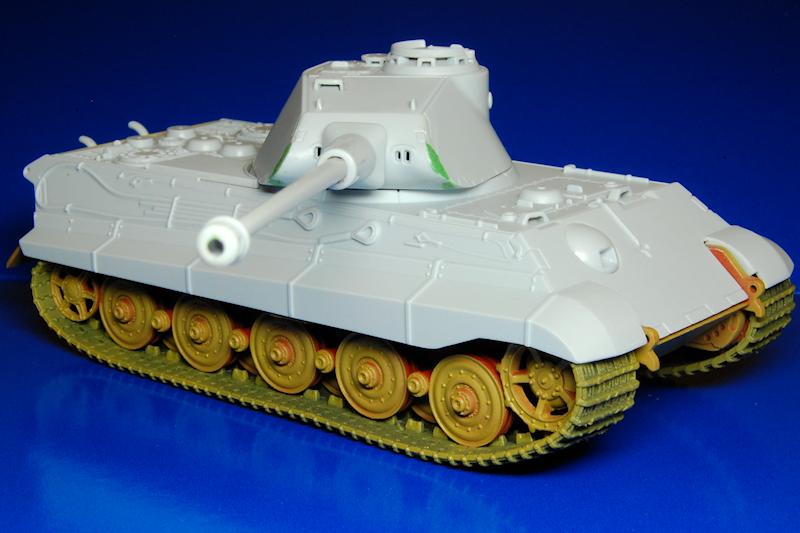
We start off building the hull tub; you can see in the photo (22) that the sides have a number of ejector marks but these are really irrelevant as all will be hidden by the wheels, tracks and skirts. Fit of these parts is nice, just a little gap where the rear plate meets the sponsons (photo 24) but not visible from the outside. Wheels were pretty easy to clean up, which is good considering how many there are, and the fine sprue attachment points can be seen arrowed in the photo (26) of one of the wheels in profile. Sprockets also nicely detailed shame almost all that inner bolt detail will be invisible.
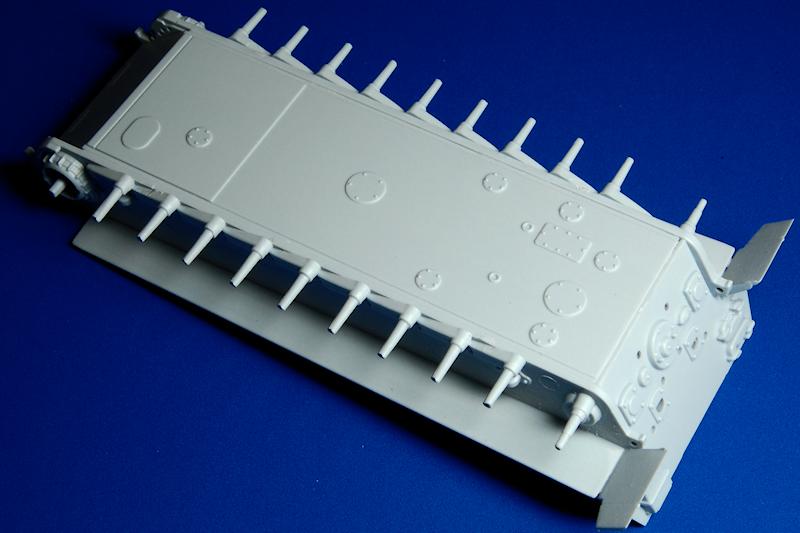
With the tracks and all those wheels in mind, I wasnt too sure which order to do everything in so I stuck all the built wheels on to cocktail sticks and primed them and the hull. While that was setting I glued on the upper hull details: the machine gun mounting, which strangely for a dome fitting into a round hole, had a bit of a gap around it I was expecting it to wedge in tightly; then the grilles on the engine deck.
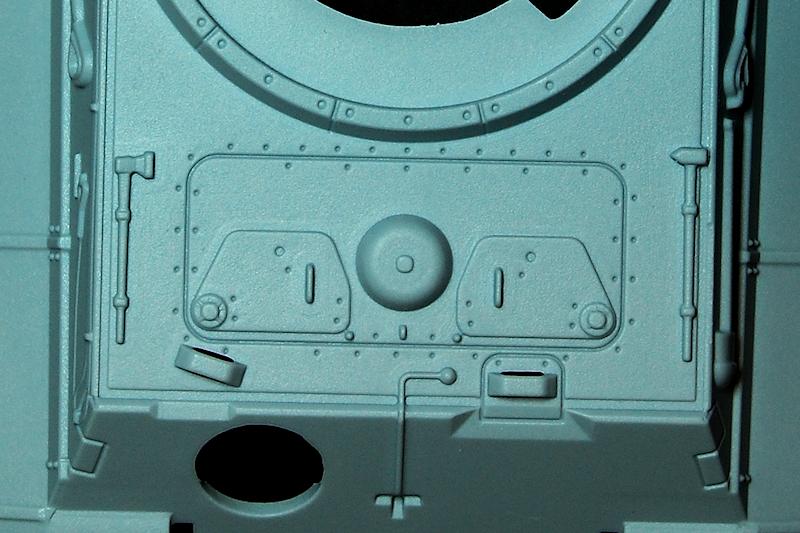
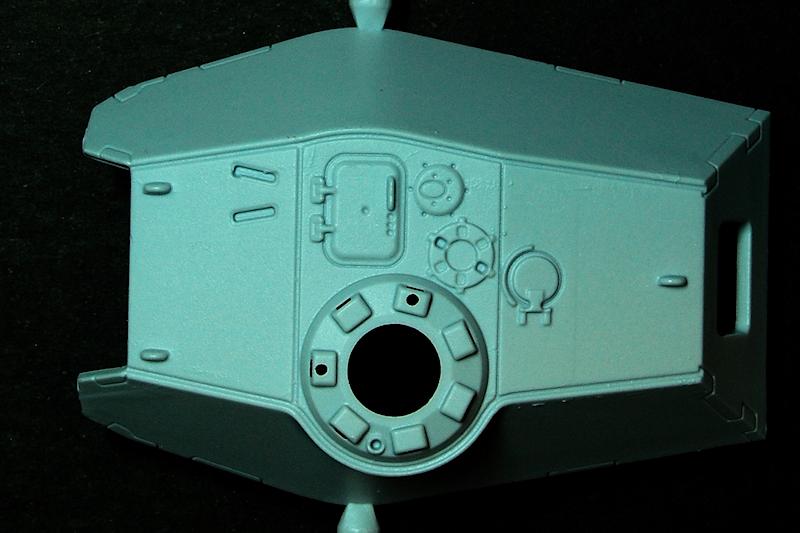
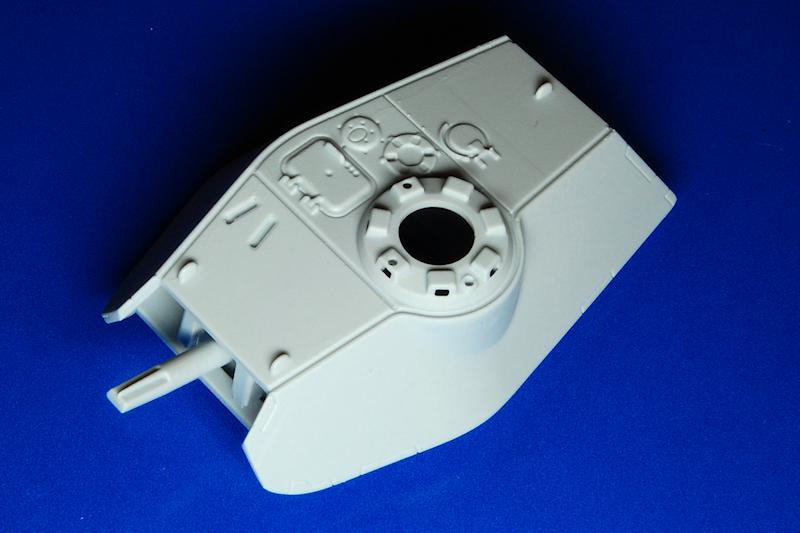
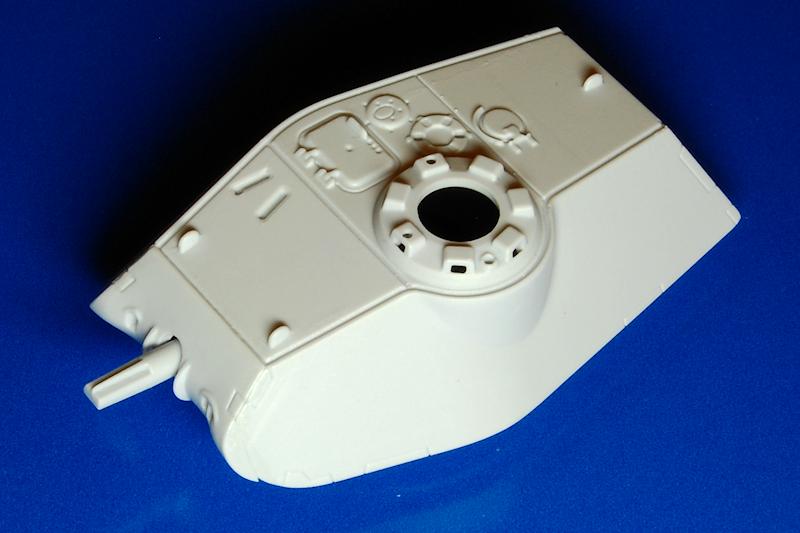
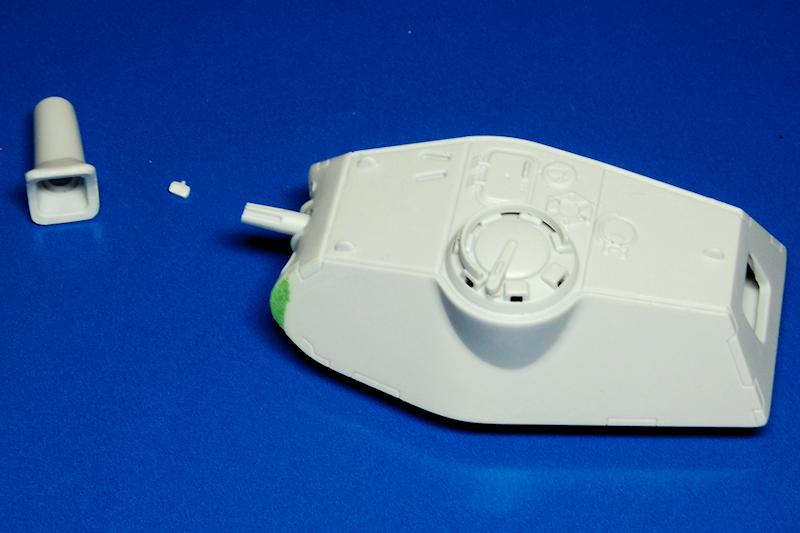
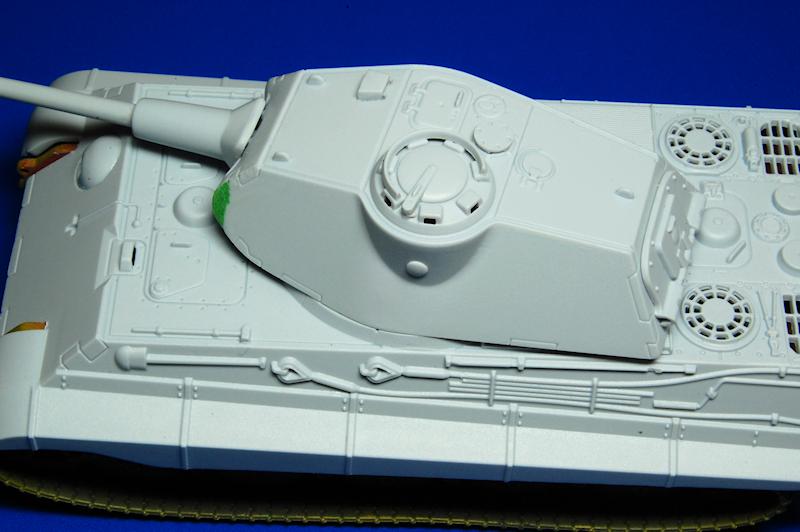
The turret starts off with the base and the hinged attachment for the gun, which is fortunately nice and sturdy considering the long gun. Then on with the turret top and front; the top fits well, but the front plate had a small gap towards the bottom so that where you want a smooth curve there is a small step. It could be that I positioned it slightly incorrectly, but moving it up produced a bigger step at the top edge. So, a little sanding and tiny amount of filler (photo 35) was used to restore the rounded profile.
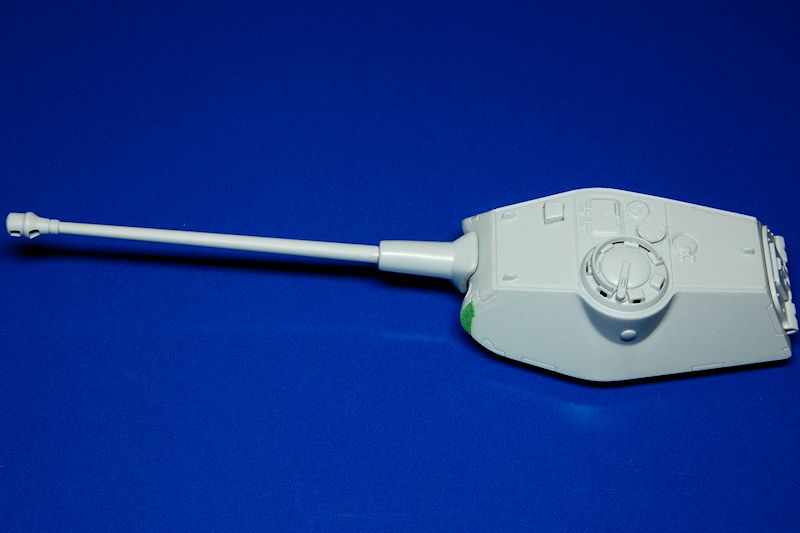
The muzzle brake is in two parts, one of them integral with the gun tube; the join is OK and relatively easy to clean up once made, just a bit of attention needs to be given to maintain the small groove that runs around it. The thin end of the gun tube that fits into the mantlet seemed a bit too long for the hole it goes into so I chopped a millimetre or two off, and its a similar story where the mantlet and gun assembly then attaches to the hinged peg protruding from the turret: a mill or so was removed from the end of the peg to ensure the gap between mantlet and turret front wasnt too wide (photo 35). The turret rear hatch is a separate single piece, then the hatch, periscope cover, ventilator top, cupola splash guard and finally the plug that was welded over the prototype pistol port in the cupola bulge, complete the turret.
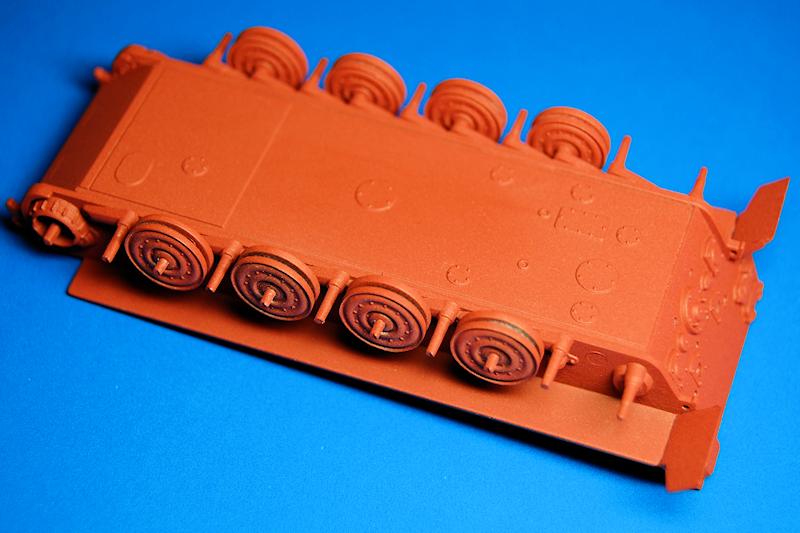
Back to our now primed hull, the inner row of wheels was attached, the fit being nice and positive and easy to keep all aligned. Conscious of having to get the tracks around the idlers and sprockets I tried to ensure a good strong join with these parts, but the attachment rods are not particularly robust. Because the tracks are so wide, the idlers and sprockets are wide too, and this makes for a lot of leverage against their mounts. This takes me back to what I touched upon earlier about making the construction easy if going for rubber tracks: the attachment of the idlers and sprockets really need to be fool-proof and virtually unbreakable. Considering once constructed, the point where they connect to the hull is invisible, I would have liked to see a VERY thick attachment point, but instead we get a mill or two thickness of rod; it might not snap but it does bend!
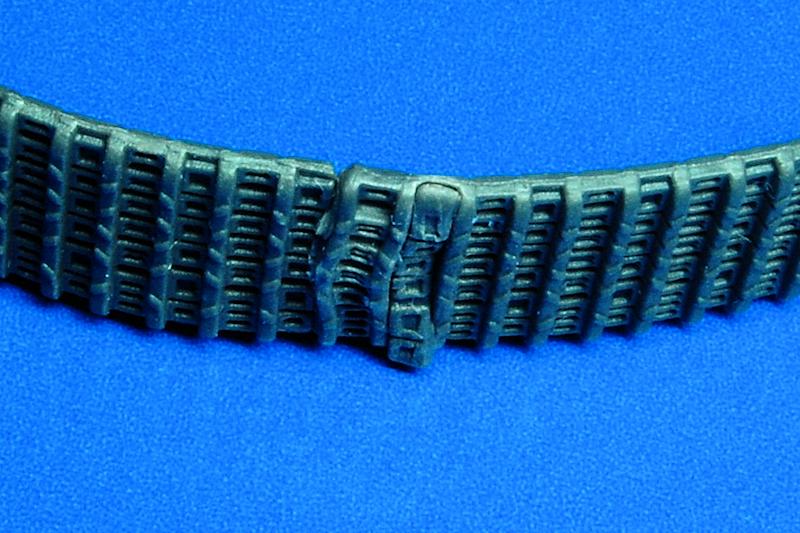
Right, the tracks; they join together quite well, but not invisibly, but of course the join will be hidden by the skirts on the upper track run. You can see I squashed mine together with pliers, and then tried to get a better shape to the joined ring by putting them in very hot water and pulling them to the desired elongated hairpin-bend-ended loop. Under this duress one of the joints failed, so I messed around seeing if hot glue would be good (too messy) or if beading elastic would be invisible (not really, but it was strong and didnt tear the holes it was threaded through as I thought wire or thread might.) Considering they are rubber the detail of the tracks is OK, at least when viewed at normal size.
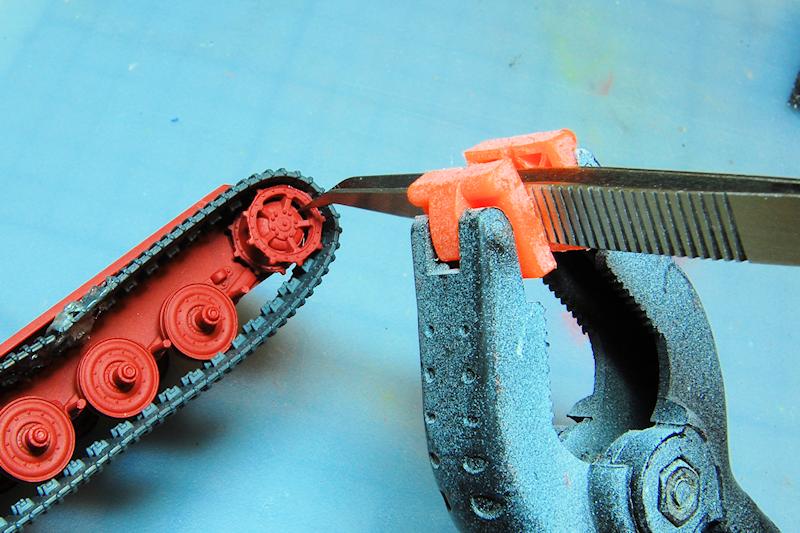
I couldnt really get the sprocket teeth to sit well into the track drive holes which meant the tracks sitting up off the sprockets, so having determined which ones should be fully engaged, I simply cut those teeth off. The tracks were fitted with only the inside run of road wheels in place, and then the outer run were attached. The tracks were forced down into the sagging position with two scraps of sprue glued in at the front end and a piece of cocktail stick at the back; looks pretty messy, Im sure it could be done more elegantly, although it is completely hidden once the hull top is in place all you can see is the underside of the upper track run. Photo 47 shows more fiddling around to get the right hand track to sit on to the sprocket.
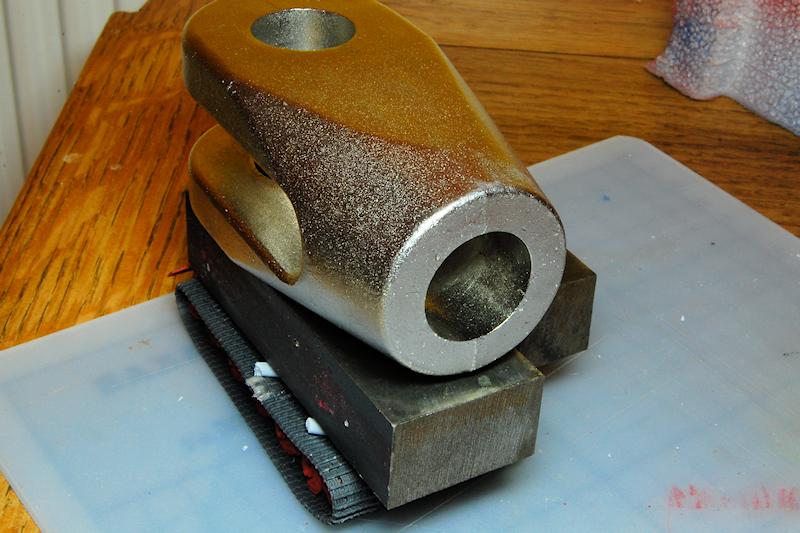
On that bendy sprocket mount I did get fed up with it on the left side and cut the post off, drilled a hole and inserted a thicker piece of plastic rod through the hull into the sprocket (visible in photo 49). This stopped the track from pulling the sprocket out of true which in turn makes the track look skewed. The sprocket was then CA glued on to the track (photo 45) and then the sprocket and track were attached to the new plastic rod. It is now pretty straight on that side, so if I built this again thats the approach Id take from the start. In fact Im thinking about metal rods ! See the photo (50) face on to the tracks the right hand one had the axle replaced, the left hand one didnt, and I think is visibly tilting up a little. So once I had finished this stage, it sat with a big metal weight on it overnight to make sure the road wheels squashed down on to the tracks and stayed aligned with the teeth (no, thats not a giant tracked mortar )
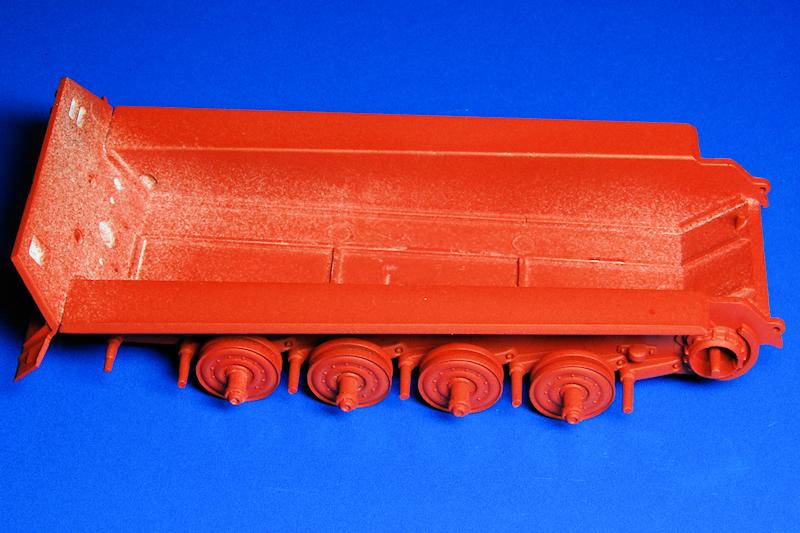
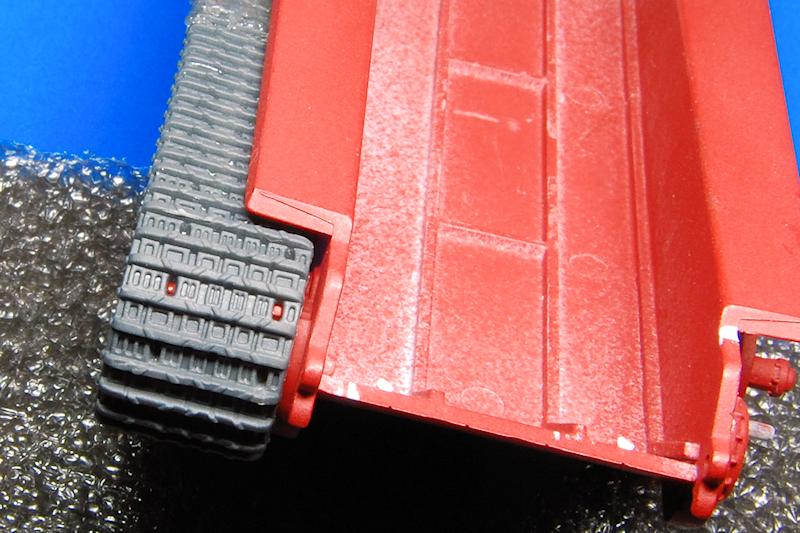
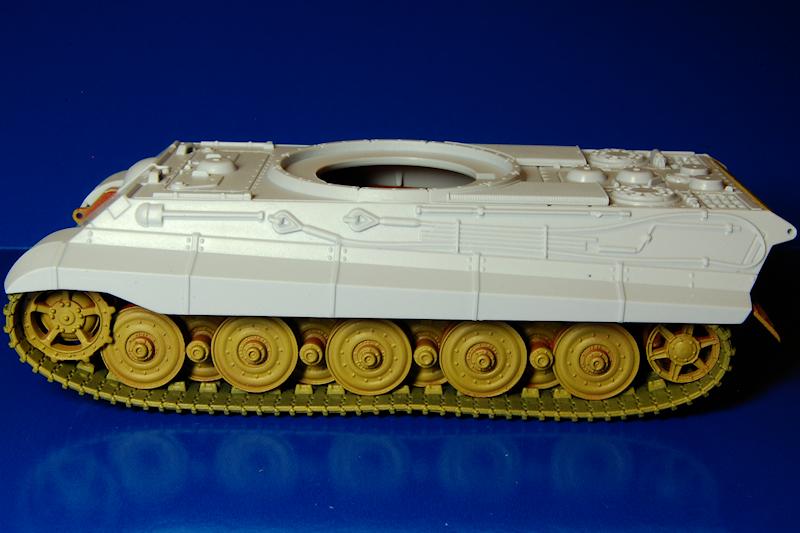
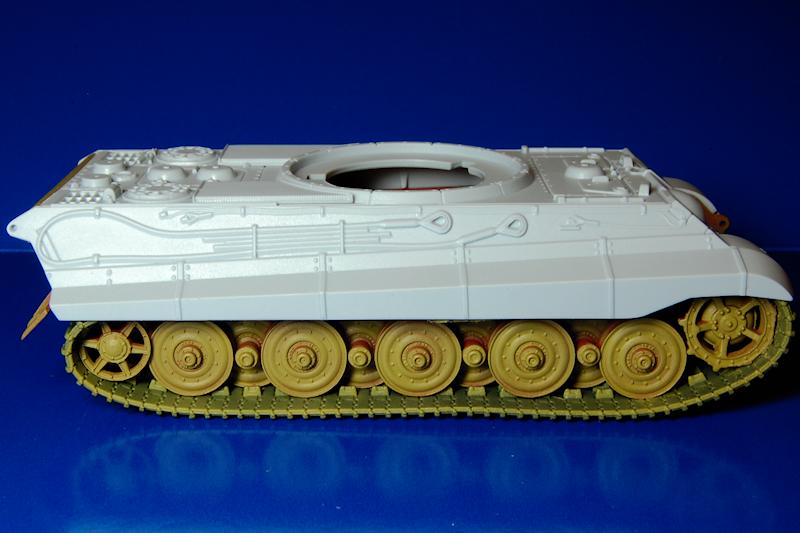
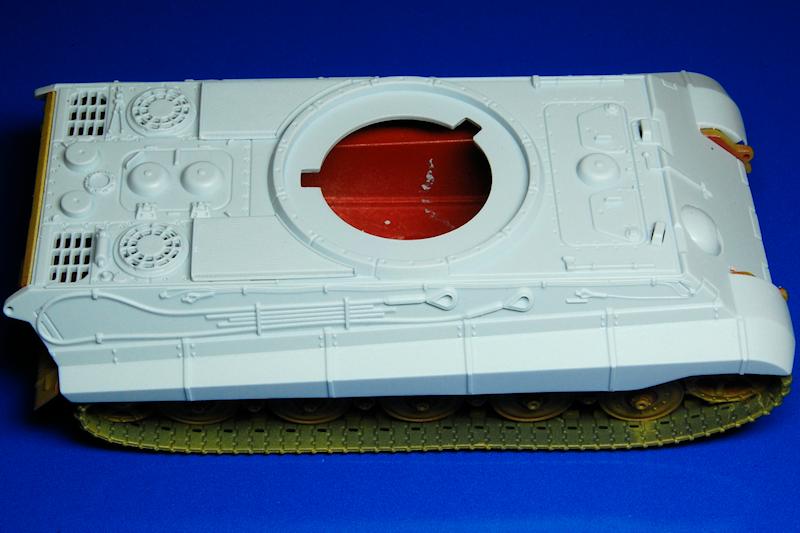
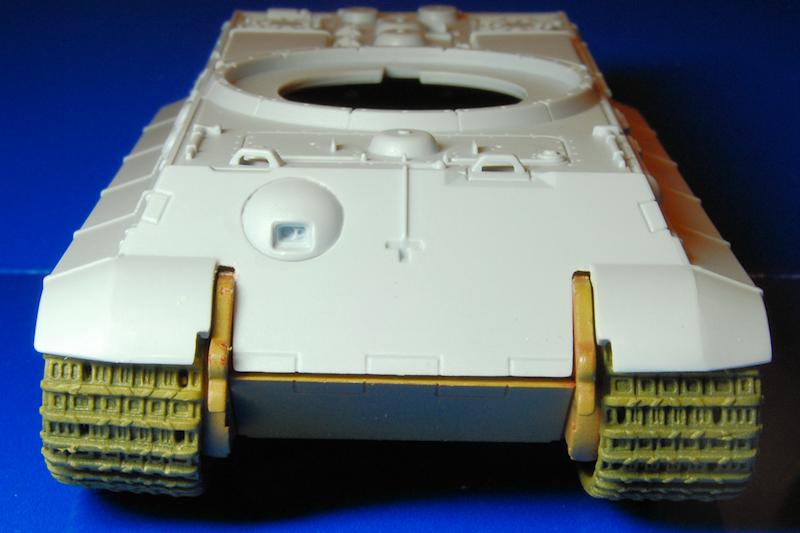
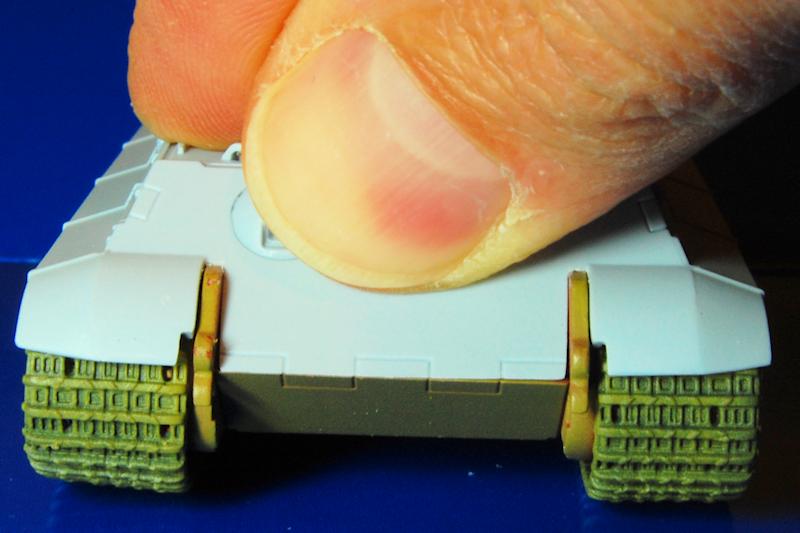
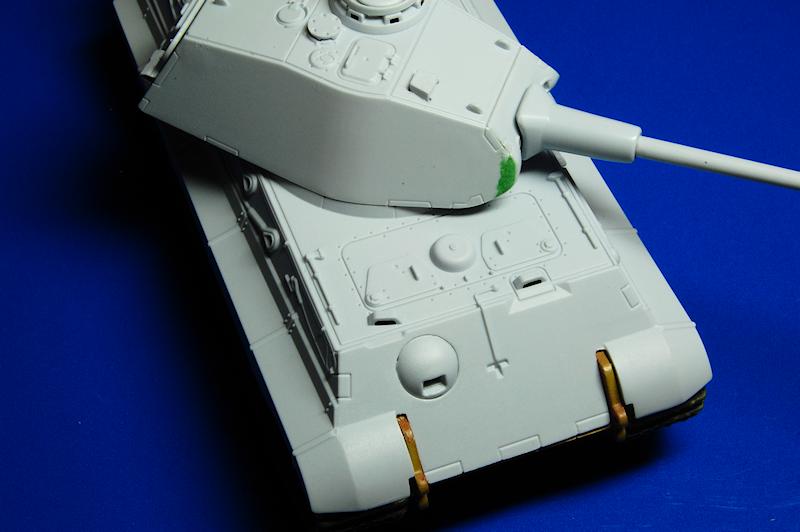
Because the hull top fits so tightly over the tracks I kind of came to the conclusion that the only way to paint this is to do it in two parts, so I gave the wheels and tracks a thinnish coat of dark yellow. The hull top is just sitting in place in all of these photos, to show the fit. I found that I needed to remove some plastic from the slot on the right of the upper nose plate (photo 56) to allow the halves to meet up on that side. The head on view shows how tight the fit is, with some pressure needing to be applied to get the nose plates to meet up (photo 57). Im not too sure about the small gap between the flaps at the back and the side skirts (photo 58) just not being able to find any decent close up photos of this area on the real thing.
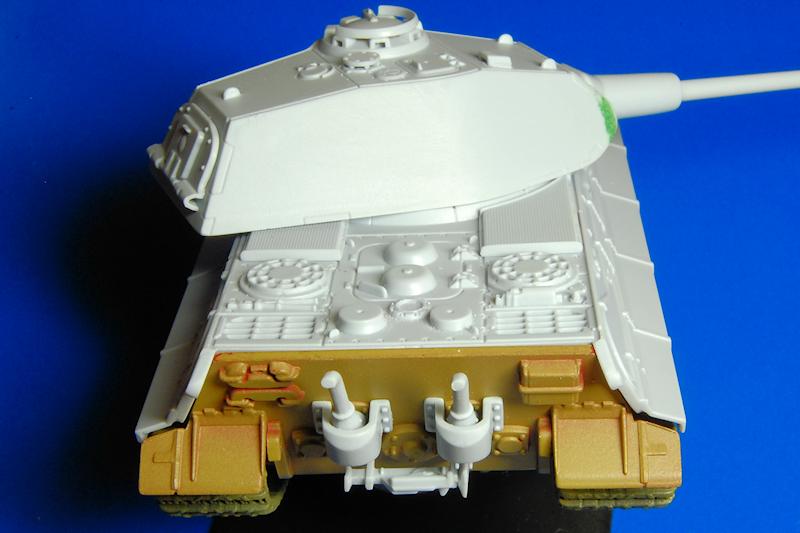
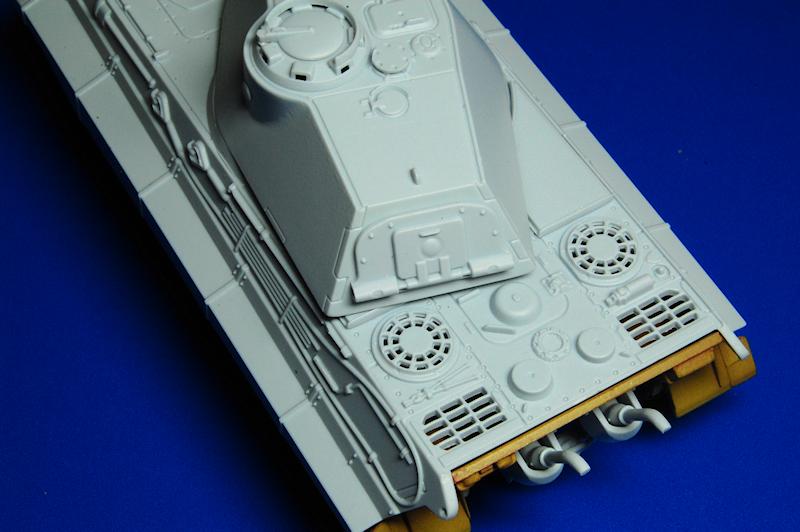
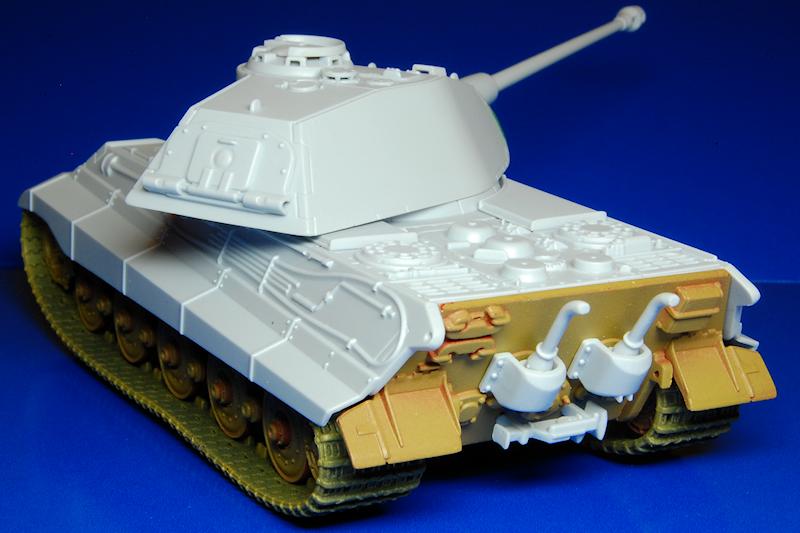
At the back, the exhausts come in two pieces each, and look well detailed, though the pipes themselves would benefit from being drilled; there is also the jack to attach, with the towing hooks and jack block being already moulded in place. These parts, and the whole hull top, are all just shown unglued so look a little wobbly, otherwise all the parts are on apart from the towing shackles to be fitted to the eyes on the rear of the side plates.
Conclusion
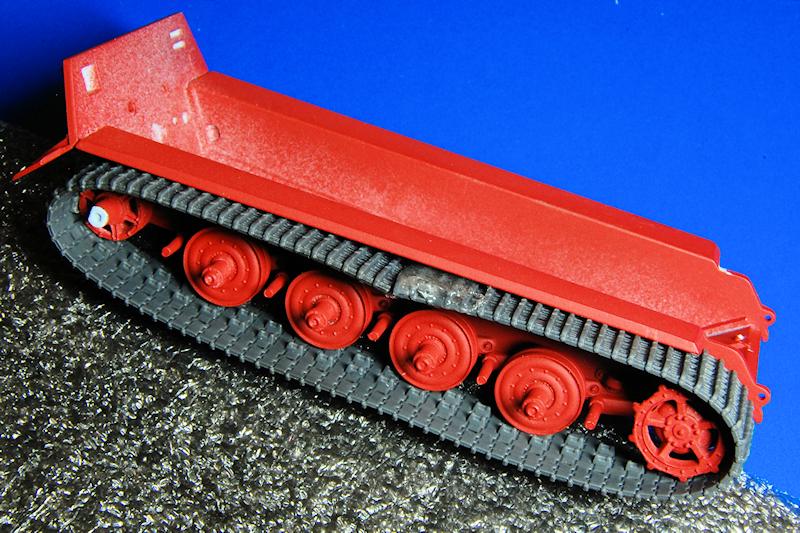
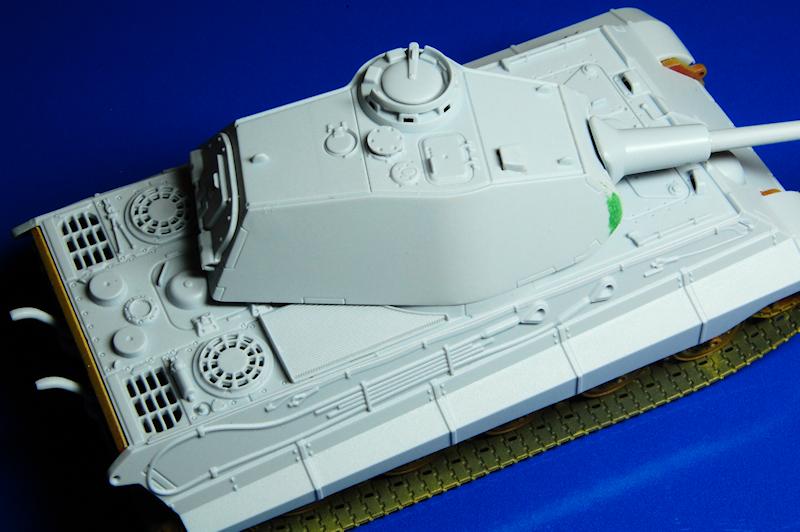
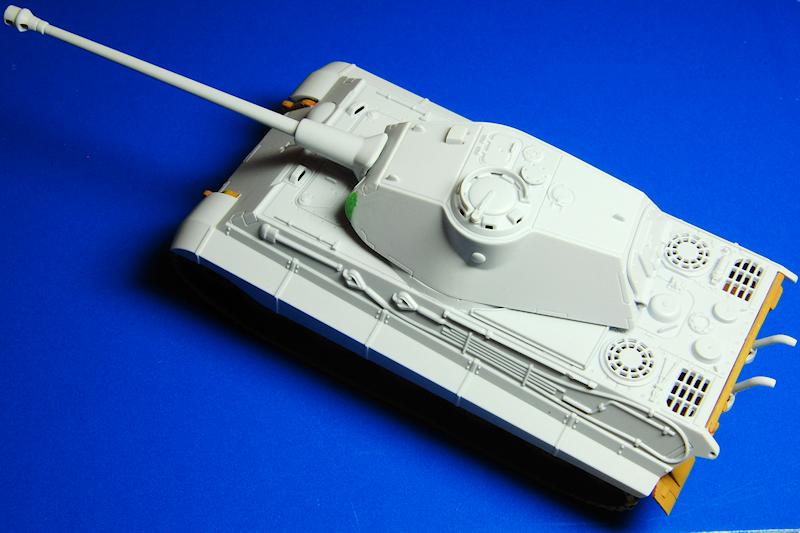
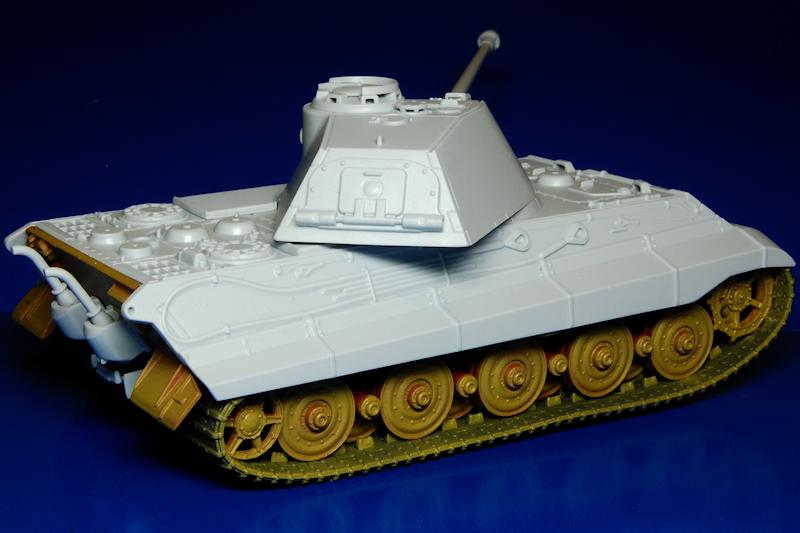
The remaining photos give an impression of what the finished model will look like, and despite some of the difficulties I had, it does, I think, have a pretty impressive presence for a 1/76 scale kit its easily the biggest one on my shelf! If it wasnt for the tracks, with the stresses they place on the wheels, the need to provide them with sag, and the way in which they cause the upper and lower halves to need to be squeezed tightly together, this kit would be an absolute breeze to make, and could probably be built in an hour or two. Considering the approach that was taken with the recent Cromwell kit, where the tracks were injection moulded on one pre-shaped piece, it is a real disappointment that we have gone back as it were to rubbery tracks. Perhaps the designers had a good reason for this, but I would have thought that the layered road wheels of the KT would have been ideal for this approach indeed perhaps with the inner set of wheels and the inner halves of the idlers and sprockets all moulded integrally with the track, with just the outer layers of the wheels to add?
Then there is the issue of the Zimmerit. It beats me why they didnt elect to mould the Zimmerit on. One of the nice things about these recent Airfix offerings seems to be the very good quality of the moulding, so I would have thought we could have expected a very decent effect to have been achieved had they attempted it. As for me simulating Zimmerit on this kit well, thats one of the reasons I havent painted the hull top or glued it on yet. I have a couple of techniques in mind, and the area to be covered isnt in fact that complex, this tank having nice big panels; the main difficulty will be what to do with the sides where the cables and tools are moulded on, depending on which method I go for, engraving or pasting. Suggestions welcome
Perhaps Airfixs traditional market wont care too much about the Zimmerit, but I still have misgivings about the tracks. On the up side, this kit is pretty cheap, and in the UK at least, very available in shops.
SUMMARY
Highs: Low cost, high quality clean moulding and details, a simple build in most respects. Lows: The rubber tracks, the lack of Zimmerit.Verdict: A missed opportunity to put out an easy to build yet decently detailed and historically accurate model.
About Matthew Lenton (firstcircle) FROM: ENGLAND - SOUTH EAST, UNITED KINGDOM
Earliest model memory is a Super Sabre my grandmother bought for me around 1972. Have always dabbled in painting and making things, and rediscovered doing that with plastic in 2008. Vowed then to complete the 30 year old stash, and have made some progress. Hobby goes hand in hand with BBC Radio 3...
Matthew, super review! Great writing style -- kept me interested. Thanks for showing us what to expect when built up.
I recall seeing a photo of a KT with Porsche turret (properly zimmerit-itized {New adjective!}) on a later hull without zimmerit. Maybe that's the solution to paste or engrave?
Matthew,
A very concise and also entertaining build review. I must say that it's very nice to see a "new" Airfix kit reviewed and more than a bit nostalgic in general. One of the very first kits that I ever built (when Velociraptors roaned the earth) was the Airfix Tiger I. It is pleasant to see that the evolution of Airfix's moulding is approaching the standards that one might consider the current norm. While I can appreciate the "audience" these kits might be targeted at, it's still disappointing to see some of the "shortcuts" that were taken (moulded on tools, cables, hatches). With a bit more effort they could have targeted a larger market.
Of course what you say about the tracks is quite disappointing, especially after the nice job they did on the Cromwell. As for the Zimmerit, several sources that I have seen suggest that the use of the paste was discontinued in September 1944 and that there are photos of quite a few Tiger II's without it. As for other "inaccuracies," I have read more than a few articles that mention that, in the latter stages of the war, all manner of jerry-rigging was common on almost all German vehicles. In particular I recall one source stating how a Tiger I was returned to service after having parts replaced from three different versions that were cannibalized. This even went as far as swapping out turrets and even various hull plates.
If it is your intention to coat your beast with Zimmerit then I only see a few options. The most common would be to first sand off moulded on details so that you would have smooth panels to work with and apply a thin coating of some sort of putty that can be textured. Another way I have seen is to use a small jewellers screw driver, heat the blade and apply to the plastic. With this method you could work around the cast on details. Then another option that I have seen involved the use of Zimmerit photo-etch. I know it exists in 1/72 scale but may not in 1/76. Finally there is the use of Humbrol liquid poly cement outlined in an article HERE.
Cheers,
Jan
Thanks Fred and Jan for your nice comments on the review.
If anyone can bring up the photo of an operational Porsche-type turret KT with no Zimmerit I'd like to see it. According to Jentz and Doyle, the fitting of the 50 early turrets was authorised in Feb 44, with the new series production turret starting to be fitted to the KTs from June 44. There is the somewhat vague sentence about "Three additional turrets originally ordered for Porsche prototypes were also converted by Krupp for mounting on Henschel chassis from April to August 1944." So that's still short of the 9th Sept 44 order stopping Zimmerit, but maybe there's time for an overlap...
Anyway, I had dug out an Airfix Panther kit and experimented a little using the Liquid Poly method that Jan links to, and actually found my best result was using a knife to score in the ridges rather than trying to press them in with a flat blade. I suppose the problem with engraving is that you do get an inward groove when what you really want is something that sticks out, especially the vertical pattern between the horizontal strokes.
In preparation, I have some tow ropes coming from Poland (Eureka brand via Ebay) and today ordered some tools from Dan Taylor's Model Works. So I'm covered for pasting, or for engraving-with-accidental-ruining of the details!
I was thinking about the tracks and re-read Michael Johnson's build log on the Cromwell and there was some discussion about the limited detail, particularly on the inside of the tracks, although the Cromwell tracks are relatively narrow and rather ridged in appearance; I'm thinking maybe that it was decided that the KT tracks are just too big and complex in terms of tread detail to do the same method.
When I built this model recently I opted for the metal axel-solution, the joint was much stronger and it was really quite easy to fix.
The end result was pretty good I thought. Ages since I built armor in this scale but was a christmas present


Comments