Background
The Ford V3000 was used extensively by German forces in WWII, being manufactured throughout the war by the German operation of the Ford Motor Company, Ford-Werke, in Cologne. The chassis and cab was used as the basis of Maultier half tracks, but many more thousands of straight trucks were produced and deployed in various roles. ICM produce a well-received polystyrene kit of the subject in 1/35, but if youre looking for it in 1/72, to my knowledge, there are currently only resin or metal kits.
Hunor Product
Hunor Product are a Hungarian manufacturer specialising in 1/72 Hungarian armour and figure subjects, and also have a number of trucks in their range. They seem to have been relaunched at some point in the recent past, but when I emailed them this week I received an undelivered message and their website seems currently to be down. Nevertheless their products are currently available from various outlets, such as Tracks and Troops.
Introducing the kit
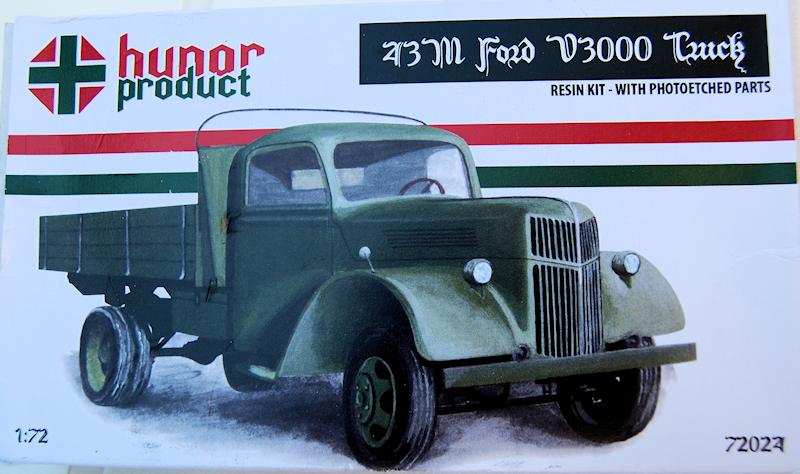
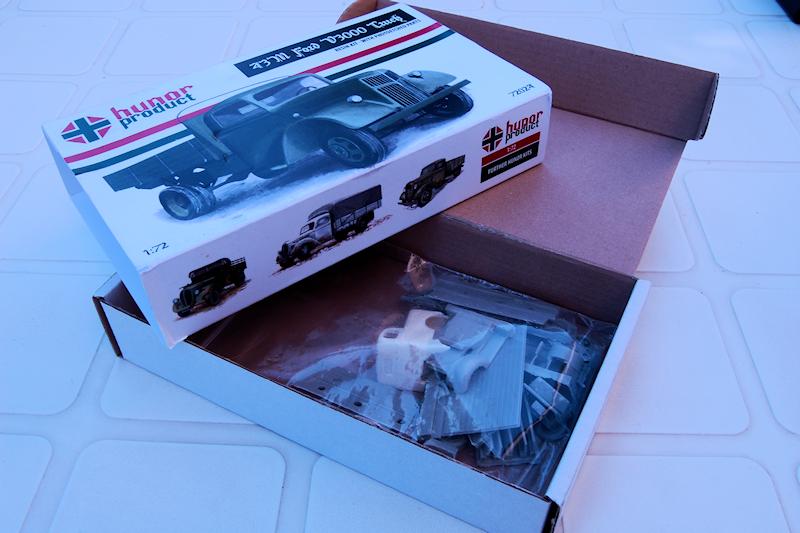
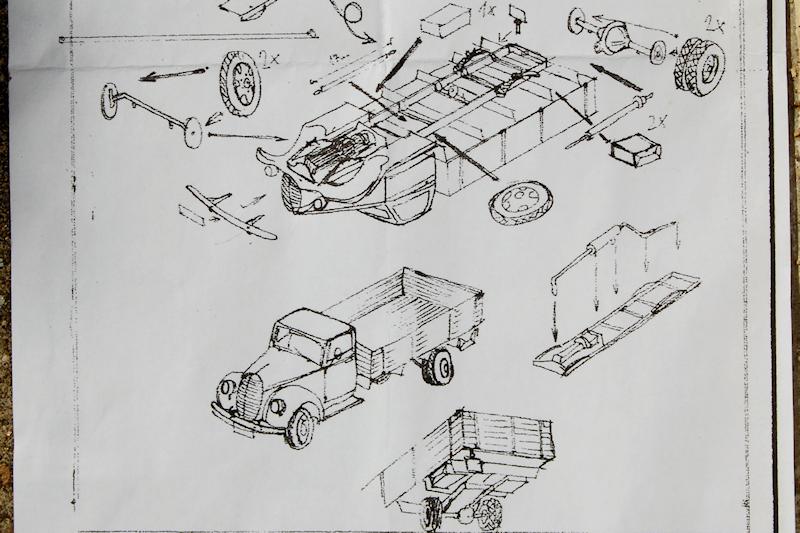
The kit comes in a sturdy top opening postal type box with the nice touch of a full colour sleeve which serves both to ensure the box stays shut as well as providing a colour illustration. Parts were all contained in a sealed polythene bag, packed around with foam pieces to prevent rattling around, but despite what it says on the box, there were no photo-etched parts included, and no decals either.
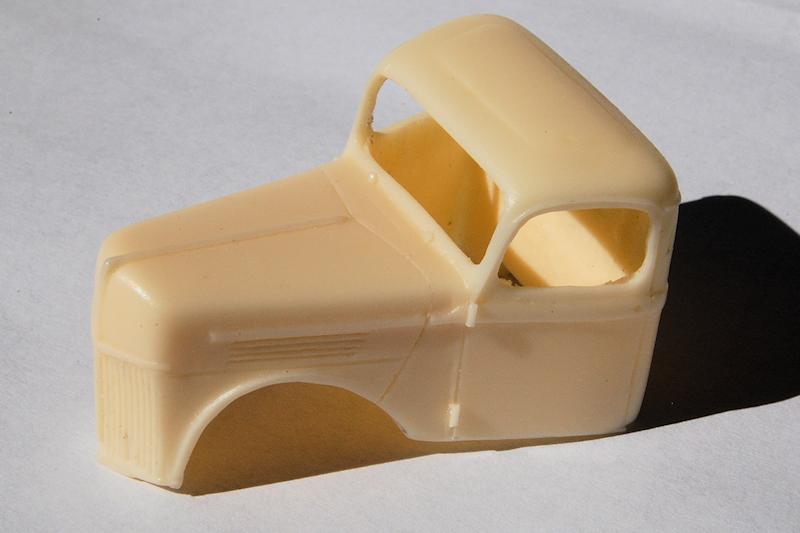
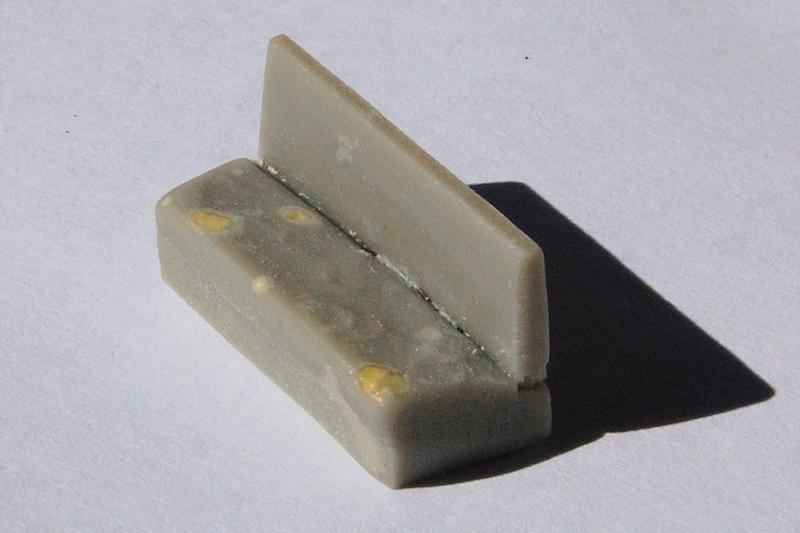
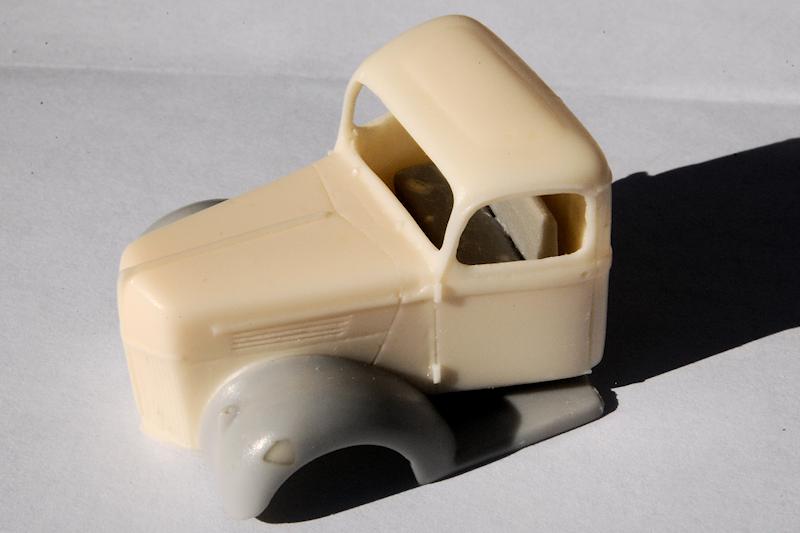
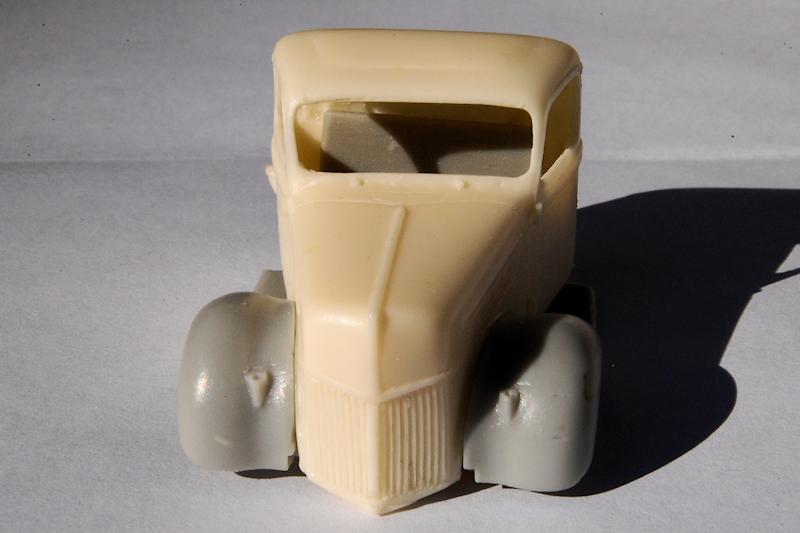
All of the parts are cast in grey resin apart from the one piece cab body which is pale yellow. An instruction sheet is included, which to be honest, is a little primitive, and I wonder if it was actually the wrong sheet for this kit, as the radiator grille illustrated looks more like the Ford V8/51 truck, and that may explain one or two other oddities, which I will come to below.
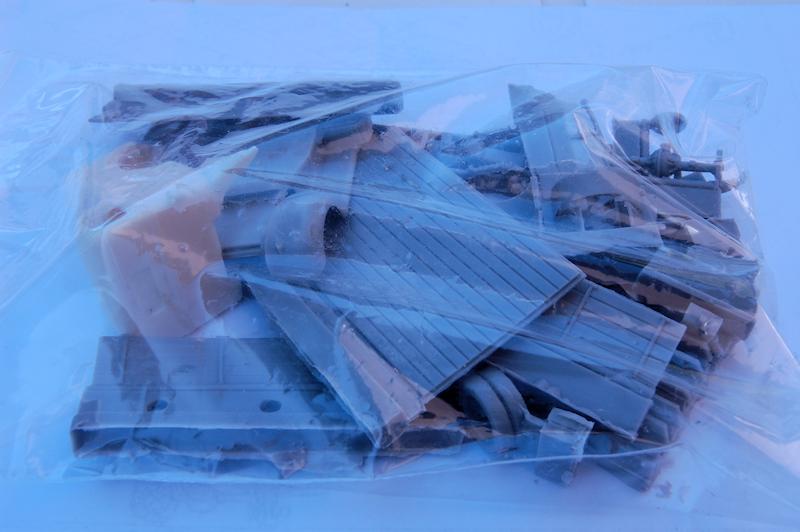
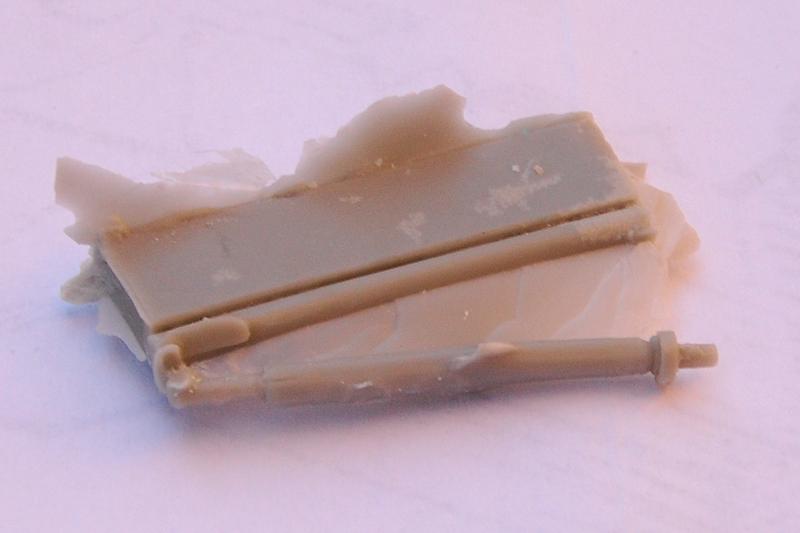
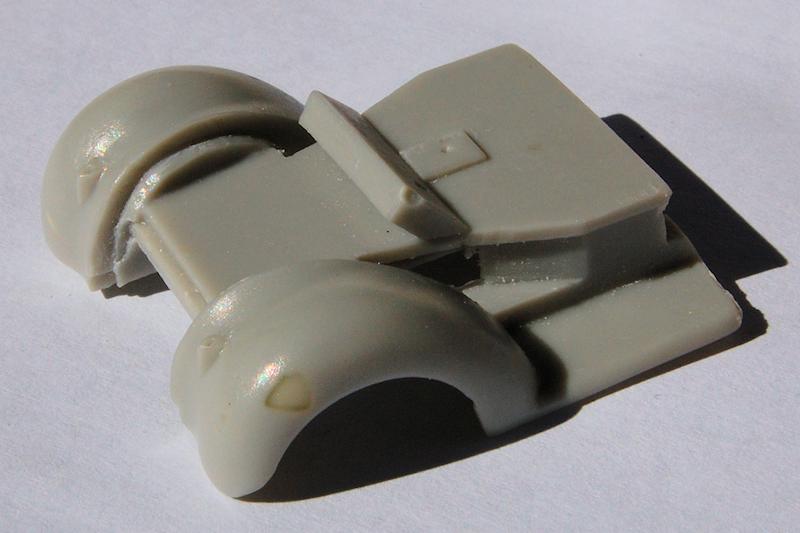
As can be seen in the photos, many of the parts come attached to resin blocks and while most of them came away from the blocks relatively easily, some care is needed, as one or two were quite firmly attached, while other parts are rather fine and delicately moulded, so potentially breakable.
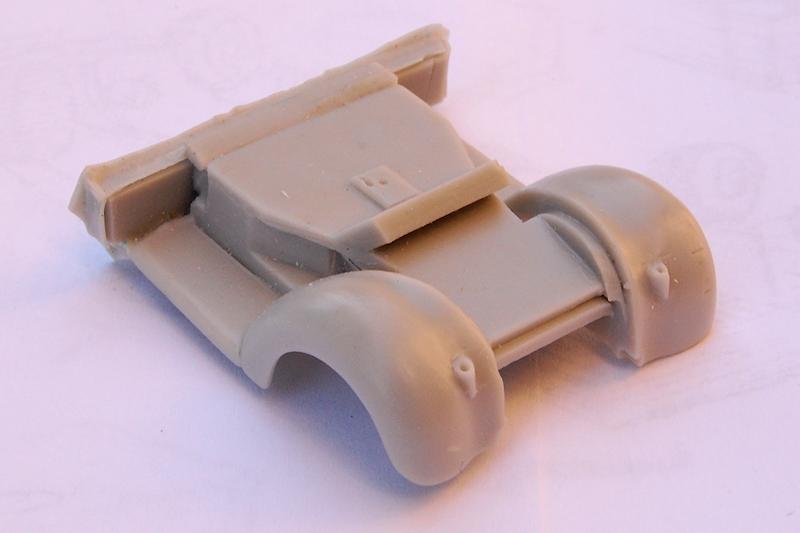
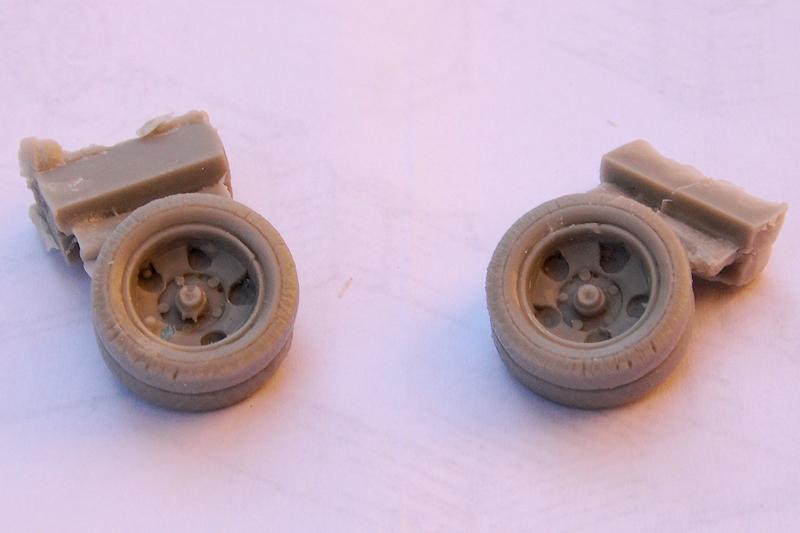
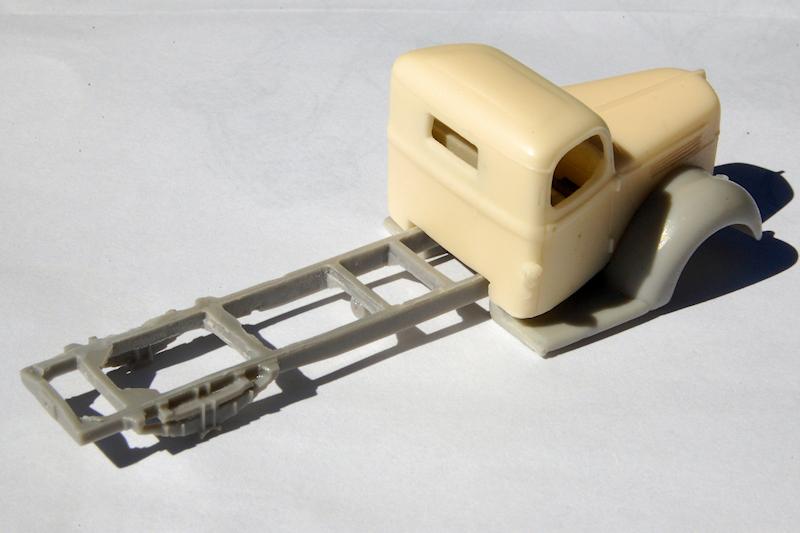
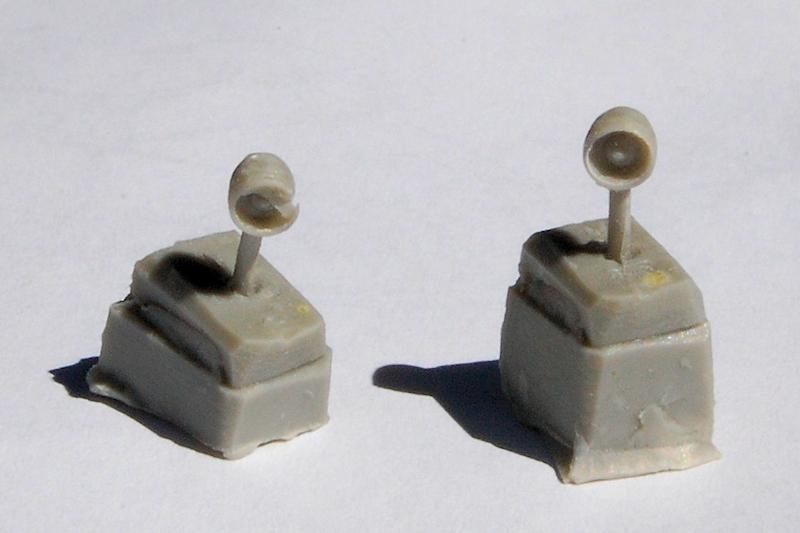
The cab body and base are particularly impressive components, being complex shapes, yet well detailed. Detail is good across the kit, although there were a few blemishes in some of the mouldings, as can be seen looking at the wheels for example, and perhaps especially one of the headlamps.
Building the basic kit
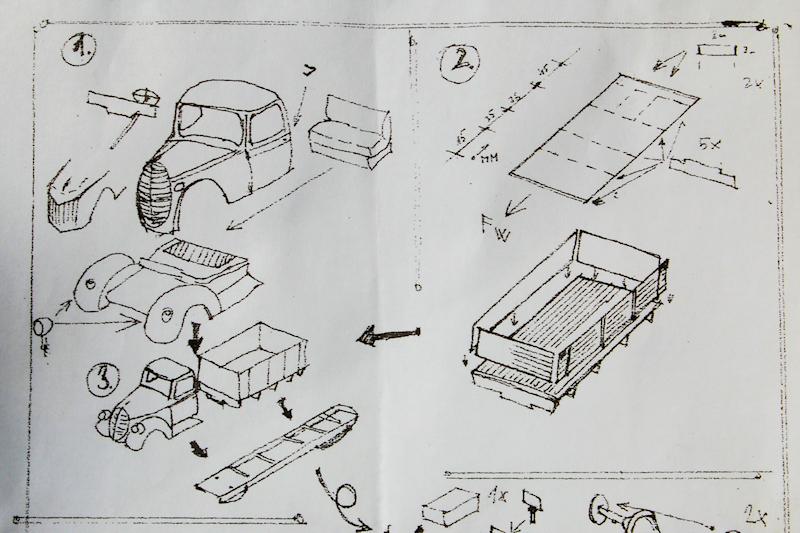
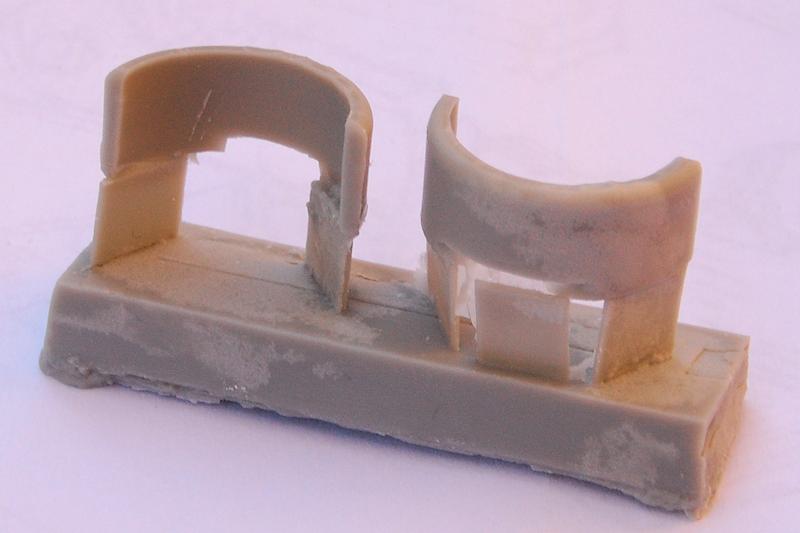
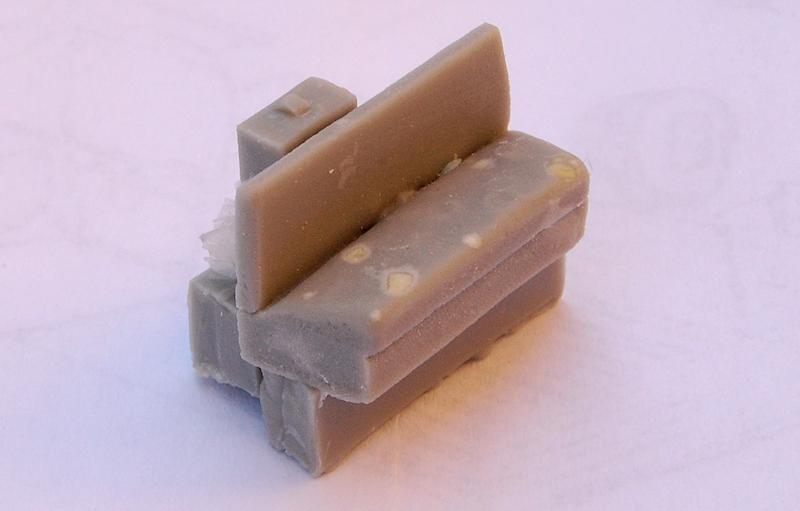
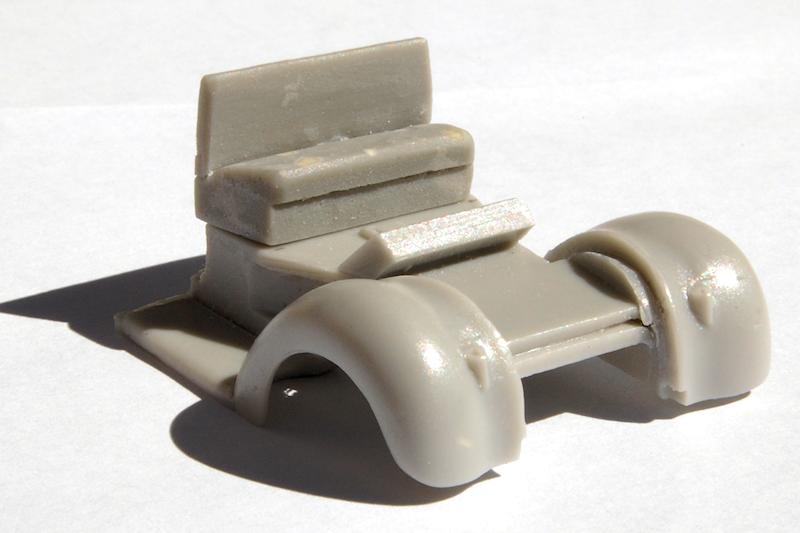
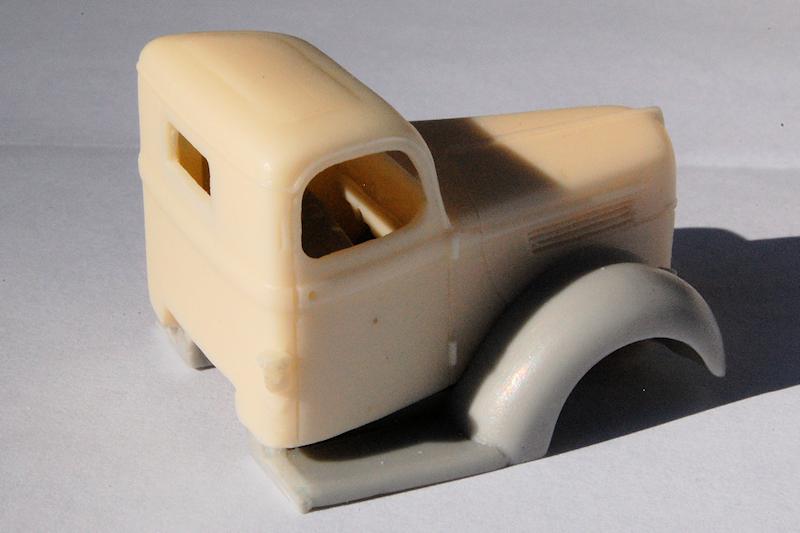
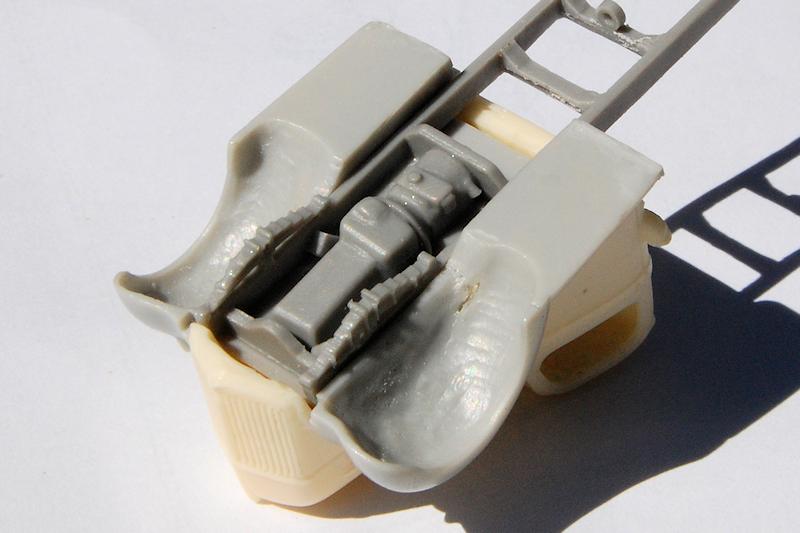
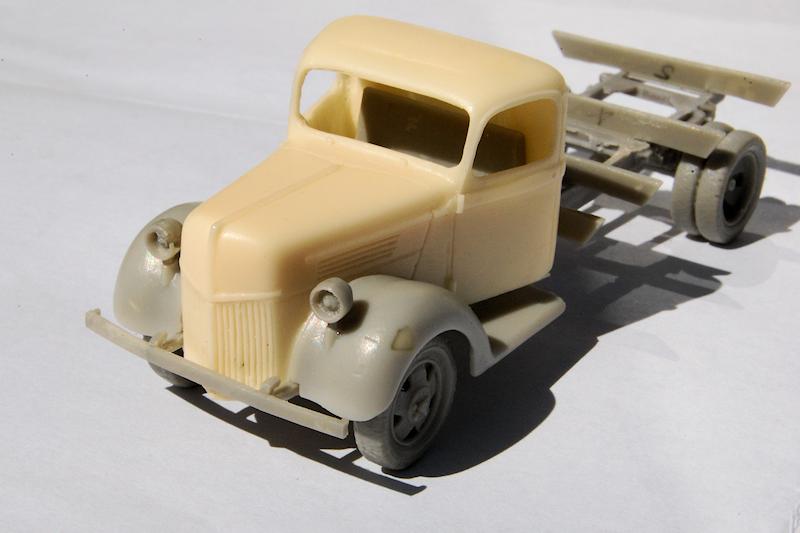
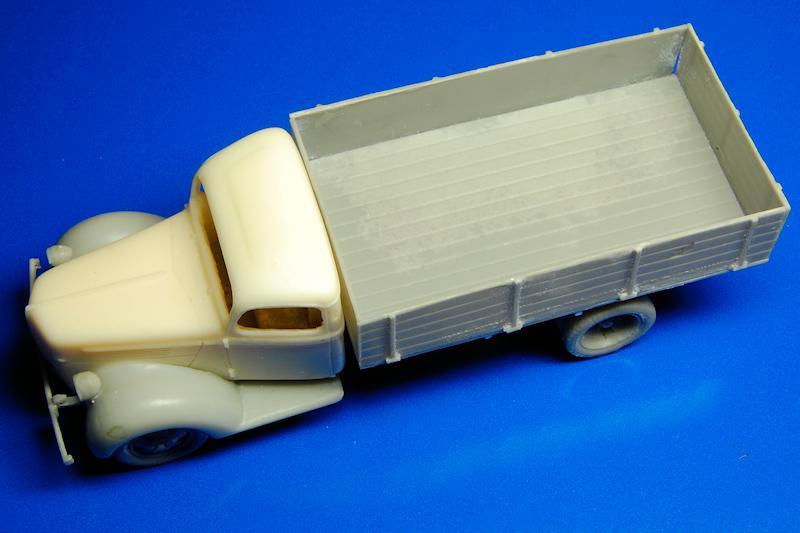
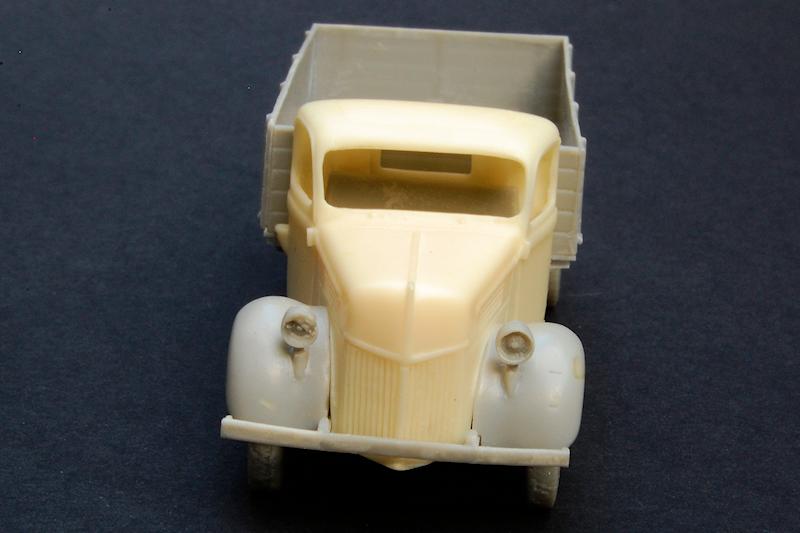
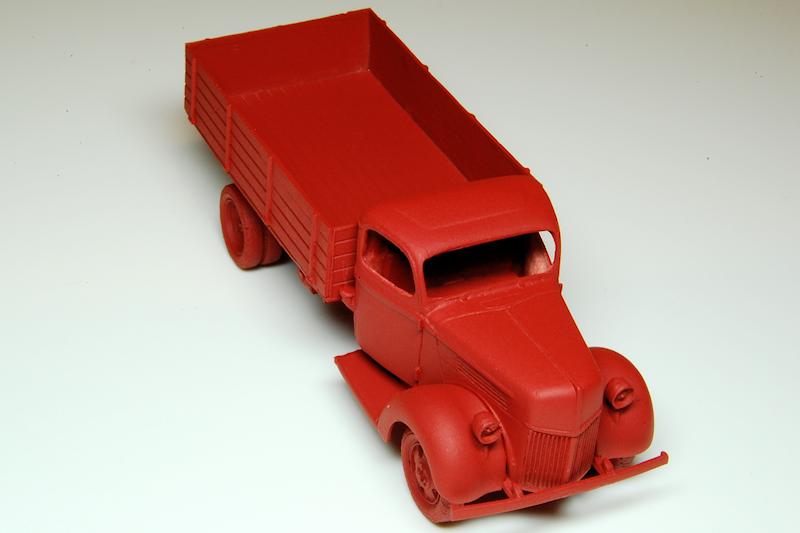
Step 1: Starting with the cab components, the first job is to clean up the cab body, base and the seat. As I hope is evident in the photo the cab cleans up beautifully; note the fuel filler cap on the cab rear corner. The cab base took a little working out to ensure that the moulding block was trimmed back correctly, and I kept checking it against the cab body and the chassis frame to ensure that it fitted in with them. For some reason there were two bench seats included, though one was clearly too long for this cab. In the photo of the seat, the contrasting colours are just colourless resin, not holes.
Once cleaned up the cab body and base fit together perfectly so very perfectly in fact that there is literally no need to ever glue them together, and indeed I would recommend they are not in order to ease later construction and painting. I fitted the cab to check the correct position of the seat, then glued the seat on to the base. The instructions show a dashboard and steering wheel being fitted, but none were included in my kit. It also shows the headlamps being fitted at this stage, which I left until later.
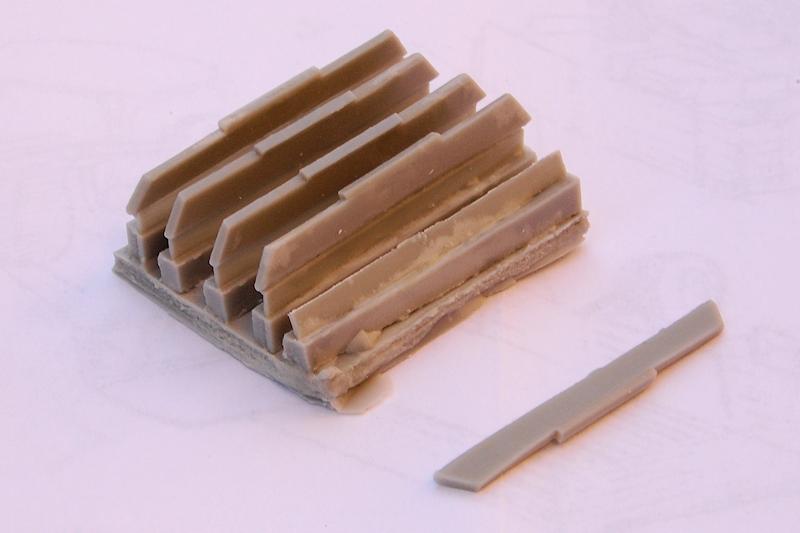
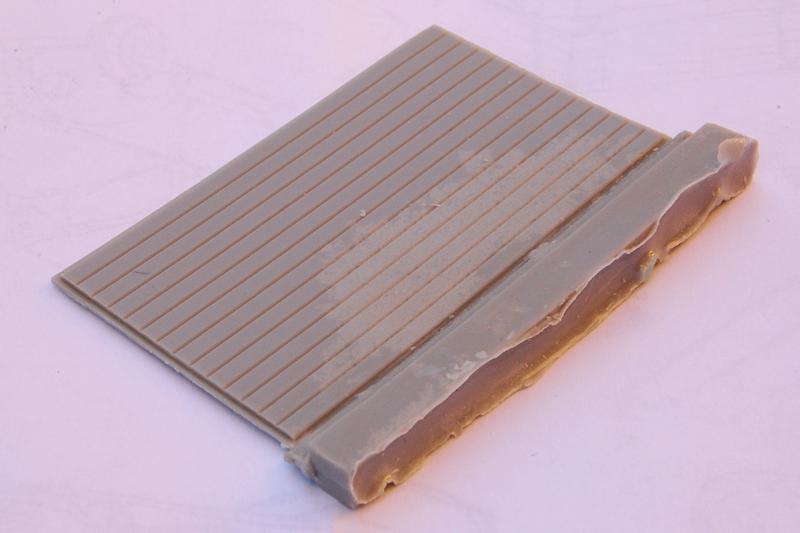
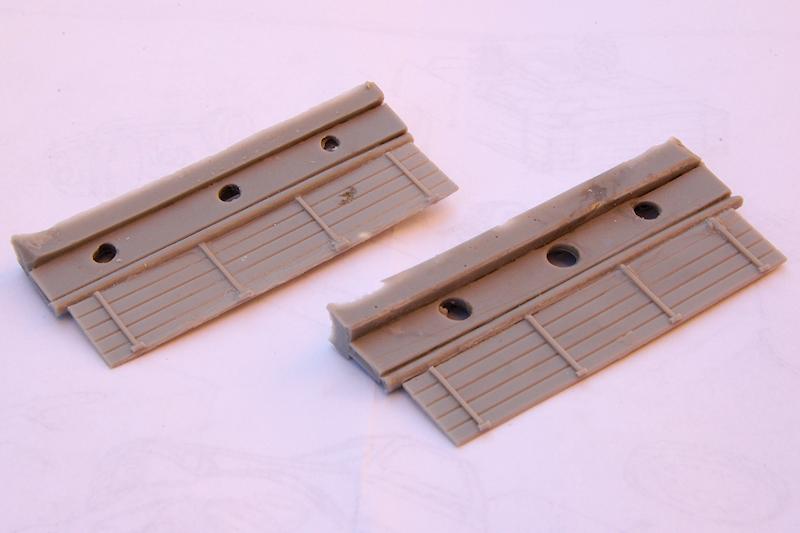
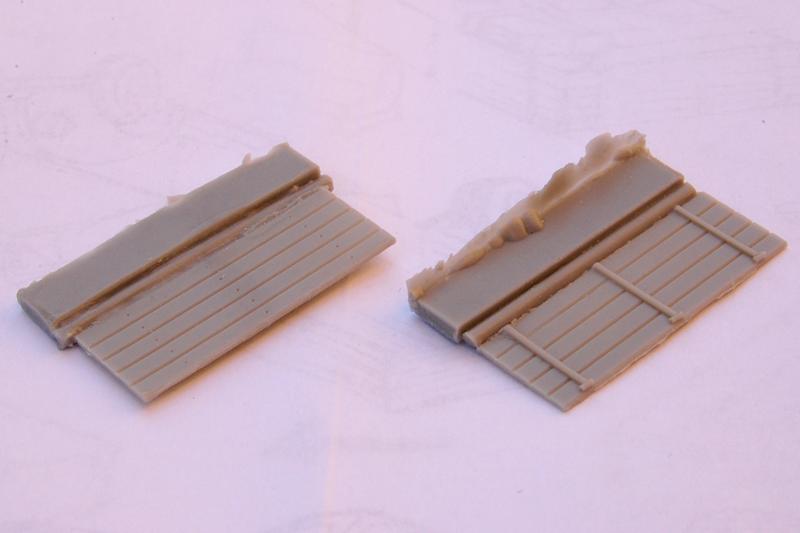
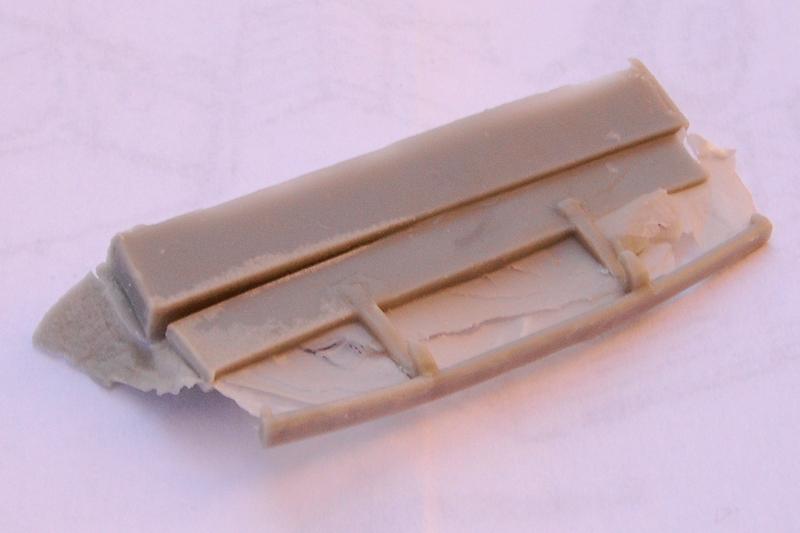
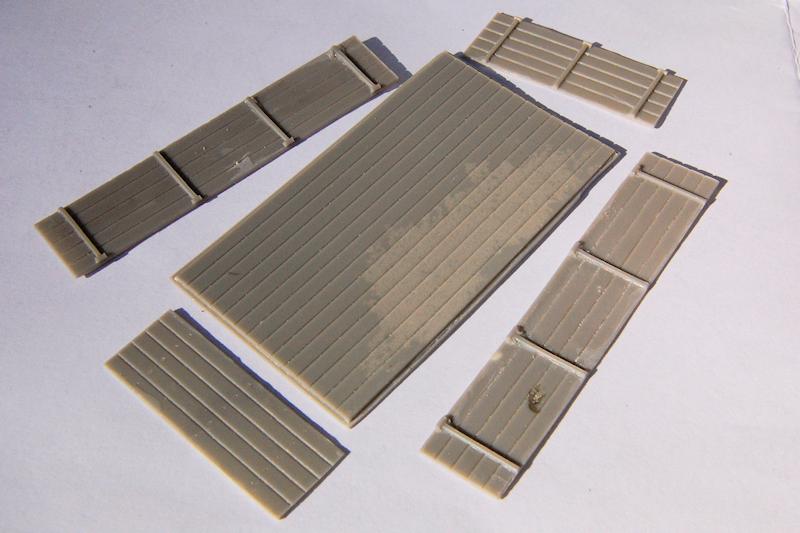
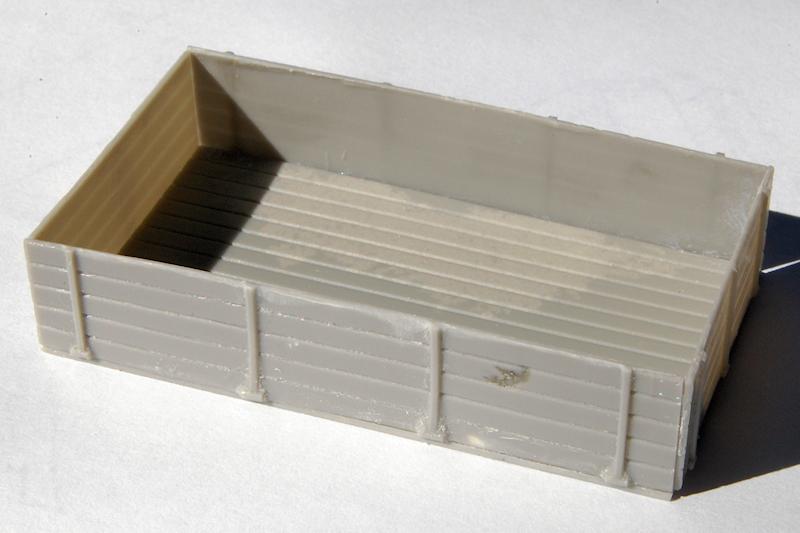
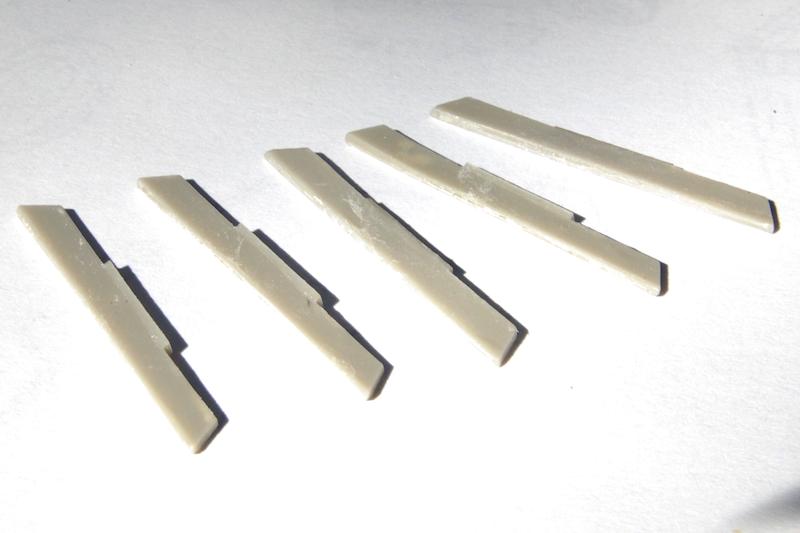
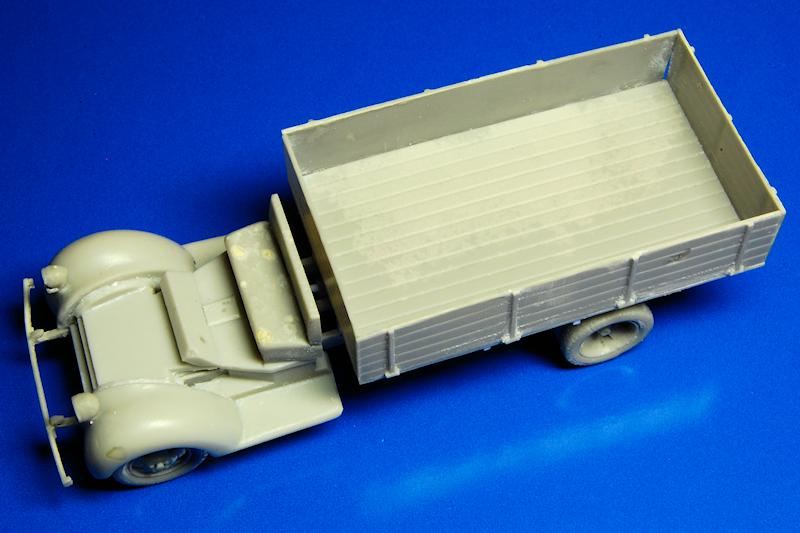
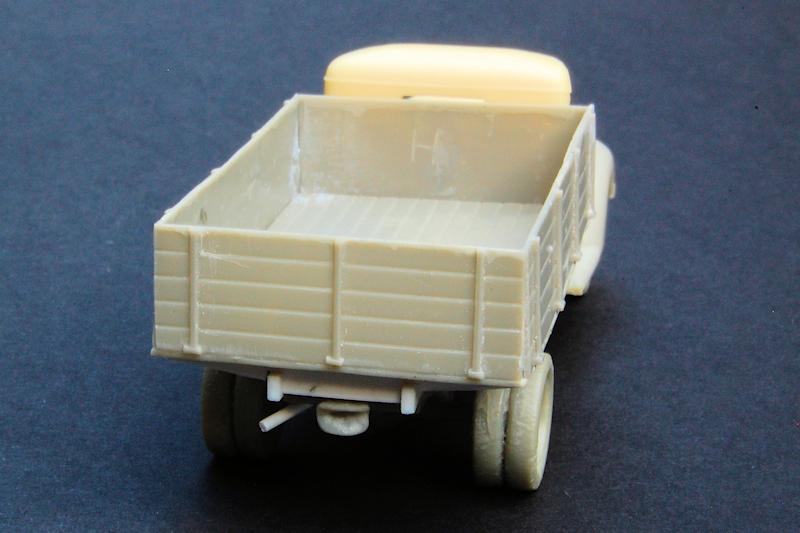
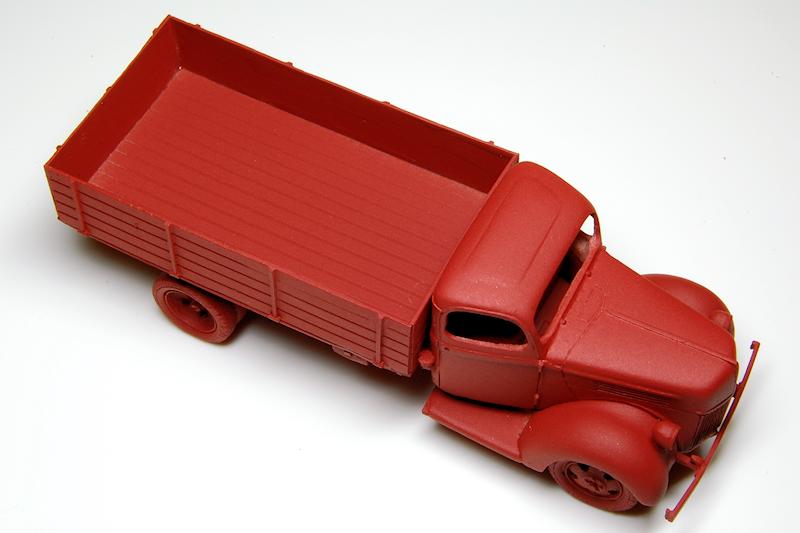
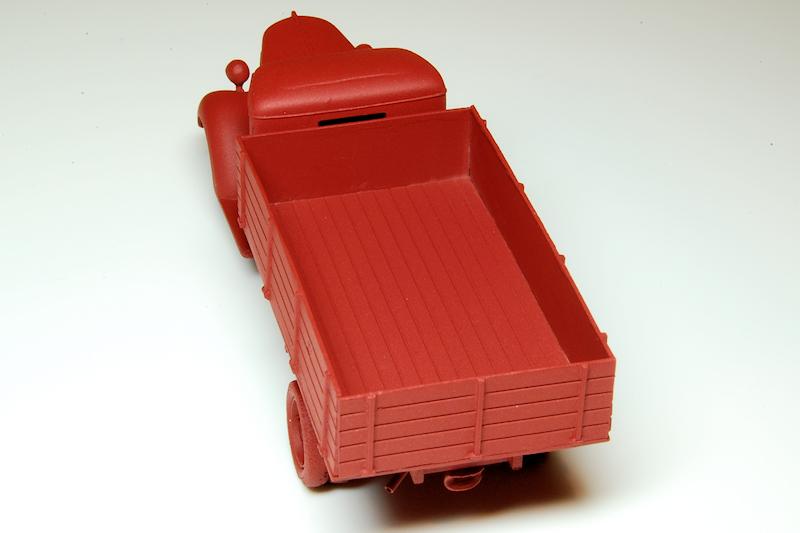
Step 2: This is the construction of the wooden cargo bed, along with the supports that attach it to the chassis. The base and sides are really very thin and care is needed to ensure that they are not cracked or chipped you can see that I lost a sliver from one part of the base. This went together relatively easily, with one small gap in one corner.
Next comes attaching the wooden beams that support the cargo bed on the chassis; this is where I found the instructions baffling. There are five supports, with the instructions showing the distance between each one. For the life of me it looks like it spaces them at 15, 35, 35, and 45mm but thats clearly wrong as that adds up to a dimension much longer than the entire truck! Now, I tried tacking the supports on to the cargo bed at what seemed like sensible intervals, taking into account the rear wheel, but there was an obvious problem in that the final support didnt make contact with the chassis.
I should perhaps explain that at this stage I was on holiday deep in the French countryside with no access to computers or books just me, the kit and the tool box. So for now I removed the supports and proceeded with more of the build.
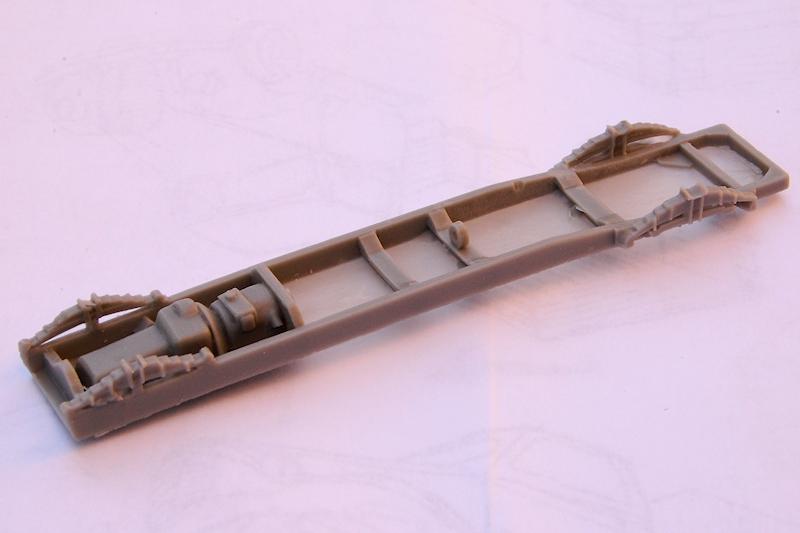
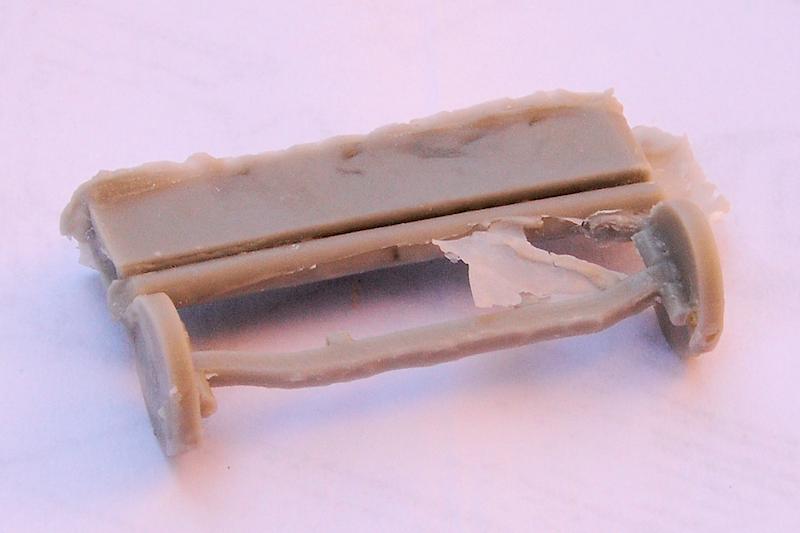
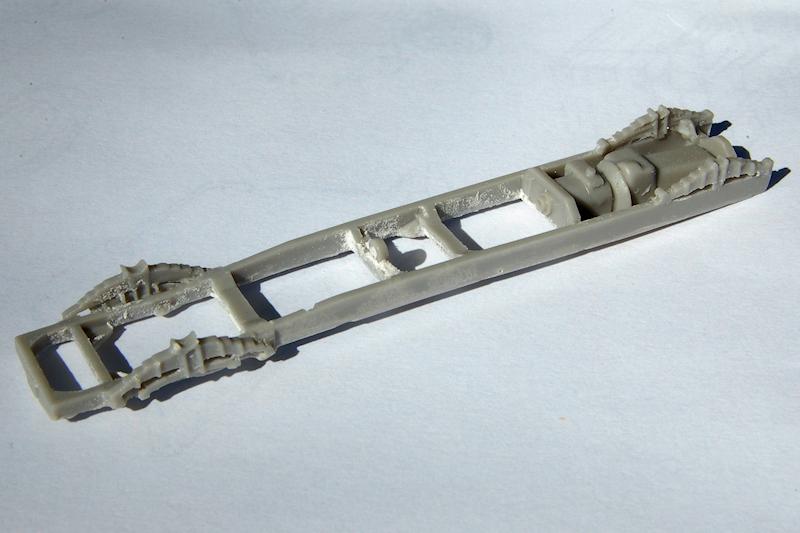
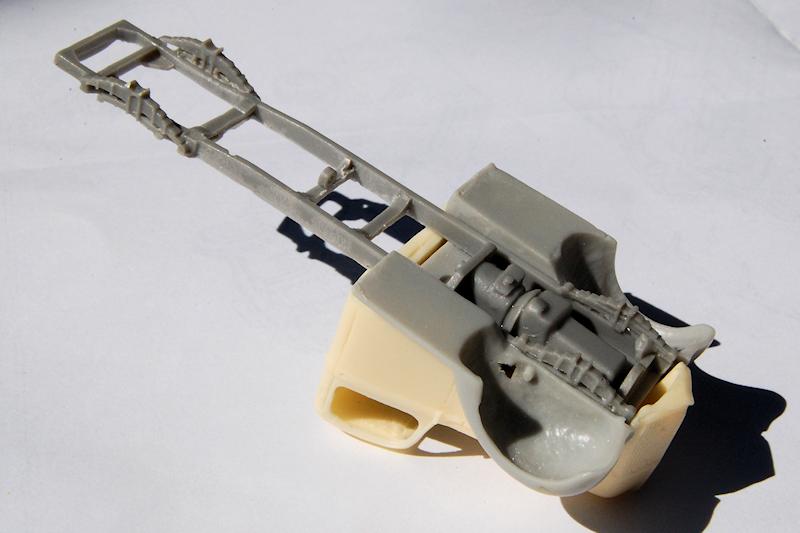
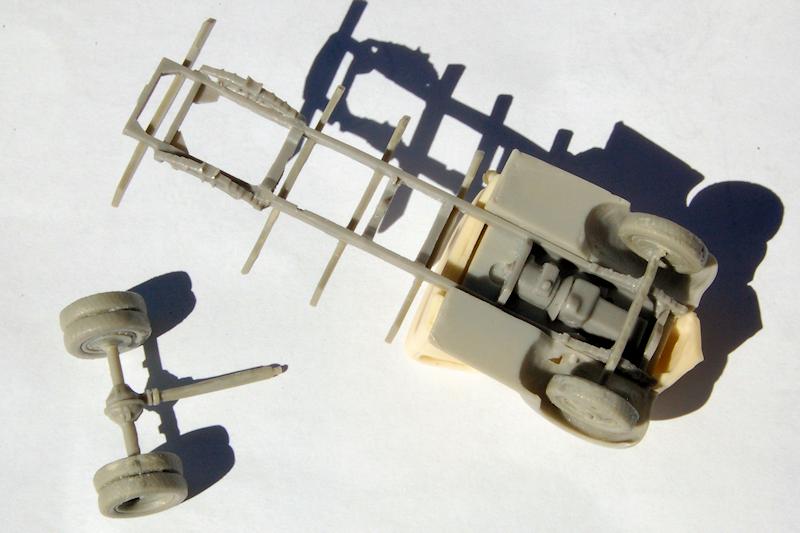
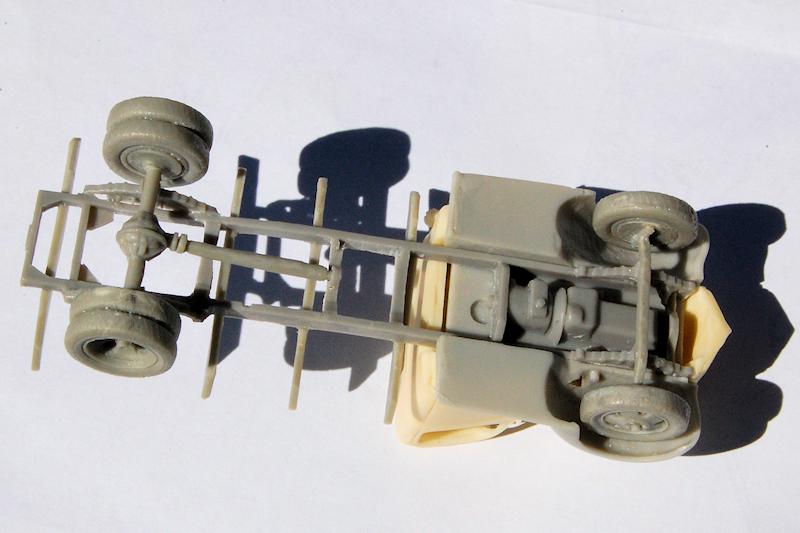
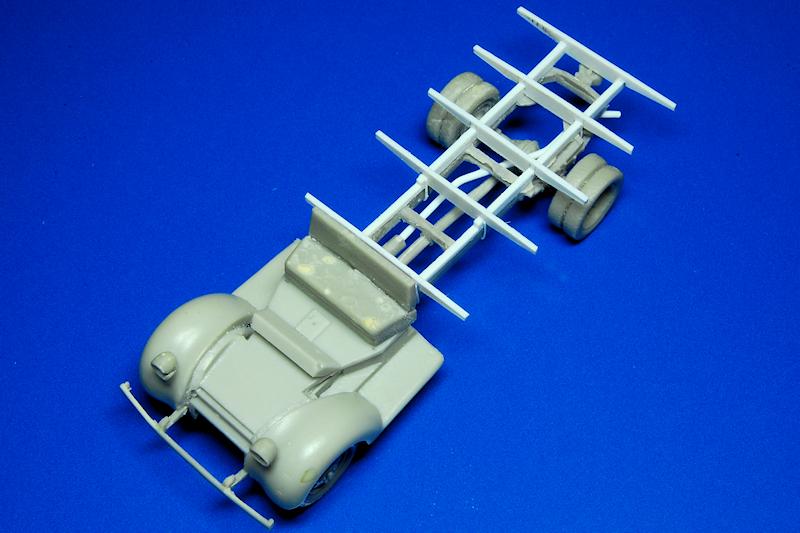
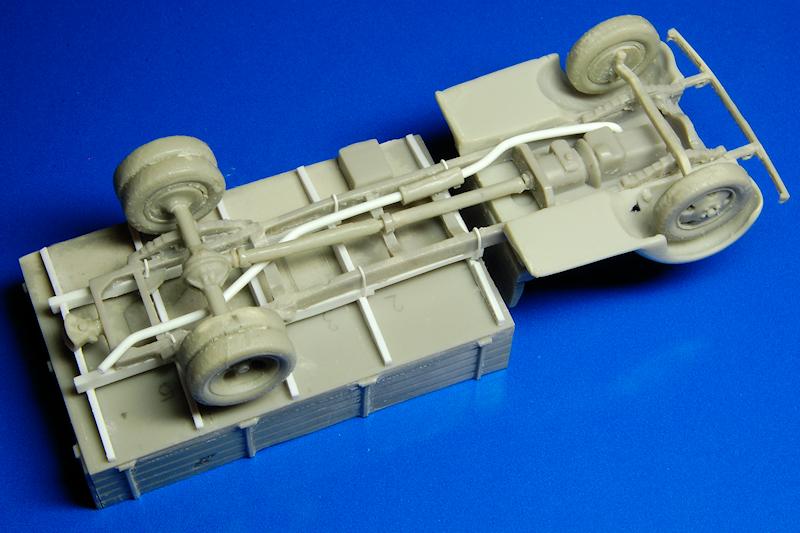
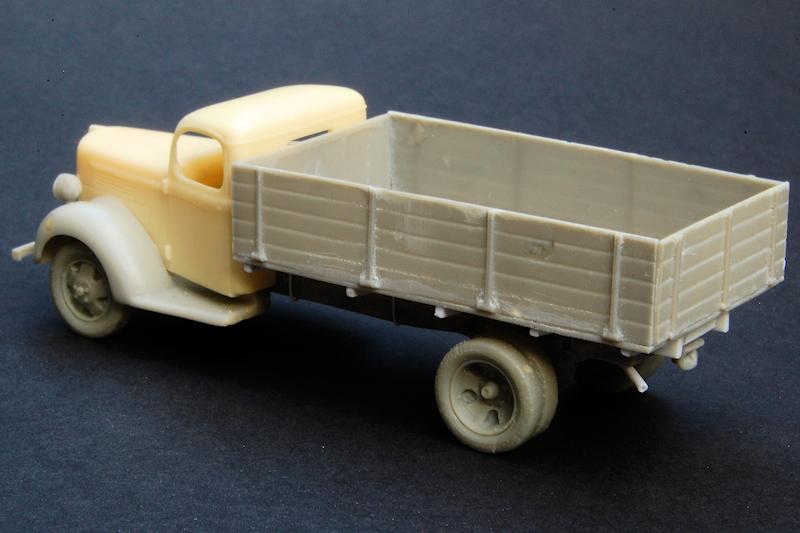
Step 3: Mounting the chassis to the cab. As with the cab parts, once cleaned up, the chassis fits perfectly with the cab base, and is again rather a fine component, with the suspension leaf springs and the bottom of the engine and transmission already moulded in place. I kept the cargo bed separate at this stage, but added four of the cargo supports.
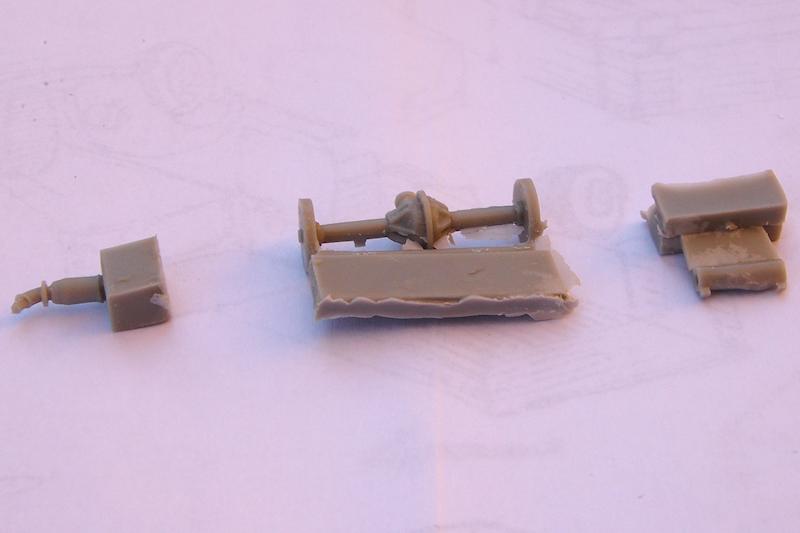
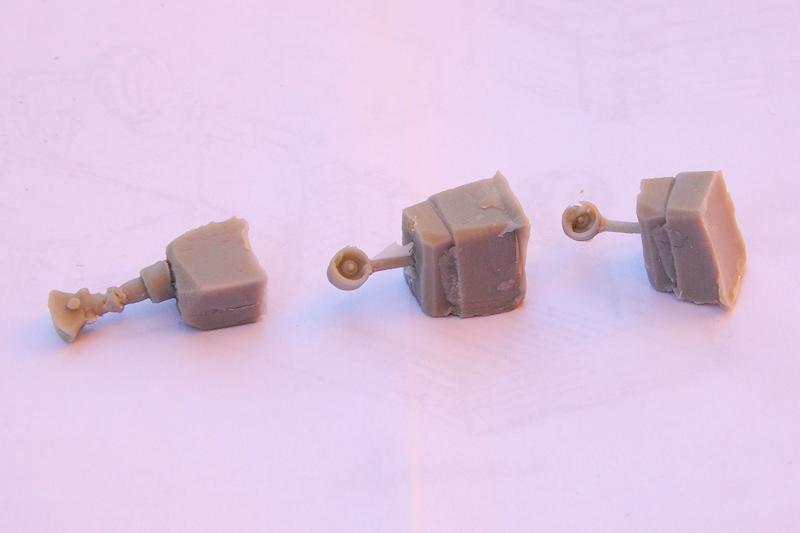
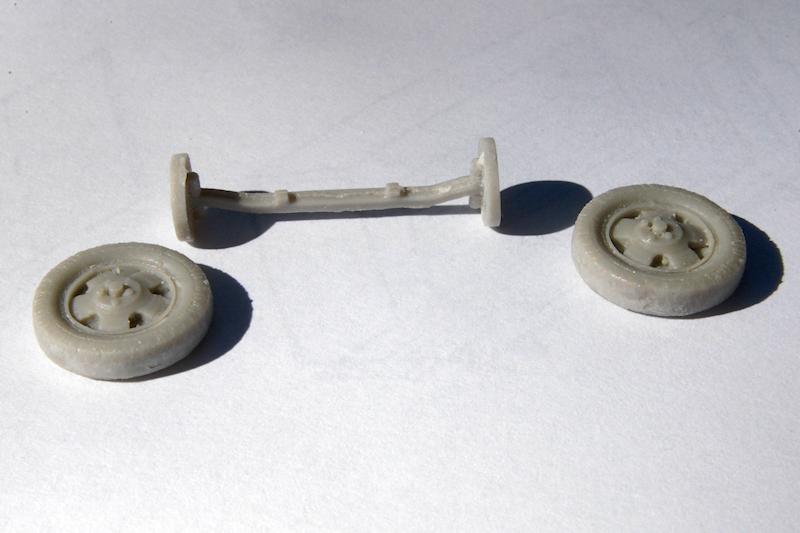
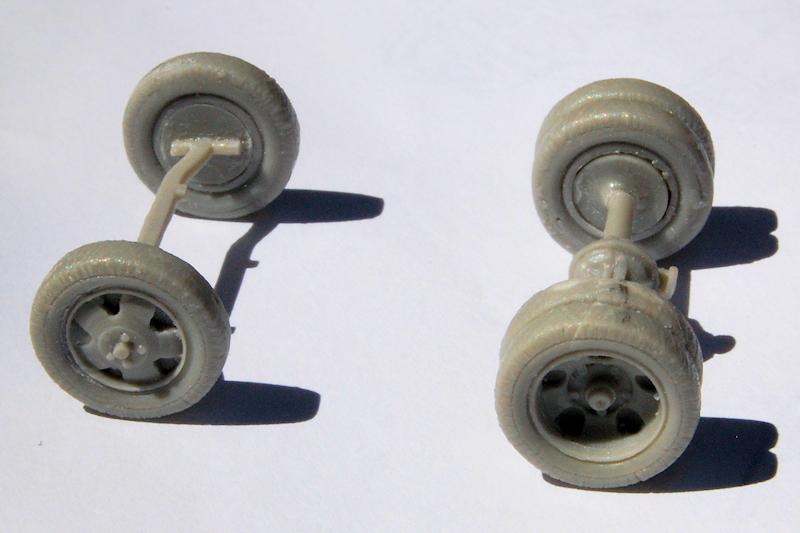
Step 4: Im calling it Step 4, but here the instructions show the truck flipped over and everything else being attached. The wheels cleaned up and went together well, but note that I managed to break the rear axle; once the double wheels are on, theres a fair bit of leverage available on a relatively thin and brittle axle, so again, some delicacy of touch is needed.
The front axle assembly glued straight on to the chassis. The rear half of the drive shaft attached to the differential on the rear axle with the other end of the shaft locating nicely in a hole on one of the chassis cross members.
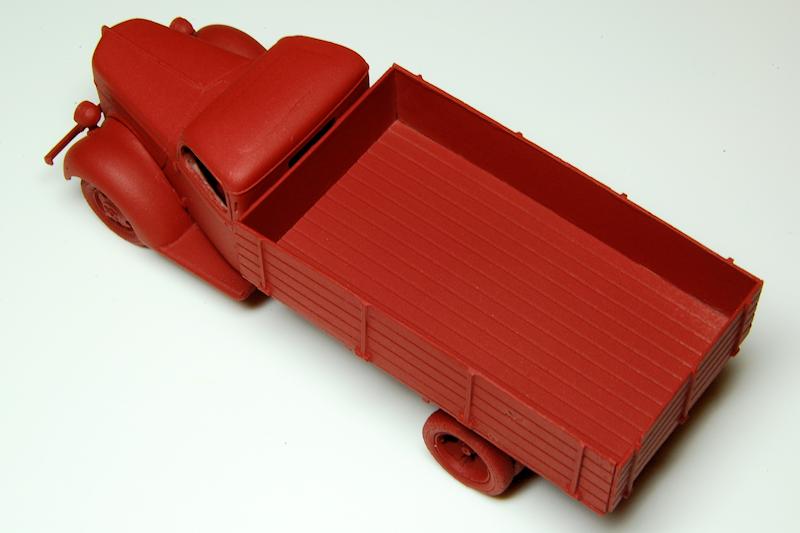
The headlamps: in the photo can be seen the defective one, with part of its rim displaced into the centre of the lamp. I havent as yet fixed this but am thinking it could just be filled in with epoxy so as to represent a lens. With the wheels, lamps and then the bumper in place, it now really looks like a truck
Further building
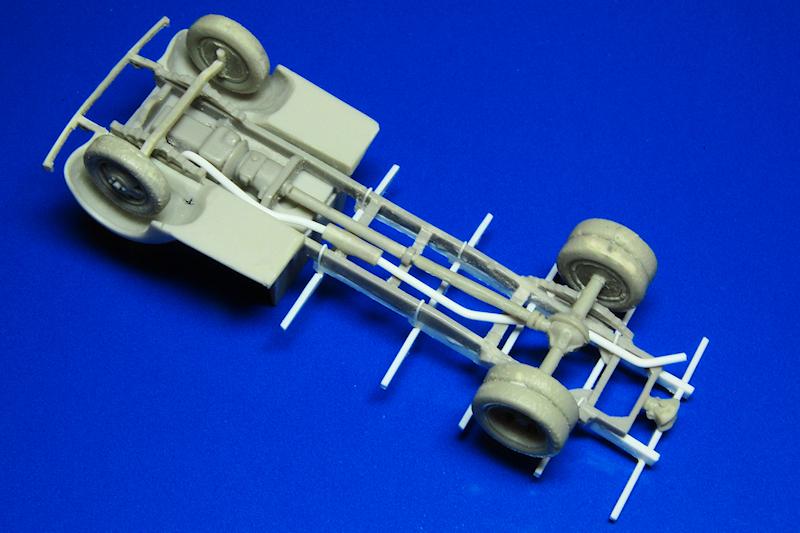
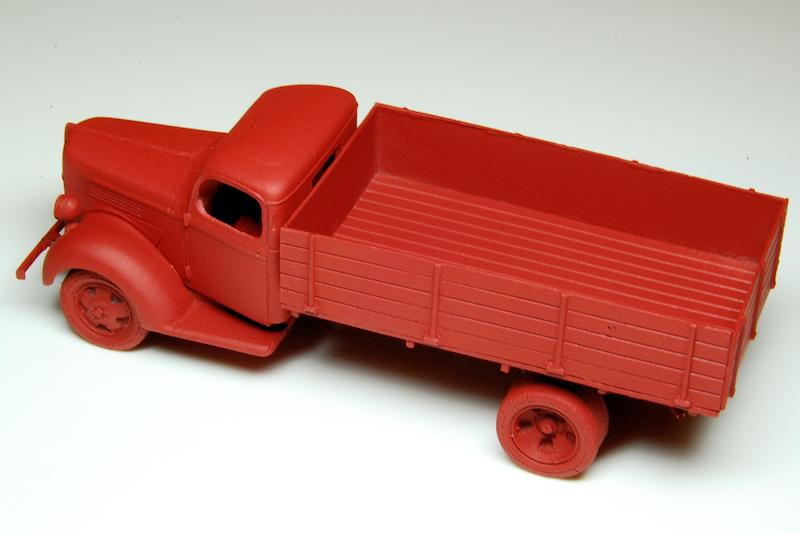
Once back in England, with access to reference drawings, I could see the problem with the way the cargo bed mounted on the chassis. They both appear to be of relatively correct length, but there should be a pair of longitudinal wooden beams bolted to, and extending beyond, the rear of the steel chassis frame, thus providing sufficient length for five transverse mounting beams to support the cargo platform. These were constructed from two 0.5mm Plastruct square sections laminated together then glued to the chassis; the U-bolts that connect them were simulated with loops of 0.3mm rod. After looking at photo references I wasnt too keen on the shape of the kit provided transverse supports and cut some more from styrene sheet, with a thinner tapered profile and cut outs to fit onto the longitudinal supports. Incidentally, a small amount of straightening of the resin chassis under hot water was done at this stage.
Although the instructions show an exhaust system, and includes the silencer box, the pipes were made from 0.5mm rod. The routing of the exhaust system isnt too clear on the instructions, but I think I have something resembling a credible layout.
The most useful reference I had when adding these underside details was the scan of the ICM kit instructions on the
Armorama review of their 1/35 V3000; it includes two excellent top and bottom isometric drawn views of the layout.
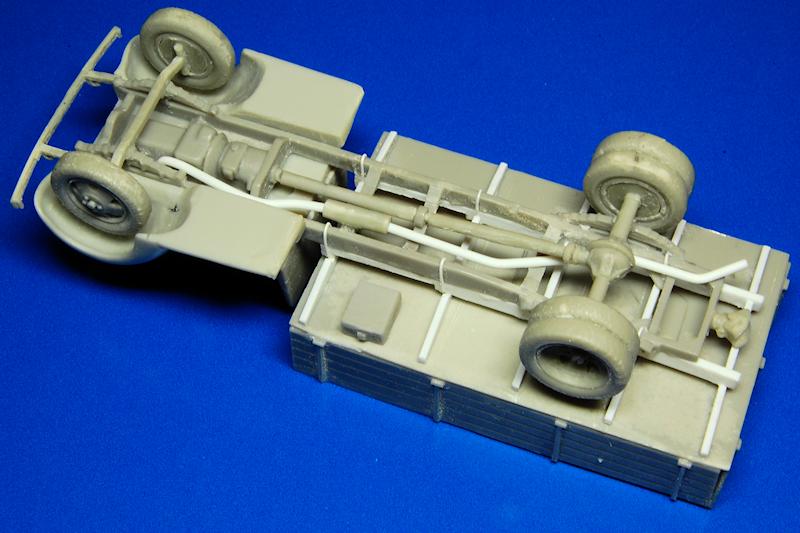
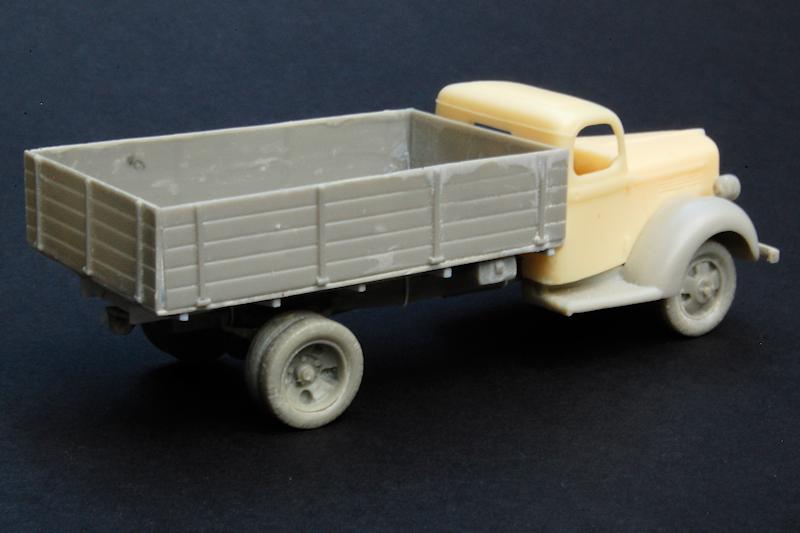
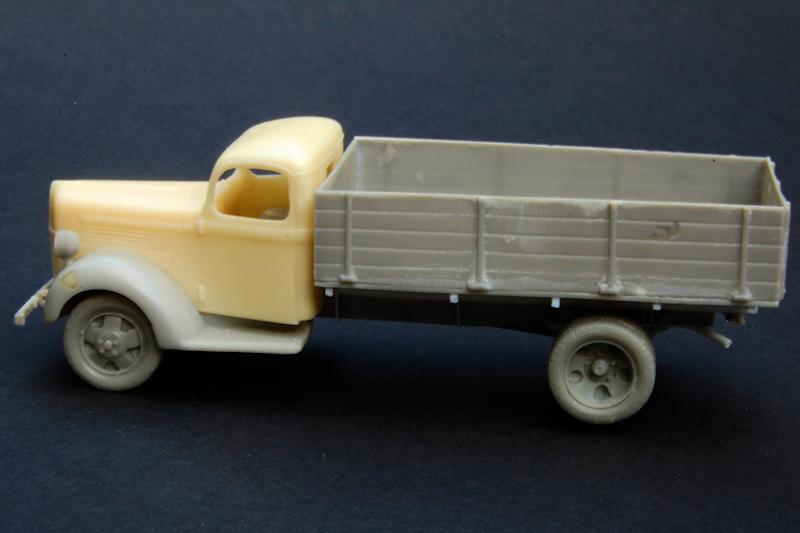
The final departure between instructions and parts was that only one locker was provided while the instructions show two. The last detail in place was the tow hitch, and with everything else together, the cargo bed was attached; note in the photos, the cab top remains separate, making this final attachment much easier to line up.
Conclusion
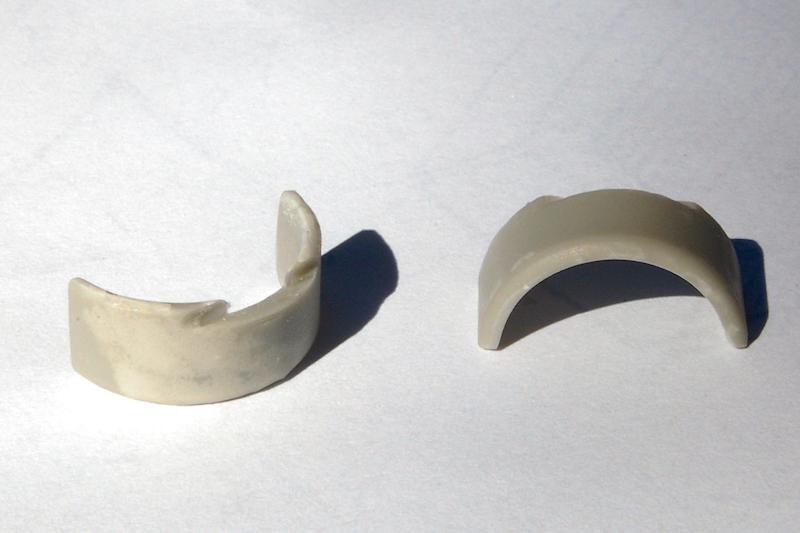
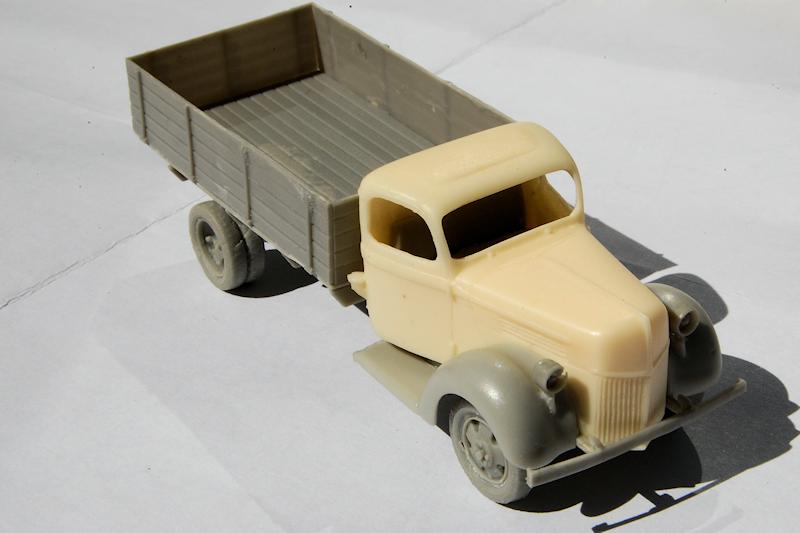
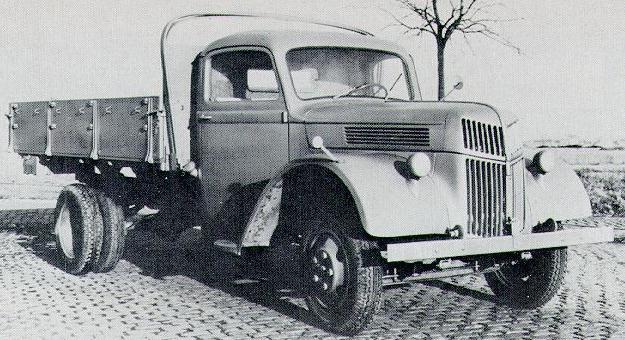
Note that there is no Notek lamp included, which would be standard for a vehicle in German military use, and from what I can see, there is nothing definitively military about this truck at all, which may add to its appeal for some. I am certainly thinking about a civilian finish for mine. In fact the box cover art is based on a slightly different version of the V3000, possibly (I stand to be corrected) a post-war example, with the radiator grille openings extending up to the bonnet itself; the cover painting certainly looks to be based on the photograph Ive included here. The photo and box art both show no rear mudguards fitted, so although these are included as kit parts, Ive left them off.
I found this a very enjoyable model to build, and until I hit the issue with the chassis rear, very straightforward despite the instructions. The basic construction was only really four or five hours, with a few more hours for the final alterations that I did. There is obviously scope for a fair bit more detailing: registration plates, internal cab details as well as glazing, wipers and mirrors - more good reasons for not gluing the cab on. Overall I think it has produced a decent looking representation of this very widely used truck and Im looking forward to giving it some final detailing and a non-military paint job.
Thanks to Andras Karacsonyi for providing the sample for this review.


Comments