DRAGON MODELS [ MORE REVIEWS ] [ WEBSITE ] [ NEW STORIES ]

Built Review
172
Panther Ausf. D
Sd.Kfz. 171 Panther Ausf. D Early Production
  • move

by: Jan Etal [ TREAD_GEEK ]

Introduction

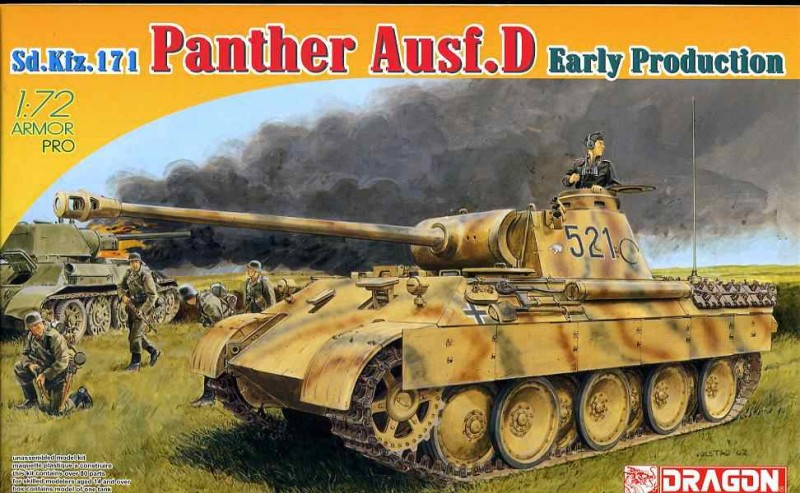
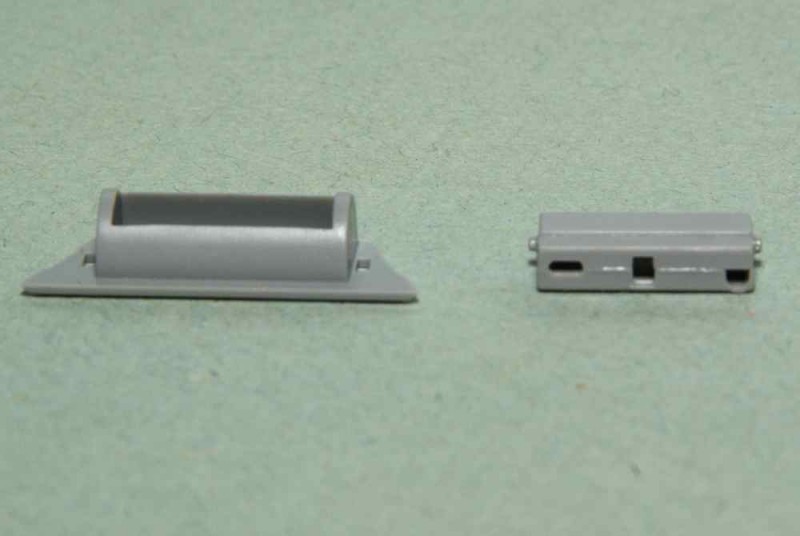
The Sd. Kfz. 171, Panzerkampfwagen V, Panther Ausf. D was an early variant of the well known Panther series. Its design was loosely based on experience gained from encounters with the Soviet T-34 tanks. The early production Ausf. D models can most readily be recognized by their commanders drum cupola and the fact that the hull machine gun projected from a hinged armoured flap as opposed to a ball mount.

This was the first German tank to make extensive use of slopped armour that varied from 15 mm to 120 mm in thickness. These early versions were powered by a Maybach HL 210 P30 engine, V-12 gasoline engine which delivered 650 metric hp at 3,000 rpm and providing a top speed of 55 km/h (34 mph). Main armament consisted of a 7.5 cm KwK 42 L70 gun and two 7.92 mm MG-34 machine guns.

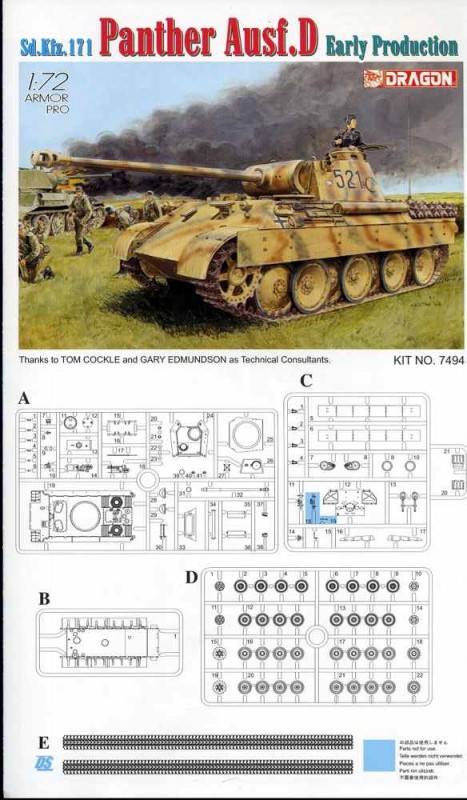
The subject of this review is the Dragon Armor Pro, Sd. Kfz. 171 Panther Ausf. D Early Production, kit #7494.

Contents

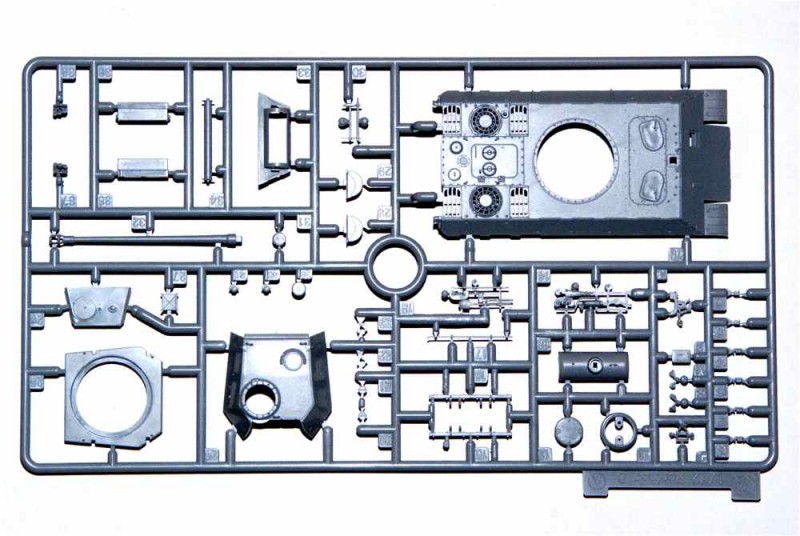
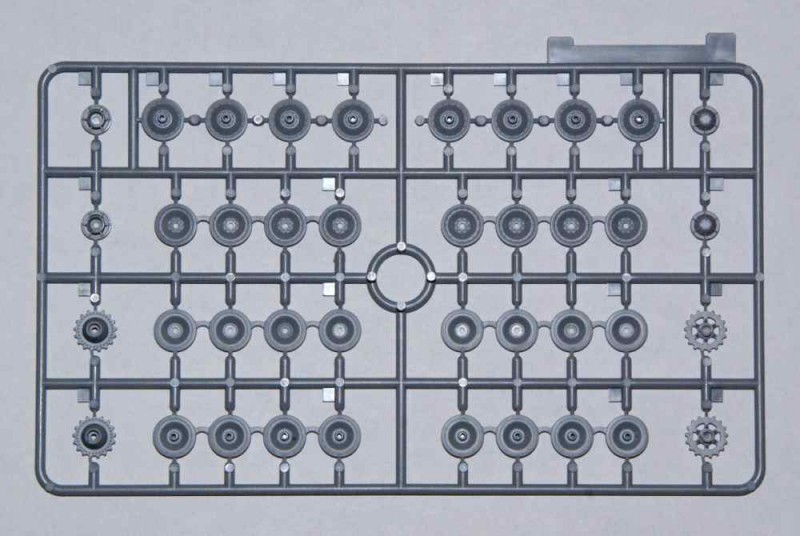
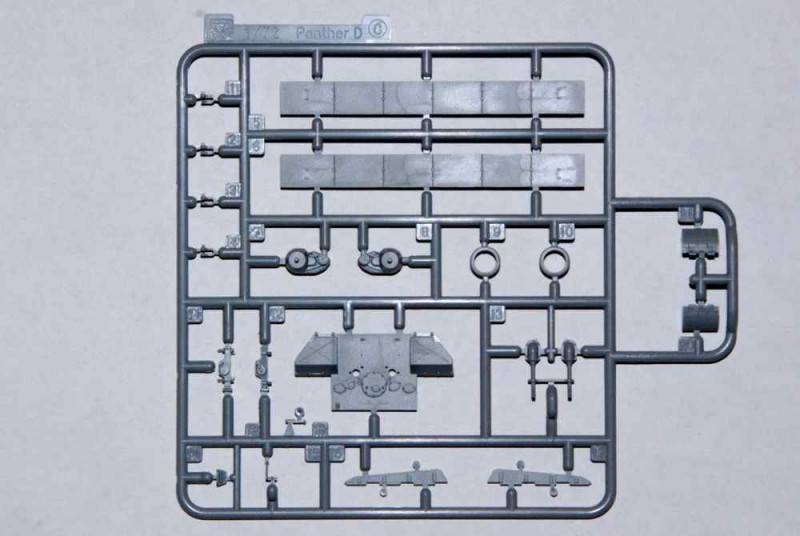
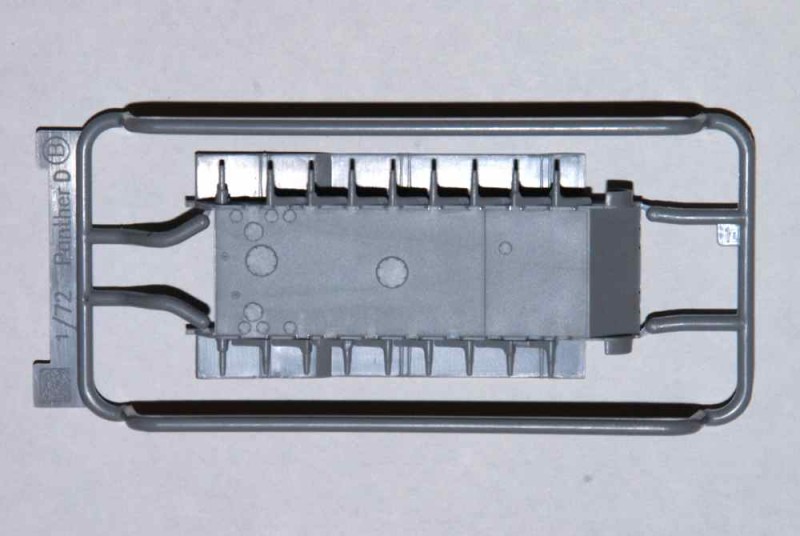
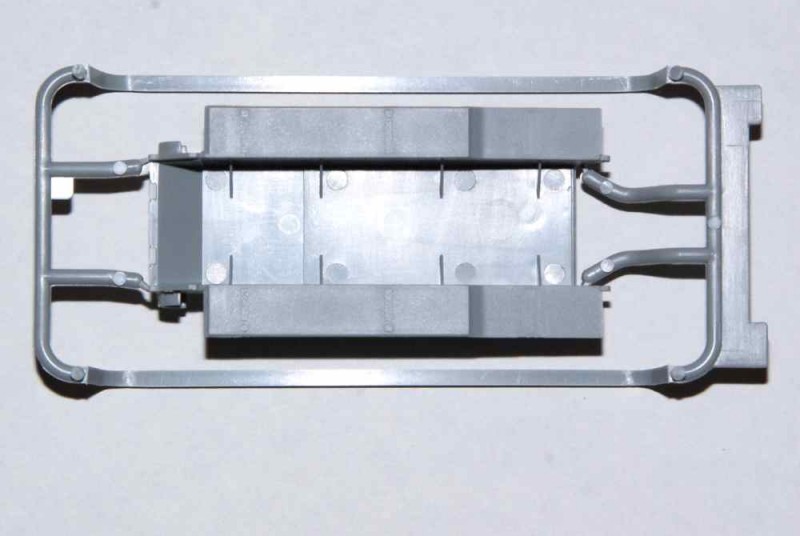
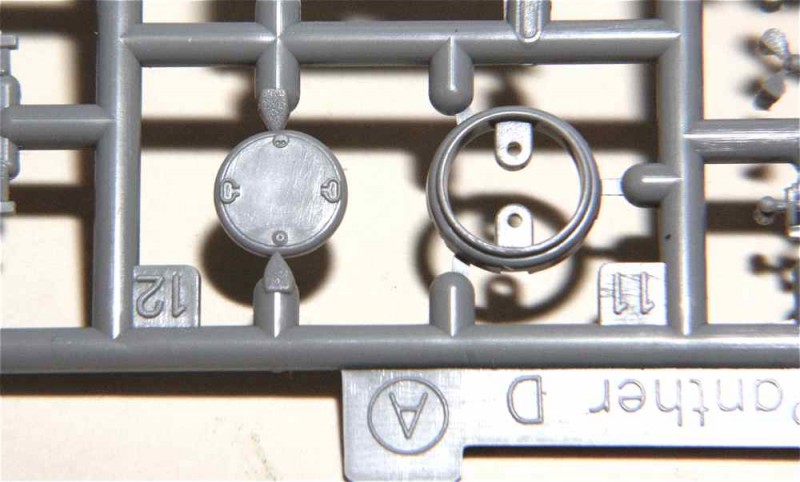
On removing the box top one finds that it is fairly well filled with plastic. Four individually wrapped sprues of light grey styrene are present. A large sprue ‘A’ contains 41 parts including the main upper hull and turret pieces. A medium size ‘C’ sprue holds 21 parts made up of the hull rear, side skirts and various detail pieces such as towing shackles. A larger ‘D’ sprue holds 22 pieces that make up the tank’s suspension. On the final ‘B’ sprue resides the lower tank hull.

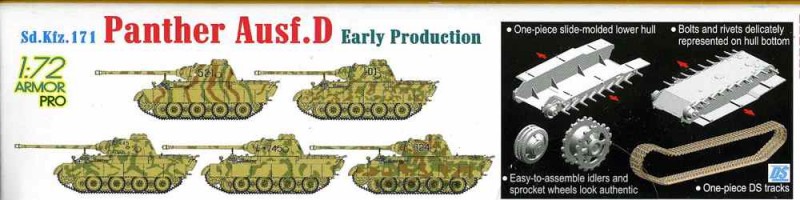
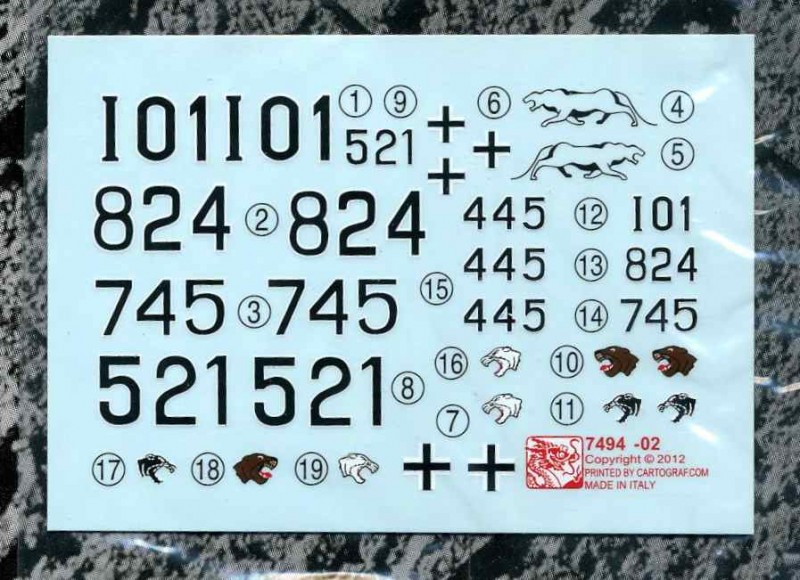
The standard Dragon accessory card is present and on it you will find a pair of Dragon DS tracks and a rather busy set of Cartograph decals.

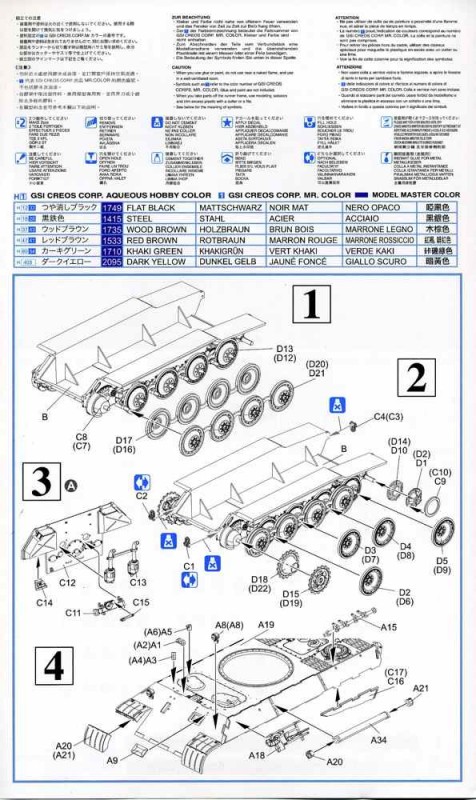
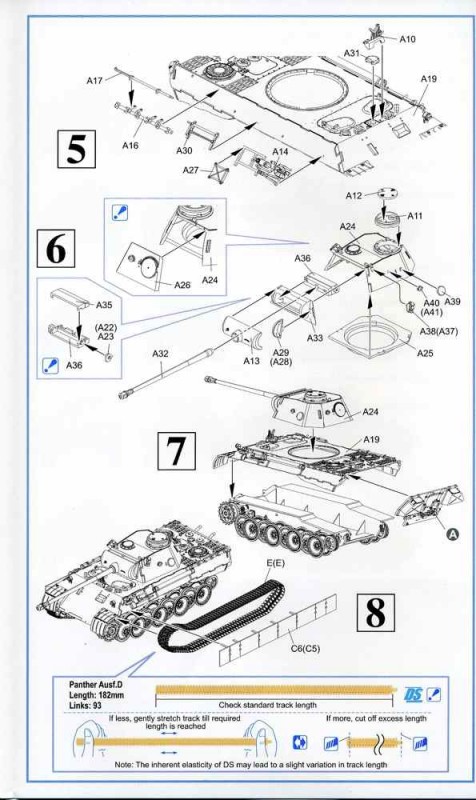
A four sided instruction card is provided, displaying a parts diagram, two sides with eight assembly steps and one page showing painting and marking schemes. The assembly instructions for the tank are in the form of exploded view line drawings using arrows to indicate parts placement.

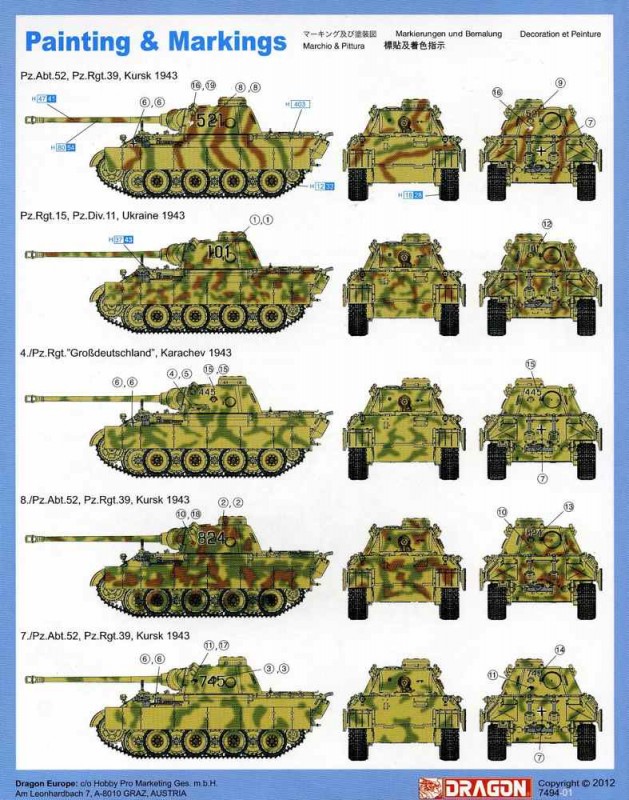
Painting and marking instructions are provided for one of five vehicles:

-Three of the vehicles are from the Pz.Abt.52, Pz.Rgt.39, Kursk 1943.

-Pz.Rgt. 15, Pz.Div. 11, Ukraine 1943

-4./Pz.Rgt. “Großdeutschland”, Karachev 1943

All the options are for vehicles in variations of a dark yellow base with a disruptive pattern of red-brown and khaki green camouflage. The colour references provided are for the GSI Creos Corp Aqueous Hobby Color, the same company’s Mr. Color and Model Master enamels.

Review

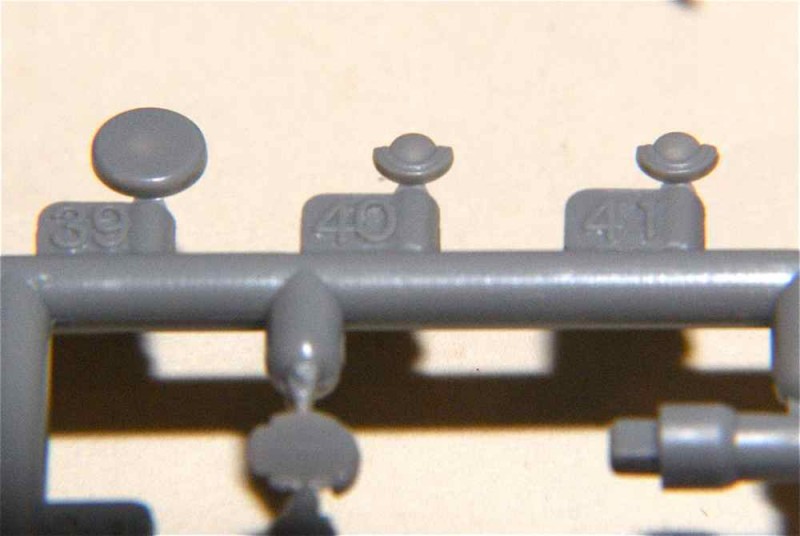
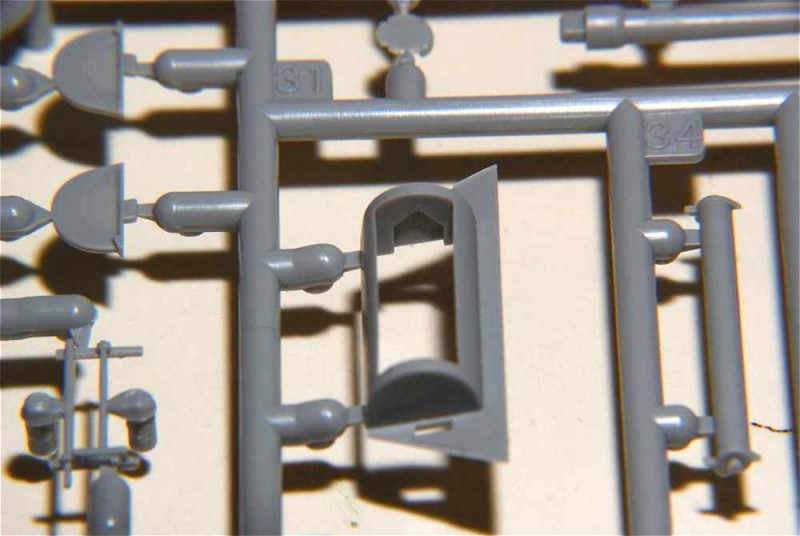
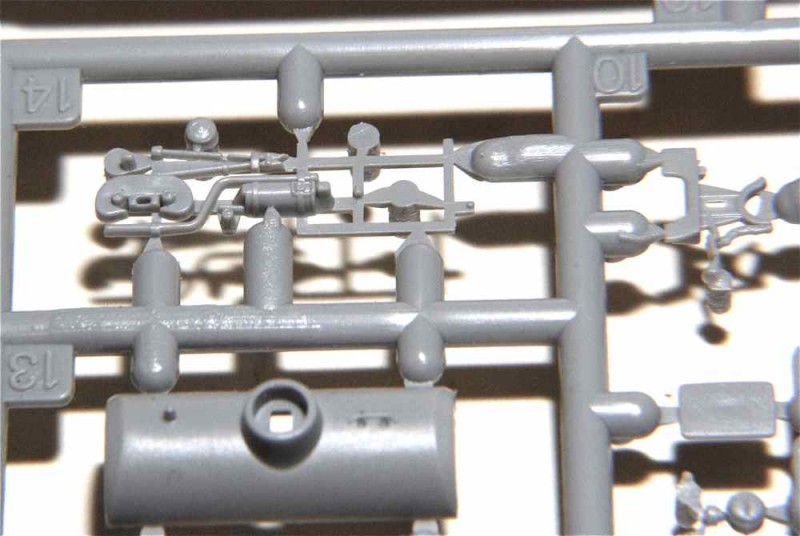
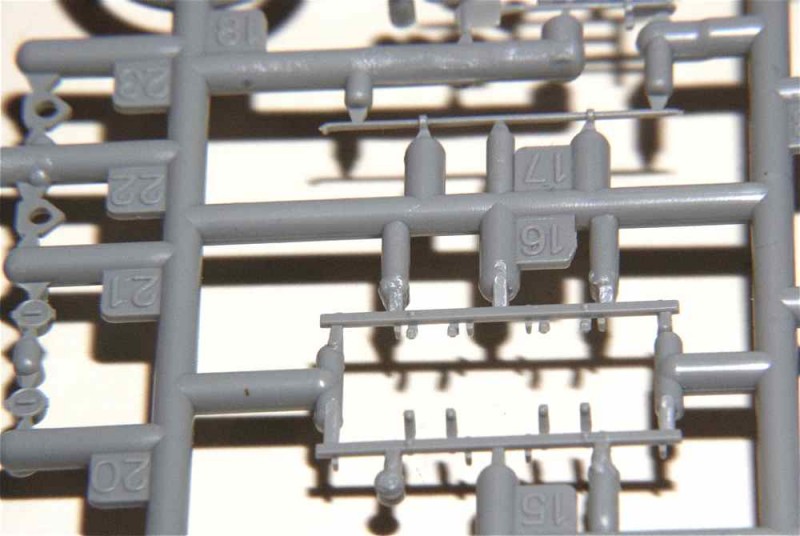
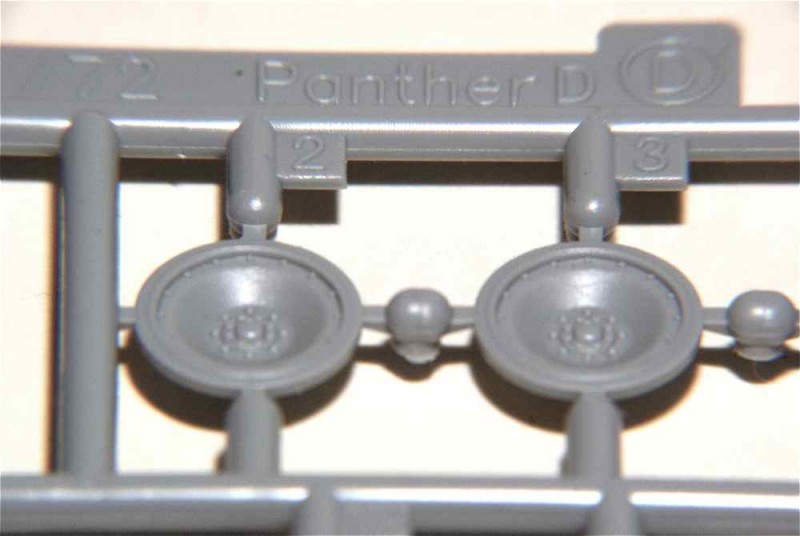
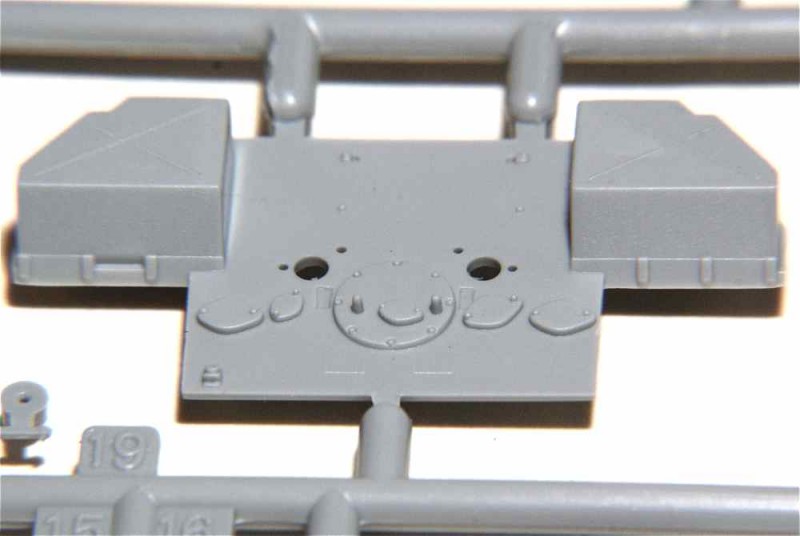
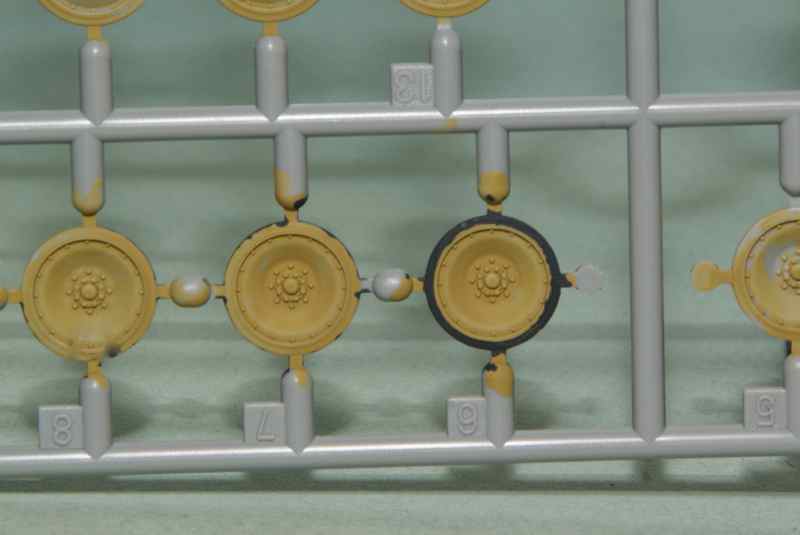
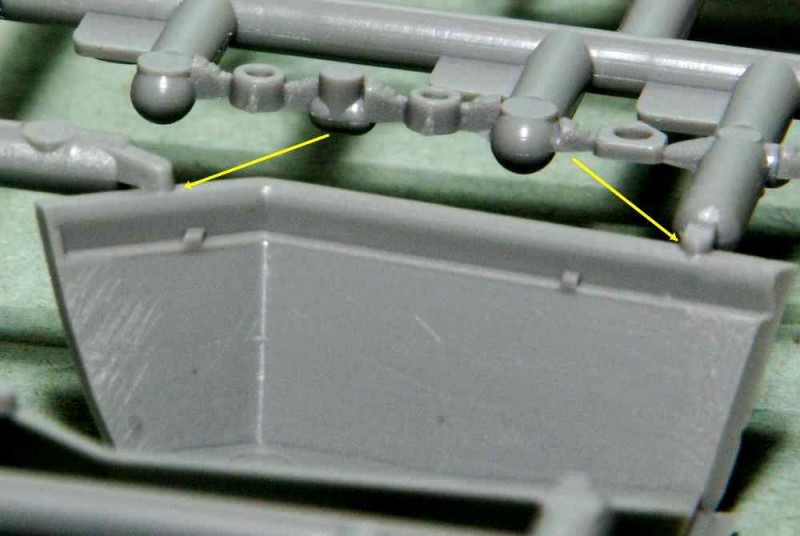
On examining the sprues the first thing that will impress you is the level of detail on even the smallest parts. Be it panel lines, bolt or screw heads, interlocking armor joints; they are beautifully rendered. Ejector marks are minimal and where they do appear they are mostly on internal surfaces that will not show after construction, or be otherwise hidden after the addition of extra parts. Flash is virtually non existent and mould seam lines were generally very light and can most likely be removed with a light scraping with a sharp hobby knife.

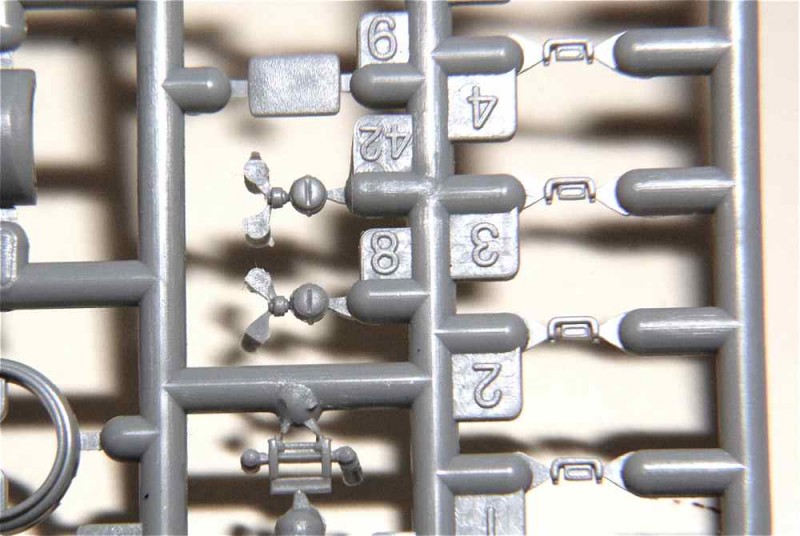
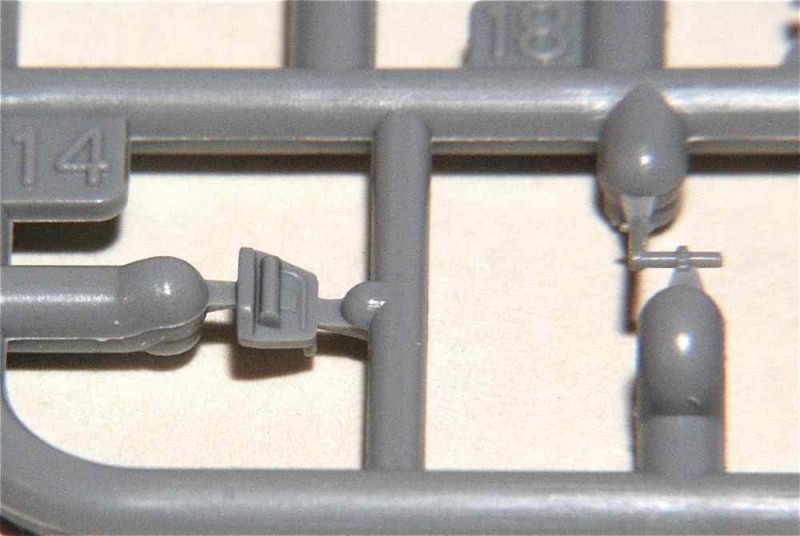
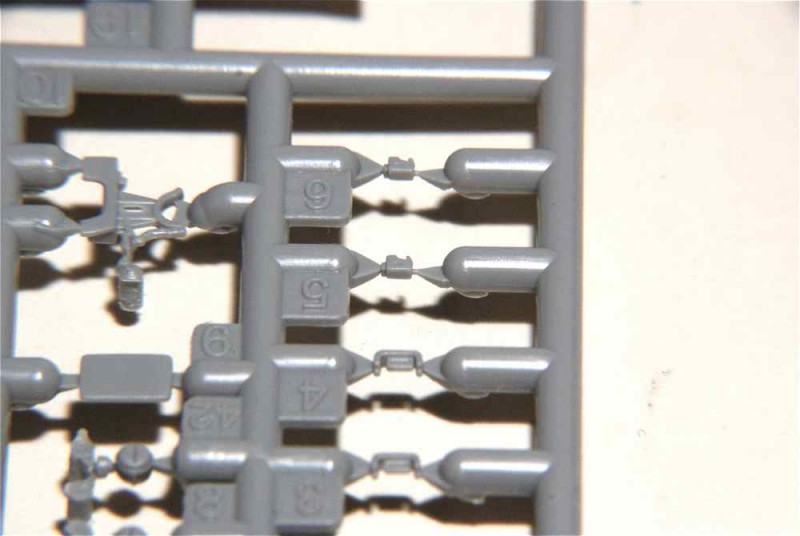
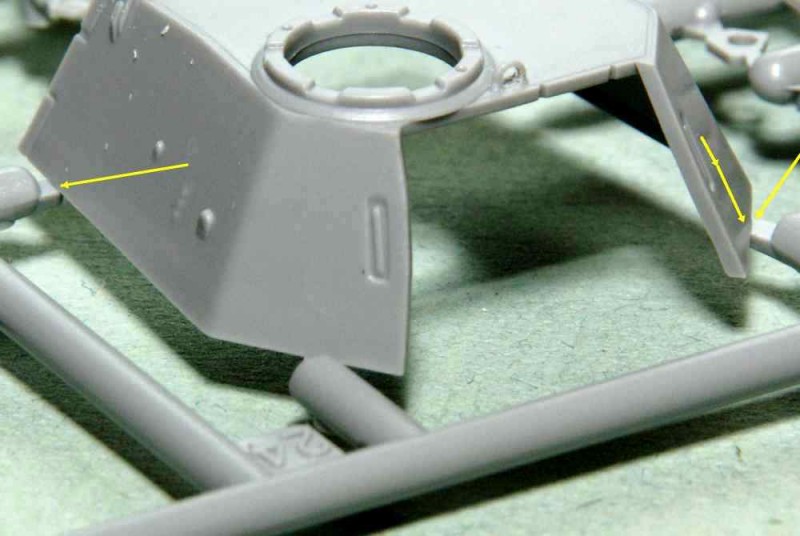
As with other Dragon kits that I have reviewed, some of the sprue gates for the smaller parts are quite large. This will require considerable care when separating them from the sprue. Other smaller parts have equally small gates to them. However, some parts, such as the main turret piece (A24), turret back plate (A26) or the rear hull armour plate, have larger connectors at awkward locations, that will require careful cleanup. Further inspection also revealed that several parts such as the periscopes (A1-A4) and tool racks have greatly undersized locating pins compared to the respective holes or recesses that they are meant to fit into.

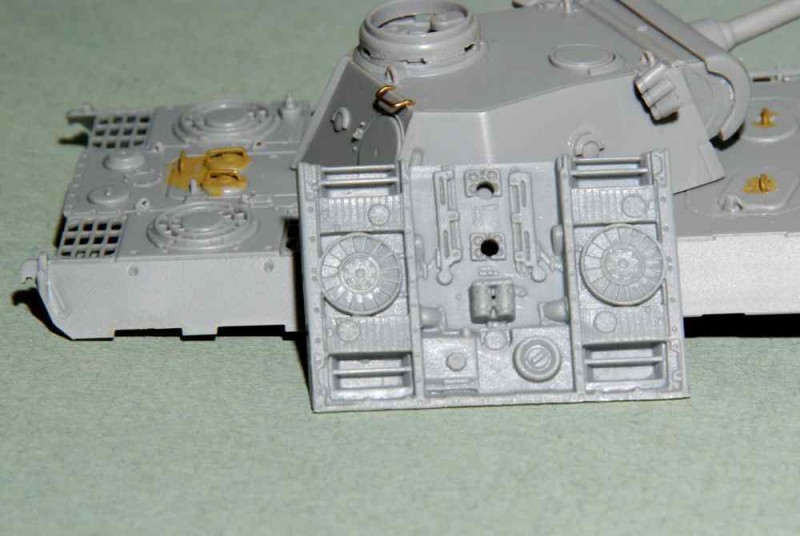
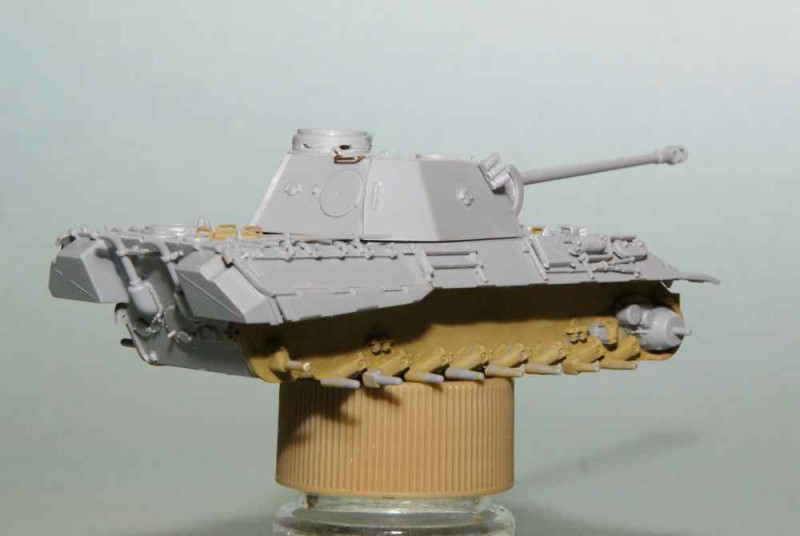
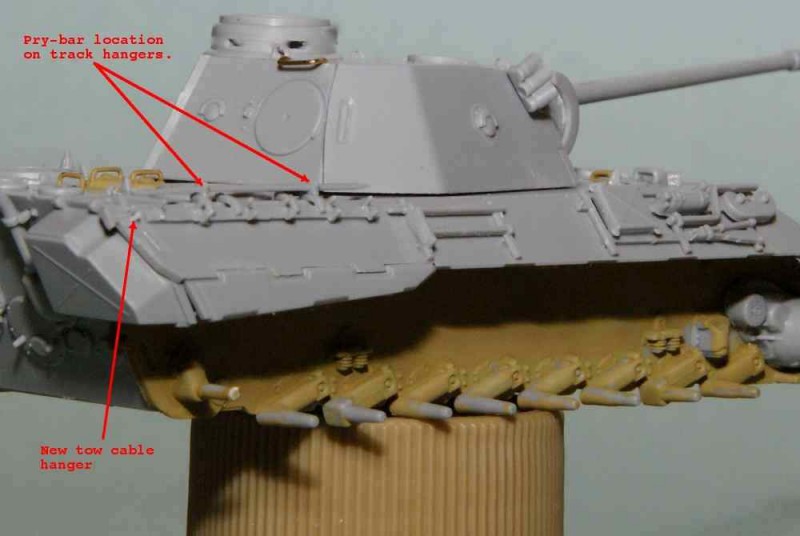
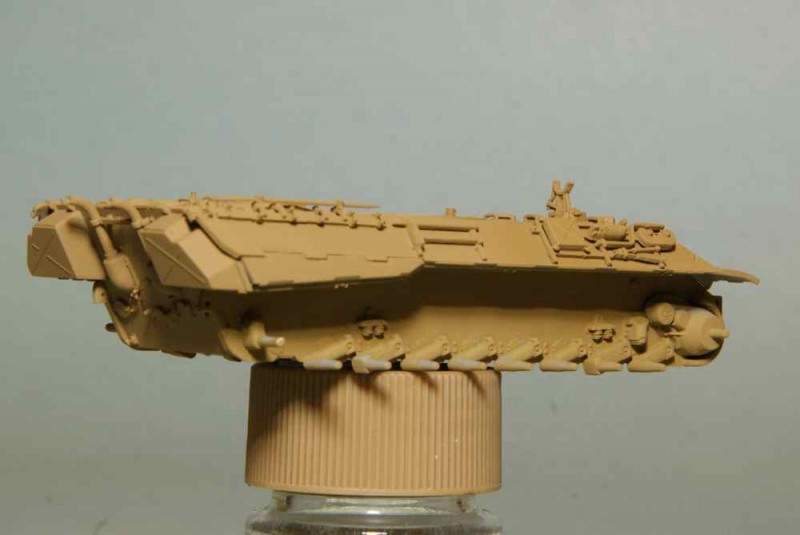
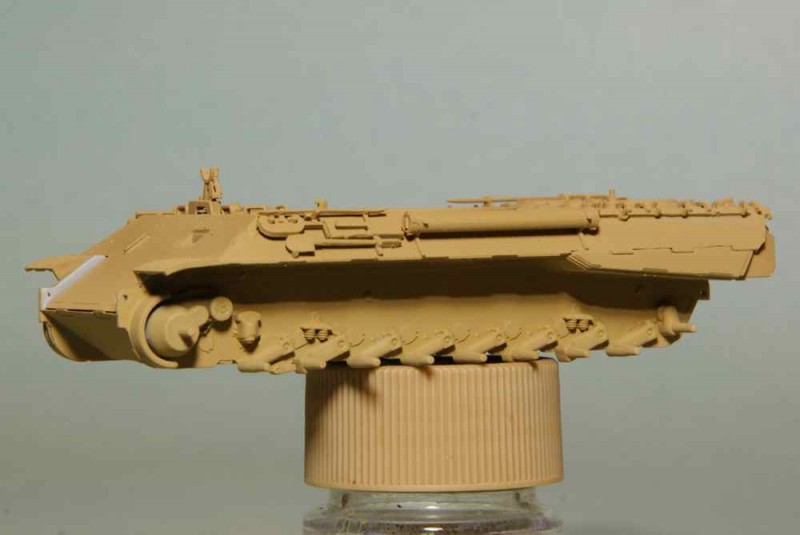
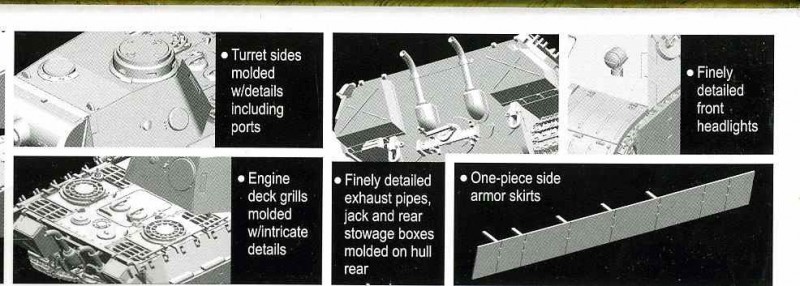
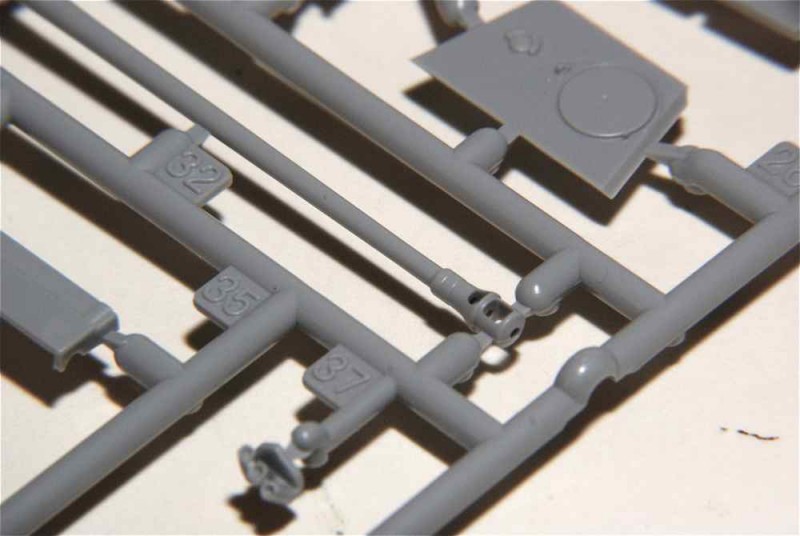
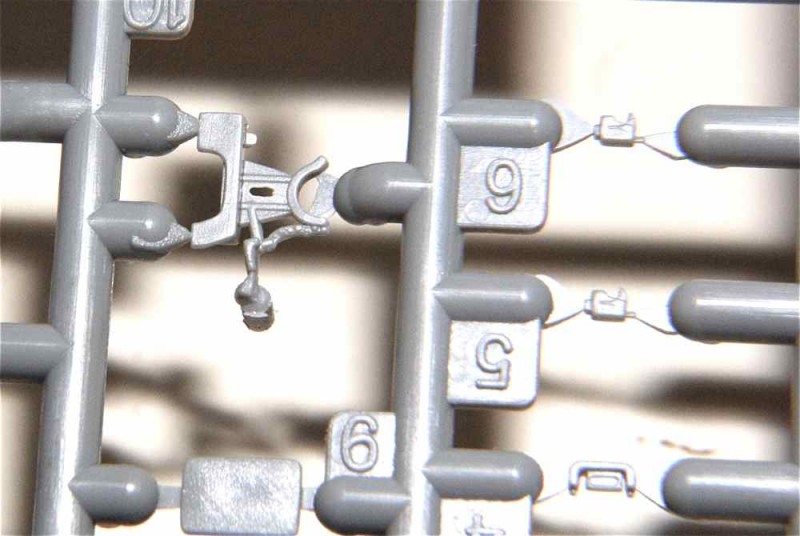
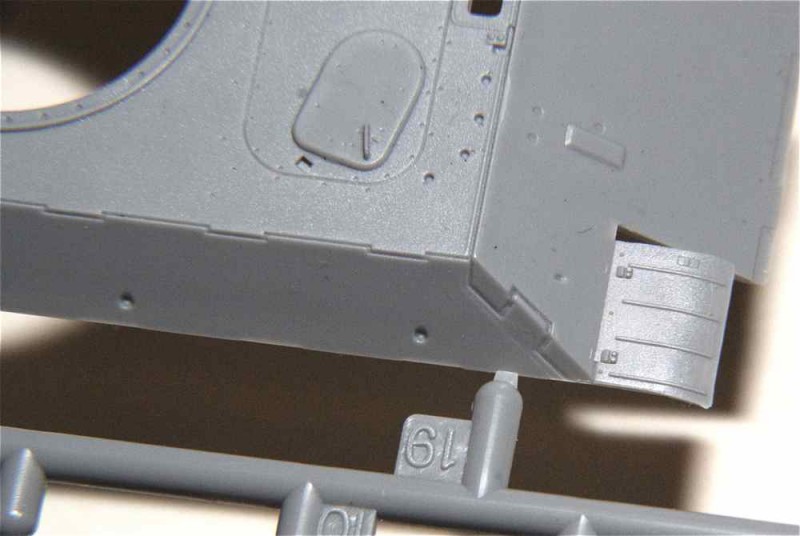
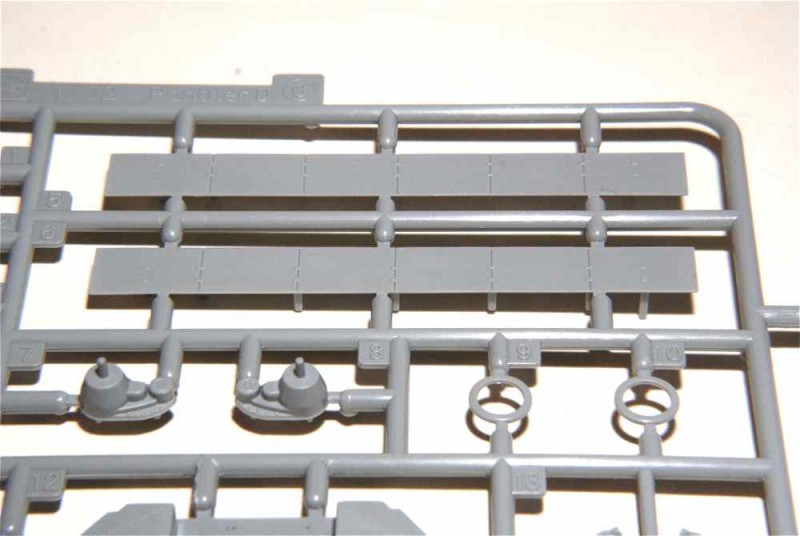
The predominance of tools come moulded on racks that are attached to the hull and the level of detail must be seen to be believed. The only individual tools to be attached are an intricate vehicle jack (C11) that has gear rack teeth present and even a separate operating handle (C15) and a large pry-bar. While spare tracks are shown on the box top illustration, none are present in the kit but the hangars to which they would be attached are available as separate parts (A15, A16). Side skirts are represented in plastic and have been moulded with tapering edges to reduce their perceived thickness.

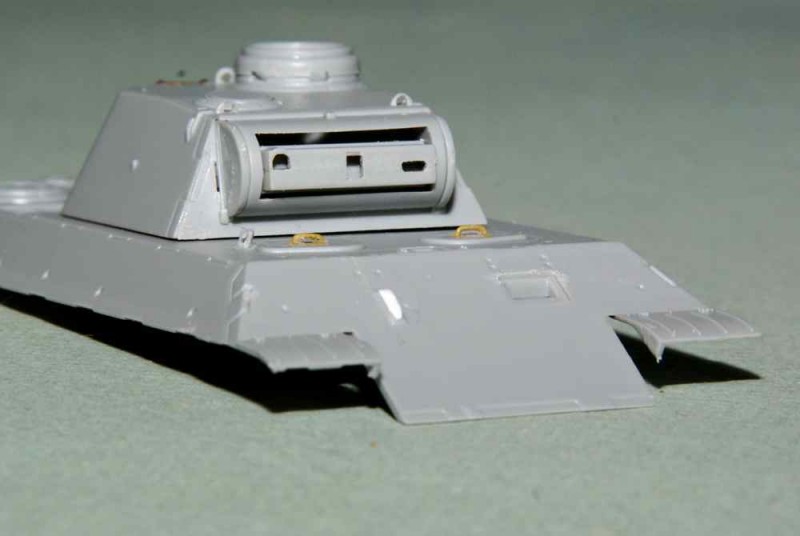
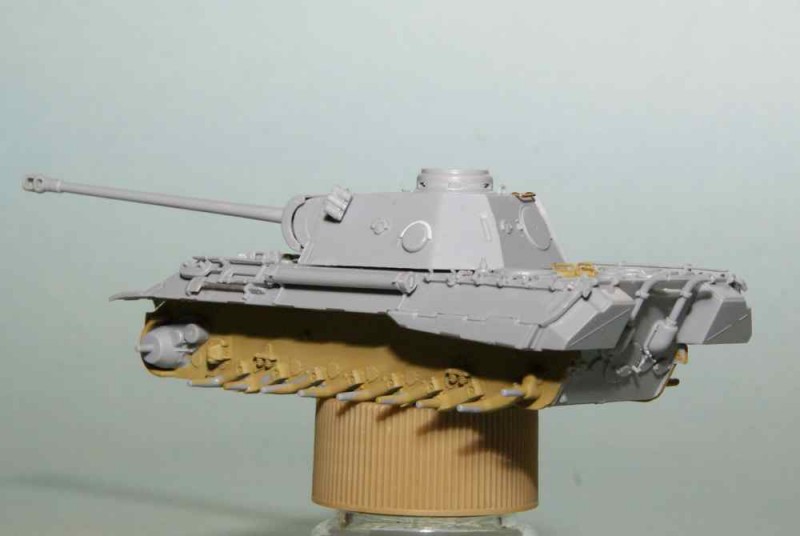
All hatches are moulded on except for the commanders hatch. Unfortunately this hatch has no interior detail and is meant to be attached in the closed position. Having this hatch displayed open will require a moderate amount of work on the modellers part to display it that way.

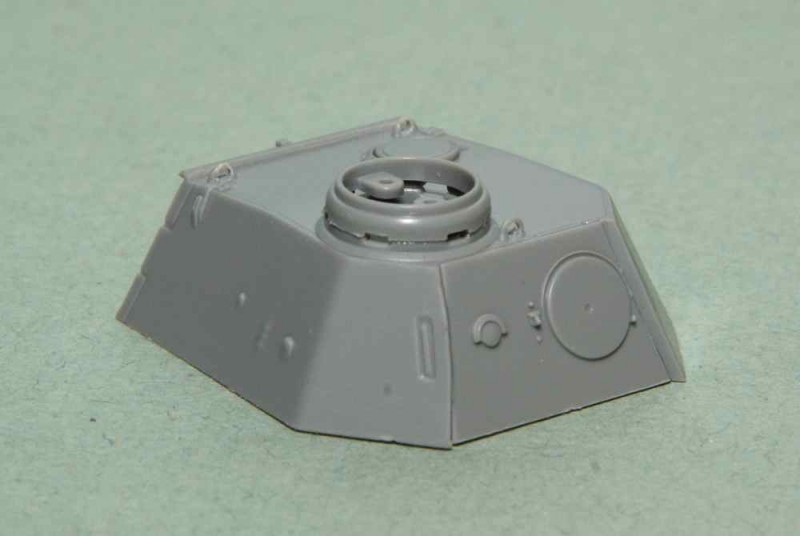
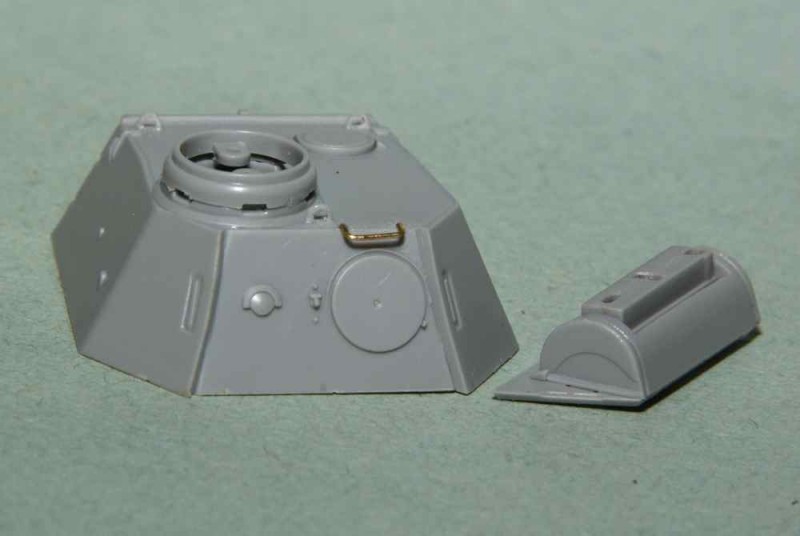
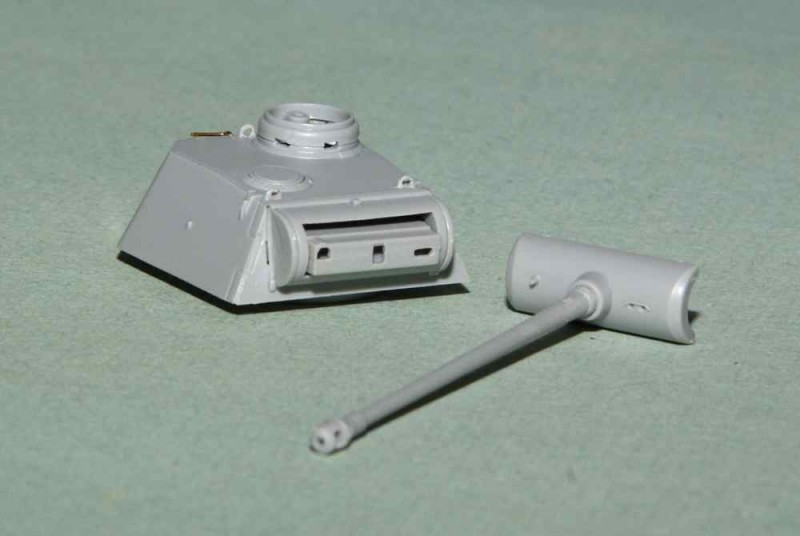
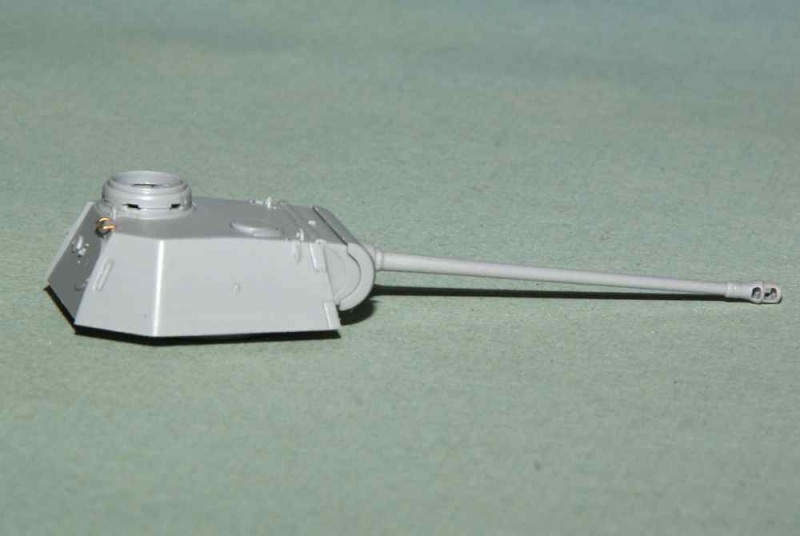
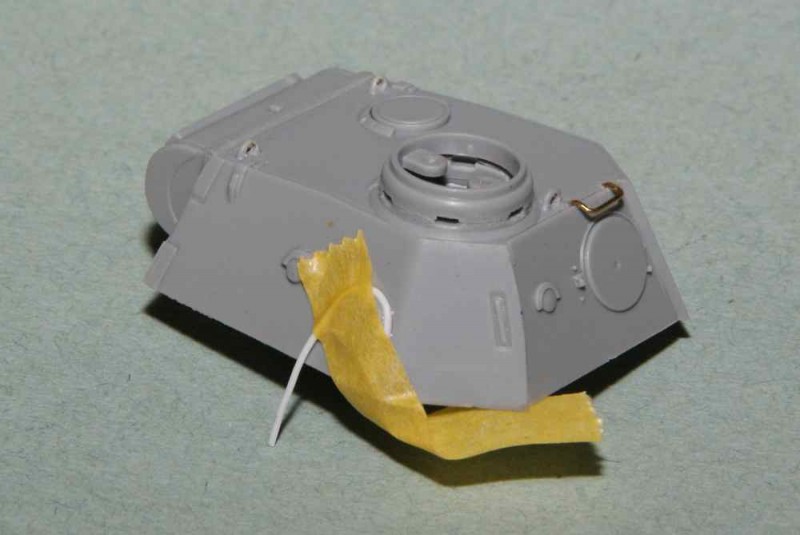
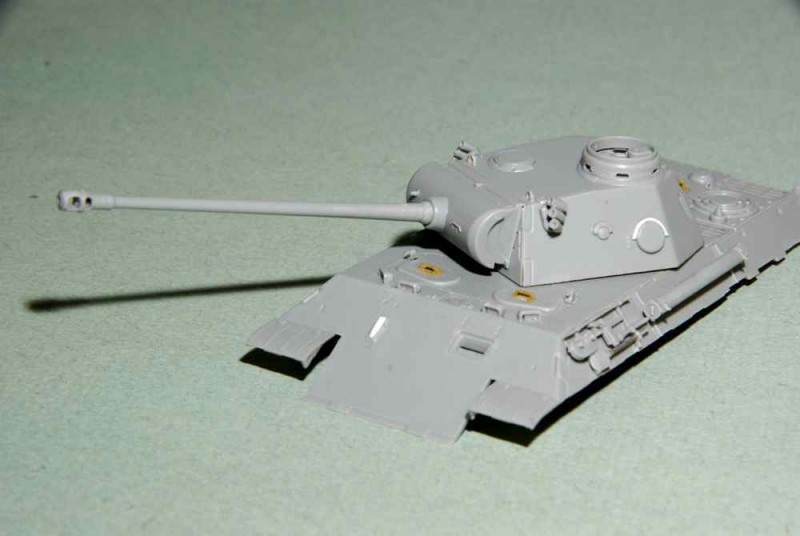
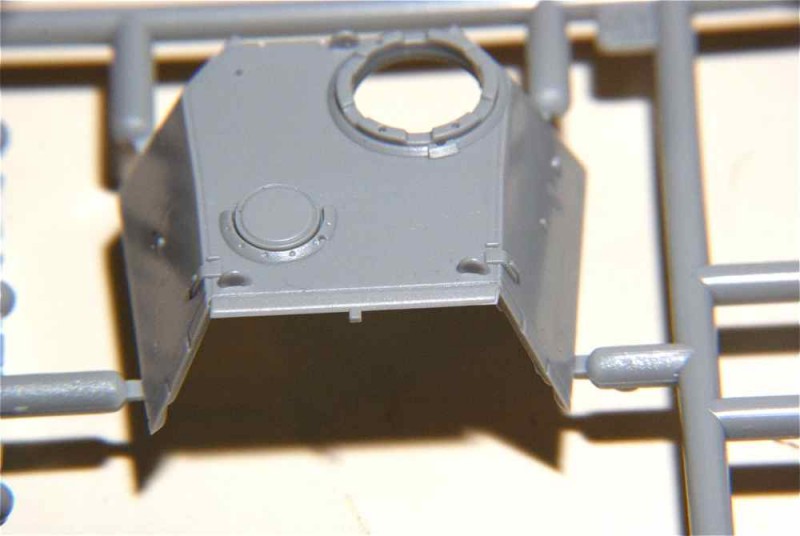
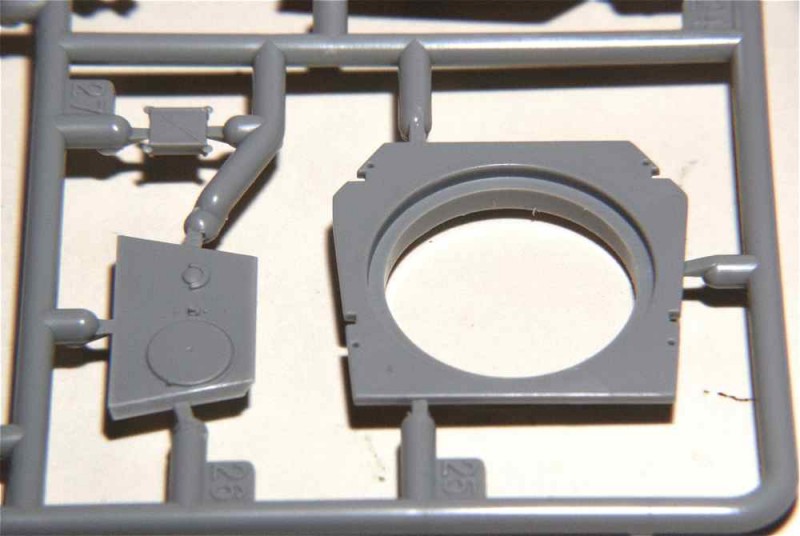
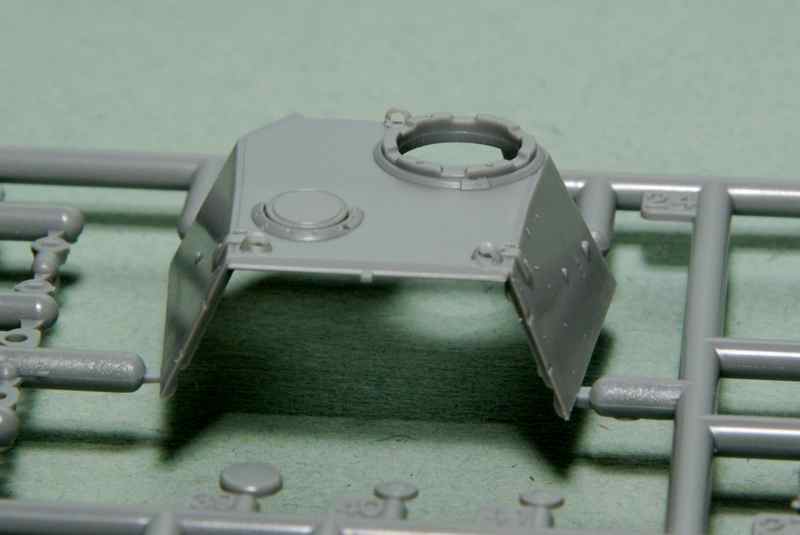
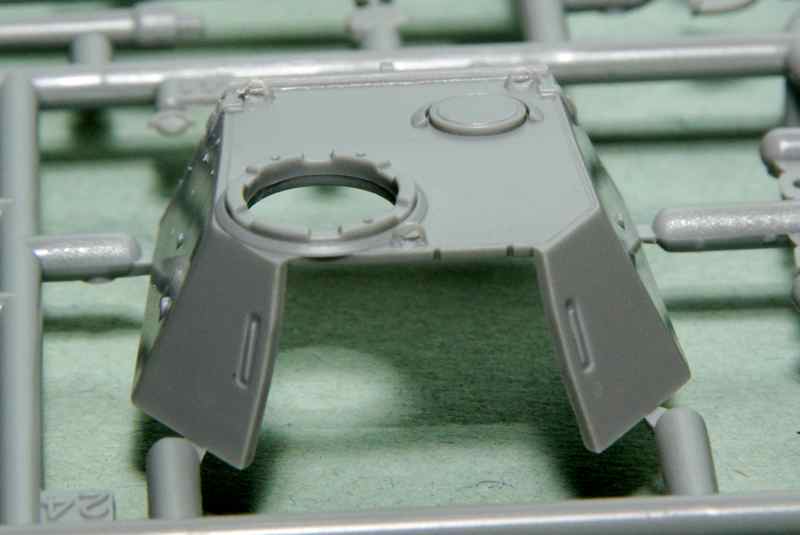
The turret is provided as a shell minus rear wall, mantlet and bottom with the turret ring. There are even separate parts provided for the pistol ports. The main gun barrel is moulded in one piece with the muzzle brake already present and slide-moulded so that the bore and other openings in it are open.

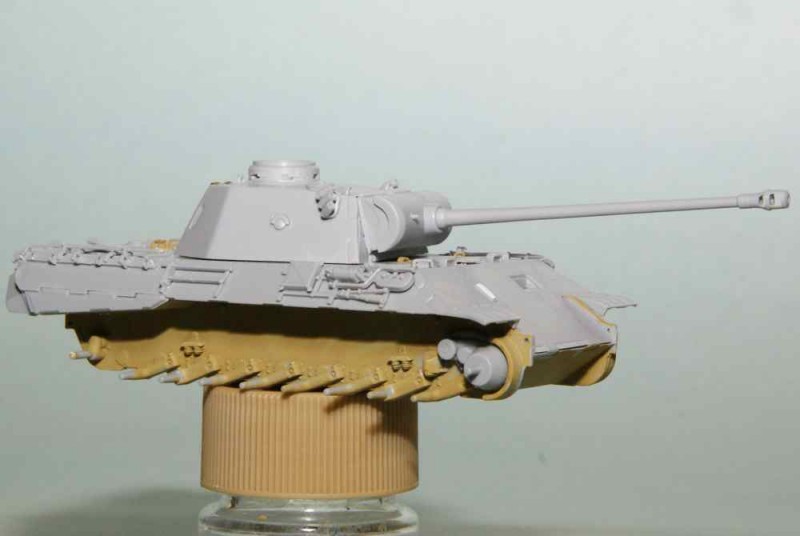
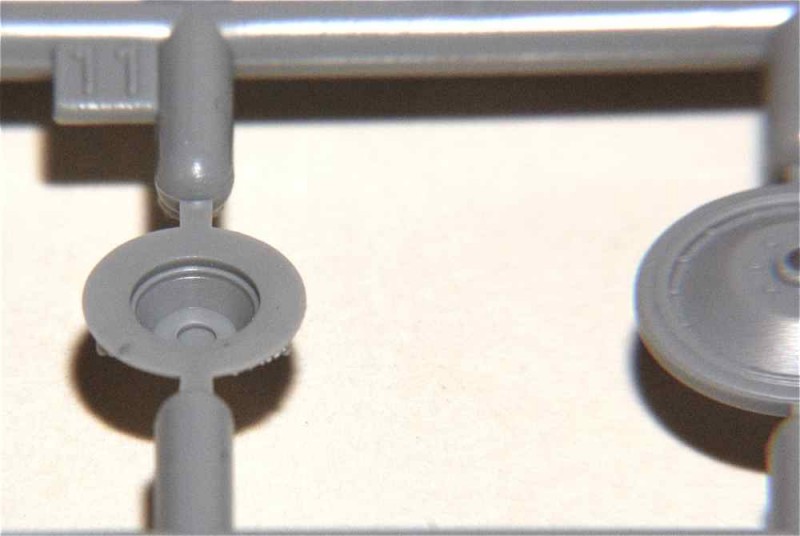
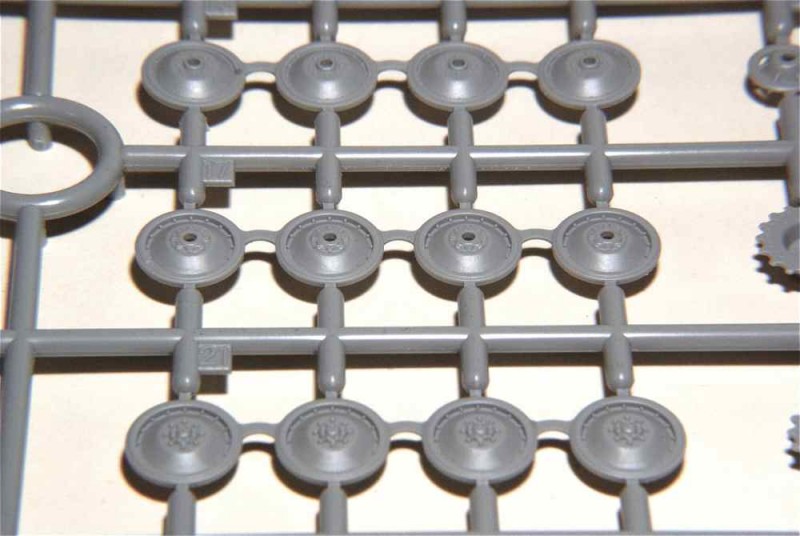
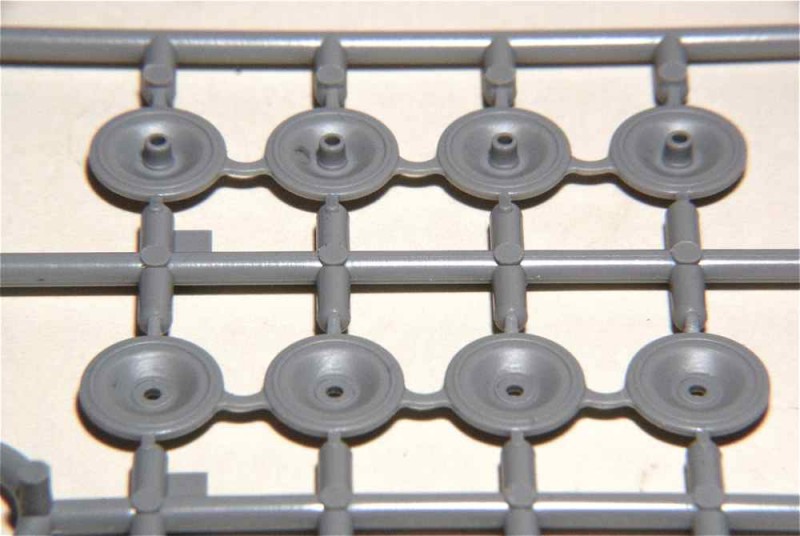
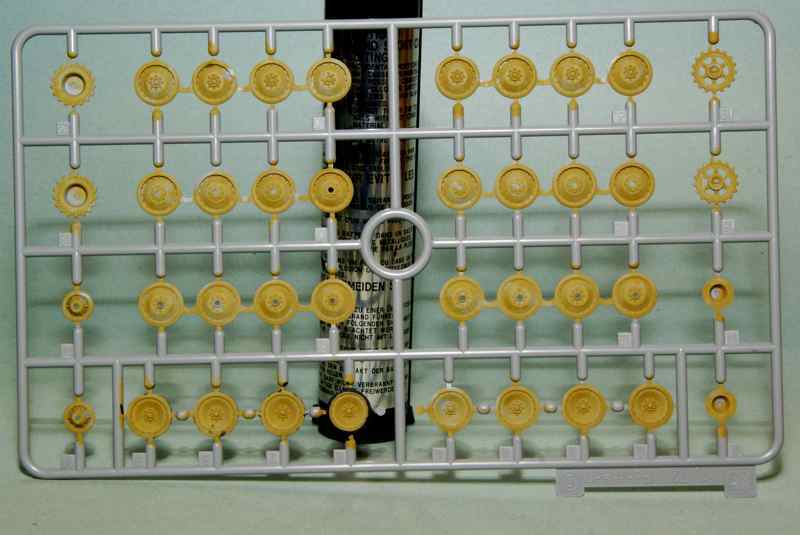
The suspension makes use of road wheels where the innermost road wheels consist of 'layers' or sets of wheels that are joined by small bridges and then fixed on to the pegs on the hull sides. The outermost road wheels are individual pieces. This will provide a fairly fast and accurately positioned suspension where the joined sets will not be visible after construction.

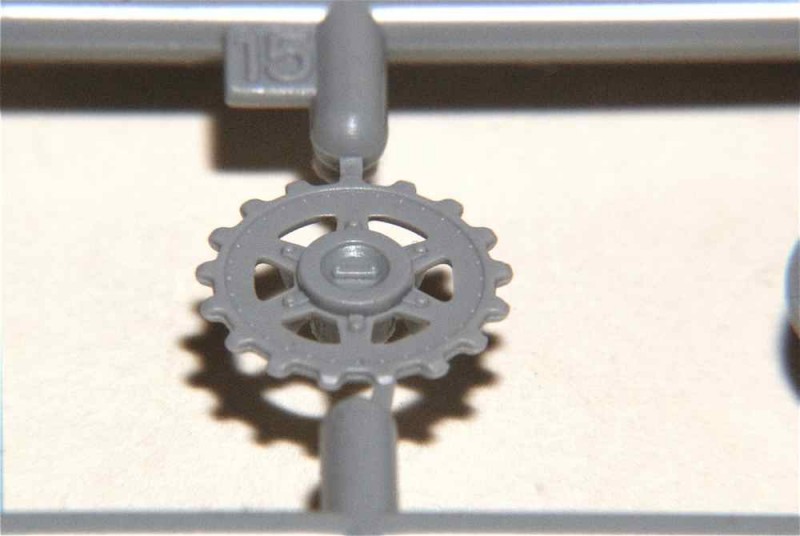
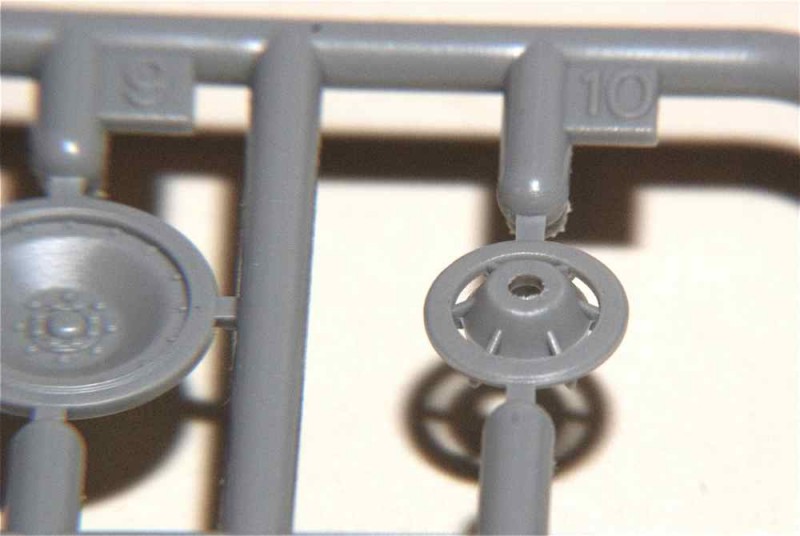
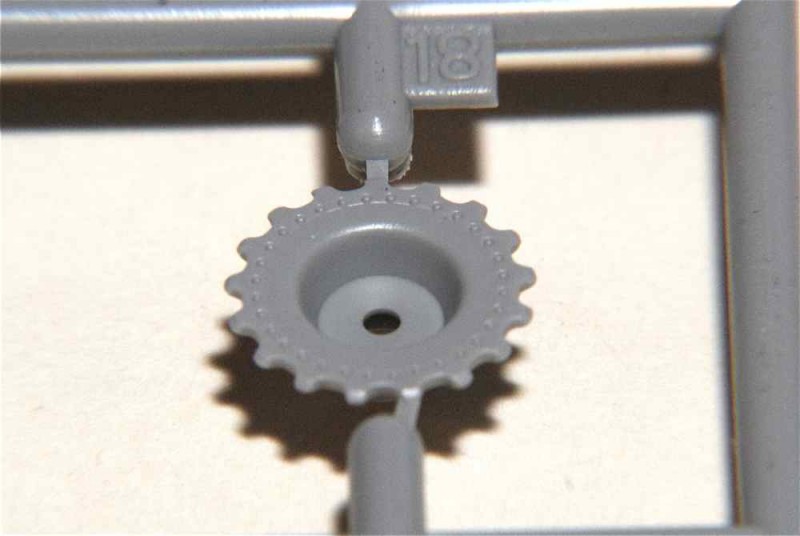
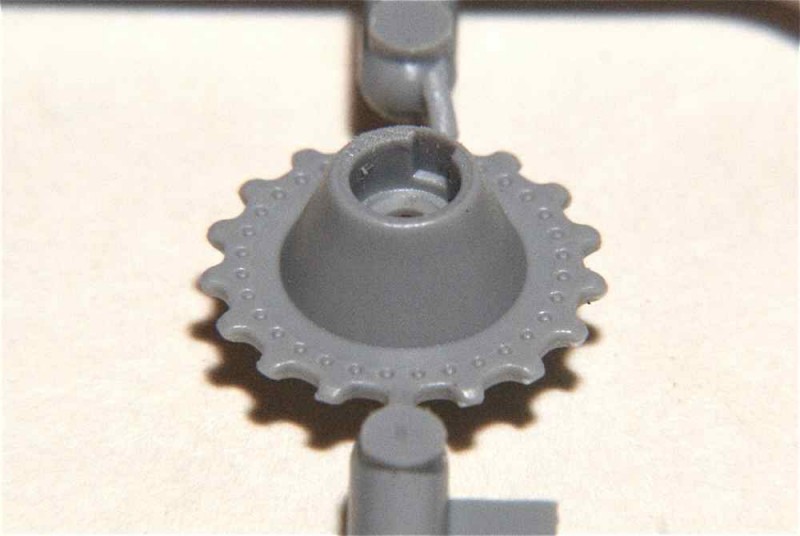
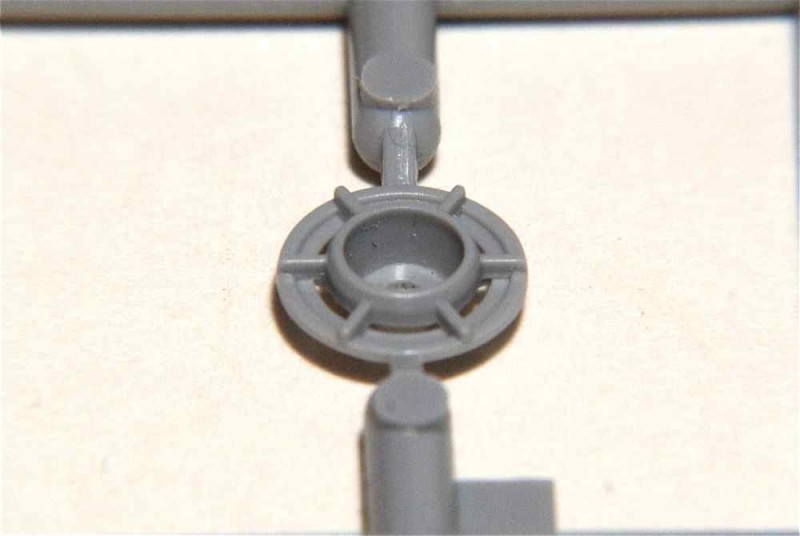
There are final drive housings that fit onto the hull sides and the drive sprockets are two piece affairs that fit onto these. Each rear idler is a three piece affair and will sit on it’s own mounting peg at the rear hull side.
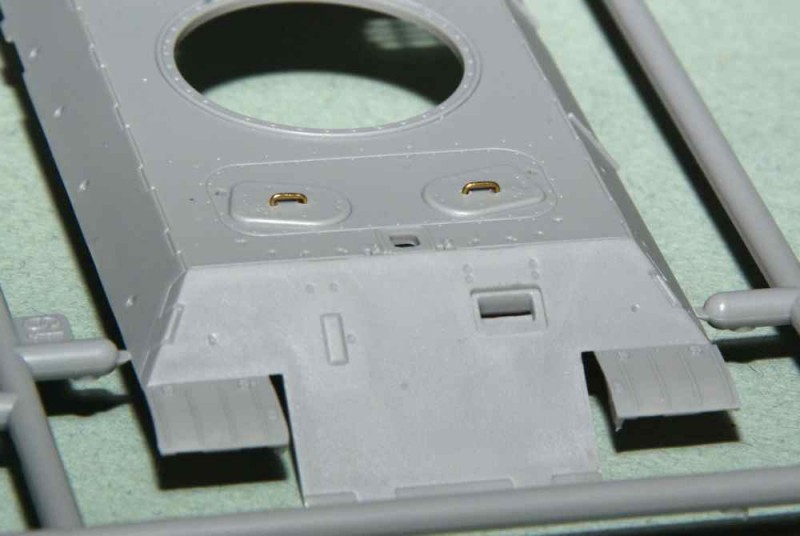
The instructions show the driver’s armoured vision port cover is to be glued in the closed position. What they fail to show is that there is an option and a part (A7) that permits the builder to model this port in the open position. Part A7 is a nicely moulded support to hold the armoured cover in that orientation.

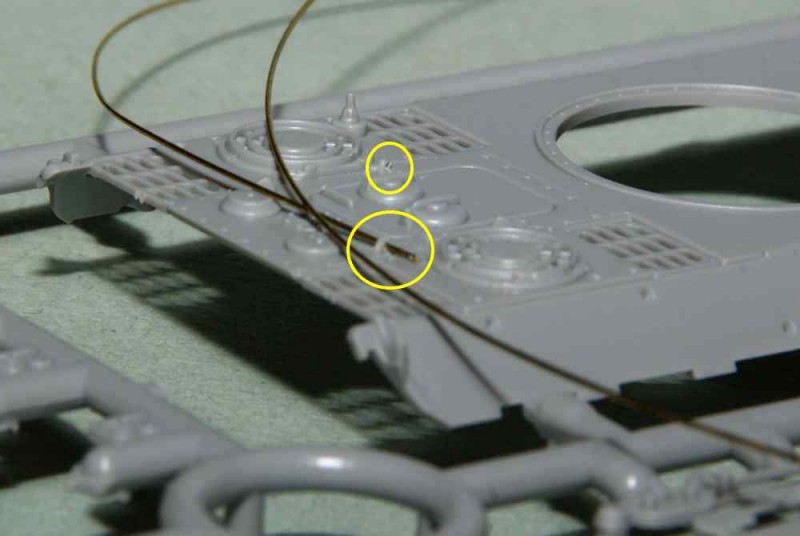
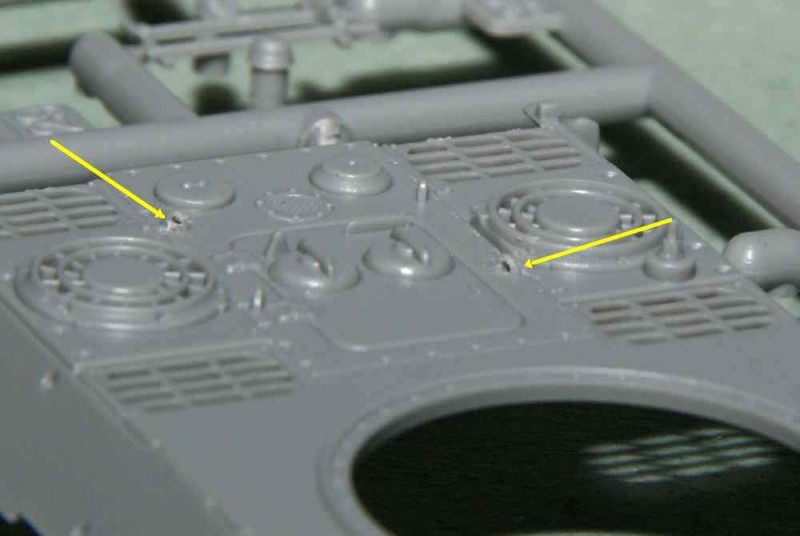
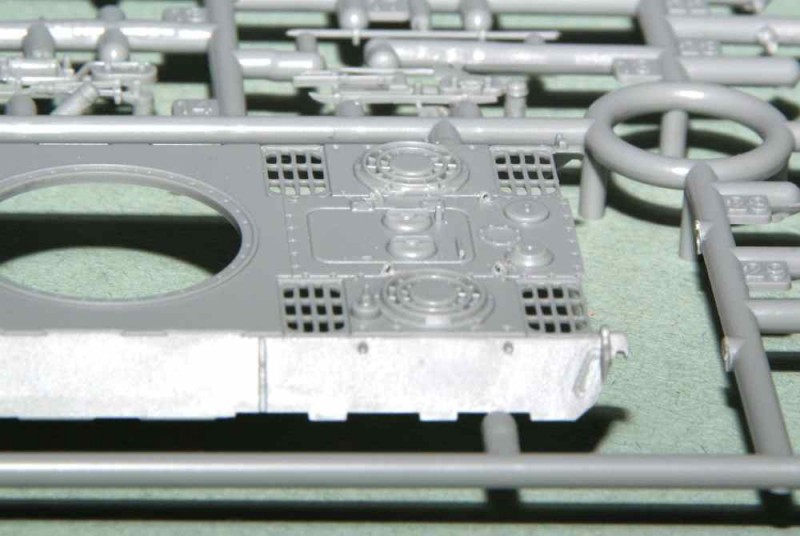
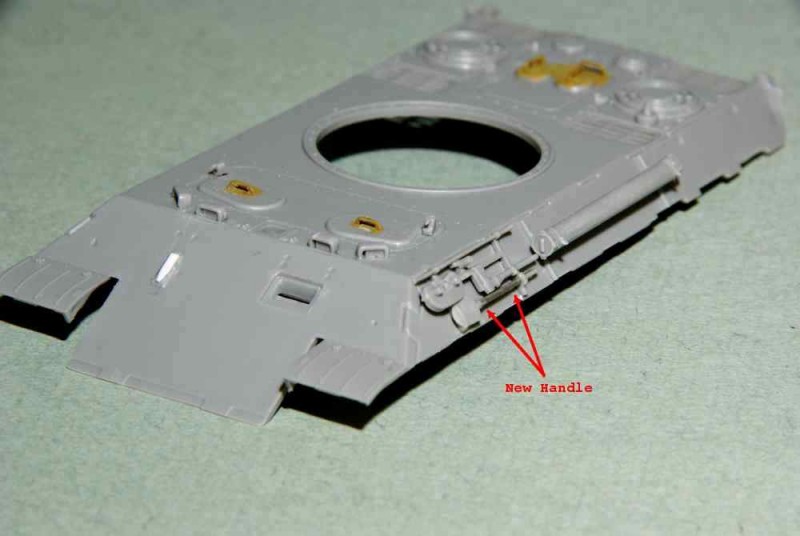
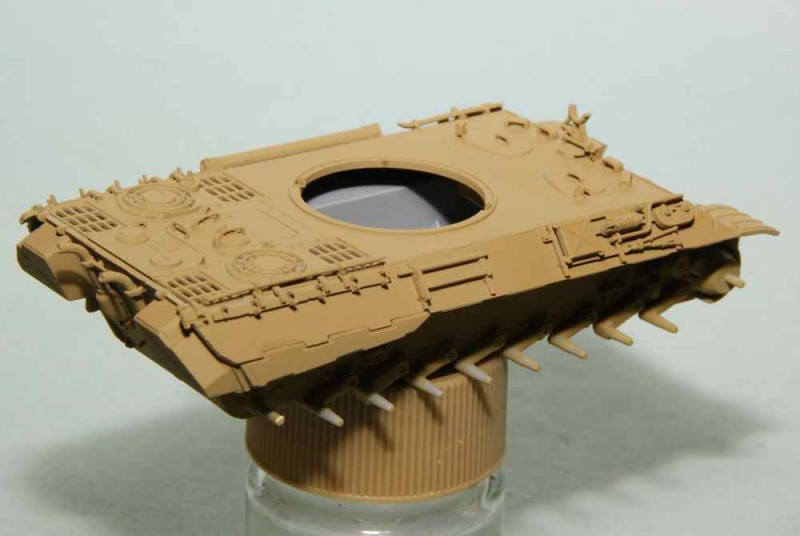
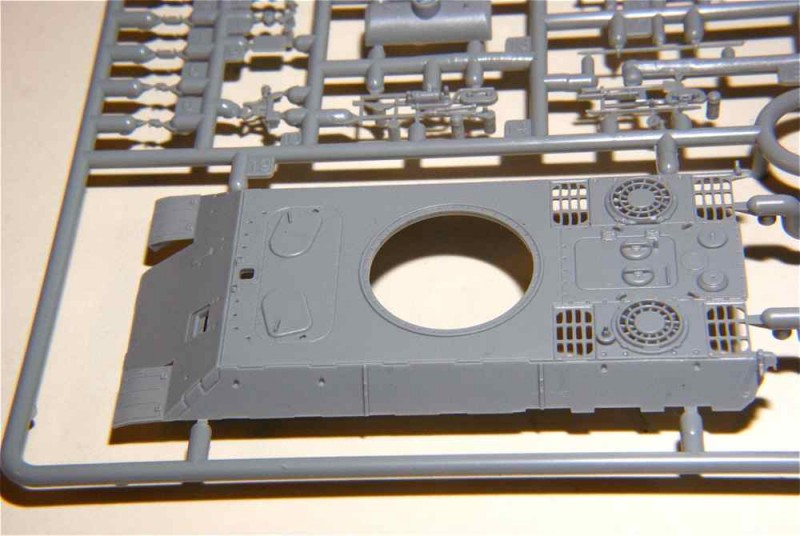
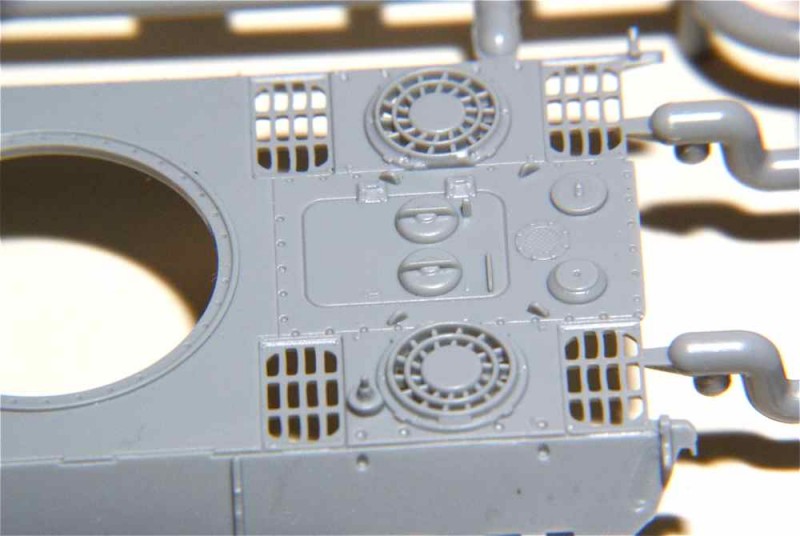
With this kit we also see Dragon taking a couple of steps backward from their previous standards. All grab handles and lifting eyes are moulded on and represented as lumps of plastic. No PE alternatives are provided in this kit and indeed, there is no photo-etch at all. Virtually all previous Panther and Jagdpanther kits came with PE frets with engine compartment intake screens as well as other optional detail alternatives. Another glaring omission with this kit and was ‘standard’ in the past, is the lack a part to represent the radiators, fans and general engine compartment interior. As all grills on the engine compartment are moulded as openings, the interior of the area will be quite visible.

Build Observations

The instructions are broken down into eight distinct steps. The modeller should study these and determine if the assembly order suggested is the best.

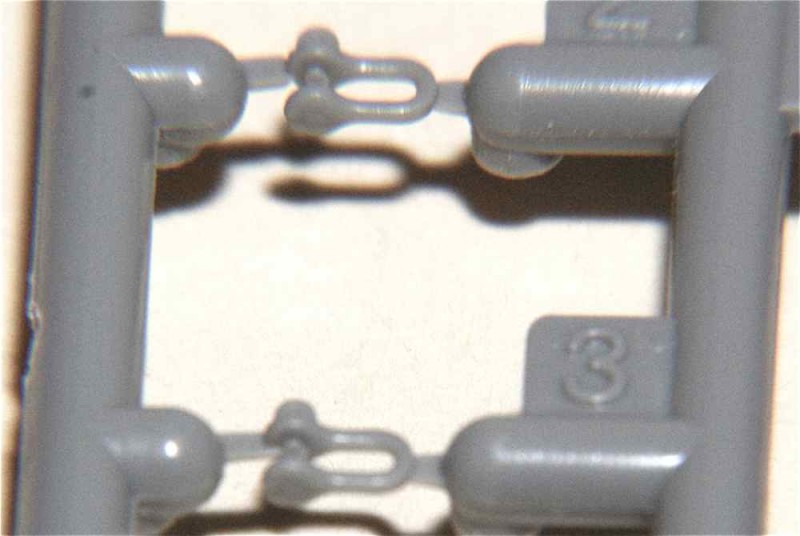
Steps 1 and 2 focus almost entirely on the construction of the suspension components on the lower hull. As mentioned above, the interlocked sets of road wheels should greatly speed assembly. In Step 2 the towing shackles (C1-C4) are to be attached but this should be delayed until construction is complete as they are extremely delicate, small and are meant to be attached by a press fit.

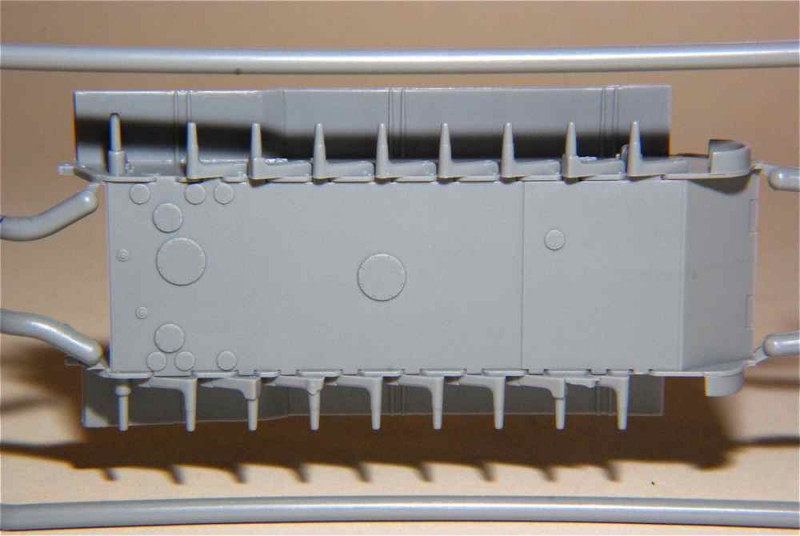
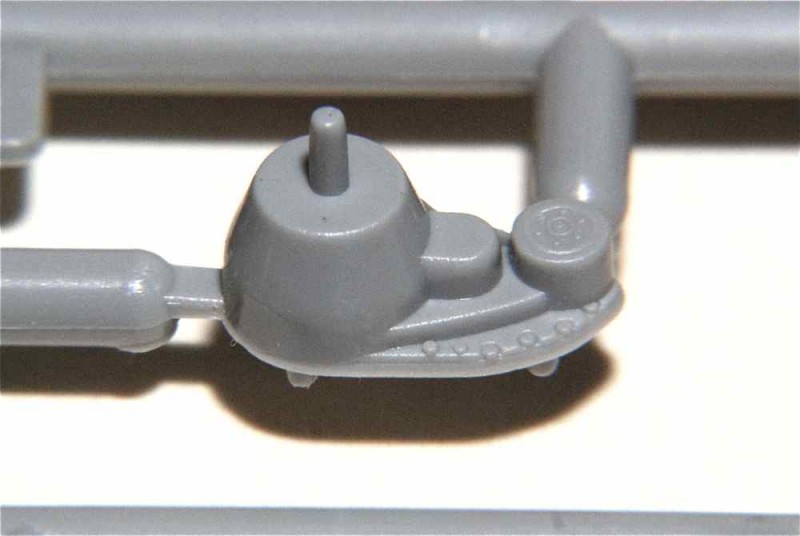
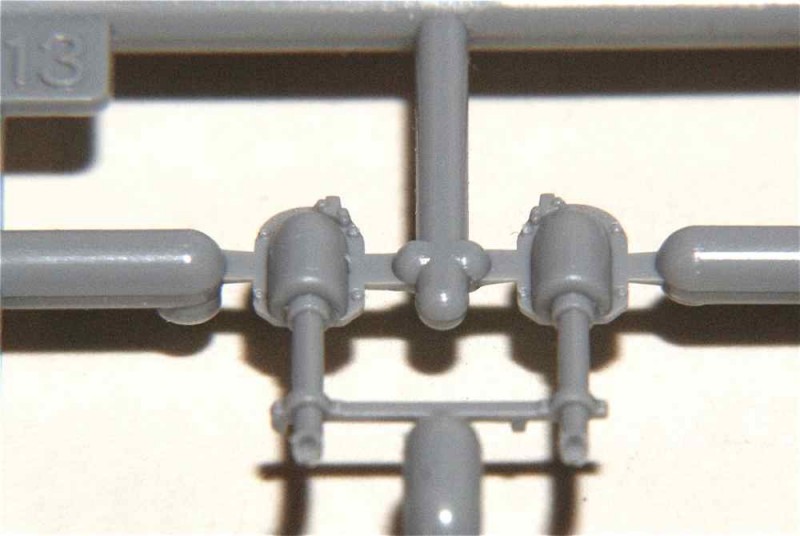
Step 3 is where the rear armour plate is detailed. The mufflers, jack and rear driving lights are attached. Thanks to slide-moulding the muffler exhaust openings are hollow.

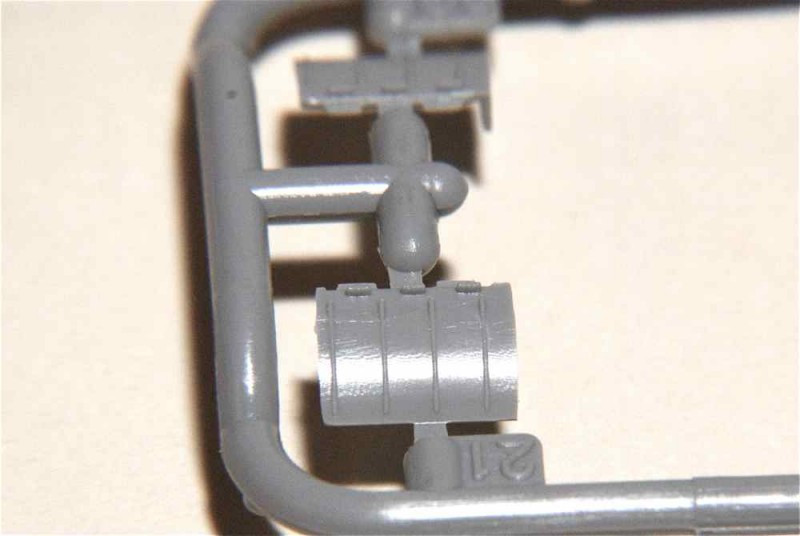
Step 4 deals with the attachment of detail parts to the upper hull front and left side. These parts include the headlights, a tool rack, spare track hangar, periscopes, gun cleaning rod tube as well as others. As mentioned above, many of these parts have locating pins that are far undersized for their respective locating features. The gun cleaning rod container is made up of three parts and the modeller will have to pay special attention as to the proper orientation of the pieces when attaching them.

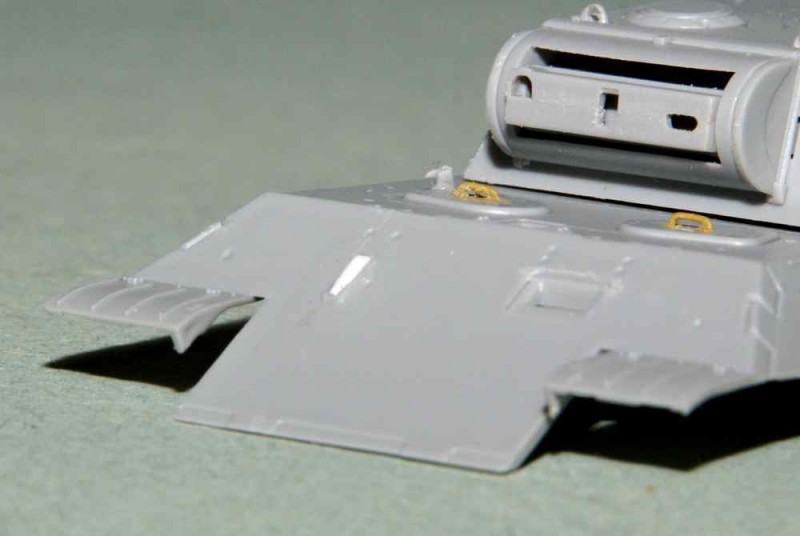
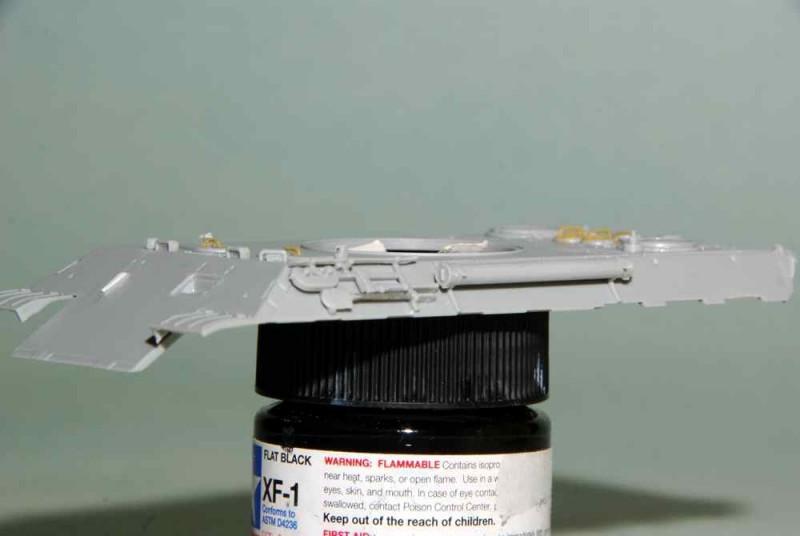
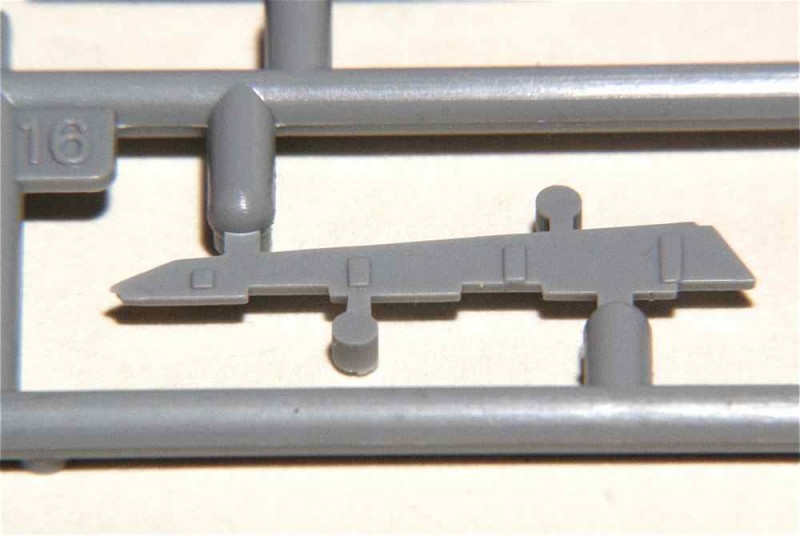
Step 5 adds the final details to the upper hull. These included the right side tool racks, track hangers, a hull top ventilator dome (A31) and main gun travel lock (A10). The ventilator dome has no positive locating feature so care will need to be exercised when attaching it. The travel lock can only be displayed in the up position and there is no provision for it to represented in the stowed orientation.

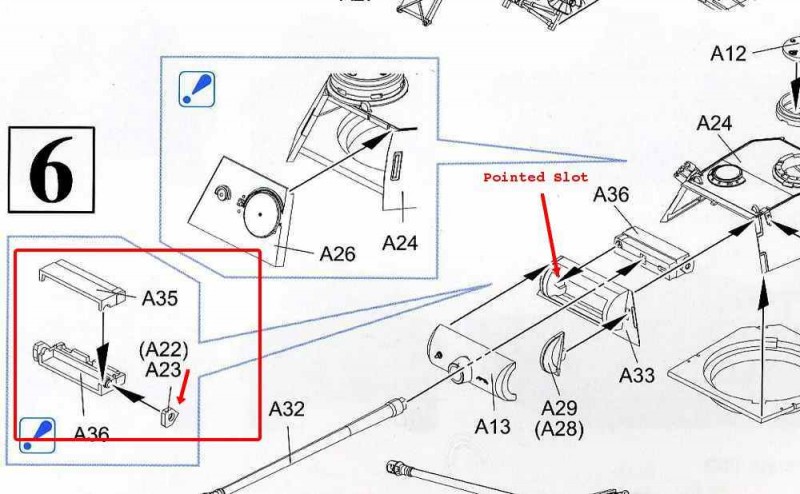
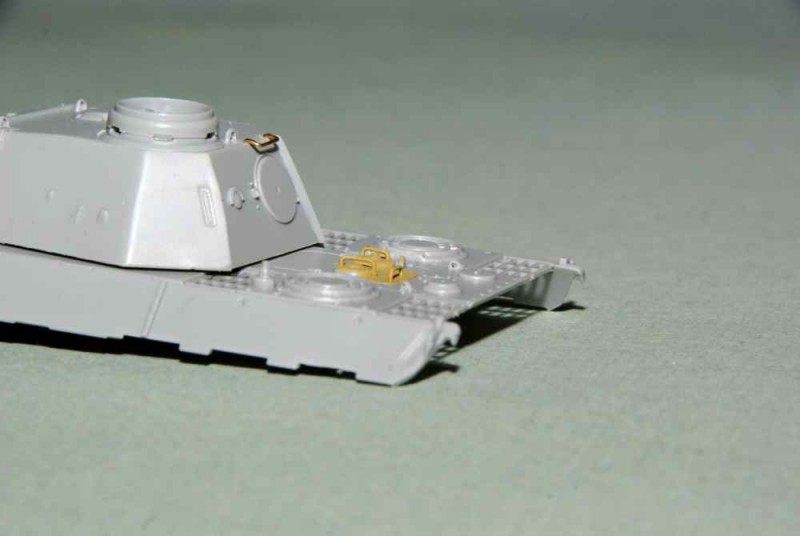
Step 6 concentrates on the construction of the turret. Many of the larger pieces had a positive and accurate fit. However, if the modeller wishes the gun to be posable in elevation then they will need to exercise extreme care when assembling the various internal mantlet components. Having reviewed the instructions from various previous Dragon Panther releases, the engineering pertaining to this kit appears unnecessarily complex and prone to problems.

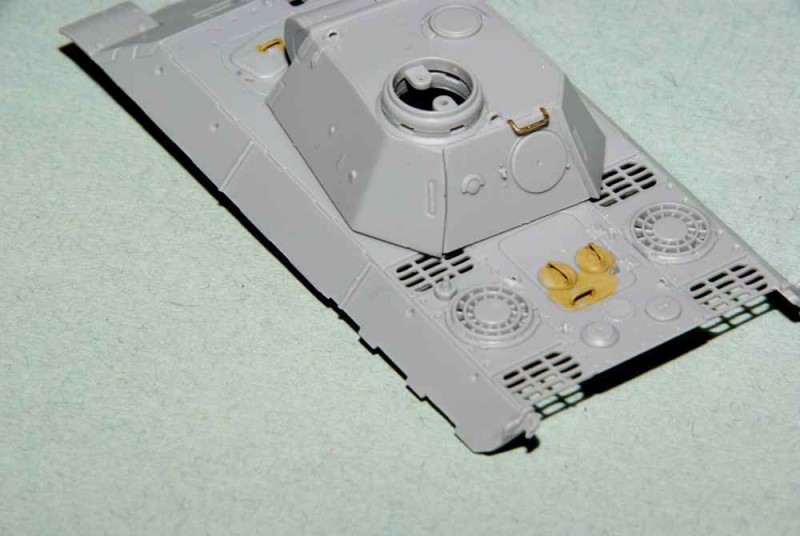
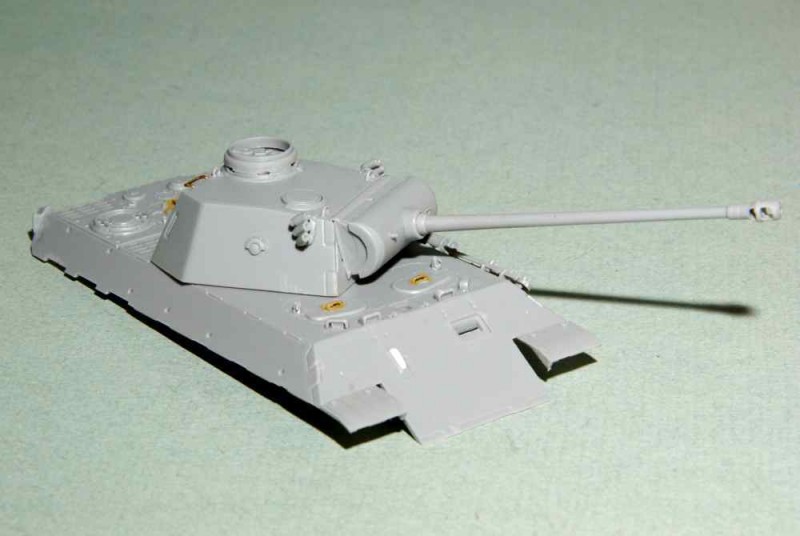
Step 7 involved the attaching of the completed turret, the rear armour plate to the hull and then the upper hull to the lower. From dry fitting, the fit of the hull pieces was very good and therefore no problems should be expected. It is with the turret that the builder will experience a rather odd development. This could be a major issue for those that want the turret on this one to be rotatable. It is that there were none of the slots and tabs that stop the turret from falling off. The turret is just meant to rest in the turret ring or more precisely be glued in place. There were obvious marks in the mould for the slots so they could be used as a guide to cut them out. As there are no corresponding lugs or tabs to fit into these notches the builder will need to fashion their own.

Step 8 sees the completion of the tank with the attachment of the DS tracks and side-skirts.

Conclusions

To this reviewer this kit appears to be contradictory in terms of its components/engineering. It leaves one wondering as to why some smaller parts, in some cases tiny, are provided separately whilst others that could be provided separately are moulded integrally into larger parts. Having released a number of Panthers in the past, one might assume that this new one would follow a similar and established pattern.

This kit is neither a ‘quick-build’ nor up to the standards that Dragon has established by its past releases. That is not to say that it will not result in a attractive addition to anyone’s collection. In many areas the moulding is high quality but one can’t help question the ‘little things’ that were ignored that would make the overall kit more complete. A simple enough ki

A Build Log has been started in the forums to further evaluate this kit.
SUMMARY
Highs: Very high quality moulding suitable for all experience levels.
Lows: No PE or engine bay interior. Vagueness in the instructions. Missing features may frustrate some modellers.
Verdict: Recommended, but with the mentioned limitations considered.
Percentage Rating
80%
  Scale: 1:72
  Mfg. ID: 7494
  Suggested Retail: $19.95
  Related Link: Panther D Blog
  PUBLISHED: Sep 02, 2012
  NATIONALITY: Germany
NETWORK-WIDE AVERAGE RATINGS
  THIS REVIEWER: 84.51%
  MAKER/PUBLISHER: 86.16%

Our Thanks to Dragon USA!
This item was provided by them for the purpose of having it reviewed on this KitMaker Network site. If you would like your kit, book, or product reviewed, please contact us.

View Vendor Homepage  |  More Reviews  

Photos
Click image to enlarge
  • move
  • move
  • move
  • move
  • move
  • move
  • move
  • move
  • move
  • move
  • move
  • move
  • move
  • move
  • move
  • move
  • move
  • move
  • move
  • move
  • move
  • move
  • move
  • move
  • move
  • move
  • move
  • move
  • move
  • move
  • move
  • move
  • move
  • move
  • move
About Jan Etal (tread_geek)
FROM: ONTARIO, CANADA

I've been building models since about age 10 with the occasional hiatus due to real life events. First armour model was a 1/76 Airfix Tiger I and was followed by a 1/72 Revell F4U Corsair. I've built primarily 1/76 and 1/72 armour and aircraft but occasionally have tinkered in other larger scales....

Copyright ©2021 text by Jan Etal [ TREAD_GEEK ]. All rights reserved.


Comments

Thanks for getting this one up, Matt. As the kit was not 100% finished I'd like to invite any viewers to visit the Panther D Blog. While some of the same images appear in the review, the pictures have more detailed explanations appended with them. Cheers, Jan
SEP 03, 2012 - 05:06 AM
Hey Jan, Finally! Good review and the sprue detail pics are what I wanted to see. I have a few questions but didn't know if to ask them here or in the blog? Regards, AJ
SEP 03, 2012 - 01:29 PM
Jan, you wrote: In my SdKfz263 review, I wrote: The detailing on the wheel guards mystifies in terms of how decisions were made as to which details are moulded on and which are separate parts; that big storage box on the right hand front fender, for example, is just a piece of additional stowage, but is moulded on, as are the fire extinguisher and shovel, both items that you might want to paint separately and which should be cylindrical in section, while B10 and 20, thin flat boxes, standard to this vehicle type, are pointlessly presented as separate parts. In your Panzer III N review you wrote: While an interesting subject and in many ways a beautifully detailed kit, this offering from Dragon is rather perplexing. It is as if two separate minds or purposes designed this kit, with one opting for the minute “Dragon detail” pieces of the past, and another introducing attempts to limit parts-count and speed assembly. To this reviewer it seems that we end up with a compromise between the two schools of thought that may not satisfy the majority of builders who prefer one or the other. Something of a pattern developing in Dragon's recent 1/72 scale offerings. I was wondering how much of it is connected with their desire to get more than one version from the same parts, and thus decisions are more driven by being able to use sprues again in different boxes rather than the immediate consideration of the specific subject. That makes sense in some instances, but not sure about all. Then there are the enigmas of the instructions; it's almost as if the authors of the instructions haven't built the kit... which knowing the nature of business practice sounds entirely plausible, yet totally non-sensical.
SEP 04, 2012 - 12:43 AM
There is considerable speculation on this subject and unfortunately no consensus. Dragon is definitely reusing sprues to save mould production costs but they have pretty much done this in the past, hence their notoriety for marking unused parts in a kit. However, this appears to be being taken to some extreme. In a new kit that I am reviewing (one of a series of three variants) a sprue containing 27 parts has all but 7 marked as unused. Another sprue of this kit has 17 unused parts out of 54 present. Several of these parts are quite large and consume quite a bit of plastic. Obviously, starting with the initial release of the first variant limited forethought had been given to this by engineering. From some information that I have come across many believe that Dragon is placing more emphasis on "ready made" or pre-assembled models. I have read that the market for these in the far east is vibrant, to say the least. Simplification means faster assembly time and therefore reduced labour costs. Yet with many of these recent kits there are parts provided that are nearing infinitesimal in size. Example is the tiny lights that reside just below the turret on the Neubau-Fahrzeug. My finest tweezers were barely capable of holding these in a useful manner. I have a friend that was a pattern-maker (created moulds for aerospace components) who is also an avid Braille modeller. According to him it is blatantly evident that there is a lack of communication between parties in the mould making process and yes, he states with certainty, nobody is building the thing or in some cases has a clue of what they are designing or working on. Thanks for dropping in and commenting. Dragon kits still rank near the top of the industry but some may turn away from them if the frustration factor contines. Cheers, Jan
SEP 04, 2012 - 04:31 AM
@tread_geek – Jan, You’ve done a super job on this review. The photographs are of excellent quality and shows off the kits parts to good advantage. This review along with the build log that I’ve been following will compliment and complete this project leaving no issues unturned. I’m happy you mentioned about the lack of spare track links for the storage racks along the hulls sides, a horrible omission by Dragon as these items are quite the fixture in photographs of these tanks and a much needed item in the field! This is the same equivalent as anyone having to walk through California’s Death Valley desert for a day without any water to drink. I noticed in your close up photographs that Dragon decided to go for a molded on idler wheel shaft. It will be interesting to see how you will fit the DS tracks on the kit without any means of adjustment for tension? Some of their kits do require some adjustment in order to accommodate for too long or too short on the track length and in some case Dragon has supplied the modeler with separate idler shafts for just this purpose. Don’t misunderstand me I’m just observing and wondering what I will be contenting with when I do get this kit in my hands. I often wonder what’s around the corner? There is always room for improvement and the competition for the mighty dollar is king in any business. You may be on top today but not tomorrow – that is a certainty! ~ Eddy
SEP 06, 2012 - 08:26 PM
@Braille - I am very glad that you have found the review informative and potentially helpful. I've worked with the DS tracks a fair amount recently and so far they live up to the best expectations most of the time. When too short I have found that they can and do stretch quite well but one needs to take care when doing so. The finer the track the more delicate you must be in the process. I have broken and even deliberately cut the tracks (to shorten them) and have had minimal issues using regular glue to cement the pieces. I am currently working on the suspension of the Panther and how it works out will definitely be an entry in its Blog. IMHO, it seems that several companies are "experimenting" to find the "next great thing" that will propel them to the forefront. An example is the recent kits from Airfix and Trumpeter that have most of their tracked suspension moulded as one piece, including the tracks with sag. This is surprising as Pegasus has been doing this for quite some time. When I first started reviewing Dragon kits I noted that as time went by the parts count and intricacy of the moulding kept on increasing with each release. Over the last dozen or so kits I see the parts count diminishing yet more detail that used to be separate items being moulded on. As I've mentioned, this seems to be opposite to what we have seen in the past. Could it be that these companies are trying to find a "happy medium" between a regular kit and those meant for the wargaming crowd? Cheers, Jan
SEP 07, 2012 - 07:01 AM
Jan, To stretch the tracks do you heat them in water or hot sand? Does stretching effect how they fit on the teeth of the drive sprockets? Can you get enough to achieve the sag on non-return roller style running gear? Do I sound like an inquisitive 6 year old or what? Keep up the good work, Keith
SEP 12, 2012 - 05:43 AM
Thanks for the the comments and questions and sorry to have taken so long to answer. Stretching - So far I have stretched these type of tracks at basically room temperature and dry. With the exception of the first (Late Production) Chi Ha tracks, I've had no issues and those tracks were only a problem because they are so delicate and I was a little too forceful. That track broke at least three times but standard Testors tube glue joined the broken pieces with no issues. With the second tracks of this type (Early Production) I was more careful and had no mishaps. Effect on Drive Sprocket Teeth - I usually use an unstretched portion around the sprockets. Achieving Track Sag - I don't believe that this will be a problem with DS tracks. Just stretch them along the longest straight run sections between the sprocket and idler. In the case of this kit and ones like it, it might not be so necessary as the skirts will pretty much hide the area in question. However, I have seen more than a handful of modellers here achieve quite nice looking track sag even between return roller type suspensions. In some cases where the track is only a bit tight, just place the track over the sprocket first and then tease it around the other suspension components as the DS tracks have a nice natural elasticity. With too long tracks, just cut off a few links and then re-glue the sections with your favourite cement. In most cases these tracks are quite forgiving but you do need to be gentle in the stretching process. As for you questions, the only inappropriate question is usually the one not asked. Cheers, Jan
SEP 21, 2012 - 05:34 AM
   
ADVERTISEMENT


Photos
Click image to enlarge
  • move
  • move
  • move
  • move
  • move
  • move
  • move
  • move
  • move
  • move
  • move
  • move
  • move
  • move
  • move
  • move
  • move
  • move
  • move
  • move
  • move
  • move
  • move
  • move
  • move
  • move
  • move
  • move
  • move
  • move
  • move
  • move
  • move
  • move
  • move
  • move
  • move
  • move
  • move
  • move
  • move
  • move
  • move
  • move
  • move
  • move
  • move
  • move
  • move
  • move
  • move
  • move
  • move
  • move
  • move
  • move
  • move
  • move
  • move
  • move
  • move
  • move
  • move
  • move
  • move
ADVERTISEMENT