Fast, flexible reconnaissance units with good range and communications were a central principle of the mechanized warfare developed in Germany in the 1930s, the need for a heavy armoured reconnaissance vehicle being first met by adaptations of standard 6x4 truck chassis (Sd.Kfz.231 (6-rad)). In 1934 specifications for a much more sophisticated vehicle led Büssing-NAG to design the schwerer Panzerspähwagen (8-rad) series [heavy armoured reconnaissance car (8 wheel)] based on an all-new 8x8 chassis, starting operational delivery in 1937.
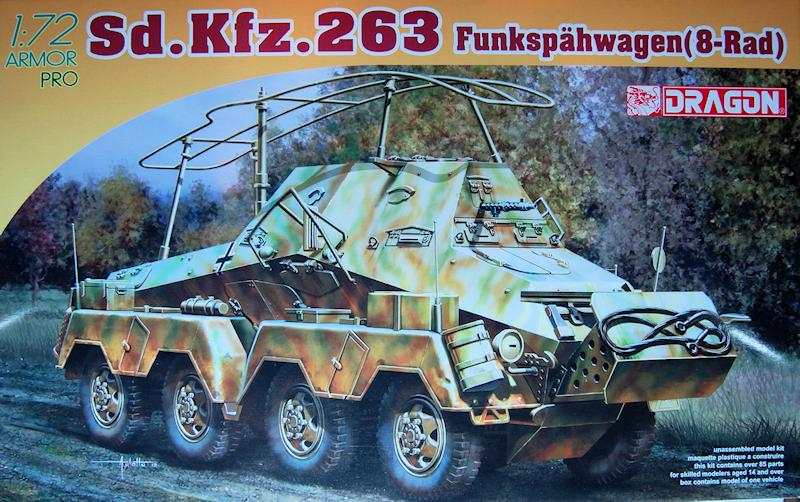
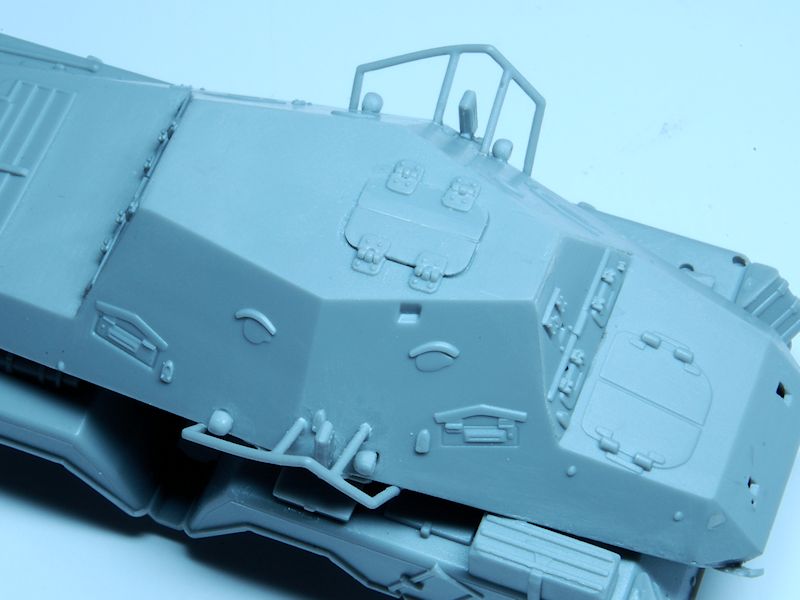
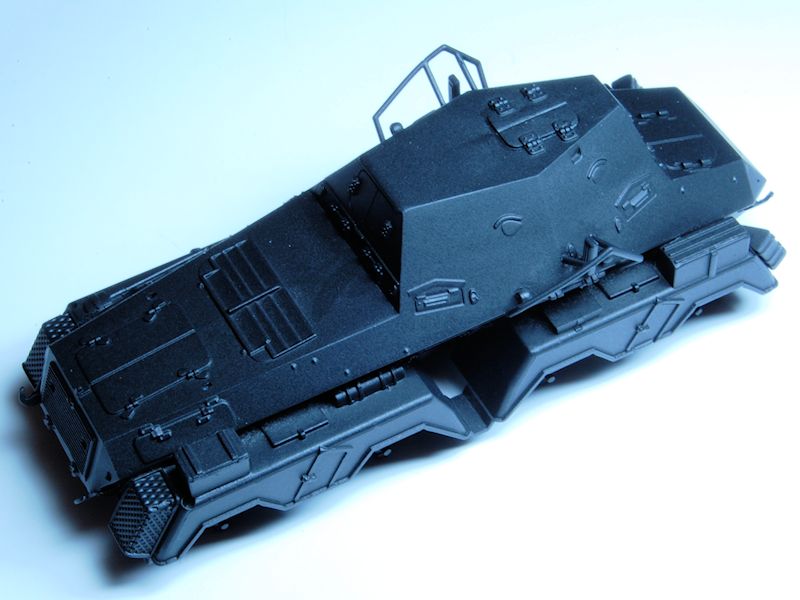
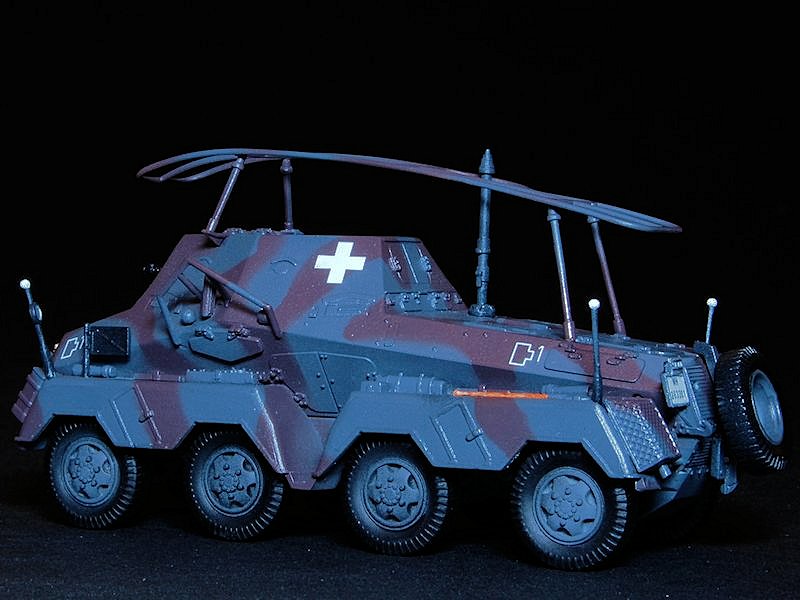
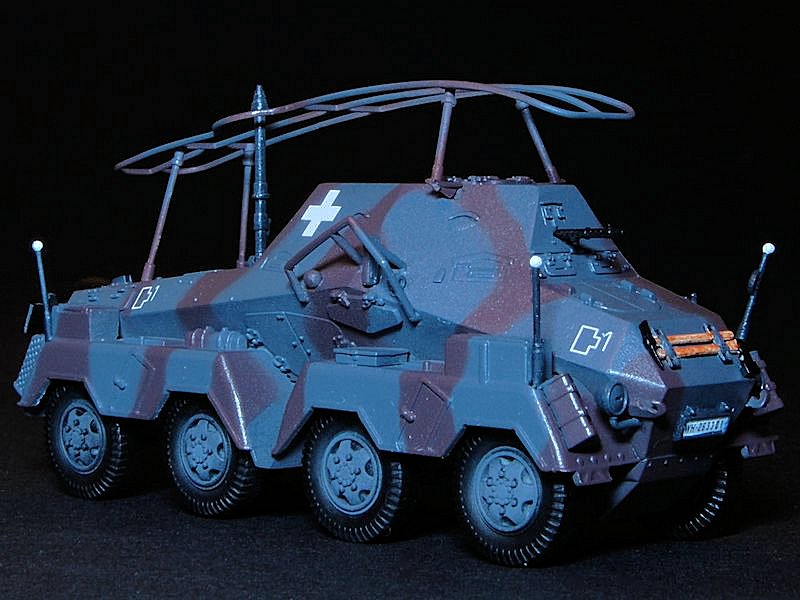
The first such vehicles had rotating turrets with 2cm guns, but to produce a specialist mobile communications centre, the Sd.Kfz.263(8-rad) was designed with an enlarged crew compartment formed by armoured plates welded to the existing hull, in place of a turret. Equipped with a large frame mast, a telescoping radio mast mounted through the rear deck, and armed only with a single machine gun, this is the subject of Dragons recent 1/72 scale release, reviewed here.
Introducing the kit
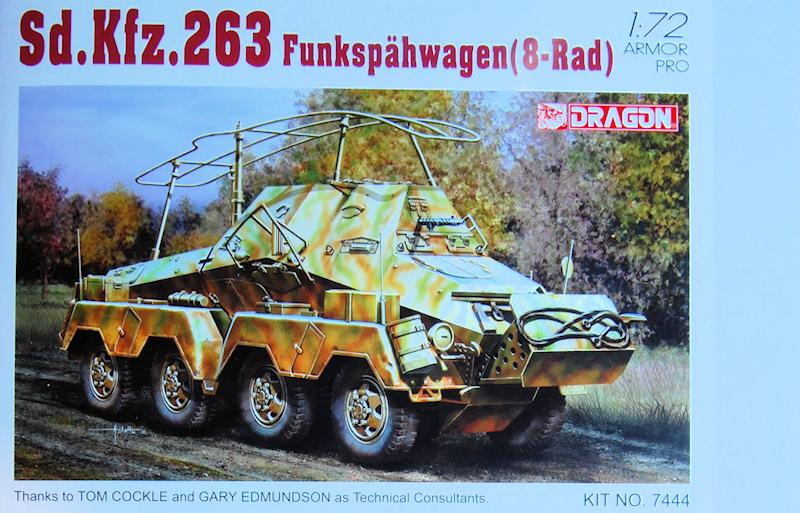
Before opening the box, there is the oddity of the name Dragon chose to print on it, Funkspähwagen when all available references name this type a Panzerfunkwagen. Never mind. The box is big for a finished model of only 8 or 9cm long, but with the opening top, theres plenty of room for storing your half built assemblies.
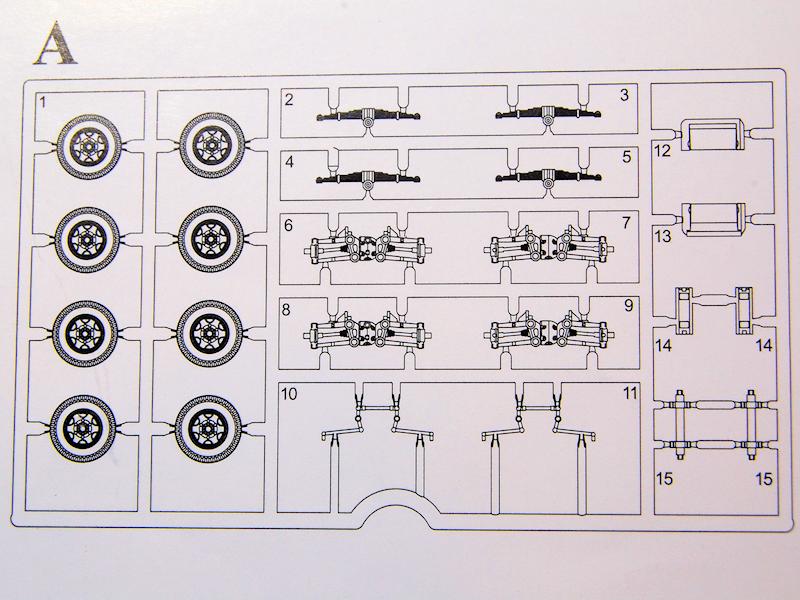
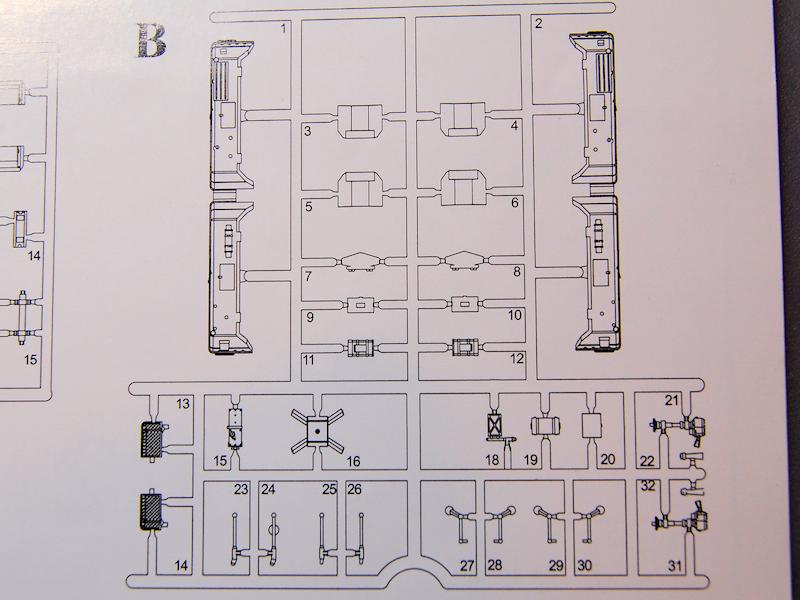
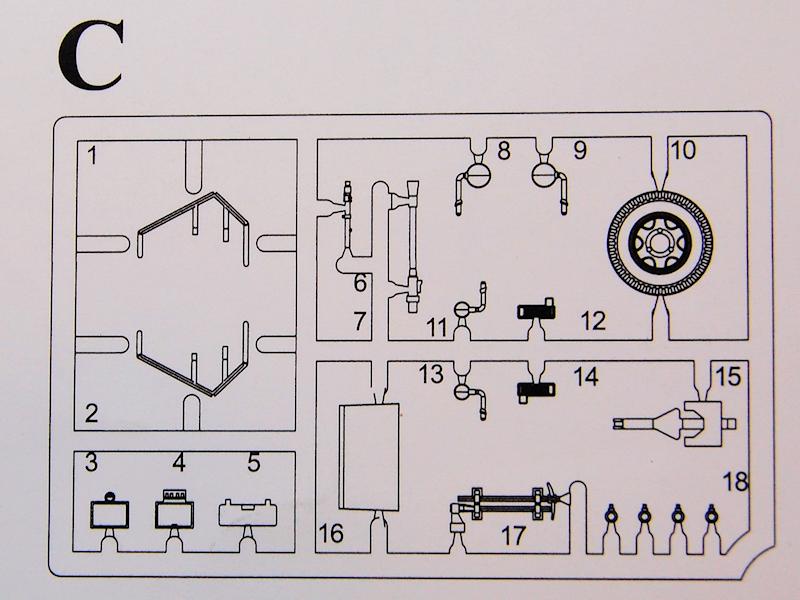
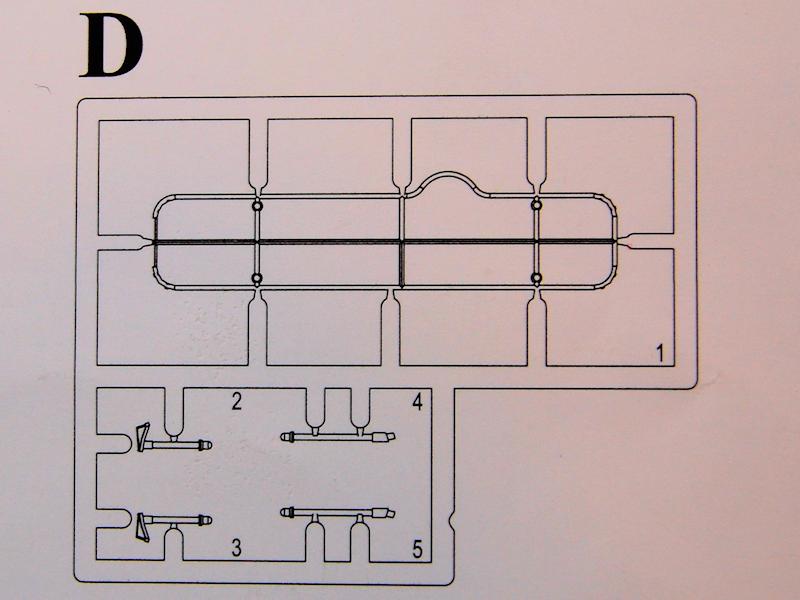
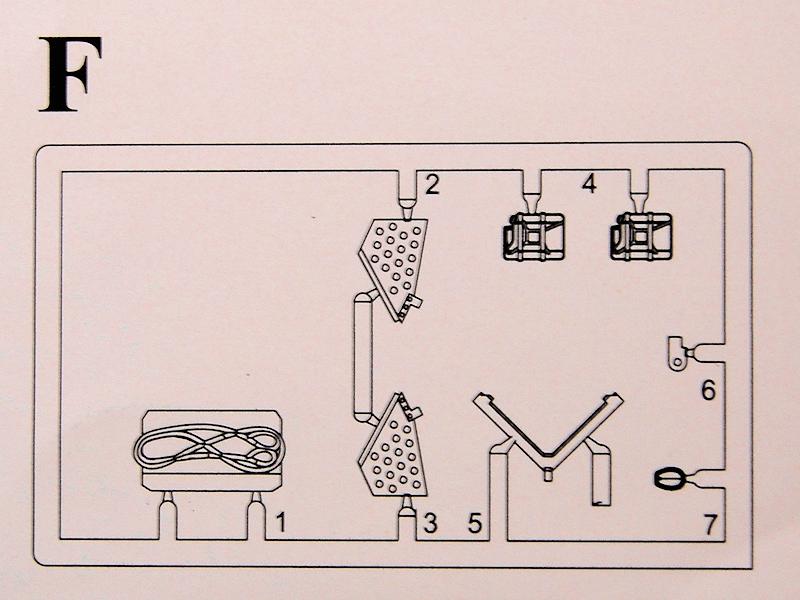
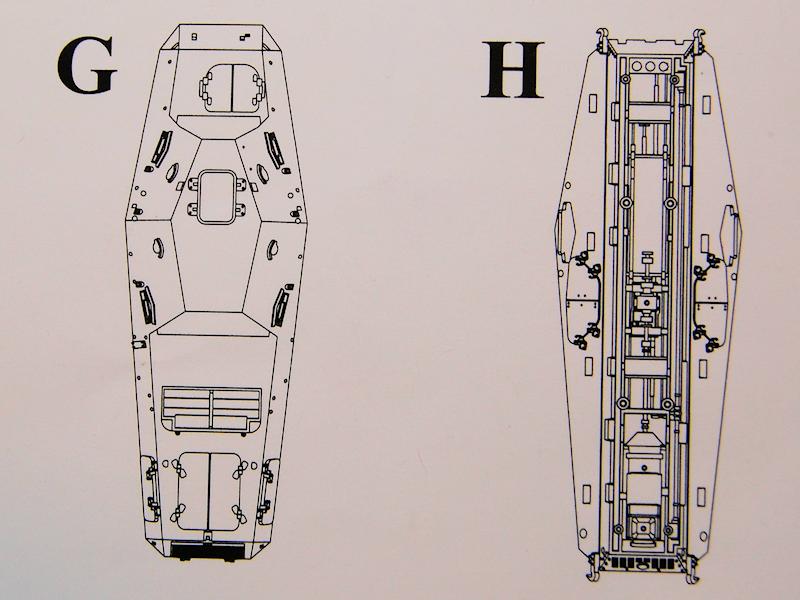
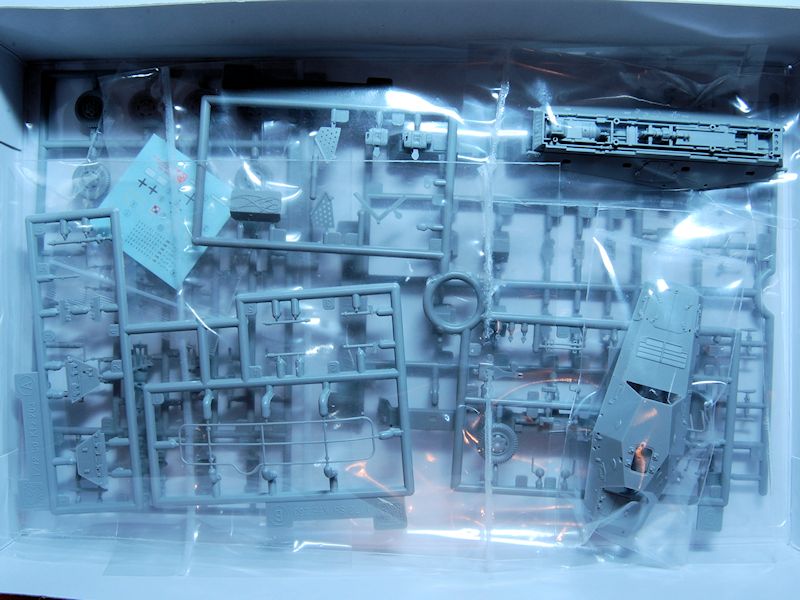
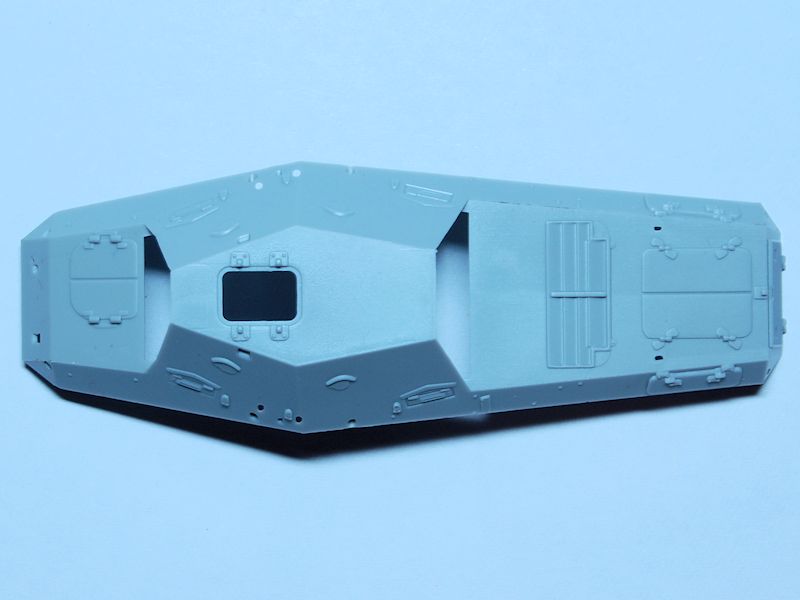
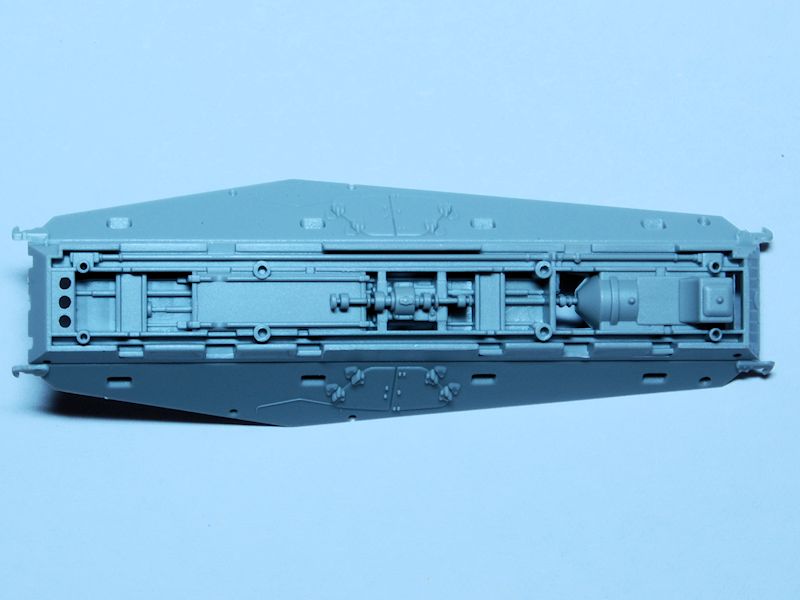
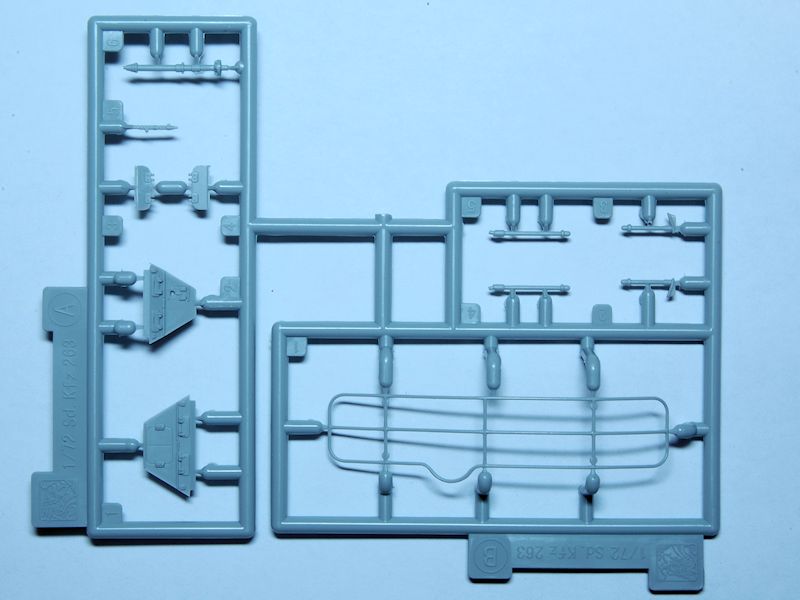
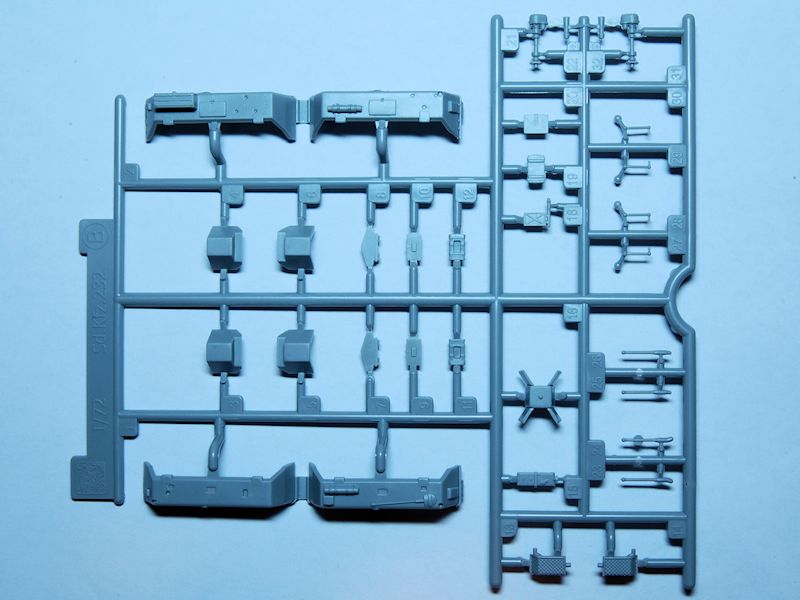
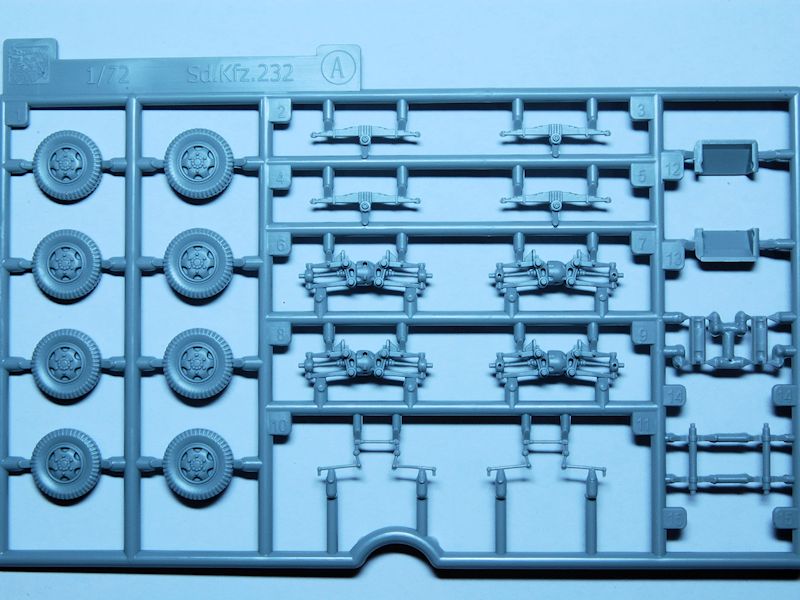
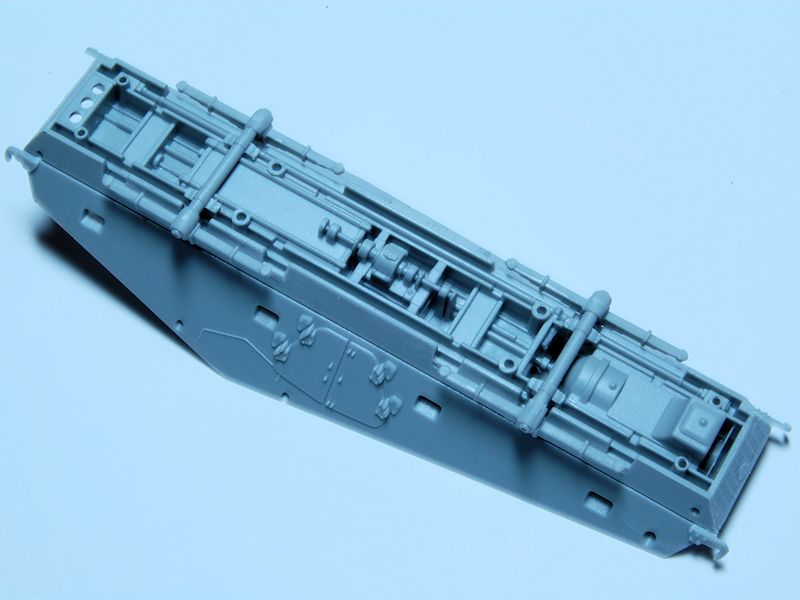
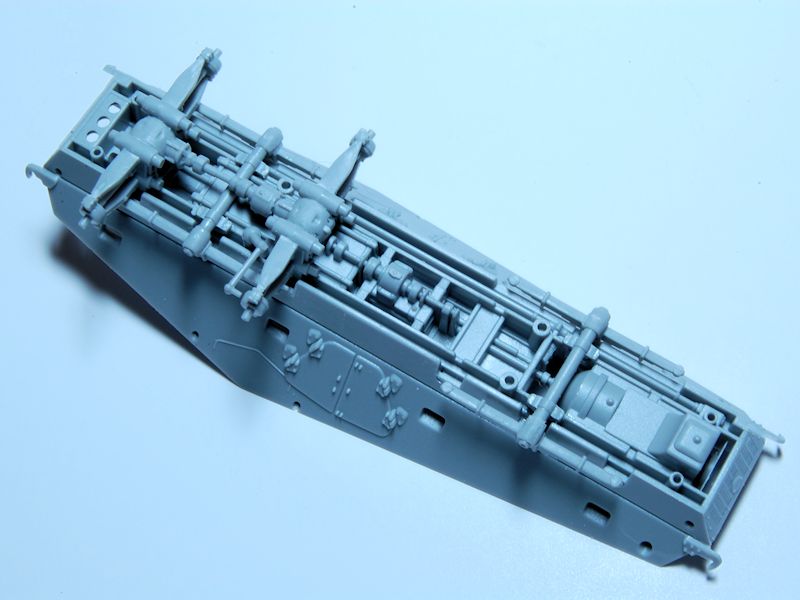
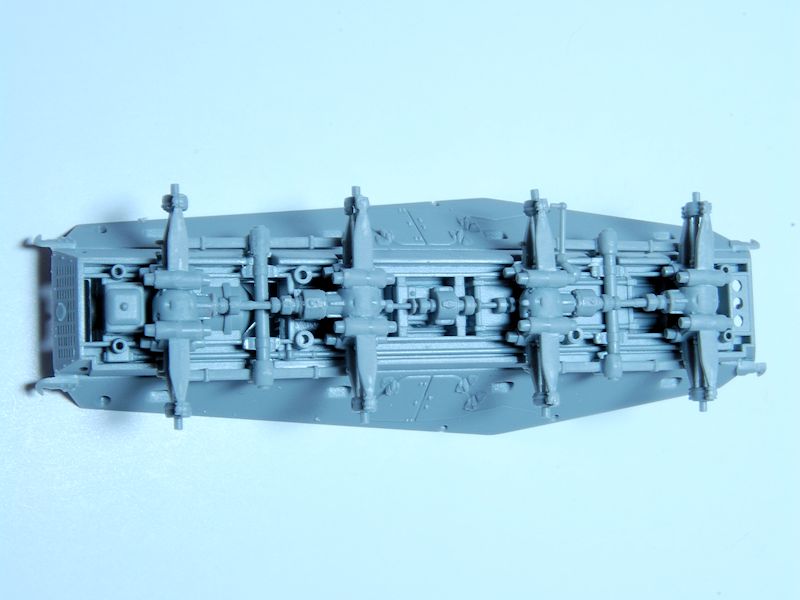
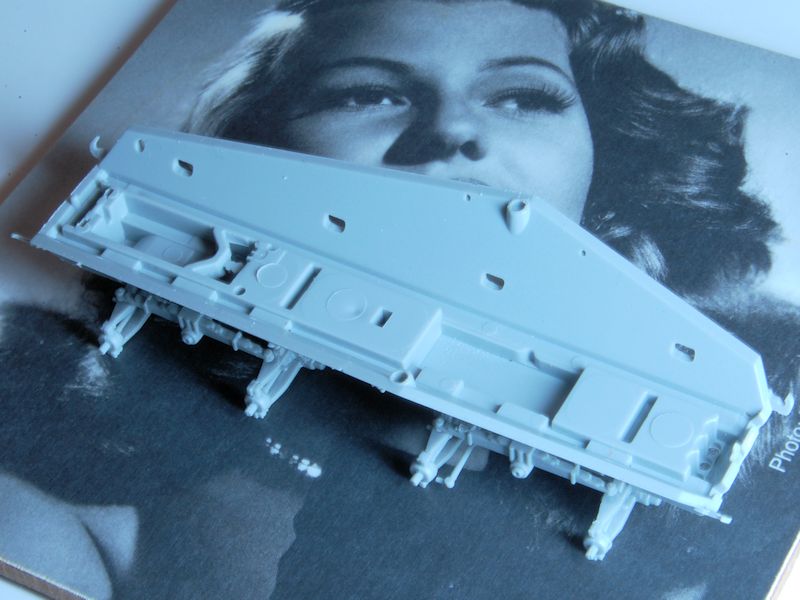
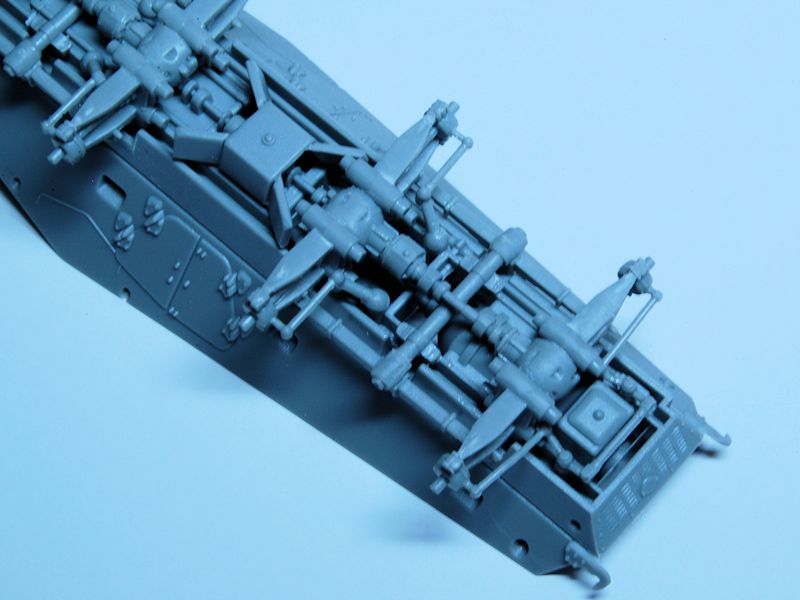
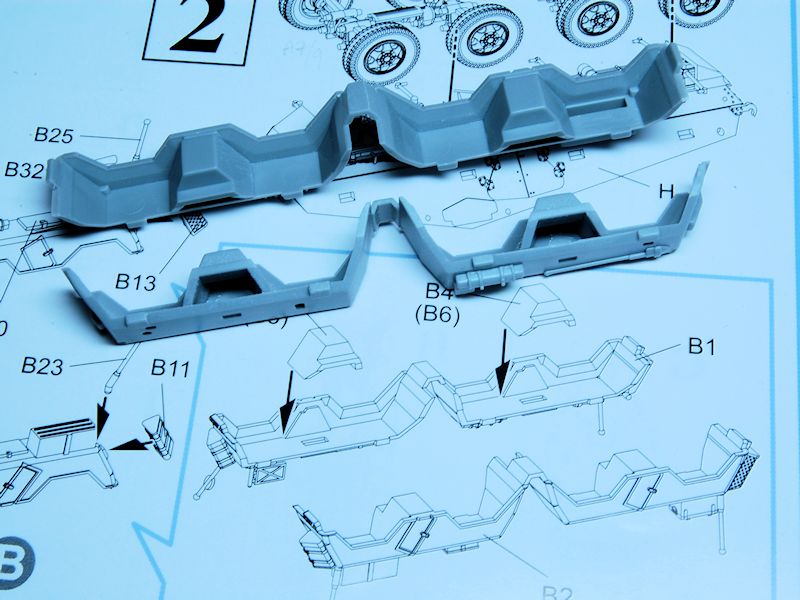
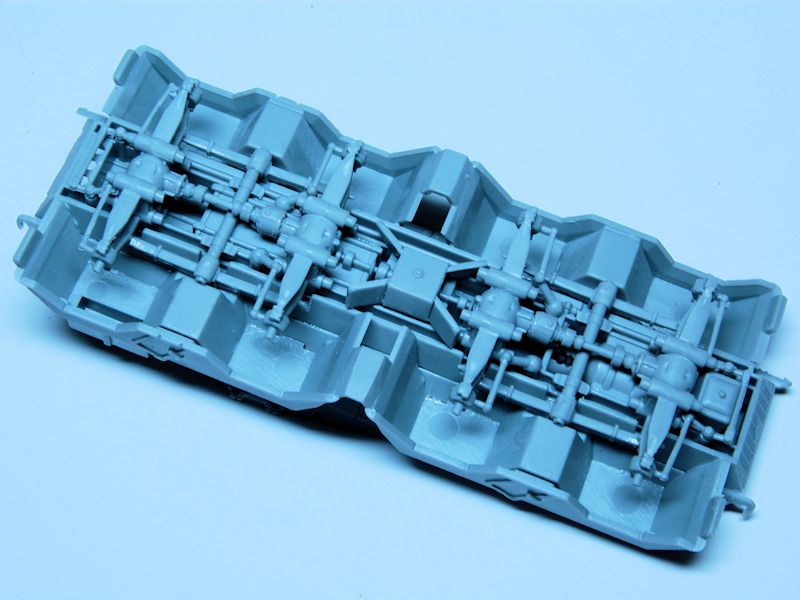
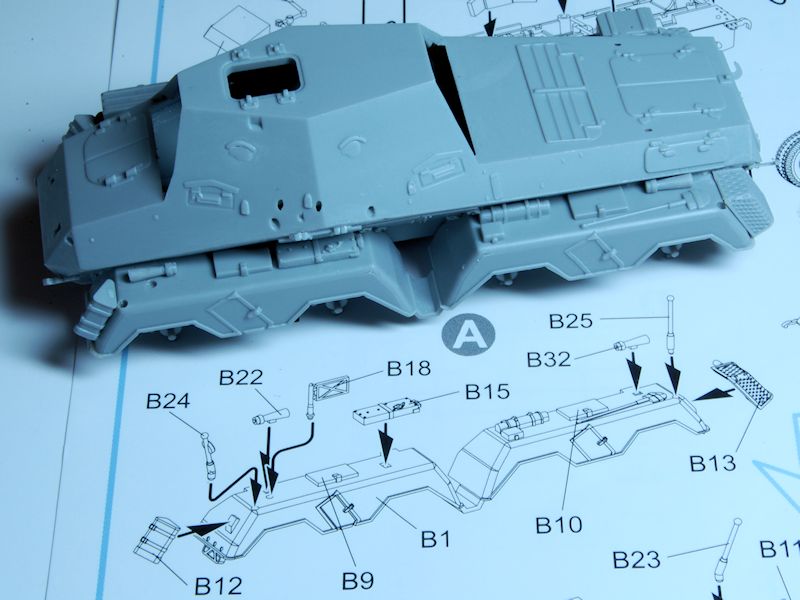
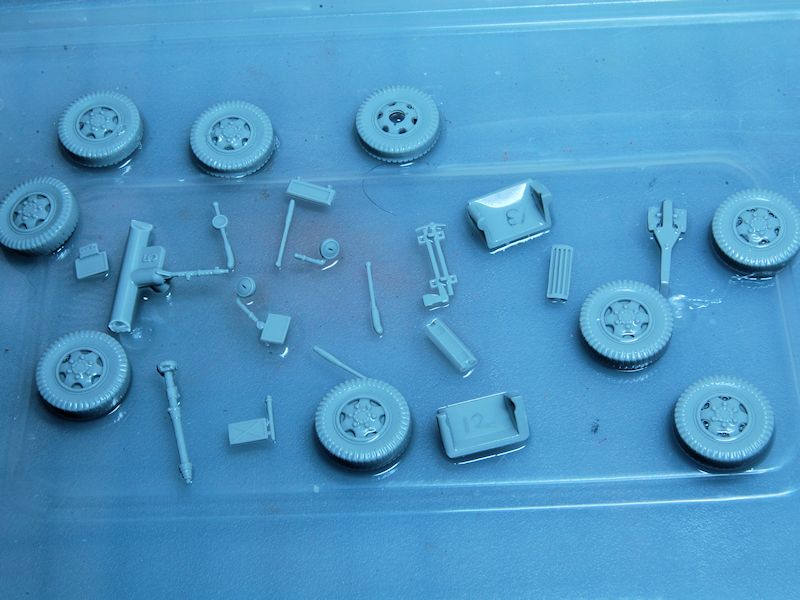
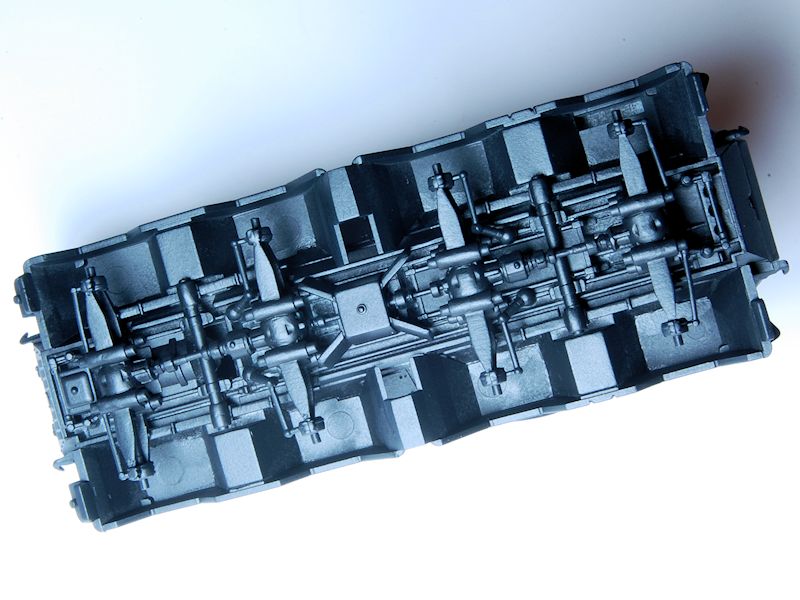
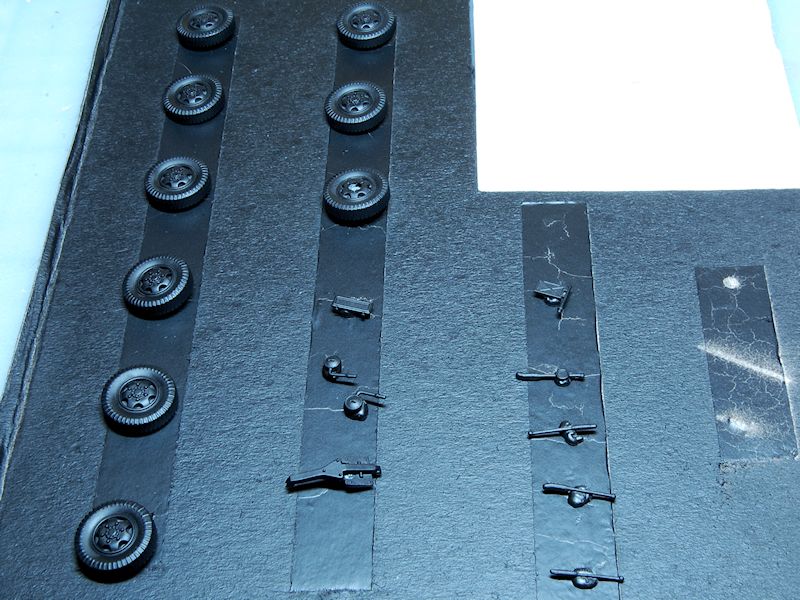
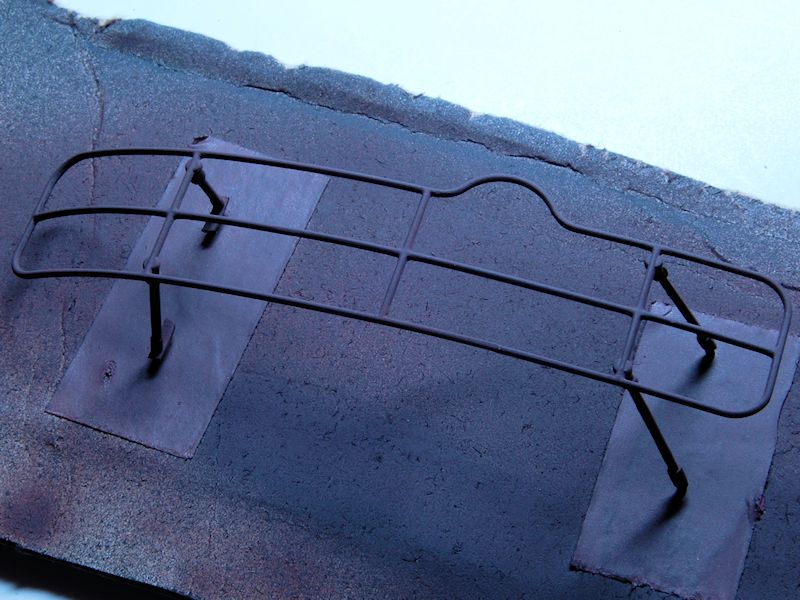
There are five sprues, plus upper and lower hulls, all individually bagged. This presentation of the hull bodies as standalone, unsprued parts in bags is very nice, meaning no attachment points to clean up. I have to single out the lower hull for special praise as possibly the most impressive individual component I have ever seen on a small scale kit, due to the cleanliness and depth of the slide moulded details. Sprues are as follows: A has most of the suspension components; B smaller suspension details plus the big mudguards; C the small hull details; D the frame aerial; F is the zusatzpanzer armour plus fuel cans. With G being the upper hull and H the lower, theres no sprue E.
The parts breakdown potentially allows many other 8-rad variants to be produced; Dragon have already released an Sd.Kfz.232 (item 7429) and I guess that sprues A, B, C, F as well as the lower hull are also present in that kit, with possibly just the upper hull and the aerial sprue being different. For our subject kit, in terms of Parts not for use, while no parts are actually shaded out in the instructions, I believe only the 2cm gun, C7, that is totally redundant.
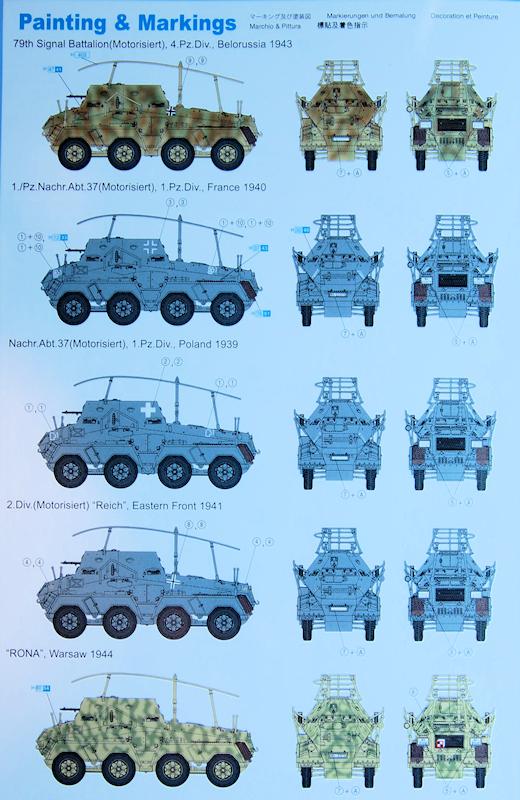
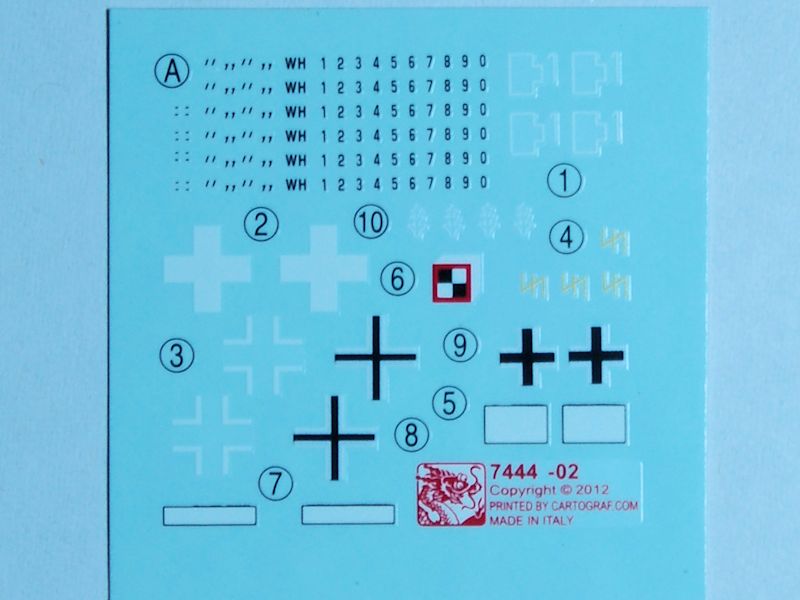
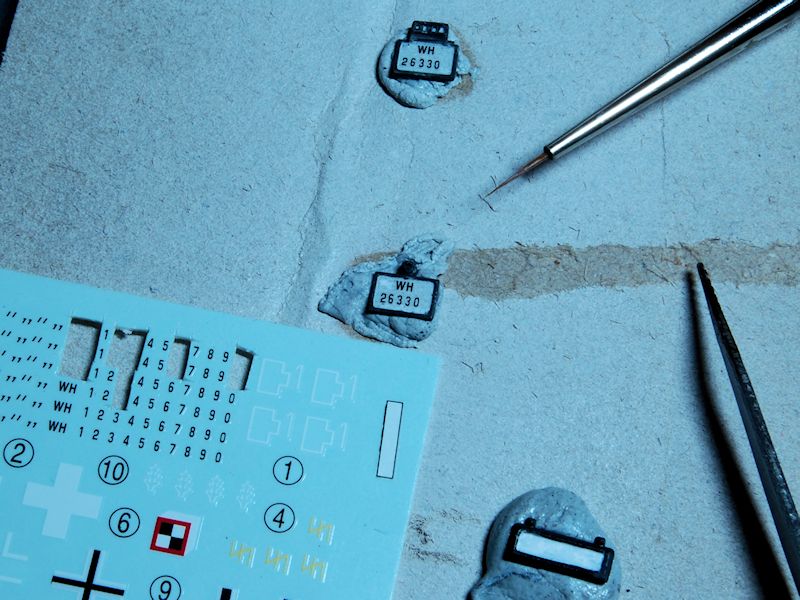
Decals and painting instructions for five different vehicles with four different Balkenkreuz are provided; although very helpful, I question if all of them can be created strictly accurately from this kit, particularly if the instructions are directly followed and no other references are used - more on that later. Note that number plate decals are individual letters, not complete plates, so, considering the need to produce three plates for this model, those not wanting that challenge may want to source ready-made one piece plate decals.
Building the kit
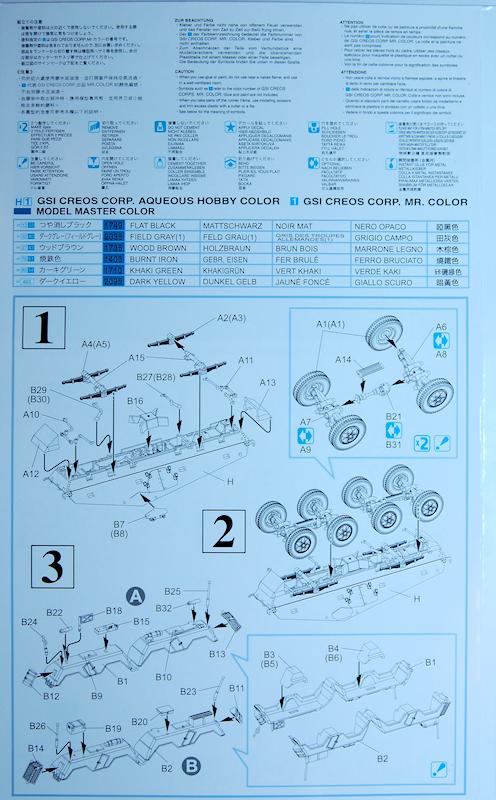
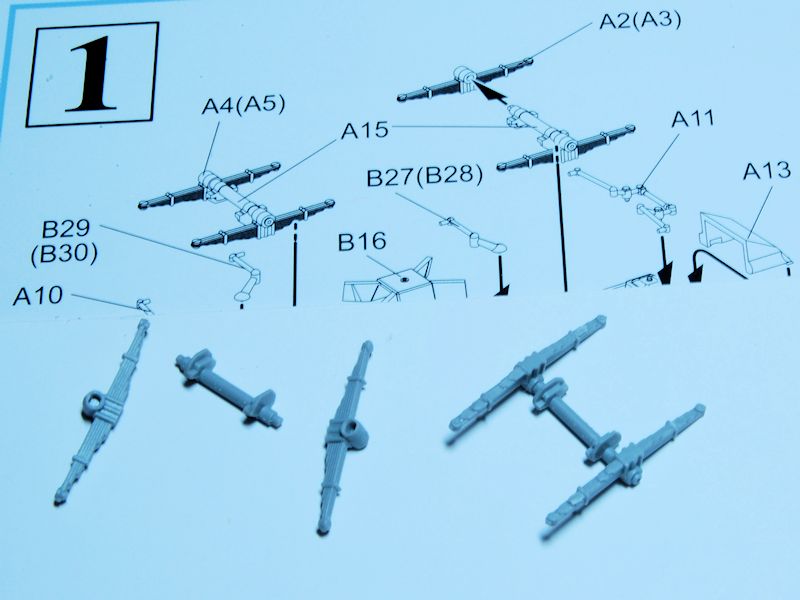
Step 1 Make up two pairs of leaf spring suspension units then attach them to the bottom of the lower hull. Add steering arms and the centre protective plate B16. I left A12 and A13 off at this stage so that they wouldnt obscure the ends of the suspension units when airbrushing; a tiny nitpick for rivet lovers is that the five bolts on each of these are moulded evenly spaced, when the centre three should be slightly closer together.
Straightforward but watch the part numbering: where parts are identical, it makes sense to me that they all have the same number, so theres no need to keep track of which piece is which. With the leaf springs, all identical, instructions label the pair on one side only, like this: A4(A5) and A2(A3), with the bracketed number being the spring on the opposite side. The steering arms are similarly labelled, B29(B30) and B27(B28), but this time the pairs are actually mirror images, not identical.
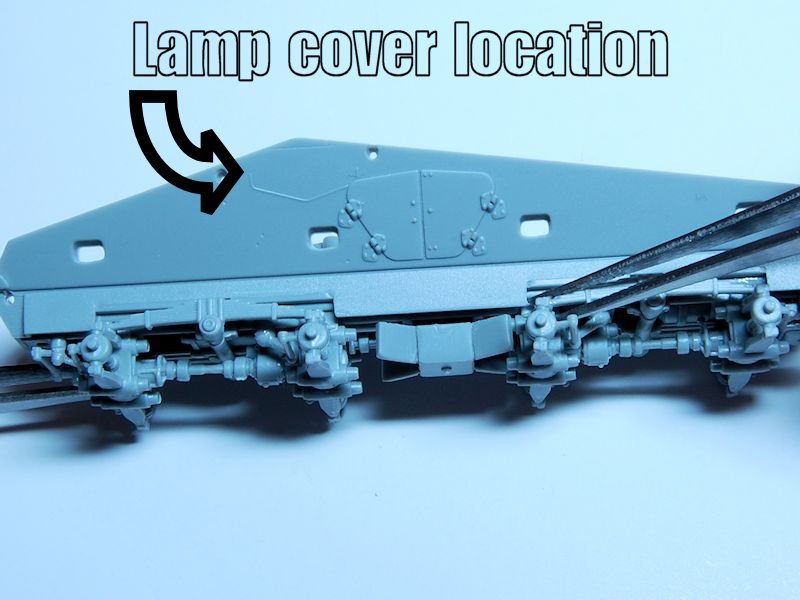
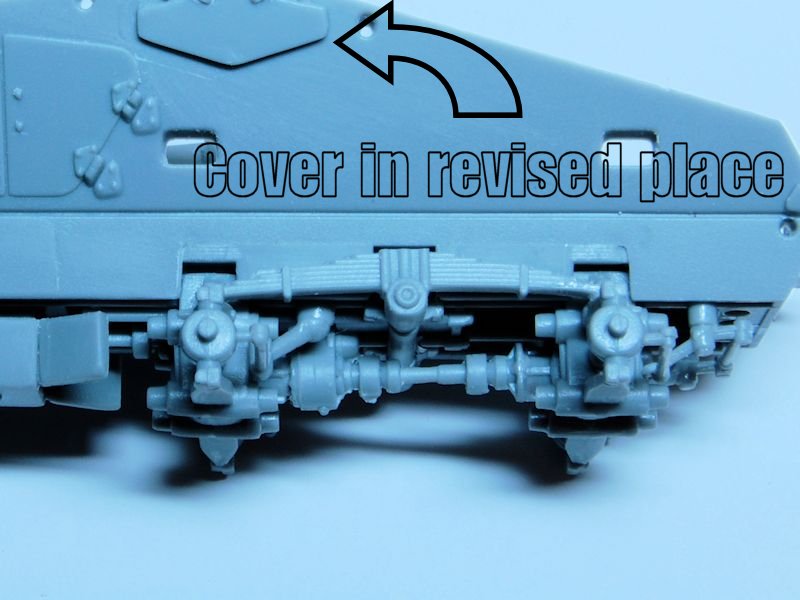
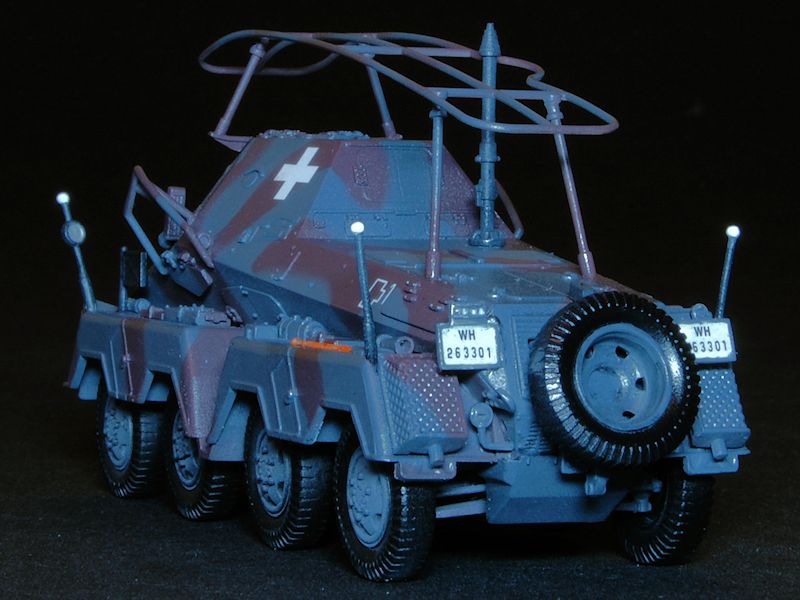
B7 and 8 are covers for the reversible lamp reflectors and their location is marked on the hull side with a small ridge; this is best removed as it positions the covers too near to the split crew access hatch. The hinges of them should sit right on the angled edge either side of the apex of the sloping lower hull plate - refer to a photo or even the box art, but not the painting guide. Being separate parts has the effect of making them stand out noticeably more from the body than the access hatches, while photos show that both should be similarly only very slightly proud of the plate they are set in to. This raises the issue of which version of the 263 the kit represents; according to Hilary Doyle and Thomas Jentz in Panzer Tracts no.13-2, this cover was deleted from May 1941, so if modelling a later vehicle you could leave the covers off completely, and just remove the locating marks. This is not shown as an option in the instructions, but may perhaps be the reason for these parts being separate.
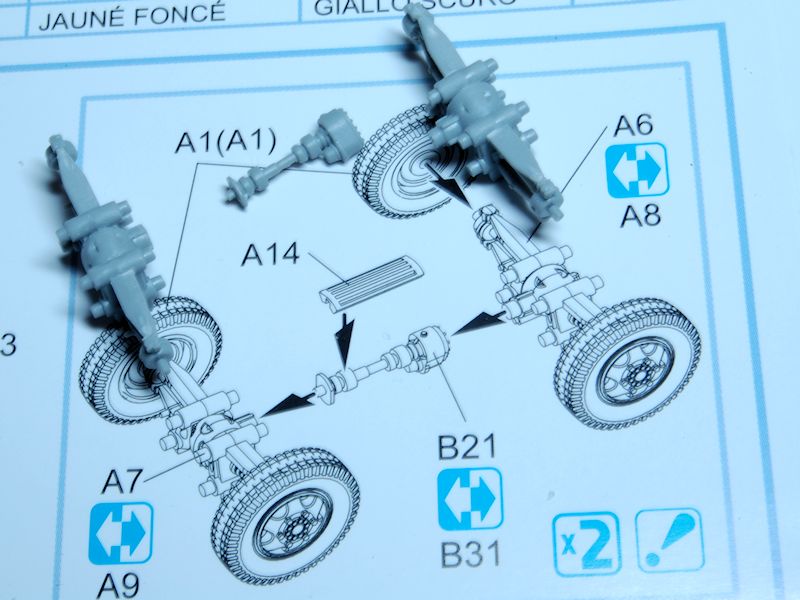
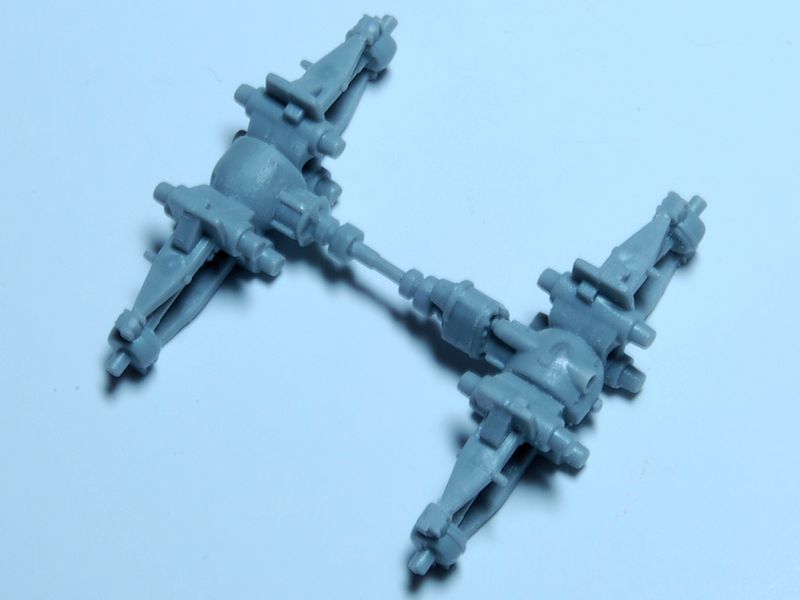
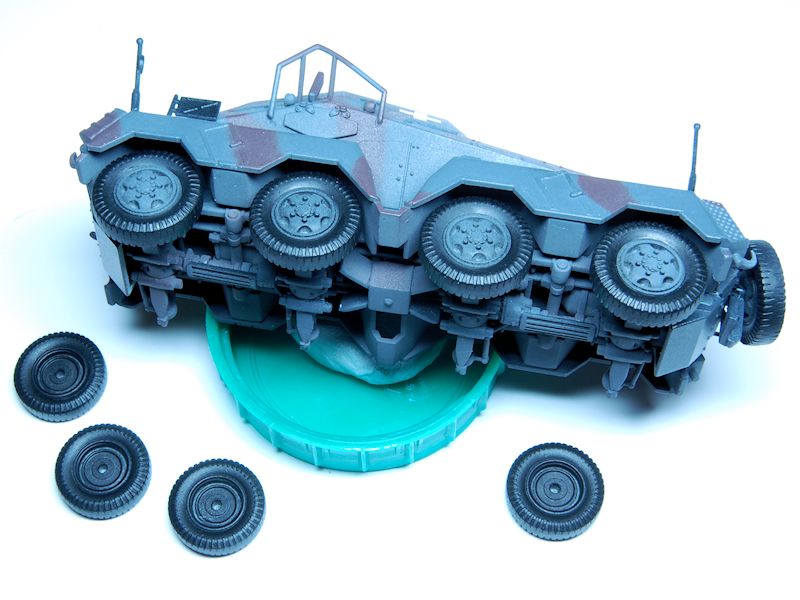
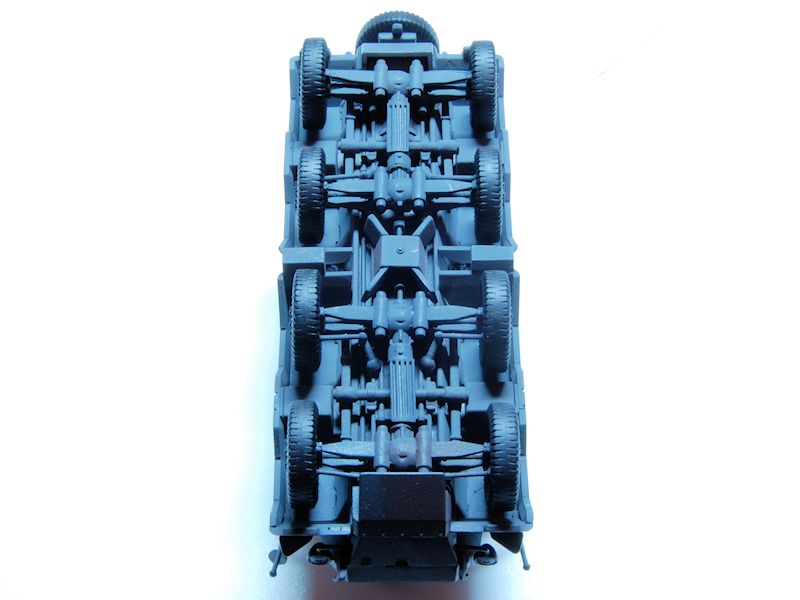
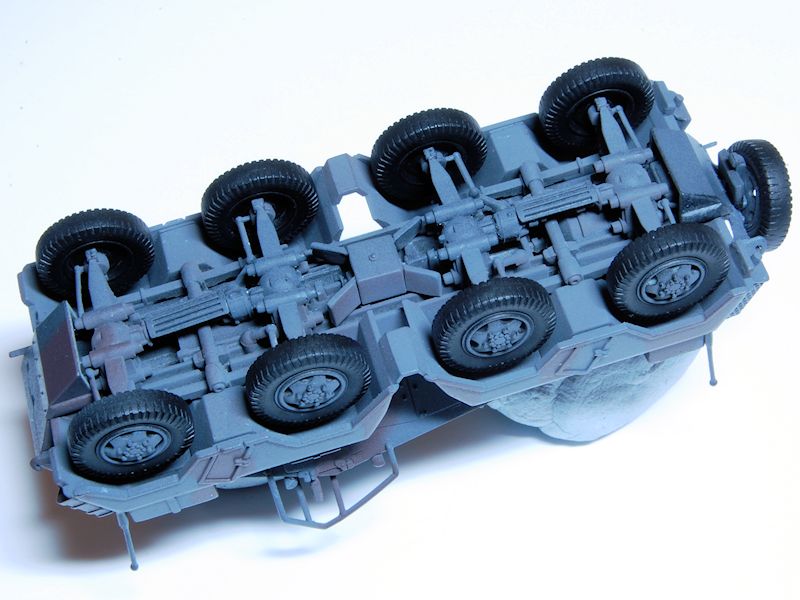
Step 2 Make two pairs of axles, each pair connected with a drive shaft. Some more odd instructions here as the Optional symbol is used for all of these parts, in addition to the x2 symbol; there is of course nothing optional about them, you need both - identical - sets. A protective cover (A14) then goes over each shaft, but I left these parts right to the end. Having given the axle units some time to set they are then mounted on to the hull. Location is nice and definite giving a strong and even mounting for the body on the wheels.
The leaf springs dont make any contact with the axle units, being dead straight, which doesnt seem right. The Panzer Tracts book has a great photo of a 263 in a workshop propped on axle stands with three wheels removed, and this confirms that, of course, the springs should curve slightly down to make contact with the axles. To achieve this I cemented each spring end in turn to its axle, keeping them in place with tweezers held closed with a clamp until set.
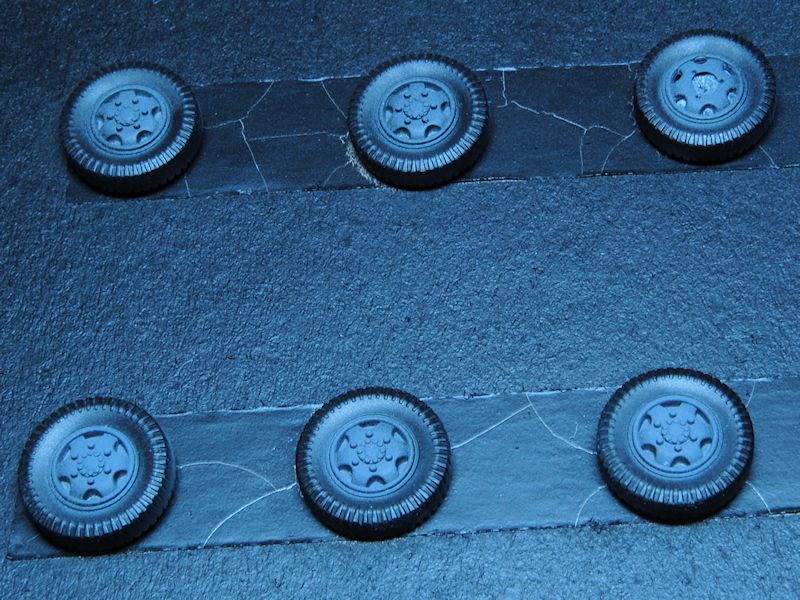
Note that I kept the wheels off until the end. Regarding the tyres, whichever reference photo I look at, I cant agree with Dragons claim to have produced wheels w/authentic tire tread pattern. Seems to have been at least a couple of tyre types in common use, one considerably more knobbly and off-road looking with far fewer, but bigger treads, the other more road tyre-like, but still with fewer treads that cut in at an angle compared to the kit tyres which have relatively unremarkable treads that cut in straight at the side but go nowhere near the centre of the tyre. This brought forth visions of locking up all eight wheels while overcooking it on a deceptive bend on a wet leaf-strewn country road at 50mph! Woo-hoo!
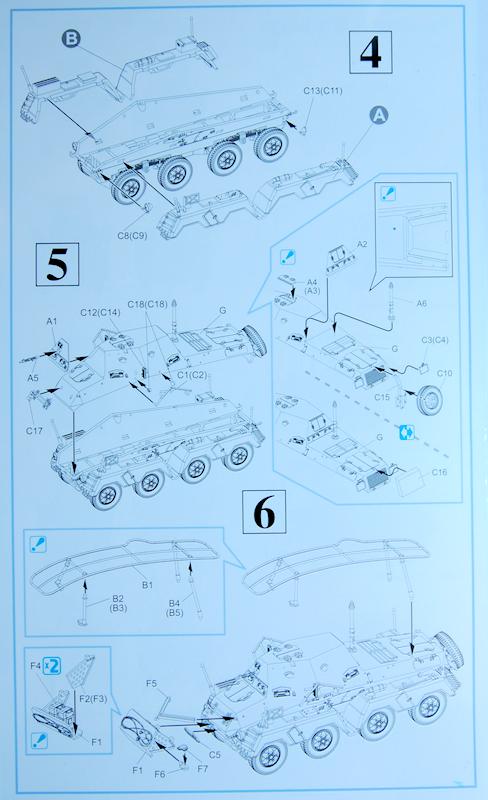
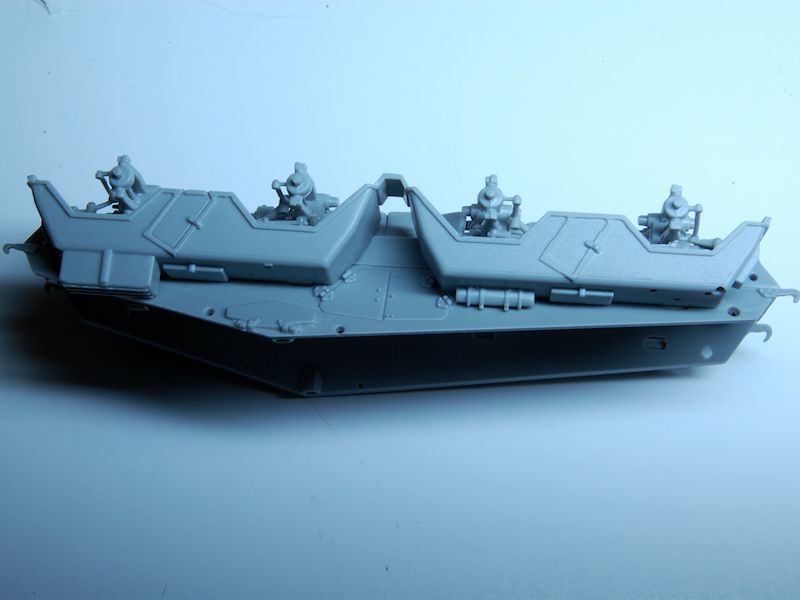
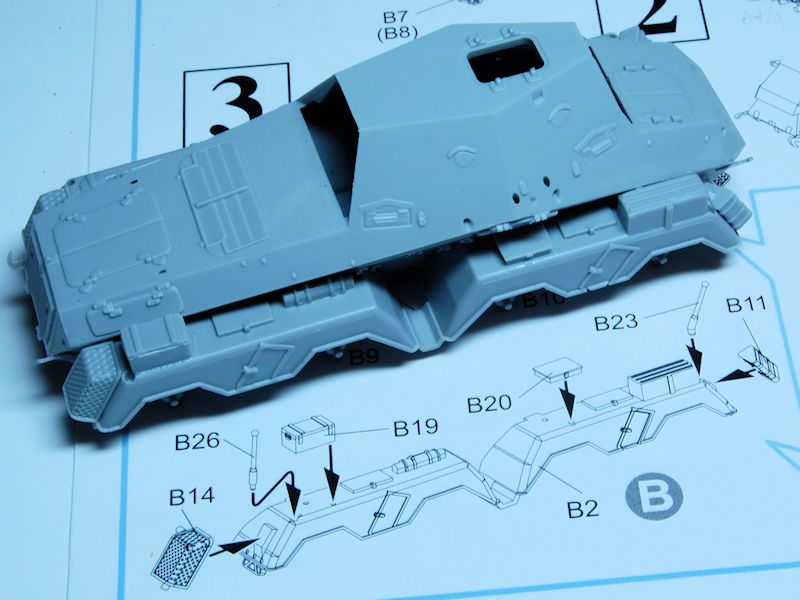
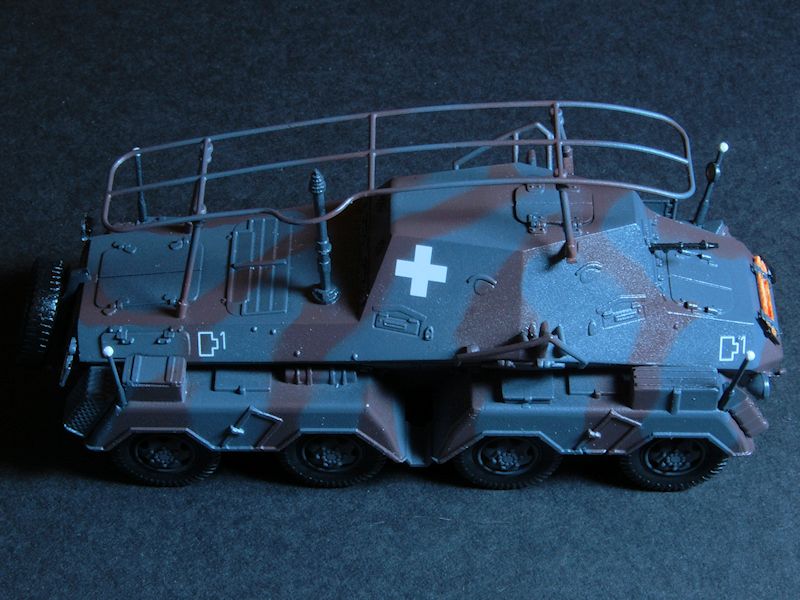
Step 3 A bit of odd ordering here as many small details are shown as added to the tops of the wheel arches first, prior to adding the big inner arches to the underside and before the whole assembly is added to the hull. At least the width indicators and the pennant holder should be held over to a later stage, in my case right at the very end. B22 (a horn) is shown fitted facing the wrong way, the opening should face forwards, i.e. away from its companion part B32, rather than the same way. Some reviews have wished that the exhaust covers, moulded to represent mesh, had been etched metal and for £19, some might have expected Dragon to oblige.
The detailing on the wheel guards mystifies in terms of how decisions were made as to which details are moulded on and which are separate parts; that big storage box on the right hand front fender, for example, is just a piece of additional stowage, but is moulded on, as are the fire extinguisher and shovel, both items that you might want to paint separately and which should be cylindrical in section, while B10 and 20, thin flat boxes, standard to this vehicle type, are pointlessly presented as separate parts.
B19, another storage box, is not a standard vehicle part so could be omitted, although it does serve to hide the locating holes on the wheel arch. In fact a shovel was factory fitted in this location, in symmetry with the one moulded on the other side.
B11 and 12 are, in section, unequal triangles; the instructions show them fitted with the long edge of the triangle outermost, while photos clearly show the short edge outermost, but its no problem to swap them over. They should, strictly, be hollow in section, though Ive no idea what they are.
B18 is a pennant holder, an item that stopped being fitted after 1939, and is presented as a solid rather than a see-through piece; its another part that could be improved with etched metal.
Step 4 I recommend in this step that at least the rear lamps are fitted before the wheel arches are attached; I thought Id leave them off for painting purposes, but found adding the rear lamps right at the end very difficult. Actually thats an understatement, it was impossible and I ended up creating new brackets for them, although it did seem to me that the kit brackets are the wrong shape, positioning the lamps too low, when they should be tucked up higher, almost against the number plates. This kind of problem is of course caused by having crystal clear photos of the real thing in the Panzer Tracts book serves me right!
The front mudguard extensions I think were actually rubber mud flaps, but Im not sure what the kits big textured pattern is for, nor why the left hand one has four big rivets while the right side has none four tiny rivets would be more correct.
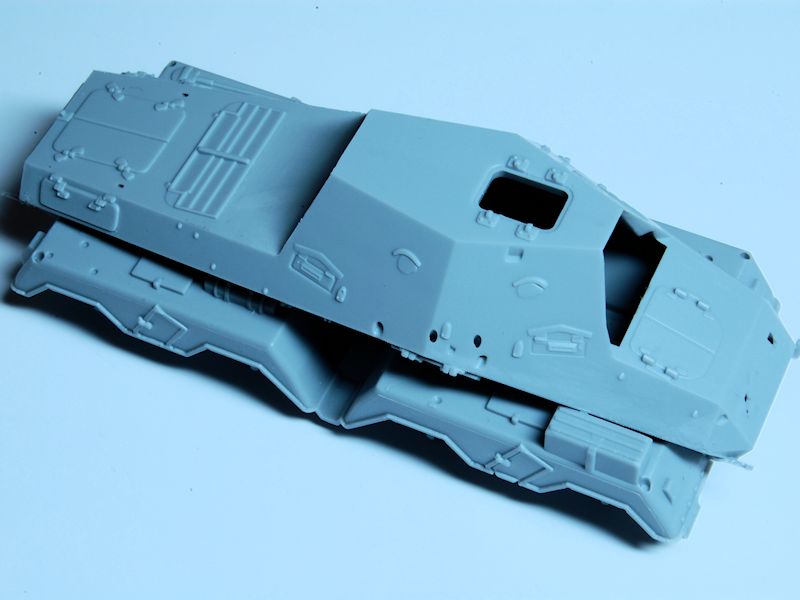
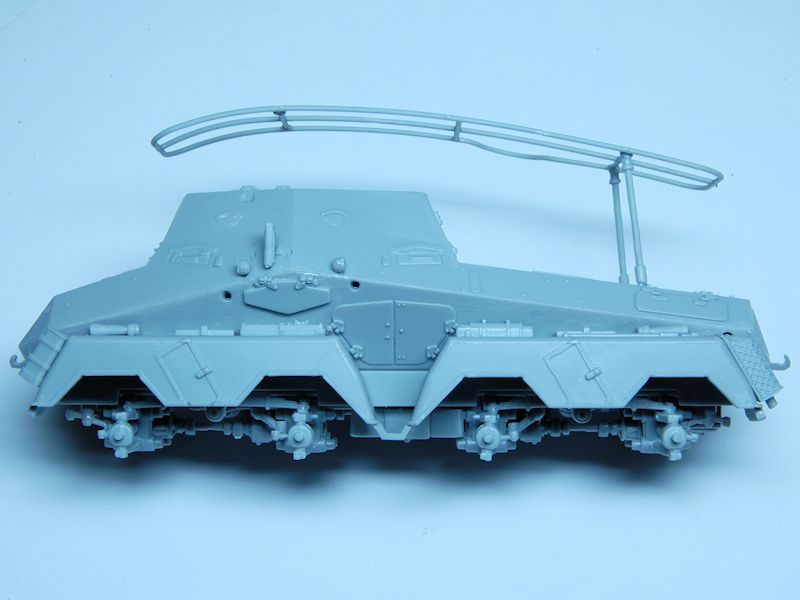
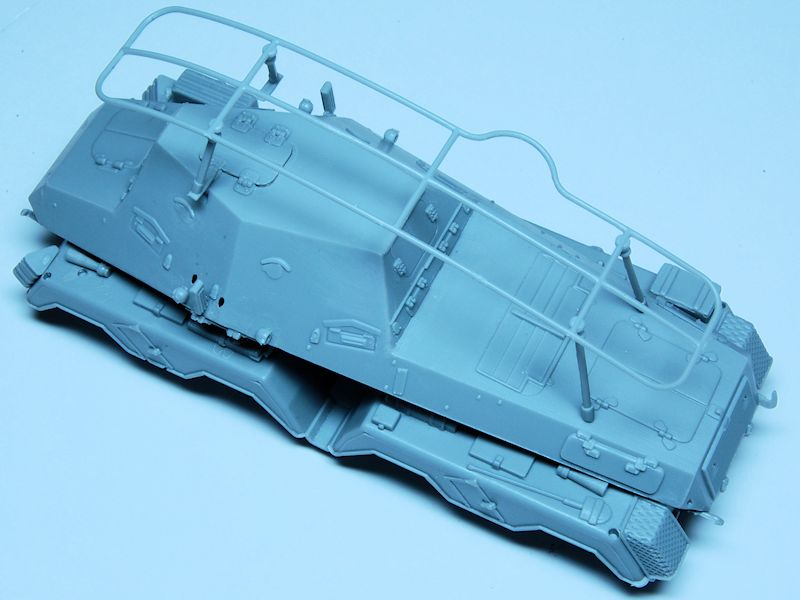
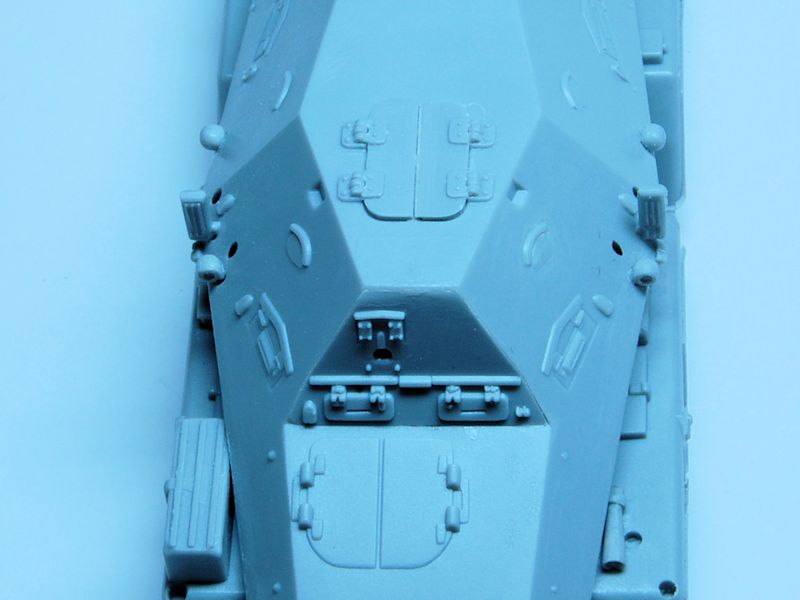
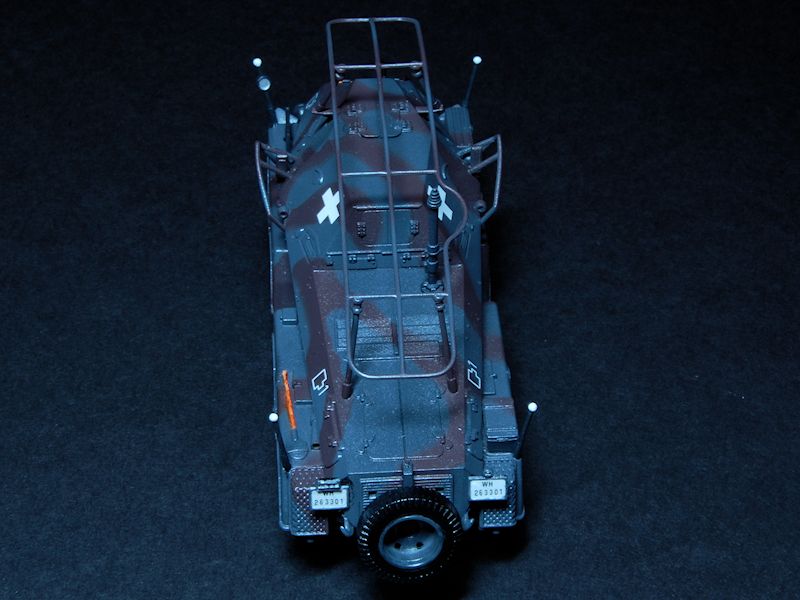
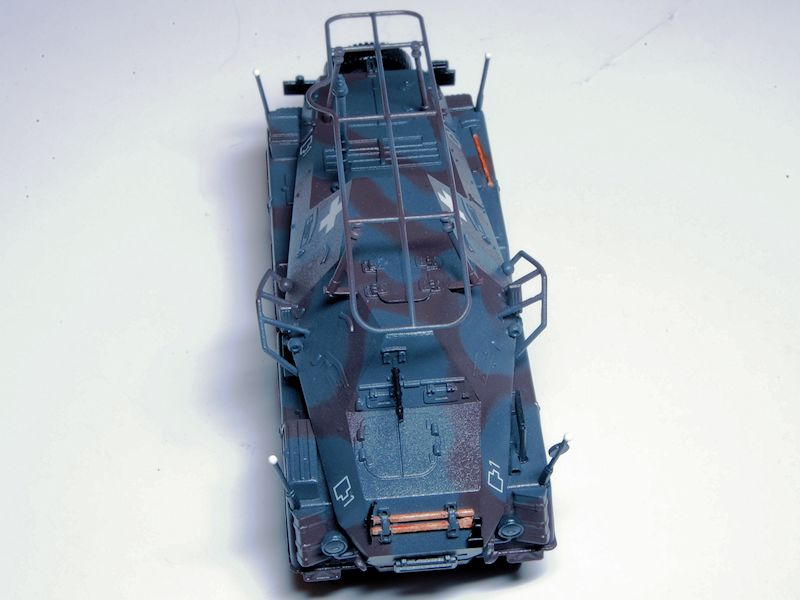
Step 5 Adding the upper hull superstructure, it fits more or less perfectly, with no gaps along the big lateral joints. Actually, photos of the real thing show that the upper side plates slightly overlap the lower, the resulting shadow being the reason for the very sharp and distinctive line; unfortunately you dont really get this effect on the finished model, where the exact join between upper and lower hull is all too obvious. I found the one part of the kit that didnt fit perfectly, for me anyway, was A1, the front plate of the crew compartment, requiring a small amount of filler along the top edge. The blurb on the Dragon website states that the split hatch on the roof can be assembled open or closed; well, theres no detail on the underside of the part, no detail inside, and no figure with which to plug the hole, but if the modeller can furnish any of those things themselves then the opening hatch is a useful design feature.
This step has a couple of options at the back of the vehicle: either the spare wheel mounted on a rack (the real thing unhooked from the hull top and hinged down to the ground) or an armoured cowl that protects the rear grille. This raised more questions about kit design and vehicle versions: photos, particularly of early versions, 1937 1940, show few carrying a spare wheel in this position, and have just the exposed grille with no cowl. Unfortunately two enormous locating holes have been pointlessly moulded into the grille for the cowl to locate on to, so that leaving both cowl and spare wheel off is not really an option. Oddly, the painting diagrams show neither of these in place, but just the exposed grille!
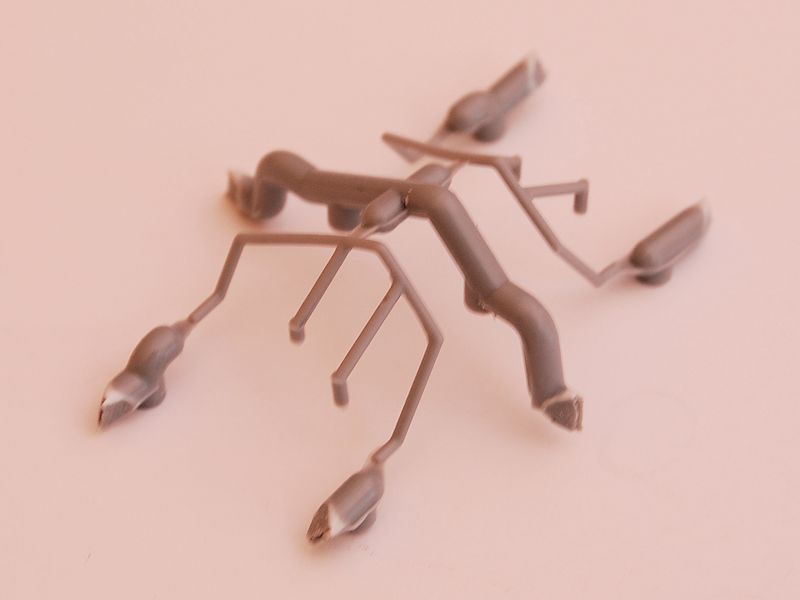
C18, the indicator lamps, are very tiny and need care to handle, and did make me wonder why the sprue attachment point is on the rounded outer side of the lamp body rather than on the stem end. Tortuous clean up.
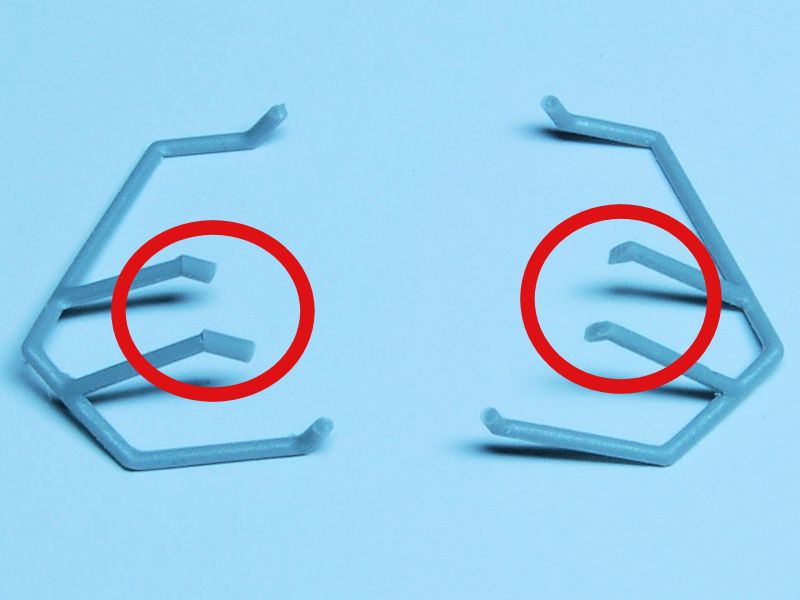
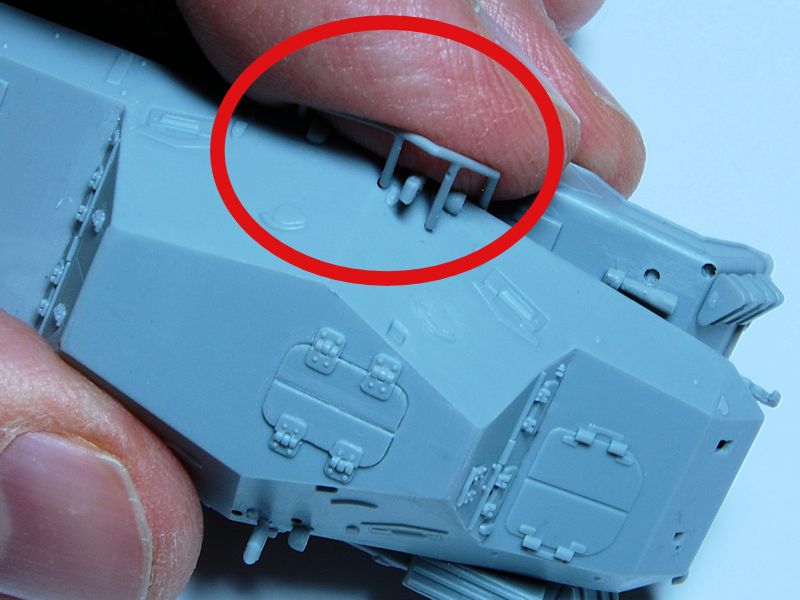
C1 and 2 are the indicator guard bars, a feature of 1939 on examples. I gave these a fair bit of reshaping at the mounting points in order to fit into the mounting holes, something that is visible in the comparison photo. These are really quite oversized in terms of bar thickness and how far they protrude from the vehicle, but nevertheless they do provide a distinctive and interesting look.
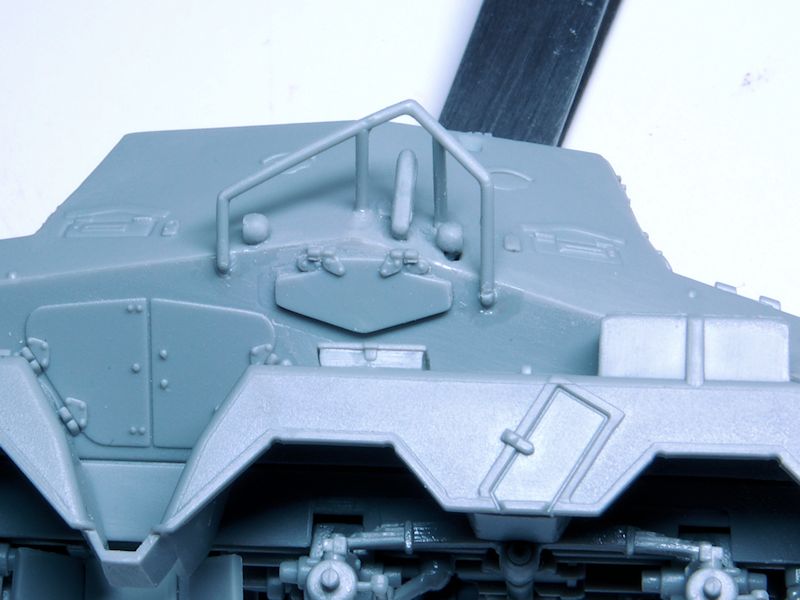
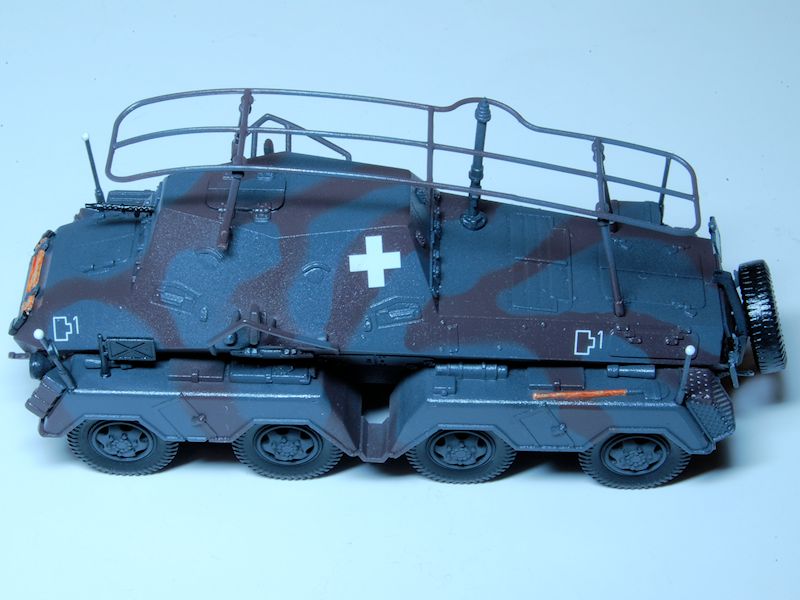
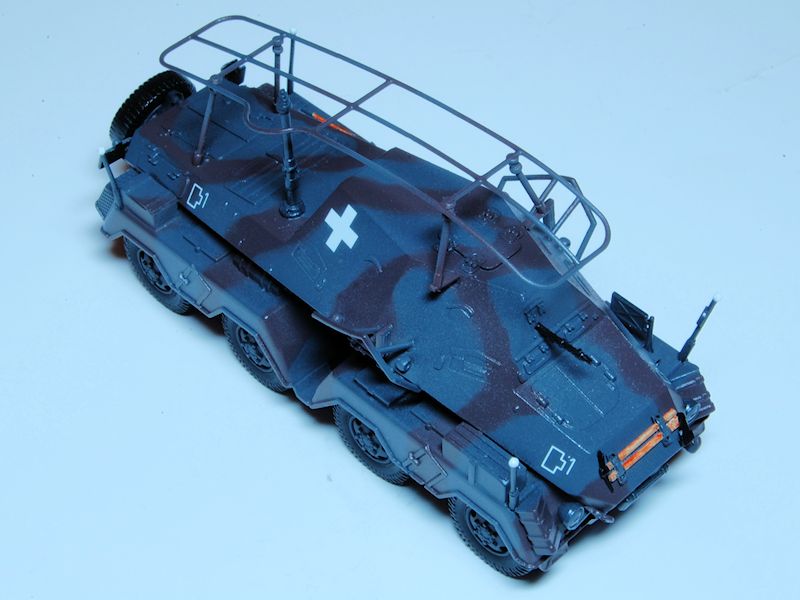
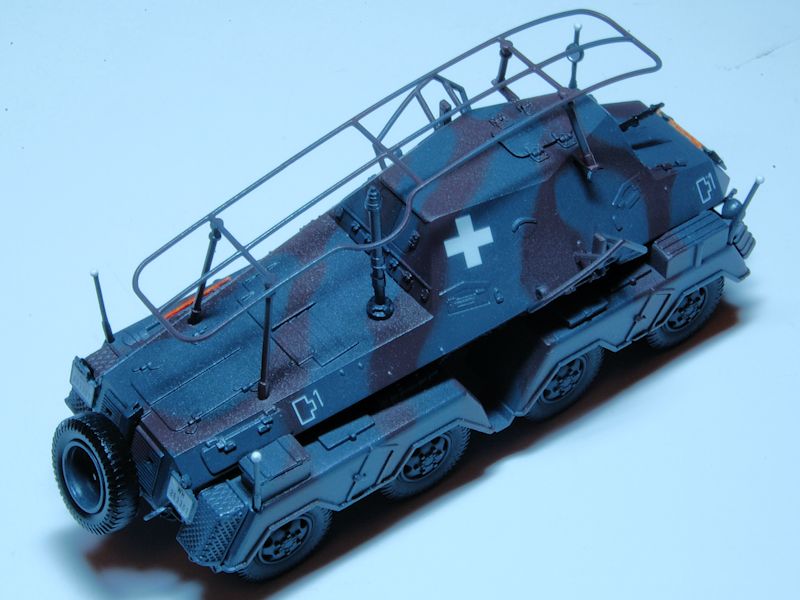
Step 6 The frame aerial also fits perfectly; in order to ensure alignment of the supports I attached the rear, B4 and 5, first and dry located them into the slots on the hull, and left it to set, then added the front supports and dry located it again to line everything up. As with various other features, the frame aerial is something that varies between early and later versions; 1937 versions have supports that are vertical, while 1938 on examples have the supports angled in both directions, mounted a little wider on the vehicle body.
The other part of 6 is the Zusatzpanzer (additional armour) that attaches to the nose. This could also be optional, as it was factory fitted to later vehicles though also retrofitted perhaps in the field to some earlier vehicles. Photos do suggest that it was relatively rare on 263s, though Panzer Tracts does have one photo of an early vehicle, complete with both pennant holder and retrofitted Zusatzpanzer. Similarly to the rear grille, if you want to leave this armour off youll need to fill four locating holes in the hull. Again, the painting diagrams show the vehicle without this add-on armour. The front number plate is also affected by all this: there is a central locating hole (again, pointless) in the front hull nose for the number plate, but if using the armour then the number would, I believe, be painted on. If leaving the armour off, and so using the number plate part, note that it should sit vertically, so that there is a gap between it and the hull on the underside, rather than flush on to the hull; the mounting point on the plate itself doesnt really help with this, and I had to add a small piece of rod under the plate to do it. A final point on the Zusatzpanzer is that the Notek light is mounted on it; if youre representing an early / pre-war vehicle, I say just leave it off; plenty of photos show these vehicles without them.
Painting and decals
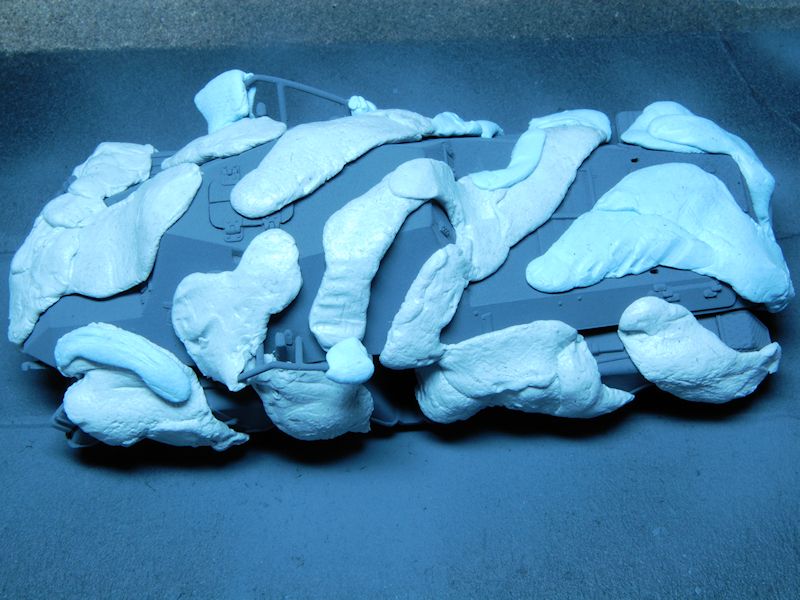
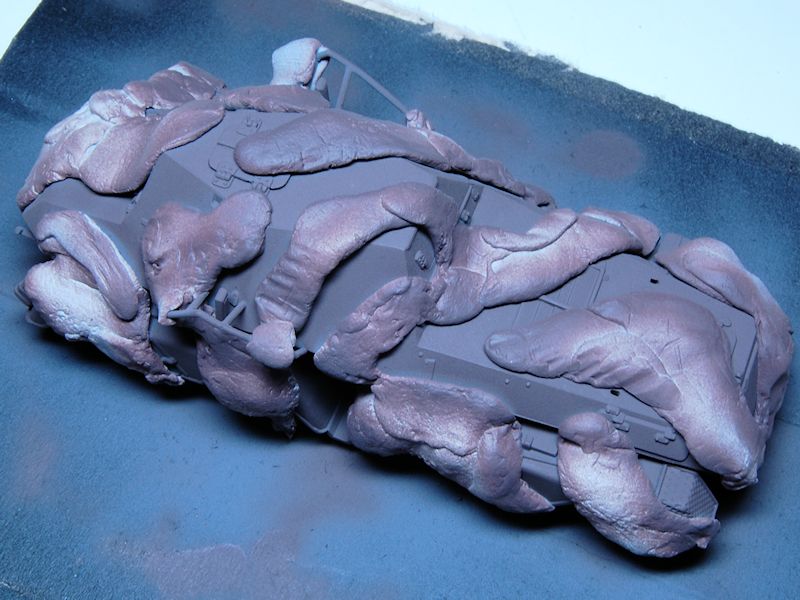
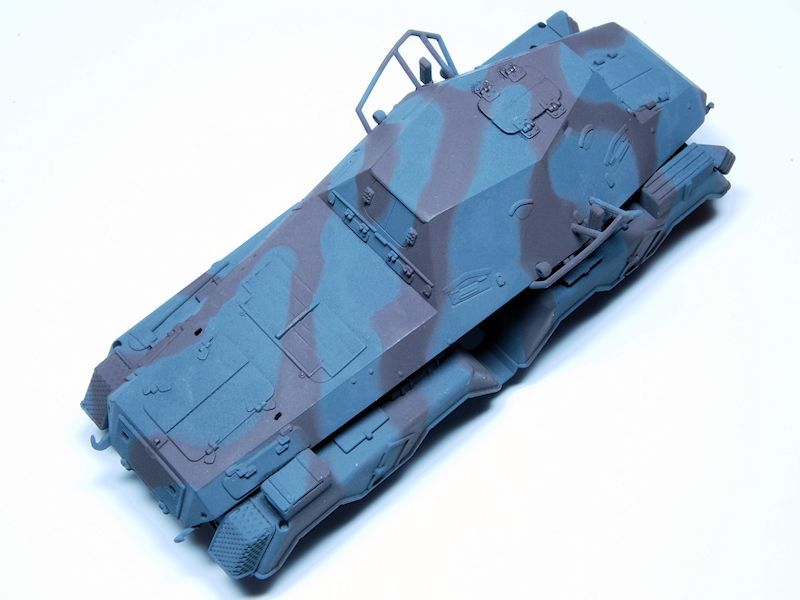
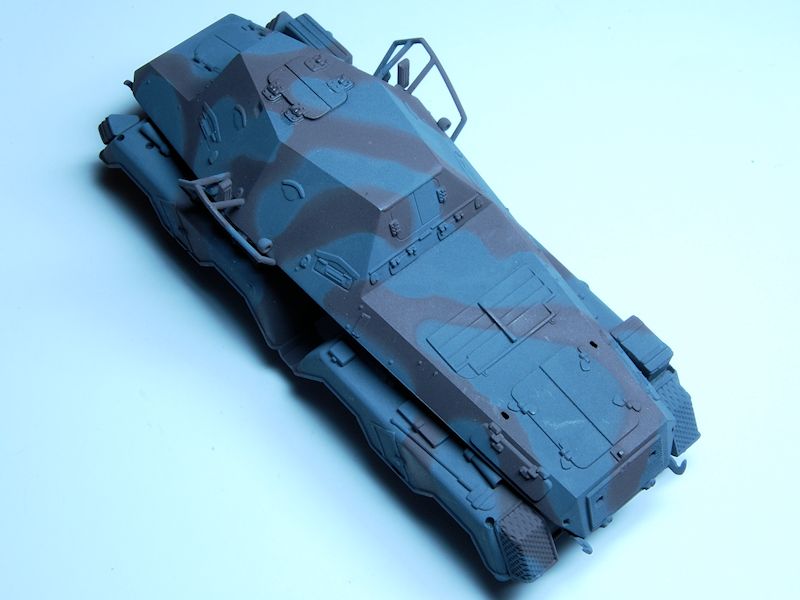
As can be seen from the photos, quite a number of parts were left unassembled while painting commenced, but so as to show you the vehicle completed, I did a fairly quick paint job that could at least allow final assembly to be done and provide the basis for weathering and paint effects later if so desired. I used black acrylic car primer, followed by Tamiya dark grey XF-24, masking the tyres off to speed things up. If youve followed what Ive said above about the different versions of this vehicle, you may see that I have chosen to model it as one of the earlier models, just pre-September 1939, and so wanted to show it as per one of the photos in the Panzer Tracts book, with 2/3rds Dunkelgrau RAL46 and 1/3 Dunkelbraun RAL45. For the brown I started with Tamiya Flat Brown XF-25 and mixed in Sand Yellow XF1 until it looked close to RAL45 samples I found on the web. Blu-tack was used as a mask.
Gloss varnish, decals, then more varnish was applied; the Balkenkreuz used were the plain white Polish campaign type. Wheels and details such as width indicators, pennant holder, aerials, number plates were all added and a touch of paint was applied to a few of them. No weathering or matting down was done, so please excuse the shininess. At this final stage I made a stupid mistake and attached the tools to the front the wrong way around at some point I will fix it. Note that there is yet another pair of large holes for these tools, rather unnecessarily, right through the nose of the vehicle. Small pins might have been better.
Conclusion
With the width indicators, two aerials, guard frames, all those wheels and its rather high profile it certainly produces an impressive looking model and I have to say I love its ugliness. The kit fits together very well and parts need only minimal clean up, thus it is a pleasure to build. Modellers with a little ambition could improve it simply by creating finer guards and width indicators. The suspension and lower hull are particularly impressive in terms of detailing and accuracy of fit: all eight wheels sat on the ground with no particular effort on my part and the assembly is all nice and rigid and the parts strong.
As already discussed, a few odd design decisions were made regarding details, similar to something that Ive seen mentioned in a recent review of another Dragon 1/72 kit on this site. Then there is the slight frustration that all marks of this vehicle seem to have been consolidated rather innaccurately in to a single model, although as I've hinted at, it is possible to tease these out into the different versions by using the kit parts, a little effort, and a decent set of references, although some of the big locating holes in the body dont help matters.
A very decently engineered kit then, let down a little by some odd design decision making. Finally it's not cheap for an 8.5cm long model of 48 parts.
References
Panzer Tracts No.13-2 Schwerer Panzerspaehwagen (Sd.Kfz.231, 232, & 233) and Panzerfunkwagen (Sd.Kfz.263)by Thomas L Jentz and Hilary Doyle
Squadron / Signal Amor No.4 Panzerspähwagen In Action
German Armoured Cars of WW2 by John Milsom and Peter Chamberlain (A&AP, out of print)
SUMMARY
Highs: Chassis and suspension one of the best small scale efforts I've seen. Great parts fit. Impressive looking model when built.Lows: Ambiguities about exact version represented. Some options and details could have been better thought out and presented. Pricey for a small model.Verdict: A beautiful little kit in many ways, but with a few odd weaknesses that perhaps could have been avoided, especially at the price.
Our Thanks to Dragon USA! This item was provided by them for the purpose of having it reviewed on this KitMaker Network site. If you would like your kit, book, or product reviewed, please contact us.
About Matthew Lenton (firstcircle) FROM: ENGLAND - SOUTH EAST, UNITED KINGDOM
Earliest model memory is a Super Sabre my grandmother bought for me around 1972. Have always dabbled in painting and making things, and rediscovered doing that with plastic in 2008. Vowed then to complete the 30 year old stash, and have made some progress. Hobby goes hand in hand with BBC Radio 3...
Matthew,
An exhaustively detailed and informative review. Having recently been the recipient of this kit, the review could not have come at a more appropriate time. Thanks to Armorama and your efforts I shall now know where to look when the time comes to build mine. Please also be forewarned that I may drop by this thread in the future with any queries that might arise.
Cheers,
Jan
A very good and informative review and my thanks to people like you for doing them. I've seen this kit and a somewhat similar cousin (234 or something) and thought about getting it. There's something interesting about it's looks but thanks to this review I might hold off getting it until my skills sharpen a bit.
Regards,
AJ


Comments