Introduction
In recent years we have become accustomed to different manufacturers releasing the same model at the same time. I recall both Academy and AFV Club with their M18 Hellcats; SdKfz 251s from Dragon and AFV Club; Strykers/Marder IIIHs/PaK40s; Panzer 1s and Panzer 4s from Tristar and Dragon. More recently we have had a spate of 17-Pounder and 25-Pounder artillery pieces from Bronco and Dragon and Valentines from MiniArt and AFV Club. The list is endless.
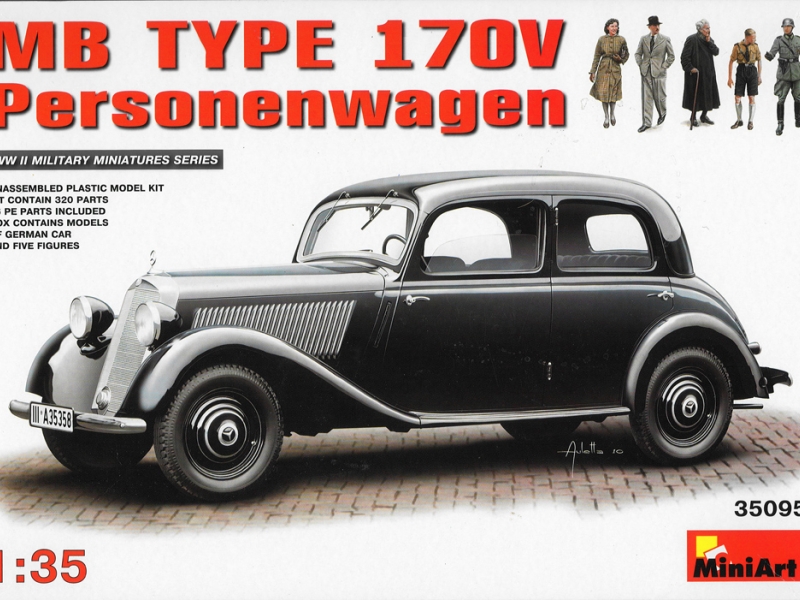
What is unusual is that a humble saloon car is now getting the same treatment from two different companies: the German pre-war Mercedes 170V has come in for a lot of attention from both Master Box and MiniArt.
The saving grace here is that, so far, though there have been numerous versions released, none of them are duplicates as of yet. I have already reviewed two different cars from Master Box:
the 170V Polizeikübelsitzwagen, and
the 170V Tourenwagen. Soon to be released from Master Box is a
Kfz1 Type 170VK, which is the genuine militarised four-door staff-car version; and also its
radio car variant.
With three other versions of the Mercedes-Benz 170V available (or shortly to be released) from MiniArt, fans of this particular car are currently very spoilt for choice. MiniArts versions are a Personenwagen saloon car, an open top Cabriolet B and a Cabrio saloon.
This review will deal with the MiniArt MB Type 170V Personenwagen saloon car, and it will be interesting to see how the two model companies have dealt with the same basic car, though in different versions. Neither company has mentioned Mercedes-Benz on their box arts or instructions as this avoids any licensing problems with the real car manufacturers name.
Background
The history of the Type 170V started in 1931 when Mercedes-Benz, famous for its luxury cars, decided to build an economy class car. They showed their first Type 170 car at the Paris exhibition that year, and the public accepted the car. By 1938, it had become very popular. The car had many technical features ahead of its time: Mercedes-Benz released the 170V with different body types, from traditional sedan to quite extreme roadster, all meant to please the civilian market. The car was widely exported, and those variants had quite visible external variations, such as different bumpers, lights, etc.
The success of the car attracted the attention of the armed forces, since the German military and their highly mechanised army required staff cars. However, a dramatic shortage of vehicles forced a call-up of many civilian autos. The Mercedes-Benz 170V was not really appropriate to the role of the soldier: its rear-wheel drive and low ground clearance restricted its use away from normal roads. However, the high quality of construction, high reliability and simplicity of operation made 170 series very popular with the army in spite of these limitations. As a result, all versions of the 170, without exception, served in all types of units of the German armed forces. Even purely civilian 170Vs were purchased willingly by the military departments, and Daimler-Benz developed four versions intended exclusively for the army and police and therefore never sold on the civilian market.
The Kit
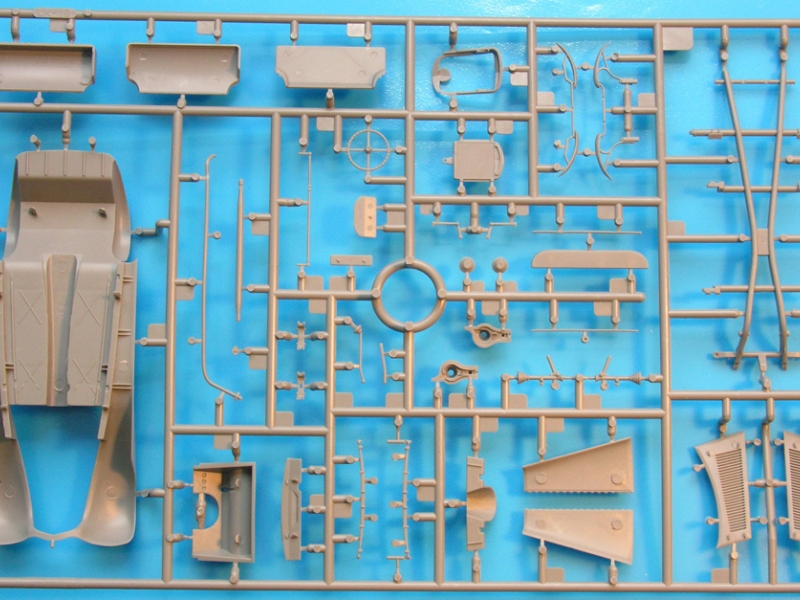
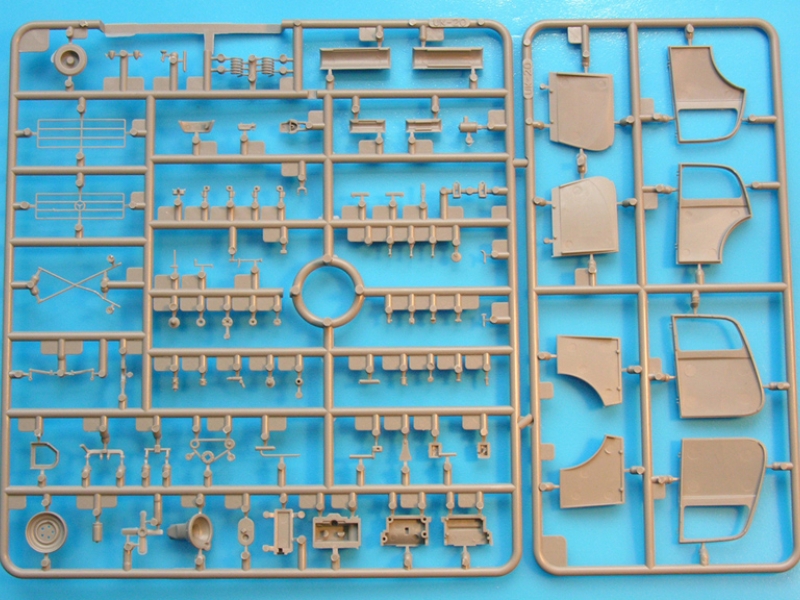
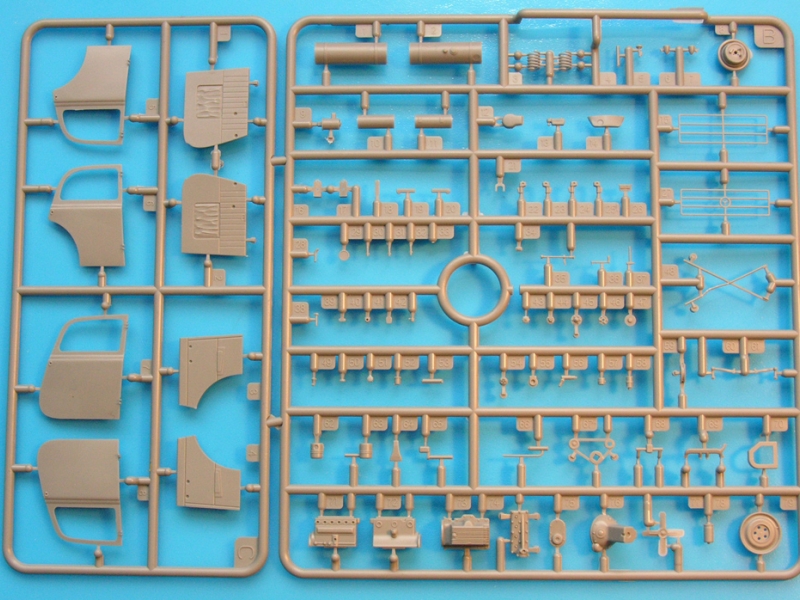
Upon opening the box you are presented with three cellophane bags containing the parts. The body shell had slight damage to the windscreen pillars during shipment., but MiniArt were very good and replaced it quickly. The second bag contains clear parts for the windows, a photo-etch fret and the decals, while a third bag contains five sprues with the bulk of the parts.
The contents are:
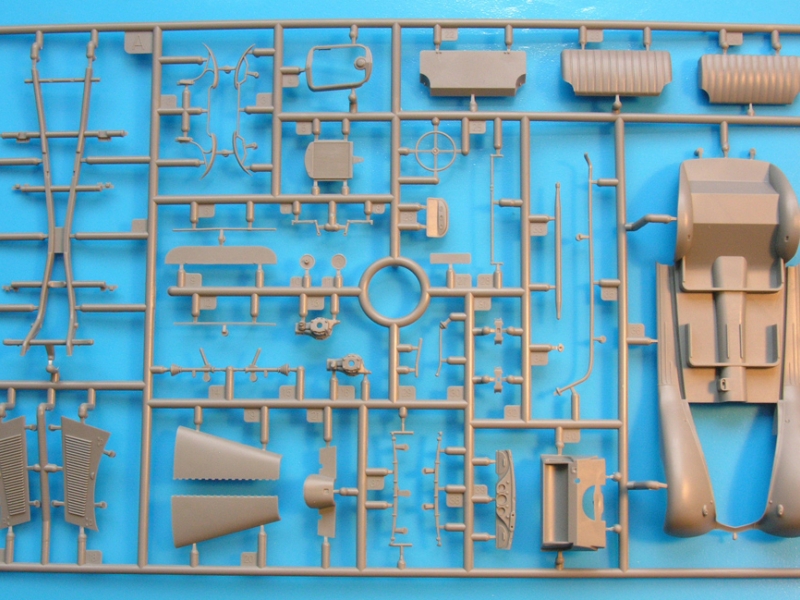
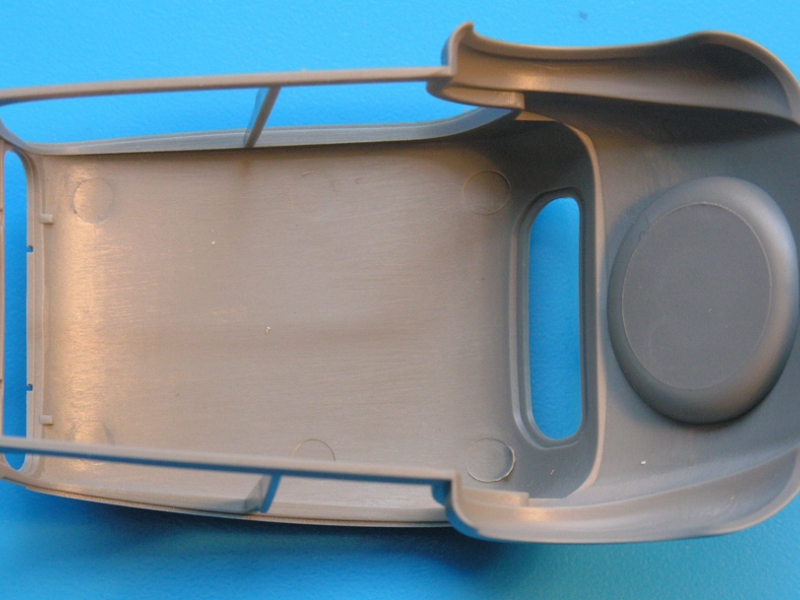
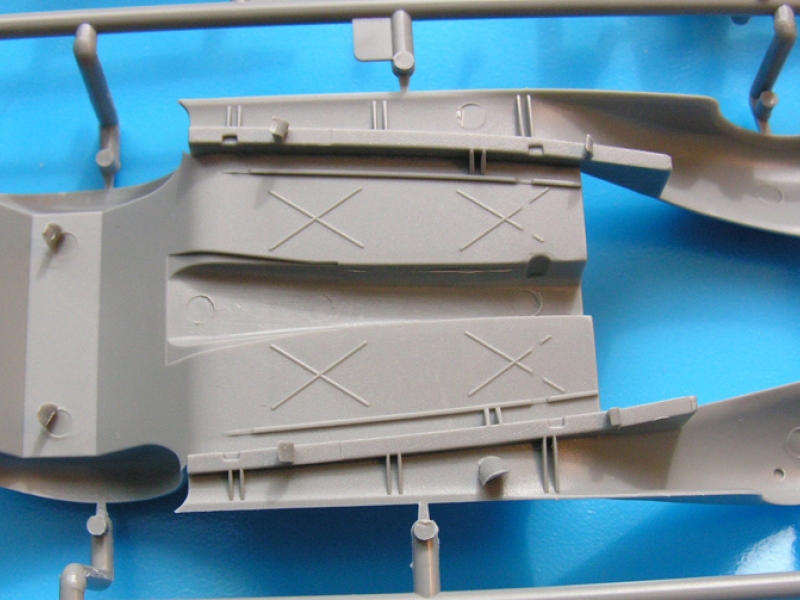
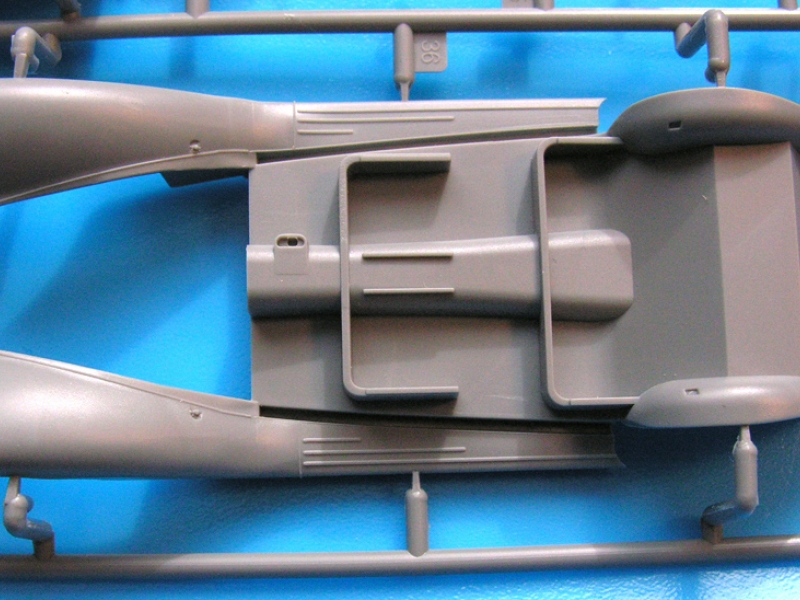
Sprue A - chassis, floorpan, seat bases dashboard, engine bulkhead, bonnet panels, radiator and housing, exhaust, steering wheel, bumpers, suspension and transmission components.
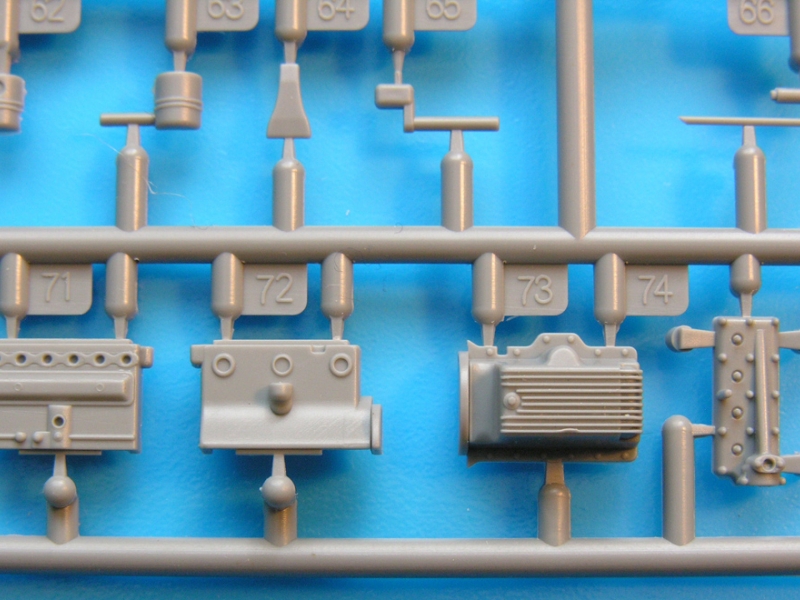
Sprue B - engine components, optional luggage rack, fuel tank, coil springs. This is joined to:
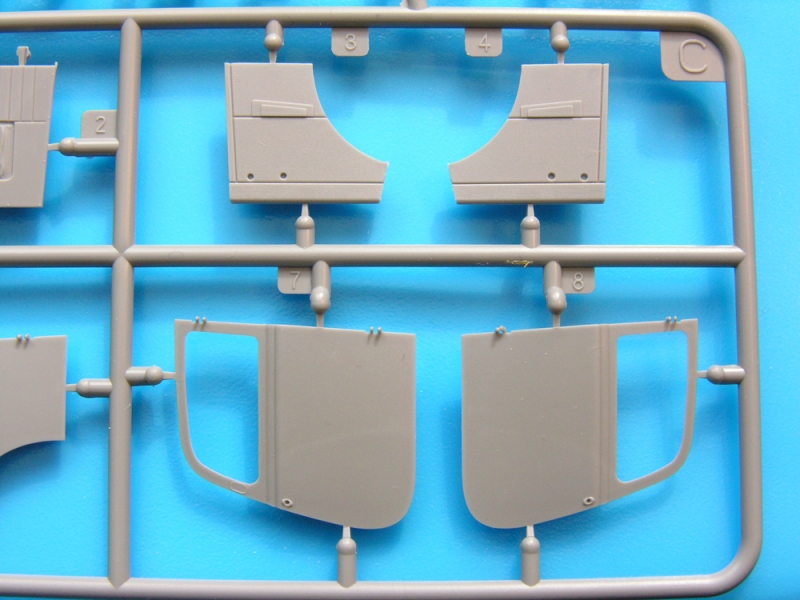
Sprue C doors
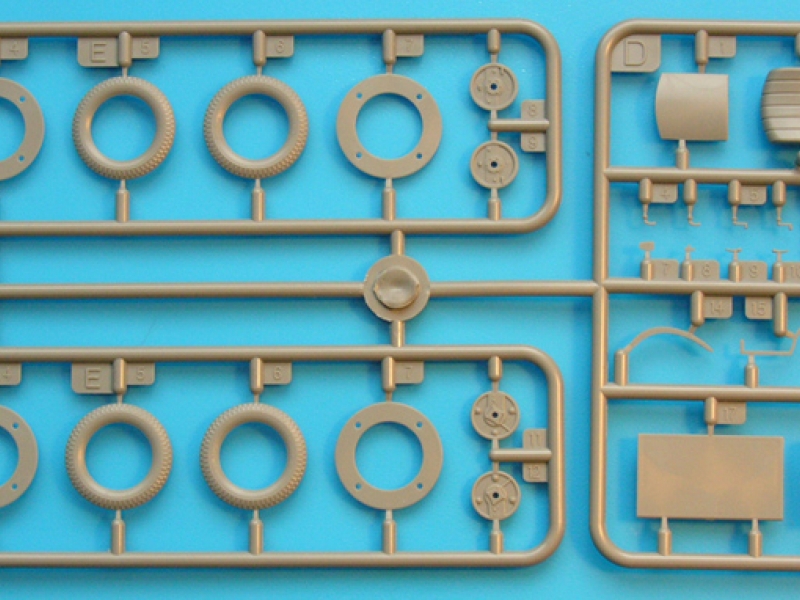
Sprue D (2 off) - seat backs, door handles, headlight shell, luggage box.
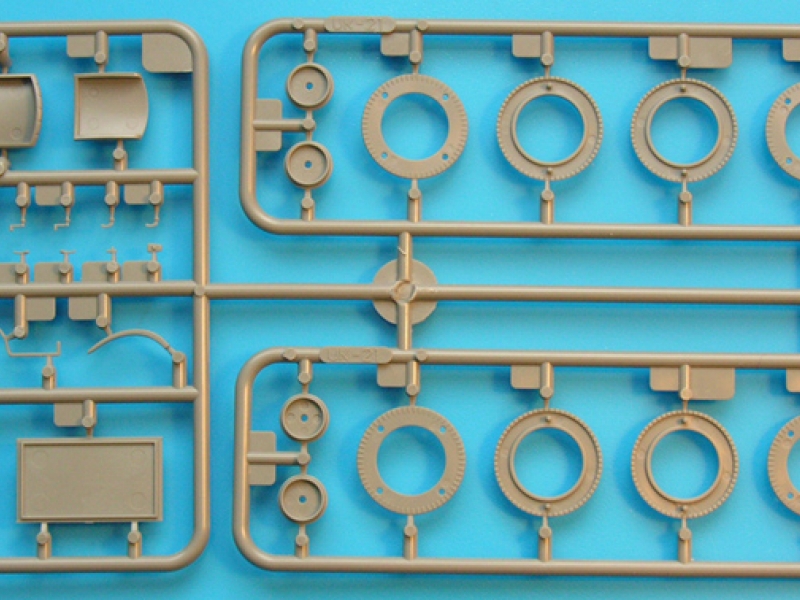
Sprue E (3 off) - wheels and tyres.
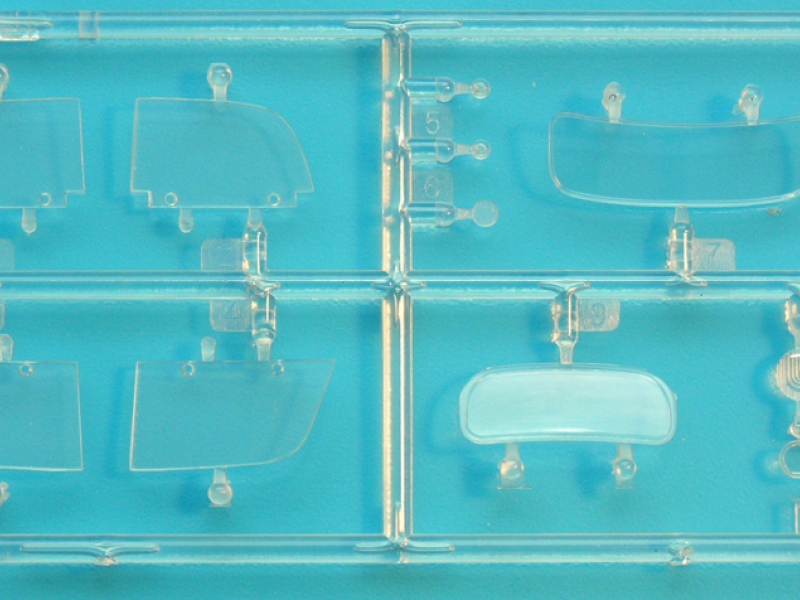
Sprue F - clear parts - windows, headlight and sidelight lenses, dashboard glasses.
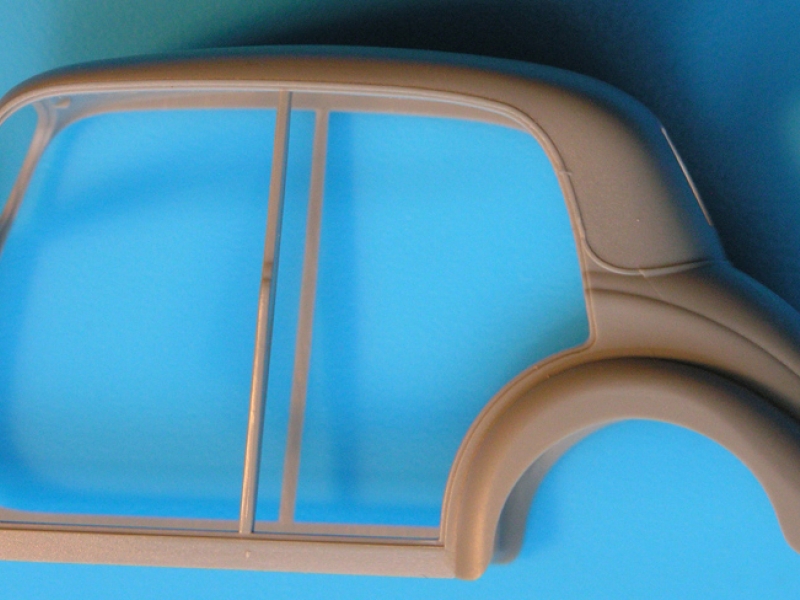
Sprue G - body shell.
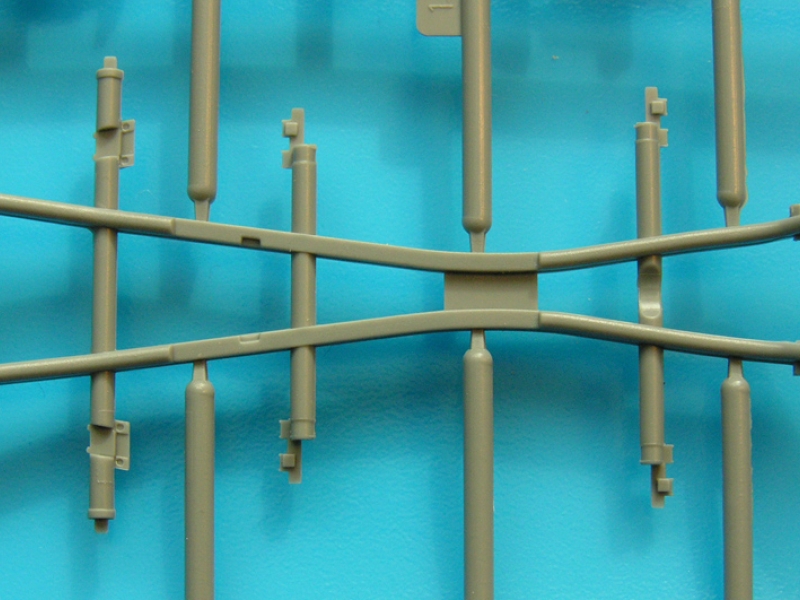
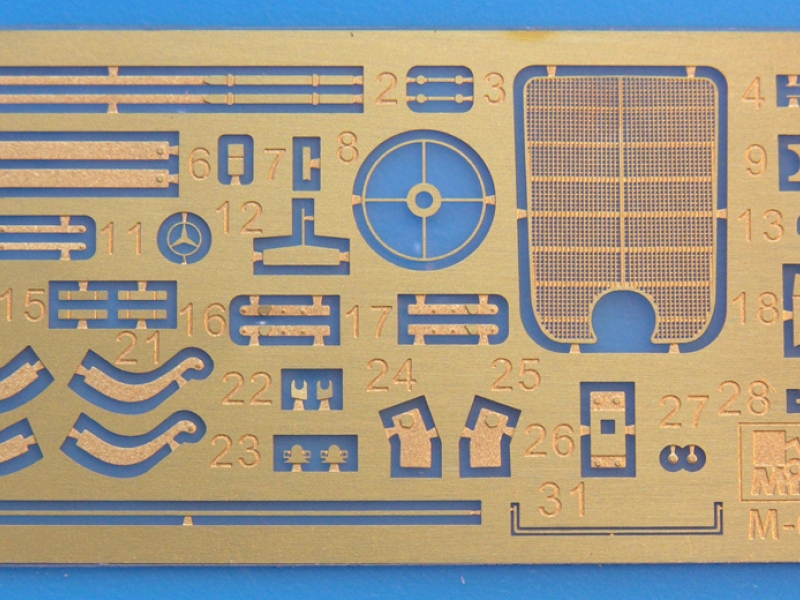
Photo-etch fret - radiator grille, badges, various straps and mounts, windscreen wipers.
Decals.
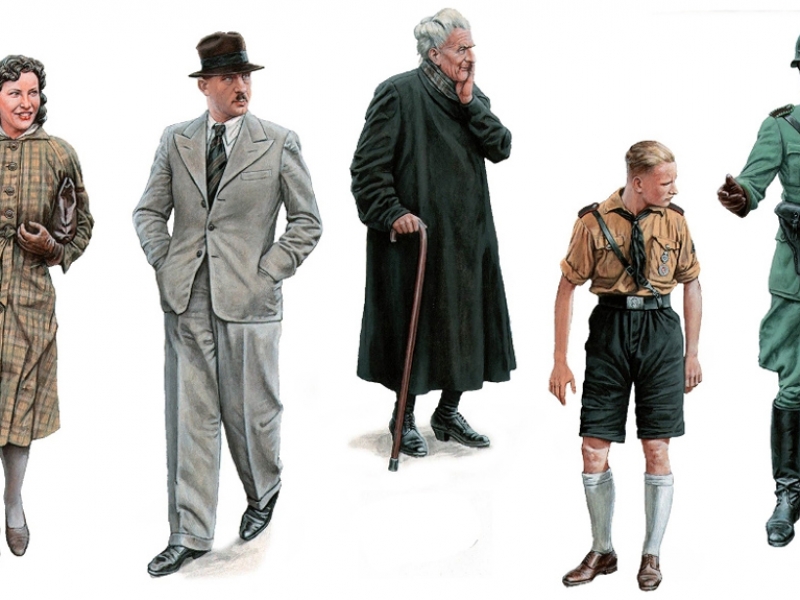
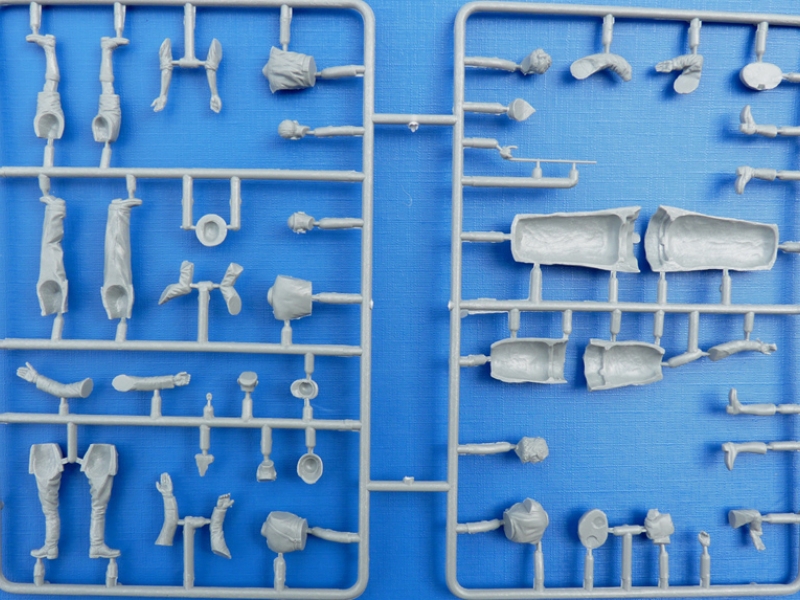
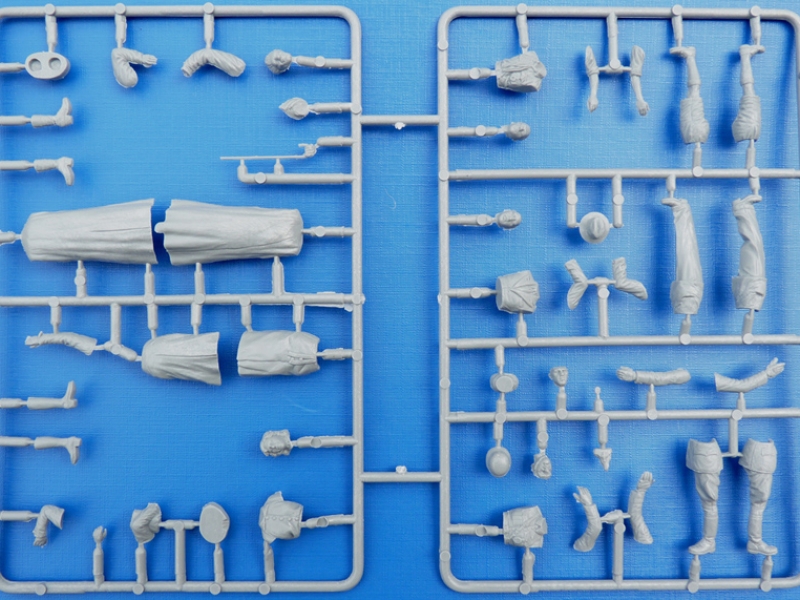
An additional bag contains two separate sprues with parts for five civilian figures which have been released separately by MiniArt as
German Civilians. These are reviewed by my friend Martyn Smith at the end.
the review
The overall quality of the parts is very good with very crisp moulding. There is some minor flash on some parts, but nothing to worry about. The walls of the mudguards are chamfered to appear commendably thin with no damage. There is no sign of warping or sink marks, but there are a few injector marks that will need to be dealt with, notably on the underside of the floor pan and the inside faces of the bonnet panels. Slide moulding has been used thoughtfully on a handful of parts. The etch fret provides a very nice radiator grille and that famous three-pronged badge and various other pieces for that extra bit of finesse.
You will need to think about how to paint this model as many parts will be inaccessible once everything is in place.
Construction
Construction starts with the engine and gearbox, which are detailed in Stages 1-6 with the rear transaxle in Stage 7. The breakdown of parts compared to the MasterBox kits is practically identical, and the level of detail is comparable. There is an engine mounting frame at the front, which needs two etch brackets added (PE24 and 25). Unfortunately, the position of these is none too clear - see Stage 12 below.
Attention then turns to the chassis in Stage 8. This needs a little clean-up as the mating joint is a little too obvious. The cross members are all moulded in-place and only a few plastic brackets and mounts need to be added. Two etch brackets need to be folded and mounted on the ends of one cross member; however, Id leave these off for now until the floor pan is ready to be mounted. They look very delicate and easily lost.
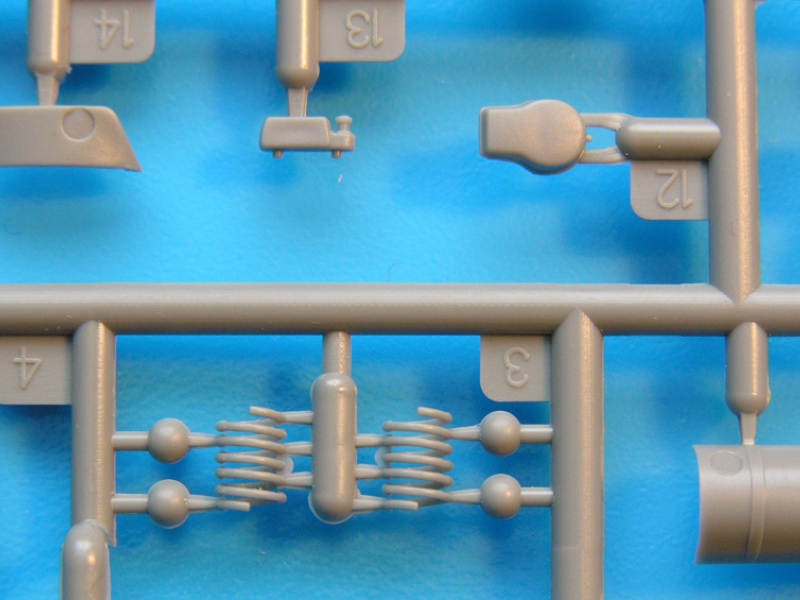
Stage 9 shows you how to bend up some wire (not supplied) for the rear wheel brake hoses. I found the drawings provided to be very confusing, as it appears that each hose should be bent from three pieces of wire and joined together! Dont be fooled and look at Stage 11 to see what they look like and how they actually fit. Some beautiful slide-moulded coil springs form the basis of the rear suspension in Stage 10 that also includes the drive shafts and rear transaxle. Final details are added in Stage 11, including those wire brake hoses, brake drums and U-shaped brackets which have to be formed from the etch fret (Master Box supply these in plastic).
Stage 12 shows you how mount the engine and the main drive shaft into the chassis. It might be wise to leave the two etch engine mount brackets mentioned above (E24 and 25) until this stage, as they form the bridge between the frame and the front chassis cross-member. The front suspension can then be added and completed in Stages 13 and 14.
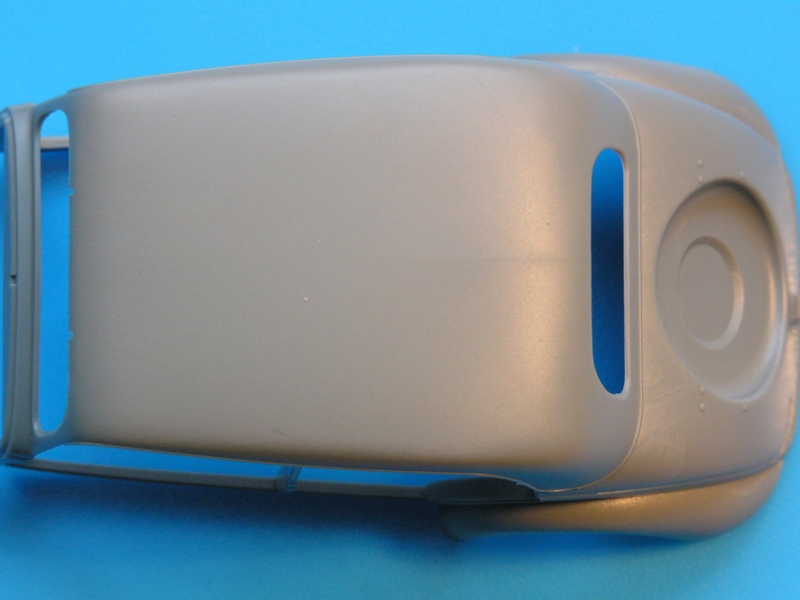
More etch bracketry is needed in Stages 15 to 17 where the exhaust is built up. The Master Box method is to add the pipes to the chassis. MiniArt have you building the whole system before adding it to the chassis and engine. I think it would be wiser to mount the silencer (muffler to Yanks) to the rear chassis first (which needs two etch brackets), then add the pipe between the silencer and the engine. The front bumper and interior wing supports are then added in Stage 18 before mounting the completed chassis/engine under the floor pan. The floor pan itself will need to have several ejector pin marks removed.
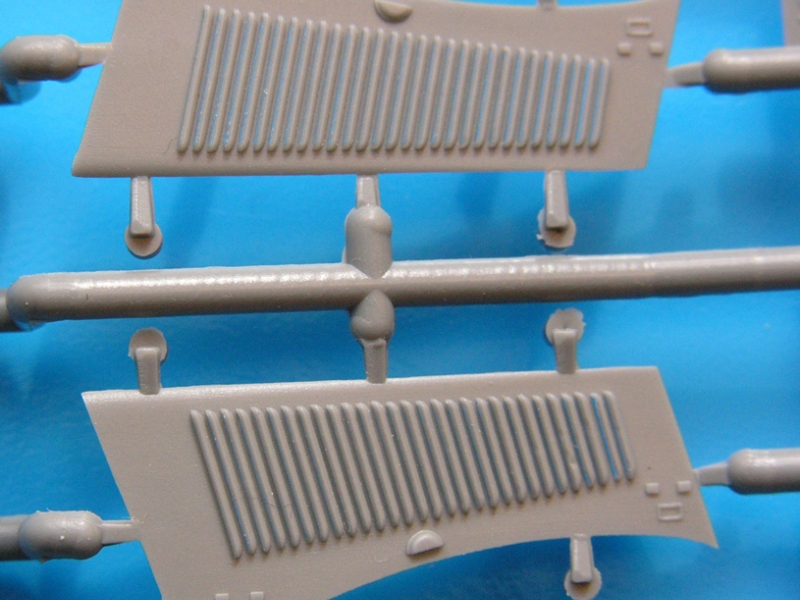
Comparing the floor pans from the two manufacturers is interesting, as this is one place where they dont agree. The shape of the inner edges of the front wings are noticeably different, which impacts the shape of the bonnet side panels. Also, the front corners of the MiniArt wings are nicely rounded (more correct), whereas the Master Box ones are more pointed. The ribbing on the running boards is also different, and Id say Master Box have the better interpretation here, with their curved ribs (as opposed to MiniArts straight ribs). Look at the website references at the end to make your own comparison.
Stage 20 deals with the front bulkhead: here three tools are mounted on top, but no straps are provided. The early-version cylindrical fuel tank is built-up and added (this is the only option, as opposed to Master Box, who also provide the later larger tank). The drivers pedals are added directly to the bulkhead with no arms behind them. In fact, the accelerator should have a long arm on its right side, which goes through the bulkhead higher up. Master Box treat these better, but they will not be very visible on this closed saloon car version. The completed bulkhead plus the steering column, gear lever and hand brake are all added in Stage 21.
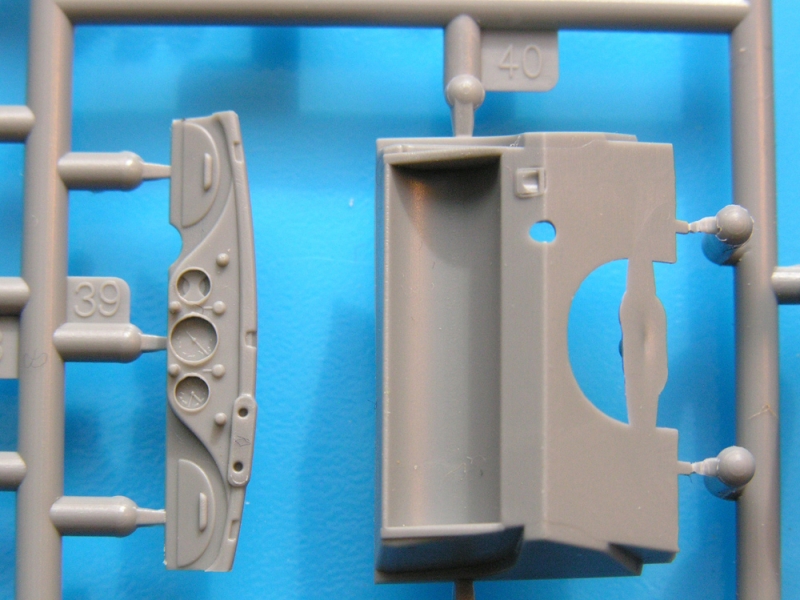
The seats are built in the next two stages, and the front seats each have four brass pieces added to nicely replicate the reclining adjustments for the seat backs. The dashboard is nicely-done, though some very delicate painting will be needed to bring out its best. The dials are moulded-in recesses with tiny raised detail for the instrument markings. Clear lenses are then added. I think these would have been better as decals with no moulded-on detail. The largest instrument the speedo is only 3 mm across, so it will be very difficult to do them justice. Another thing to drive you mad are the two windscreen locking knobs at either side of the dash. The two knobs go inside two tiny etch brackets, which are each made from two tiny parts. Crazy!
Stages 26 and 27 introduce us to the main saloon car body shell, into which are inserted the completed dashboard, the windscreen, the rear window, indicators, a photo-etch rear view mirror plus lights and bumper on the rear. One minor option on the rear is the normal light or a military convoy light.
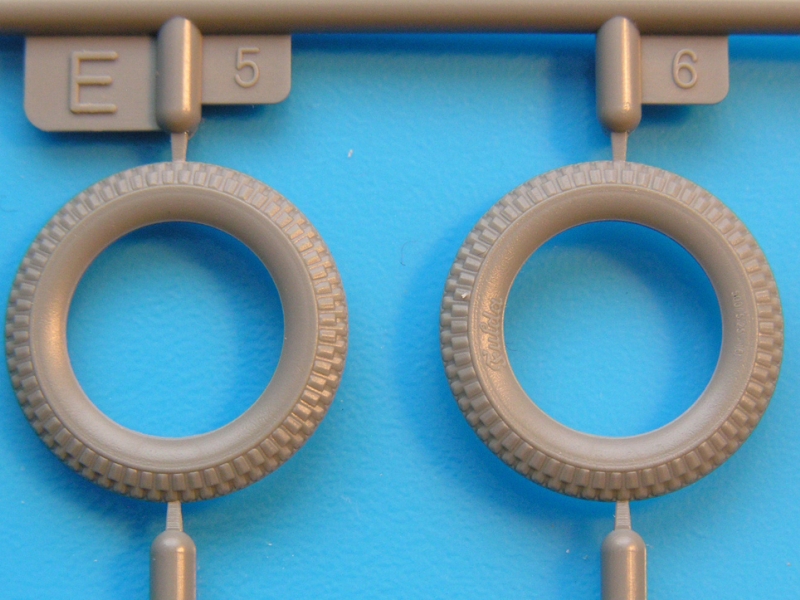
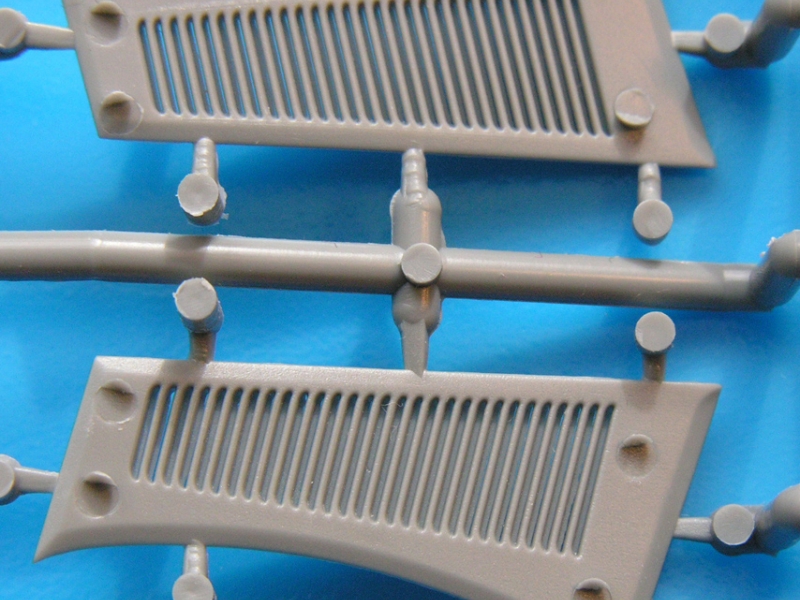
Attention now turns to the wheels in Stages 28-30 and 32. Where Master Box used vinyl tyres, MiniArt have recreated the tread pattern by sandwiching four thin slices of tyre, much like many model motorcycle tyres we have seen recently. The outer slices have manufacturer markings (Fulda) and tyre sizes moulded-on. Be aware that the inner faces are blank, so be sure to fit them the correct way around to show off these delicately-moulded details. The hubcaps are separate pieces so these could be left off as an option, though this is not noted in the instructions.
Stage 31 is building the radiator from a surround into which the radiator itself is mounted. This will have to be painted first- at least on its forward face- because a very nice etched grille then fits into the radiator surround just like the real thing. The surround is topped off with a radiator cap and an etched Mercedes star.
In Stage 33 the steering wheel is added with the inner horn ring from photo etch. The wipers are also etch and at this point the radiator grille and body shell can be dropped in place, once the interior and engine have been painted.
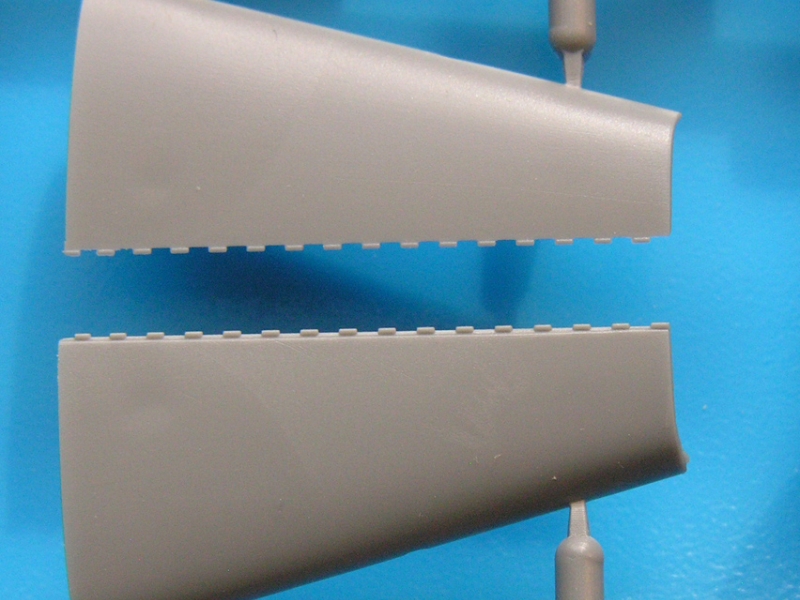
Bracing struts across the top of the engine bay are added in Stage 34 (missing in the Master Box kits) before moving on to the beautiful bonnet side panels. The vents have been slide-moulded, and the slots are actually open! The downside is the injector marks on the rear faces, but they will be easy to clean up and wont be visible if the sides are modelled open. The panels have chamfered edges to make them appear thin. Nice!
Ive already mentioned the fact that the inner edges of the front wings from the two manufacturers are different. This means their side panels are also different, and the MiniArt panels are substantially longer than the Master Box items, meaning the MiniArt bonnet is also longer. Im a little confused about this, as the floor pans from the two manufacturers are the same length. I think MiniArt seems to place the engine bulkhead slightly more rearward, so this would explain the difference.
The latches on the bonnet sides are a little confusing: if you choose to model the bonnet open, latch parts are provided for the sides and also the wings. If the bonnet is closed, the latches are built complete on the bonnet sides. This is all explained in Stages 35, 36, 38 and 39. The missing Stage 37 shows you options for building two different types of rear view mirrors that mount either on the wings or the drivers door pillars.
Stages 40 through 43 show you how to build the four doors, which all have separate interior door panels and handles.
The windows dont need glue, as they are pinned and sandwiched between the panels. Some modest surgery will enable them to be modelled open. In Stages 44 and 45, we are provided with an optional luggage box and rack which, presumably, is for a civilian version (variant 2 in the painting guide). The spare wheel can be fitted to the rear body in Stage 46. The final two stages show the fitting of the doors, headlights (including a Notek if wanted) and the rear rack. The headlights have clear lenses.
Instructions
The 12-page A4 instruction sheet has a 4-colour cover with clear B&W line drawings showing the construction stages. There are 48 stages in the build process, and I can't imagine any problems being encountered, as the process is quite logical. Basically, there are only two main building options: the car can be built with the doors and bonnet either open or closed. Minor options include different exterior rear-view mirrors, an alternative rear light and an optional luggage rack at the rear. Four different colour schemes are suggested.
Painting and markings
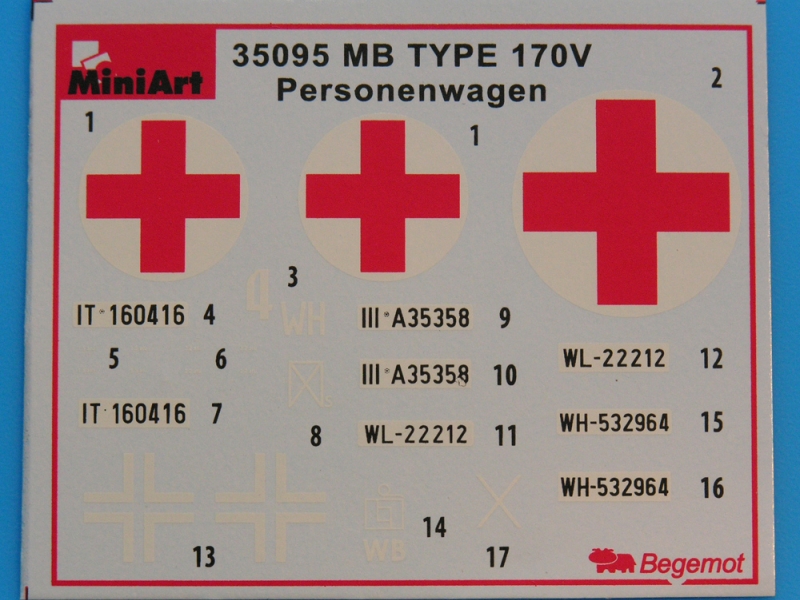
Painting and decal options cover four cars:
Option 1 - A
Heer vehicle in Panzer grey with red cross markings on the roof and doors.
Option 2 - A civilian car painted gloss black with lots of chrome (if you are brave enough). Featured on the box top.
Option 3 - A Luftwaffe vehicle in Panzer grey.
Option 4 - Another
Heer vehicle in green disruptive paint over Panzer grey.
Conclusion
There is no doubt that this MiniArt model is very well-engineered and well thought-out. I cannot help but compare it to the Master Box 170Vs I have already reviewed. The MiniArt kit has more finesse, with many details using photo-etch. However, this has its downside making construction that much more fiddly and even annoying, especially considering the miniscule size of some parts. Master Box issues their 170Vs with no etch whatsoever, but their models are just as accomplished as MiniArts. There are discrepancies between the two manufacturers, notably the length of the bonnet. However, if built up and put side by side, Im sure no one will notice too much of a difference. I would say the Master Box kits would be easier to build. Compared to Master Box, the nicest points about the MiniArt kit is the etch radiator grille, the slide-moulded bonnet panels, and the way the tyres are rendered.
170Vs from both companies are well worth purchasing and constructing as they are all damn fine models! Prices vary from source to source. Check your favourite stores and websites.
References
The Early Mercedes
Model Armour walkaround
MB fan website with great technical details
Figures included
(reviewed by Martyn Smith)
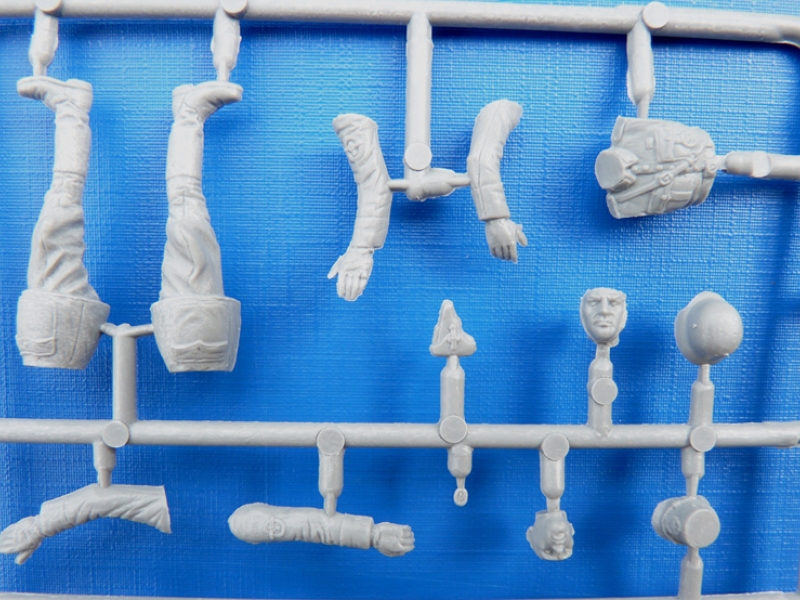
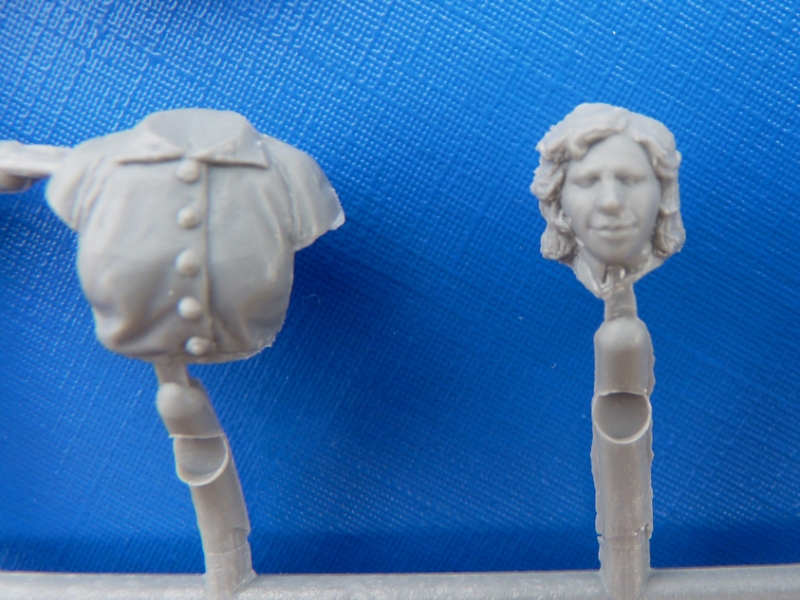
The Mercedes comes with useful a set of five figures: three civilian, a Hitler Youth and a "civilian" policeman.
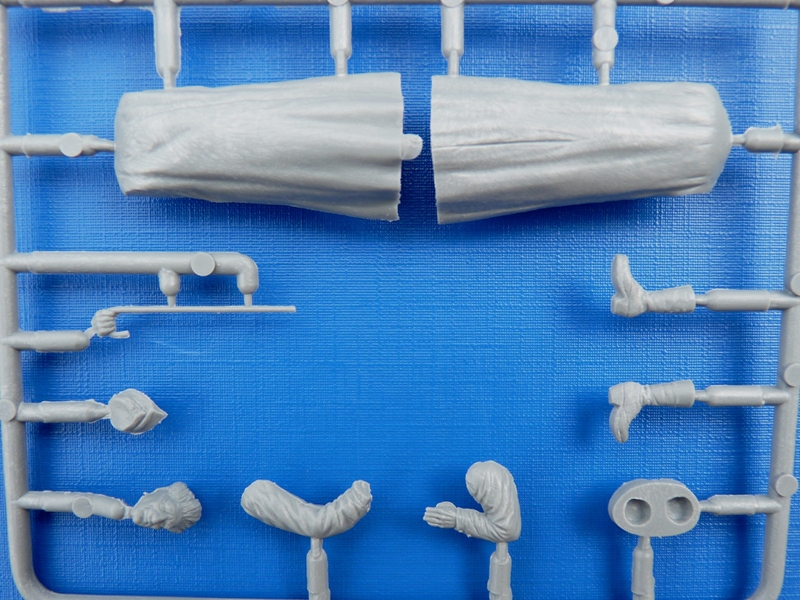
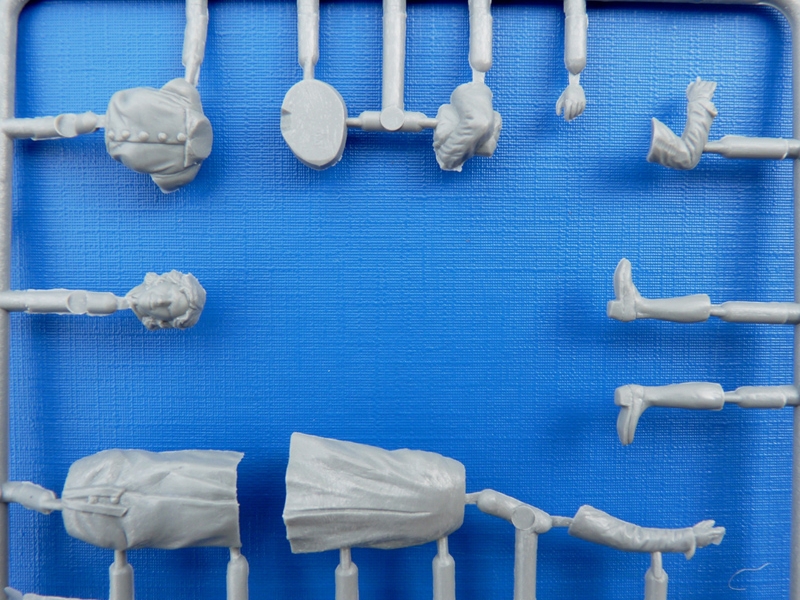
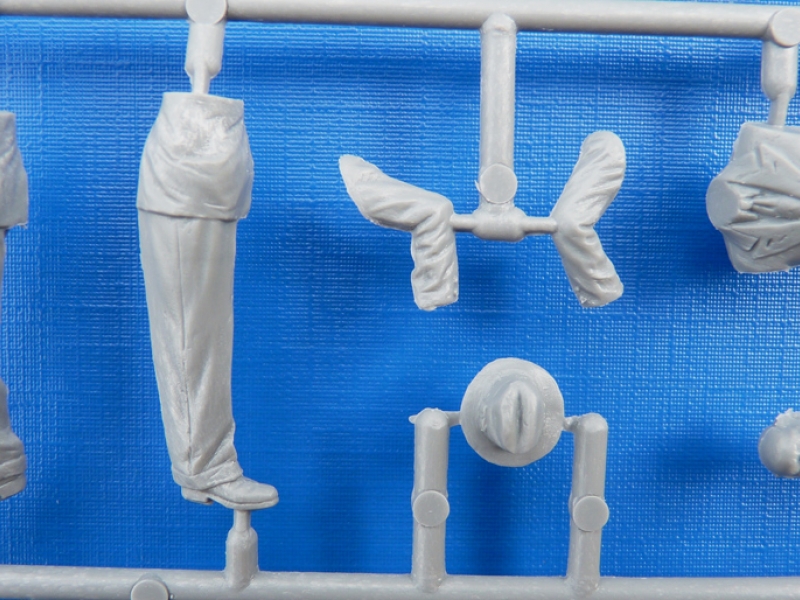
These are fairly well made and available separately from MiniArt as kit#35086 "German Civilians." They are of the usual multi-pose format, with separate torsos, heads, legs and arms. Faces are quite good, with distinct character (but see notes below). Some have multiple arms, so there is a little variety in the poses. As usual with MiniArt figures, there are bolder seam lines and more flash than youll find on their vehicle kits. These are not too bad, though, with a little flash: mainly around the hands/arms, and nothing a sharp blade cant cure. In total there are 46 parts in light grey injection-moulded styrene.
The figures are as follows:
1.) "Young" female with overcoat. I say "young" because although she appears fairly young on the colour artwork, the face in styrene doesnt match this at all, being older and plumper, although her face does have a feminine look and isnt too bad. Not a problem, but be aware if you are after a specific look from this figure; it wont match the colour pictures for the kit. She is portrayed walking with a handbag under her left arm, and there is a choice of two rights arms provided. I reckon she could represent any nationality of the period.
2.) Walking man with a single-breasted suit and tie, wearing a hat, hands in pockets. Typical of German nationals of the time (mainly because of the hat IMHO), this character really looks the part. If the head was replaced, I reckon he too could represent many other nationalities of the period.
3.) Elderly lady with a walking stick. Wearing an overcoat, she looks suitably frail. Again, the face doesnt quite match the colour artwork, but its acceptable. There are possible uses for other nationalities, although the coat for me rules out British (possibly - Im no expert on 1940s fashion).
4.) Male Hitler Youth member. This is a good figure with the stature of a young man around the age of 16. His clothes are typical of The Hitler Youth organisation, but I would say it leans towards pre-war or early war period, possibly not 1944/45, when they were preparing more for defense of Germany, but I stand to be corrected.
5.) The final figure represents a uniformed regular policeman of the
Ordnungspolizei or Orpo, and I would say a member of the
Schutzpolizei or municipal police who maintained order in major cities and towns, as well as smaller townships in more rural areas. He is standing, and two sets of arms are provided allowing for different poses, such as directing traffic or checking papers. He is provided with a holster for a P08 Luger, which appears to be the norm looking at period photos. A choice of military helmet (Stahlhelm) or shako with cockade is provided. For early war, the helmet would have decals (national and
Ordnungspolizei insignia), but later war these were omitted. The shako for me is more suitable for earlier in the war or even mid to late 1930s, and is a really nice touch. The figure is wearing M34/40
Stiefelhosen ("boot britches") breeches and M36/40
Feldbluse Field Blouse, which were usually of a more greener shade than the armys.
In conclusion, I think these are a great set of figures. They can have multiple uses; probably the least flexible is the Hitler Youth figure because of the badges on the torso, but these could be carefully sliced off. The policeman could be used as he is portrayed in an urban setting, or altered to suit, say for example, a prison guard, senior officer's bodyguard, etc. All were common roles for the police battalions. For Late War, the
Ordnungspolizei would wear officers peaked caps, so this is an option too.
The other three figures can be used in many urban settings, and I think for several western European nationalities.
Figure references:
I found little of use apart from
the Ordnungspolizei website which has some great photos to help you decide on a scenario (and does not cover up the atrocities the Orpo were part of, either).
Also, theres the useful
Wikipedia.


Comments