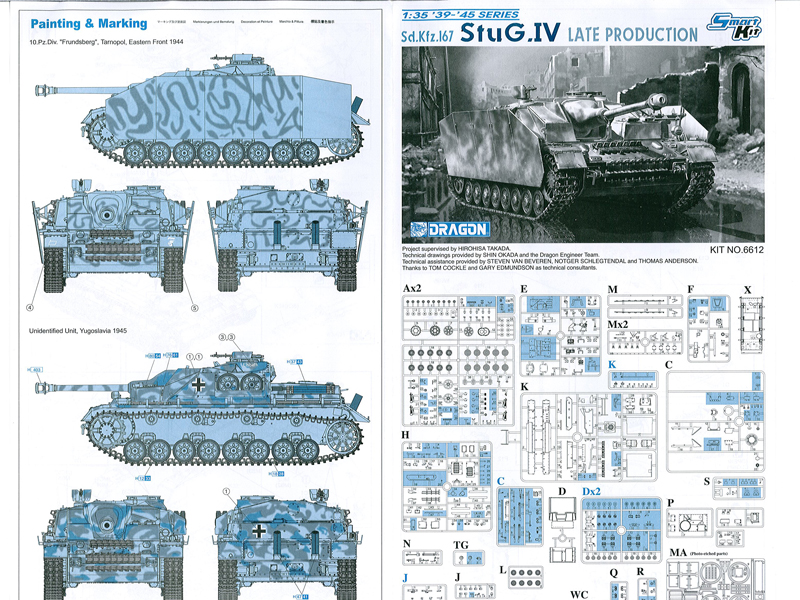
The StuG IV was a self-propelled assault gun, serving with the Wehrmacht and its allies from late 1943 till the end of the hostilities. The vehicle was, essentially, the superstructure of the StuG III, mount on a modified PzKpfw IV chassis. The resulting machine was armed with the main gun of the Pz IV, and weighed nearly a ton less than the vehicle it replaced. Until May 1945, about 1,100 StuG IVs were produced or converted from salvaged Pz IV hulls.
As the war progressed, the base vehicle changed, and so did the assault gun itself switching the Pz. IV Ausf. H chassis for an Ausf. J one. The superstructure was up-armored, and the hand-operated machinegun at the top was replaced with a remotely-controlled installation.
Previous releases of the StuG IV in 1/35th scale all feature early production versions of the vehicle, and include the popular Tamiya kit, an Academy version, and DMLs own sets.
the kit
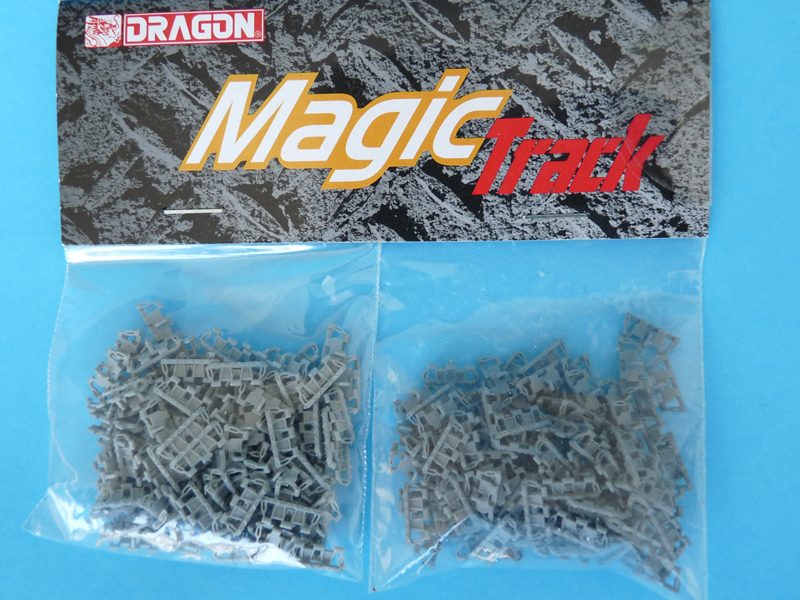
The kit contains an impressive 1,025 parts, spread over 29 sprues and 4 plates of photo-etched parts. Two hundred sixteen Magic Track links and a length of twisted steel wire raise the count to 1,242.
Of the total number, about 636 parts are referenced in the instructions (some of them optional), and about 606 are marked as Not for use in the diagram.
the review
The late production features include: a new casemate roof, new drivers and loaders hatches, remotely-controlled machine gun, one-piece frontal armor on either side of the gun, vertical exhaust pipes with flame dampers, late return rollers, and finally, dual layer Schürtzen on the sides of the casemate. With these features, the vehicle could be dated to a machine produced in the last quarter of 1944 (October-November, after Zimmerit was dropped) and before the Pz IV Ausf. J lost the 4th return roller on each side.
The kit comes in with a massive amount of optional parts, so you could dress your vehicle in a way that differs from any other in the world. There are no less than three styles of metal return rollers in this kit, four styles of muzzle brake, two types of idlers, pose-able hatches and main gun, choices of metal vs. plastic parts, etc.
So onto the parts.
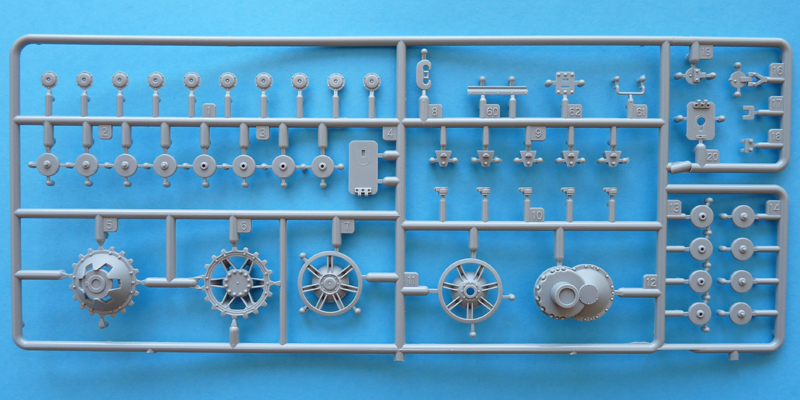
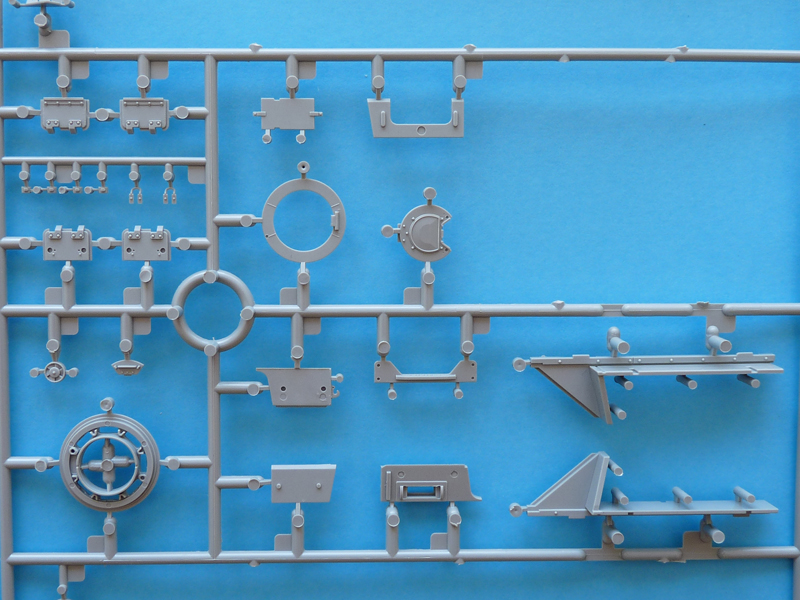
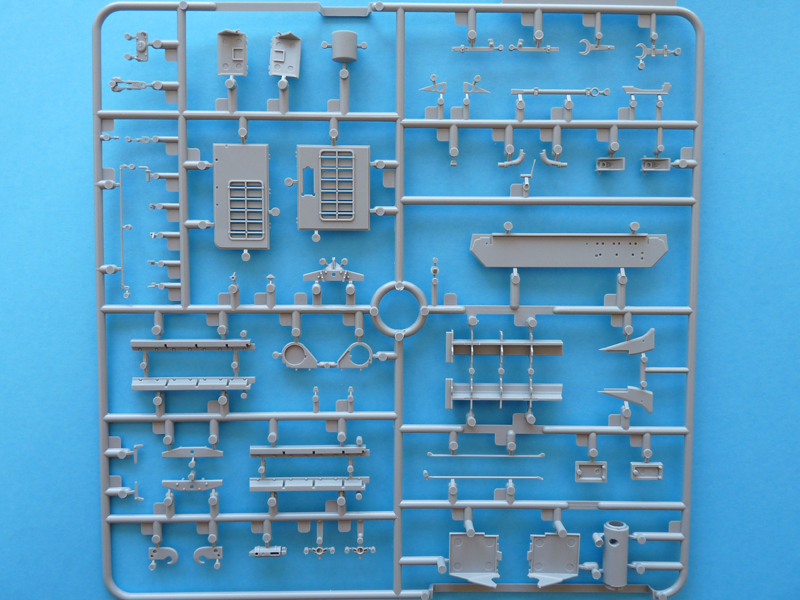
Sprue A: 143 parts, 121 used. Each of the two sprues is split into a bigger and smaller section, and all four sections are packed together. The parts include final drive covers, brake covers, suspension details and wheels (drive sprockets, idlers, road wheels and return rollers). Two styles of idlers are provided early and late. Its interesting to note that both color schemes in the instructions are shown with the early idler. The road wheels are made of two halves and a separate hub. They are nicely-detailed (including the brand and size labels), but all have a mold line down the middle of the rubber bandage.
Sprue A (blue): 12 parts, 1 used the monolithic add-on armor to the right of the main gun. Theres a supplement instruction sheet for this part, which replaces parts C13 and C18 in step 11, despite their beautifully rendered weld seams and bolt detail to match the late vehicle pattern.
Sprue B: 17 parts, 13 used front hull details, rear armor plate, idler supports. They are all handed, and the idler mounts are multipart affair, but the locating pins will make it easy on the builder.
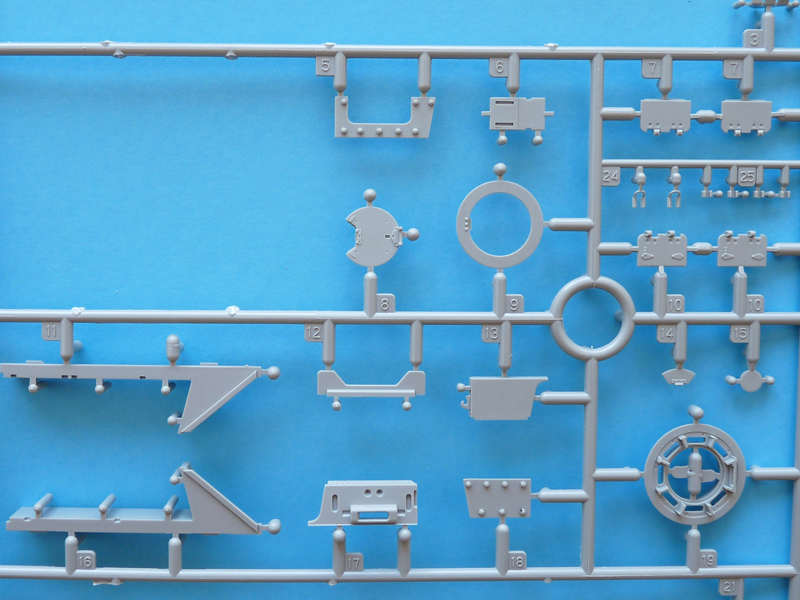
Sprue C: 27 parts, 15 used upper hull detail, commanders cupola. DO NOT glue parts C13 and C18 for a late vehicle.
Sprue C (blue): 21 parts, 2 used generic tools and kit for German armor, also sold as Cyber Hobby kit 3873. Only the jack supporting block and the crowbar are used here, the rest goes to the spares.
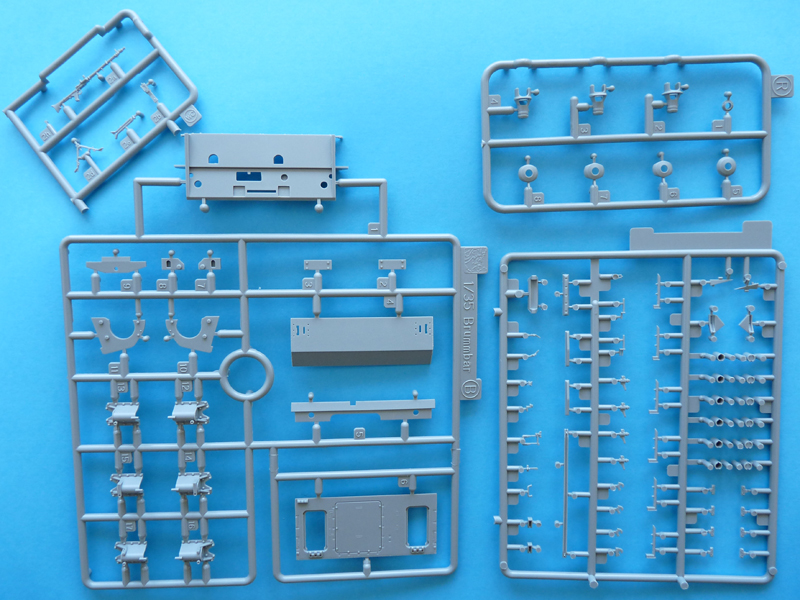
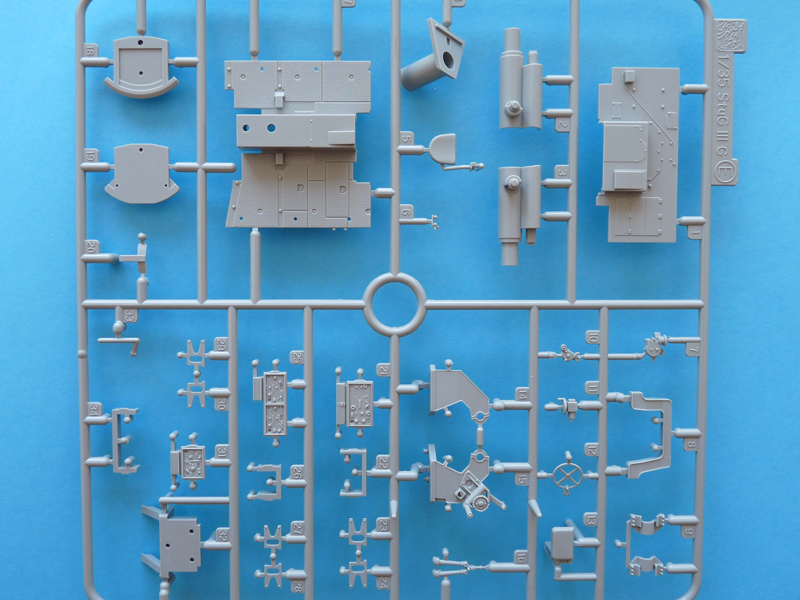
Sprue D: 2 parts, both used the Stugs casemate (without the roof), and the engine deck frame, whose both hatches are separate pose-able parts.
Sprue D (blue): 51 parts on two sets; out of these just 2 out of the 8 exhaust pipes are used. Optionally you could also use the return rollers for the Jagdpanzer 70 these sprues are taken from.
Sprue E: 34 parts, 28 used storage racks, radios and gun support from the StuG III.
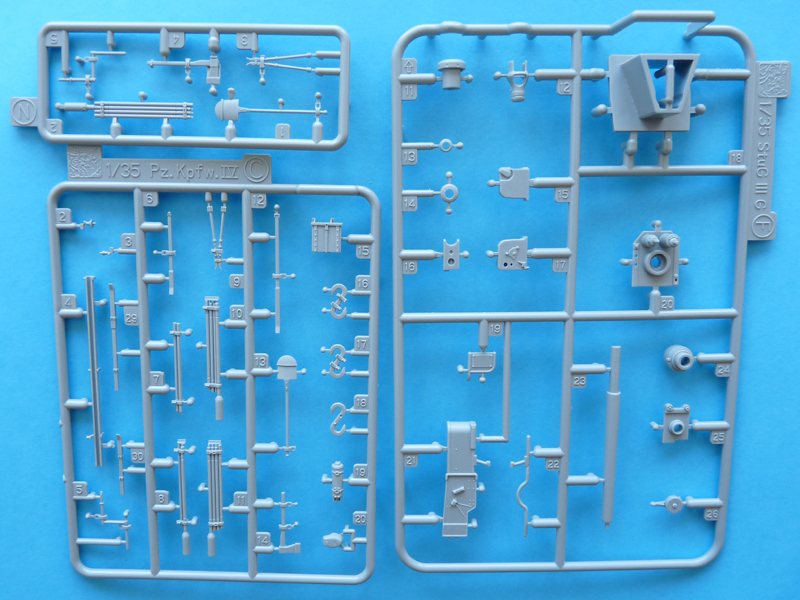
Sprue F: 16 parts, 11 used gun details. You can add an early style angular mantlet to your spares from this one.
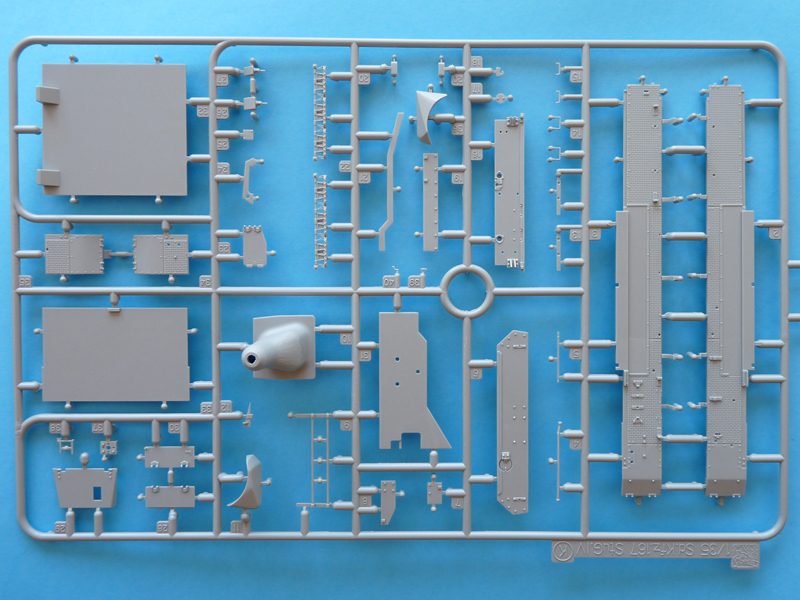
Sprue G: 55 parts. Just 5(!!!) parts used from this sprue 2 of them go on either side of the gun through at the front of the casemate as shown in the additional sheet for step 11. I took some time to try and locate the other 3 parts in the instructions, but failed miserably!
Sprue H: 60 parts, 32 used mainly engine deck details, fenders and a pair of rear towing hooks.
Sprue J: 12 parts, 11 used this clear sprue contains the periscopes for the commanders cupola and the driver.
Sprue J (blue): 7 parts for the tank jack.
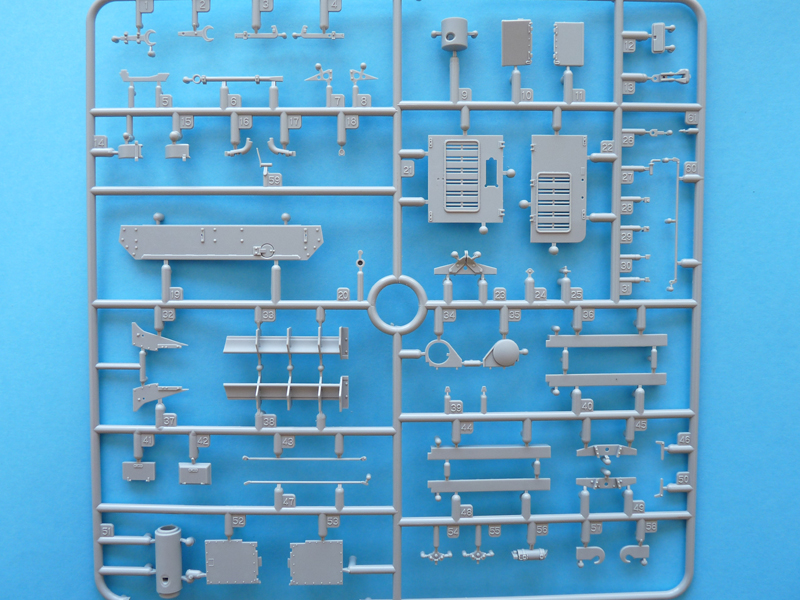
Sprue K: 45 parts, 40 used fenders, rear middle and upper armor, casemate floor, engine firewall, details for the fenders and casemate. Six spare tracks and two styles of commanders cupola additional deflecting armor can also be seen. The fenders have detail and an anti-skid pattern on both top and bottom, as well as Schürtzen hangers molded-on. The casemate floor and the firewall are both bare.
Sprue K (blue): 10 parts, 8 used standard antenna (not used) and several styles of the Notek rear light.
Sprue L: Eight parts for spare road wheels.
Sprue L (blue): 108 Magic Track links (left hand).
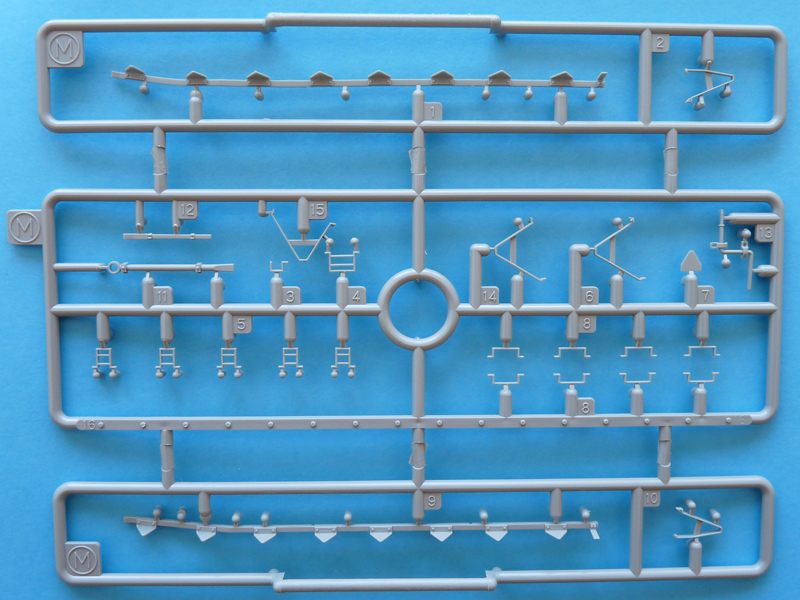
Sprue M: 92 parts, 60 of them forming the supports for the Schürtzen; there are a total of 32 boltheads (2x16) on the sprue edges.
Sprue N: Five parts for gun cleaning kit and other generic tools.
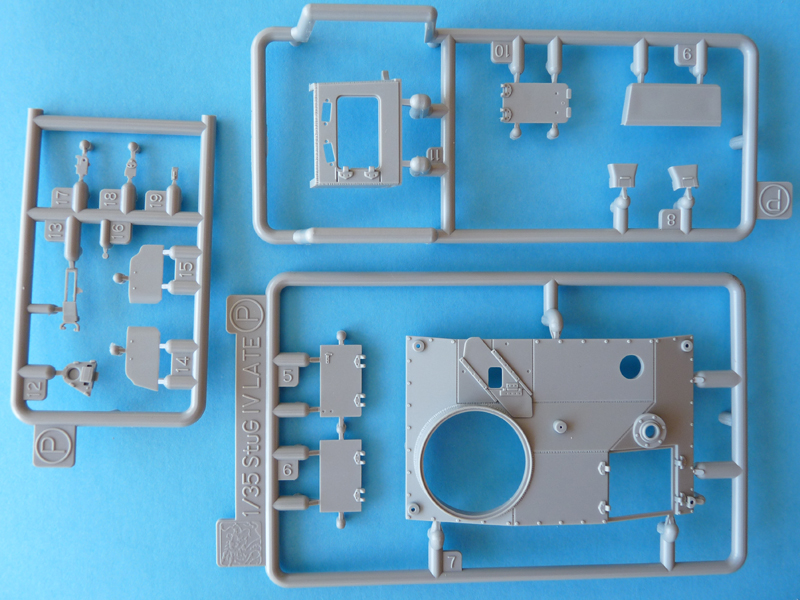
Sprue R: Eight parts, five used 4 different patterns of muzzle brake, 2 suggested as optional.
Sprue R (blue): 108 Magic Track links (right hand).
Sprue S: 11 parts, 5 used details, including a spring catch that kept the drivers hatch open.
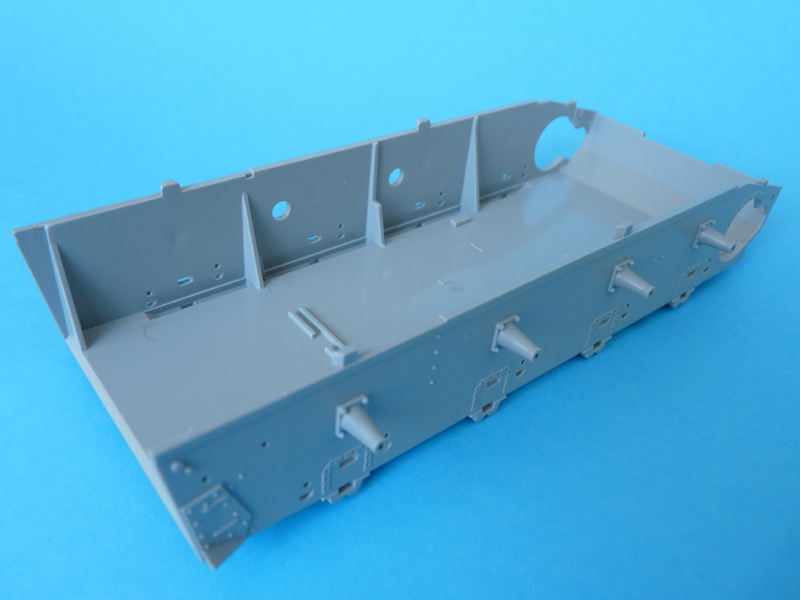
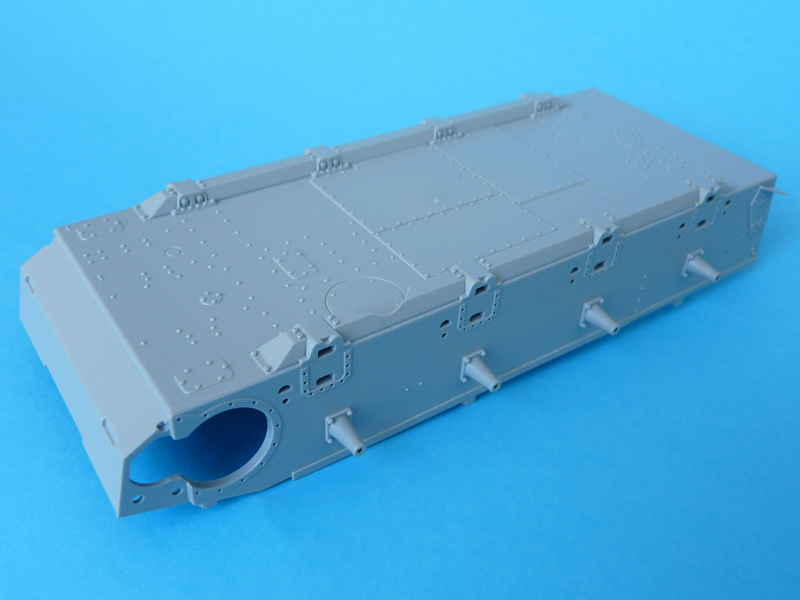
Sprue X: slide-molded hull tub with 4 return roller supports on each side.
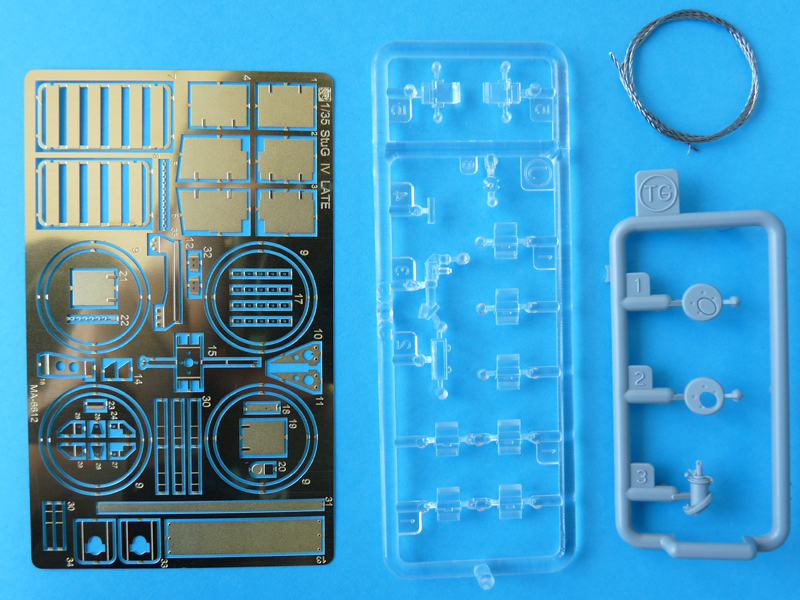
Sprue Z: a single length of metal towing cable.
Sprue WC: 4 parts, 2 used the MG-34 and its bolt cover for the remote-controlled weapon station. You get a folded or extended bipod for the spares.
Sprue TG: 3 parts, 1 used the cover and muzzle of the close defense mortar on the top of the casemate.
Sprue MA: 67 various photo-etched parts.
Sprue MB: Five photo-etched Schürtzen (left hand).
Sprue MC: same for the right side.
Sprue MC: Six more (a second layer additional casemate protection?).
The reason for the large count of unused parts is obviously the massive sprue-sharing Dragon is doing with several kit families. Aside from the generic spues (antenna, MG-34, fender kit, etc.), there are sprues from at least four vehicles other than the StuG IV late production vehicle itself: its predecessor (the StuG III), the Pz. IV (chassis), the Brummbär assault gun and the Jagdpanzer IV/70. You are essentially left with idler and bogie mounts, as well as return rollers and other pieces of kit for at least two complete other vehicles.
The parts are all beautifully-detailed, and apart from the seam lines on the road wheels and the sprue gates, theyll need almost no cleanup. There are no visible sinkholes, mis-molding, or incomplete parts present, and delicate details are well-protected from twisting and breaking-off through clever sprue design. All my test fitting has shown pretty snug fit, and NO need of filler whatsoever, even with big parts.
The detailed gun assembly and the radios are the only interior features in the kit, despite all the separate hatches. If you model these closed, you can consign said parts to the spares box as well.
Instructions & painting guide
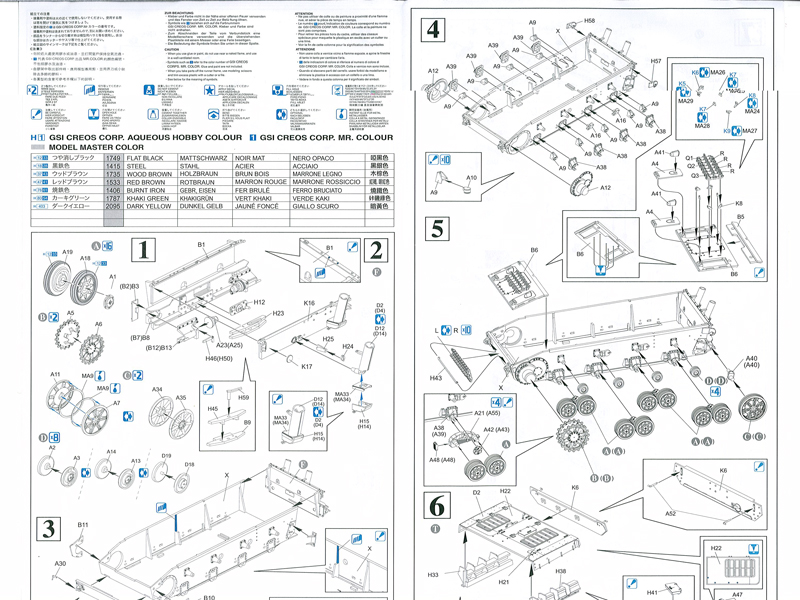
There are 14 main construction steps, with many inserts for sub-assemblies. Each of these rarely requires parts from less than 3 sprues. My advice here:
- Study the instructions carefully, as there are parts that look identical on different sprues, but are specific to each vehicle type (early or late, the sprue donor kits, etc.).
- Remove each part from the sprue immediately before gluing it to avoid confusion.
- Label your sprues clearly, and if you could hang them in front of you in alphabetical order do it, your life will become a lot easier.
painting & decals
The painting guide is typical Dragon left profile, front and back of both machines suggested, Gunze paint callouts and decal numbers where applicable. The now-standard Cartograf decals includes markings for 2 machines:
- a Dunkelgelb example with green squiggles from 10th SS Panzer Division Frundsberg, Tarnopol, Eastern Front 1944
- a named machine from an Unidentified Unit in Yugoslavia, 1945, in full three-color camo.
conclusion
The kit is outstandingly molded, and being the first one to actually depict a late pattern StuG IV, it will be a nice addition to the collection of each WWII German armor fan. There is a large number of pose-able and optional parts that will allow modelers to create an attractive and unique replica of this important tank killer. In my personal opinion, the kit could benefit from optimized part distribution among the sprues, and better instructions.
Highly recommended.
Thanks to Dragon USA for providing this review sample. Be sure to mention you saw it reviewed here on Armorama when purchasing.
SUMMARY
Highs: Highly detailed exterior, excellent molding, proper depiction of late StuG IV. Lows: Half the parts are not used, instructions could use improvement.Verdict: An excellent kit for experienced modelers that will build into a nice replica of this late-war vehicle.
Our Thanks to Dragon USA! This item was provided by them for the purpose of having it reviewed on this KitMaker Network site. If you would like your kit, book, or product reviewed, please contact us.
About Peter Ganchev (pgp000) FROM: GRAD SOFIYA, BULGARIA
I bought and built my first kit in 1989. Since then it's been on and off until about 4 years ago, when modelling became the main stress-relief technique. Starting with 1/72 aviation I've diversified into armor, trucks, artillery and figures, as well as a number of other scales.
Pete,
Excellent review, very detailed - I think this is the first one I've seen which highlights how many surplus parts you get in a DML kit - in this case nearly half! I wonder how may of those extra parts in the spares box ever get used....
As a footnote; if you are correct and the details put the production date of this vehicle as the last quarter of 1944, the Frundesburg scheme on the instructions is inaccurate. Frundesberg was with Hohenstaufen at Tarnopol in early 1944. The two divisions transferred to Normandy in June, and were retained in the west until the end of 1944 (Hohenstaufen took part in BOB, Frundesberg had been detached from II SS Pz Corps and was in Alsace until Feb 1945). This means that the Tarnopol scheme is a historical impossibility.
Hi Steve and thanks for the positive input. I did have this used/unused maths coming for some time and the kit was the perfect subject to highlight it. I've got a Befehlsjager 38M which has about 35% of the parts not used, but it's an open-topped vehicle - loads of detail goes in the fighting compartment. I guess one can always look in the spares bin to upgrade earlier releases, e.g. Academy's Pz. IV series vehicles, whose roadwheels are half as thin, not talking about the rest of the details and the OVM.
From my reading so far it appears that the flame-damping vertical exhausts were introduced sometime in August 1944. Many more of the Late productions updates were also available in the second half of that year.
I looked up the previous releases during the review and noticed a DML early StuG IV using the second scheme (Elsabeth), can't claim the modeller used kit decals though.
I could be wrong in both counts, and the camo doesn't really matter to me, because I do like the kit details and the way it builds so far (it took a lot less sanding and filing than my recent 1/72 completions). A lot of beautiful 2, 3 and 4 color schemes out there, all I need to do is set my sight on a particular machine and start airbrushing the camo
Steve, can you elaborate on what you mean by "the Tarnopol scheme"? I know that Tarnopol is a location in the Ukraine (today, though it has been part of Poland in the past).


Comments