introduction
The history of the Type 170V started in 1931 when Mercedes-Benz, famous for its luxurious cars, decided to build an economy class car. They showed their first Type 170 car at the Paris exhibition in 1931. The public accepted the car very well, and the 170V that appeared in 1938 became very popular. The car had many technical features that were advanced for the time. Mercedes-Benz released the 170V with different types of bodies for the different needs of the civilian market, from traditional sedan to quite extreme roadster. The car was widely delivered for export, and these variants had quite visible external variations such as different bumpers, lights, etc.
The success of the car attracted the attention of the armed forces. The German military and their highly mechanised army required special passenger cars. However, a dramatic shortage of such cars forced a call-up of many civilian cars. The Mercedes-Benz 170V was not really appropriate to the role of the soldier: its rear wheel drive and low ground clearance restricted its use away from normal roads. However, the high quality of construction, high reliability and simplicity of operation made cars of the 170 series very popular with the army. As a result, all versions of this car, without exception, served in all types of units of the German armed forces. Even purely civilian 170Vs were purchased willingly by the military departments. Daimler-Benz developed four types of the car on the basis of the Mercedes-Benz 170V, all intended exclusively for the army and police and never sold on the civilian market.
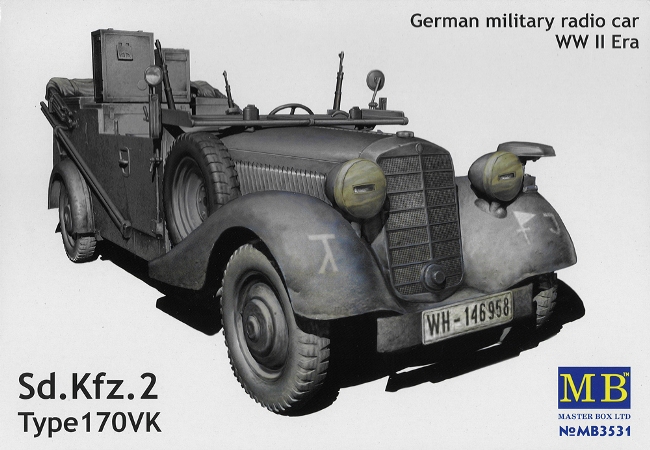
This particular model is the first that looks truly military, rather than just a civilian car pressed into military service. Having said that, the Polizeikübelsitzwagen was hardly civilian. The SdKfz 2 was specifically tailored for the German military forces. The VK was a largely simplified vehicle that boasted short, diagonally cut doors in a slab-sided body providing sufficient room for four. All the 170VK bodies were wooden framed with either sheet aluminium covering or a Vulcanboard covering (a compressed 5-6 mm thick man-made fibre and glue-compressed board). The chassis is not reinforced compared to the car, but is different only at the rear where the chassis members raise upwards to support the rear deck of the Kübel body (where on the car they are much lower and support the floor of the rear luggage space). It was produced between 1938 and 1942. The model seems to be a mix of two marks a Kfz 2/1 Fernsprechwagen (telephone) and a Kfz 2/2 Funkwagen (radio). More on this below.
The latest Mercedes 170 variant from
Master Box represents the 170VK radio car in 1:35 scale. Master Box from the Ukraine have previously released two Mercedes-Benz 170Vs, both of which I have already on another site (links below). A model of the base (non-radio) 170VK (Kfz 1) will also be available soon:
Kfz 1 Type 170 VK /3530/.
This version differs in having four passenger doors (as opposed to the three of the radio car) and an open rear load space with no boot lid (which the radio car does have).
contents
The characteristic double-ended Master Box box has grown in size compared to the previous models. The design of the box top has also been simplified which is a shame in my opinion. Inside the box is a single cellophane bag containing four sprues with three further smaller polythene bags containing tyres, clear parts and decals. None of the sprues have identification letters or part numbers, but the instructions do have part numbers identified quite clearly. The contents are:
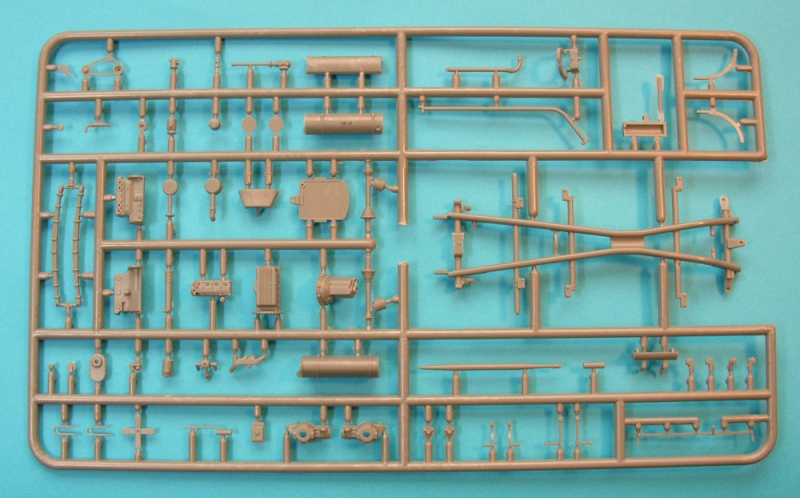
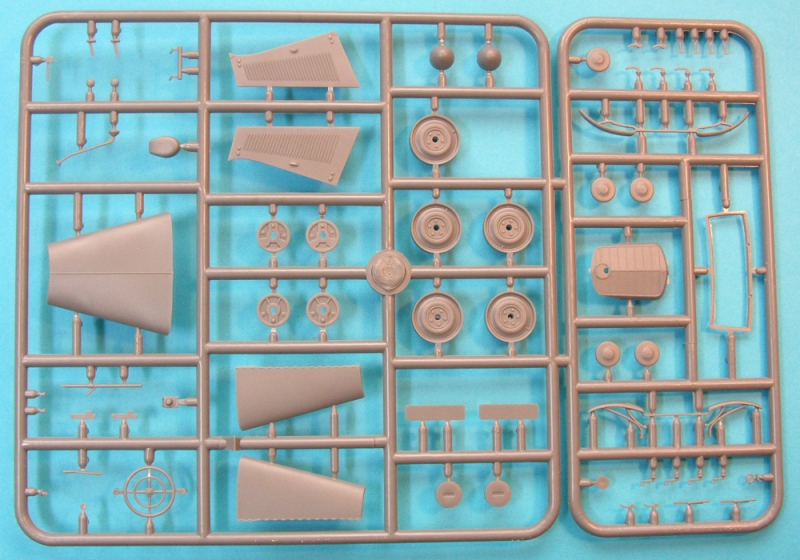
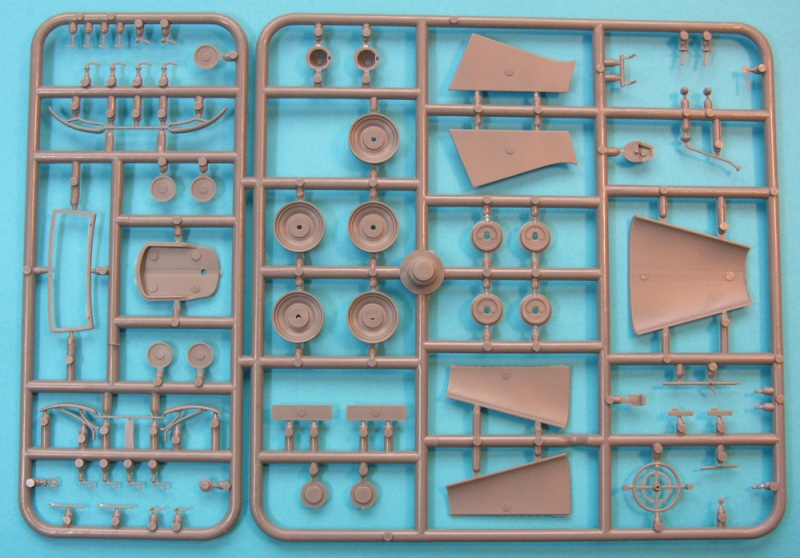
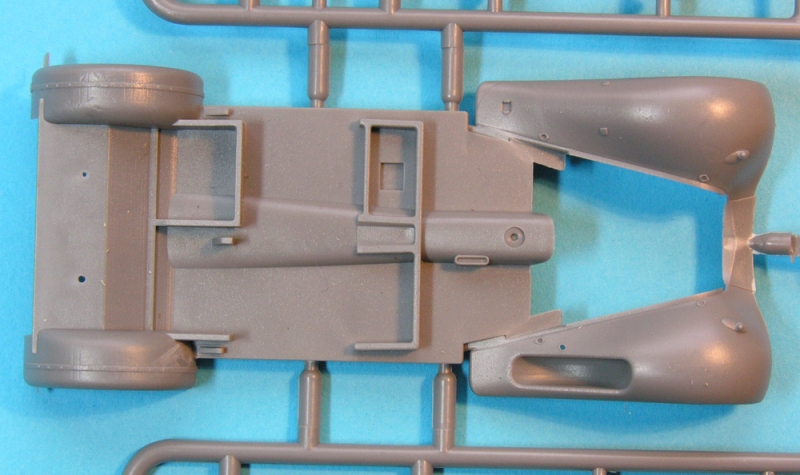
Sprue A*, the chassis and all mechanical parts including a complete engine.
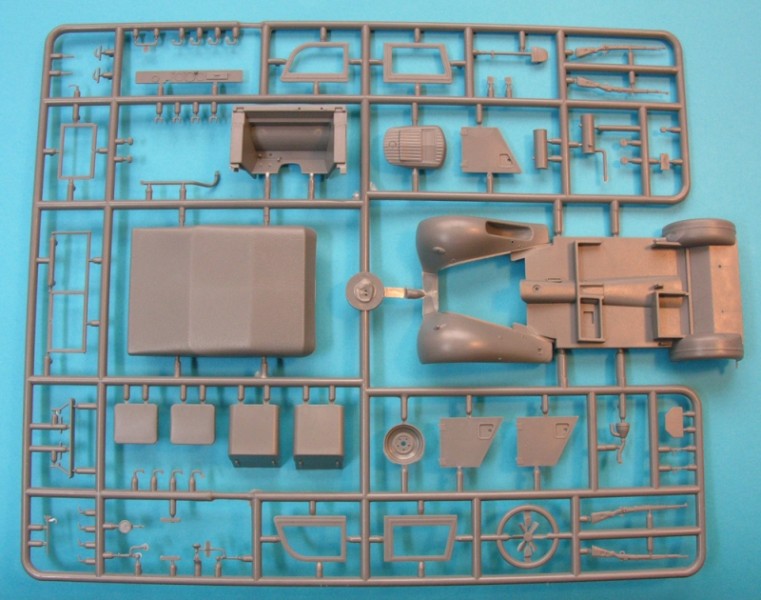
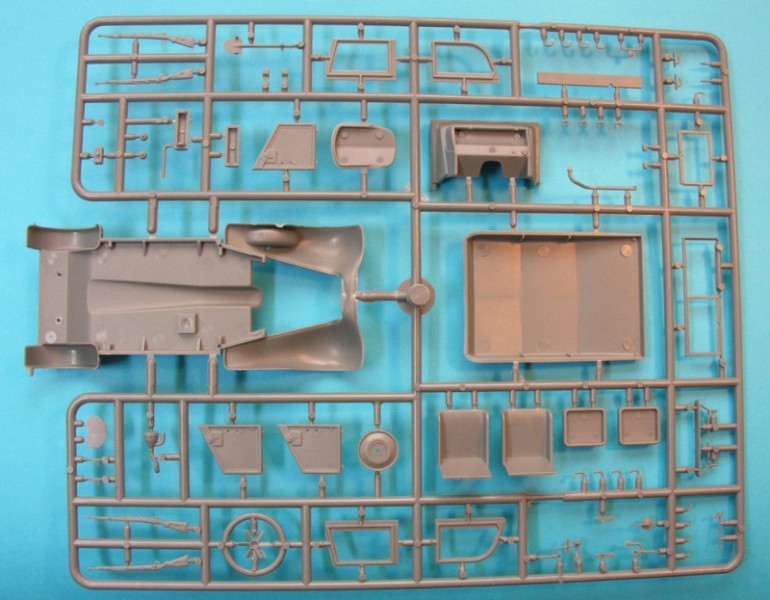
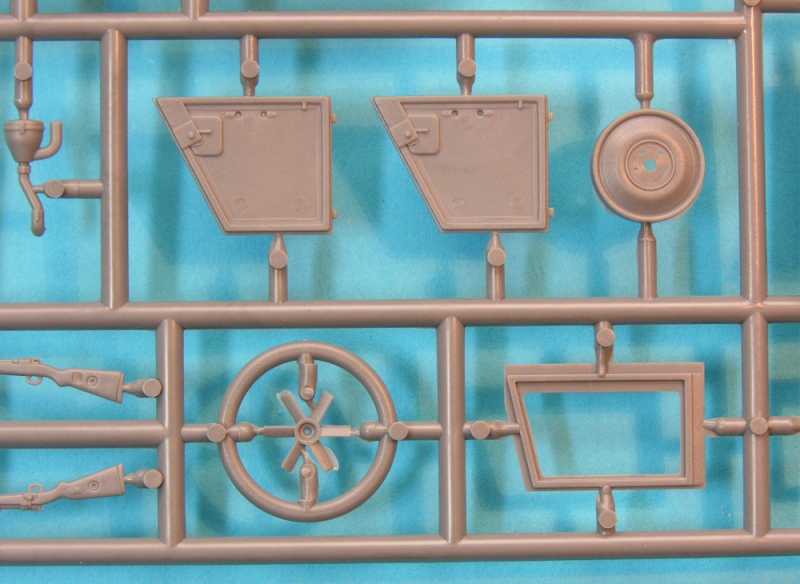
Sprue B, floorpan with wheel arches, hood, doors, front seats, rifles, windscreen frame, spare wheel hub, various fittings.
Sprue C*, the bonnet and wheels, and minor interior fittings.
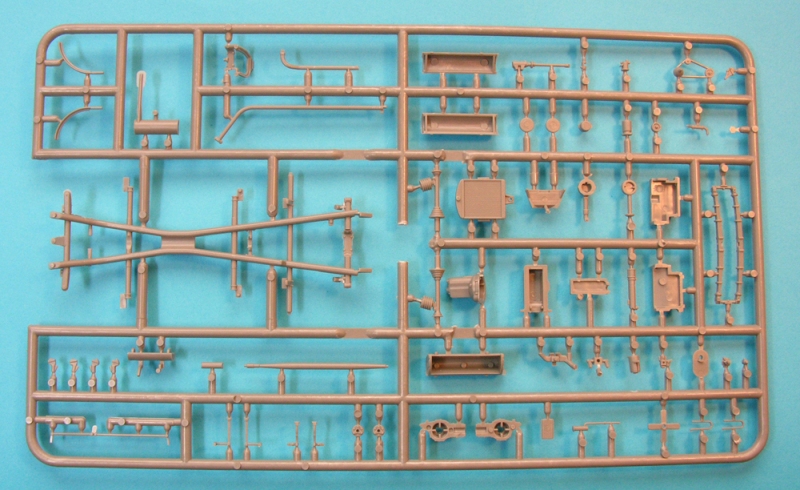
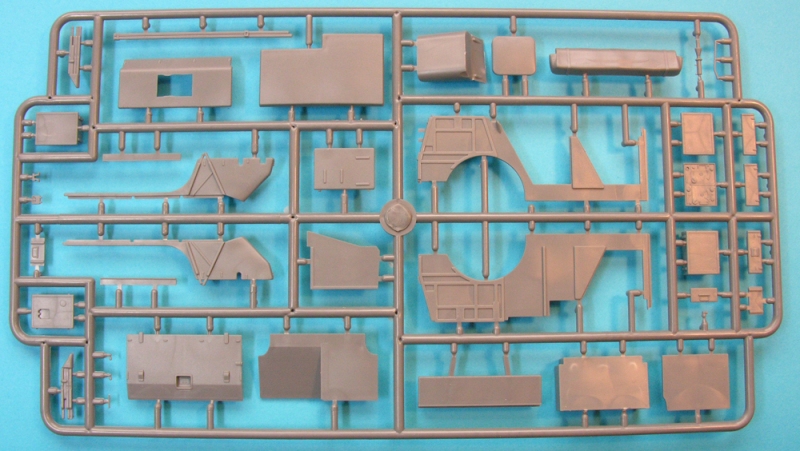
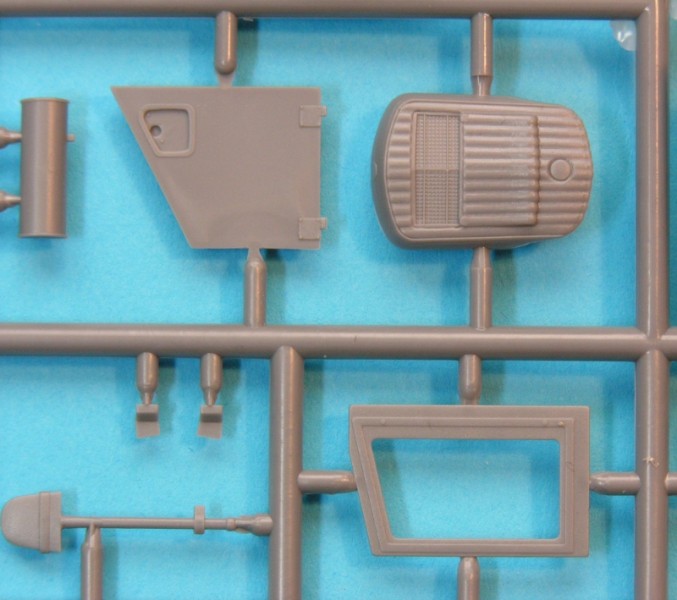
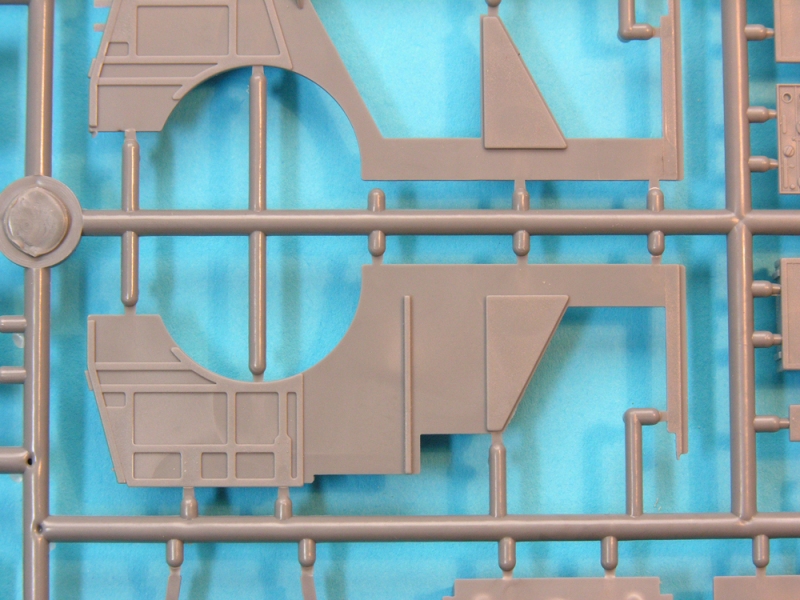
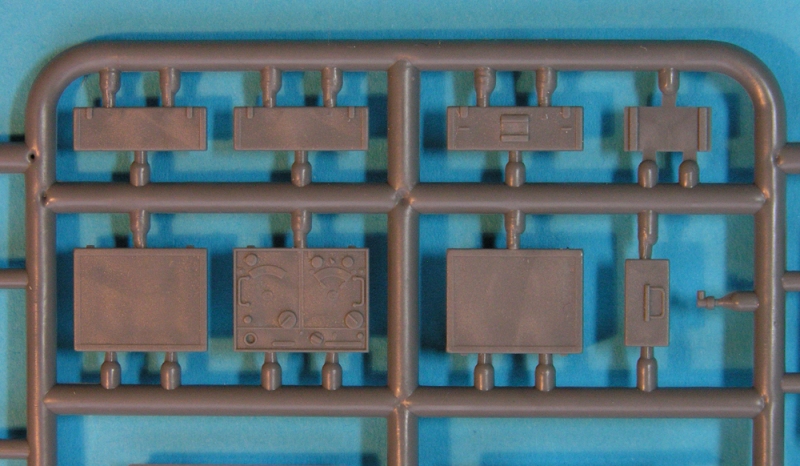
Sprue D, main body panels, rear seat, radio parts and equipment boxes.
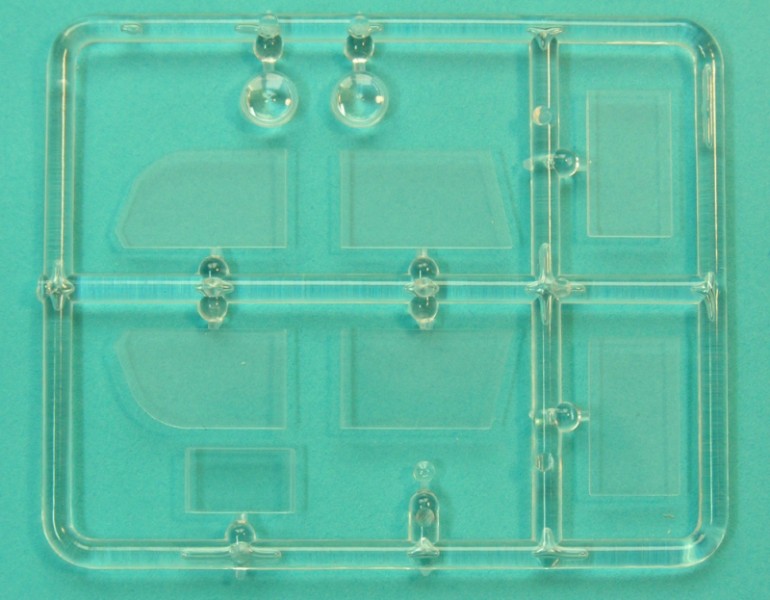
Sprue E, clear parts.
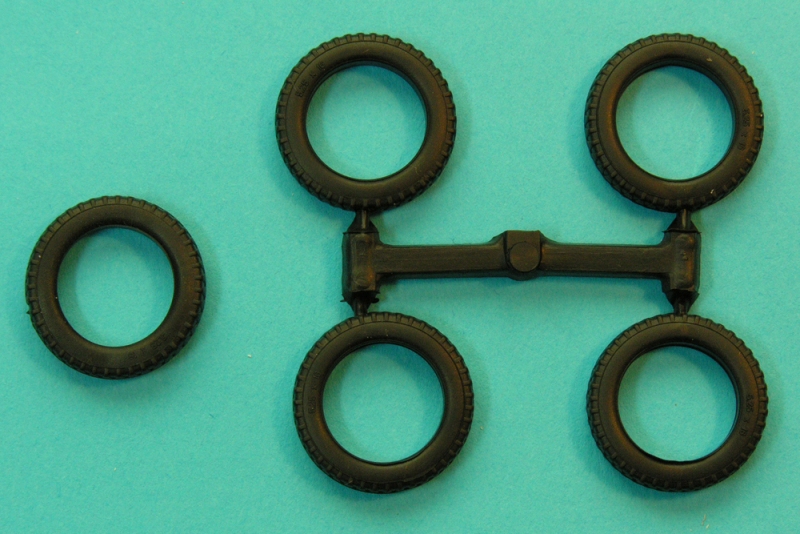
Sprue F*, rubber tyres.
Decals.
Asterisked sprues* are shared with the other models.
Instructions:
The previously favoured 4-page A3 instruction sheet has given way to a more conventional 12-page A4 booklet. The previously-used CAD drawings have also given way to line drawings of varying quality. I find this disappointing as the CAD drawings set Master Box instructions apart and they were every bit as clear as line drawings. I didnt find any initial errors. There are no less than 51 stages in the build process and I cant imagine any problems being encountered. The build process is quite logical. Warning notes are minimal with just one piece of advice in English, German and Russian.
Building options:
The four-part bonnet can be modelled open to reveal the detailed engine underneath.
All three doors can be modelled open or shut.
The headlights have a choice of clear headlight lenses or blackouts.
Alternative radiator grilles with or without a cold-weather muff.
The hood can be modelled in three ways: hood up with windows; hood up without windows; hood down.
The windscreen can be displayed up or down and the drivers panel can be opened separately.
Boot lid open or closed.
Choice of normal rear or convoy light
review
First impressions:
The overall quality of the parts is very good with crisp moulding. There is some minor flash on some parts, but nothing to worry about. Ejector pin marks will need to be removed from the inside faces of the doors and boot lid, and from inside of the hood top. The walls of the wheel arches are commendably thin. Unfortunately, this means they are easily damaged and, as with the two previous models, the lower edges of the front mudguards show damage from rubbing against other sprues during transit. There is no sign of warping and the sink marks on the sides of the chassis rails present on the Polizei kit are absent here. However, there is a very minor sink mark on the face of the radio which probably wont show after it has been painted.
CAD drawings can be found on the
Master Box website of the model showing the different options and the amount of detail at
Construction:
Like the previous models, construction is broken down into three main stages:
Engine, Chassis, Body. In total, there are 83 steps to get through!
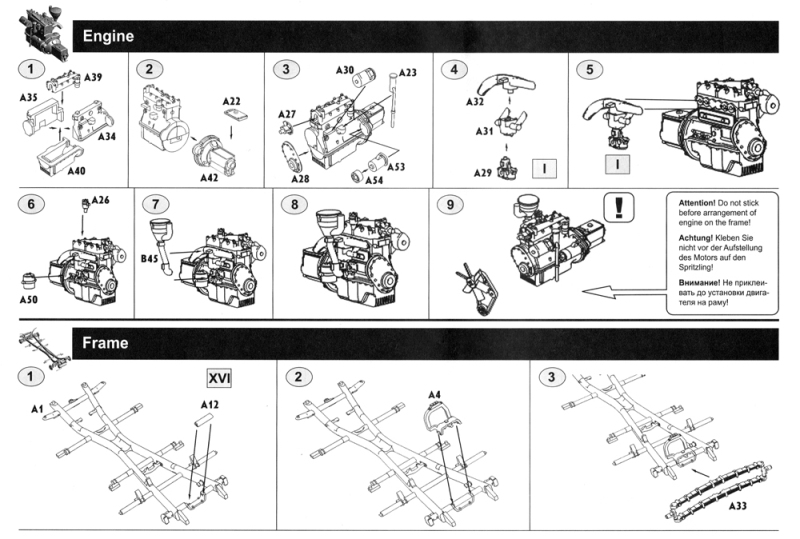
Engine:
Eight steps relate to the engine build. There are twenty-one parts to replicate the four-cylinder engine, and once constructed and detailed with some plug cables you will have quite a basic but good-looking engine. The only warning is to leave the fan/fan belt off until the engine is mounted in the chassis.
Chassis:
The next step is the chassis of the car. This kit has the bonus of being able to make the chassis separately from the bodywork, speeding up construction and enabling you to paint the chassis and body as two components.
Twenty-three steps (fourteen previously) take you through building the complete chassis and mounting the engine. Each step is very clear and concise, sometimes just adding one part at a time. I keep comparing these instructions to the previous ones, but I guess the increased number of steps with larger drawings makes the construction that much clearer.
The main chassis members are moulded as one together with five cross-members. The seams on the chassis rails are still present, but they are not that bad and a few minutes work with a knife and a file will remove them. Steps 1-8 have you adding structural components to the main chassis frame followed by double front transverse leaf springs for the front suspension. We then move on to the rear transaxle and its own suspension components in steps 9 to 12. Steps 13-17 have you adding the steering linkages, front wing supports, the wheel brake drums, front bumper and exhaust pipe. In step 18, the engine is mounted on the chassis and in steps 19-21 the driveshaft, the radiator and water pipe and fan/fan belt are added. The engine and chassis will need to be painted before they are married up.
At step 22 the wheels and tyres are added. The wheels have separate hubcaps which could be left off. Step 23 has two drawings of what your completed chassis should look like from above and below an excellent idea.
I think the only thing that might disappoint some people during these stages is the fact that the tyres are rubber. Normally, the biggest problem with this kind of tyre is the seam around the circumference. On my example, the seam is remarkably clean with no flash whatsoever. The only markings on the sidewalls are the tyre dimensions. I am not aware of any aftermarket wheels for the current Master Box Mercedes-Benz 170Vs, or the other versions of the 170V available from Mini Art, but with so many kits available it could only be a matter of time before some become available.
I would like to add a comment here direct from Alexander at Master Box.
A lot of modellers have had bad experiences with rubber tyres when, in time, they start to eat the plastic. In our case, experience is positive. The first test model (of the Tourenwagen) was assembled in January 2011, a year ago, and since that time nothing has happened with models in our collection or assembled by our acquaintances.
Body:
The final 51 steps! These take us through construction of the bodywork starting with what seems to be a mistake in the width of one part. In step 1, we are asked to trim 0.5 mm from each side of the boot floor. This will ensure an accurate fit to the rear edge of the main floor pan in step 2. Step 3 tells us to add part B9 a hook under the left rear floor but a second one should be added on the opposite side. The second hook is on the sprue. In step 4 the gear lever and handbrake are added before steps 5 and 6 show us how to add components to the engine bulkhead such as the fuel tank, dashboard, steering wheel and foot controls.
Steps 7 to 12 show us how to model the four bonnet panels in either open or closed positions. The famous Mercedes badge is added to the radiator grille. If the bonnet is modelled closed, the bonnet top is provided as one piece (although this is not shown in the instructions). If they are to be modelled open, the edges of the panels could be thinned down a little for a more realistic scale appearance. Two grilles are provided, one from the original kit and a new one as an option for this vehicle. The new grille features a cold-weather muff which would be appropriate for the winter colour scheme suggested on the box top. When the bonnet is completed it can be added to the floorpan or left off as a sub-assembly for painting and added after the chassis/engine have been brought together with the main bodywork.
From step 13 we start to build up the body panels starting with the rear bulkhead and a box section that takes the space occupied by the right rear passenger seat. What appear to be rails (not sure about the purpose of these) are then added into the boot before the three seats are put in place. In step 17 the side panels are added and a box is added to the previously installed rails. Going forward to step 50, two further equipment boxes are installed inside this boot box, and the way it is drawn suggests that this box could be slid in or out on the aforementioned rails. I am not clear about this, though.
The boot lid follows (with minor pin marks on the inside face) and here we have alternative rear lights a conventional rear/brake light or the familiar German convoy light. Of course, the boot lid can be modelled open or closed as shown in steps 19 and 20. In step 21 we add the three passenger doors (again with minor pin marks on the inside face) which each have separate handles inside and out. One of the colour scheme options shows the front doors removed. In reality, I believe the doors could simply be lifted out of their hinges, so this is a further build option or just model them open as yet another alternative.
In step 22, tops are added to the boot space and the rear passenger compartment box followed in the next steps (23 to 28) by adding small fittings such as an aerial mount on the left rear, latches on the bonnet, a spade on the left wing, headlights which can have either clear lenses or blackouts, a Notek light, hood fittings and a pair of rectangular section poles in the stowed position on the right rear side panel. This is where the confusion lies between the two marks. The Kfz 2/1 radio car did not carry these poles so leave them off. However, the Kfz 2/2 did have them, but would not have carried the radios or the aerial mount at the left rear. These two sections of 2-metre long wooden poles were joined together like a fishing rod to be 4 metres long. One had a hook on the end for holding telephone wire as it was reeled out or reeled in from the vehicle which, as a Kfz 2/2, carried several reels of telephone cabling (I guess in the boot).
Thanks to Leonard Paul for this information.
Steps 29 to 31 are possibly the most complex and certainly the most fiddly part of the whole model. Two pillars are mounted on the front door frames. The left has a drivers rear view mirror and the right has a searchlight. The pillars themselves are very delicate mouldings and have some flash that will need some careful removal. What is worse is that the searchlight pillar has two tabs either side which will demand a very sharp knife and some skill to remove if the pillar is not to break. Onto these pillars, indicators and four tiny adjustment latches have to be added. This is brilliant detail that will need patience to accomplish successfully. The left-side pillar has a large mirror as a separate part, but on the right is the searchlight that has a separate and tiny clear lens that must be added.
The windscreen is next (steps 32 to 35) and the frame is in two parts with a separate frame for the drivers side. This can be modelled closed (which will be necessary if the screen is folded down on the bonnet top) or slightly open for some air conditioning! Into both of these frames, clear windows are dropped. Wipers and wiper motors are then added. Remember that there is no photo-etch on this model and everything is accomplished with some very delicate moulding.
Three Karabiner 98K rifles can be fitted in steps 36 and 37, one for each passenger and each have delicate brackets to hold them in place. Now we come to the hood (in steps 38 to 42) which can be modelled down or up, either with or without side screens in place. Clear parts are supplied which are fitted inside the side screen frames and the rear window. In reality these were polythene and they may look more realistic if you are brave enough to actually fashion your own window panels from cellophane or a plastic bag. The inside of the hood top has six fairly large pin marks which will need cleaning up if the side screens are not fitted. If fitted, I doubt they will be visible through the windows.
The radio is assembled in steps 43 to 45 and when complete sits precariously on top of the box in the rear compartment. The radio is a Torn.Fu.B1 which is an HF transceiver for field use. See the reference listing at the bottom for an excellent website. One slight disappointment is that there is no option for the radio aerial in use. Looking at Master Boxs own website there is one CAD drawing of the aerial mast extended though it is shown in the wrong place. It would have been nice to have this as an extra option in the kit.
All that is left to assemble is the spare wheel which sits in a hollow in the right front wing, and the aforementioned equipment boxes that go in the boot.
That is it! All that needs doing now is adding the body onto the chassis after each major component has been painted.
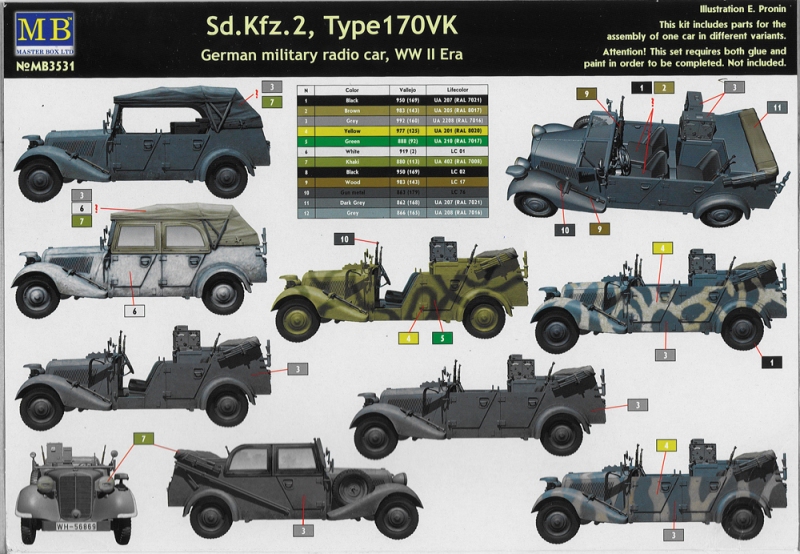
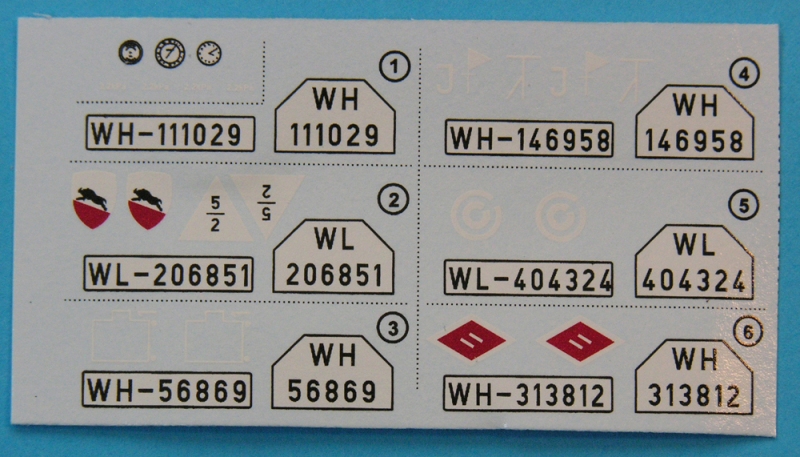
Painting and Markings:
This is where things get really confusing. The decal sheet is clearly marked with six different vehicle options two Luftwaffe and four Wehrmacht. Apart from the main box top artwork which is option 4 on the decal sheet, only one of the colour scheme options on the box rear can be identified. This can be matched to option 3 from the only front view on the box rear. Other than these, you have no idea which schemes belong to which decal option. Master Box have really slipped up here.
Decals are also included for the drivers instruments. Check the references below as the instructions give no indication as to which goes where.
Market competition:
In 1:35 scale, Master Box have just one competitor: Mini Art. However, there is no cross-over whatsoever in the subject matter as yet.
Dont forget that Master box have already released two versions as detailed above a Polzeikübelsitzwagen and a Tourenwagen. Also, soon to be released from Master Box, is a Kfz1 Type 170VK which is the genuine militarised four-door staff-car version which can be viewed
Here.
With three other versions of the Mercedes-Benz 170V available (or shortly to be released) from MiniArt, fans of this particular car are currently very spoilt for choice. MiniArts versions are an open top Cabriolet B, a Cabrio saloon and a Personenwagen saloon car (review link below).
Conclusions
Along with its two sister kits, I have to admit to being very pleasantly surprised by this model. It is well planned resulting in a simple but extremely well detailed kit straight from the box. It is well-engineered with crisp moulding. Flash and seam lines are minimal, and even ejection pin marks are notably absent. I cannot speak for the fit of parts as I havent started to put it together.
There are some downsides, however. The worst is the lack of co-ordination between the decal sheet and the colour profiles. The tabs on the searchlight post will be difficult to remove without damaging the part. There is confusion over the identity of the actual vehicle is it a radio car or a telephone car? The lack of an erect aerial mast is also disappointing but it shouldnt be too difficult to find reference and build one yourself.
What outweighs the bad points is the fact that Master Box have been brave enough to choose an interesting series of cars all based on the same chassis. I think this version is the most fascinating, far more so than your average Tiger, Panther or StuG, and it will make for a very interesting piece in the display cabinet. What I really must do is find the time to build the three Master Box 170s and the single MiniArt 170 I have now reviewed. They will look very good all displayed together.
I think this kit is enough to keep the more experienced modeller happy and even the novice will be able to produce a nice looking reproduction from the box. I am looking forward to seeing more versions of this car.
Prices vary from source to source. Check your favourite stores and websites.
Very highly recommended.
This kit was provided by Master Box as a review sample.
References:
For the 170VK:
dayerses
Wiki
kfzderwehrmacht
mbchassisclub>
For the radio:
laud.no
References for the 170V Tourer are fairly plentiful:
tabacaria
walkaround
Other reviews:
Tourenwagen
Polizeikübelsitzwagen
Personenwagen


Comments