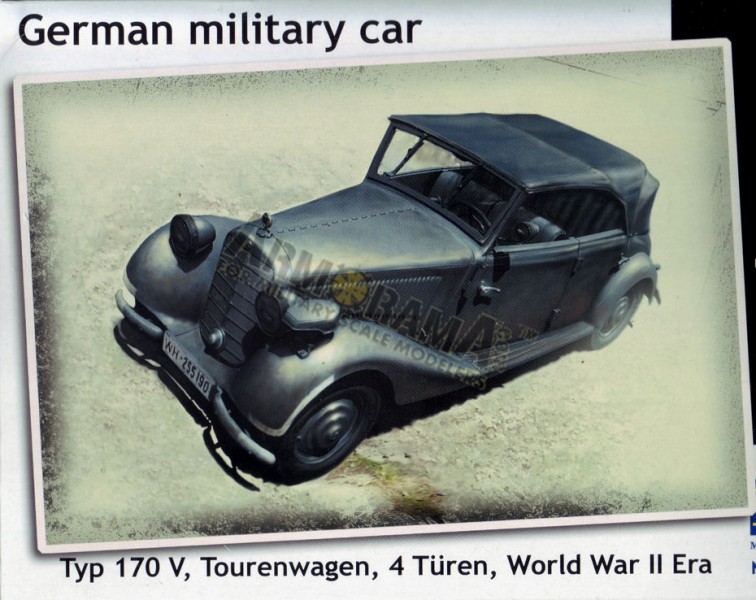
Unfortunately, the model manufacturers cannot now include the manufacturer's name in a model kit. This model, of the Mercedes Benz Type 170V is no exception.
All this apart, once again, it's great to see the less 'glamorous' side of military vehicles getting the proper treatment by the 'styrene' manufacturers. For too many years, a subject like this would have been the provenance of the resin manufacturers rather than the 'mainstream'. Releases like this allow many more modelers the chance to build a vehicle, which although in its military guise, is very much along 'classic' lines.
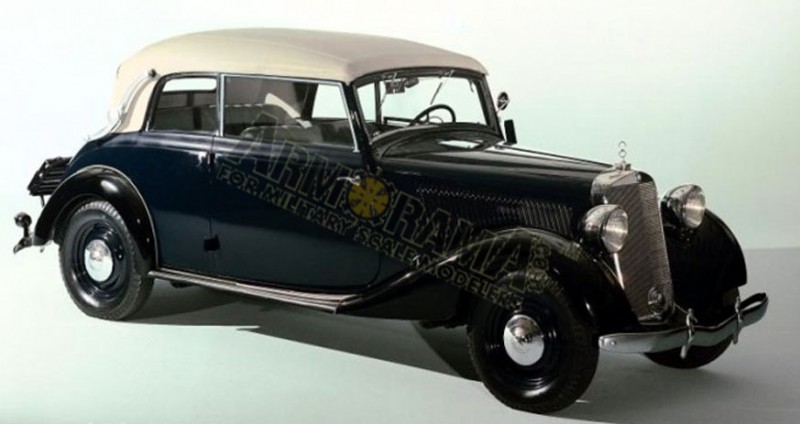
the 170V from Masterbox ltd.
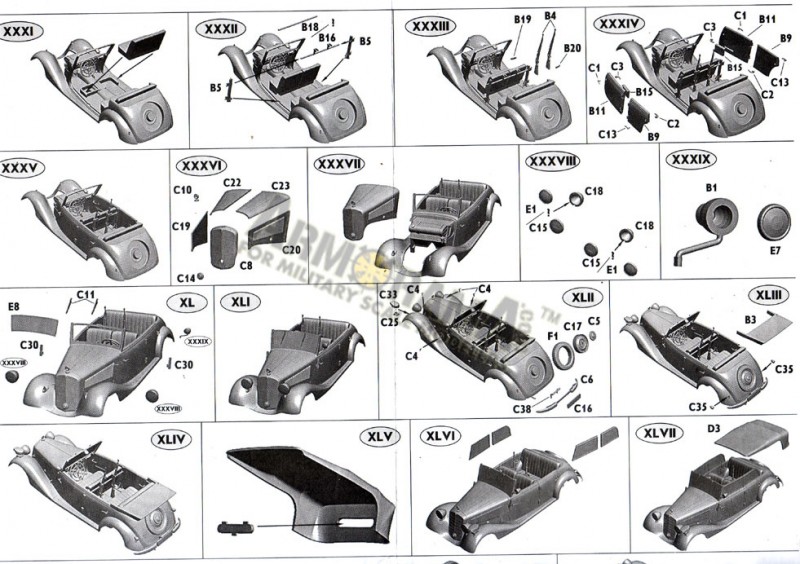
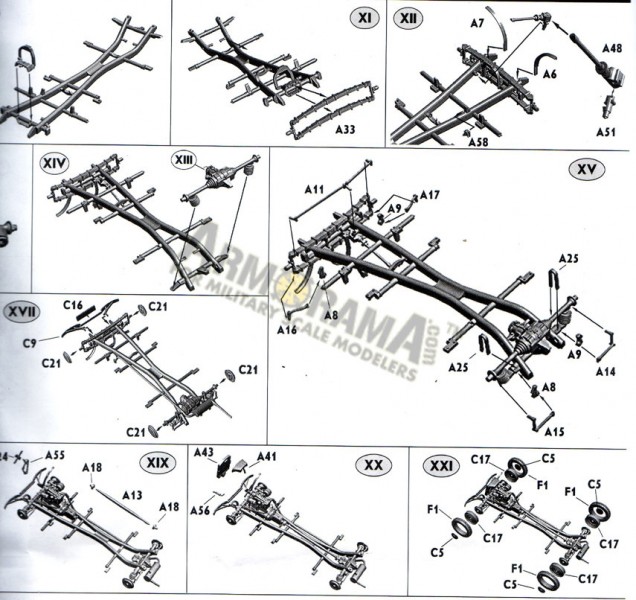
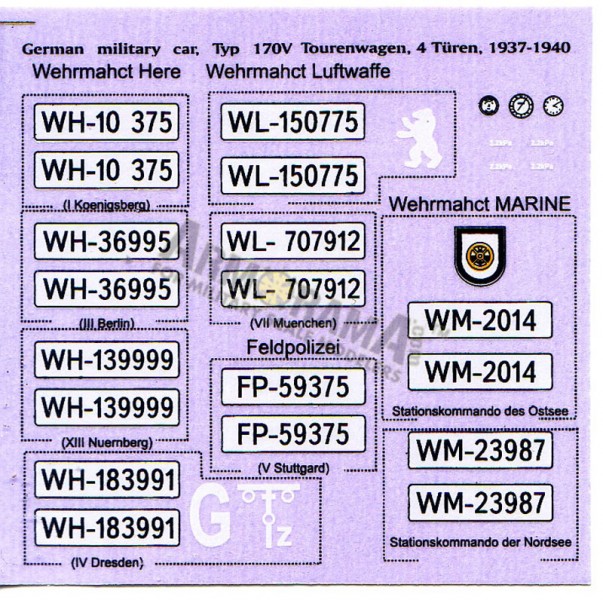
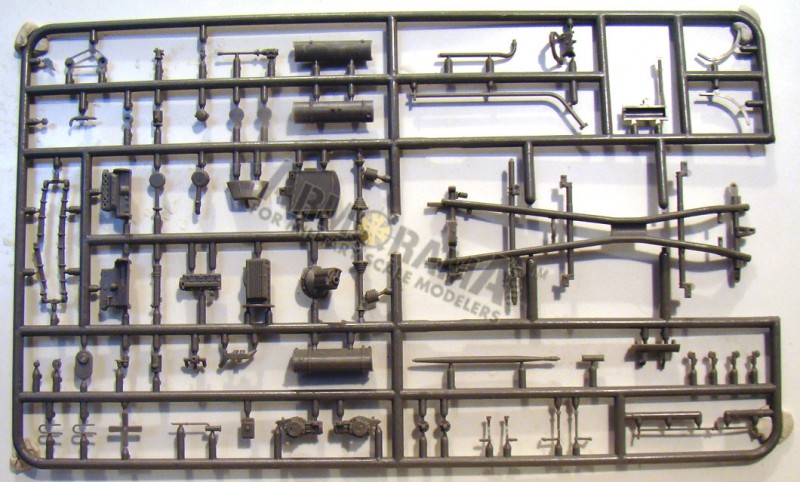
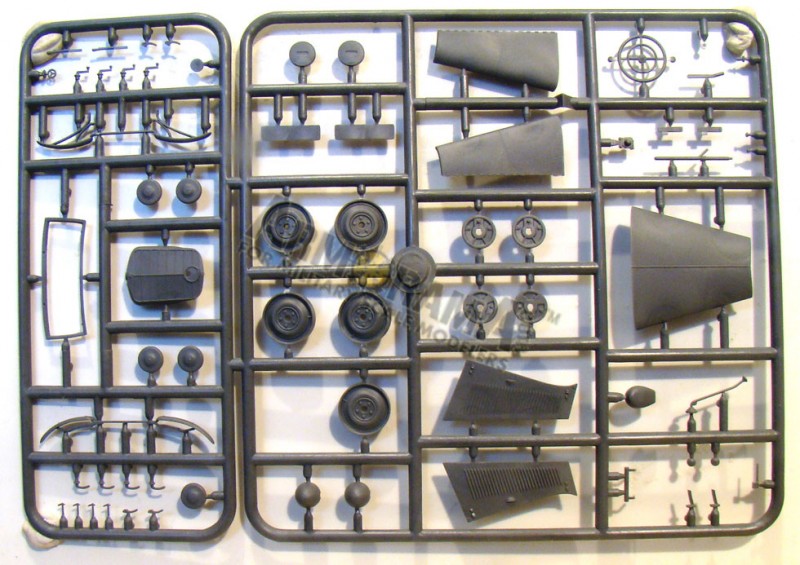
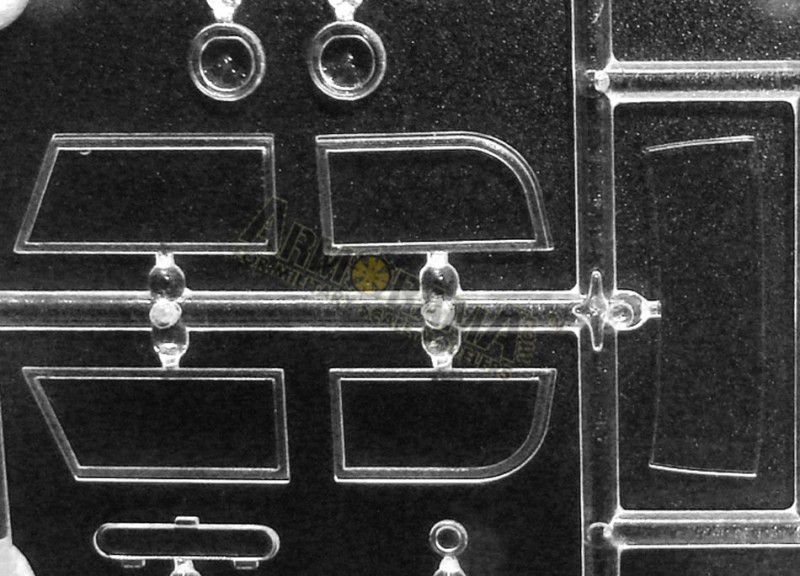
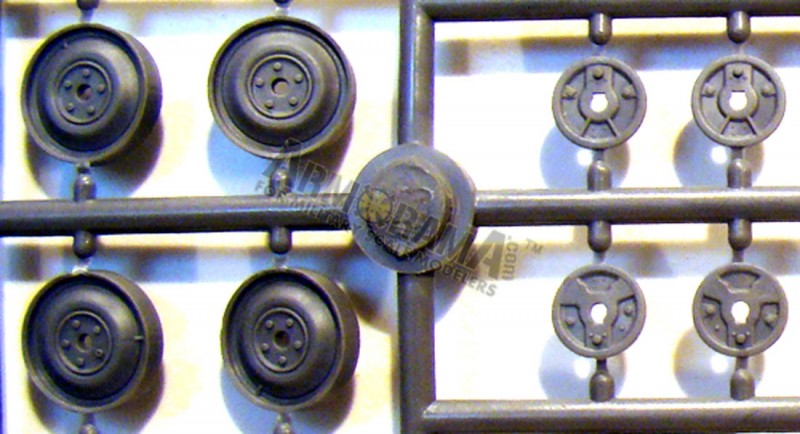
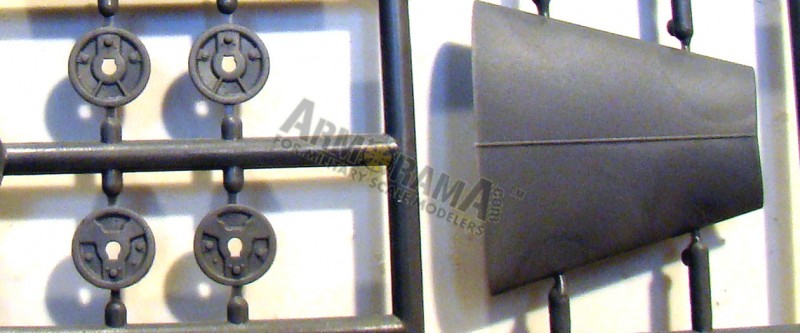
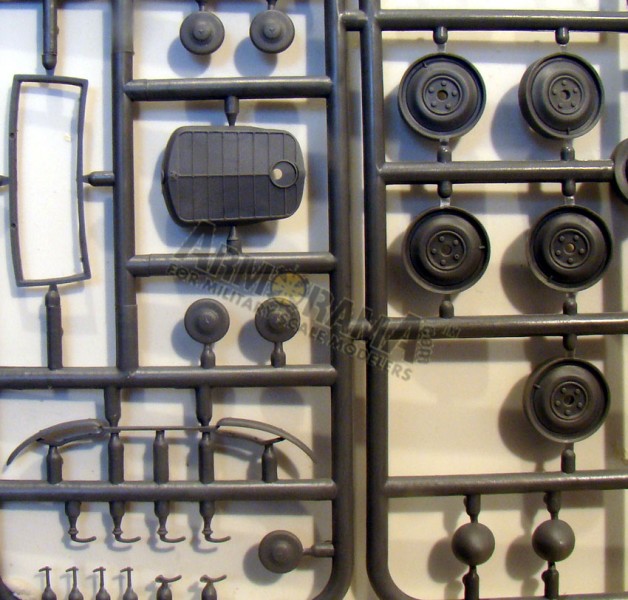
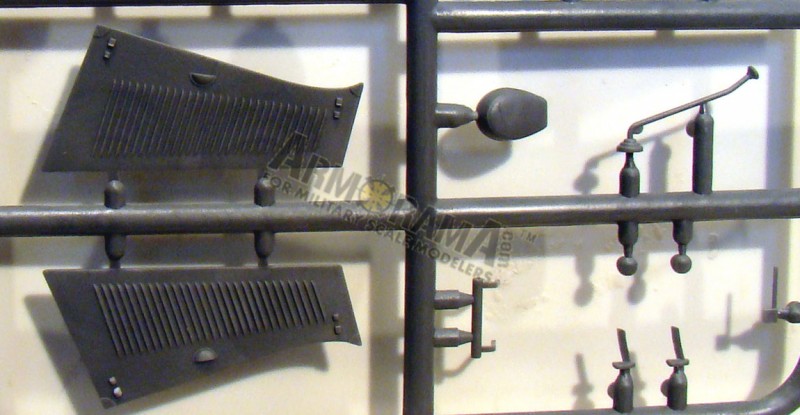
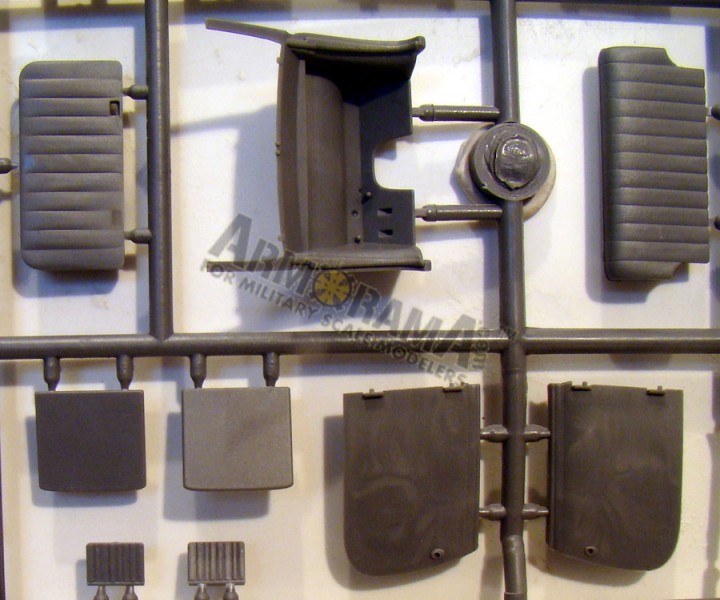
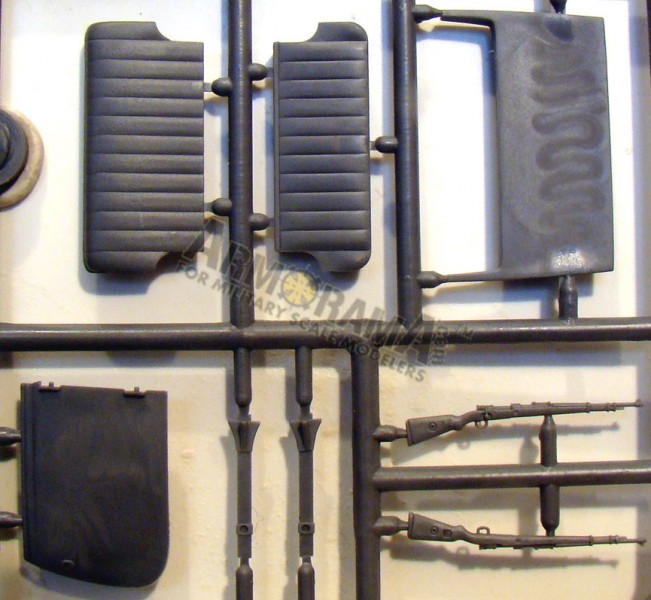
The model is: MB 35100 - German military car, Type 170 V, Tourenwagen (1937-1940). The model comes on four dark & light grey styrene sprues, a fifth has the transparent parts and the last, five vinyl tires. In total, the model has around 130 parts. Also included is a medium-sized decal sheet with markings for 10 different vehicles. 4 Wehrmacht (Heer), 2 Luftwaffe, 1 Feldpolizei and 2 for the Navy. Instructions are presented in a VERY different format from what we expect from other manufacturers in the form of a large (A1) double-sided sheet with instructions taken from the CAD drawings. More of that later, but, it really does make for VERY clear instructions.
in some depth
First Impressions:
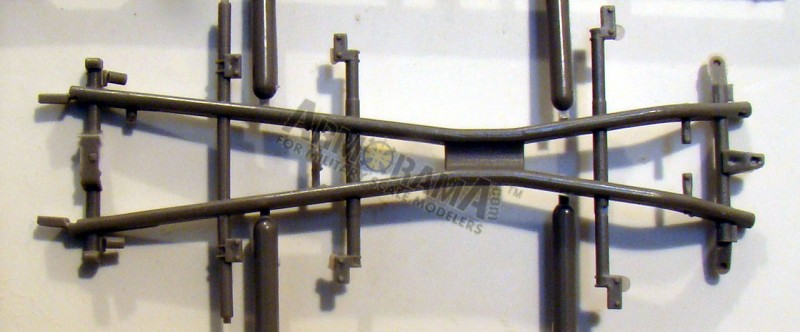
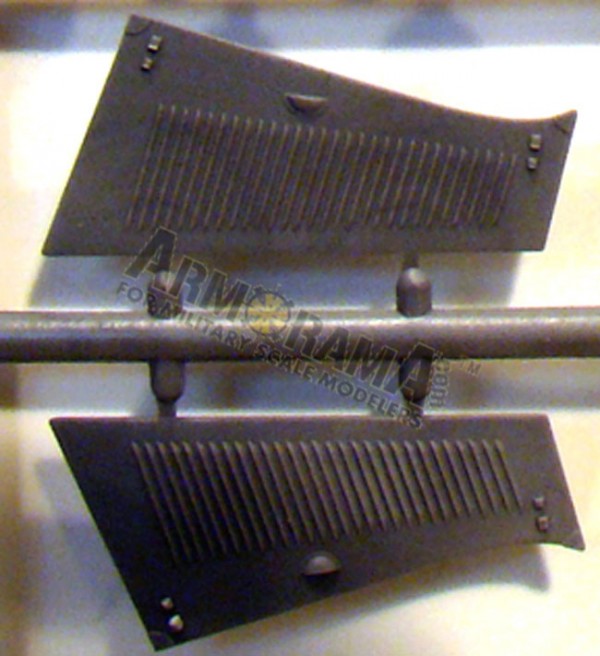
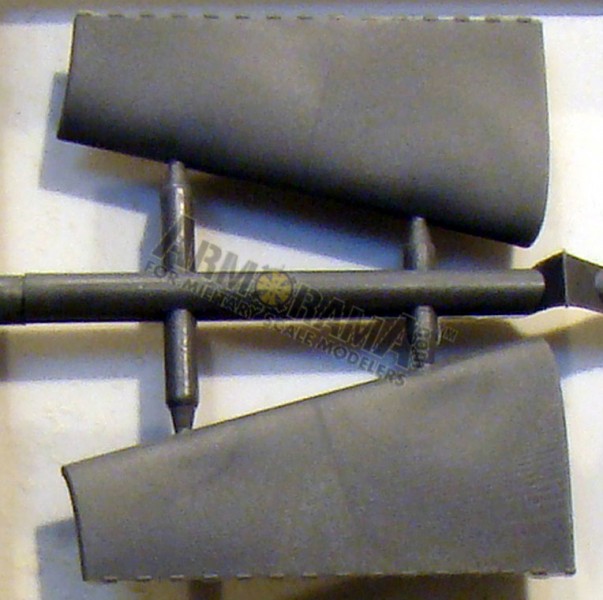
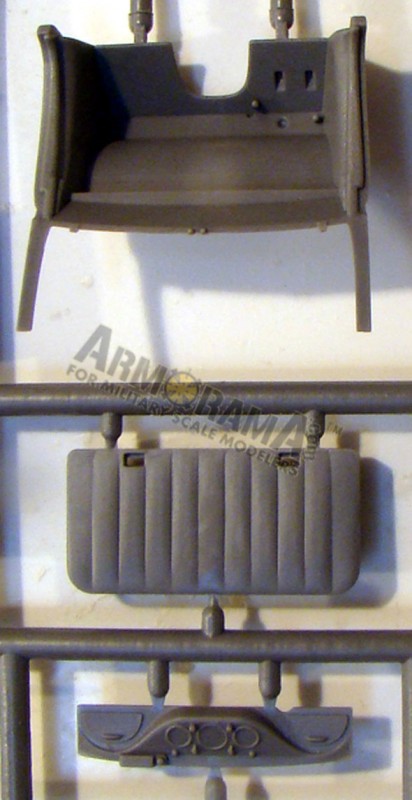
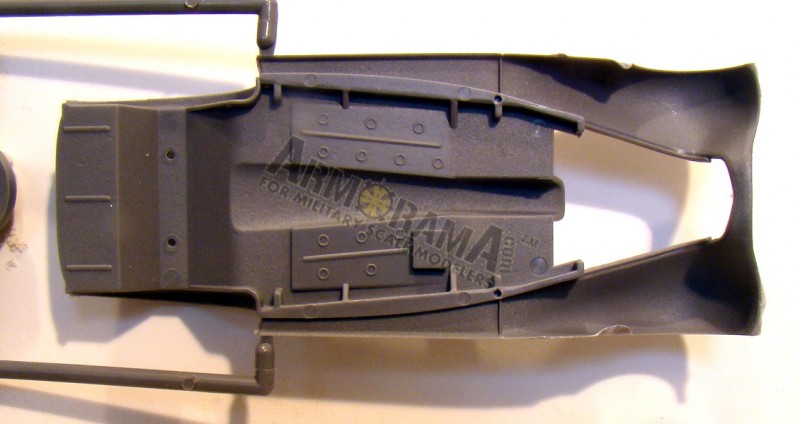
Unfortunately, in this, the review sample, there were a couple of parts (slightly) broken. Since they are 'clean' breaks they'll be easily repaired. Apart from that (accidental damage), everything was where it should be and the first impression, confirmed by the images, is that the molding is very crisp indeed. The only 'excess' plastic was under the front mudguards and will be a quick job with the X-Acto and some fine-grain Wet'n'Dry. The plastic is hard and rigid (precisely the kind I prefer!), I have a real dislike of soft styrene which tears and warps - particularly in larger parts. The two largest parts - D1 (the floor & front mudguards) and A1 (Sub-Frame) are the two most probable to suffer warping, in fact they are perfectly straight and perfectly molded.
The Instructions:
Now, I guarantee that not everyone will like this format. I do. Firstly, it's VERY clear, you've got nice big images of the three sprues at one side of the page and when you require detail, there's a close-up provided. This definitely seemed to originate from the original CAD plans, so it's cost-effective to use something that already existed. Now there are a couple of build options. There are two kinds of fuel tank - a smaller (Pre-1939) and a larger (1939 onwards). In addition, the Type 170V, being a convertible, can be built with the hood up or down, side windows rolled up (or down) and with the design of the front bonnet, the engine can be easily displayed although the internal hinges will have to be added. A very nice design 'touch' is including the closed bonnet and separate parts to show the hood up. Also appreciated is the molding of separate doors again, to show some of the good internal detail.
Construction:
Sometimes, with vehicles of this type, there's a tendency to slightly over-engineer, with this model, it isn't the case. Take for example, the sub-frame. Personally, I prefer a single molding (providing there's no warping) to a series of sub assemblies which can get complex and can be difficult to actually get flat. In this, I'm pretty sure that Masterbox have got the 'balance' right by avoiding the excessively complex. We're so used to the massive 800 parts plus, of some models, this should be put together in a couple of evenings.
Subject:
With the spate of recent softskin releases, I have to say that I'm re-discovering a lot of the reasons why Axis is an immensely popular area. There really is a lot of potential (particularly with dioramas) in this kind of subject. I've always been more interested in subjects like the Pz.38(t) over the more 'boxy' forms of the JagdTiger or even the Panther. This kind of subject really enthuses me.
Being Civil About It:
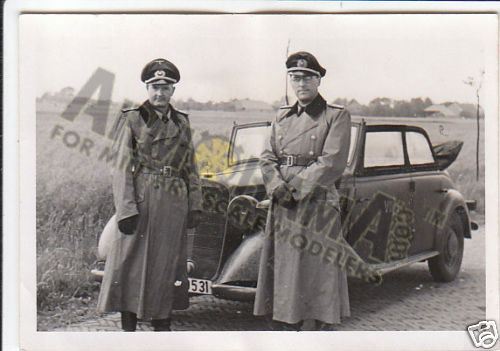
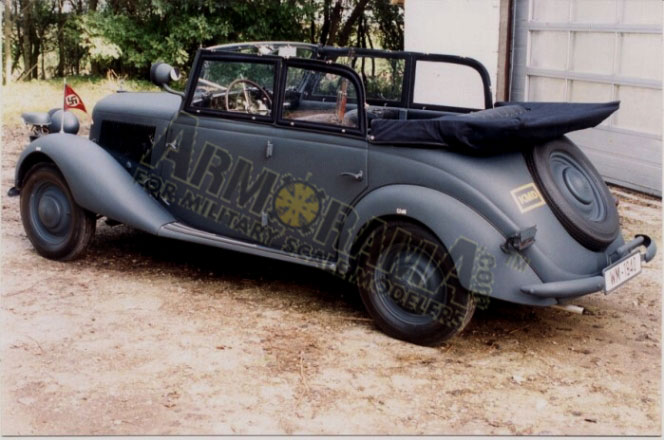
Some comments have been made in the forums about the current spate of German softskins and the fact that no-one has included chrome parts for bumpers etc. Let me try and answer that. Primarily, the intention has been to produce civilian vehicles which saw service in a military role. In this, the bumpers and all chrome parts were painted over (for somewhat obvious reasons), there's a few other parts as well - the NOTEK light on the front and (obviously! the rifle racks in the back. Taking it back to a civilian vehicle should be simplicity itself - particularly by 'chroming it with an appropriate sheet from the Bare Metal Foil Company....
Improving the Model:
I've frequently said that sometimes you can judge a model's accuracy by the amount of AM sets that have been released for it. With this model there's only (I believe) one set available. This is from Hauler which replaces/improves the steering Wheel, adds detail to the rifle racks, replaces the registration plates, mirror & windshield wipers and gives you a photo-etched Mercedes symbol for the front bonnet (somewhat unnecessary as this IS included in the model).
Another area, which is in-progress, is a set of seated passengers for the car. This is coming from Masterbox themselves although no word on release date.
Tired of this debate?
The tires on the model are produced in vinyl. Now this not to everyone's taste. There are those who (with some justification) believe it's unnecessary as they have to be painted anyway, so what's the point of producing them in a material which can be problematic. Personally, I don't have any real thoughts one way or the other. They are nicely molded with good detail, no excess flash and easy to attach. My only thoughts are, like everything else, a little preparation can save problems later. What I do, is to paint them with a PVA-type adhesive (to key them for painting) let them dry and treat them like any hard styrene wheels. As I DON'T use enamels, I don't have a problem with possible chemical reactions between oil-based paints and vinyl.
Conclusions.
Masterbox have taken quite a while to get this model onto the shelves. Many people still seem to believe that there should be a fortnight between announcing a W.i.P. and getting their hands on it. I don't. Personally, I prefer the manufacturers to take their time with NEW releases and get things right on launch. From what I can see from the model, they HAVE got it right.
Another nice aspect of this model, not only is it the first 170V in styrene, it's also an 'accessible' model. Modelers of almost all levels of experience will find it easy to build - this is particularly true for less-experienced modelers who may find some of the recent softskins pretty complex affairs. This is as complex as it has to be - no more, no less.
As to potential as a subject, it's only limited by your own imagination! A captured example painted in OD, part of a convoy of senior officers or a heavily loaded example retreating on the Eastern-Front. the sky isn't really the limit with subjects such as this.
It's the first release of this type by Masterbox - hopefully this will be sufficiently successful to fund more vehicles of this type.
SUMMARY
Highs: Subject area, quality of molding, relative ease of assembly.Lows: Not everyone will welcome the vinyl tires. Instructions are good, but some may find them complex. By the same token some may bemoan the lack of chrome parts.Verdict: An excellent model of a wonderful subject. Sufficiently simple to allow all levels of modelers to (hopefully) get something out of it.
Our Thanks to Master Box Ltd.! This item was provided by them for the purpose of having it reviewed on this KitMaker Network site. If you would like your kit, book, or product reviewed, please contact us.
About Jim Rae (jimbrae) FROM: PROVINCIA DE LUGO, SPAIN / ESPAñA
Self-employed English teacher living in NW Spain. Been modelling off and on since the sixties. Came back into the hobby around ten years ago. First love is Soviet Armor with German subjects running a close second. Currently exploring ways of getting cloned to allow time for modelling, working and wr...
I was really excited to see this kit finally released and it looked great on the sprue[despite the crushed box--and mine had broken parts too] The instruction sheet was huge but at first appeared to be very clear---but once in mid build it becomes appearent that for some parts it is not at all. While the CAD drawings are nice---placement is actually not indicated on several parts. Moulding seams run the length of of the one piece chassis, inside and out, and the soft plastic chatters when scraped to clean-up. The chassis assembly is very detailed, but just as tedious and requires adding a part and waiting for full curing beofre continuing. Things don't get any better moding on to the bodywork, as the parts suffer from poor fit---very little of my kit really seemed to go together in fact and this became the first build I can remember not caring to finish.
Jim's review is another review of this kit that is obviously from someone who hasn't tried to build the kit yet.. .
Well, it doesn't on my copy, yes it's an area which would be subject to that kind of my problem, but in mine it simply doesn't.
As to your comment about part placement, I'm interested in your comments but some of the parts, their placement is really obvious, and NO, i'm not justifying ommissions in the instructions at all, there really is NO excuse for that...
Jim~ Hey forgive me there's nothing wrong with you're review as an in-the-box review---it's similar to several others I've read----but just as off-the-mark when it comes to the reality of building this kit.
It looks great-- but its a dog.
.Im not one to give up easily but to show you some of what Im talking about:
There's my chassis---A LOT of work to clean up for something hardly seen later-fun huh?
I did get it built up
but it was yards of work to get parts to fit and a guess at several positions--to give an example--and this is not the most obscure one:
Part "A-52" is drawn very clearly---but it's placement is not indicated what-so-ever!
neither is C7 but we can guess its a windshield frame and guess how it attaches
At 1st I was very impressed with the look of these CAD drawing-instructions----after trying to assemble the Masterbox MB I am not so much. Below--it's easy enough to guess where gearshift [C34] goes & even brake lever [C29] but what is that tiny disk?[C27] DO you see any direction where to attach it?? what does it do?
Anyways if you build it-good luck--you'll find the rear doors wont fit well no matter what---theres 2 huge deformed holes right behind them in the body, a large parting line down the fender next to that, and on & on & on.........
..at $42 or so around town its expensive garbage.
Well, following your comments, I began building the model yesterday.
There WERE moulding seams on the chassis which, scraping with the X-Acto, I got rid of in a couple of minutes. Now, the angular ones, towards the rear, they could (just could) be weld-lines? Whatever, they are, clean-up time was minimal.
The attachment of the fuel tank I found extremely simple it slotted on neatly and a couple of sweeps with the glue brush held it in place.
Now the rear section being attached to the floor, did give me a few minutes of concern, The fit was far too tight so I had to do some vertical sanding on either side to get it to click into place agin, it was a few minutes work, but fit was very good.
Later on, i'll be starting a proper Build-Log and take photos of the build...
I too am building this kit for a full build review and have noticed all the same problems mentioned earlier (including a crushed box) and will add two more. One, they make no mention of the one piece hood in the instructions and two, my tires SU_K. There is large pieces of rubber flash on mine and a nasty seam that runs along on one side of all of them. Good thing is that side can be placed on the inside of the vehicle and not be seen. I'm hopeing Hussar comes out with some resin replacements. Other than that I think the model is o.k. Definately lots of options for those wanting to supper detail the engine. As for the crushed box, the kit wasn't sent direct to me but to my friend who wanted me to do a build review for a site he helps on. The kit was sent to him from MB. The box was flattened and the fenders of my kit were damaged as a result. I am leaving them as is and will contribute it to bad driving.
Roy
Well Jim, its possible your example was not as bad as mine, still, do you really think that a Mercedes-Benz may have had a weld build anything like that jagged raised parting line my arrow points to?
come on really
As for the fuel tank, I had no comment about it. I never said no part of the kit fit, but to deny the kit may have a lot of issues is a bit of a dis-service--
Enjoy the build--I'll look forward to seeing some detailed pics
Roy~ I think that all the kit boxes are arriving crushed because a much over-sized soft box is used to give the impression that more is in the kit --a closer sized box wouldn't crush & squish so much
Yes--the tires a covered with flash that's impossible to cleanly remove


Comments