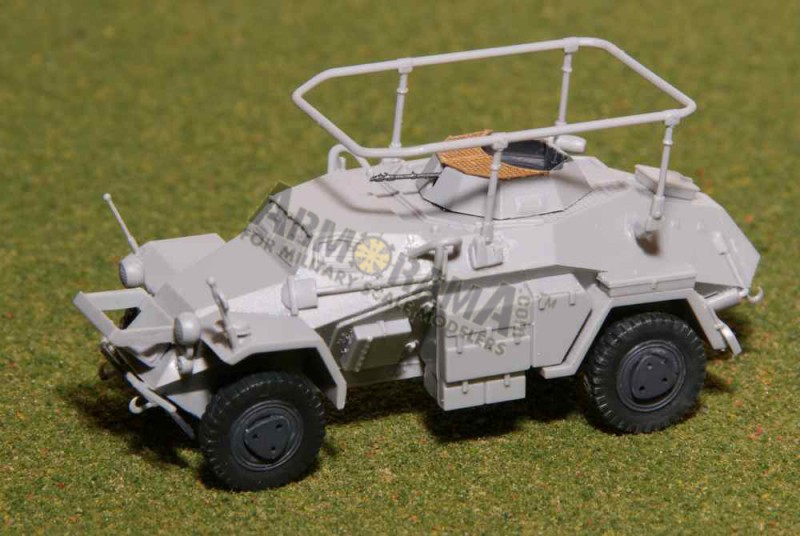
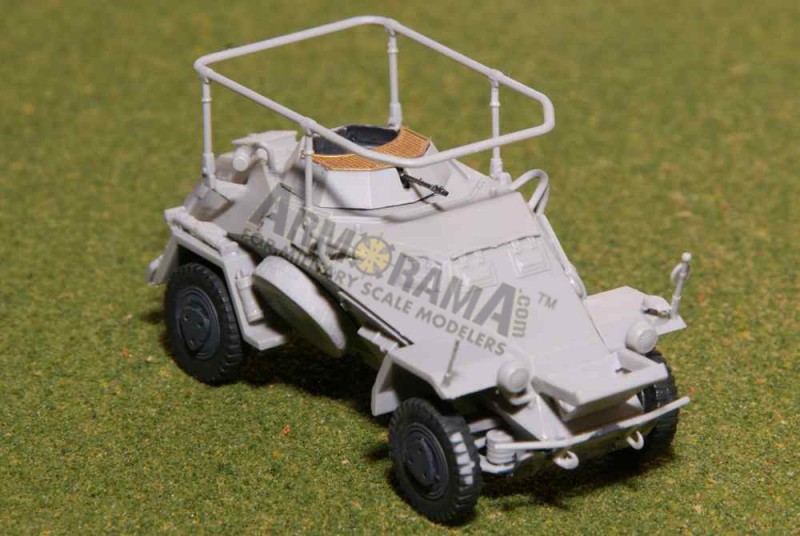
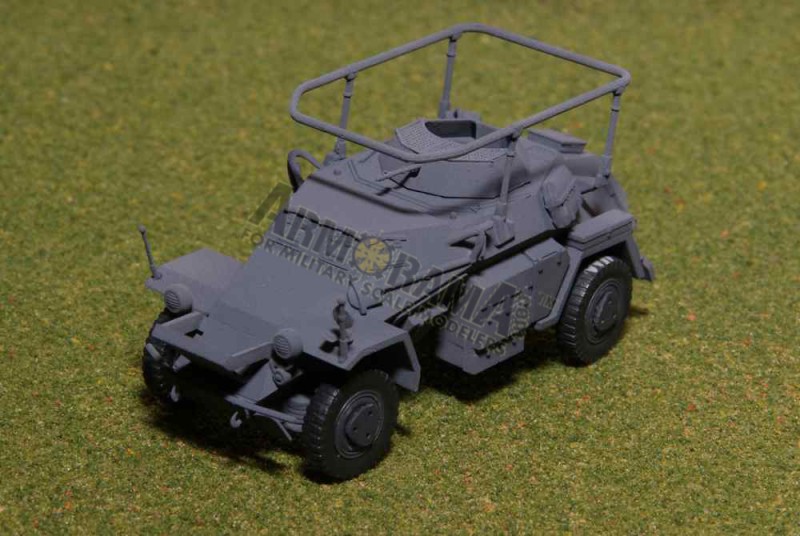
Designed as a replacement for the Sd.Kfz. 221, the Sd.Kfz. 223 was a reconnaissance vehicle based on the Sd.Kfz. 222 chassis and equipped with a long range FuG 10 radio. In the 223, the 222s 2 cm cannon turret was replaced by a smaller version armed with a single MG-34. Mounted on the upper hull and projecting above the turret was a collapsible tubular frame antenna for the long range radio.
The four-wheel drive vehicle had a crew of three, was lightly armoured and weighed 4.3 tons. It was powered by an eight-cylinder engine producing between 75 and 85 horsepower. Top speed was approximately 50 mph (80 km/h) with a range of 175 miles (300 km). The vehicle was issued to the Panzerspähwagen squadrons of light, Panzer, and motorized infantry divisions.
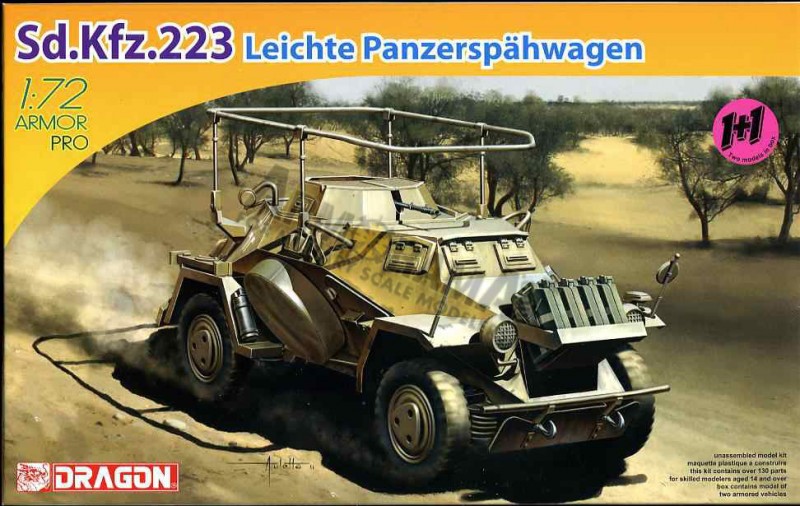
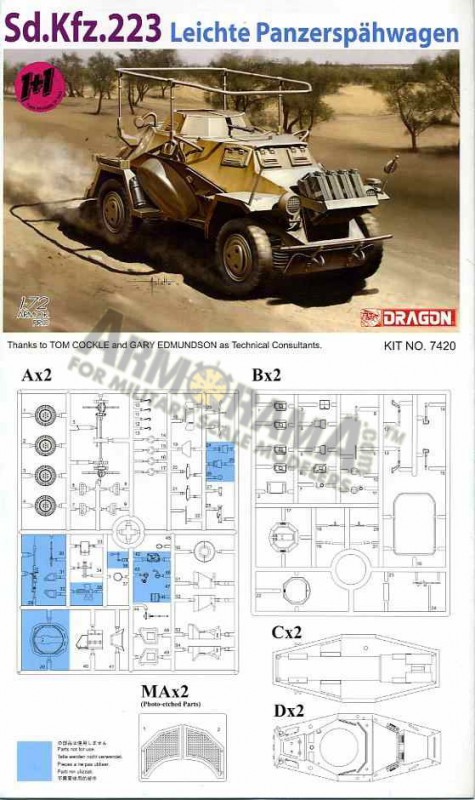
Dragon Models have released a 1/72 Armor Pro 1 1 Sd.Kfz 223 Leichte Panzerspähwagen kit #7420.
Contents
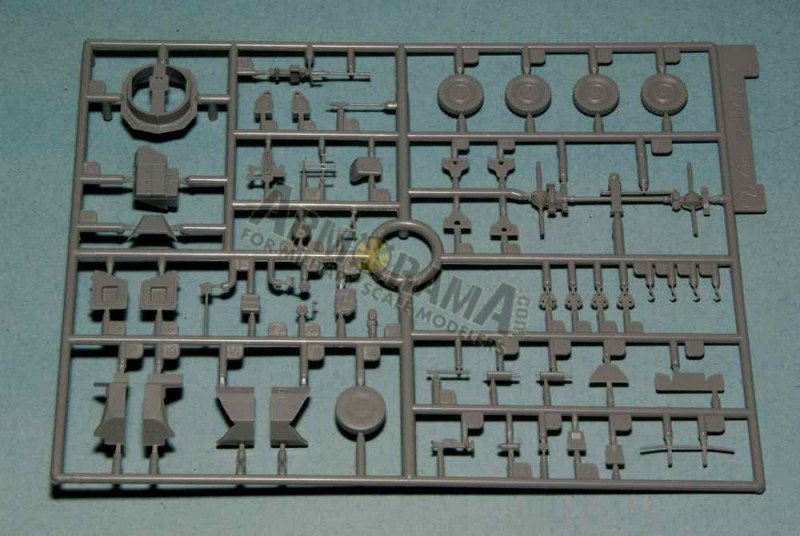
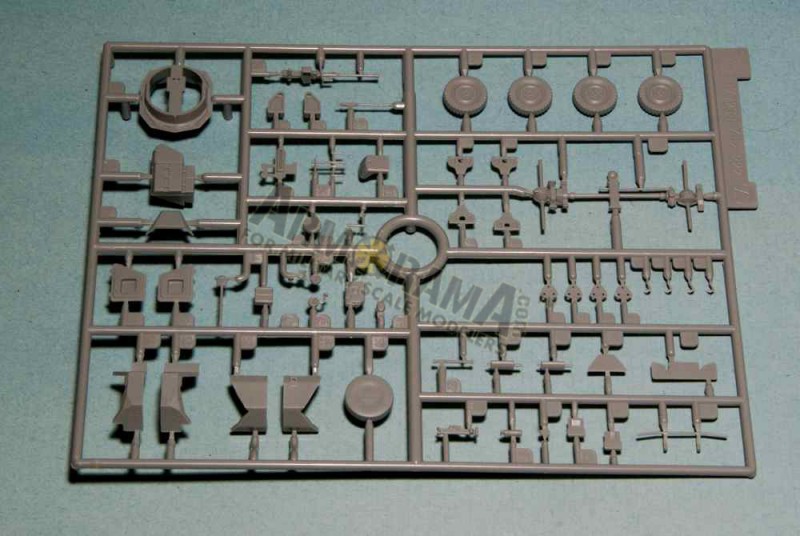
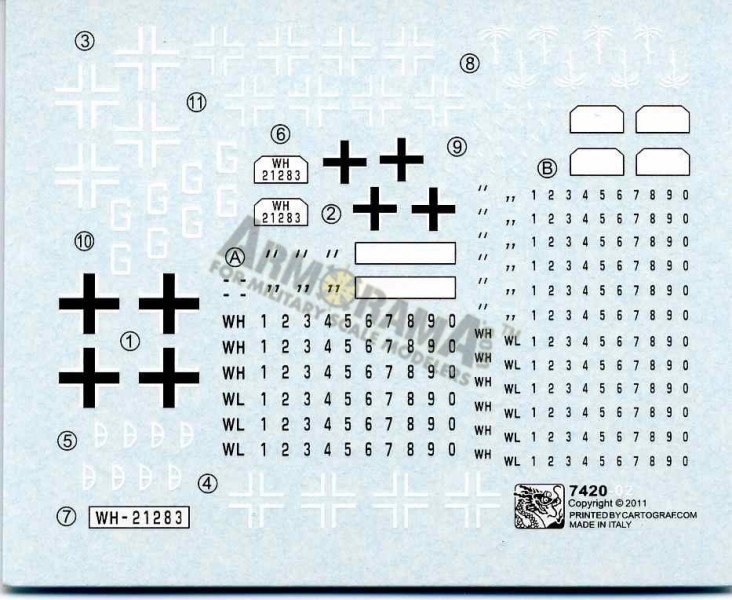
The box contains two complete kits. Four sprues of styrene plastic, moulded in the standard Dragon light grey colour, are present. Two moderate-sized sprues are to be used to build one model. A Dragon accessory card carries a small sheet of Cartograph decals and two small PE frets, each containing the turret top anti-grenade screens. Also present is a six sided instruction card containing one page of sprue parts layout and four pages of build diagrams in the form of exploded view line drawings. The last page provides painting and marking options for three vehicles.
the Review
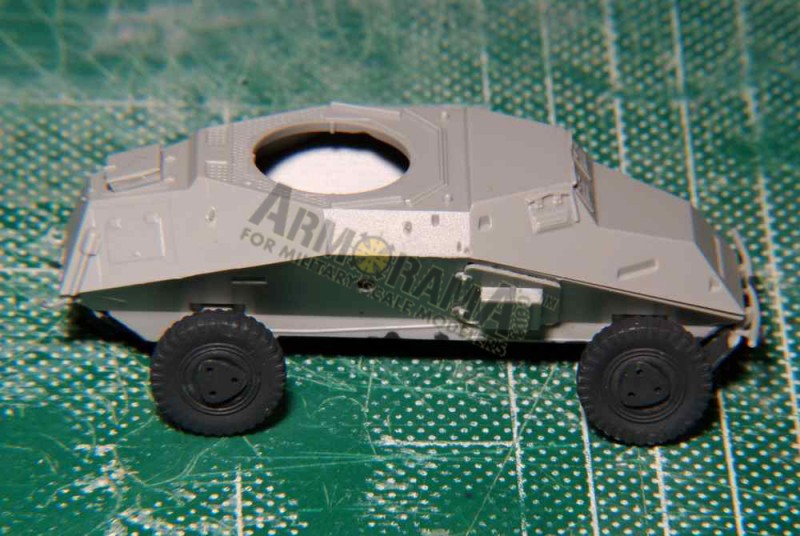
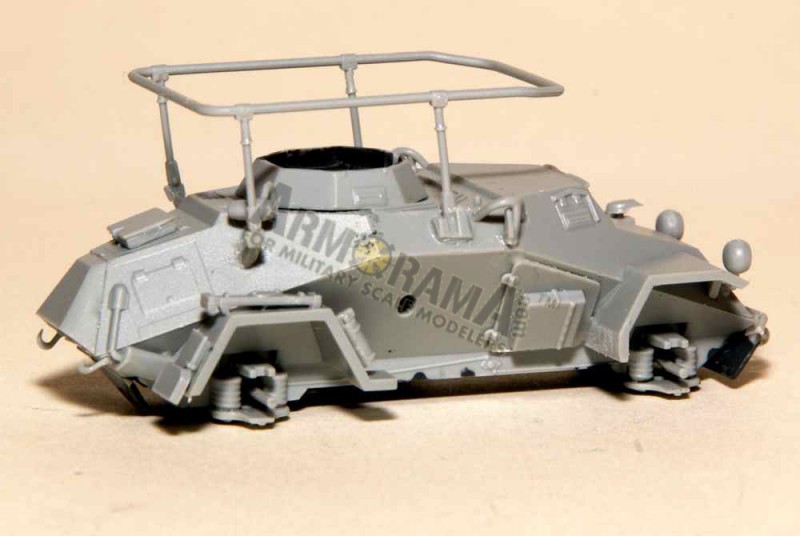
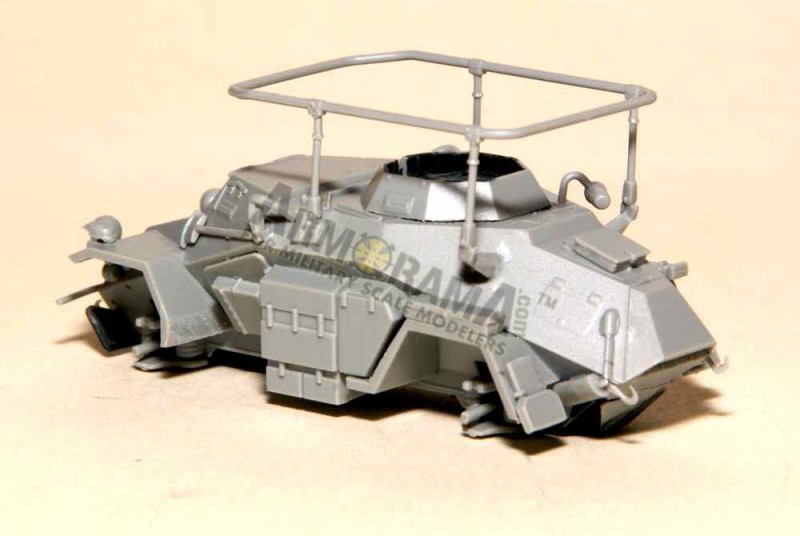
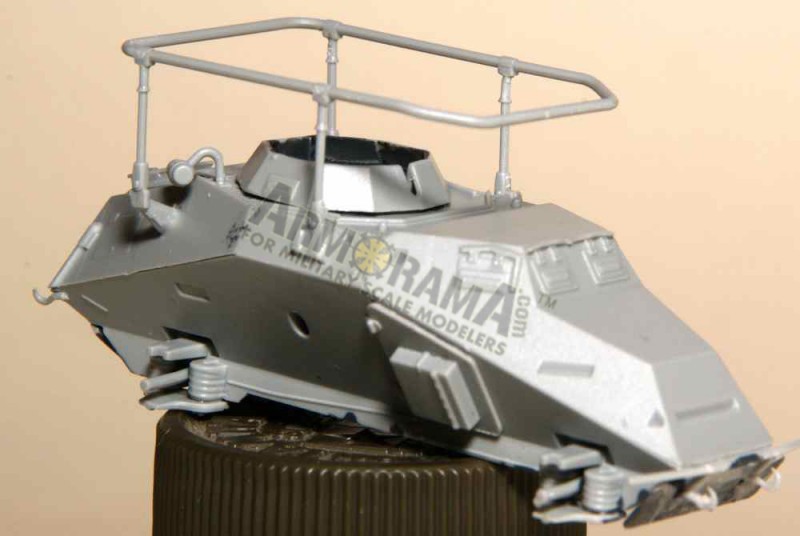
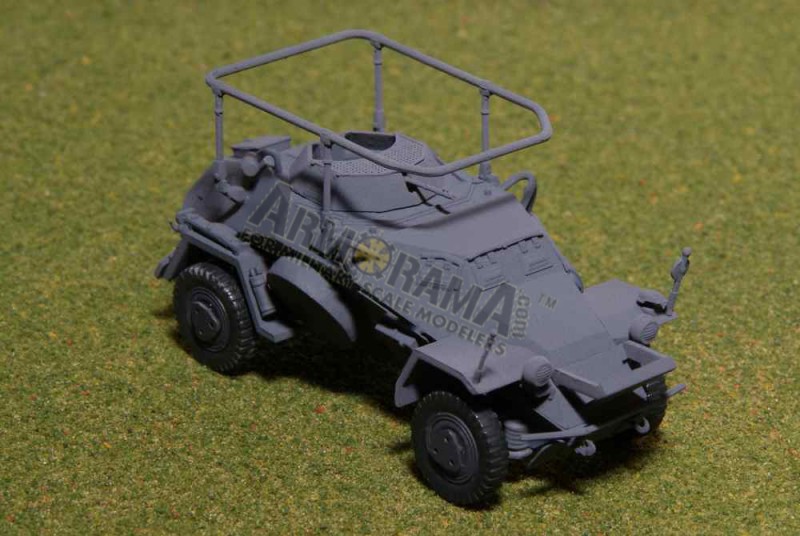
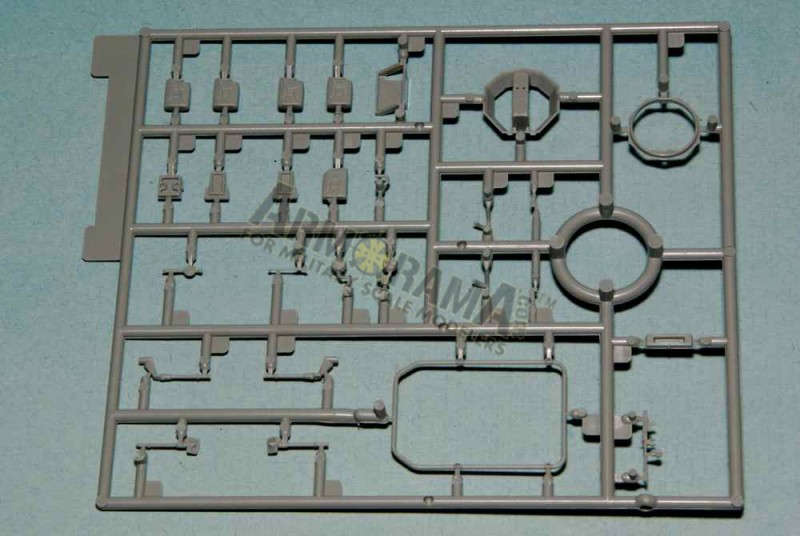
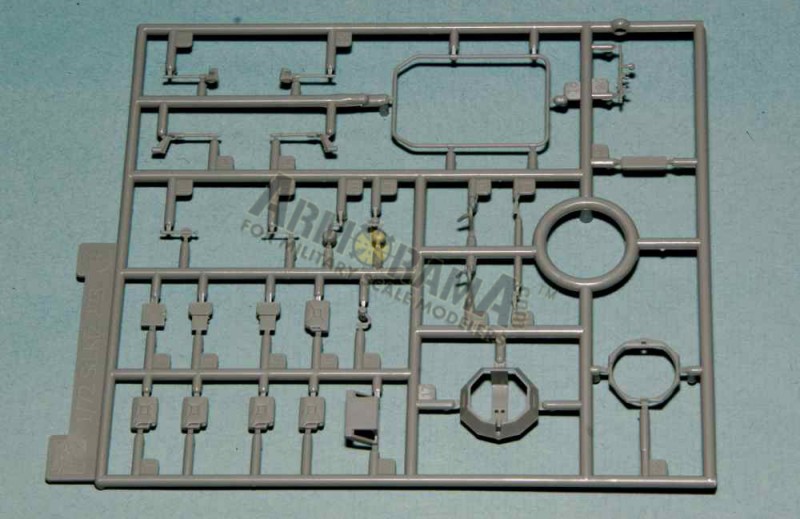
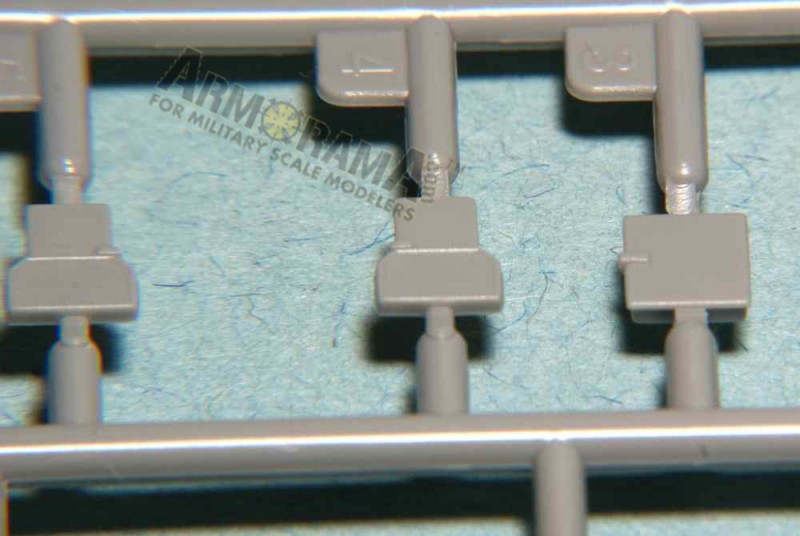
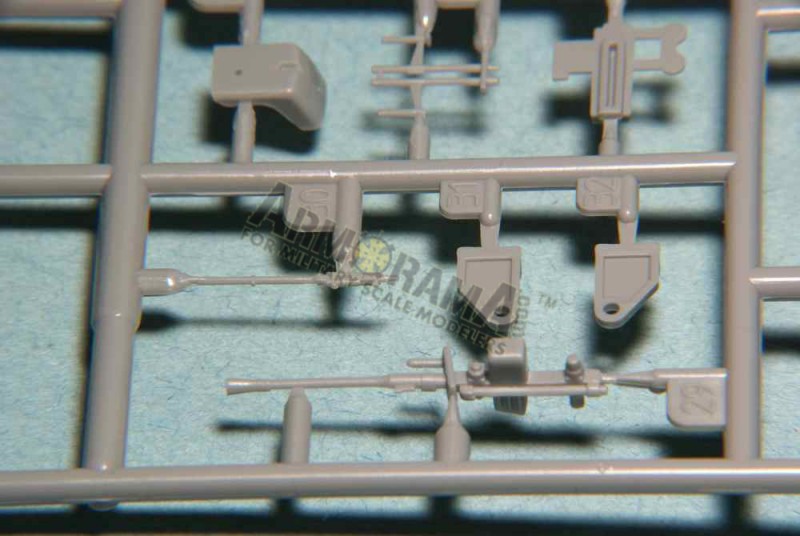
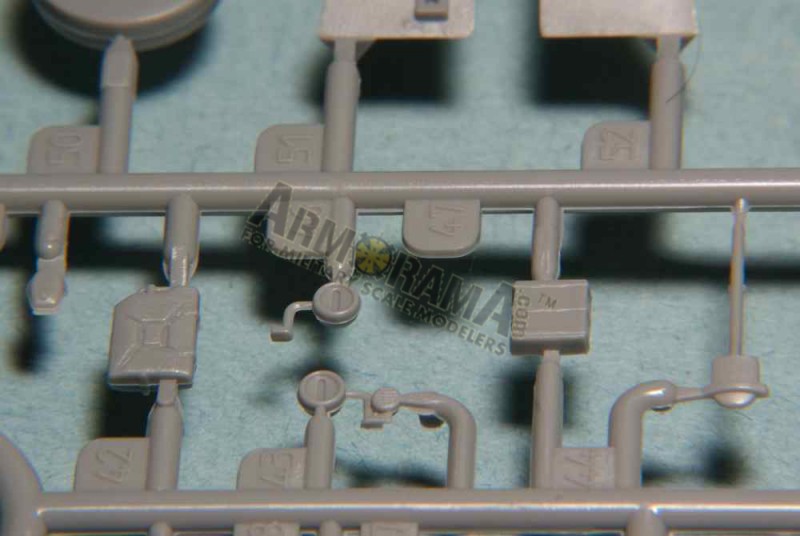
Looking over the sprues, one will see that the parts are moulded with extremely crisp and fine detail. There are no sink holes, and ejector pin marks are only present on areas that will be hidden after assembly. Flash is virtually non-existent, and the majority of moulding seam lines are light and should be easily removed with a scraping of a sharp hobby knife.
While an improvement in the size of sprue connection points (gates) is evident when compared to older kits, its still not universal with the parts in this kit. Many of the smaller parts have equally small gates to them. However, some parts, such as the radiator cover and the small turret, have larger connectorsand at awkward locations that will require careful clean-up.
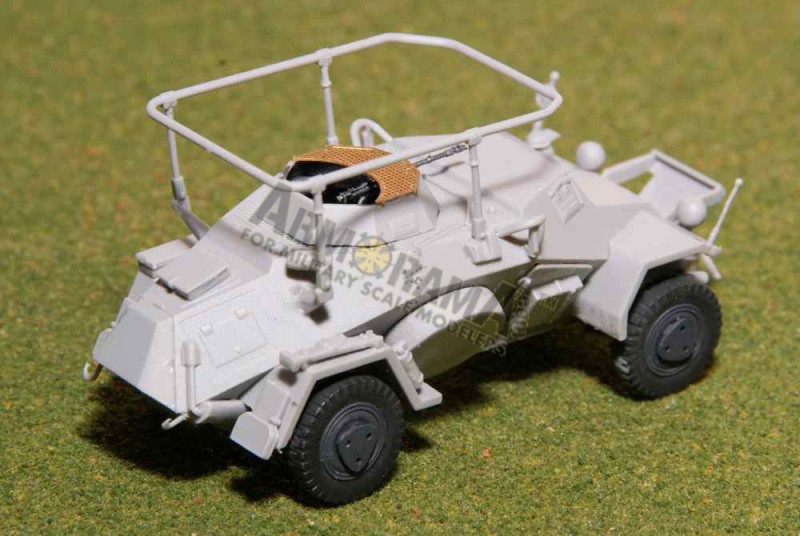
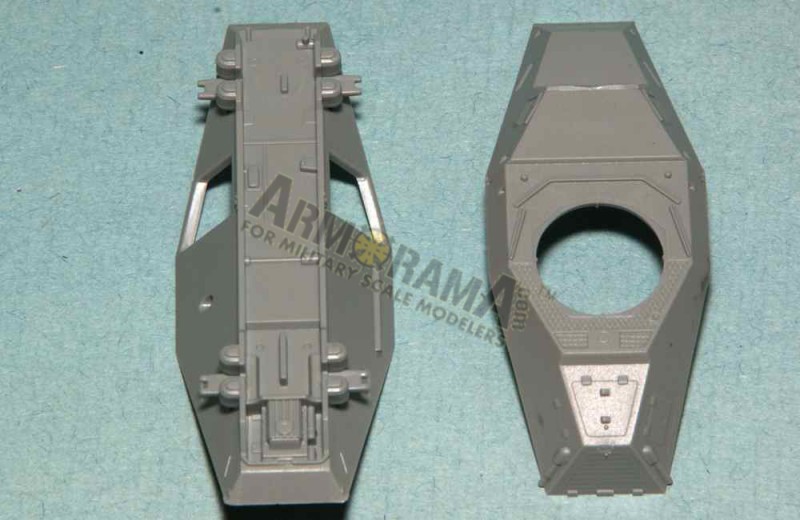
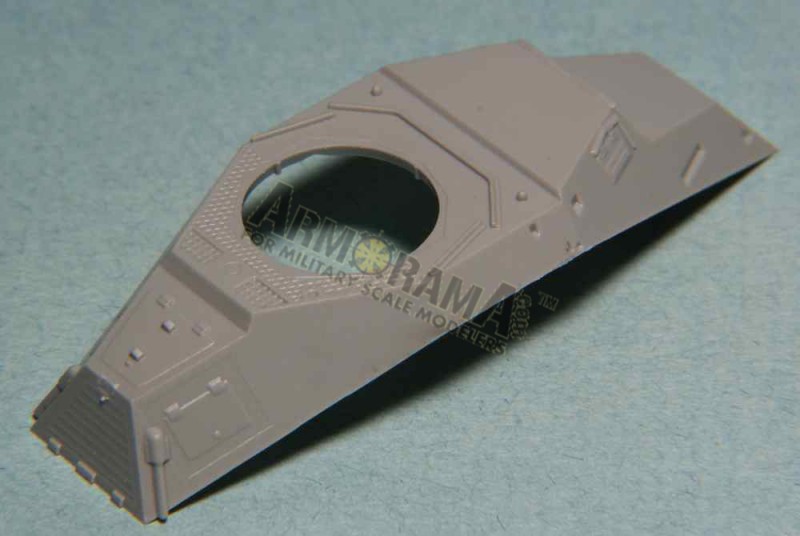
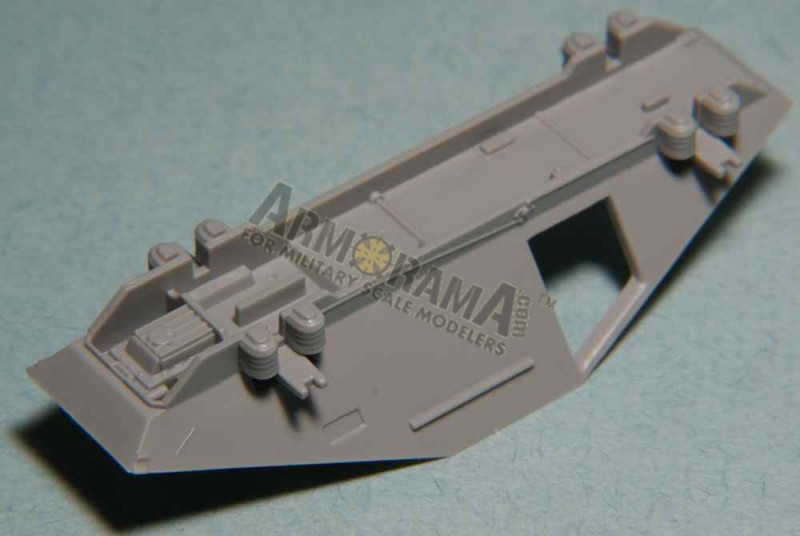
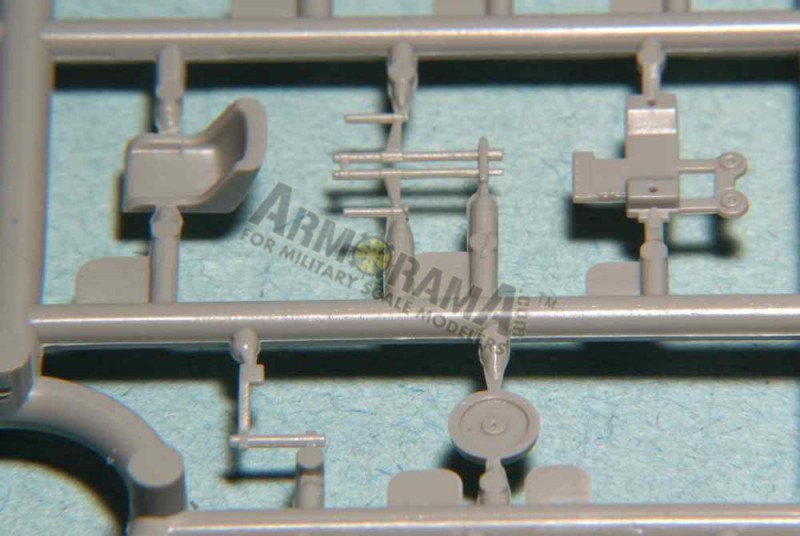
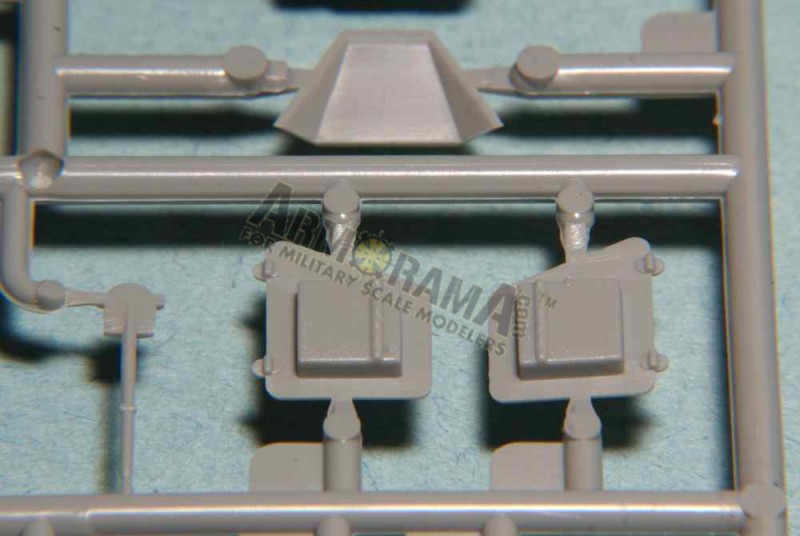
With only a couple of exceptions, the tools and external stowage are all moulded as individual pieces. Unfortunately, while separate pieces, the drivers doors have no internal detail and possess a rectangular depression where a moulded-on storage box is present. The fighting compartment and turret vision ports, and the engine compartment hatches are all moulded-on. Other than a minimal amount of internal turret detail (seats and their supporting framework), there is no other interior detailing.
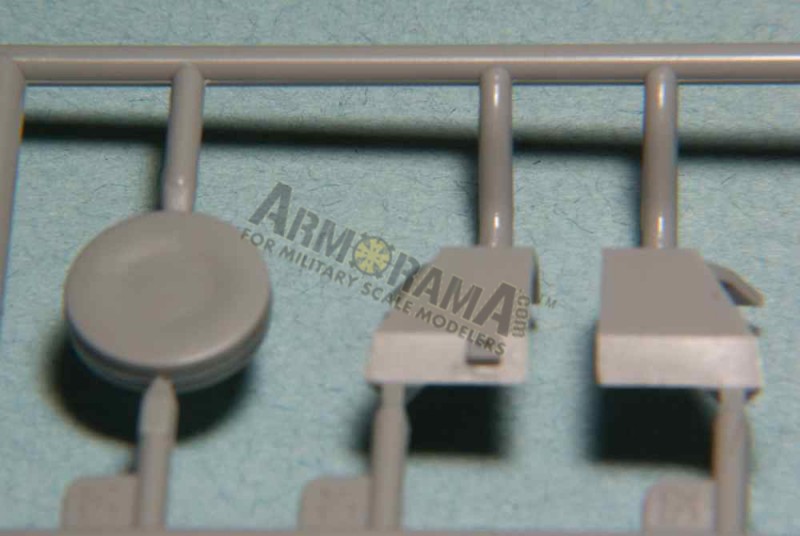
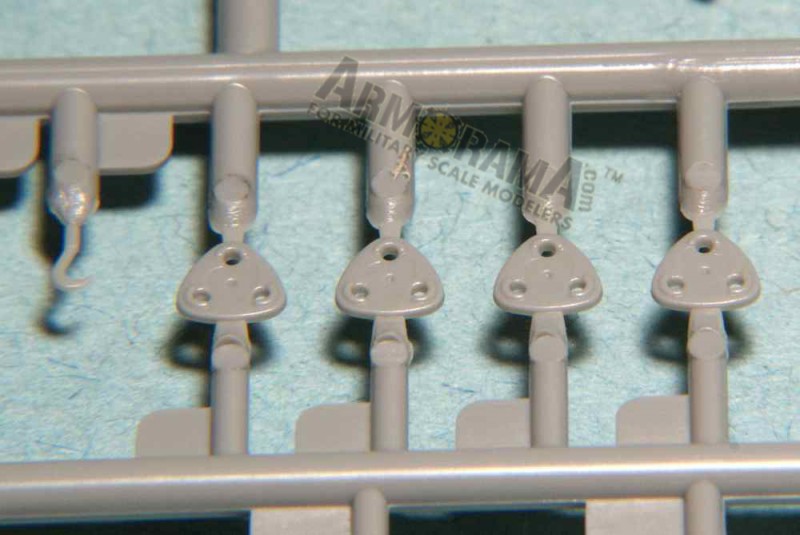
A total of 26 parts from the two A sprues are unused, and relate to the 222 version of the vehicle. Included in this count are a pair of fabulously-moulded 2 cm cannon and their accompanying MG-34 coaxial machine guns.
painting & decals
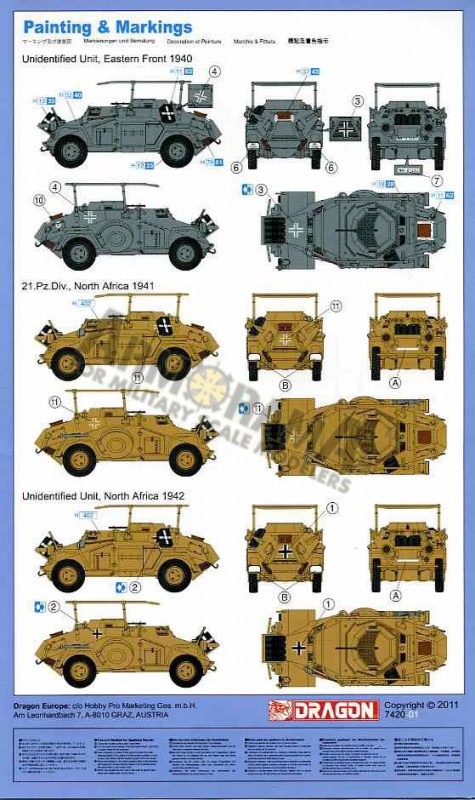
The options for painting and markings are:
A Field Grey vehicle on the Eastern Front 1940 from an un identified unit
A Sand-coloured vehicle of the 21st Panzer Division, North Africa 1941
A Sand-coloured vehicle in North Africa 1942 (unidentified unit)
A full set of water-slide decals is provided for the Eastern Front vehicle. Unfortunately, while a good selection of decals is provided, markings for a second vehicle will prove frustrating for the majority of modellers. These others are provided for with blank white license plates and individual numbers and letters to make up your own. These are absolutely tiny and will prove awkward to place and line-up in this scale. I think that while one or two modellers will love this, more will find it very frustrating and look for an alternative option.
The colour references provided are for the GSI Creos Corp Aqueous Hobby Color, the same companys Mr. Color and Model Master enamels.
Build Observations
What had, on first glance, appeared to be a simple and uncomplicated kit, proved instead to be quite troublesome. As with any kit, the builder should review the instructions thoroughly before starting construction.
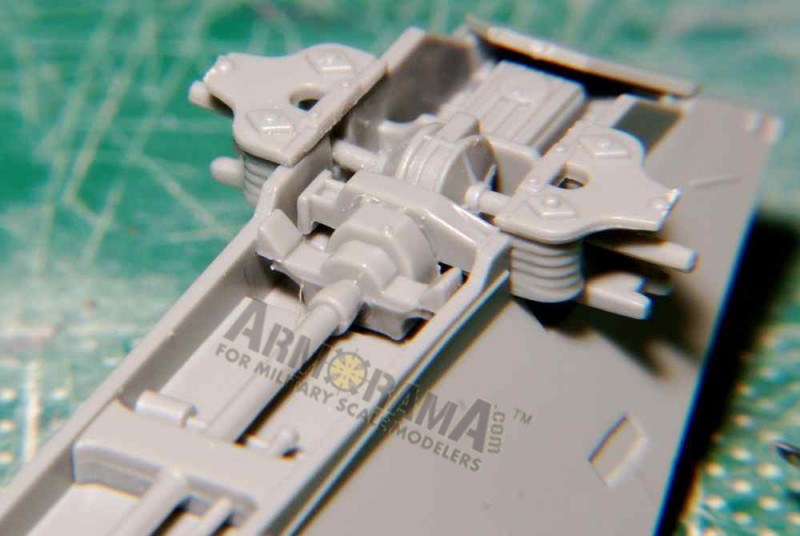
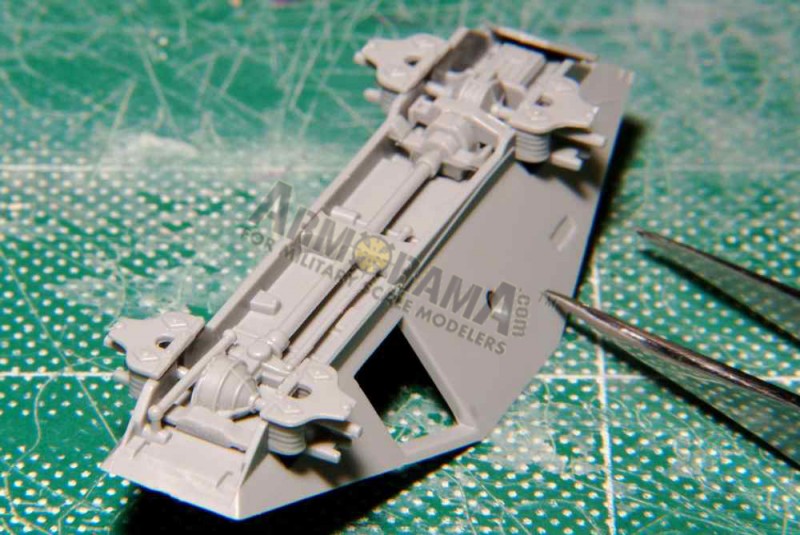
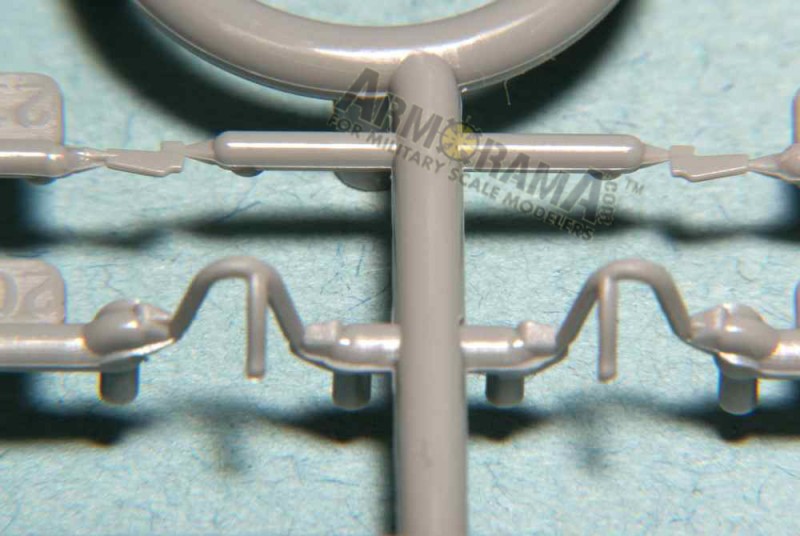
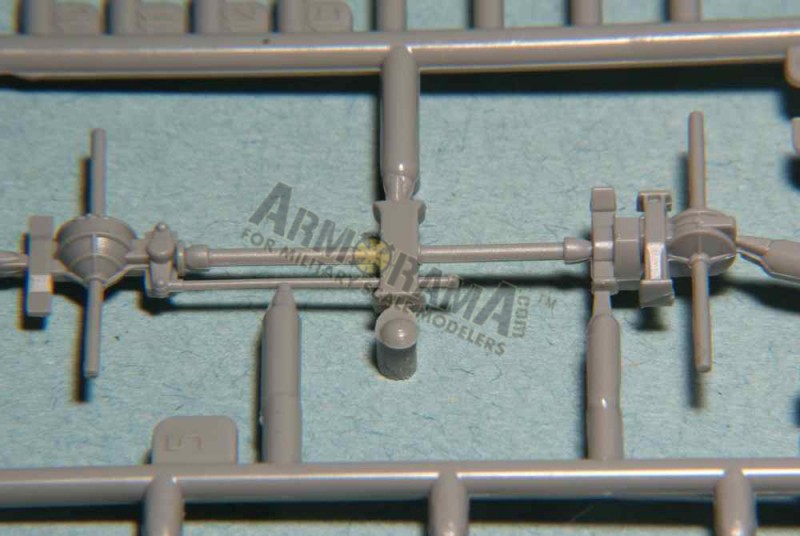
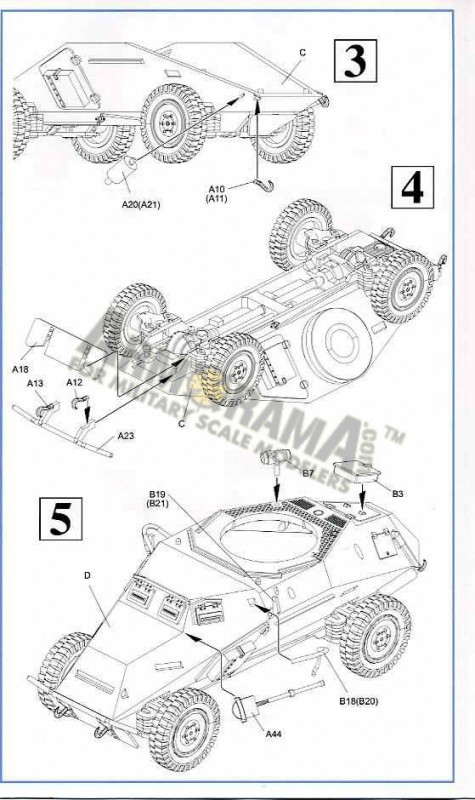
In Step 1, a highly-detailed drive train (A5) is to be attached the hull bottom. The fit and positioning of this piece was absolutely perfect. The second part to fit was a tie-rod (A22) that has no features to assist in its proper positioning. Each end fits onto two fine lugs or pins, and care will be needed to achieve proper positioning. The last part in this step is a rear plate (A19) that, again, has no locating features. The builder will need to survey the drawings in the instructions to determine the final orientation of this part. For these types of parts, I used a gel type tube glue.
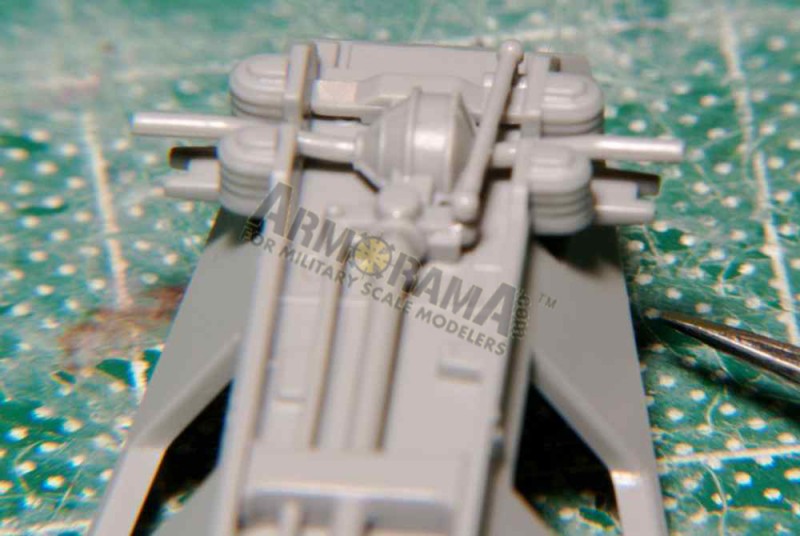
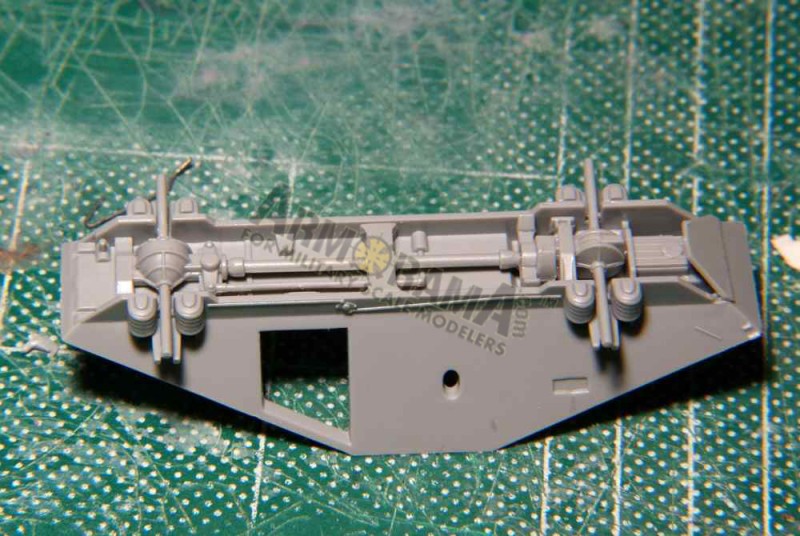
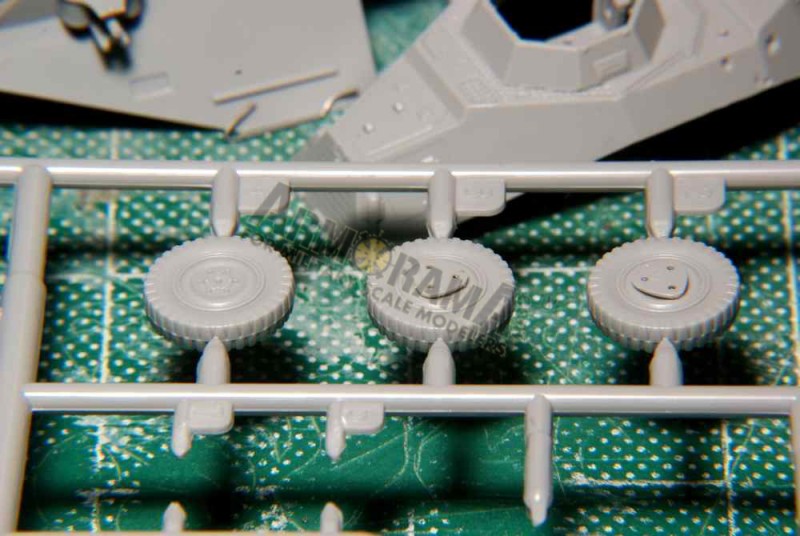
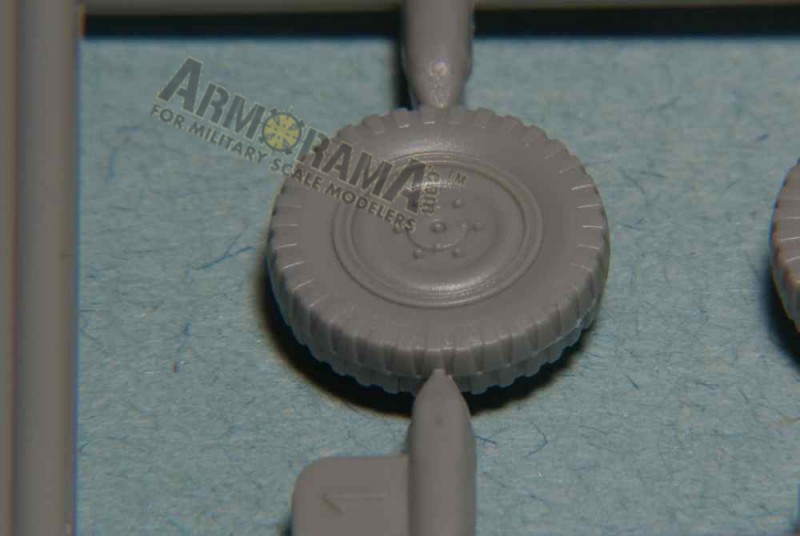
Step 2 sees further parts added to the lower hull. These include the hull doors, spare tire, various suspension arms and the wheels. It is here that the first anomaly in the instructions appears: the wheels are referenced as part A1 for the right side and A2 for the left. On the A sprue, the wheels are numbered 1-4. It appears that all the wheels are identical and could be attached in any order or position.
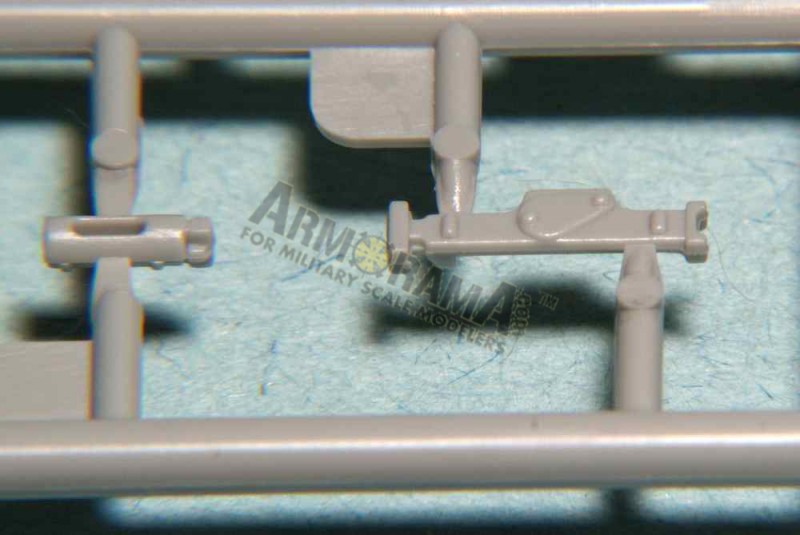
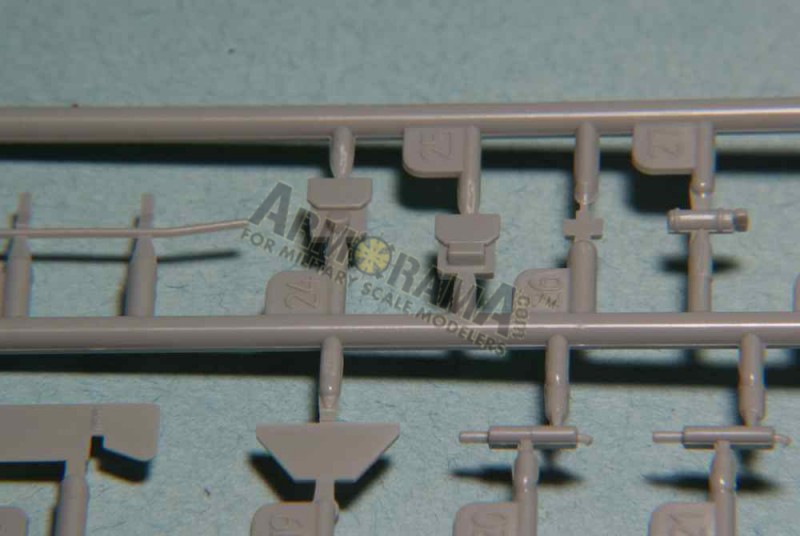
During Step 3, the rear hull tow-hooks (A10, A11) and lower mufflers halves (A20, A21) are to be attached. Shallow depressions in the hull signify locations for the tow-hooks and, as they are very small, care will need to be taken with their handling. Attaching the mufflers during this step could lead to problems as they are meant to align and join with their moulded-on upper halves after the hull halves are joined. Waiting for their attachment until later still presents another problem: while there is a slightly raised line of plastic on the hull to show the muffler positioning, there is no other positive attachment feature to assist the builder with the exact location.
In Step 4, parts are attached to the front lower hull. These are the front bumper (A23), tow-hooks (A12, A 13) and a front plate (A18). As with the positioning of the rear hull plate earlier, the front bumper has no positive positioning feature.
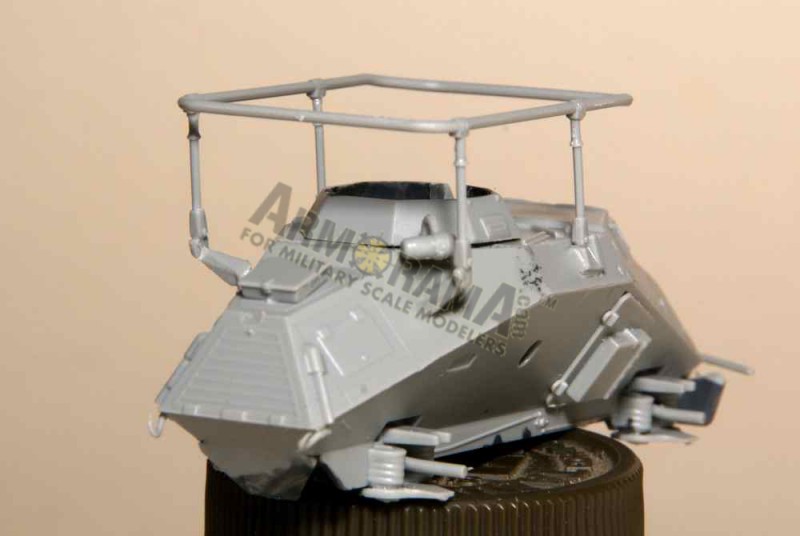
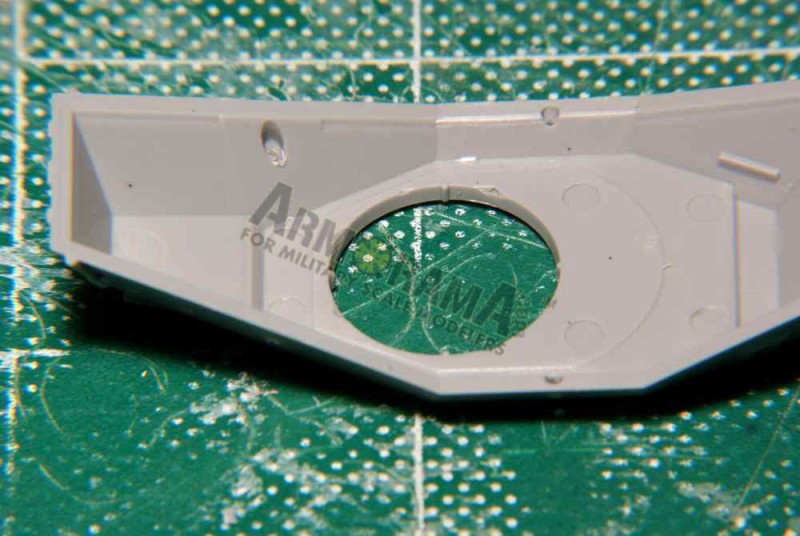
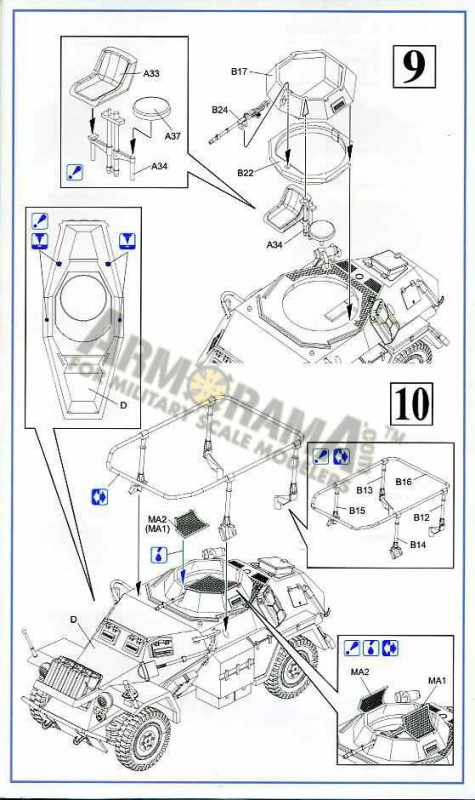
Step 5 has the builder attach the upper hull to the lower, and then add various external details to the upper part. It is during this step that a significant error in the instructions occurs: there are no holes for attaching the frame antenna supports in the upper hull. Indeed, it isnt until step 10 that the builder is shown that these holes should be drilled out from the inside. If one had already joined the hull pieces, then there would be a major problem, so do remember to drill them out first.
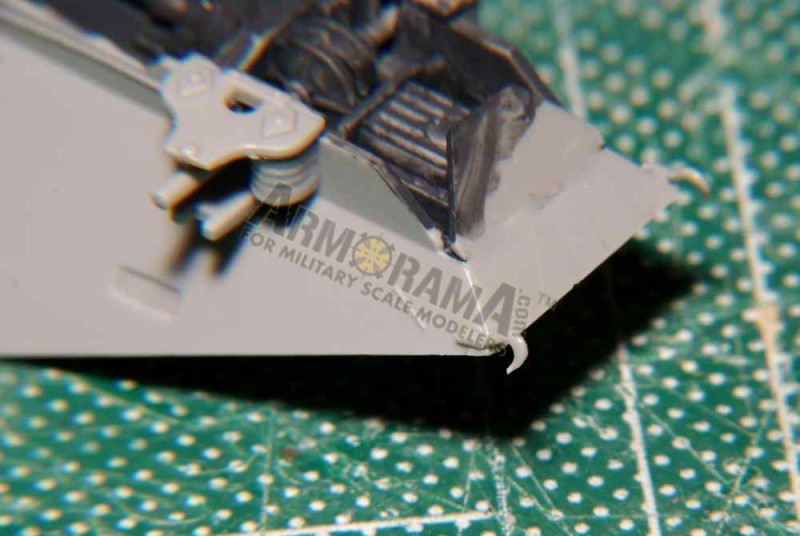
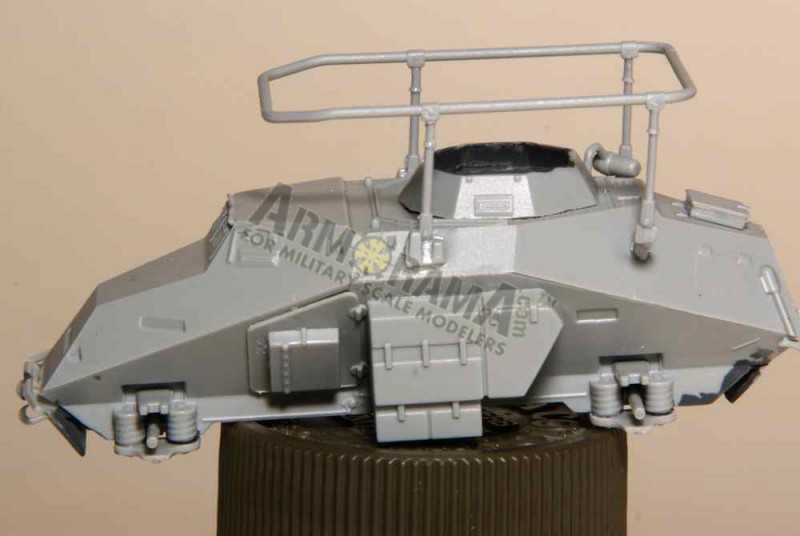
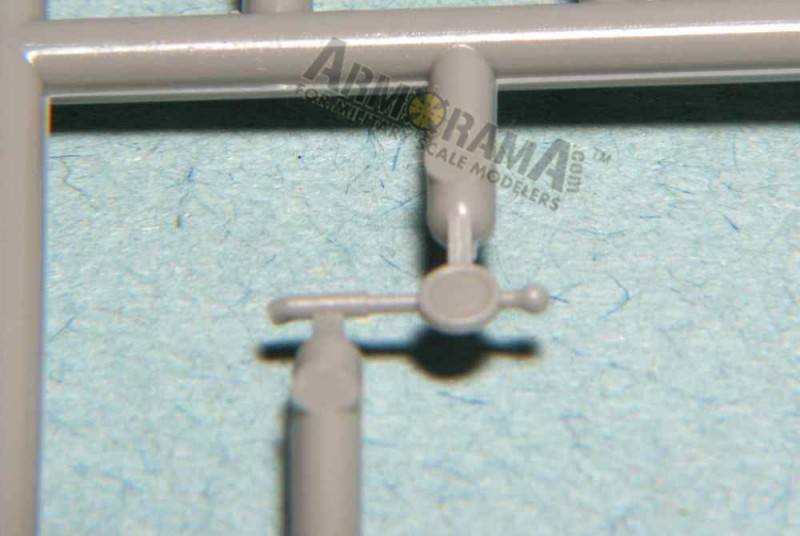
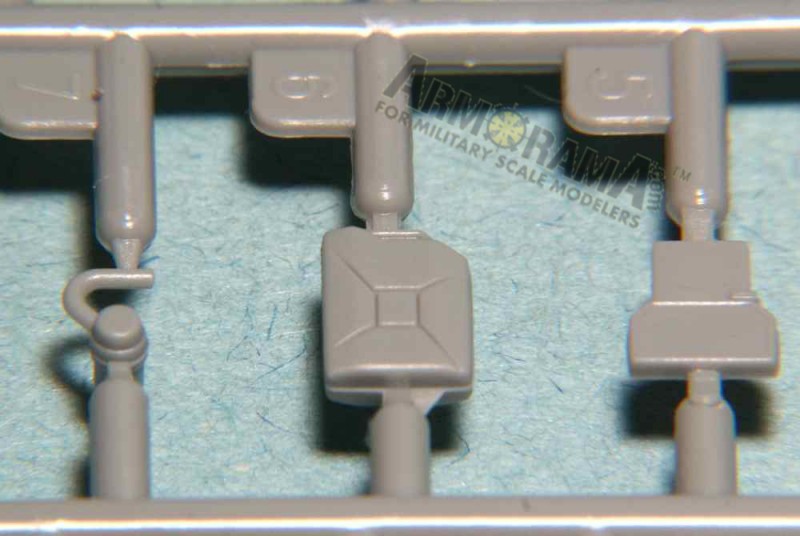
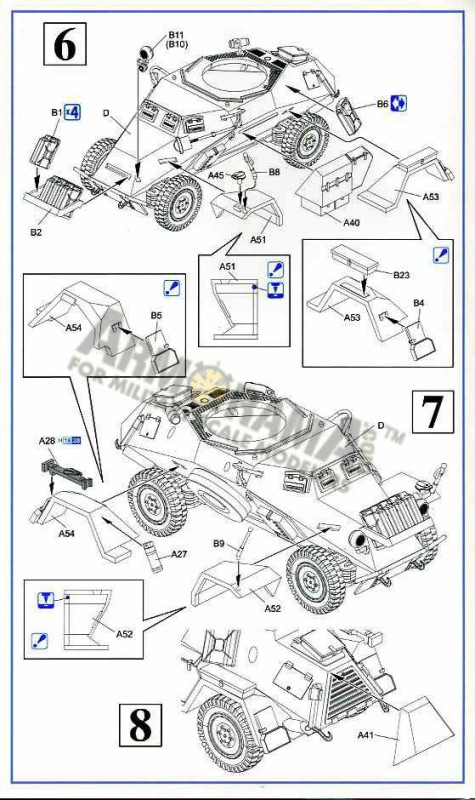
The fenders, lights and other external details are added to the hull in Steps 6, 7 and 8. It was during Step 6 that I attached the mufflers and other external details. Care will need to be taken with positioning certain parts as locating features (holes, pins, lugs etc.) are either very faint & shallow or nonexistent. It is during this step that the front Jerry can rack is attached. This rack is set far too high on the front plate. After checking a few sources, most images of 223 vehicles show this, or a similar rack, positioned lower and closer to the front bumper.
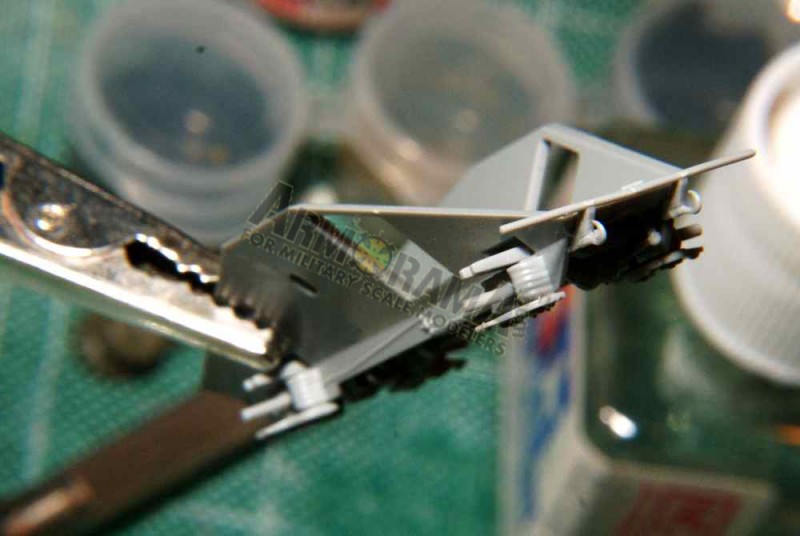
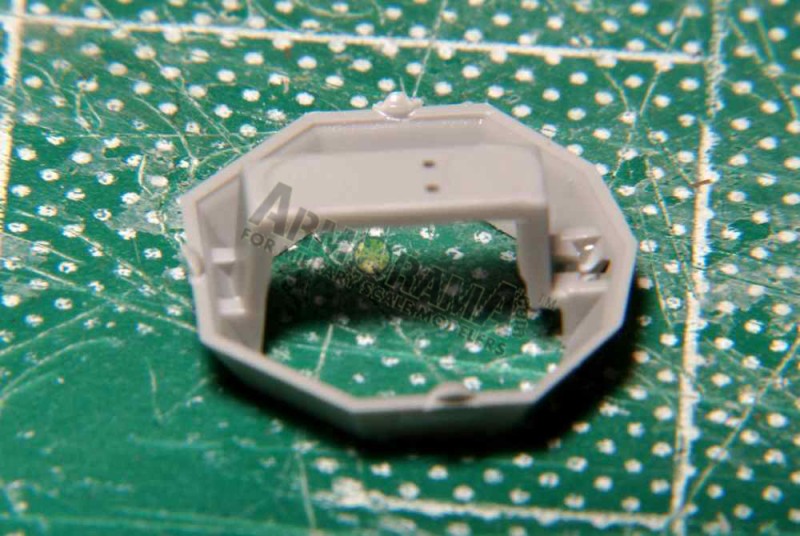
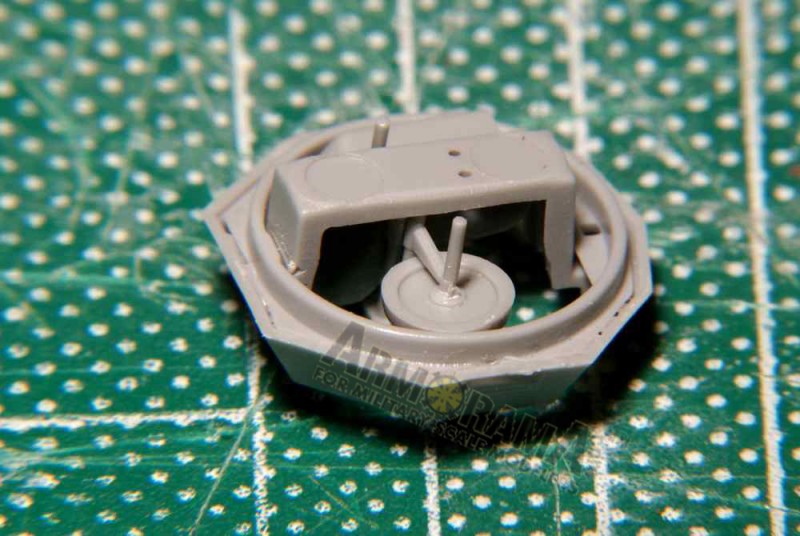
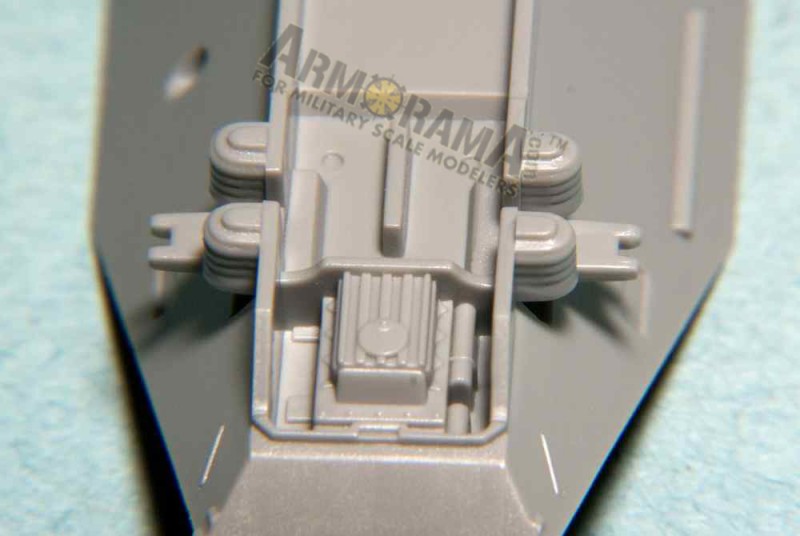
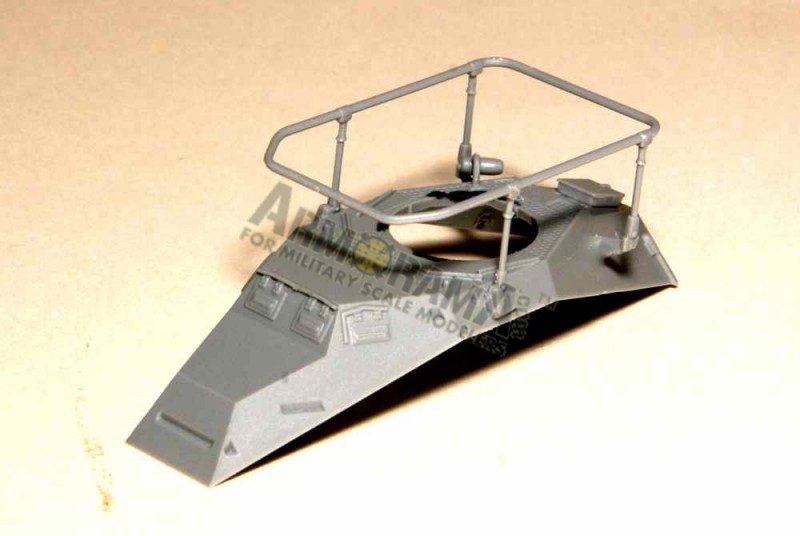
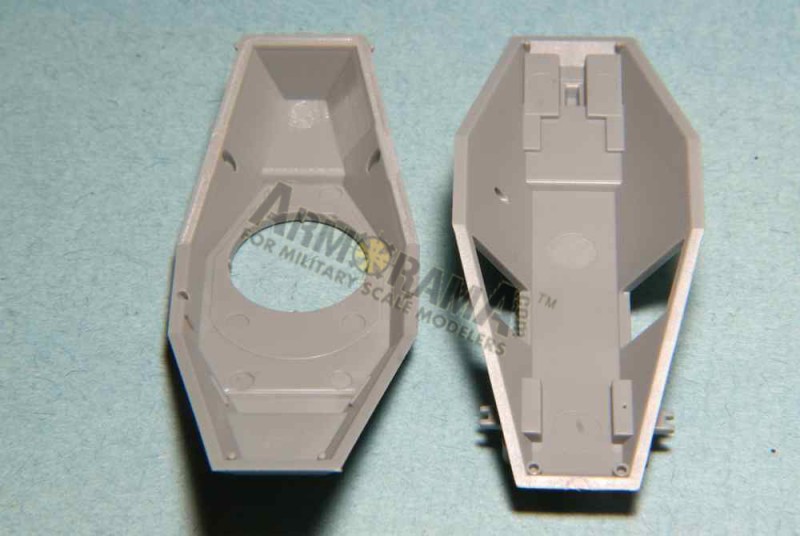
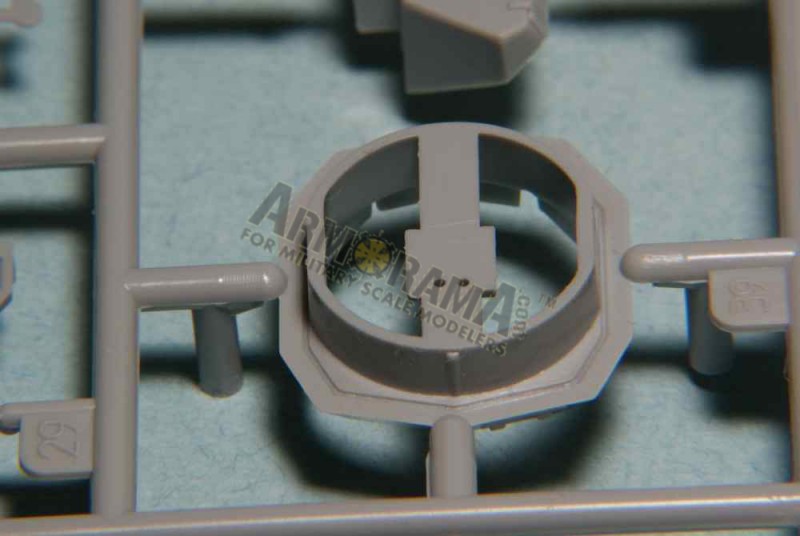
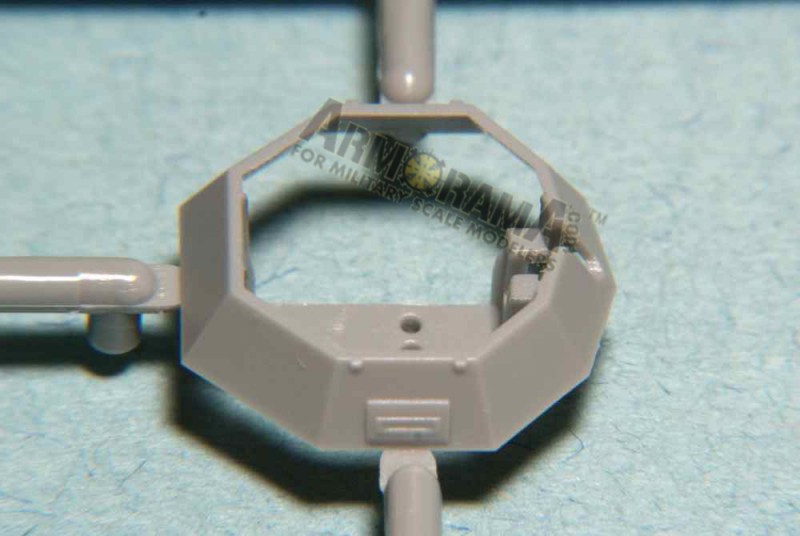
Construction of the turret is the focus of Step 9. To the purist, the turret interior is wrong and obviously an afterthought for the use of parts from the previous 222 kit. The 222 interior has two seats mounted on a somewhat central support that attaches to a crossbar piece running through the lower turret. The real 223 interior has only one bicycle-type saddle/seat mounted behind a turret-centred pillar. For the builder of this kit, the main problem is that the instructions are unclear as to how the interior should attach to the rest of the turret. Unfortunately, this author did not discover the issue until after greatly modifying these pieces to fit within the given space. In this kit the builder will find that the turret does not possess the notch and tab mounting feature of most Dragon turrets. Several small vertical ribs around the turret ring base act to create a press fit.
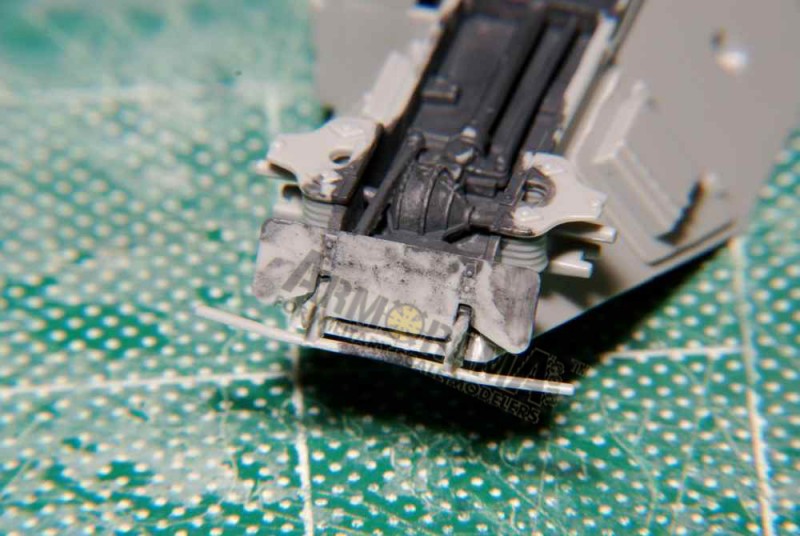
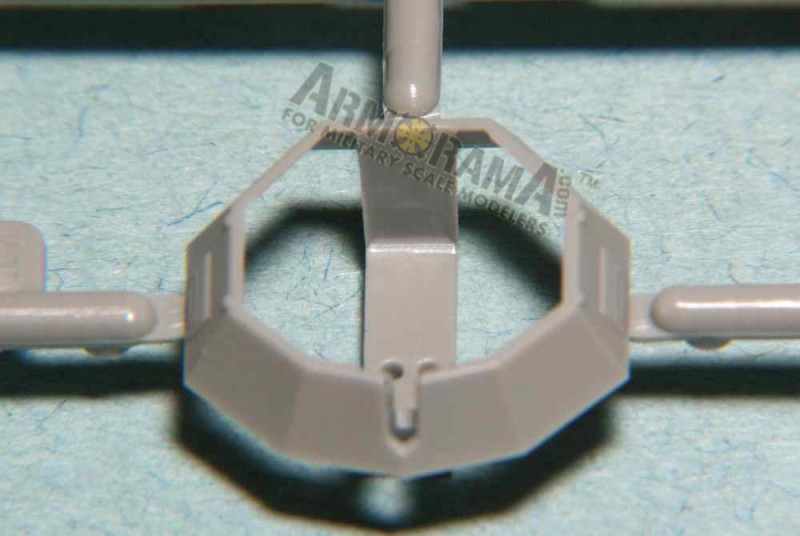
Construction concludes with Step 10 and the attachment of the anti-grenade screens and assembly of the frame antenna. The screens are photo-etched and can be assembled in the open or closed position. The frame antenna is a delicate, but finely-moulded five piece affair. Unfortunately, there is no provision made to depict the antenna in the folded or stowed position.
Construction of the antenna proved to be an exercise in patience. While the instructions show attaching the frame supports to the main antenna body and then to the vehicle, I chose a different course. I first worked on getting all the support arms to fit snugly in the upper hull. The holes that I previously drilled were not appropriate for the two front pieces. They required a more oblong shape to accept their mounting lugs. Careful trimming and shaping of each hole was required to get the proper fit and positioning. Avoid gluing these parts until everything appears correct.
Conclusions
This kit should produce a very nice model of the Sd.Kfz 223 reconnaissance vehicle. The fit of certain parts was as good as one would expect from Dragon. Having said that, the same cannot be said about the instructions. These are amongst some of the poorest that I can recall from this company, clearly a re-work of the 222 ones. Not just errors in numbering and part number anomalies, but the construction sequence opens up the potential for significant problems for the inexperienced if they don't read through the instructions thoroughly enough.
For an experienced modeller, these errors may not be too bad, but for those new to modelling or this scale, these are the sort of difficulties which won't help them enjoy the building experience. Even for a moderately-skilled builder, these issues could cause frustration. The assembly instructions could have done with some definite proof reading and testing by someone actually building the model from them, such as we've seen in this review. So while I am unimpressed by these instructions and lack of certain part locating features, I will still recommend this model of a rather unique subject.
SUMMARY
Highs: Interesting subject with extremely delicate moulding and details. Exquisite MG-34.Lows: Still some issues with large sprue attachment points. Poor instruction accuracy and sequences. Vague to non-existent locating features on some parts.Verdict: With proper care, will build into a fine representation of the subject vehicle. Not without faults but recommended.
Our Thanks to Dragon USA! This item was provided by them for the purpose of having it reviewed on this KitMaker Network site. If you would like your kit, book, or product reviewed, please contact us.
I've been building models since about age 10 with the occasional hiatus due to real life events. First armour model was a 1/76 Airfix Tiger I and was followed by a 1/72 Revell F4U Corsair. I've built primarily 1/76 and 1/72 armour and aircraft but occasionally have tinkered in other larger scales....
Very good and detailed review that I wish was up two weeks ago. I picked up this kit last month hoping that it would be a breeze. At least now I have a reference and confirmation that there are problems with it. I stopped building the first of the two because of problems.
I see from the pictures that you had to really rework the turret interior. In looking at the instructions they really don't show where that interior is supposed to fit. I see that you tried to get everything to fit in and on that cross bar piece that you ended up modifying and lowering. Is that the best solution? Is there an alternative? Do you have any pictures of the actual interior of the real thing?
Thanks,
AJ
Thanks for the comments and the review was actually with the editors about a week ago. I'm sorry that you found out from experience that the kit wasn't as you presumed but, I was quite surprised also.
One of the most difficult aspects of this review was finding information that pertained to this vehicle. Even information about the model itself was sketchy at best. I finally found the 222 version instructions on the Internet and from them realized too late that my radical surgery wasn't totally necessary. The top of part A34 (the seat frame) is meant to be attached to the "crossbar" piece that runs through the turret.
What I tried on the second turret is to cut the crossbar about 1.5 mm back from the two holes in it. Then I cut the piece that attaches to the turret back so that only the front portion with the two holes remains. I added the round seat (A37) to the frame but left off the "bucket seat" and will most likely remove its support arm.
A rather great resource that I found was at the AFV Interiors Web site. It has several pictures of an actual 223 interior and accompanying explanations.
If you have any further questions, please feel free to ask in this thread. I'll see if I have any pictures of the "revised" interior that I am trying with the second build.
Cheers,
Jan
Greetings to all,
Due to household projects, I've been slow to make any progress on this build. I've grabbed bits and pieces of time here and there and felt an update might be due. The largest progress has been on making a base for this little hot-rod. I chose to use a resin Astra Small Base in my first attempt for a base. I won't go into the details of the process as I am saving that for an upcoming review of the product. I'd also like to offer my thanks to my SWMBO (my resident artist) for help in the painting of the base.
The 223 is not affixed to the base and still needs a fair amount of tweaking. The decals are applied and have received a top coat of future. With the gluing of the wheels, all parts except the front Jerry cans, are attached. I used a spare hull side Jerry can that is meant for the 222 version on this build as the 223 one does not have any kind of support rack. I have broken the right width marker more than a dozen times and finally got around to making a new one from scratch. Minor weathering has been started on the lower hull. Here's the pictures as it stands.
I have started the second model of the kit but I'll probably do a separate Blog of that assembly as I've made some modifications to it.
Cheers,
Jan
Appreciate you taking the time to comment, Bill. As I mention earlier, I have started the second vehicle in the kit and perhaps because of the experience with the first, the second has come together a bit easier.
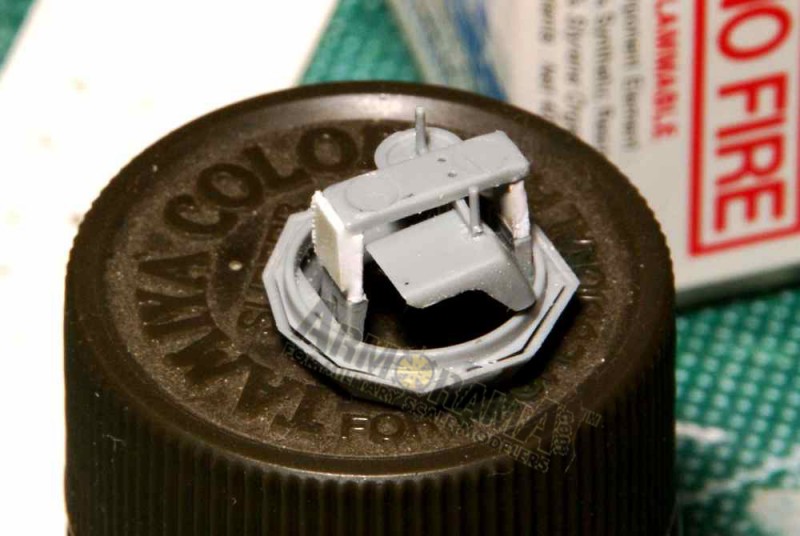
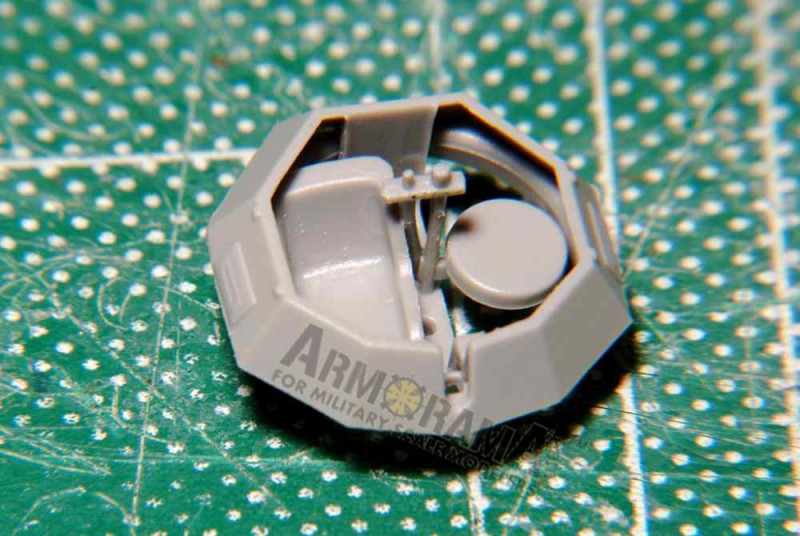
For AJ and anyone else building this kit, I used a simpler modification process to deal with the second turret interior. While not 100% historically accurate, it is closer to "the truth" than my first modification and also I believe simpler.
Part B17 has a crossbar to which the seat support (A34) is meant to attach. In the second vehicle, I cut this crossbar from just behind the seat frame mounting holes and at its rear most area. For the purposes of this option, I consider the turret front to be the end where the opening for the MG-34 is located. Here's a picture of the surgery.
The real 223 has a single seat/saddle mounted on a support and it is somewhat centrally located but offset to the left. I used the simple disc shaped seat for the gunners seat and left off the second chair-like seat.
Comments or questions are always welcome.
Cheers,
Jan
The 223 is really coming along great!!! For someone that always says that they can't do bases, that base looks very nice too. Can't wait to see this little beast finished.
I must also say thanks for the last picture of how to handle the turret interior and the link to pictures of the real thing. It's seems like a fairly simple solution and a lot simpler than either the first method or trying to create the real thing. Just wondering but do you think that the second seat fame should be removed from the main frame?
Thanks,
AJ
Thanks for the comments people, they are always greatly appreciated.
@AJB - I haven't totally decided what to do with the frame for the second seat but it should probably be removed at the point where it attaches to the vertical piece. As for the seat that is supposed to go there, one could place it just forward of the turret in the interior as the radio operators seat.
@Woltersk - Thanks Keith, it truly was problematic and took a fair bit of thought and research to get it to the point that it is. I'm currently doing the second vehicle and it has come together rather easier than the first. I had the intention of doing a separate Blog of the second build but that will have to wait until other projects are completed. In the "you can't please all the people, all the time department," it might have been nice to have the option of having the frame antenna attached in the stowed position.
Cheers,
Jan


Comments