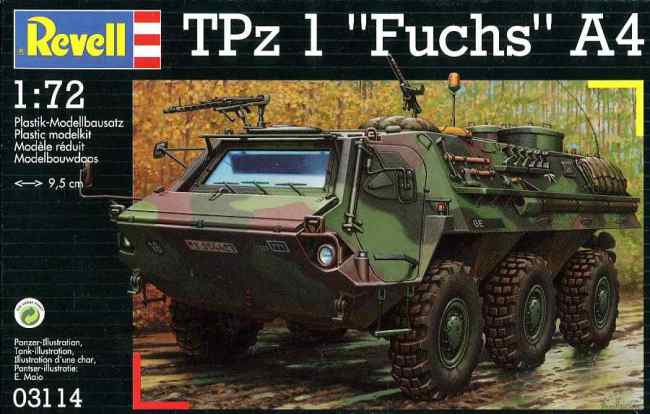
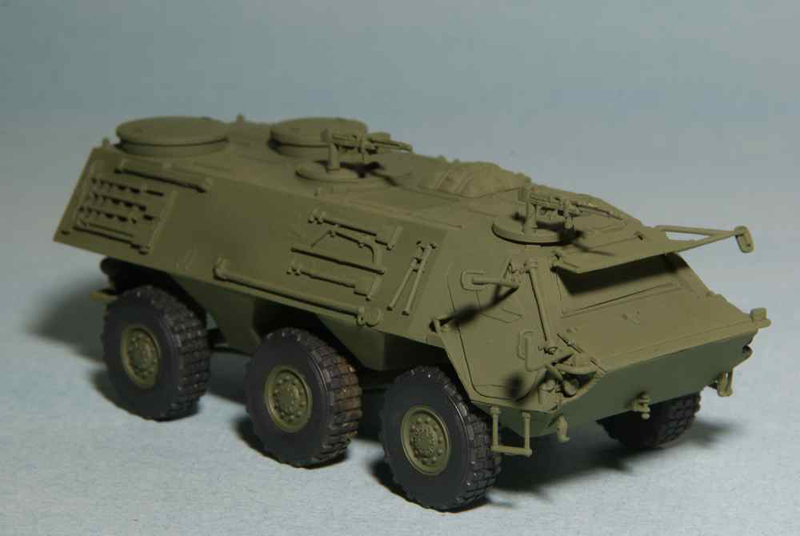
Developed by Daimler-Benz and built by Thyssen-Henschel the TPz-1 Fuchs is a lightly armored 6 X 6 amphibious personnel carrier. From 1979 onwards over 1000 were produced and they are characterized by high performance on all terrains and low noise.
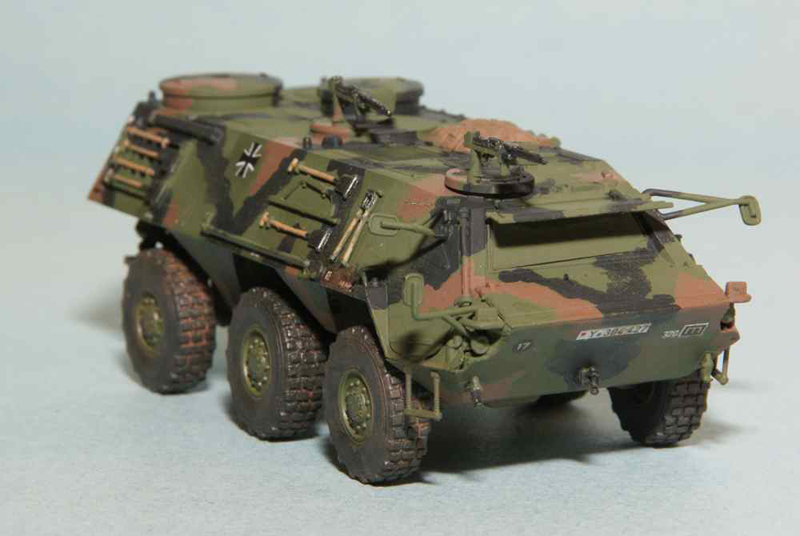
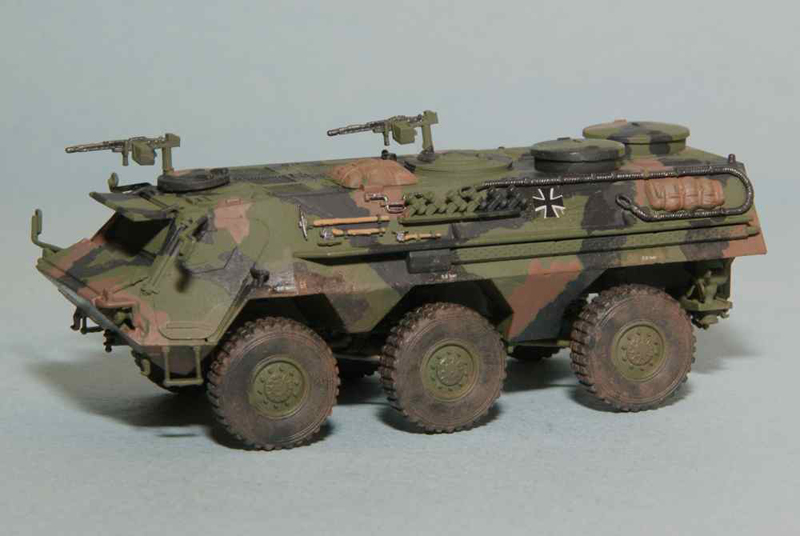
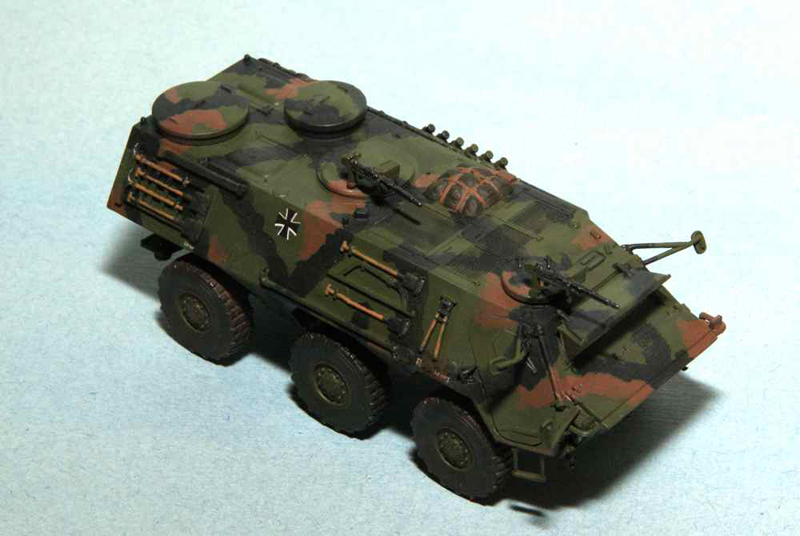
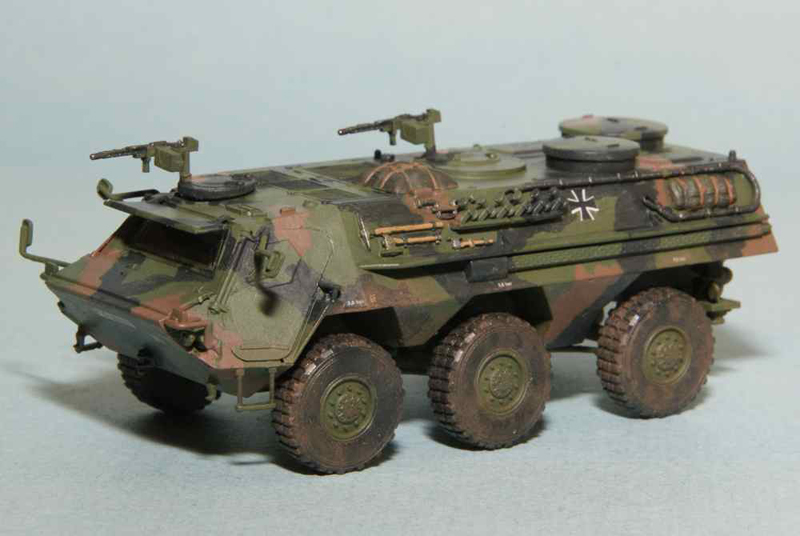
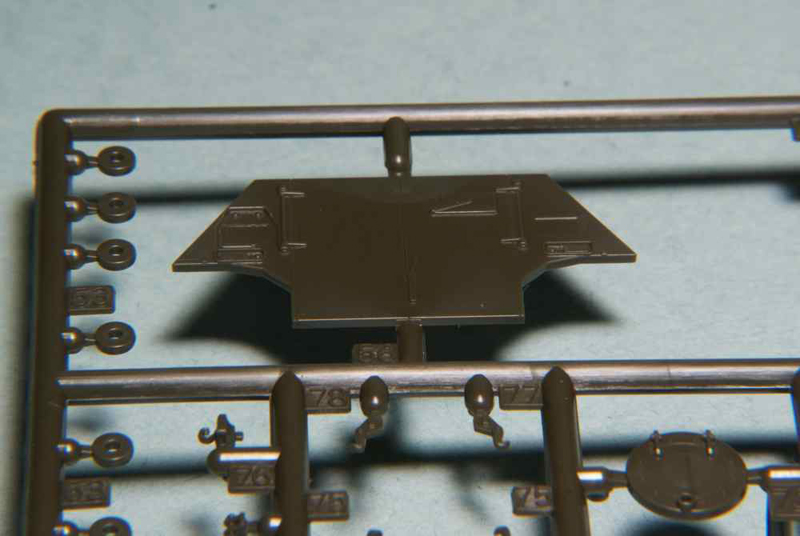
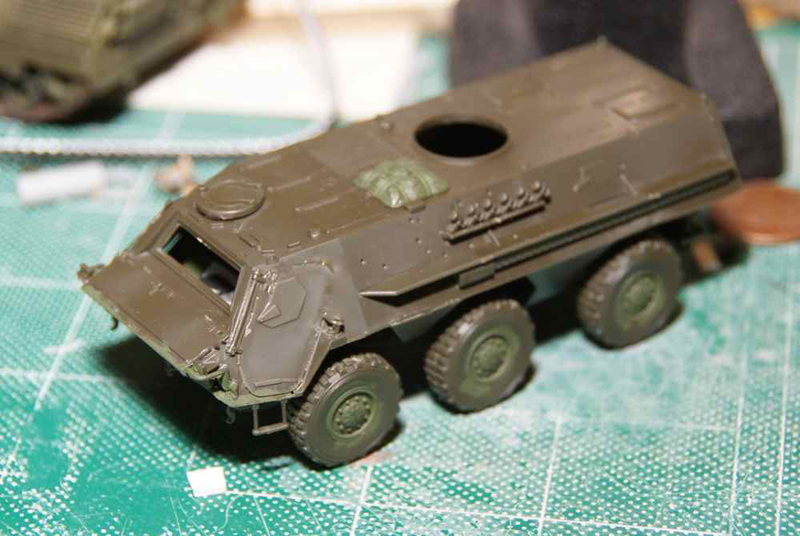
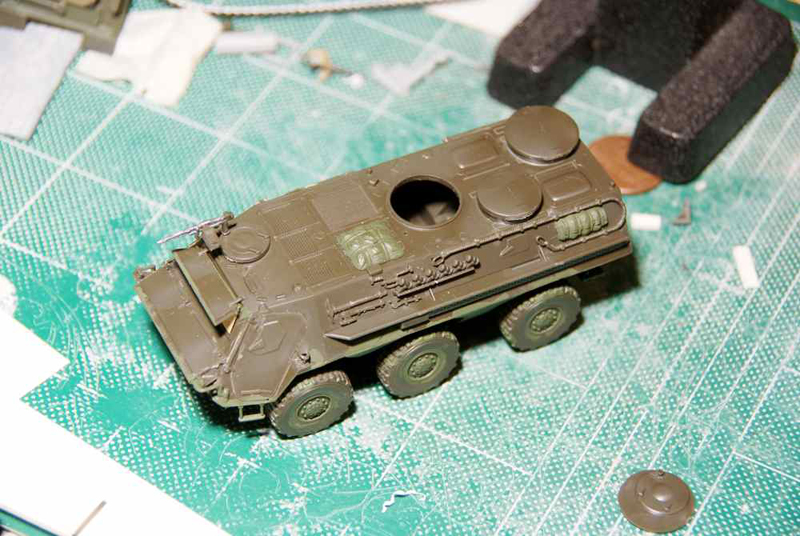
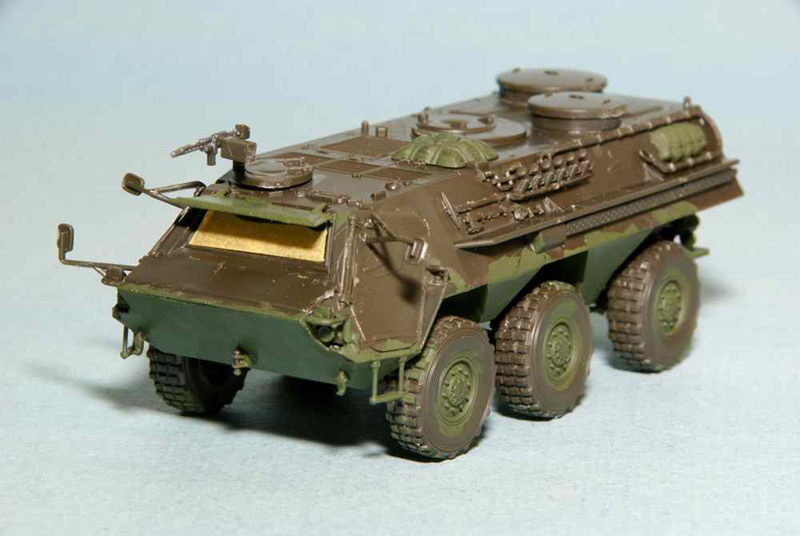
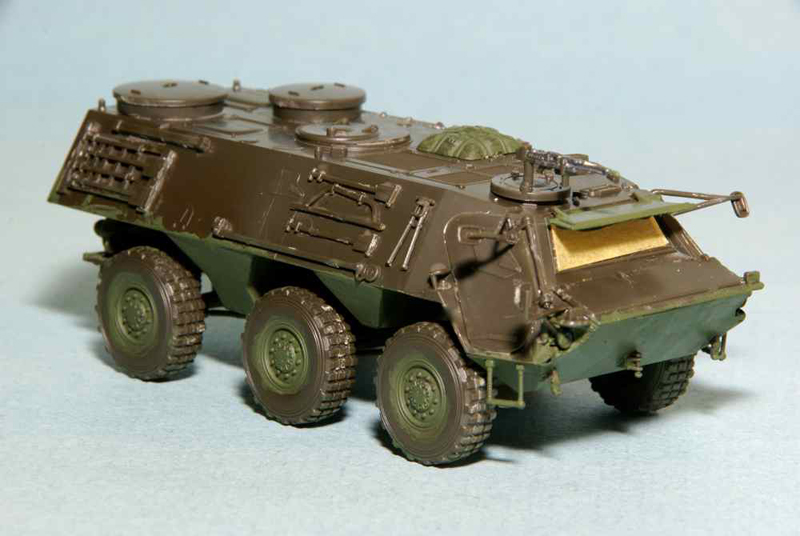
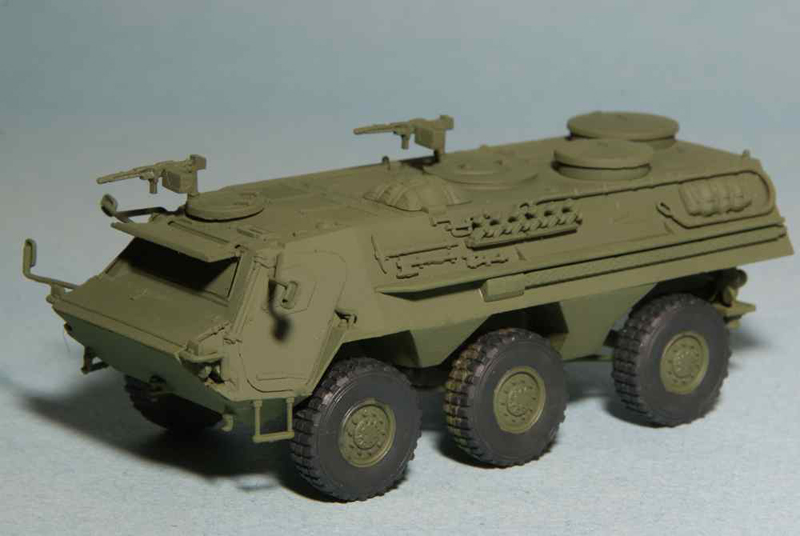
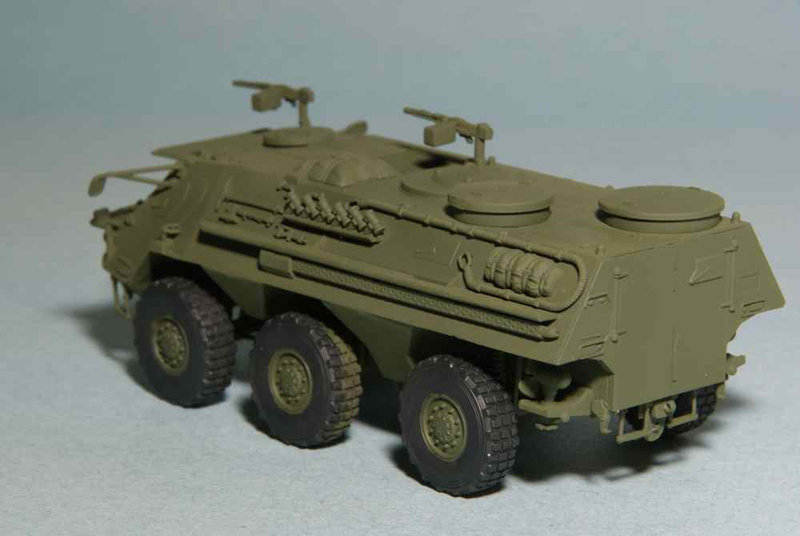
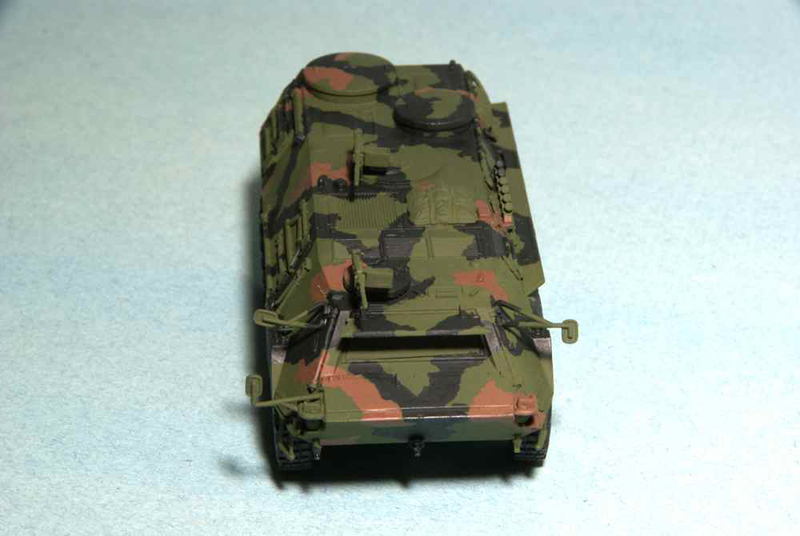
Numerous variants have been made and the different vehicles are outfitted with different equipment tailored to specific purposes. As an example, the troop transport for engineers, represented in this kit, could carry ten soldiers and carries coiled barbed wire in their characteristic round containers on the roof.
The Fuchs is powered by an 8 cylinder 320 horsepower Dainler-benz OM 402A Diesel engine. Maximum road speed is often quoted as being 60 MPH (100 Km/h) and water speed at 6 MPH (10 Km/h). Normal combat weight is around 16 tons and various armaments can be carried.
The subject of this review is the Revell 1/72 scale TPz-1 Fuchs A4, kit number 03114.
Contents
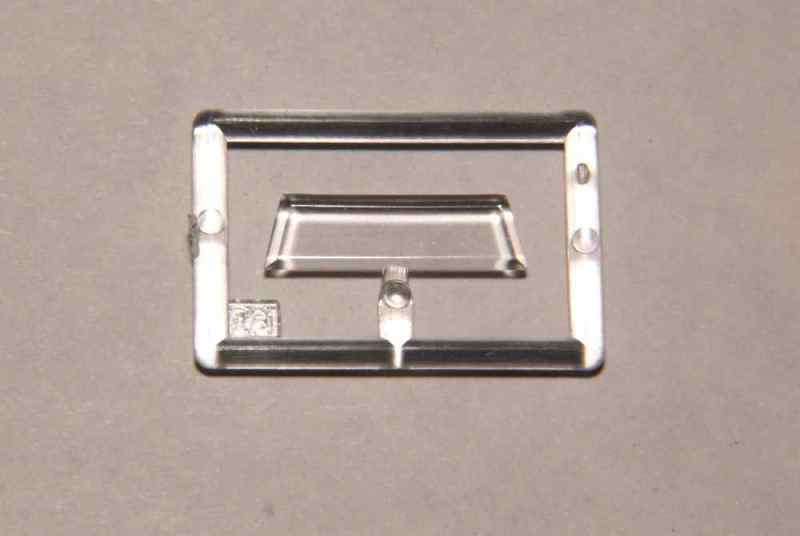
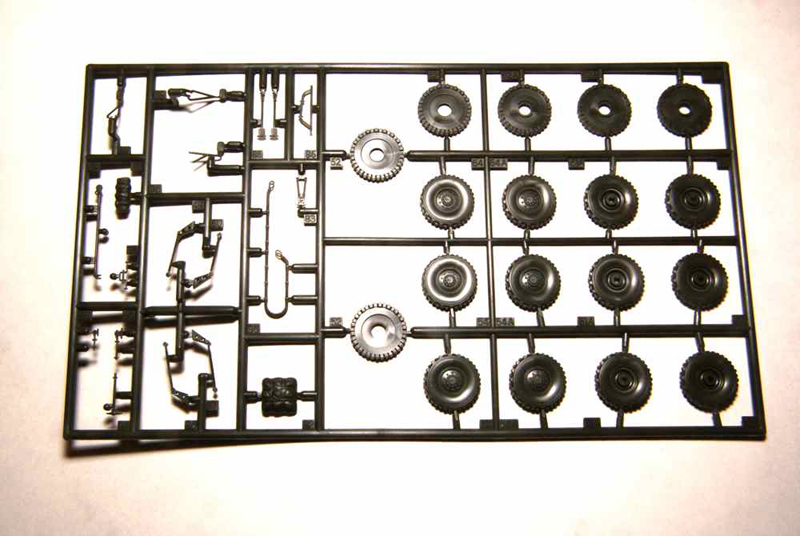
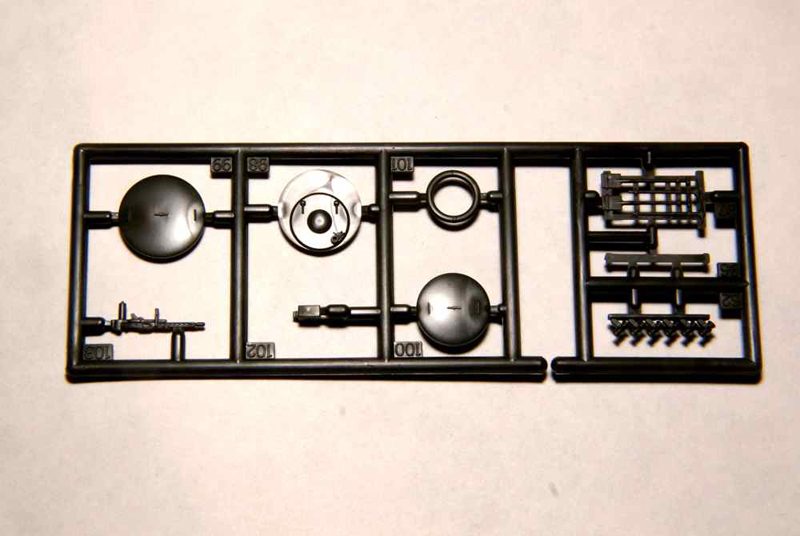
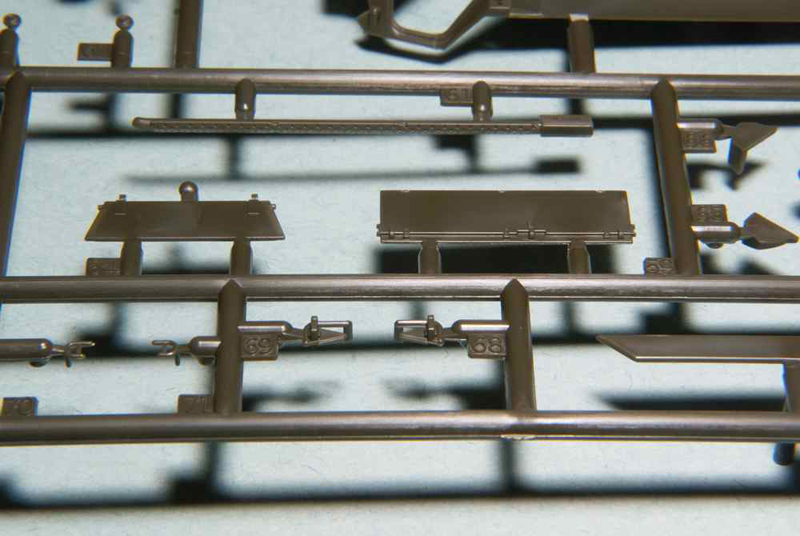
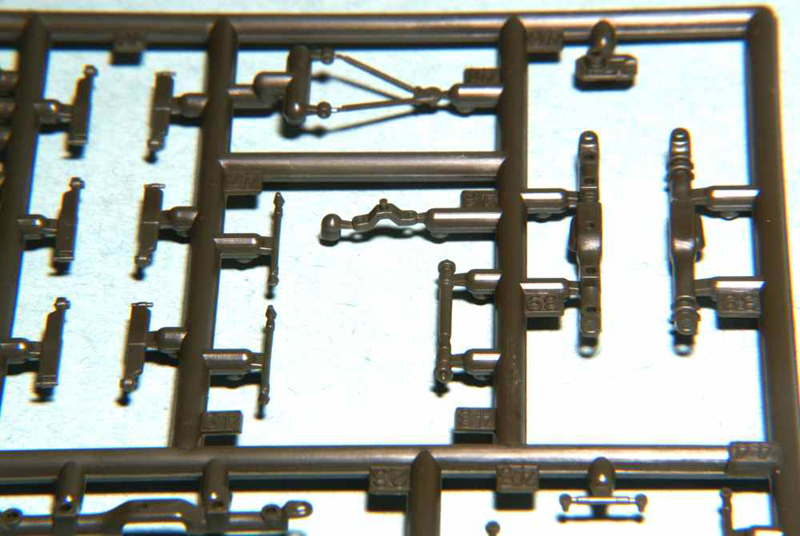
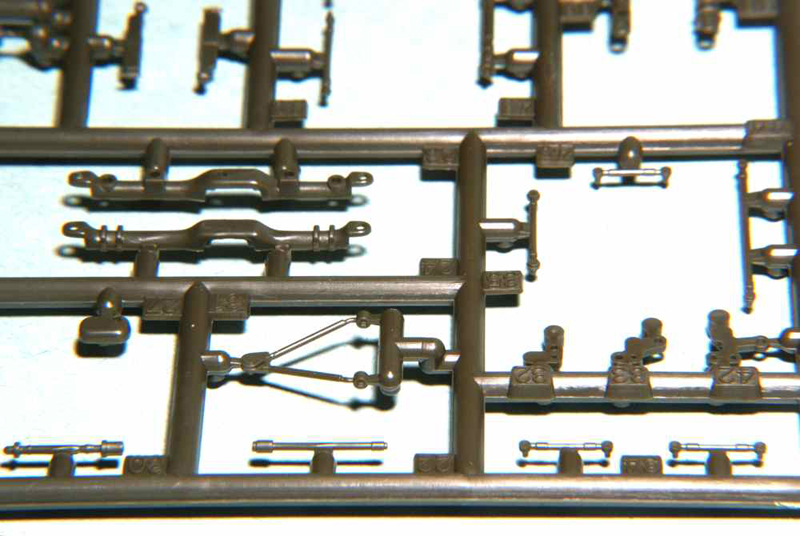
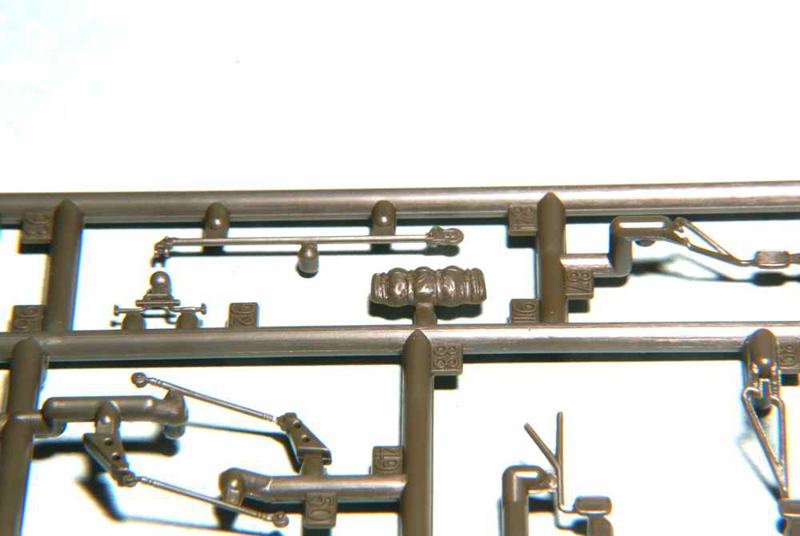
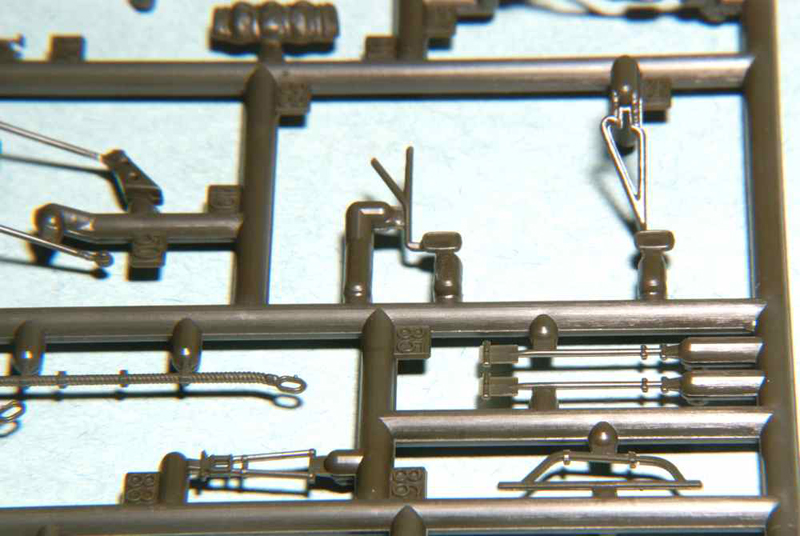
After opening the box you will find three larger sized sprues and one smaller sprue moulded in dark green styrene, as well as one clear plastic sprue containing the windshield. The sprues contain 102 numbered parts but in several circumstances the number will reference multiple parts. Due to these multiple similarly numbered parts the count of parts will approach 150.
Also included is a 12 page instruction guide with assembly instructions and a painting guide for two vehicles. The assembly instructions are in the form of exploded view drawings with arrows directing parts placement. Assembly comprises 36 steps with parts count during steps varying.
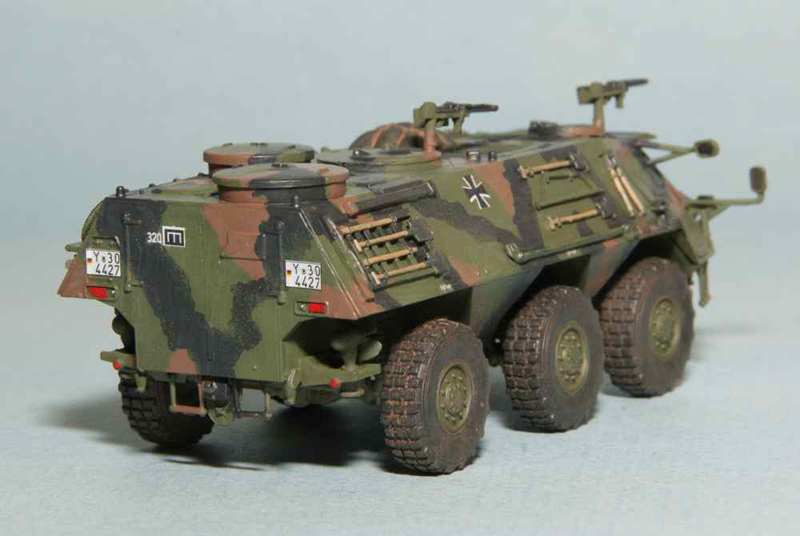
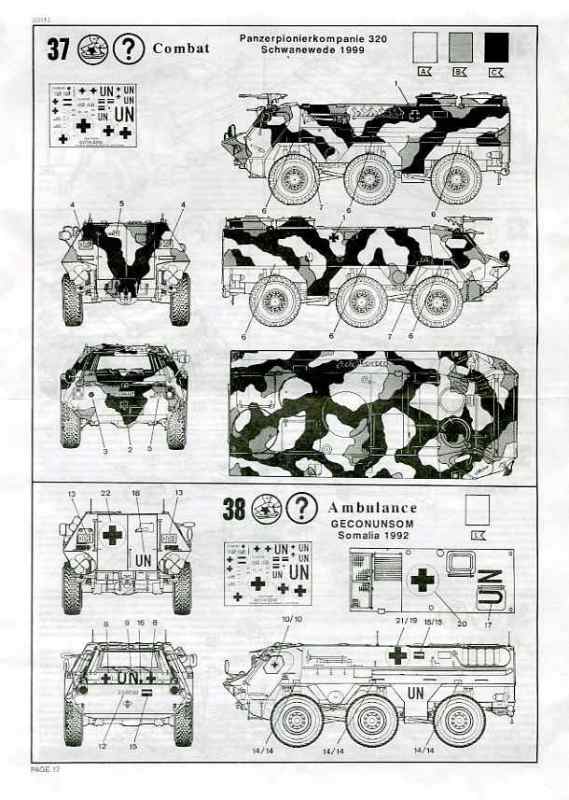
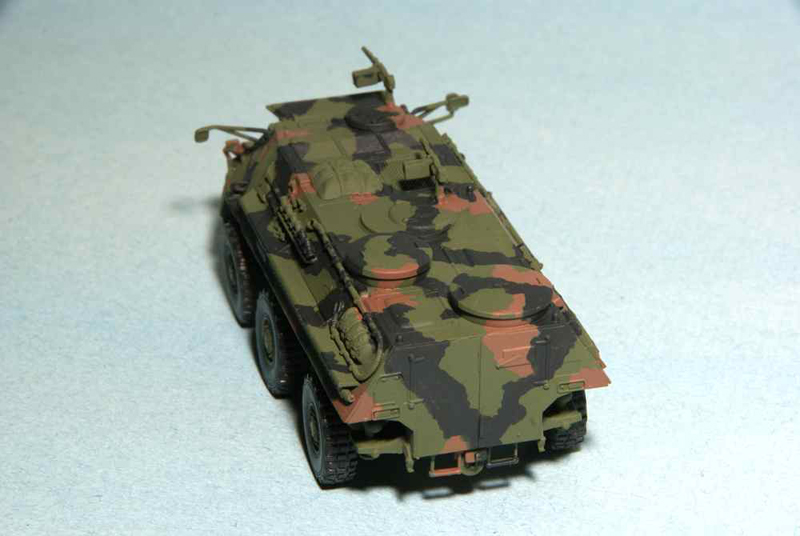
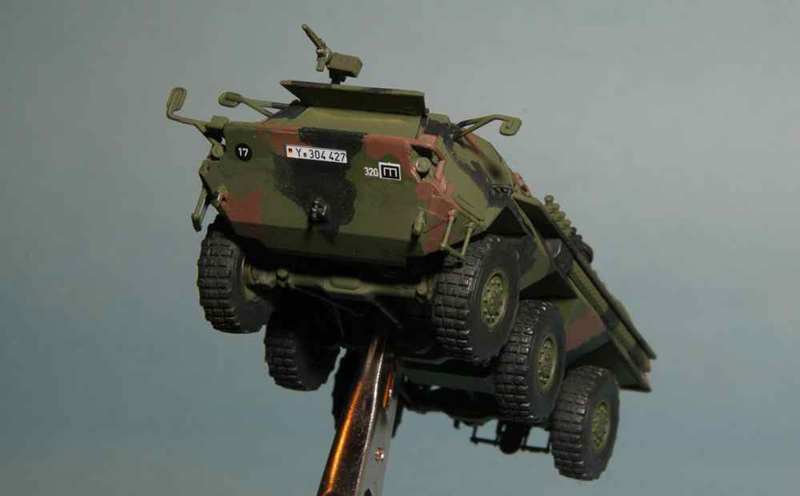
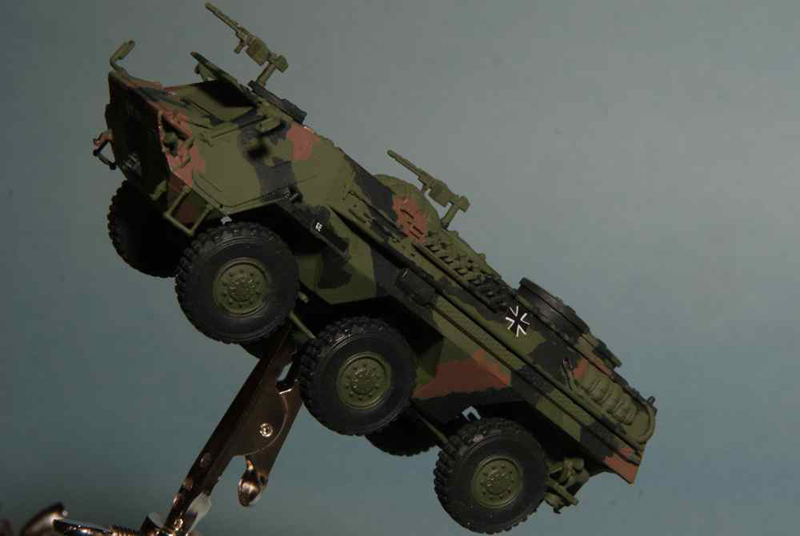
The finishing guide of the instructions shows two illustrations of vehicles. One is for an engineer vehicle in typical NATO green, black and brown camouflage. The other is for the ambulance version done in all white. Water slide decals are provided for two different German Army units and are nicely detailed and in register.
Review
This kit permits the builder to build one of two variants. Either the combat engineer variant or the ambulance variant. The instructions note which parts are to be used with each variant. Ostensibly the builder could use this kit to build a third variant, a straight troop transport, by leaving off certain variant specific parts.
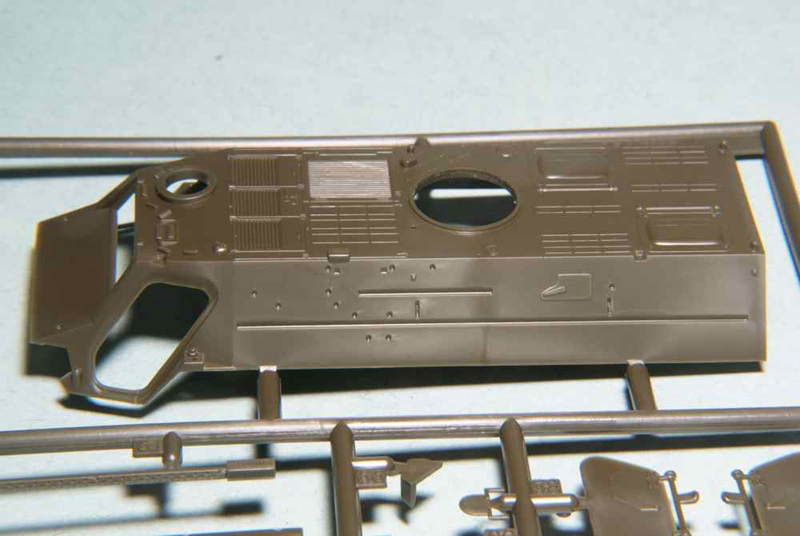
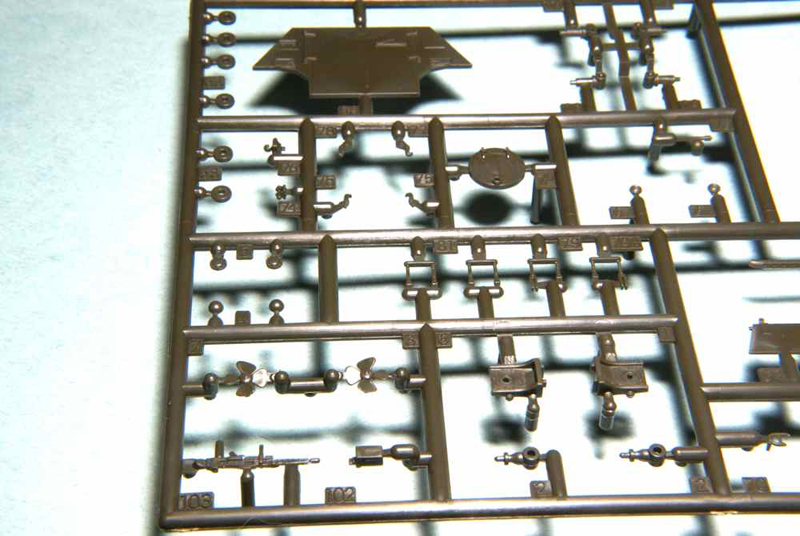
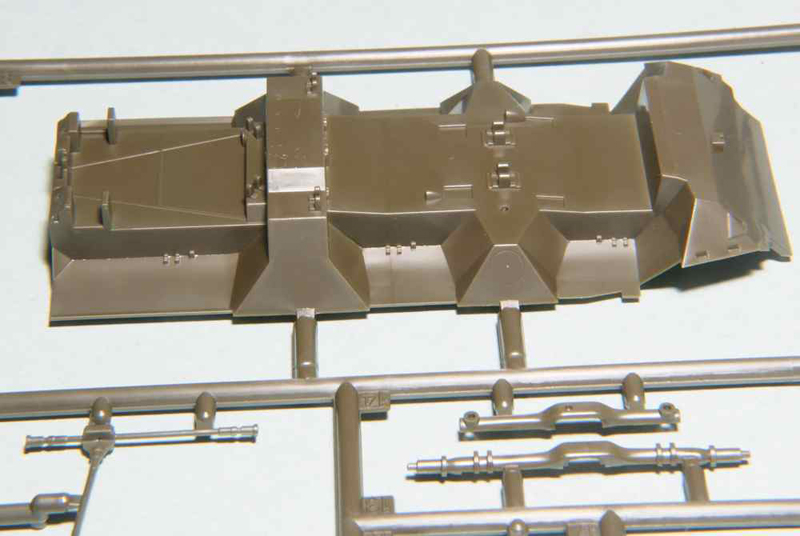
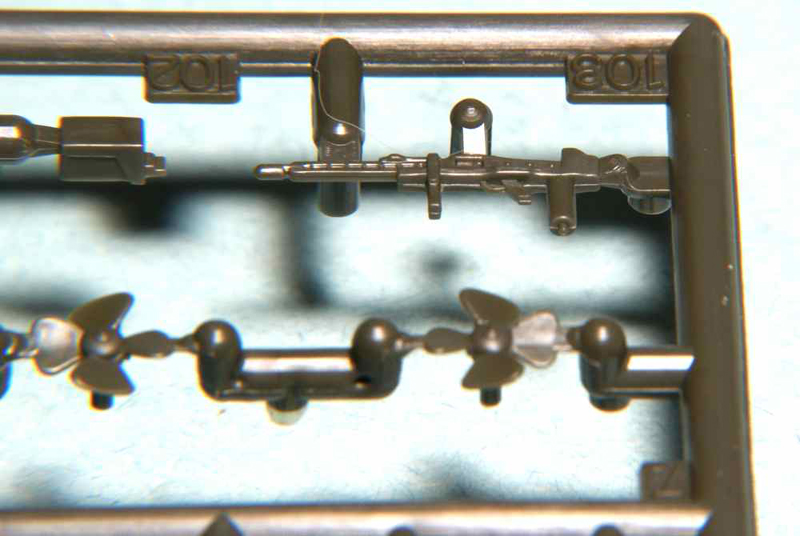
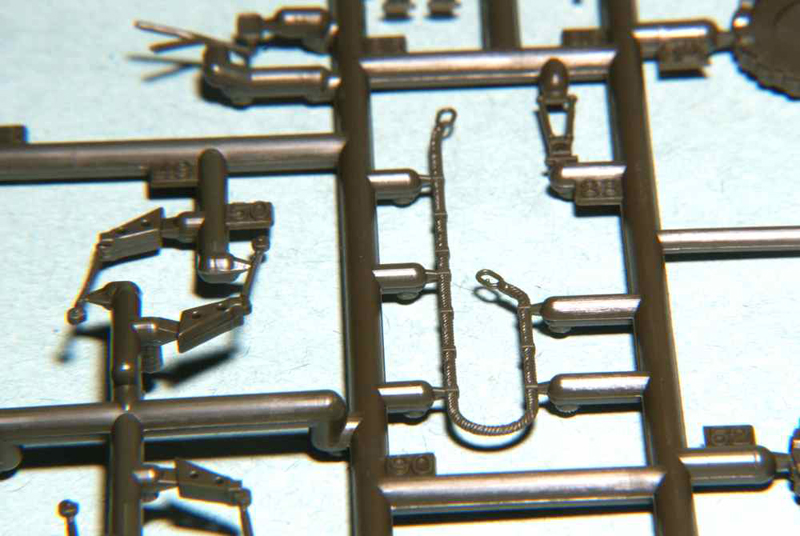
The moulding of the kit parts appeared predominantly flash free with no evident sink holes or excessive mould seams. Detail on many parts is quite impressive and where necessary, delicately done. In some cases the details on parts are so fine that care will need to be taken when painting them so as not to obscure it. An example of this is the fine and delicate moulded spring like sides of the crew steps as well as a fairly descent MG-3. Another nice touch is that Revell has moulded on the anti-skid panels on the hull, although at this scale no texturing is evident on them. Unlike some other kits in this scale, all the tools and external storage are individual parts.
Ejector pin marks are minimal and were they are present are on surfaces that should not show after assembly. One area of concern is that some sprue gates are quite substantial and could lead to problems with parts removal.
Build Observations
Having previously built the Revell SPz-2A1 Luchs, I was intrigued to see how this kit would come together. My original supposition that this build should be easier to build as it had one less axle, would be proven incorrect.
Like other Revell kits that I have built the plastic is rather hard and somewhat brittle. This can result in problems (breakage) when separating smaller and thinner parts, such as the individual tools, from the sprue.
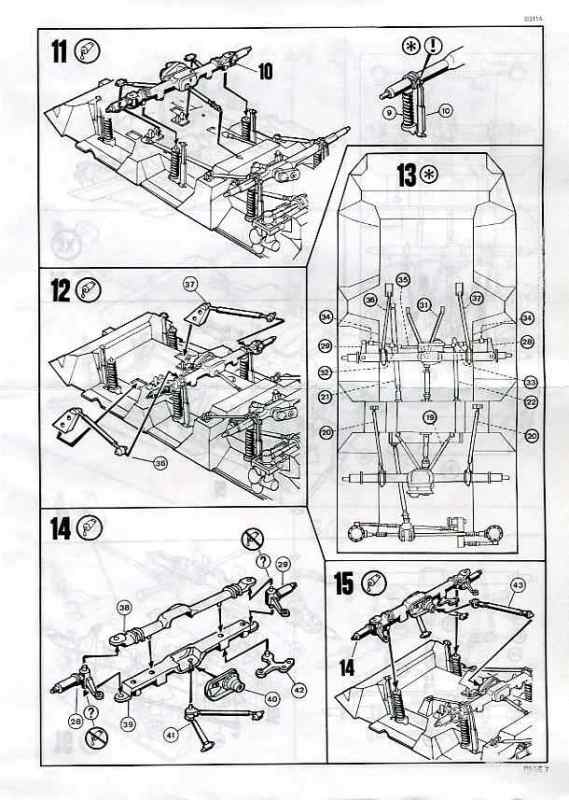
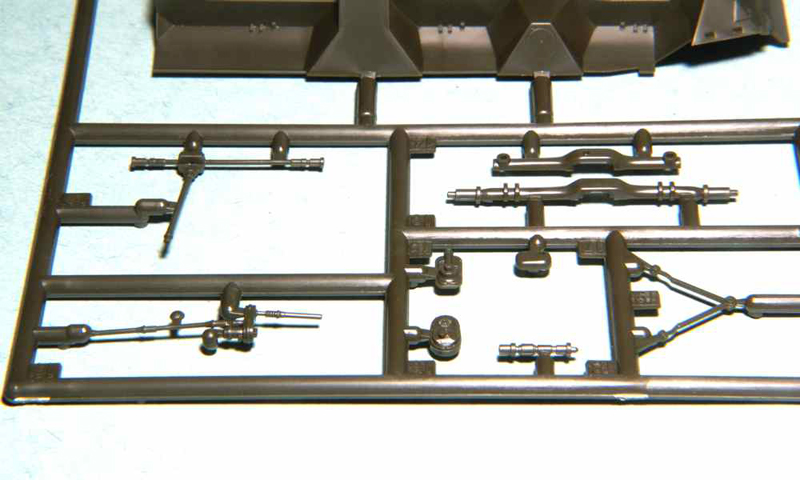
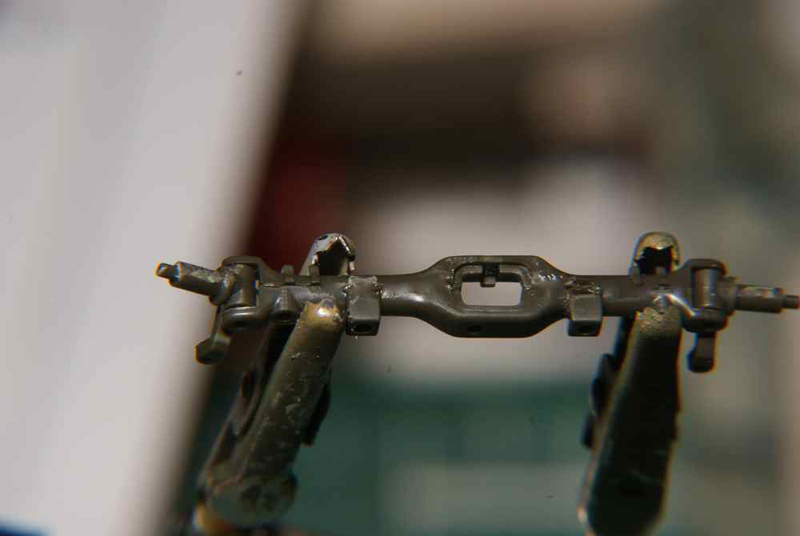
The first two steps in the instructions are to assemble the two water propulsion units that will be mounted on the rear hull sides. Each assembly is made up of five parts. This assembly went well but required care as the parts are quite small.
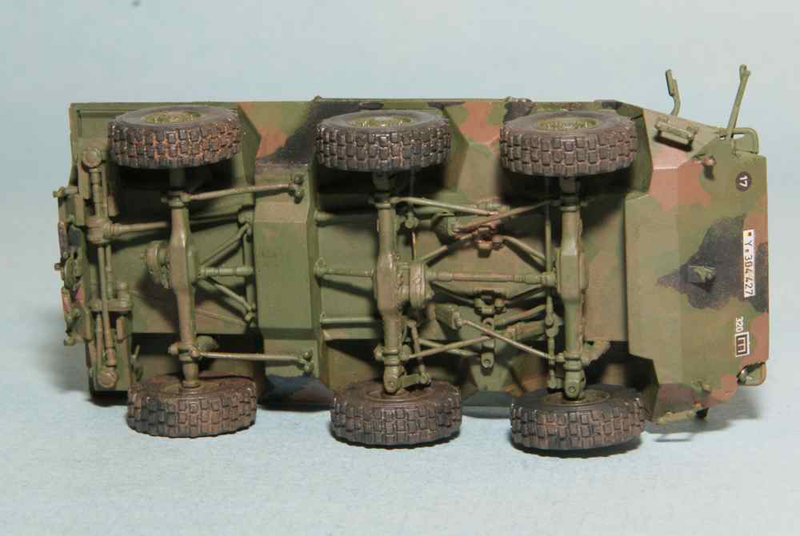
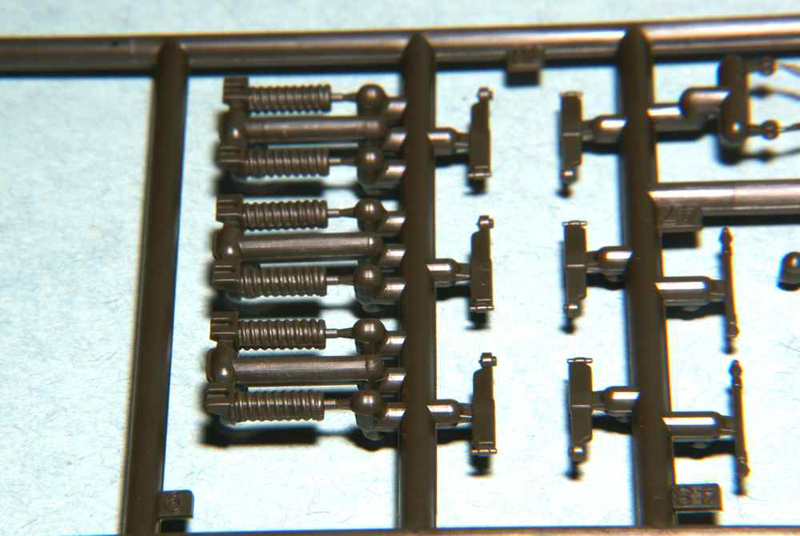
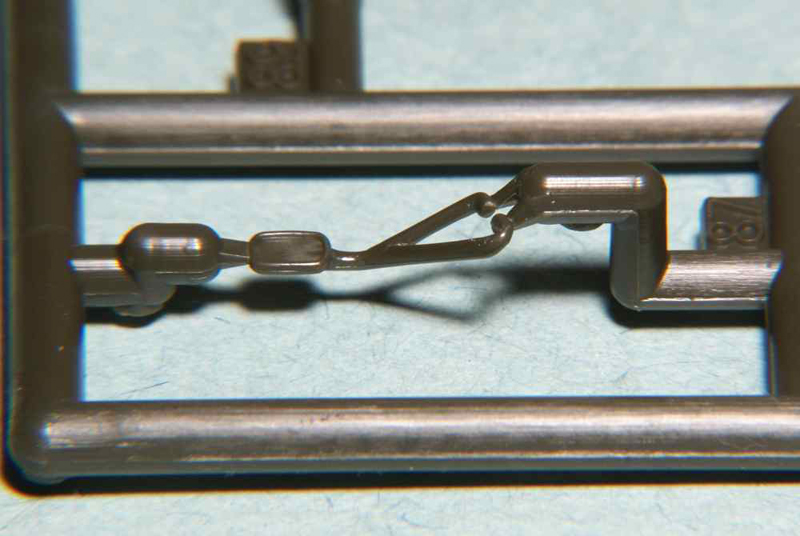
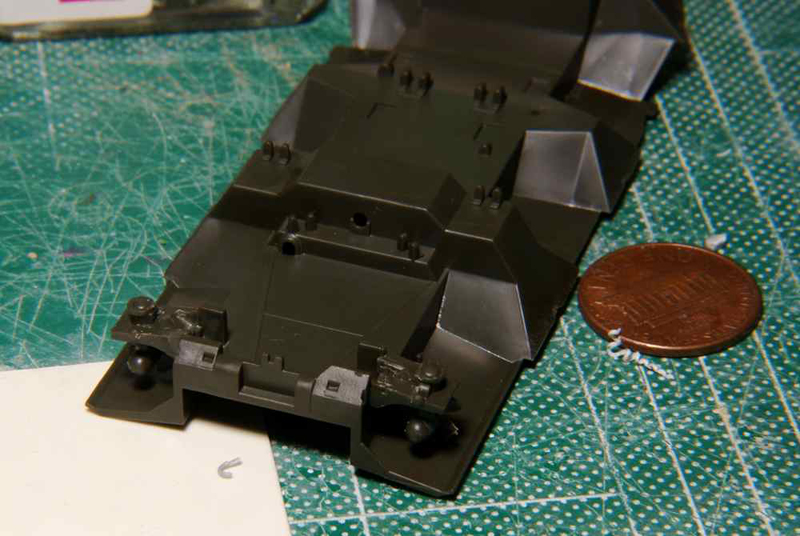
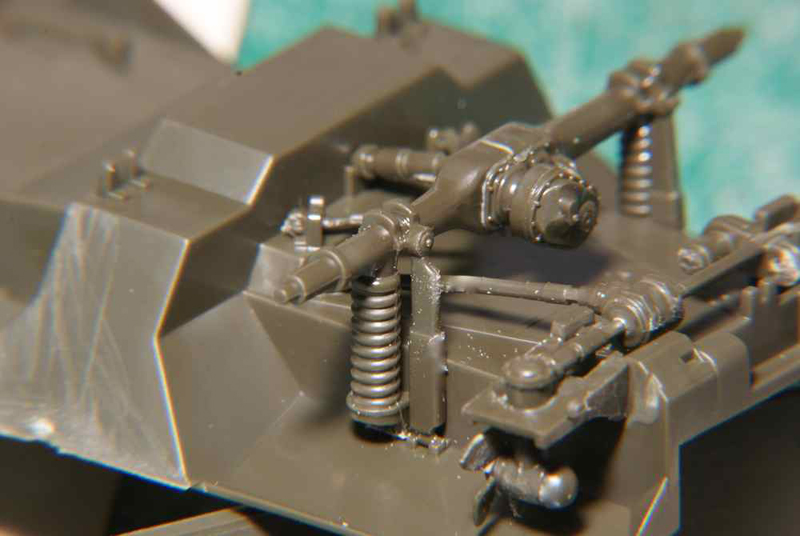
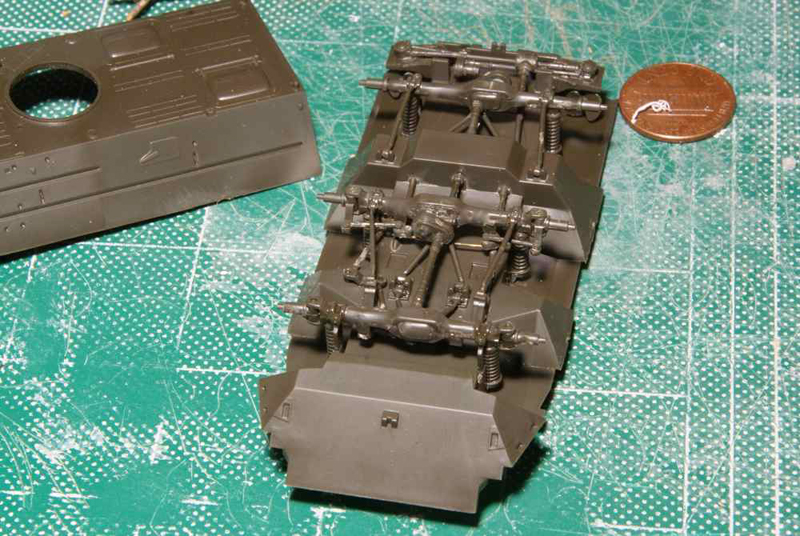
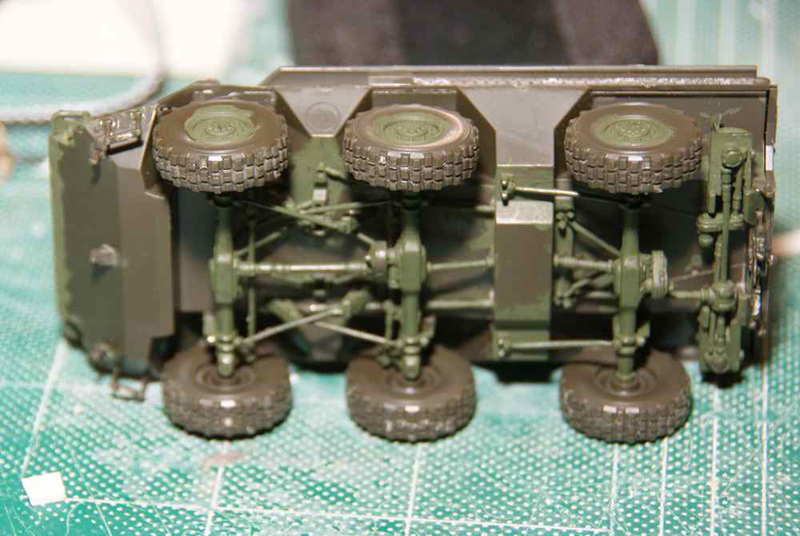
Step 3 involves the attachment of the water propulsion units to the hull sides. Also in this step the instructions have the builder attach six spring mounts (Part 9) and the six shock absorbers (Part 10) to the lower hull. It is here that I felt it best to ignore the instructions. The locating features of the spring mounts are a small tab on the hull that fits into a recess in the spring mount. The tab and recess features possess a very loose and sloppy mating surface. It was at this time that I felt the best possible solution would be to mount them when the completed axle was ready to be glued on. The locating pins that insert into the axle would greatly assist proper placement and alignment of their support parts.
Step 4 is the attachment of the propulsion and traverse linkages for the propellers while step 5 is the construction of the rear axle. The first step went without issue but the second step required a slight variation from the instructions. Two parts, the axle drive shaft (Part 18) and a V shaped tie rod (Part 19), would cause problems when trying to mount the completed axle to the model due to aligning five separate points to their mounting features, all at the same time. This is the first example where a slower drying tacky gel or tube glue should be used. This type of glue was used throughout the assembly of the suspension system.
In step 6 the builder is to attach the rear suspension component to the spring mounts. It was at this point that I glued the two spring mounts (Part 9) to the hull and then the completed rear suspension component to them. Immediately following this process I attached the shock absorbers to each side. This sequence would be followed for each of the other two axles.
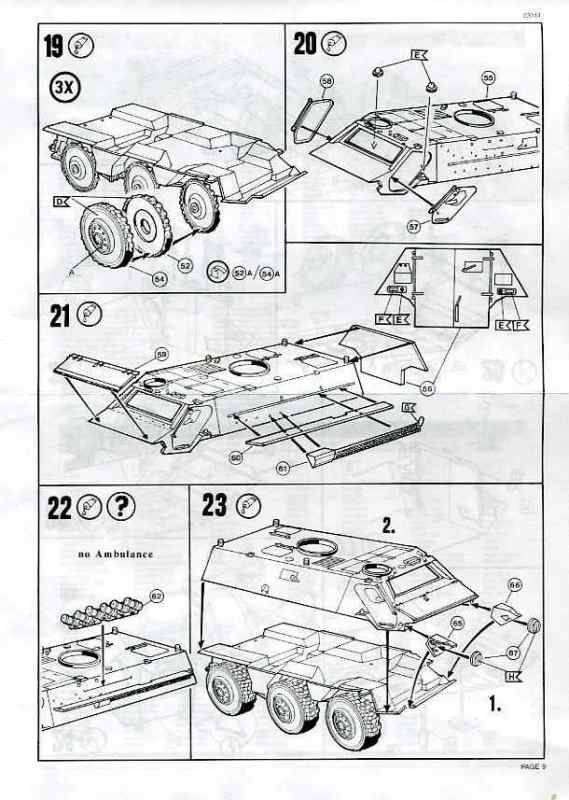
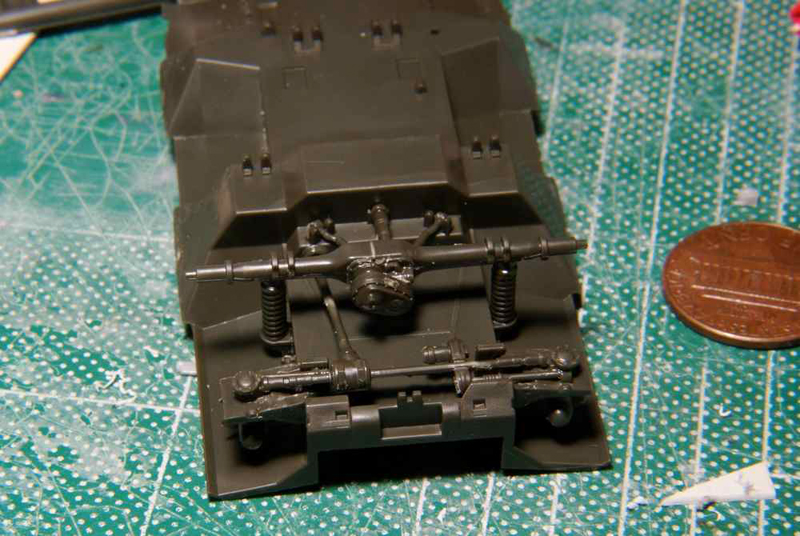
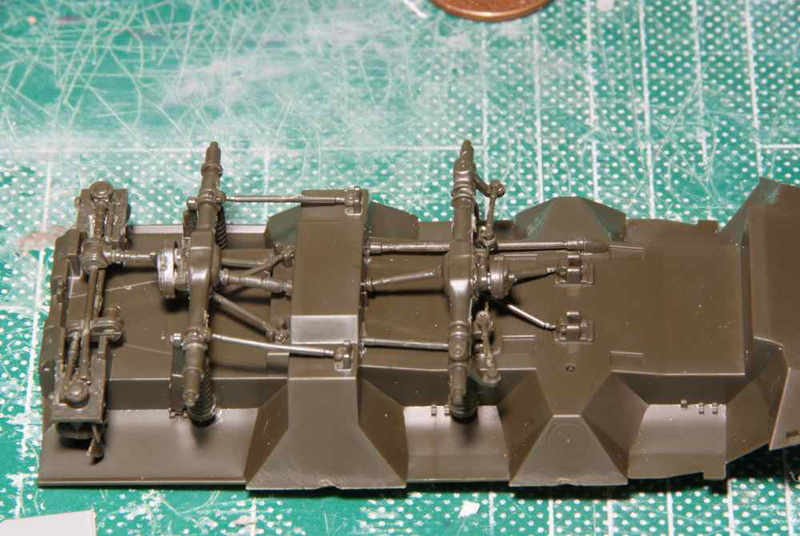
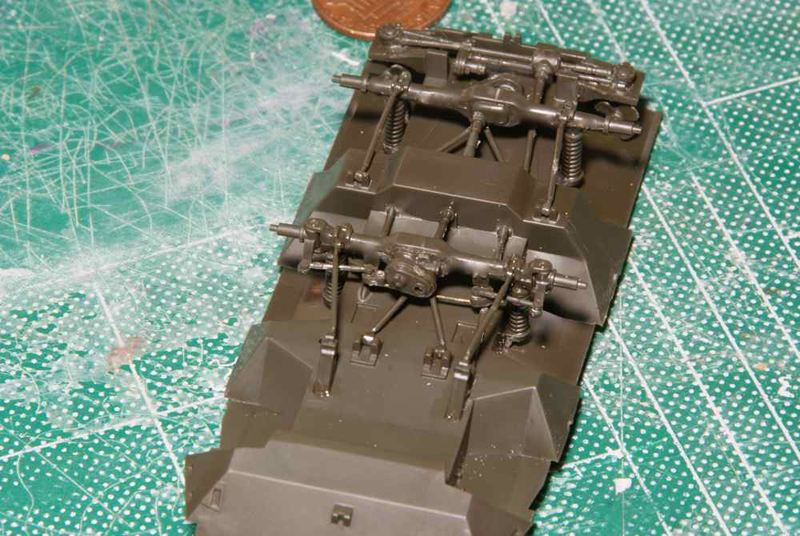
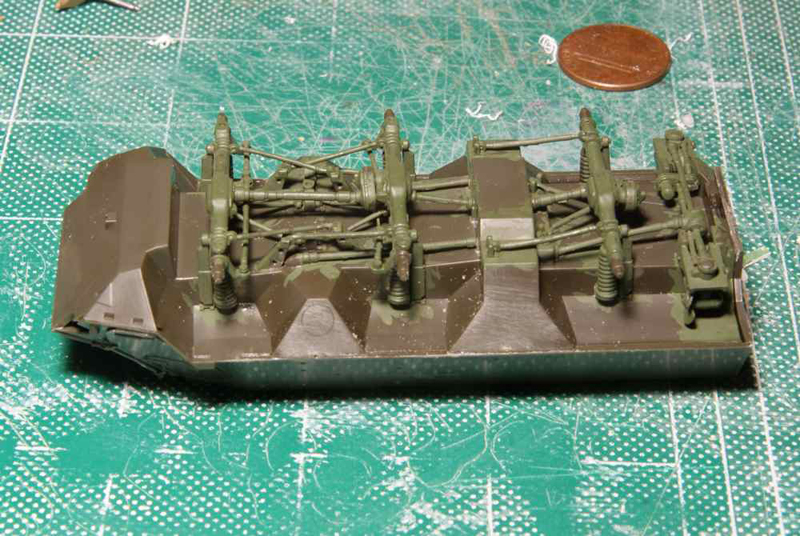
During steps 7 through 17 the forward two axles and their accompanying suspension components are added to the lower hull. The main point that I would like to stress here is that the builder study the instructions and take their time. It may not be the best to follow the manufacturers assembly order for all these steps. I had to review the instructions numerous times to determine what would be the most practical assembly order. It became quite obvious that following the suggested assembly order could lead to considerable difficulties when trying to place parts when others were placed prior to them.
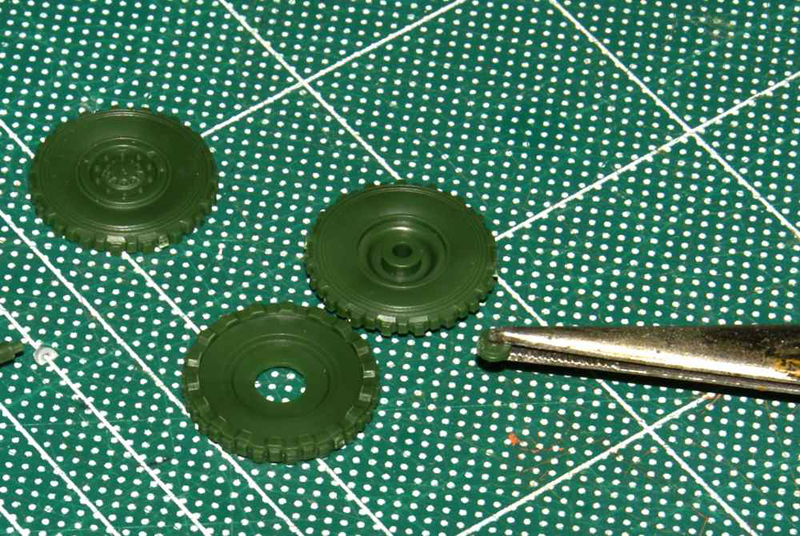
With step 18 the assembly of the wheels is started and during step 19 they are placed on their respective axles. Here again I decided to diverge from the instructions and leave these steps until after the body construction was complete.
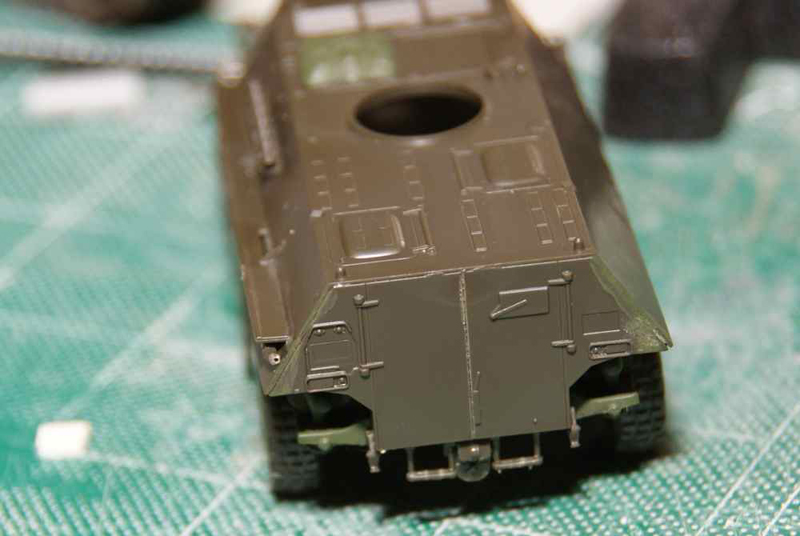
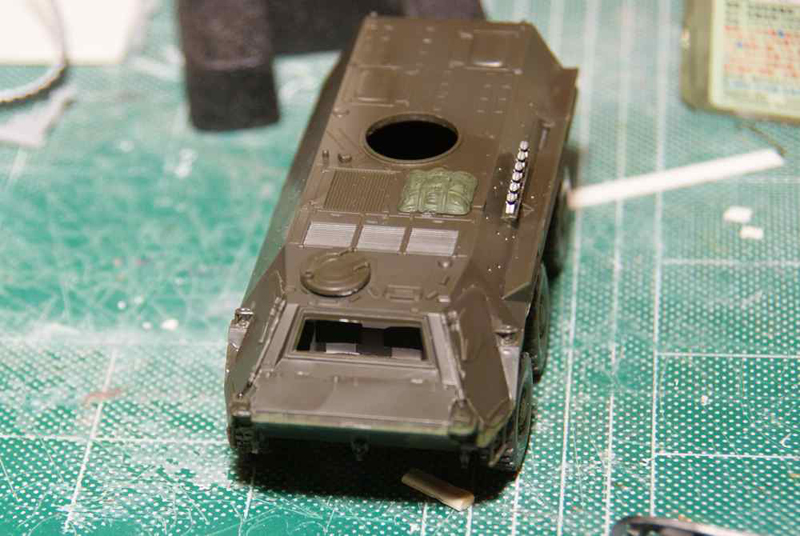
With step 20 the external detailing of the hull begins and continues until the last step, 36. Care needs to be taken when removing some of the smaller and thinner pieces from the sprue as the brittle nature of the plastic used can cause them to deform and break. The kit has shallow depressions to facilitate the placement of some of the external tools and stowage. However, the pins on the actual parts are so undersized as to make this feature almost useless.
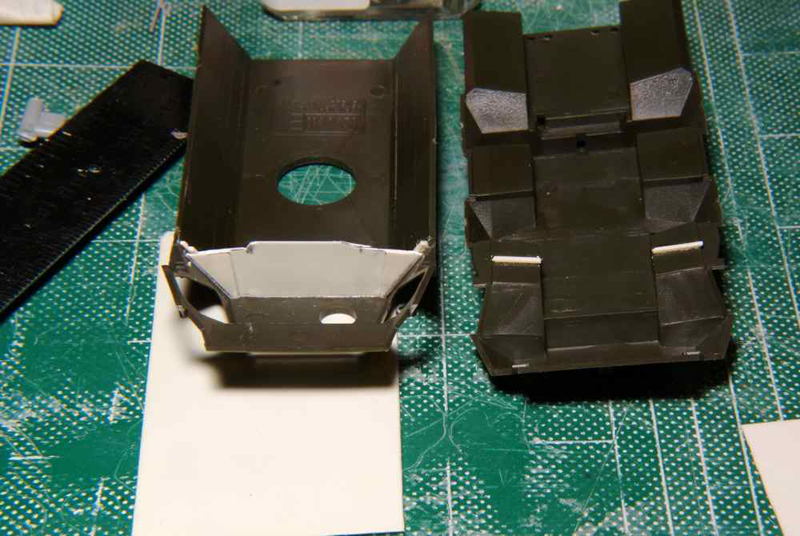
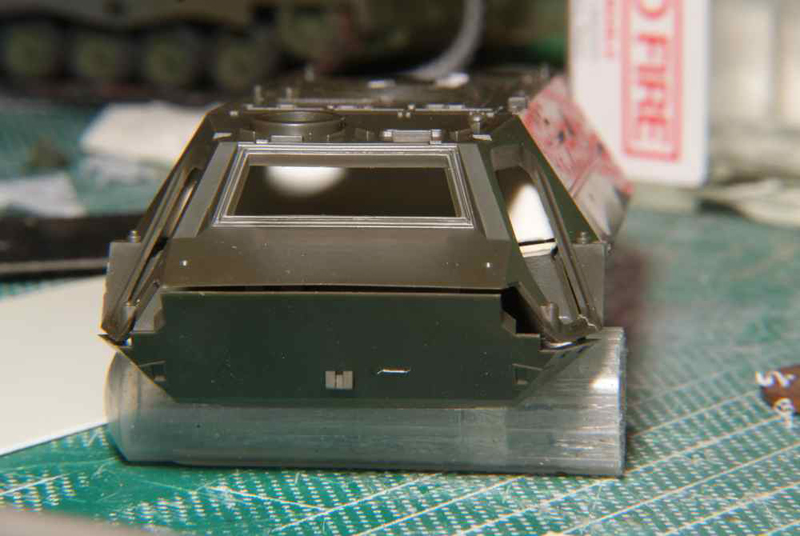
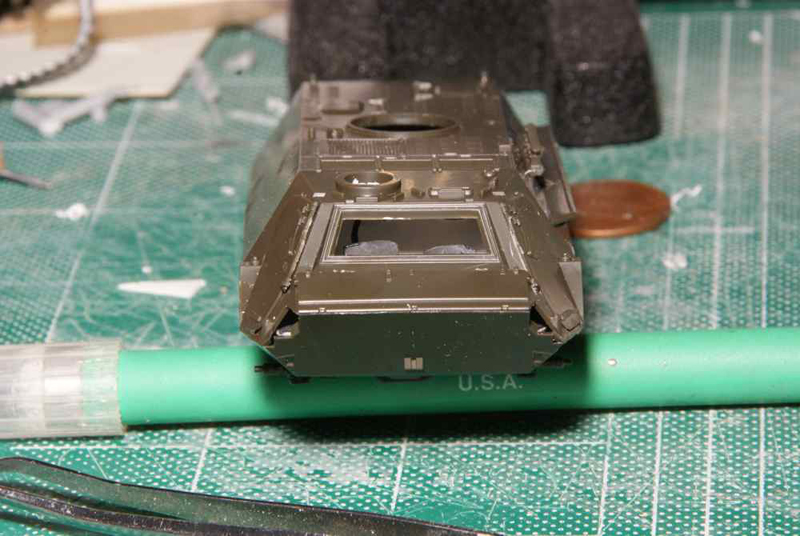
The main drivers compartment doors are nicely done and one might consider positioning them in the open position. Unfortunately there is no interior detail on the doors, neither is there any compartment interior. In my case I desired a rudimentary interior so as to have something visible through the clear windshield. I used bits and pieces of sheet styrene to scratch up a firewall, cabin floor and two rudimentary seats. The cabin interior was sprayed white and the seat cushion portions a muted black. Following this I joined the upper and lower hull.
Finishing
There are only two options for painting and markings and as I was building the engineer variant it would have the standard NATO three colour camouflage. I used Tamiya NATO colours for the camouflage throughout. Detail pieces such as tools and the machine guns were painted with a mix of Tamiya and Model Master Acryl paints. After the painting was done I sprayed the vehicle with Tamiya X-22 clear in anticipation of applying the decals.
After the clear gloss had dried I applied the decals representing the Panzerpioneerkompanie 320, Schwanewede, 1999. The water-slide decals provided were coated with decal setting solution after application to the model. After a suitable drying time the model was again sprayed with clear gloss to set and seal the decals.
As pictures of these vehicles generally show them fairly clean I decided to do minimal weathering on mine. Various colours and hues of Delta Ceramcoat inexpensive acrylics were used as washes and or dry-brushed as needed. As a final step I dusted the entire vehicle with a very light and dilute spray of Tamiya XF-57 Buff to simulate dust and tone the colours down. After all this was complete I applied two successive coats of Model Master Acryl Flat Clear #4636.
Conclusions
I had previously built the Revell Luchs and as this suspension was extremely similar I had hesitated about tackling this build. My inhibitions about building proved to be quite justified as the suspension alone proved to be as intimidating as I originally envisioned with the previous kit. The thought of getting all six wheels of such a complex suspension to sit squarely on a flat surface seemed almost impossible. After successfully getting a few newer small scale kits built, I felt that I might have the necessary skills to tackle one of these beasts again.
Considering its age, the Revell TPz-1 Fuchs proved to be a fine kit of this vehicle. My only wish was that all the troop compartment hatches had not been moulded closed and that a rudimentary interior could have been provided. The build was not without its own issues and I certainly would not recommend it to a novice builder. The skills that I learned have both boosted my confidence and allowed me to look forward to future challenges.
SUMMARY
Highs: Interesting subject with fairly good fit and fine detail. Reasonable price.Lows: Construction order in the instructions not the most logical at points. No interior detail, troop compartment hatches moulded on. Brittle plastic.Verdict: A positively great kit for the Braille scale builder interested in modern vehicles. Recommended.
I've been building models since about age 10 with the occasional hiatus due to real life events. First armour model was a 1/76 Airfix Tiger I and was followed by a 1/72 Revell F4U Corsair. I've built primarily 1/76 and 1/72 armour and aircraft but occasionally have tinkered in other larger scales....
I was following this build in the forums and it's great to actually read about it in detail. Super review and it did answer a lot of questions that I had. Having read what is involved I'm glad that I decided to wait for it before attempting my build.
Regards,
AJ


Comments