The Panther is considered by many experts to be Germany's best tank design during the war, and perhaps the best tank of World War 2 period. Though it came too late to turn the tide in Hitler's favor, the Panther had several notable features, including a deadly 7.5 cm KwK 42 L/70 gun, sloping armor in thicknesses to resist many other tank guns of the period, and excellent communications. Dragon has been releasing multiple versions of the Panther's three variants (D, A and G in order of development), often in versions with and without Zimmerit.
Given the importance of the tank and its kits, a number of after-market photo etch manufacturers have released upgrades to improve on Dragon's already excellent quality and detailing. It's never a bad thing when new upgrades are brought out to compete with existing ones, and Alliance Modelworks is releasing a series of sets intended for Dragon's Panther series. The latest is for the Ausf. G. The G model was the most-numerous Panther, and it has some unique features, including crew compartment heater that sticks up prominently above the engine grates.
what you get
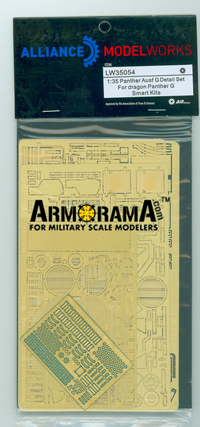
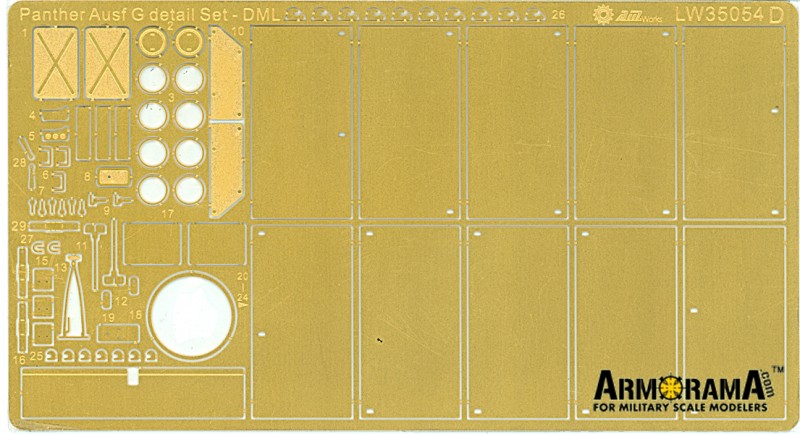
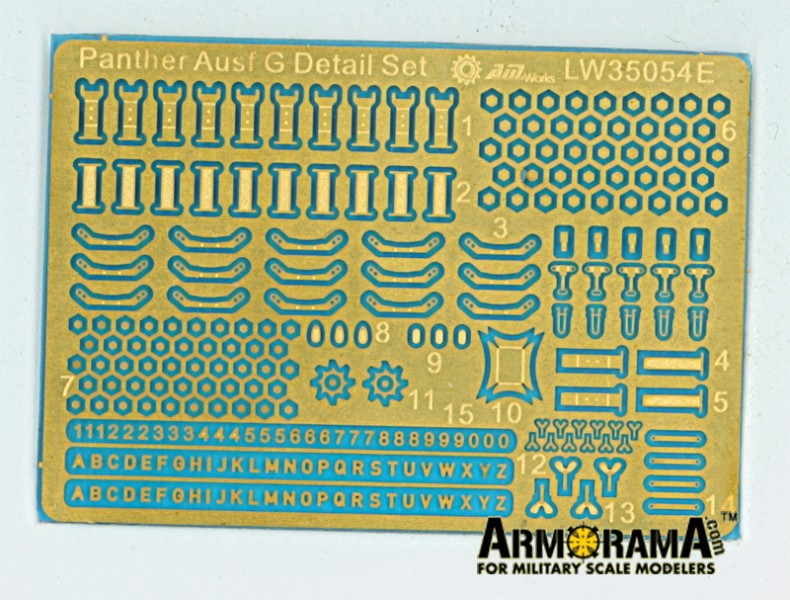
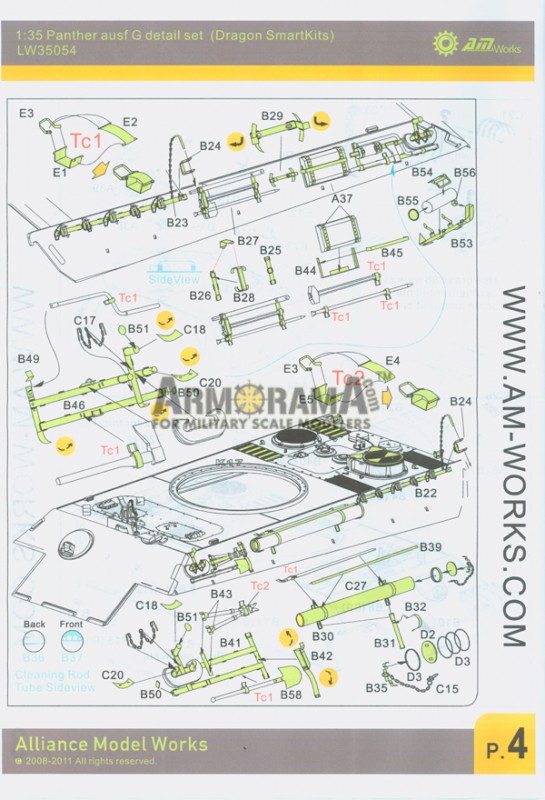
The set comes in a clear plastic bag reinforced by a black heavy paper liner with an AMW label stapled to the top. Inside are included:
5 frets of photo etch
5 pages of instructions on three pieces of paper
the review
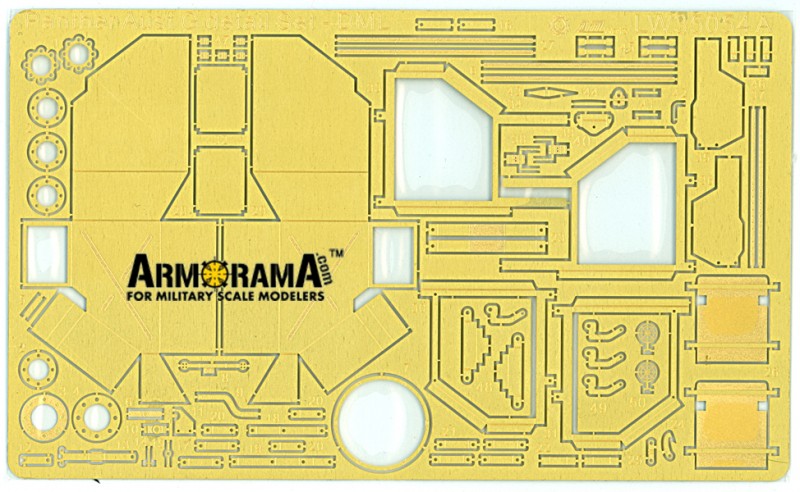
Thanks to the amazing work by Thomas Jentz and Hilary Doyle, the details of the Panther G are well-documented. The differences in the various PE upgrades, then, is what details each company chooses to reproduce, and what solutions they provide the modeler. In the case of Alliance Modelworks, they have focused on a clear, clean provision of the essential details like the tools, their mounting system and the side skirts or Schürzen meant to detonate shaped charge rounds prior to hitting the tank itself.
Indeed, one of the best features about the kit are the side skirts or Schürzen. While styrene Schürzen are much better than in the past, they still can't compete with metal; Dragon's own metal skirts are a better solution than plastic, but still a bit clunky in comparison to these. Most current PE Schürzen are thin and flimsy, hardly making it believable they could provide even small arms fire protection. These panels, however, seem much more reasonable and to-scale than anything I've seen previously, and are fabricated in a thicker brass than those of the competition.
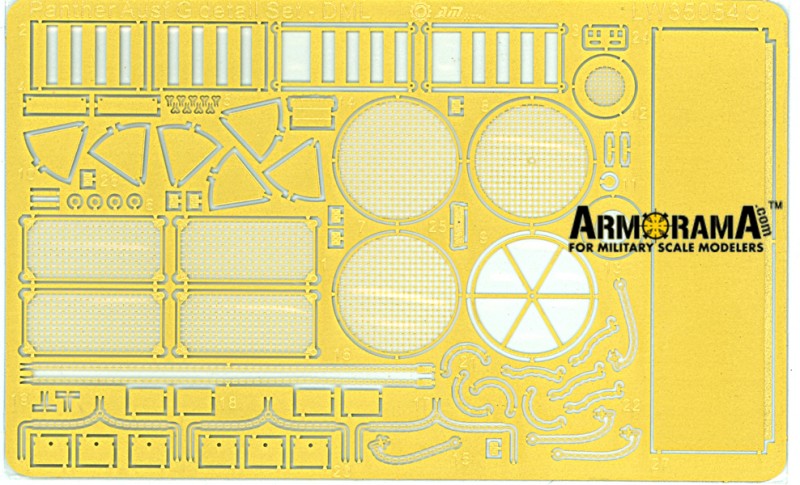
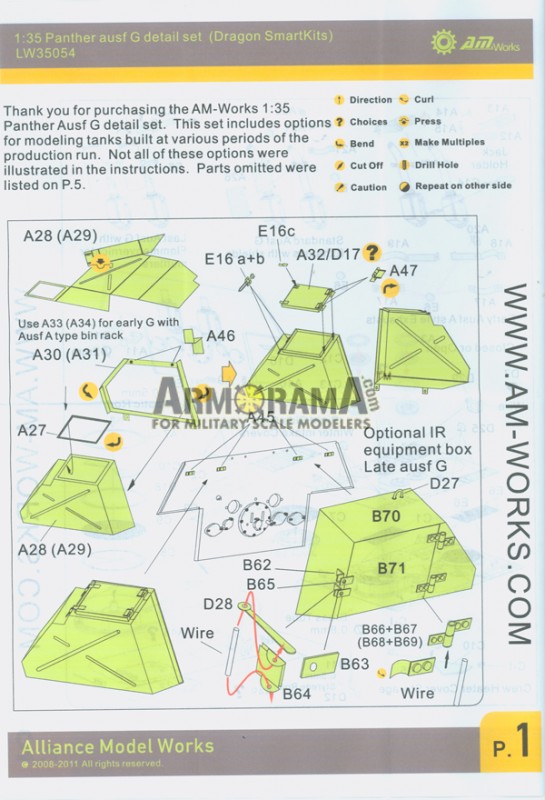
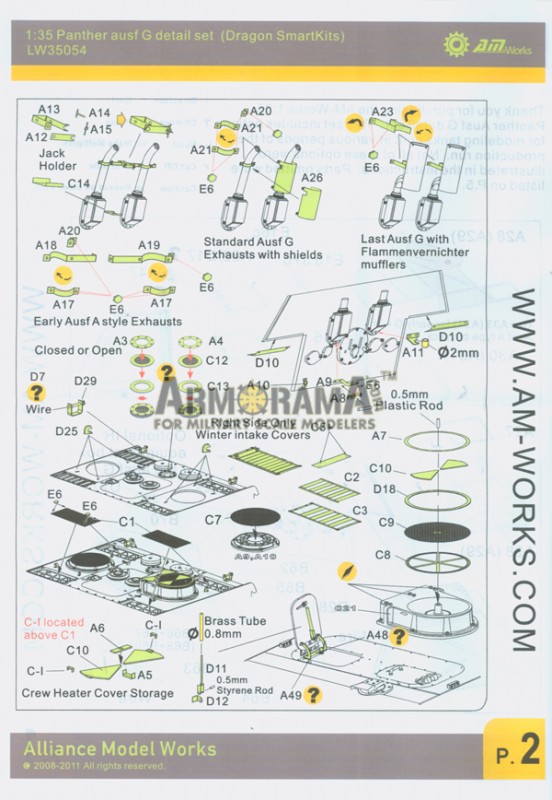
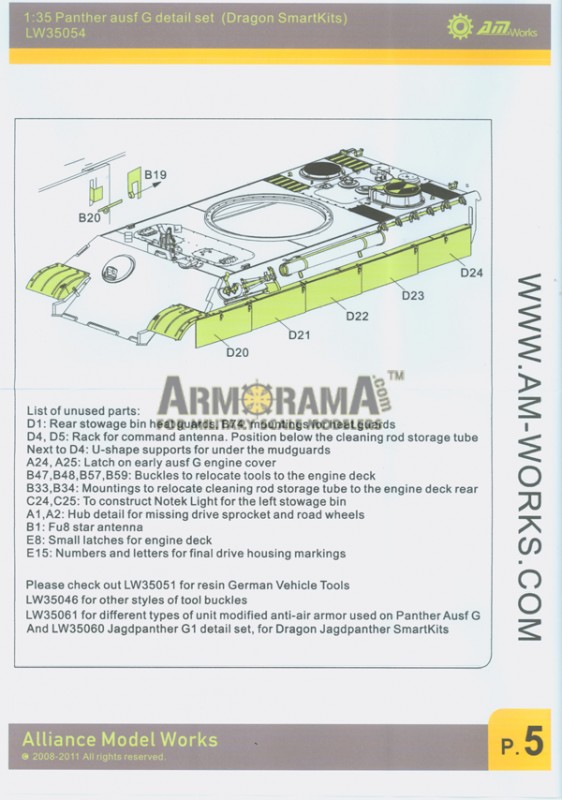
Indeed, brass thickness is used to solve a number of issues, such as the rear stowage bins and their lids, allowing for some clever variations on the standard bins included in the kits or other PE sets. Ausf. A-type mounting racks are present, as well as a box for optional IR equipment from a very late Ausf. G. Other aspects that set it apart include the seven-part crew heater assembly that goes a long way towards equaling or even exceeding the resin version I purchased from Tiger Models.
Given the variations of Panther G within the variant, AMW has done a fine job allowing modelers to customize their build, including four options for the exhausts and their shields. One of those options is the Panther A version allowing for a "transitional" build. As in other cases where more options are provided than simply OOB, consult your references.
I'm particularly happy with this set;s clear instructions. Parts are often identified, too, which makes for easier understanding of what you're doing. One knock on some other manufacturers is their usage of exploded-view assembly stages that often fail to convey where something goes exactly. That's not a problem from what I can see here.
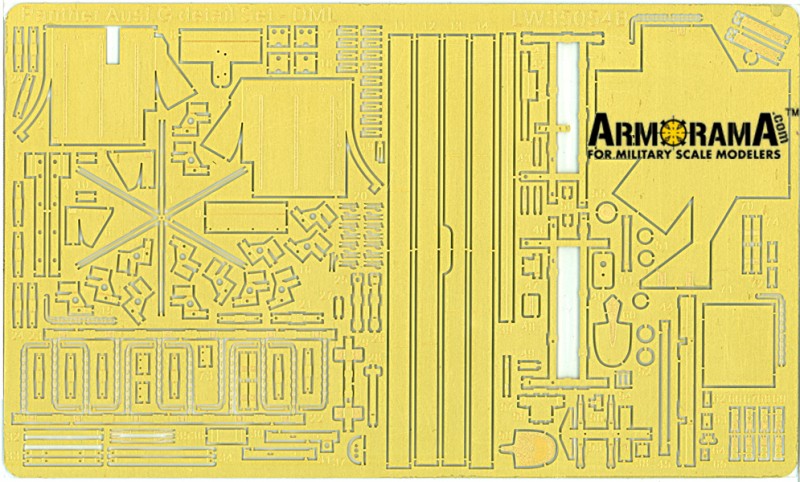
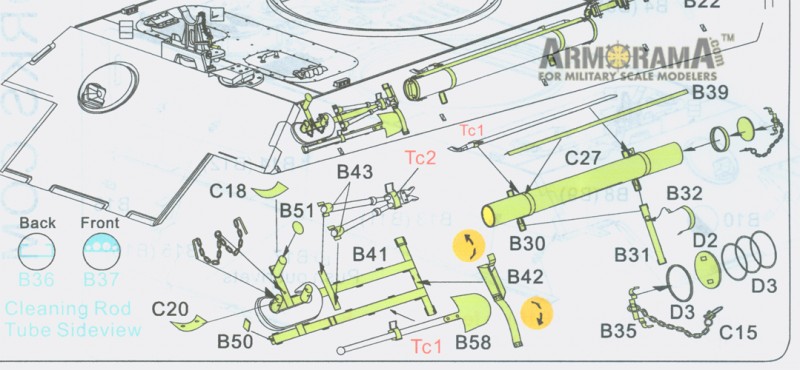
I'm not entirely satisfied with everything in the set, including the fact that it demands modelers form from flat brass what Jentz & Doyle refer to as the "cylindrical storage tube" on the side of the tank. There has been some debate about whether these tubes contained extra radio aerials, or the interlocking wooden handles for the gun cleaning rod, but whatever they held, they were present and with this set, you have to "roll your own." AMW says they made this decision in order to give modelers a more-accurate bin in case they choose to show it in the open position. A pre-formed cylinder would be easier to use, but sacrifices scale thickness.
You must also supply your own plastic or brass rod for things like the handles on the rear deck storage compartments. But overall that's a small omission.
conclusion
This is a very good set for what you get, though the price direct from AMW is significantly more expensive than sets by other manufacturers purchased from Internet sellers. Certainly buying direct allows buyers the confidence and reassurance they're getting their money's worth. I don't think anyone will be disappointed with this set, and it establishes a high bar for the competition in a number of areas. It doesn't "blow away" all the other sets on the market, but gives several of them a real run for the money.
Thanks to Alliance Modelworks for providing this review sample. Be sure to say you saw it reviewed here on Armorama when ordering.
SUMMARY
Highs: Beautiful photo etch set with ample upgrades for almost any aspect of the Dragon Panther G Smart Kits.Lows: Cleaning rod/spare antenna tube come flat & must be formed. Set is more expensive than others like it on the market.Verdict: Highly-recommended for what's included. This should allow you to model any Panther G variant.
Our Thanks to Alliance Modelworks! This item was provided by them for the purpose of having it reviewed on this KitMaker Network site. If you would like your kit, book, or product reviewed, please contact us.
Brian, that's great attitude! By modellers for modellers - thanks for that!
I think that there are not that many modellers that care about construction looking 100% as on real vehicle and such people usually can scrathbuild that on their own.
This is a fantastic discussion, thanks, Brian, for giving us all a peek behind the curtain as to how these things are done.
I also appreciate the nuanced discussion about each manufacturer. Making purchasing decisions is hard, given that most reviews just say "here is what you get." How well do the pieces come off the fret? Are the instructions clear about bending? When finished, do the results approximate the real thing or represent it as accurately as today's technology allows?
This alone has me interested enough that I'll probably by a set or two. Cutting those tiny pieces off the frets and cleaning them up is half the battle. Thanks for the info and pics Mike!
Regards,
Mike
To close the loop on the AMPS Central SC "Wildcats" newsletter article about the history of armor modeling PE mentioned above, here's the link:
V2 N8 "Wildcat"
Hope anyone who surfs over to our web site enjoys the newsletter.
Happy modeling!
Mike, that's a helluva fine newsletter, you really set a high bar for other clubs.
Thanks for sharing that, hopefully this will help some fellows dip their toes in the water of PE. Latches and clasps are a good "first step" because they REALLY up the ante on realism. Other PE often enhances, but there's no comparison between a styrene latch with its "suggested" outline and a brass one. AMW should be commended for developing this breakthrough, since removing the latch handles from a fret of PE is one of the most-annoying and biggest timewasting things I can think of next to watching "Real Housewives of New Jersey," LOL.
We're motoring along with our PE-based group build, and since the subject came up about the PE cleaning rod tube being made from a flat piece of brass which required rolling into a cylinder, I thoght I'd post this pic of one of the AM-Works cleaning rod tube assembled:
For anyone interested in our progress, you can find the latest build notes here:
AMPS Central SC Group-Build Page
With the latest PE set hints and tips here (with photos):
Panther PE Set Build Notes 2
Sorry Bill for "hijacking" you thread!
Thanks for the compliments, Brian!
The stacking construction on the cleaning rod tube end caps was remarkably easy. Even though I soldered the components together, this is a method that would work very well with CA -
The actual gluing surface contact area of the rings is significantly greater than an edge-glued flat part rolled into a rim for the cap and therefore would be much, much stronger. Also, that strength would allow builder to clean-up the circumference of the cap while using the CA as a filler producing a nice clean build.
I confess that I don't normally solder as much as I have on many of these assemblies. Usually, I use either CA or epoxy depending on my estimate of the strength needed for final assembly and finishing, reserving solder for those joints that need the most strength. And this set would be no different except for the fact that we're using it as the basis for an exercise in group-learning.
We're trying to squeeze all that learning potential from the effort that we can, and I have to say that some of the guys in the club have made great progress in learning some new skills - soldering being one of them. It's gratifying to see a guy who's a basic-skill level modeler successfully tackeling those front fenders and soldering them together like a pro!
So, soldering is not the mysterious modeler's equivalant to the Alchemist turning lead into gold, and any modeler out there in Armorama-land can learn and master the techniques with just a little effort and time.
In regards to the "C-hook" tubes, those were also remarkably easy to do once I found the right sized drill bit to use to roll them around. For anyone interested, follow the links and read the detailed description on our website.
However, the AM-Works PE set parts can be used to detail-out the kit's plastic tool racks and rear stowage boxes along with the kit cleaning rod tube and other areas. So, the PE parts are not really a set of either / or choices, but a continum of increasingly detailed assemblies. Many of the PE assemblies are well suited to practice and try more complicated construction techniques without having to make irreversable changes in the DML kit.
For example, if a builder messed-up the PE rear stowage boxes, he could easily just add the PE mounting frames and hooks to the kit plastic boxes for a very nice improvement in their appearance. The same applies to the tool racks - the modeler could easily just add the PE tool clamps, "C-hook" keeper chains and pins, etc, to the kit's plastic racks and not have to build the brass tubes, etc.
Thanks again to Alliance Model-Works for the review samples, advice, and encouragement!
Happy modeling,


Comments