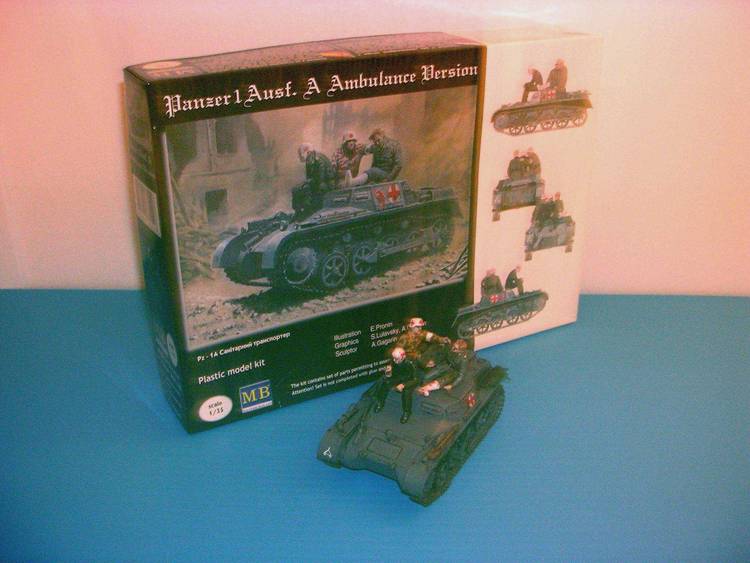
The following is the " Built " review, of Master Box Limited's Pz-1A Ambulance Version, 1/35 scale. If you have been following the AFV reviews for the past month, you should have noticed that I have been posting reviews of MB Ltd's line of 1/35 scale armor kits, as " In Box Reviews ". In response to some of the readers requests, I have put together this " Built " review of this model subject. In case you don't know about these models yet, Master Box Limited is a fairly new model company based in the Ukraine, who have a small but growing line of 1/35 scale armor kits, with more in the planning stage. Visit their website for more detailed information. Their kits are quite unique, with some armor subjects that are not on the market now by other model producers. These little Panzers are contagious, as I have found, and I am pleased to have had the opportunity to share my findings with you. First off, I must say that when I had originally contacted MB Ltd. about these kits I was warned by Mr. Alex Surzhenko, Director of the company, of some fitting problems of some of the parts of their model kits, due to some casting problems of the original molds that unfortunately were overlooked at first...Since the first " In Box review " of this kit, I have found out for myself that yes, a little putty and trimming is needed in a few minor places to complete this kit successfuly, but I had no real problems at all producing a decent finished subject. Here we go...
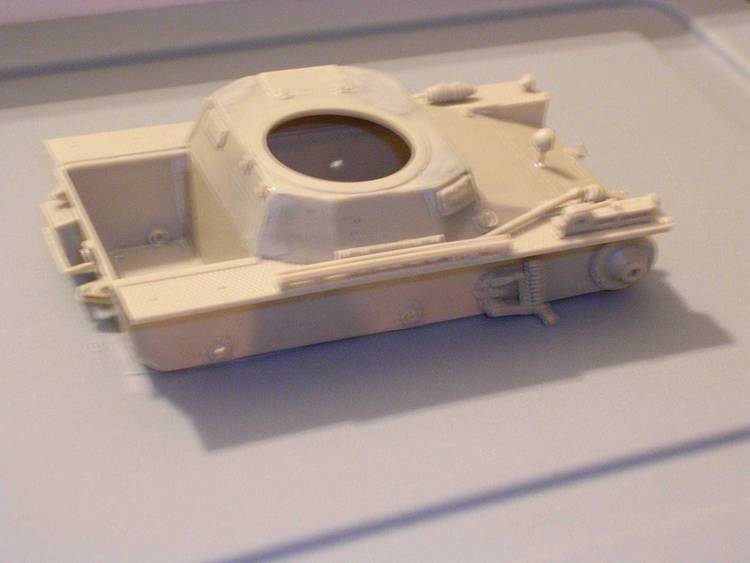
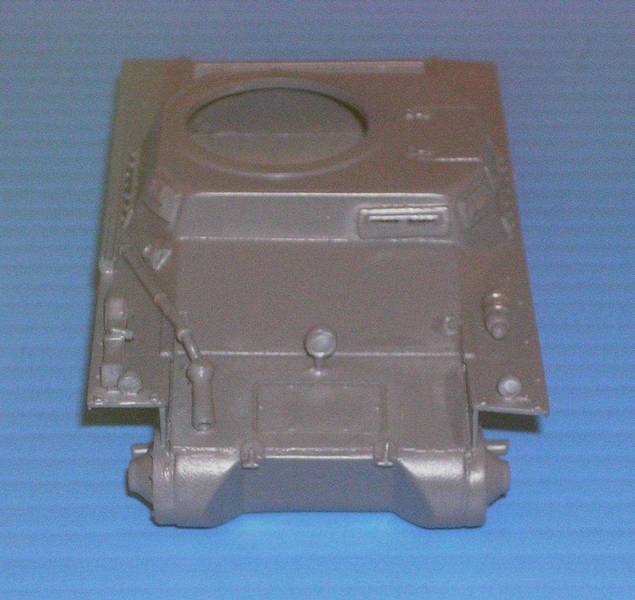
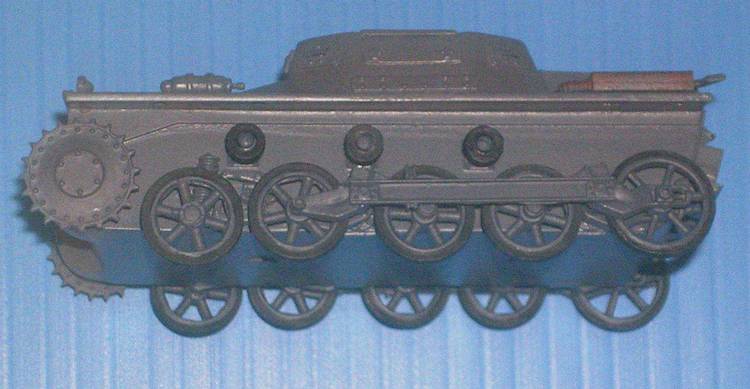
If you read over and study the instruction sheets before you begin, you will notice that they have provided an additional step by step photo instruction sheet with the kit in addition to the other sheets. Take my advice and follow this sheet, as the completion of this kit will be much easier if you do. I must also add that there is even more info at MB Ltd's website, under the "Assembly" heading in the main menu. You begin this model by assembling the lower half of the tank body first, by attaching the bottom plate, rear plate, and left and right plates together. There is also an engine compartment divider that is added at this stage. Then you must add the top front hull piece before moving on to the next step...which is the front piece of the lower tank body, and the first fit problem that you will encounter. After test fitting this piece, you will have to trim a little plastic from each outer edge of this piece to get a good fit between the left and right tank halves. Then as the photo shows on the step by step sheet, you will have a small gap lengthwise that needs to be filled. A little Tamiya putty and 15 minutes passed before the next step. Build the tanks lower turret body next, and you will see the remainder of the fit problems unfold before your eyes...After you glue the five pieces together, you will see that the corners just don't match up tight in all places. Instead of trying to trim to fit, I suggest gluing it all up and filling the small holes with a little goop...The last fit problem that I had is when you attach this piece to the tank body itself, on the right side of the lower turret against the tank body will be a small gap...again, a spot of putty and a little sanding fixed this FUBAR... Now, this may sound like alot of extra work to go through, but believe me, it really isn't...all in all add an extra 30 minutes total of fit adjustments to the final build time. I've had much worse....You can then go onto building this kit as per the instructions, or as I like to, mix a little of your own method with the companies recommendations, such as painting some parts before assembly, and installing this piece before that piece...There are just some steps that you will find with any model kit that seems to make more sense in adjusting their placement time. Use your own judgement and have fun with it! I myself used Testors pinpoint modeling cement in constructing this model, as well as a little super glue here and there for quick holds. I have noticed that Master Boxes' plastic formulation is softer than other model manufacturers, which makes it much easier to work with, such as trimming, sanding, and such. As far as paints and finishes for this kit, I used Tamiya spray enamel #2079, German Gray, for most of the parts, and Model Master # 2079 Schwarzgrau RLM 66 for hand painted parts. I try to use readily available finishes for first subjects only for the reason that some modelers do not own an airgun set-up. The Tamiya and MM colors matched perfectly (mine or my camera's eye's couldn't tell the difference!) but you may choose a different gray. The kit's paint color suggestion is Panzergrau, which is German Gray as far as I'm concerned. After curing, decals, future, washing and sealing, I moved onto building the treads themselves, which are Master Boxes seperate Tank treads...They are pretty much of a cakewalk, and instead of going into the assembly of them here, check out the recent review of this product at Armorama. I I left the front and rear fender pieces off of the tank until after final tread placement, just to make it a little easier on me and my clumsy hands! After tread mounting, I gave the entire subject a light coat of clear matte spray and set it aside for curing...Time to move onto building and painting the figures that are supplied with this kit. These three figures are pretty cool, decent detail, 2 wounde soldiers and one medic. All three ride on top of the finished Panzer. I chose to paint the figures as shown on the box cover, because #1, I liked the way that they looked in the cover art, and #2 there are no paint sceme's given for the figures in the instructions. In which I must point out is a minor dissapointment, but matching the german uniform colors accurately was not a problem...Beginning figure painters may need a little reference, though. I am going to bring this to their attention and maybe it can be corrected in future printings of the instruction sheets.
All in all, even with the few downfalls of this kit, I still believe that it is a good kit for the money, and the finished model subject is really nice...I love these little Panzers and I had alot of fun building this one-I think you will like it too...
Thanks again to Alex Surzhenko, Director of Master Box Limited, Ukraine, for mproviding the model kits for both reviews of this and all Master Box subjects to date.
About Mark R. Smith (Gunny) FROM: PENNSYLVANIA, UNITED STATES
I have been building models of all sorts all of my life, concentrating mainly on the coolest one's when I was younger, but now I focus directly on all military subjects, from armor to warships. After years of counting rivets, I put away the calipers, dial indicators, and micrometers and now just ha...